

Page 1

Vasco Mini 2
USER MANUAL
ENGLISH
Page 2

Copyright © 2019 Vasco Electronics LLC
www.vasco-electronics.com
Page 3

Table of contents
1. Operation of the device 4
1.1 Function keys 5
1.2 Battery charging 6
1.3 In-built SIM card 6
1.3.1. Terms of service 6
1.3.2. SIM card expiration 6
1.3.3. SIM card number 6
1.4 First start 7
2. Vasco Mini 7
2.1. Choosing the source and target languages 7
2.2. Voice recognition 8
2.3. Pronunciation 8
2.4. History 8
3. Menu 9
3.1 Clean history 9
3.2 Device settings 9
3.2.1 Networks 9
3.2.2. Device 10
3.3. About 10
4. Notication bar 11
Specication 12
Page 4
4
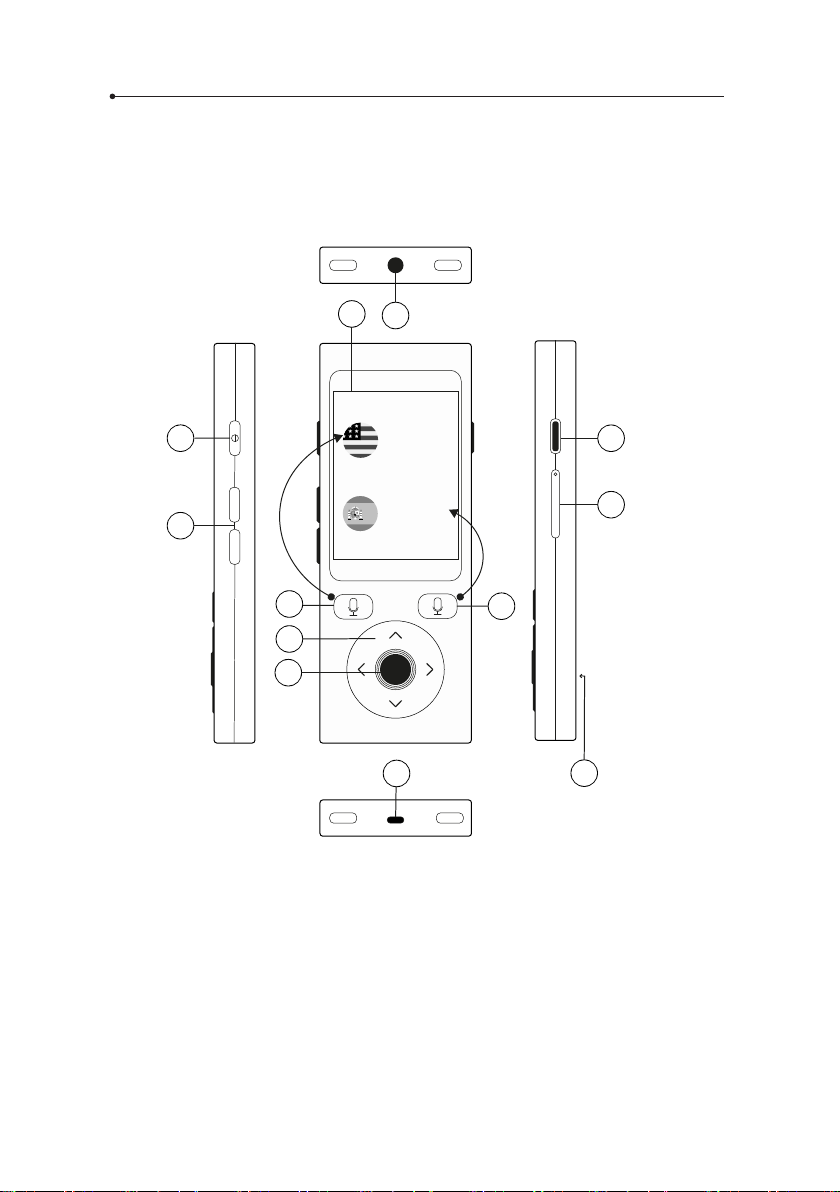
1. Operation of the device
1
10
6
+
7
-
2
English
(United States)
Spanish
(Español)
3
8
9
4
5
11
1. Touchscreen 7. Volume Up/Down
2. Source language 8. Back
3. Target language 9. SIM card slot
4. Arrows 10. Earphone input
5. Enter 11. Micro USB
6. Power ON/OFF 12. Loudspeaker
12
Page 5

1.1 Function keys
Power
• Device turned o: hold this key for 5 seconds to turn the device on.
• Working device:
• push this key to block the screen, push again to unblock
• push and hold the key for 2 seconds and tap “Power o” to turn the
device o
Volume
• Working device: push up or down to increase or decrease the volume.
• You will see the following icon. .
Back
The back button allow you to get back to the previous screen.
Arrows
5
The up/down arrow keys allow you to highlight the translated text. They also
serve to select options in the settings.
Enter
The Enter button allows you to replay translated text. It also serves to conrm
the selected option in the settings.
Page 6

6
1.2 Battery charging
• Plug the charger into an electric socket and the USB cable into the
device in order to charge the battery.
• The battery indicator moves to charging mode.
• The battery is fully charged after about 4 hours.
• After the battery is charged, remove the charger and the USB cable.
WARNING: Charge the battery in a well-ventilated area between 14°F
and 95°F (-10C to +35C). To charge the battery use the charger provided
by the manufacturer. Using any other charger may damage the device.
1.3 In-built SIM card
The device is equipped with an international SIM card that allows it to
work without WiFi. The in-built SIM card is prepaid and doesn’t require any
contract.
1.3.1 Terms of service
The device should only be used for private purposes. Data transfer and
translations cannot be used for other purposes than everyday AND REGULAR communication between people. Any use other than that will cause
blocking the SIM card.
The SIM card can only be used with the device it come with and according
to local laws.
1.3.2 SIM card expiration
The SIM card expires after 2 years from the last use of the device. In order to
prolong this period, just use your device through a GSM network.
1.3.3 SIM card number
Your SIM card number starts with 2345. You will nd the complete number
on the inner side of the box.
Page 7
7
(Español)
English
(English)
OK
Spanish
WARNING: Don’t bend or scratch the SIM card. It should not have any
contact with water, dust or electricity.
1.4 First start
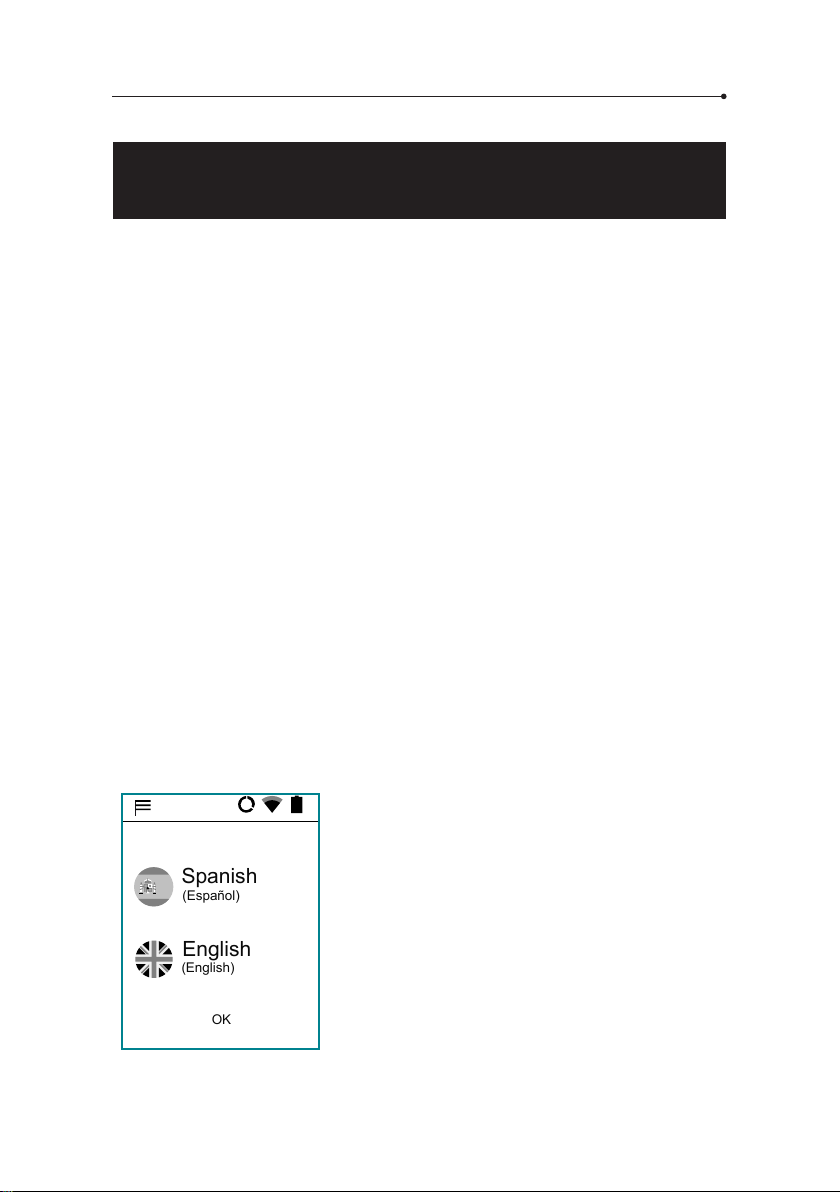
After turning the device on, choose your language. Then, read and accept
the terms of service. The language chosen will change all the regional
settings.
Slide the screen right to unlock.
You will see the main screen of Vasco Mini. The device is now ready to use.
2. Vasco Mini
Vasco Mini recognizes voice and translates full sentences into
supported foreign languages. The translator pronounces the
translated text out loud. For the full list of supported languages
consult the manufacturer’s website. Vasco Translator needs a WiFi or a GSM
network in order to translate.
2.1 Choosing the source and target languages
Tap the flag to see the list of available
languages. Swipe up or down to find the
language you need. Tap the name of the
language to activate it.
Page 8
8
?
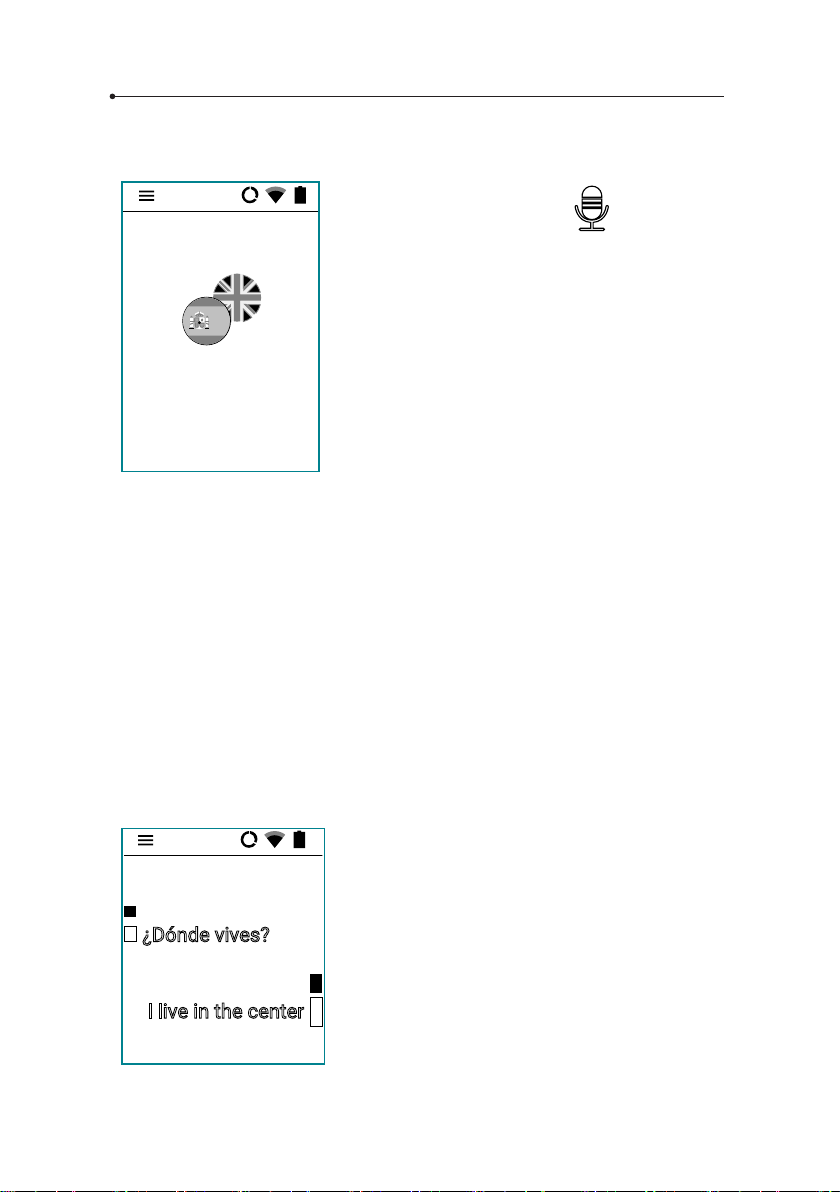
2.2 Voice recognition
The hardware buttons
serves to
enter text using the voice recognition
function. In order to enter text for transla-
tion, tap and hold the key and, after hearing
a beep, say what you want to translate in a clear,
monotonous voice, from a distance of
a foot (30 cm).
When you nish, the translation is done auto-
matically and lasts about 2 seconds.
It is possible to enlarge the text box. To do so, double tap the screen.
To close the enlargement window tap “back”.
WARNING! The quality of voice recognition may worsen in a loud
environment.
2.3 Pronunciation
The pronunciation starts automatically . Press Enter to listen to it again.
2.4 History
To see or clear translation history, open the application menu and tap
« History ».
Where do you live?
¿Dónde vives?
Vivo en el centro
I live in the center
The translations appear in the main screen in
chronological order. Use Up and Down arrow
keys to navigate between the translated
sentences.
Press Enter to playback
Page 9
3 Menu
?
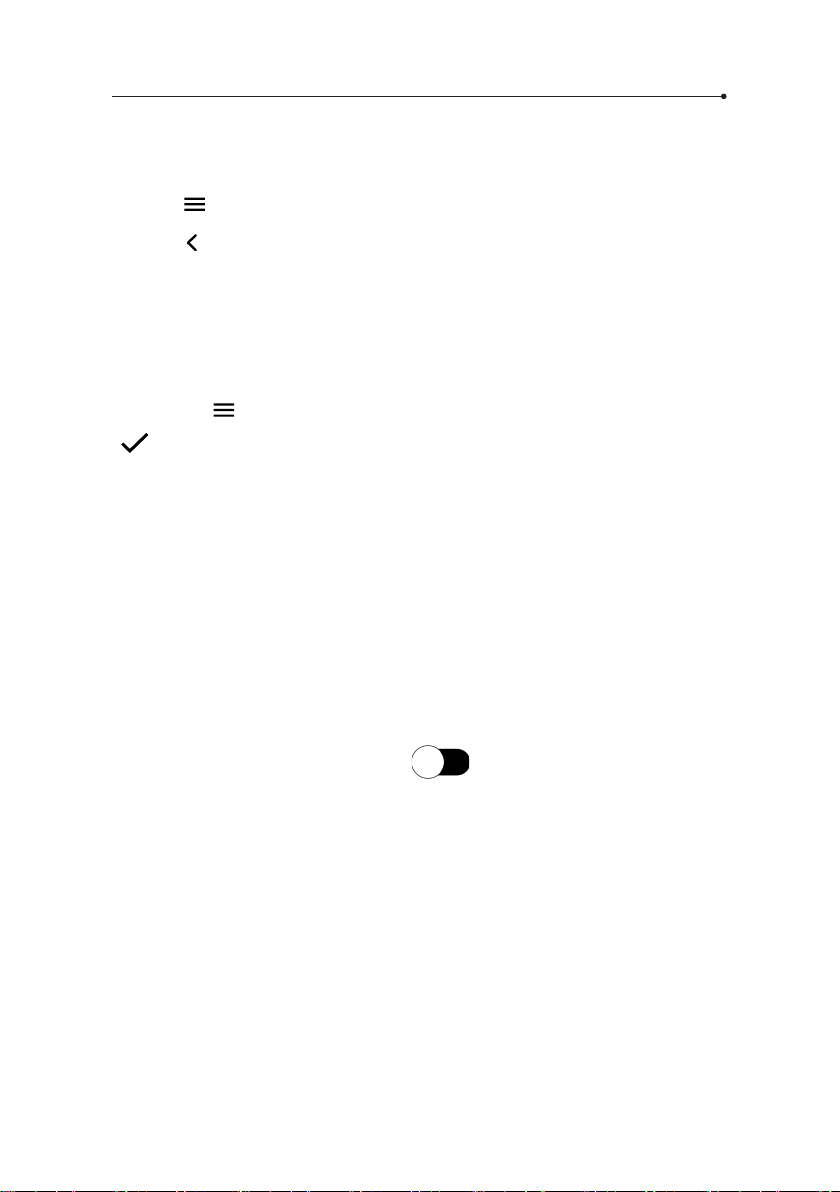
Tap the ? or swipe right to enter the menu of the device.
Tap the ? or swipe left to get back to the “select language” screen.
3.1 Clean history
Tap and hold the line for about 1 second to delete it.
To delete all the translations, go to the menu of the device
by tapping ?, select “Clean history”, press Enter and conrm by pressing
.
3.2 Device Settings
Swipe right, then select “Device Settings” to set up your WiFi connection,
congure your SIM card or change the application language, etc.
3.2.1 Networks
9
WiFi conguration
Manage your WiFi networks here.
If you see “WiFi is disabled”, tap the icon. You will see the list of
available networks.
Tap the name of the network to connect to it.
Padlock – this icon means that the network is secured with a password.
If you have the password, tap the name of the network and enter the
password. Then, tap “OK” and use the device. If you don’t know the
password, contact the network provider.
Page 10

10
Signal – the green bars show the signal strength. The more green bars,
the stronger the signal is.
Name – tap the name of the network to connect to it.
WARNING: A network without a padlock means that this network is
open. You don’t need any password to connect to it. Please note, that
some open networks require additional actions to be taken such as
logging in or accepting its terms and conditions. It’s not possible to
use such a network.
SIM conguration
Data roaming - allows you to connect to data services (It is strongly
recommended to leave this option on while using GSM).
3.2.2 Device
Application language
Change the language of the menu.
Check for updates information about it after tapping “Check for updates”. In order to update
the device, download and install the application, tap “OK” and reboot the
device. If there are no new updates you will see “No new updates”. If you see
“Device not registered”, please contact the seller.
WARNING: You need a WiFi connection in order to download system
updates.
About -
information about the software.
If a new version of the software is available, you will see
3.4 About
You can see the version of the device and read the terms and conditions.
Page 11
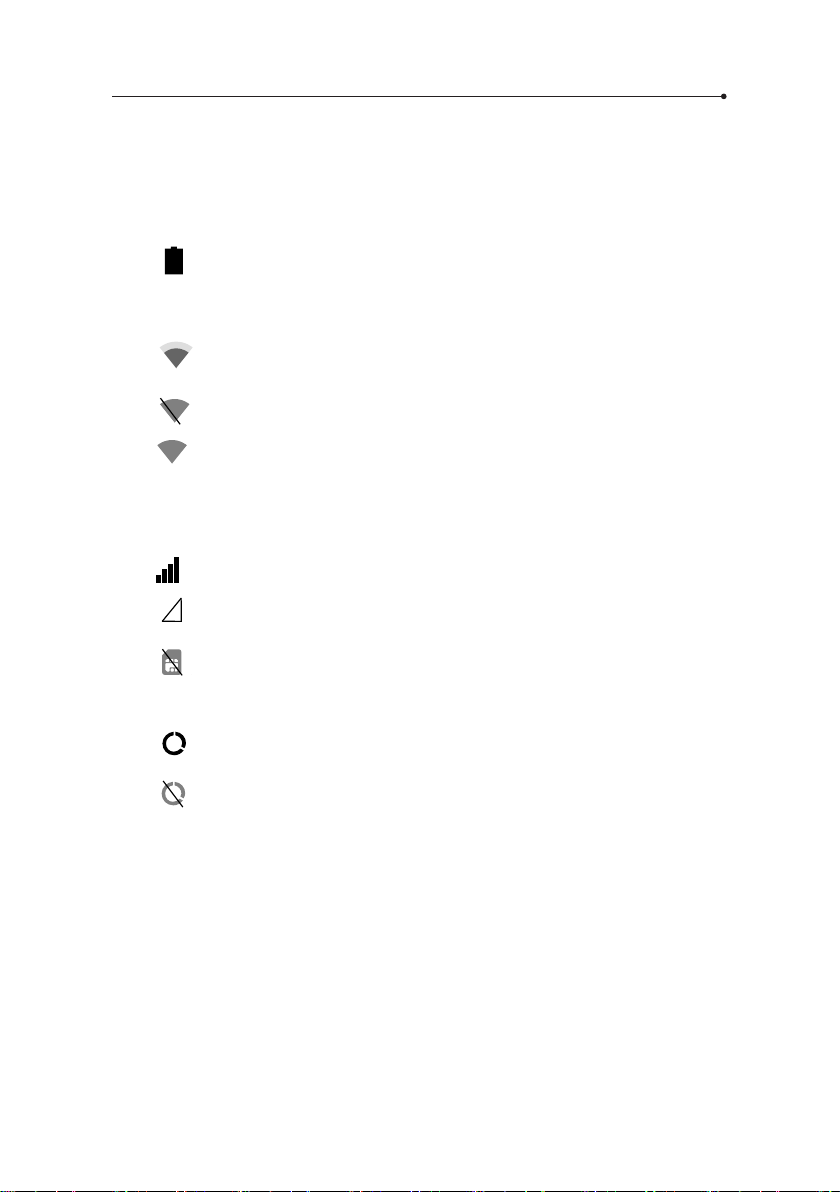
4 Notication bar
?
Battery status
11
Icon
shows the current battery status.
WiFi
Icon
Icon ? means that the WiFi module is turned o.
Icon ? means that WiFi is available and you’re within its range, but the
device is not connected.
shows the strength of WiFi signal.
GSM
Icon ? shows the strength of the GSM signal.
Icon ? means that you are not connected to any GSM network.
Icon ? means that the SIM card is damaged or not installed.
DATA
Icon ? means that the mobile data is enabled.
Icon ? means that the mobile data is disabled.
Page 12

Specication
Display TFT 240x 320 pxls, 2.0 inches
touchscreen
Processor MT6735
RAM 1 GB
ROM 8 GB
3G/4G Modem Yes
Wi-Fi 2.4 GHz
Battery 1200 mAh
Size 1.73 x 4.44 x 0.47 in
(42 x 113 x 12 mm)
Weight 0.15 lb (70g)
Earphone input Mini Jack (3.5 mm)
USB Micro USB
Page 13

Page 14

Page 15

Page 16

VMU190529
 Loading...