

Varta MARINE S65 Instruction Manual

16.5 CM 2-WAY 16.5 СМ 2-Х ПОЛОСНАЯ
COAXIAL ACOUSTIC SYSTEM КОАКСИАЛЬНАЯ АКУСТИЧЕСКАЯ СИСТЕМА
Instruction manual Руководство по эксплуатации
MARINE S65
МОРСКАЯ СЕРИЯ
VARTA MARINE S65
2
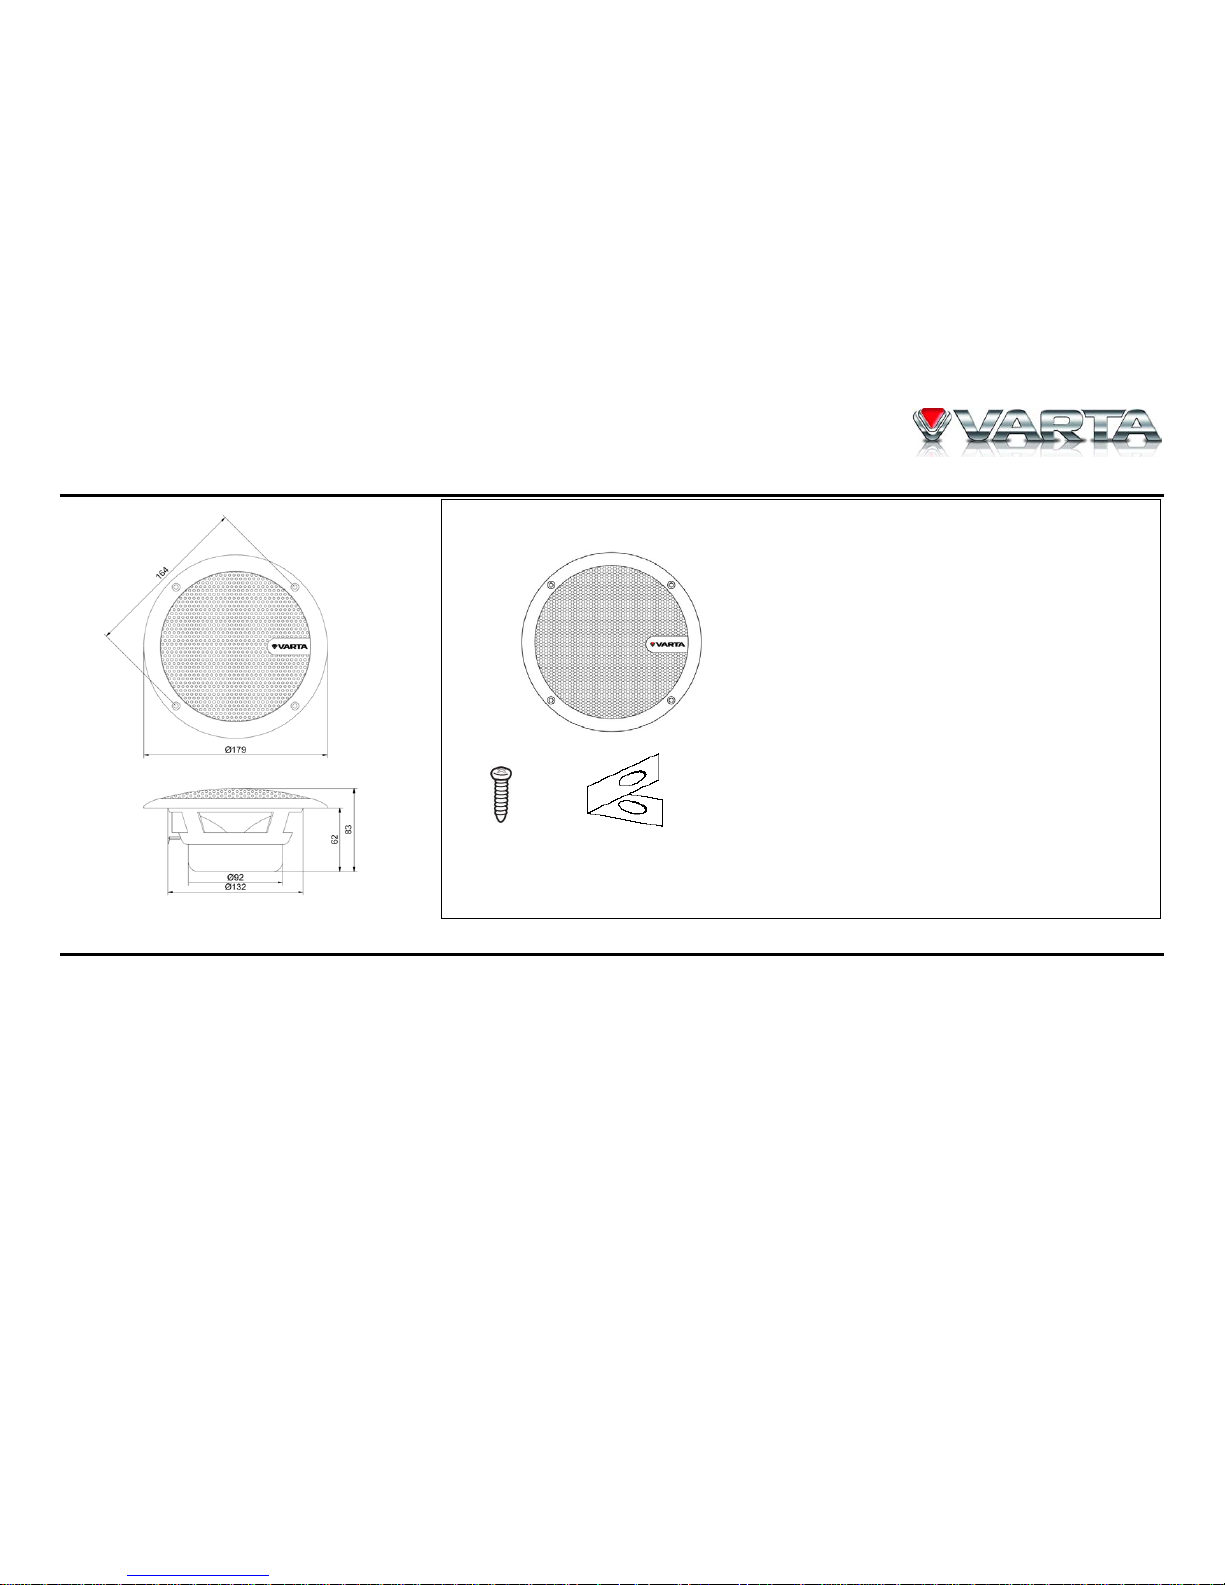
Description
(x 8) (x 8)
The set of acoustic system includes:
- acoustic system
- screw – 8 pcs
- clip – 8 pcs
Important safeguards
• The owner’s manual contains important operating and maintenance instructions for your safety. It is necessary to refer the manual.
• Do not install the speakers where they may be subjected to excessive heat moisture, dust or where they will be kicked repeatedly, brushed or bumped.
• Before mounting and connecting the wires be sure that wire of the negative pole terminal is disconnected from accumulator. Nonobservance of this
demand may cause the short circuit or fire.
• To prevent short circuit never put or leave any metal objects (e.g. coins or metal tools) inside the acoustic system.
• Make absolutely sure that the terminals for the speakers are connected to the proper outputs from the music source.
• Never run the wiring on the outside of the water craft or under it where it can be damaged. Use existing wire channels, sills, panels and molding strips
inside the water craft to hide the wiring for safety and a neat appliance.

VARTA MARINE S65
3
• Make sure the wire of the negative pole terminal is disconnected from accumulator while connecting the speaker terminals. Turn on the various
components and slowly advance the volume. Remember to check and re-check all connections to insure proper installation and use.
• Do not continuously use the speaker system beyond the nominal power handling capacity.
• Keep recorded tapes, watches, and personal credit cards using magnetic coding away from the speaker system to protect them from damage caused by the
magnets in the speakers.
• If you cannot find the appropriate mounting location, consult your nearest dealer before mounting.
CAUTION: Take extreme caution when working near the fuel tank, fuel lines or hydraulic lines and electrical wiring.
Mounting the speakers
Installation kits are available from your dealer or local stereo shop to help make your installation easy. These kits also give your installation a clean, custom
appearance. Questions about installations methods please consult a professional dealer/installer for assistance.
• Choose the place of installation for acoustic system. For most acoustic system stipulated regular places in the water craft approach. In this case you need
to know only assembly depth. Before installation acoustic system check up their assembly depth.
• At a choice of a non-standard arrangement of speakers at which it is necessary to cut them in panels of the water craft, use a mould (not included). For
achievement of ideal arrangement of acoustic system keep up geometry of a mould, as it is very important for correct installation of your system
(А=В=132 mm, ØС=5 mm).

VARTA MARINE S65
4
• If it will be necessary to cut steel, reinstall the cosmetic panel in place and use the hole you have previously cut as a template. This will help to insure
proper cutting and a good fit. Now, mark the locations for the speakers mounting screws, remove the panel and drill the screw holes. When finished you
may replace the panel.
• After cutting and drilling all holes, inspect the mounting areas for any metal burrs or rough edges. File any area that may interfere with the mounting of
the speaker.
• Clean any metal shavings from the mounting area and check for areas in which water may enter the speaker cavity. Treat the area for water protection
when necessary.
Securing the speakers
• Position the speaker into the mounting hole and re-confirm the correct mounting location and hole placement.
• Screw clips are provided to ensure a snug fit. These should be placed over the metal surface and line up the hole you have previously drilled with the
screw clip. Place the speaker into the hole, align the holes and proceed to insert the screws. Be sure to tighten the screws evenly so that it will not warp
the speaker frame.
• Turn your system back on and confirm the speakers operation first at a low volume and then you may increase the volume as you desire.
 Loading...