

Page 1
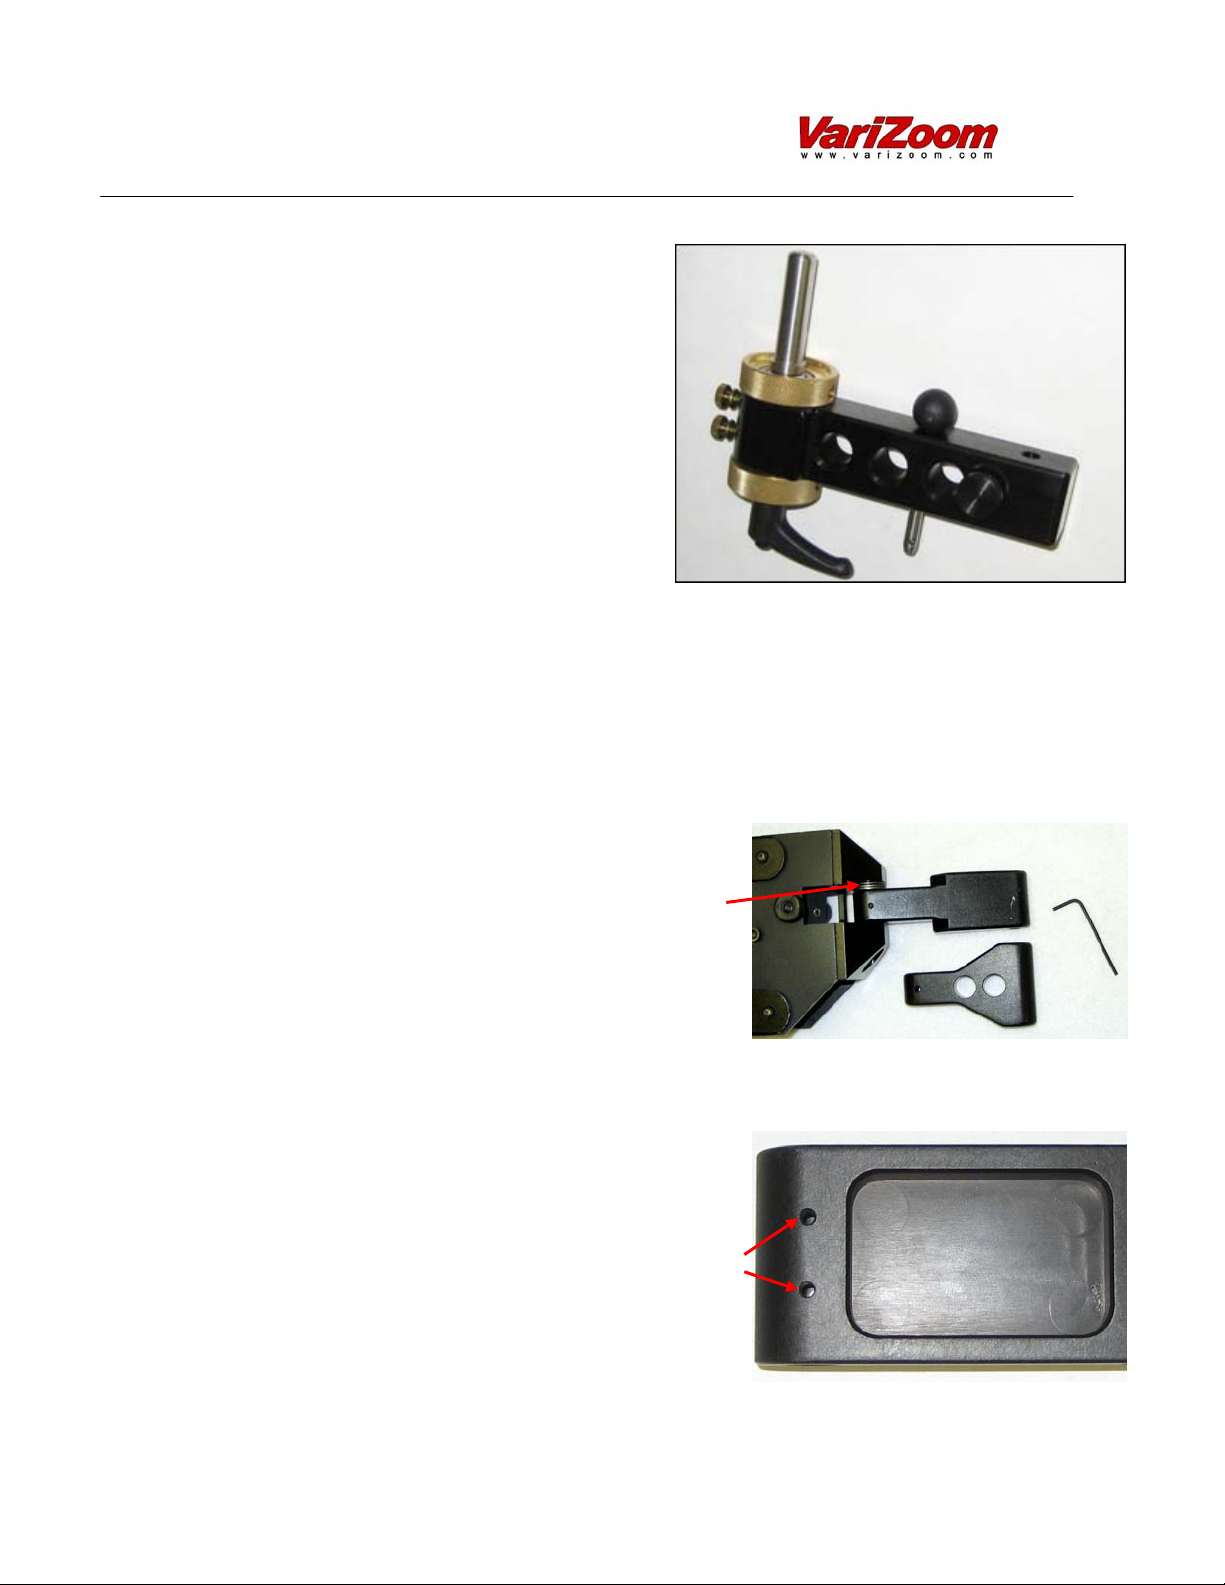
VZ-MX-TA MX Trim Adjuster
Accessory retrofit
This device was conceived to improve
the performance of the ProLite,
standard Aviator, or BlackHawk arms
by allowing the operator to adjust arm
trim (horizontal orientation) to
compensate for the twisting of the vest
mount. The trim adjuster will
essentially allow you to ‘level’ the arm
so it will ride on a plane parallel to
the ground, preventing the tendency of
the arm to drift away and making it
easier to control, which in turn allows
you to focus on the finer points of
operation.
You will have to mount the trim adjuster directly to the vest mount
where the arm is normally pinned (ProLite, Aviator) or the arm bridge is
pinned (BlackHawk - it will replace the arm bridge). The small knob on
the face can be tightened to eliminate any play between the trim adjuster
and the vest mount.
For the ProLite and Aviator, you will have to replace the existing lower
arm linkage with the supplied ‘Y’ shaped
linkage. Simply loosen and remove the set
screw on the existing linkage and slide the
shaft out, taking care not to lose the
thrust bearing assembly (looks like 3
washers). Replace the old linkage with the
new one, making sure to put the bearing
assembly in the same spot as before (on top).
Slide the shaft through the arm, bearing
assembly, and linkage, and use the set screw from the old linkage to fix
the new linkage to the shaft, tightening the screw onto the flat spot of
the shaft.
For the BlackHawk, you will have to remove
the downward-facing stainless steel post on
the lower arm linkage. To do this, you will
need to knock out the 2 roll pins that hold
the post in place. You will need a hammer
and a small rod or center punch (<0.12”) to
knock the pins out.
Page 2
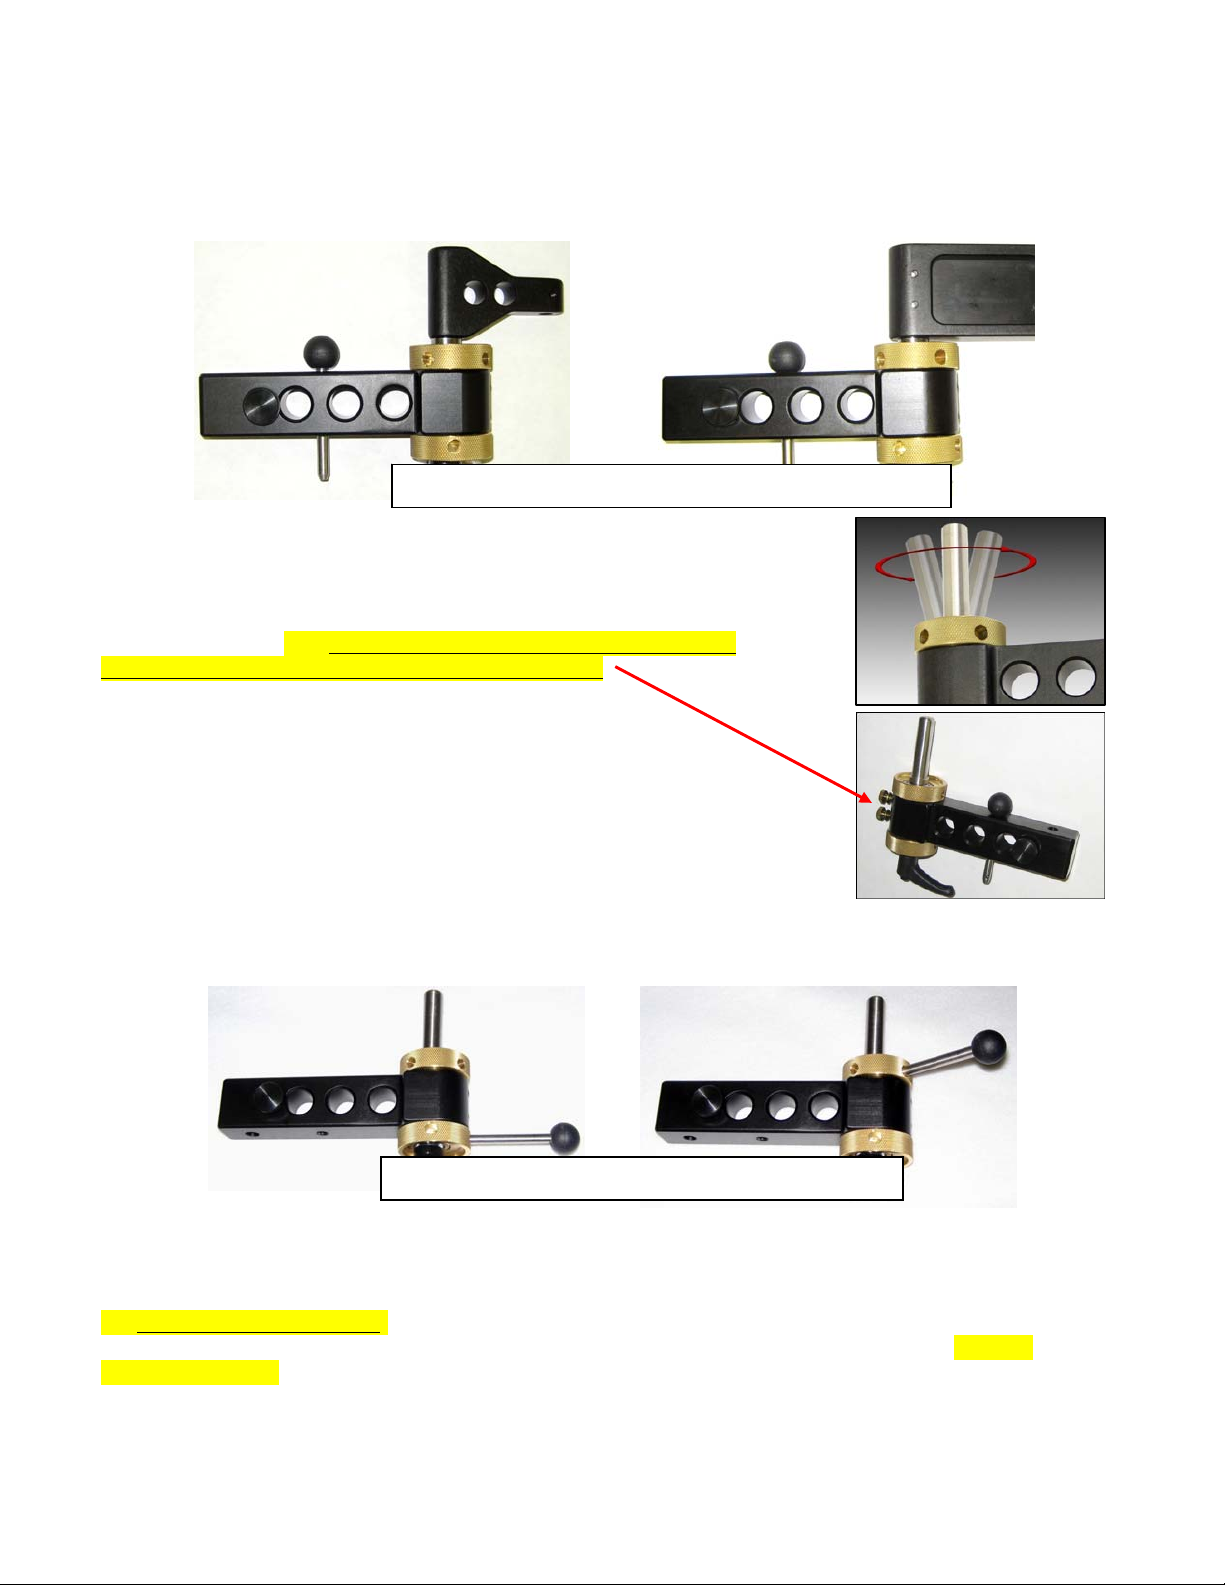
The new linkage will slide over the stainless steel post on the trim
adjuster. Once the arm is fully loaded with a balanced sled, you can
proceed to correct the planar orientation of the arm. This is achieved by
loosening the large black knob on the underside and rotating the upper
and lower brass wheels.
Pictures may differ slightly from actual unit
The brass wheels cause the post to precess
(depicted at right), modifying the relative angle of
its axis, thereby changing the planar orientation of
the arm itself. There are two methods to achieve the
adjustment. *** Start by loosening the brass
thumbscrews on the end of the unit.
Here are the two methods:
1- With the arm & sled fully loaded, loosen the adjustable lever on the
underside and turn the brass wheels using the included lever to adjust
each wheel until the arm is level, then tighten the lever fully.
Pictures may differ slightly from actual unit
2 – If you wish, you can always make the adjustment unloaded, although
this will involve more trial and error
***IMPORTANT NOTE: As an added security measure, we recommend that
you lock down the position of the adjuster by tightening the brass
thumbscrews, thereby locking the brass wheels into place and preventing
unintentional loosening of the mechanism over the course of extended
shoots.
 Loading...