

Page 1
DV Traveler
Assembly & Operation
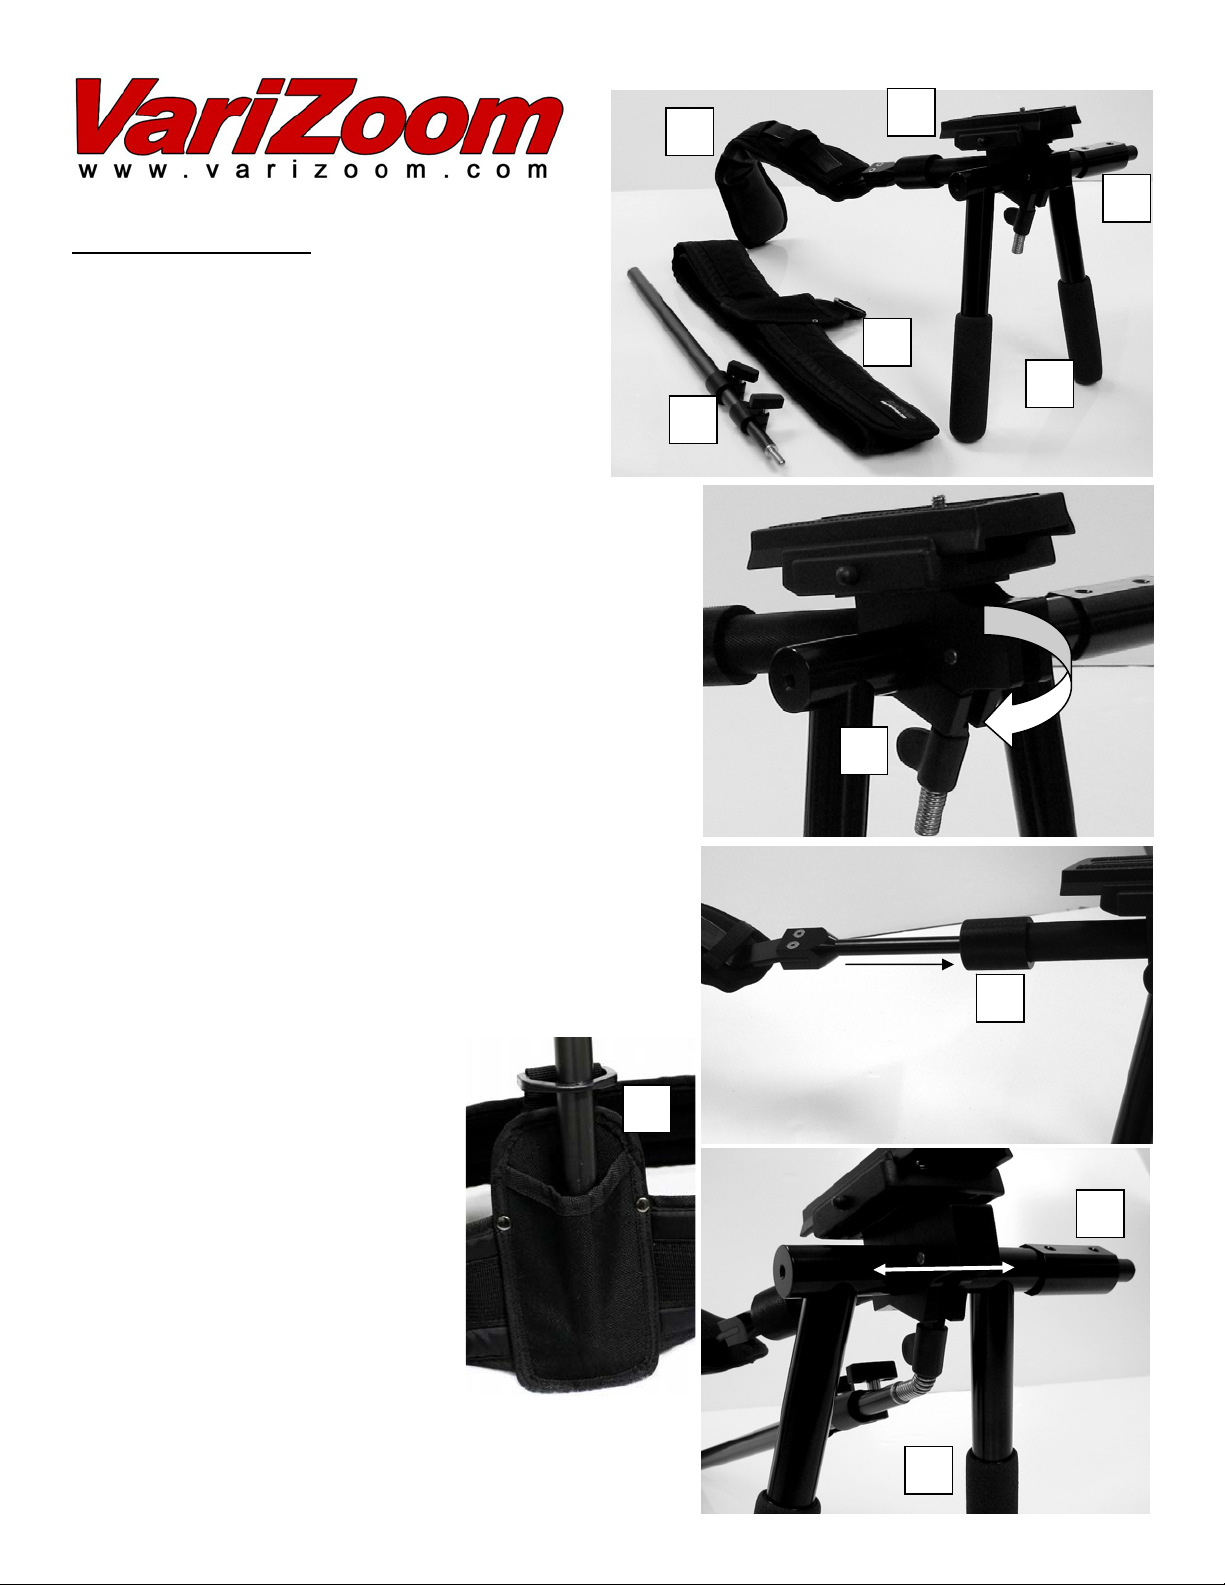
Contents of Kit: 1) Shoulder Arch 2) Handle
Assembly 3) Spring Pod 4) Belt 5) Accessory
Mount 6) Quick-Release Plate
The telescoping shoulder arch can be positioned
to the ideal length and angle, while the belt and
spring pod help stabilize your shot. The
accessory mount allows you to attach lights,
mics, XLR adapters, or anything you want with a ¼”-20
mounting screw.
1. The unit comes partially pre-assembled and folded down flat
for shipping and storage. Loosen the single wing knob w/ coil
spring (A) until you can swing the knob down and tighten to
“lock” the rig into shooting mode. When this knob is loose, you
can adjust the side-to-side position of the camera platform, as
well as the angle of the handles.
2. Attach the quick-release plate to your camera and set aside.
Wrap the belt around your waist with the holster in front.
3. Loosen the knurled aluminum knob (B) located on the
center of the handle assembly, but leave it attached. Slip the
rod end of the shoulder arch into the opening of the knob,
adjust to desired length & angle, and tighten the knob.
4. Insert lower end of the spring pod
through the d-clip and into the holster
on the belt (C).
Slide the brass tip of the support pod
into the coil spring attached to the
single wing knob (D).
5. Attach your camera to the quickrelease baseplate. Attach your
accessories to the accessory mount (if
required) (E), then position your
camera side-to-side for balance.
Loosen the spring pod knobs one at a
time to set the proper amount of
spring action.
C
1
6
5
4
2
3
A
B
E
Warranty
This product is covered by a two year factory warranty covering any
defects in materials or workmanship.
D
 Loading...