

Page 1
Navigator can also be upgraded to a full professional
system by adding a GT sled in place of the FlowPod or
GlideCam® handheld units.
NAVIGATOR
Stabilizing Arm/Vest Manual
Thank you for purchasing the Navigator. Please read the
instruction manual thoroughly before operating it for the first
time.
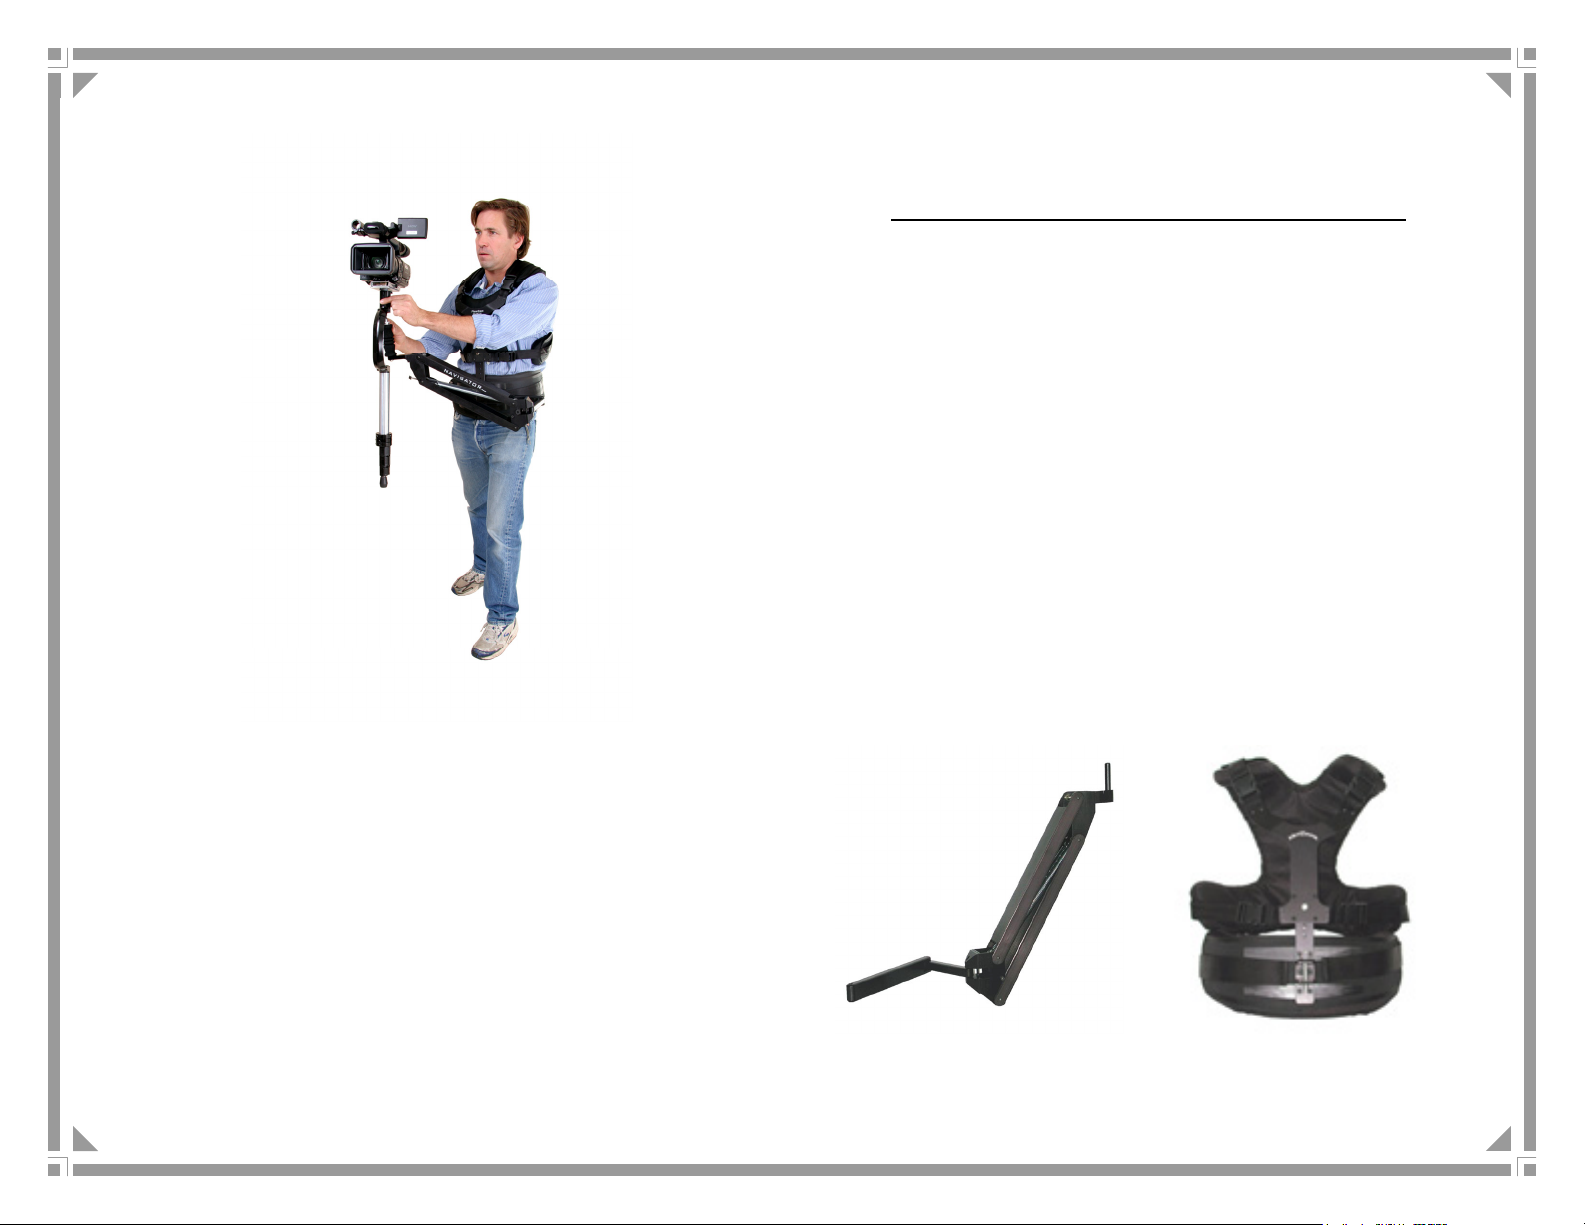
The Navigator was designed to transform your FlowPod or
Glidecam® 2000/4000 handheld stabilizer into a fully
supported system.
Although it is fairly easy to set up the Navigator, you must
know how to use the handheld stabilizer before you get
started, so read the instructions for the handheld unit first, if
necessary. Operating the full system smoothly will require
practice.
Included with your Navigator are the Arm, Vest, and
Glidecam® adapter post with screw and washer for
attaching the post to the arm or for directly attaching the
FlowPod to the arm.
Page 2
Page 2
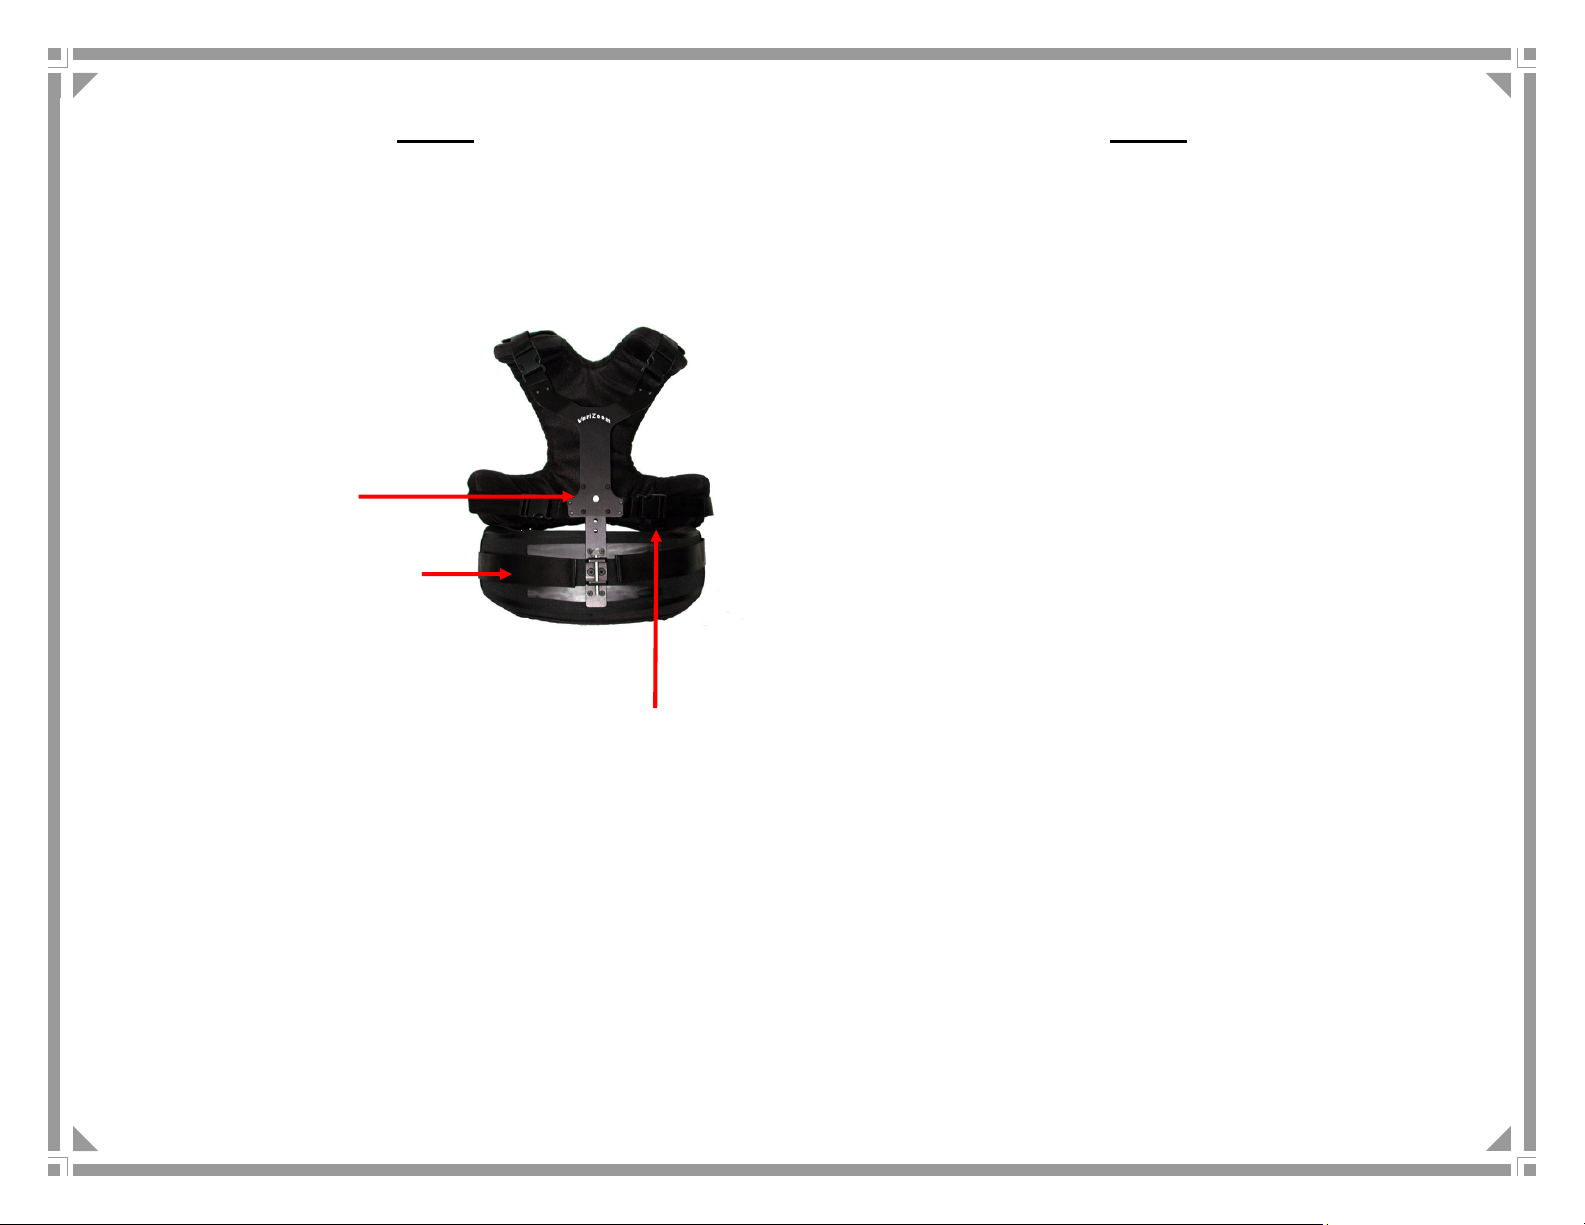
The Vest
The purpose of the vest is to comfortably distribute the
weight of the camera and stabilizing system on your body.
To achieve optimal results, you should adjust the vest so
that it fits snugly.
Adjust the vertical fit by
adjusting the straps, pulling
the chrome release pin and
sliding the chest plate up or
down until you find the right
position.
Adjust the tightness of the
vest around your waist/hips
using the Velcro strap,
drawing it around evenly on
both sides of the lower vest
pad.
Adjust the tightness around your torso by positioning the
Velcro straps across the back of the vest and securing the
buckles to the chest plate. Make the vest as tight as
possible to maximize operational quality and comfort. Once
you’ve adjusted the vest, remove it for easy re-suiting by
unclipping the buckles & strap on one side only.
Page 7
Operation Notes
Generally speaking, you have to keep in mind that the
stabilizer will not work like a magic wand and instantly
transform your shots into brilliant footage. Operator skill is
critical, and it takes many hours of practice to master this
device, but the reward for all the practice will be substantial.
Here are a few simple quick-start guidelines:
-Controlling the orientation of the sled is essential, so
find the best control point on the sled, in close
proximity to the gimbal.
-Grasp the control point lightly with only your thumb
and forefinger – do not grab it like a handlebar.
-Practice good posture and hold the sled fairly close
to your body.
-Your other hand may be put to use in controlling the
rounded base section of the arm where it mounts to
the bridge, but this is up to your discretion.
-The way you walk will affect the quality of
stabilization, so you will need to develop a lightfooted rhythmic pattern, and you may find that a
sideways step works better.
-Practice before attempting to acquire usable
footage.
-Seriously - practice, practice, practice.
Page 3

Page 6
Start by fixing the Glidecam® handle adapter post to the
arm platform. You can use a coin to tighten the screw.
Make sure the post is secure by twisting it in the opposite
direction of the screw as you tighten it. Attach the
Glidecam® to the arm by sliding the handle over the adapter
post.
Adjusting the Arm
The next step is to set the “float point”. This is essentially
the ideal point of spring tension, the state in which the sled
rises and falls with slight force. At the front end of the arm
you will find a tee-head knob for adjusting the spring
tension. Clockwise turning increases tension while counterclockwise turning decreases tension. You should adjust the
tension until the camera base floats at a level below your
collarbone, but the arm should not feel “mushy”.
Typically, the arm should be at or above the horizontal
position, and you should adjust the tension to a point that
minimizes bounce. The float point is not necessarily an
exact setting, and you may find that what works for you may
be slightly different than another person’s preferred float
point. The important thing is the end result: you have a sled
that rises and falls with slight force and absorbs most of the
shock imparted by walking.
Page 3
The Handheld Stabilizer, or “Sled”
On a professional stabilizer, the “sled” is the subsystem that
holds the camera, viewing monitor, and battery. With the
Navigator, things are a bit more simplified, as your handheld
stabilizer will become the sled, and your camera probably
has an onboard monitor and battery power. In tandem with
the spring arm, the sled creates a stabilizing or floating
effect by keeping the camera level, absorbing shock, and
allowing smooth panning action.
The basic principles of sled adjustment are that you want
the section of the sled below the pivot point to be effectively
heavier (slightly) than the upper section, and you want the
camera’s mass to be centered on the rotating axis. The
vertical and horizontal balance you need to achieve with the
sled should be explained in the instruction manual of your
handheld stabilizer.
Following the instructions in your handheld stabilizer
manual, balance the unit with the camera mounted before
proceeding.
The Arm
The arm is the link between your body and the sled. The
arm provides vertical support and allows the camera and
sled to float. The Navigator arm is a single-articulated
spring loaded arm. It is designed to be adjustable in two
weight ranges: 2 to 6 pounds and 6 to 10 pounds. As
shipped from the factory, the unit is set up for the higher
weight range.
Once you determine the exact weight of your fully loaded
camera, you can decide if the weight range of the arm
needs to be adjusted. If your fully loaded camera weighs
more than 6 pounds, you can skip sectionz A1.
Page 4

Page 4
If your fully loaded camera weighs less than 6 pounds, you
may have to remove the non-adjustable spring to get the
right tension range. If it is more than 6, you will not have to
do this. If your camera is in the 5-6lbs range, you may need
to try it both ways to see what works better.
A1 – Start by opening the arm (see below) Once you’ve
removed the two screws, you will be able to swing the top
half of the arm out and have access to the inside of the arm.
Remove two hex screws, one from each side at the top of the arm, as
pictured (5/64” key, not included)
Next, remove ONLY the spring attached to the stationary
bar – NEVER remove the spring on the adjuster assembly.
Remove the spring from the stationary bar by grabbing it
along its length and pulling it up and over the bar.
Page 5
Connecting the ‘Sled’ to the Arm
If you are using the FlowPod, attach it to the arm by
following these steps:
Remove knurled knobs from
the base of the FlowPod
handle by completely
unscrewing them.
Rest FlowPod handle over
hole on mounting platform
and carefully thread screw
with washer into handle.
When screwing the handle to
the arm, support the weight
of the FlowPod and thread
carefully to avoid damaging
the threads in the handle.
For convenience, you can
tighten the screw using a
coin.
If you are using a Glidecam®, attach it to the arm by
following these steps on the next page.
 Loading...