

Page 1
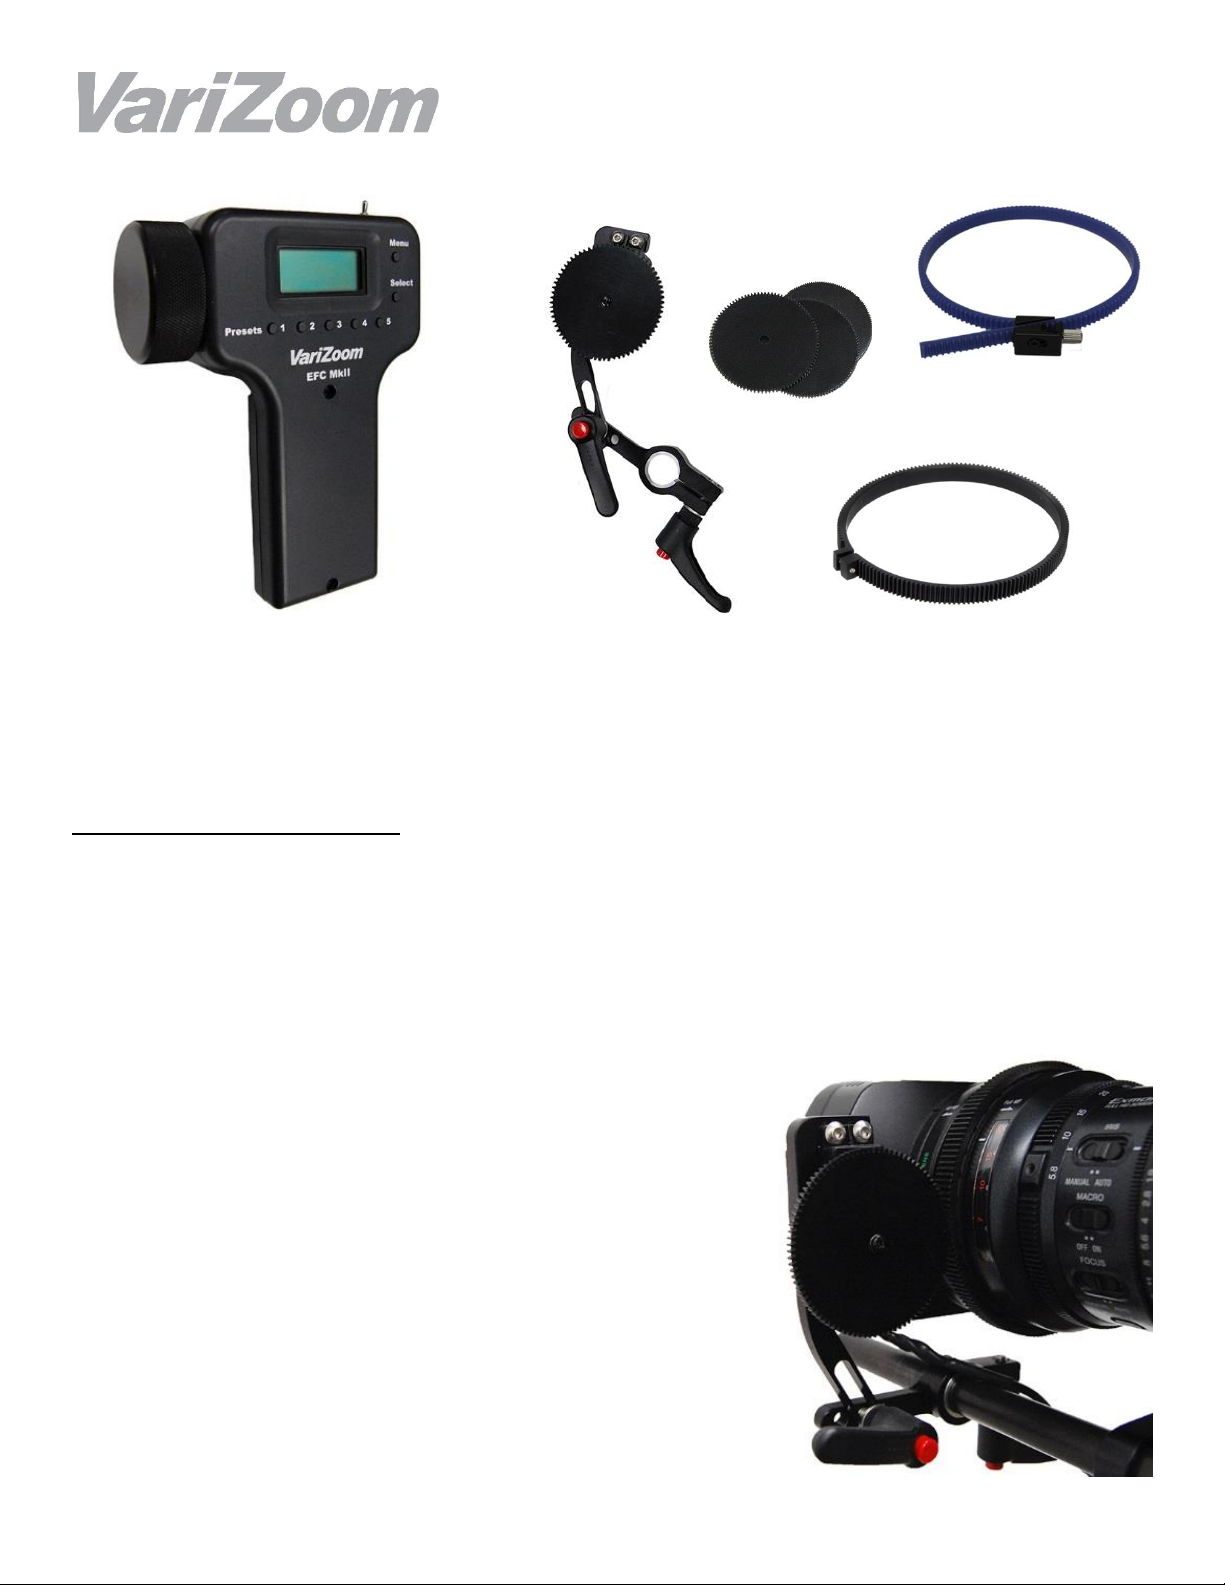
VZ-EFC2U Electronic Focus or Iris
Control
Included in the kit: 1) Hand Control Unit 2) Motor/Bracket 3) Adjustable 32DP lens gear ring adapter
4) Fixed 0.6M lens gear ring adapter (for Sony PXW-X200/PMW-300/200/EX1/EX3) 5) Canon BP915 type Battery & Charger 6) 20’ extension cable 7) 4 drive gears - Canon 0.5M, Fujinon 0.6M,
Film 32DP, Iris 64DP 8) Carrying pouch
Setting up the Motor Bracket
If your lens already has an integral geared ring, you won’t need the included adapters. You merely
need to select the correct black drive gear by checking the teeth against the lens. If your lens doesn’t
have a geared ring, you’ll need to use either the blue adjustable ring adapter, or for Sony PXW200/PMW-300/200/EX1/EX3 you can use the gray fixed-diameter gear. Based on these factors,
attach the appropriate black drive gear to the motor spindle. It may be a tight fit initially, but once it’s
started you can use the fixing screw and washer to help press the gear into place.
If you haven’t already done so, attach your rails / mattebox
rods to the camera. The EFC motor bracket is compatible
with either 15mm or 19mm rods, but for 15mm rods you will
have to use the silver step-down ring included with the
bracket. Set the position of the motor relative to the gear
ring on the lens, but leave the gears disengaged for now.
You’ll set up the hand unit next. To do this, you need to be
able to rotate the lens by hand and move the motor without
moving the lens, so leave a gap between the motor gear
and lens ring for now.
Page 2

Setting up the Hand Unit and Calibrating the Motor
Install the battery on the hand unit and flip the power switch, if necessary. Connect the hand unit to
the motor using the supplied extension cord. Turn the focus knob and take note of the direction it
turns the motor. Press and hold “Menu” until “Set-up Menu” appears on the display. The first option is
“F-Rotate,” which simply allows you to change the direction the motor moves in relation to the focus
knob. If you’re happy with the way it moves and don’t want to change, hit “Select” and you’ll see “IRotate” (on older units “Z-Rotate”) – this is not used, so skip it by hitting “Select” again. The
display readout should now say “Focus to minimum.”
Now you’re at the point of calibrating the hand unit and motor response. The motor has fixed limits to
its range of motion, so what you want to do is fit the lens rotation within those limits. Following the
menu prompt, turn the focus knob all the way to the “minimum,” meaning in the direction that makes
the number in the display decrease to “500.” (On Older Units only: You’ll notice that when the knob is
turned all the way and the number approaches zero, the motor does not respond. You want to set the
knob to a point where the motor is actually responding smoothly to input from the focus knob, usually
about “500”).
Now, by hand, turn the ring on your lens to a point close to the end of its range in the same direction
the motor would be moving it as it goes toward “minimum.” Turn the focus knob very slightly in the
opposite direction (toward “maximum”) so that it still has range of motion to drive the lens all the way
back to minimum. Now engage the motor gear to the lens ring and tighten the bracket clamp on the
rod. Using the focus knob, make sure you can drive the lens to its minimum, without overdriving or
flexing anything, then “Press 1 to Save” the minimum.
That was the hard part. Now you simply need to turn the focus knob toward maximum until it reaches
the end of the lens range, without overdriving or flexing anything, and “Press 1 to Save” the
maximum.
Next will appear another setup item “Iris – Press 1” (on older units “Zoom – Press 1”) – skip this step
by pressing “Select”. If you accidentally hit 1 here, it will lock you into the menu - to clear it, switch
the hand unit power off and on, and don’t worry, your focus calibration has already been stored.
Note that the hand unit will save this focus range, but it is relative to the position of the lens, so if you
disassemble the setup, you’ll at least have to reset the motor and lens positions to match.
Operating the EFC2U and Saving Focus Presets
Once calibrated, the readout will show a range from 0 to 999. This numerical value indexes the
electromechanical ranges of the knob and motor, and it should be repeatable to a pretty accurate
degree. So, for example, if you change focus from 220 to 430 and nothing in your scene has moved
and the lens position hasn’t moved, you should be able to accurately repeat that focal change
referencing only those numbers.
Because of this indexing, you also have the ability to store focal presets using buttons 1-5. To save a
preset, simply focus on a subject and hold the desired button (1-5) until the readout says “Saved F_.”
With these presets you can quickly jump between 5 subjects without having to visually focus using
the knob. Of course, if any of the subjects move or the camera moves, the focus will be off.
Page 3

Mounting the Hand Unit
We incorporated dual 90-degree-offset grooves to
allow the hand unit to mount to either a lateral bar
(on a jib) or a pan bar on a tripod. To change,
simply loosen the thumbscrews and change the
orientation of the clamp. In the first configuration,
the hand unit is set up to attach to the left end of a
lateral weight bar on a jib. The second is for a
tripod.
Battery Connection and Charging
The EFC2U uses a very common Canon BP-915 type battery. Although
the included battery should last for the better part of a shooting day, you
can use extended packs like the BP-930 or BP-945 if you wish. The
included charger is a straightforward unit with international voltage
compatibility and indicator lights.
Flipping the Focus Knob to the Right Side
If you prefer to have the focus knob on the right side, it’s relatively simple to move it over (if you’re
comfortable with taking things apart). You’ll have to remove the focus knob by loosening the set
screw with a 5/64” hex key, then remove the 4 case screws from the back of the unit using a 3/32”
hex key. Now you’ll be able to separate the case halves and see that on the right side is a vacant
hole covered by a removable plastic plug. The focus knob was attached to a potentiometer (blue
body) on the left side that mounts to the case with a hex nut. Loosen the hex nut and carefully extract
the potentiometer, then route the wires and insert the potentiometer into the hole on the right side,
fixing the potentiometer to the case with the hex nut. Cover the vacant hole on the left side with the
plastic plug, carefully route all the wires so they won’t be pinched, and reassemble the case. Attach
the focus knob and you’re ready to go!
Using AC Power (instead of battery)
The EFC2U includes a jack for a special AC adapter available from VariZoom. Please do not plug
other AC adapters into this jack, as damage may result. Contact VariZoom for the correct part
(VZEFC2-AC).
Page 4

*** WARNING – DO NOT USE AC ADAPTER AND BATTERY AT THE SAME TIME – DAMAGE
WILL RESULT ***
Troubleshooting
1) Motor does not move lens all the way: a) try calibrating again and use more of the available
range. b) if it is a long-throw lens or very large diameter lens, the EFC2U may not be able to
cover it entirely – it is only capable of about 180 degrees rotation with a 2.3” gear, or about 3.6”
linear travel
2) Motor is noisy at minimum or maximum (start or end of lens): a) try calibrating again and make
sure the motor isn’t pushing against the end. b) try shortening the range on the noisy end –
recalibrate and set the minimum/maximum higher or lower to be further from the end of the
knob’s range. c) make sure the gear ring and motor drive gear are lined up properly with fully
parallel teeth.
3) No response from motor: a) make sure you’re not extended beyond 50’. b) check extension
cables for damage by plugging hand unit directly into motor.
Specifications
Power Requirement: 6-10VDC, center pin positive on DC input jack
Battery: Canon BP-915 type, compatible w/ BP-930 and BP-945
Extension cable type: 3.5mm stereo (std. 1/8” stereo headphone cable)
Max extension: approximately 50 feet
Hand Unit Mounting: Up to 1.1” diameter tube at 90 degree offsets
Focus Knob Diameter: 2”
Hand Unit Dimensions: 6.25” x 4” x 2”
Hand Unit Weight: 14 oz. w/ battery
 Loading...