

Page 1

MidiVac
Controller
Model 929-5000
vacuum technologies
MANUALE DI ISTRUZIONI
BEDIENUNGSHANDBUCH
NOTICE DE MODE D’EMPLOI
INSTRUCTION MANUAL
Model 929-5001
Model 929-5002
Model 929-5003
Model 929-5004
Model 929-5005
Model 929-5006
Model 929-5007
87-900-080-01 (C)
JULY 2003
Page 2

MidiVac Controller
Page 3
Page 4
Page 5

ISTRUZIONI PER L’USO ....................................................................................................1
GEBRAUCHSANLEITUNG .................................................................................................7
MODE D’EMPLOI ..............................................................................................................13
INSTRUCTIONS FOR USE...............................................................................................19
TECHNICAL INFORMATION ............................................................................................25
MIDIVAC CONTROLLER DESCRIPTION .............................................................................................25
MIDIVAC CONTROLLER SPECIFICATION ..........................................................................................27
MIDIVAC CONTROLLER OUTLINE ......................................................................................................27
PUMP CONNECTION ............................................................................................................................28
REMOTE I/O CONNECTOR ..................................................................................................................28
USE ........................................................................................................................................................30
Setting Mode .....................................................................................................................................30
Operating Mode.................................................................................................................................30
PRESSURE VS CURRENT DIAGRAMS ...............................................................................................30
ACCESSORIES AND SPARE PARTS...................................................................................................30
Page 6
ISTRUZIONI PER L’USO
INFORMAZIONI GENERALI
Questa apparecchiatura è destinata ad uso
professionale. L'utilizzatore deve leggere attentamente
il presente manuale di istruzioni ed ogni altra
informazione addizionale fornita dalla Varian prima
dell'utilizzo dell'apparecchiatura. La Varian si ritiene
sollevata da eventuali responsabilità dovute
all'inosservanza totale o parziale delle istruzioni, ad uso
improprio da parte di personale non addestrato, ad
interventi non autorizzati o ad uso contrario alle
normative nazionali specifiche.
Informazioni dettagliate sono fornite nell'appendice
“Technical information”.
Questo manuale utilizza le seguenti convenzioni:
!
I messaggi di pericolo attirano l'attenzione
dell'operatore su una procedura o una pratica specifica
che, se non eseguita in modo corretto, potrebbe
provocare gravi lesioni personali.
I messaggi di attenzione sono visualizzati prima di
procedure che, se non osservate, potrebbero causare
danni all'apparecchiatura.
Le note contengono informazioni importanti estrapolate
dal testo.
PERICOLO!
ATTENZIONE!
NOTA
DESCRIZIONE DEL CONTROLLER
Il controller MidiVac della Varian è un controller per le
pompe ioniche. L'unità può essere preconfigurata in
fabbrica a seconda delle necessità del cliente, o
possono essere ordinate separatamente dall'utente le
schede opzionali relative alla comunicazione seriale e
al “Set point”.
Il controller può essere configurato con due connettori
in modo da alimentare due pompe ioniche. In questo
caso i valori di corrente visualizzati corrispondono alla
somma dei due valori di corrente relativi a ciascuna
pompa.
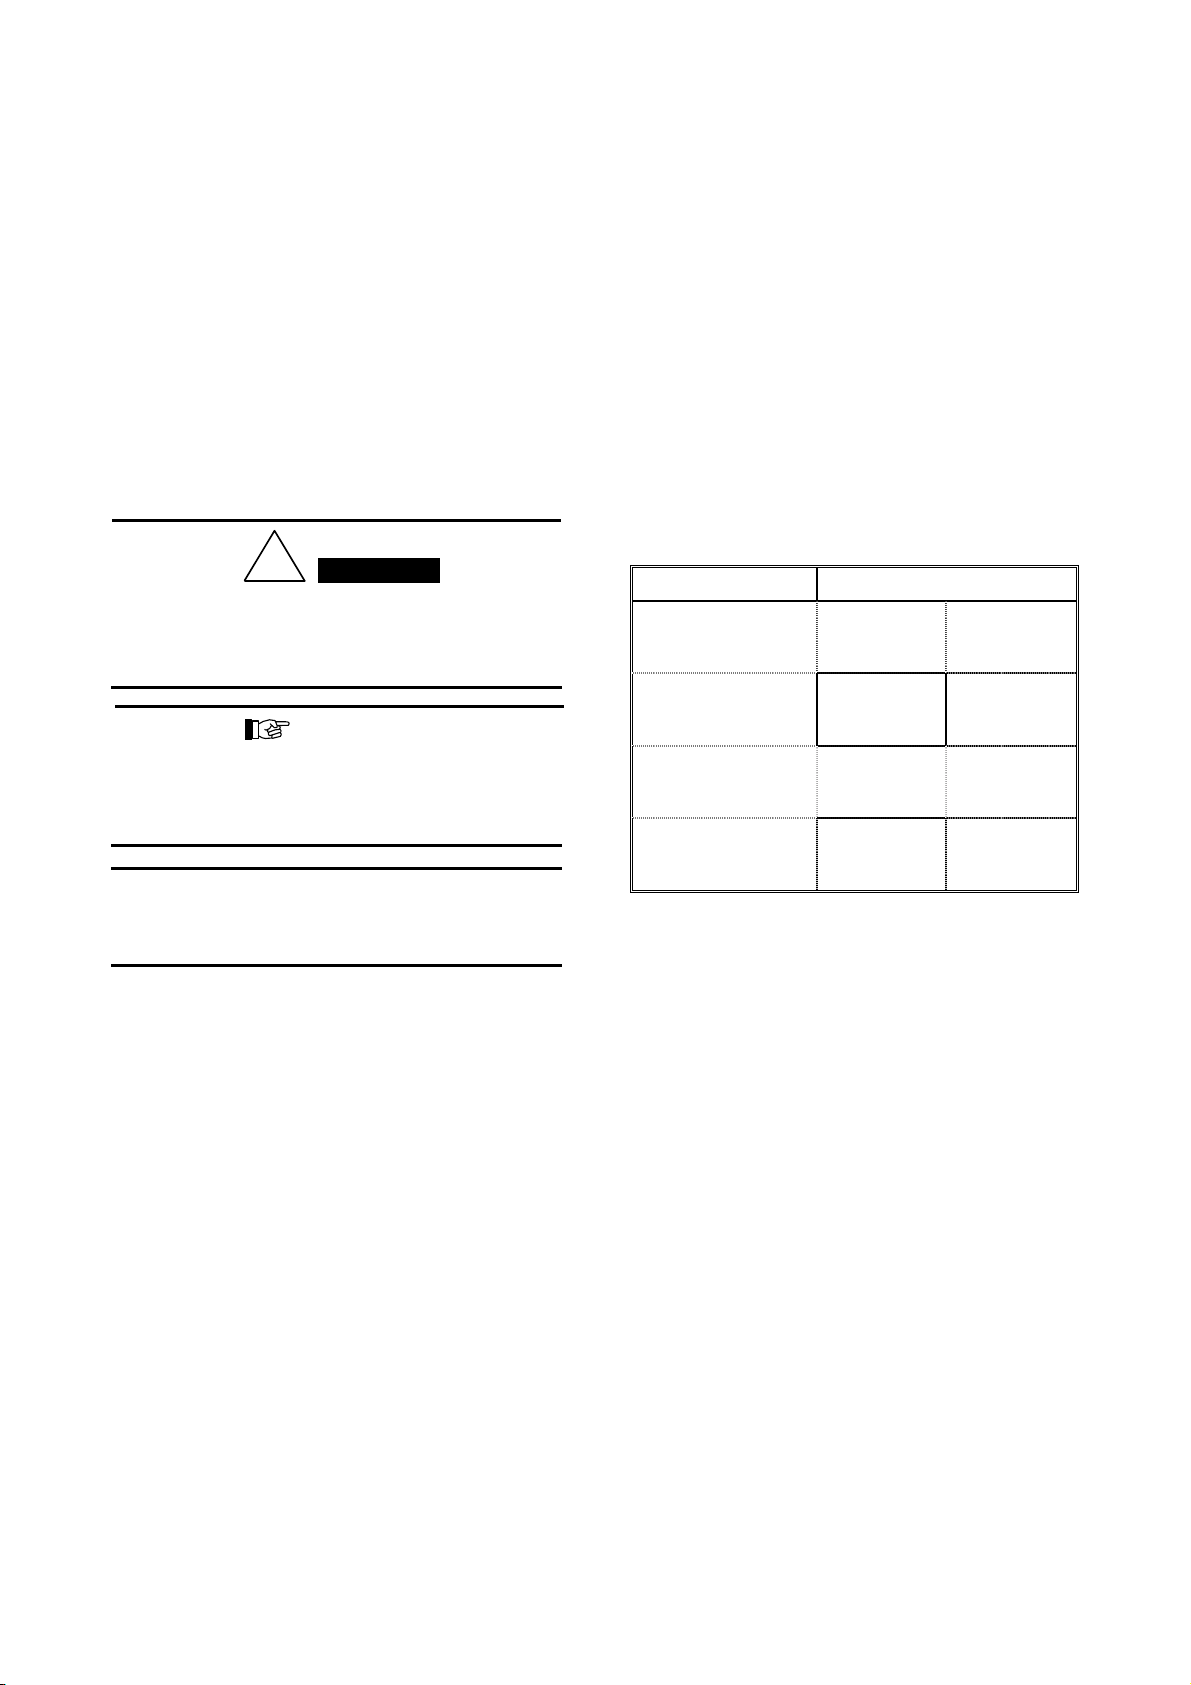
Le versioni base del MidiVac sono dettagliate nella
seguente tabella (la polarità non è configurabile):
DESCRIZIONE P/N
Unità base con tensione
di alimentazione a 120
Vac e polarità negativa
Unità base con tensione
di alimentazione a 120
Vac e polarità positiva
Unità base con tensione
di alimentazione a 230
Vac e polarità negativa
Unità base con tensione
di alimentazione a 230
Vac e polarità positiva
929-5000
(singolo
connettore)
929-5001
(singolo
connettore)
929-5002
(singolo
connettore)
929-5003
(singolo
connettore)
929-5004
(doppio
connettore)
929-5005
(doppio
connettore)
929-5006
(doppio
connettore)
929-5007
(doppio
connettore)
IMMAGAZZINAMENTO
Durante il trasporto e l'immagazzinamento del
controller non devono essere superate le seguenti
condizioni ambientali:
• temperatura: da -20 °C a +70 °C
• umidità relativa: 0 - 95% (non condensante)
1 87-900-080-01 (C)
Page 7
ISTRUZIONI PER L’USO
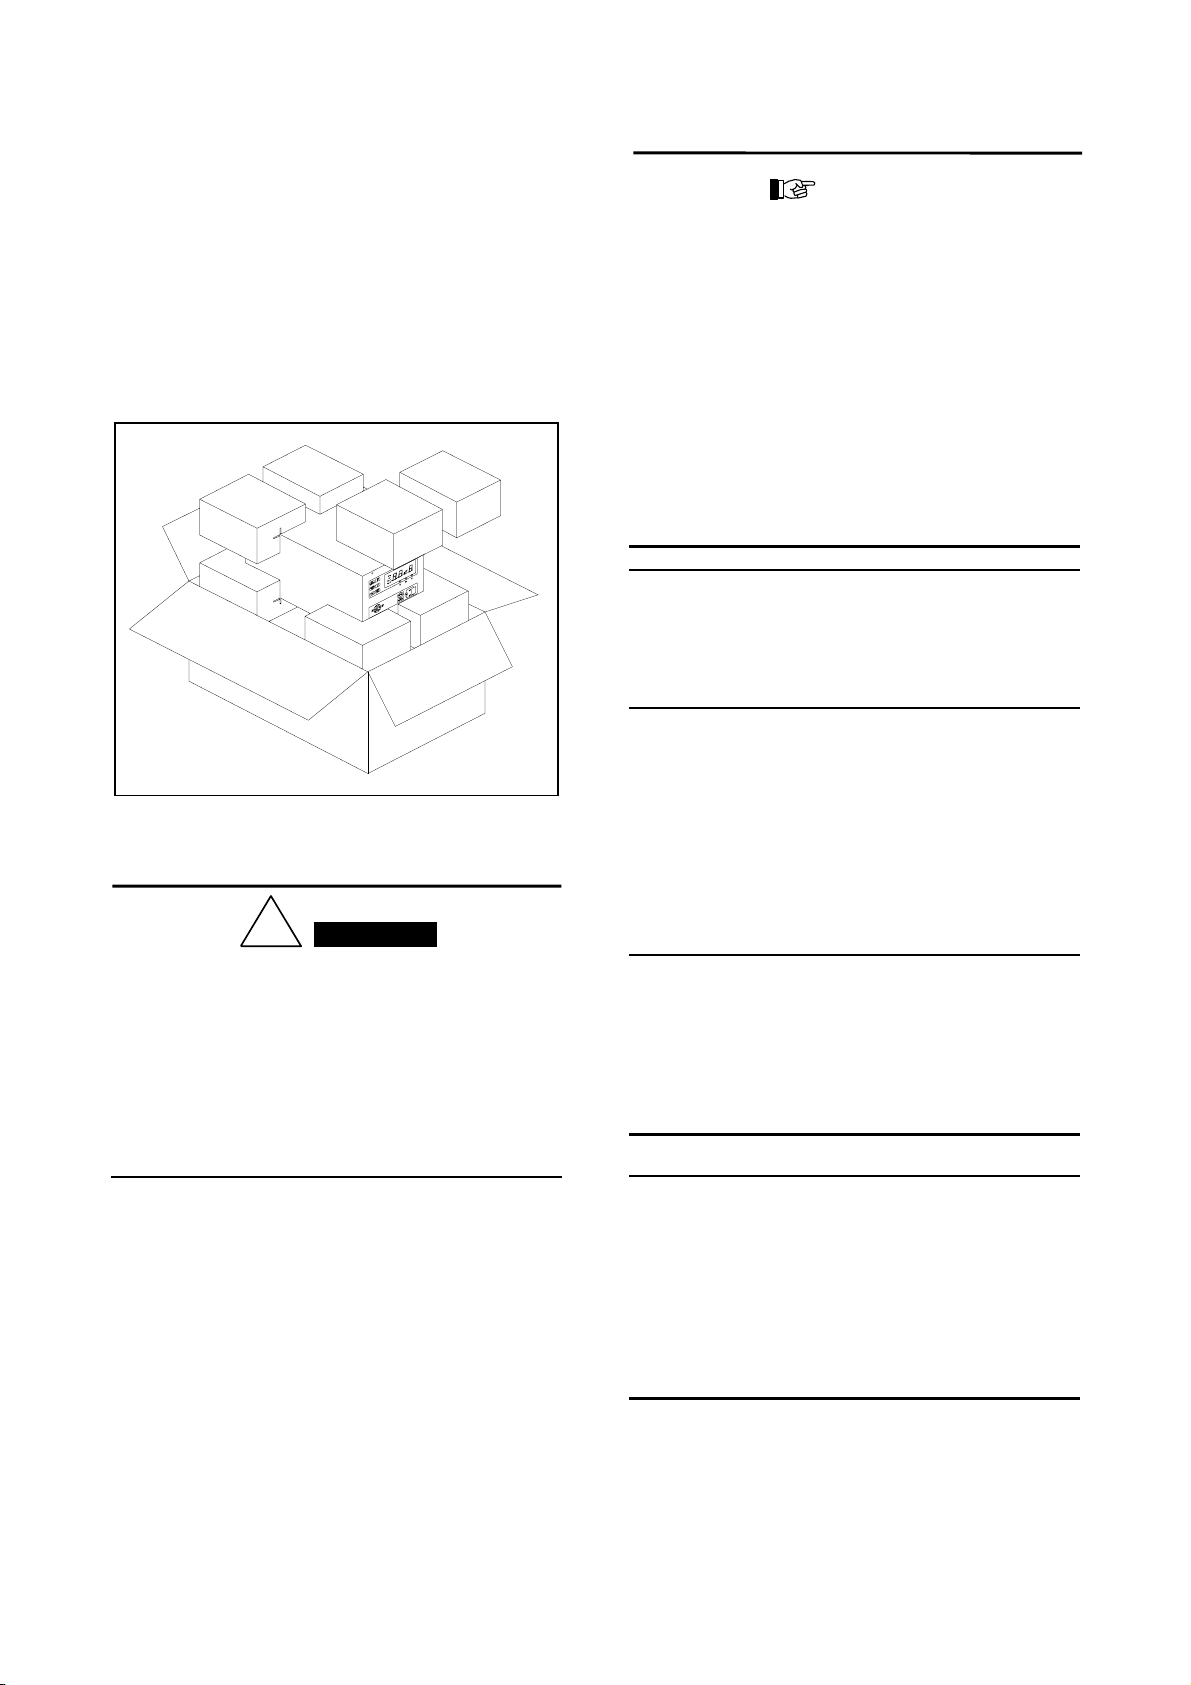
PREPARAZIONE PER L'INSTALLAZIONE
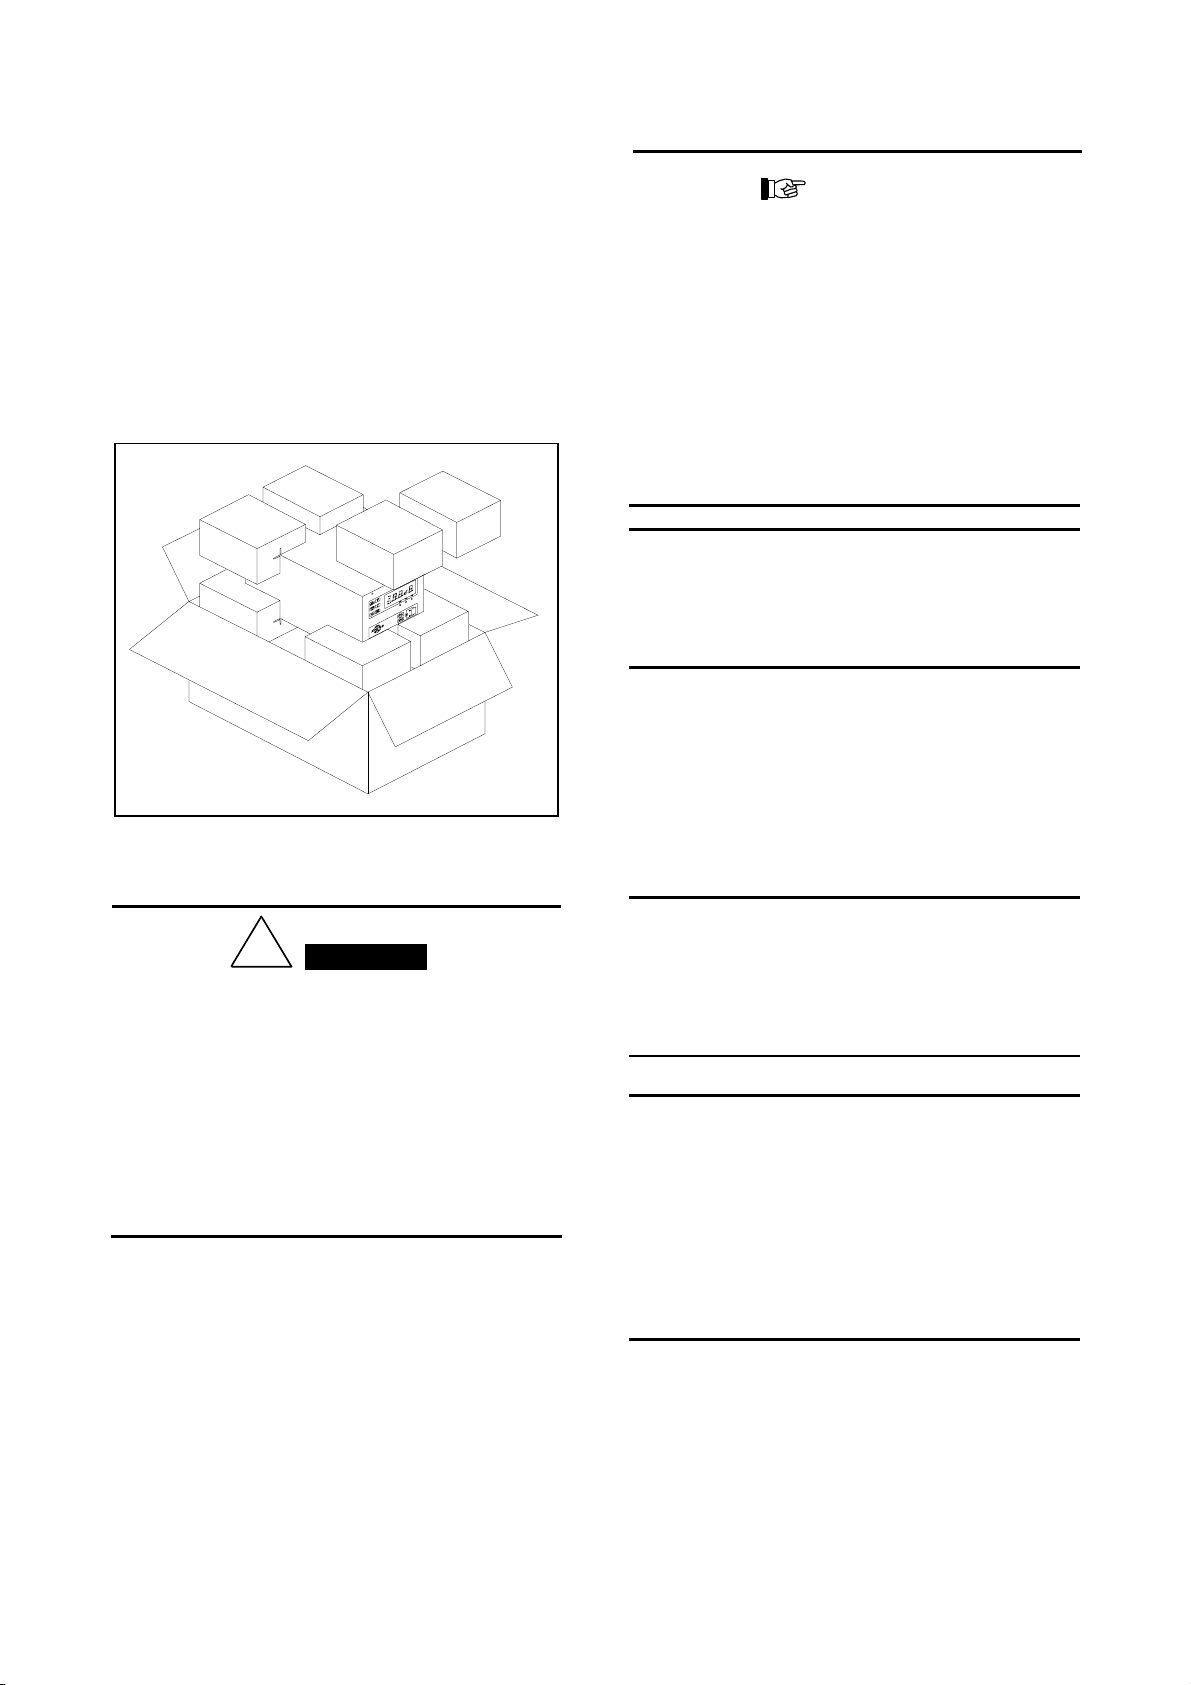
Il controller viene fornito in un imballo protettivo
speciale; se si presentano segni di danni, che
potrebbero essersi verificati durante il trasporto,
contattare l'ufficio vendite locale.
Durante l'operazione di disimballaggio, prestare
particolare attenzione a non lasciar cadere il controller
e a non sottoporlo ad urti.
Non disperdere l'imballo nell'ambiente. Il materiale è
completamente riciclabile e risponde alla direttiva CEE
85/399 per la tutela dell'ambiente.
INSTALLAZIONE
!
Il controller è munito di un cavo di alimentazione a 3 fili
con una spina di sicurezza (approvata a livello
internazionale). Utilizzare questo cavo di alimentazione
e la spina insieme ad una presa munita di
collegamento di terra onde evitare folgorazioni.
Verificare che il collegamento di terra sia collegato in
modo corretto.
All'interno del controller si sviluppano alte tensioni che
possono recare gravi danni o la morte. Prima di
eseguire qualsiasi operazione di installazione o
manutenzione del controller scollegarlo dalla
alimentazione.
PERICOLO!
ATTENZIONE!
Il controller può essere usato sia come unità da tavolo
sia come modulo a rack, in ogni caso deve essere
posizionato in modo tale che l'aria possa circolare
liberamente attraverso i fori di areazione presenti sulla
copertura superiore e laterale.
Se il controller viene utilizzato come modulo a rack,
DEVE essere inserito in un adattatore alto quattro unità
rack a causa del suo peso.
Il pannello frontale del MidiVac non è previsto per
reggere il peso dell'unità.
Non installare o utilizzare il controller in un ambiente
esposto ad agenti atmosferici (pioggia, neve, ghiaccio),
polvere, gas corrosivi, o in un ambiente esplosivo o ad
alto rischio di infiammabilità.
NOTA
Se il controller è utilizzato come unità da tavolo,
estrarre i due piedini frontali. Se il controller è installato
in un rack, rimuovere i quattro piedini e posizionarlo
con almeno 30 mm (1.2 pollici) di spazio sopra e sotto.
Durante il funzionamento, occorre che siano rispettate
le seguenti condizioni ambientali:
• temperatura: da 0 °C a +45 °C
• umidità relativa: 0 - 95% (senza condensa)
Per collegare il controller alla pompa utilizzare il cavo
specifico non fornito.
NOTA
Il MidiVac viene fornito con un cavo di interlock
collegato tra la vite (4) e la boccola (8) (vedere la figura
del pannello posteriore): questo cavo non deve essere
rimosso altrimenti non sarà possibile accendere l’alta
tensione.
NOTA
Senza la connessione di interlock tra i pin 13 e 14 del
connettore I/O remoto non è possibile mettere in
funzione il controller. Per attivare o disattivare l'alta
tensione è necessario inserire un contatto a tensione
flottante tra i pin 13 e 14.
Per attivare l'alta tensione, i pin devono essere
cortocircuitati (con l'alta tensione attivata/disattivata,
portare l'interruttore del pannello frontale in posizione
ON).
Vedere l'appendice "Technical Information" per
informazioni dettagliate su questi ed altri collegamenti,
e sull'installazione delle schede opzionali.
2 87-900-080-01 (C)
Page 8
ISTRUZIONI PER L’USO
USO
In questo paragrafo sono riportate le principali
procedure operative. Per ulteriori dettagli e per
procedure che coinvolgono collegamenti o particolari
opzionali, fare riferimento al paragrafo "USE"
dell'appendice "Technical Information".
Prima di usare il controller effettuare tutti i collegamenti
elettrici e pneumatici e fare riferimento al manuale della
pompa collegata.
!
Per evitare danni alle persone ed all'apparato, nel caso
in cui il controller sia appoggiato su di un tavolo
assicurarsi che sia stabile.
PERICOLO!
Controlli ed Indicatori del Pannello Frontale
del MidiVac
La figura e la tabella della pagina seguente illustrano il
pannello frontale del controller MidiVac con il significato
e la funzione dei relativi controlli e degli indicatori.
NOTA
Alcuni controlli ed indicatori variano la loro funzione ed
il loro significato in funzione della posizione
dell’interruttore HV ON OFF. La tabella riporta entrambi
i significati ed entrambe le funzioni.
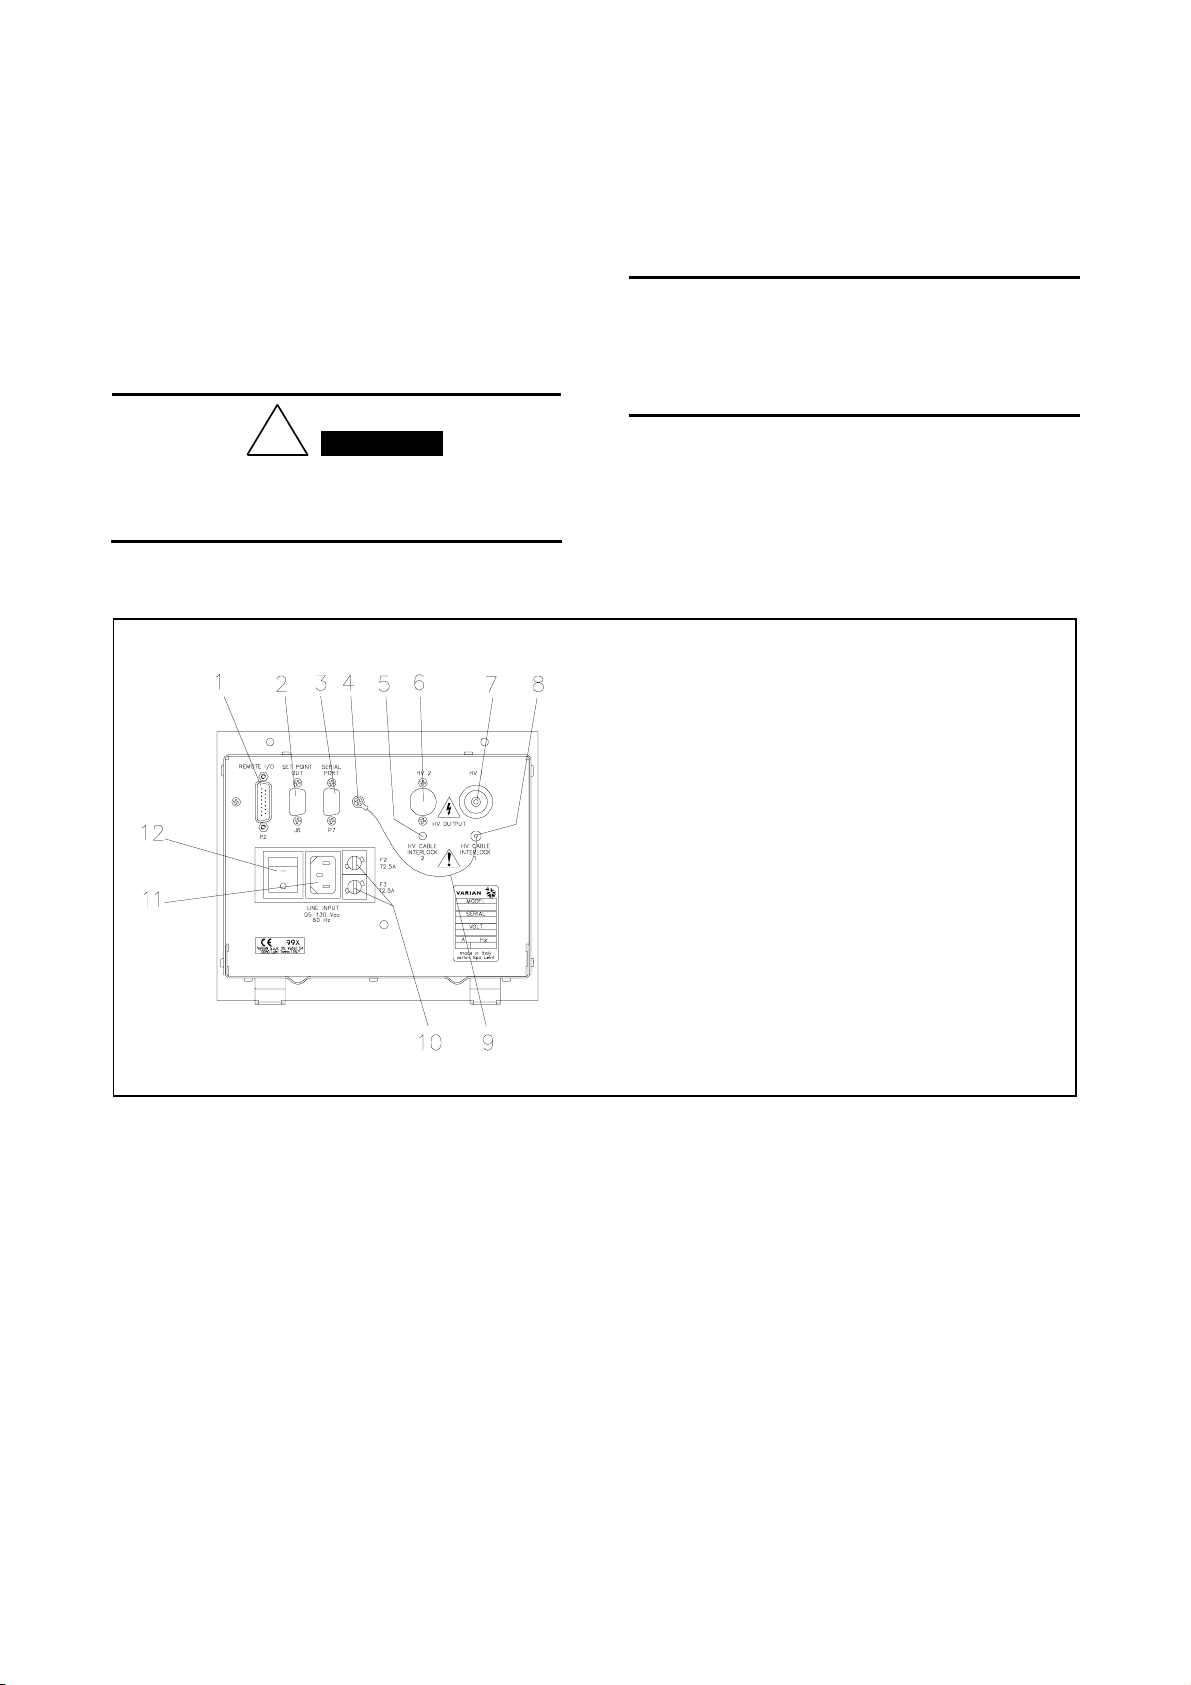
Pannello Posteriore del MidiVac
La figura seguente mostra i controlli e le connessioni
del pannello posteriore del controller MidiVac.
Informazioni dettagliate sulle connessioni illustrate
sono contenute nell’appendice “Technical Information”.
1) Connettore “Remote I/O” per controllo remoto
2) Predisposizione per connettore “Set Point” (opzionale)
3) Predisposizione per connettore seriale (opzionale)
4) Vite per collegamento del cavo di interlock
5) Predisposizione per secondo ingresso cavo di interlock
(opzionale)
6) Predisposizione per secondo connettore HV (opzionale)
7) Connettore HV
8) Ingresso cavo di interlock
9) Cavo di interlock
10) Fusibili
11) Presa di alimentazione da rete
12) Interruttore di alimentazione
Pannello Posteriore del MidiVac
3 87-900-080-01 (C)
Page 9

ISTRUZIONI PER L’USO
DESCRIZIONE RIF. DESCRIZIONE
con (12) su OFF con (12) su ON
1 Freccia in giù Quando premuto consente di diminuire il valore
2 Freccia in su Quando premuto consente di aumentare il valore
3 V Comando non abilitato. Quando premuto consente di visualizzare sul display
4 I Comando non abilitato. Quando premuto consente di visualizzare sul display
5 Set 2 Quando acceso indica che il display (9) sta
6 Set 1 Quando acceso indica che il display (9) sta
7 Amp Quando acceso indica che il display (9) sta
8 KV Quando acceso indica che il display (9) sta
9 Display Visualizza i valori delle tensioni e delle correnti
10 3Kv / 5Kv / 7Kv Il LED acceso corrisponde alla tensione massima
11 PROTECT Quando acceso indica che è stato attivato il
12 HV ON/OFF Accende l’alta tensione. Spegne l’alta tensione.
13 HV Quando acceso indica la presenza dell’alta tensione.
14 REMOTE Quando acceso indica che il controller è gestito da
15 START
PROT
16 MENU Se il MidiVac è in modo “Remote” quando premuto
della funzione selezionata con il pulsante (16).
della funzione selezionata con il pulsante (16).
visualizzando il valore del Set Point 2 quando
selezionato tramite il pulsante (16).
visualizzando il valore del Set Point 1 quando
selezionato tramite il pulsante (16).
selezionate tramite il pulsante (16).
erogabile dal controller.
funzionamento in modo “Protect”.
Quando lampeggia si è in fase di impostazione.
un computer remoto.
Quando premuto permette di attivare il modo
“Protect”.
Il LED (11) lampeggia durante le operazioni di
impostazione.
permette di passare in modo “Local”.
Se il MidiVac è in modo “Local” quando premuto
permette di accedere alle funzioni di impostazione.
Cambia il valore della tensione massima in uscita
dal controller da 7 kV a 5 kV e da 5 kV a 3 kV.
Cambia il valore della tensione massima in uscita
dal controller da 3 kV a 5 kV e da 5 kV a 7 kV.
(9) il valore della tensione erogata alla pompa.
(9) il valore della corrente assorbita dalla pompa.
Quando acceso indica che il valore di corrente ha
raggiunto il valore impostato del Set Point 2.
Quando acceso indica che il valore di corrente ha
raggiunto il valore impostato del Set Point 1.
visualizzando la corrente assorbita dalla pompa.
visualizzando la tensione erogata dal controller.
Visualizza il valore della tensione erogata dal
controller, o la corrente assorbita dalla pompa.
Il LED acceso corrisponde alla tensione massima
erogabile dal controller.
Quando acceso indica che è stato attivato il
funzionamento in modo “Protect”.
Quando acceso indica che il controller è gestito da
un computer remoto.
Quando premuto permette di attivare il modo
“Protect”.
Se il MidiVac è in modo “Remote” quando premuto
permette di passare in modo “Local”.
Se il MidiVac è in modo “Local” quando premuto
permette di passare in modo “Remote”.
4 87-900-080-01 (C)
Page 10

ISTRUZIONI PER L’USO
PROCEDURE DI USO
Modi di Funzionamento
Il controller MidiVac può essere comandato in locale dal
pannello frontale (modo “Local”), o da remoto tramite un
computer (modo “Remote”).
Se non è installata alcuna scheda di comunicazione il
modo “Remote” non è disponibile. Nel caso in cui sia
installata una scheda seriale è possibile forzare il modo
“Local” premendo il pulsante “Menu” del pannello
frontale: il LED “REMOTE” lampeggerà.
Con HV ON e “Local” temporaneo attivato si possono
effettuare tutte le operazioni previste in questo stato
(vedere la tabella dei comandi ed indicatori seguente);
al termine delle operazioni si può tornare al modo
“Remote” premendo nuovamente il pulsante “Menu”: il
LED “REMOTE” indicherà il funzionamento normale.
Con HV OFF e “Local” temporaneo attivato si può
accedere alle sole funzioni di impostazione parametri al
termine delle quali l’unità rimane in modo “Local”. Per
tornare al modo “Remote” occorre accendere l’alta
tensione e poi premere il pulsante “Menu”.
Se l’unità è in modo “Remote” e l’alta tensione è
accesa, la reale accensione dell’alta tensione dipende
dall’ultimo comando (accensione o spegnimento) dato
dal computer remoto. La condizione iniziale predisposta
in fabbrica è di spegnimento, per cui per accendere
l’alta tensione occorre passare in modo “Local”
premendo il tasto “Menu” del pannello frontale, oppure
inviare il comando di accensione dell’alta tensione dal
computer remoto.
Se l’unità è in modo “Remote” e l’alta tensione è
spenta, l’accensione dell’alta tensione è possibile solo
con l’apposito comando inviato dal computer remoto.
Il controller MidiVac può operare nei modi “Start” o
“Protect”.
Nel modo “Start”, dopo l’accensione dell’alta tensione, il
controller alimenta la pompa con la corrente necessaria
finché non interviene una condizione di errore.
Nel modo “Protect si hanno due possibili condizioni:
1. All’accensione la corrente erogata è superiore al
valore di soglia impostato: in questo caso il
controller eroga in uscita la corrente richiesta finché
questa non scende sotto il valore di soglia
impostato, dopo di ché il controller entra nel vero
modo “Protect” e spegne l’alta tensione quando la
corrente erogata supera il valore di soglia
presentando sul display il messaggio di errore
“Err2”.
2. All’accensione la corrente erogata è inferiore al
valore di soglia impostato: in questo caso, dopo un
periodo di assestamento di 30 secondi durante il
quale non viene controllata la corrente, il controller
spegne l’alta tensione nel caso in cui la corrente
erogata superi il valore di soglia e presenta sul
display il messaggio di errore “Err2”.
Accensione e Spegnimento
Per accendere il controller occorre portare su I
l’interruttore di alimentazione posto sul pannello
posteriore (vedi figura in alto). Per accendere l’alta
tensione è sufficiente portare su ON l’interruttore (12)
del pannello frontale. Una volta accesa l’alta tensione i
LED (10) del pannello frontale indicano il valore di
tensione massima impostato. Per visualizzare sul
display il valore della tensione in uscita occorre premere
il pulsante (3) del pannello frontale; per visualizzare la
corrente occorre invece premere il pulsante (4).
NOTA
Il valore della tensione in uscita può variare in funzione
della corrente: vedere il diagramma tensione/corrente
riportato nel paragrafo “MidiVac controller description”
dell’appendice “Technical Information”.
Per spegnere la sola alta tensione portare su OFF
l’interruttore (12) del pannello frontale. Per spegnere il
controller portare su 0 l’interruttore di alimentazione
posto sul pannello posteriore.
MANUTENZIONE
Il controller MidiVac non richiede alcuna manutenzione.
Qualsiasi intervento deve essere eseguito da personale
autorizzato. In caso di guasto è possibile usufruire del
servizio di riparazione Varian o del "Varian advance
exchange service", che permette di ottenere un
controller nuovo in sostituzione di quello guasto.
!
Prima di effettuare qualsiasi intervento sul controller
scollegare il cavo di alimentazione.
Qualora un controller dovesse essere rottamato,
procedere alla sua eliminazione nel rispetto delle
normative nazionali specifiche.
PERICOLO!
5 87-900-080-01 (C)
Page 11

ISTRUZIONI PER L’USO
MESSAGGI DI ERRORE
Per certi tipi di guasti il controller esegue una autodiagnostica e visualizza uno dei messaggi mostrati
nella tabella seguente.
Nel caso in cui si dovesse bruciare il fusibile F1 interno
al controller, il display presenta per alcuni secondi
l’indicazione di Vout=0.0, e poi il messaggio “Err 3”.
MESSAGGIO DESCRIZIONE AZIONE CORRETTIVA
Err 1 E’ stata rilevata una condizione di corto
circuito (messaggio “SCr”) per più di 3 minuti.
La pressione nella pompa è troppo alta.
Err 2 l controller ha spento l’alta tensione per
l’intervento del “Protect”.
Err 3 Guasto generico dei circuiti di controllo
dell’alta tensione.
Err 5 L’interlock del cavo dell’alta tensione è aperto. Se si dispone di un cavo alta tensione con il filo
SCr L’uscita dell’alta tensione è in corto circuito.
La pressione della pompa è troppo alta.
Se questa condizione permane per più di 3
minuti, il controller spegne l’alta tensione e
presenta il messaggio “Err 1”.
NOTA
La rimozione della copertura del MidiVac comporta
l’apertura del microiunterruttore di sicurezza e quindi
l’interruzione dell’alimentazione, per cui il MidiVac e
tutti i suoi indicatori si spengono e non vi è alcuna
segnalazione sul display.
Spegnere l’alta tensione e verificare che il cavo
dell’alta tensione non sia in corto circuito.
Migliorare la pressione di roughing nella
pompa.
Spegnere e quindi riaccendere l’alta tensione.
Se l’errore si ripresenta chiamare l’assistenza
Varian.
Selezionare il modo di funzionamento “Start”.
Portare su OFF l’interruttore HV (12). Se si
vuole accendere l’alta tensione anche se la
corrente è superiore al livello di “Protect”,
portare su ON l’interruttore HV (12).
Spegnere e riaccendere il controller. Se l’errore
si ripresenta chiamare l’assistenza Varian.
di interlock, verificare che il connettore dal lato
della pompa sia inserito correttamente.
Nel caso in cui non si disponesse di tale cavo,
verificare che il cavetto fornito con l’unità sia
collegato tra la massa e la boccola posta sotto
il connettore dell’alta tensione.
Spegnere e riaccendere il controller. Se l’errore
si ripresenta chiamare l’assistenza Varian.
Spegnere il controller, verificare lo stato
dell’uscita dell’alta tensione e rimuovere la
causa del corto circuito. Migliorare la pressione
di roughing della pompa.
Spegnere e riaccendere il controller. Se l’errore
si ripresenta chiamare l’assistenza Varian.
6 87-900-080-01 (C)
Page 12
GEBRAUCHSANLEITUNG
ALLGEMEINES
Dieser Apparat ist für Fachbetriebe bestimmt. Vor
Gebrauch sollte der Benutzer dieses Handbuch sowie
alle weiteren mitgelieferten Zusatzdokumentationen
genau lesen. Bei Nichtbeachtung - auch teilweise - der
enthaltenen Hinweise, unsachgemäßem Gebrauch
durch ungeschultes Personal, nicht autorisierten
Eingriffen und Mißachtung der einheimischen, hier zur
Geltung kommenden Bestimmungen übernimmt die
Firma Varian keinerlei Haftung.
Detaillierte technische Informationen sind im Anhang
"Technical Information" enthalten.
In dieser Gebrauchsanleitung werden Sicherheitshinweise folgendermaßen hervorgehoben:
!
Die Gefahrenhinweise lenken die Aufmerksamkeit des
Bedieners auf bestimmte Vorgänge oder Praktiken, die
bei unkorrekter Ausführung schwere Verletzungen
hervorrufen können.
Die Warnhinweise vor bestimmten Prozeduren machen
den Bediener darauf aufmerksam, daß bei
Nichteinhaltung Schäden an der Anlage entstehen
können.
ANMERKUNG
Die Anmerkungen enthalten wichtige Informationen, die
im Text hervorgehoben werden.
GEFAHR!
ACHTUNG!
BESCHREIBUNG DES CONTROLLERS
Der MidiVac-Controller der Firma Varian ist ein Gerät
zur Steuerung von Ionenpumpen. Das Gerät kann im
Werk nach den Angaben des Kunden voreingestellt
werden oder in Einzelkomponenten geliefert werden,
so daß der Kunde den Controller durch Einsetzen bzw.
den Austausch zusätzlicher Karten individuell
konfigurieren kann.
Der Controller kann mit zwei Steckverbindern zur
Stromversorgung von zwei Ionenpumpen konfiguriert
werden. In diesem Fall entsprechen die angezeigten
Stromwerte der Summe der zwei Stromwerte der
beiden Pumpen.
In der nachstehenden Tabelle sind die lieferbaren
Karten zur Konfigurationserweiterung aufgeführt (die
Polarität ist nicht konfigurierbar).
BESCHREIBUNG P/N
Grundeinheit mit 120 V
Ws Speisespannung
und negativer Polarität
Grundeinheit mit 120 V
Ws Speisespannung
und positiver Polarität
Grundeinheit mit 230 V
Ws Speisespannung
und negativer Polarität
Grundeinheit mit 230 V
Ws Speisespannung
und positiver Polarität
929-5000
(Einzelstecker)
929-5001
(Einzelstecker)
929-5002
(Einzelstecker)
929-5003
(Einzelstecker)
929-5004
(Doppelstecker)
929-5005
(Doppelstecker)
929-5006
(Doppelstecker)
929-5007
(Doppelstecker)
LAGERUNG
Beim Transport und bei der Lagerung der Controller
müssen folgende klimatischen Verhältnisse
eingehalten werden
• Temperatur: von -20 °C bis +70 °C
• Relative Luftfeuchtigkeit: 0-95 %
(nicht kondensierend)
:
7 87-900-080-01 (C)
Page 13
GEBRAUCHSANLEITUNG
VOR DER INSTALLATION
Der Controller wird mit einer speziellen
Schutzverpackung geliefert. Eventuelle
Transportschäden müssen der zuständigen örtlichen
Verkaufsstelle gemeldet werden.
Beim Auspacken vorsichtig vorgehen, damit der
Controller nicht fällt oder Stößen ausgesetzt wird.
Das Verpackungsmaterial muß korrekt entsorgt
werden. Es ist vollständig recyclebar und entspricht der
EG-Richtlinie 85/399 für Umweltschutz.
INSTALLATION
!
Der
MidiVac-Controller wird mit einem Netzkabel mit 3
Leitern und mit einem den internationalen Normen
entsprechenden Netzstecker geliefert. Es sollte immer
dieses Netzkabel benutzt werden, das an eine
vorschriftsmäßig geerdete Steckdose anzuschließen
ist, um Stromentladungen zu vermeiden.
Im Inneren des Controllers entstehen hohe
Spannungen, die schwere Schäden verursachen und
lebensgefährlich sein können. Vor jedem Montagebzw. Wartungseingriff muß deshalb der Netzstecker
gezogen werden.
GEFAHR!
ACHTUNG!
Der Controller kann auf einen Tisch oder ein Gestell
montiert werden. In beiden Fällen muß eine
ungehinderte Zirkulation der Kühlluft durch die im
Gehäuse vorne und unten eingelassen Luftöffnungen
gewährleistet sein.
Wenn der Controller in einem Gestell montiert wird,
MUSS er in einer vier Rackeinheiten hohen AdapterEinheit installiert werden, um zu vermeiden, daß der
Controller nicht in das Gestell fällt. Die vordere
Schalttafel des MidiVac-Controllers ist nicht geeignet,
das gesamte Gewicht der Einheit zu tragen.
Der Controller darf nicht in Umgebungen installiert u/o
benutzt werden, die Witterungseinflüssen (Regen,
Frost, Schnee), Staub und aggressiven Gasen
ausgesetzt sind und in denen Explosions- und erhöhte
Brandgefahr besteht.
ANMERKUNG
If the controller is used as a bench unit, extend the two
front legs. If the controller is installed on a rack, remove
the four feet and position it with at least 30 mm (1.2
inches) of clearance on top and bottom.
Während des Betriebs müssen folgende
Umgebungsbedingungen eingehalten werden:
• Temperatur: von +0 °C bis +45 °C;
• Relative Luftfeuchtigkeit: 0-95%
(nicht kondensierend).
Zum Anschluß des Controllers an die Pumpe ist das
spezielle Kabel zu verwenden, das nicht mitgeliefert
wird.
ANMERKUNG
Der MidiVac-Controller wird mit einem Schutzkabel
geliefert, das zwischen der Schraube (4) und der
Buchse (8) angeschlossen ist (siehe Abbildung der
Geräterückseite). Dieses Kabel darf nicht entfernt
werden, da andernfalls die Einschaltung der
Hochspannung nicht möglich ist.
ANMERKUNG
Ohne die Verriegelungsverbindung zwischen den
Stiften 13 und 14 des Fern-E/A-Steckers kann der
Kontroller nicht arbeiten. Um die HV remote AUS- oder
EINzuschalten, muss ein spannungsfreier Kontakt
zwischen den Stiften 13 und 14 hergestellt werden.
Zum Einschalten der HV müssen die Stifte
kurzgeschlossen werden (mit dem EIN-/AUS-Schalter
auf der Frontseite in der EIN-Stellung).
Detailliertere Hinweise zu weiteren Anschlußarten
sowie zum Einsatz von Zusatzkarten finden Sie im
Anhang "Technical Information".
8 87-900-080-01 (C)
Page 14

GEBRAUCHSANLEITUNG
GEBRAUCH
In diesem Kapitel sind die wichtigsten
Betriebsvorgänge aufgeführt. Für weitere Hinweise
bezüglich Anschluß und Montage des bestellbaren
Zubehörs verweisen wir auf das Kapitel "Use" im
Anhang zu "Technical Information".
Vor Benutzung des Controllers müssen sämtliche
elektrischen und pneumatischen Anschlüsse
entsprechend der Betriebsanleitung der
angeschlossenen Pumpe ausgeführt werden.
!
Falls der Controller auf einem Tisch steht, ist zur
Vermeidung von Personen- und Geräteschäden
sicherzustellen, daß er einen stabilen Stand hat.
GEFAHR!
Schalter und Anzeigen auf der vorderen
Schalttafel des MidiVac-Controllers
In der auf der nachfolgenden
wird die vordere Schalttafel des MidiVac-Controllers
gezeigt; des weiteren werden die jeweilige Bedeutung
und Funktion der Schalter und Anzeigen Tabelle
beschrieben
.
ANMERKUNG
Die
Bedeutung und Funktion der Schalter und Anzeigen
ist von der jeweiligen Stellung des Hochspannungsschalters HV ON/OFF abhängig. In der nachstehenden
Tabelle sind die jeweils geltenden
Funktionen angegeben.
Seite abgebildeten Tabelle
Bedeutungen und
Hintere Schalttafel des MidiVac-Controllers
Die nachstehende Abbildung zeigt die auf der hinteren
Schalttafel des MidiVac-Controllers präsenten Schalter
und die jeweils erforderlichen Anschlüsse.
Genauere Angaben zu den abgebildeten
Anschlußarten finden Sie im Anhang "Technical
Information".
1) Steckverbinder "Remote I/O" zur Fernsteuerung
2 Vorrüstung für den Steckverbinder "Set Point"
(Optional)
3) Vorrüstung für den seriellen Steckverbinder
(Optional)
4 Schraube für den Anschluß des Schutzkabels
5) Vorrüstung für den zweiten Eingang des
Schutzkabels (Optional)
6) Vorrüstung für den zweiten HV-Steckverbinder
7) HV-Steckverbinder
8) Eingang des Schutzkabels
9) Schutzkabel
10) Sicherungen
11) Buchse für die Netzspeisung
12) Hauptschalter
Hintere Schalttafel des MidiVac-Controllers
9 87-900-080-01 (C)
Page 15

GEBRAUCHSANLEITUNG
BEZEICHNUNG POS. BEZEICHNUNG
Schalter (12) auf OFF Schalter (12) auf ON
1 Pfeil nach oben Ermöglicht die Reduzierung des Wertes der über
2 Pfeil nach unten Ermöglicht die Steigerung des Wertes der über
3 V Befehl nicht freigegeben Bewirkt bei Betätigung die Abbildung des Wertes des an
4 I Befehl nicht freigegeben Bewirkt bei Betätigung die Abbildung des Wertes des von
5 Set 2 Zeigt bei Aufleuchten an, daß die Anzeige (9) bei
6 Set 1 Zeigt bei Aufleuchten an, daß die Anzeige (9) bei
7 Amp Zeigt bei Aufleuchten an, daß die Anzeige (9) die von der
8 KV Zeigt bei Aufleuchten an, daß die Anzeige (9) die vom
9 Display Zeigt die den Schalter (16) selektionierten
10 3 kV/ 5 kV / 7 kV Das jeweils aufleuchtende LED entspricht der
11 PROTECT Zeigt bei Aufleuchten an, daß die Betriebsart
12 HV ON /OFF Zuschaltung der Hochspannung. Abschaltung der Hochspannung.
13 HV Zeigt bei Aufleuchten die Präsenz der Hochspannung an.
14 REMOTE Zeigt bei Aufleuchten an, daß der Controller über
15 START
PROT
16 MENU Ermöglicht in der Betriebsart “Fernsteuerung”
den Schalter (16) selektionierten Funktion
den Schalter (16) selektionierten Funktion
Selektion über den Schalter (16) den
Einstellungswert 2 abbildet.
Selektion über den Schalter (16) den
Einstellungswert 1 abbildet.
Spannungs- und Stromwerte an.
maximalen Abgabespannung des Controllers.
“Schutzbetrieb” zugeschaltet ist.
die Betriebsart “Fernsteuerung” betrieben wird.
Ermöglicht bei Betätigung die Zuschaltung der
Betriebsart “Schutzbetrieb”.
Das Led blinkt während der Vorgänge zur
Einstellung der Betriebsparameter.
den Übergang auf die Betriebsart “lokale
Steuerung”.
Ermöglicht in der Betriebsart “lokale Steuerung”
die Einstellung der Betriebsparameter”.
Reduzierung des Wertes der maximalen
Ausgangsspannung des Controllers von 7 kV auf 5 kV bzw.
von 5 kV auf 3 kV.
Steigerung des Wertes der maximalen Ausgangsspannung
des Controllers von 3kV auf 5 kV bzw. von 5 kV auf 7 KV.
die Pumpe abgegebenen Stroms über die
Anzeige (9).
der Pumpe aufgenommenen Stroms über die Anzeige (9).
Zeigt bei Aufleuchten an, daß der Strom den
Einstellungswert Set Point 2 überschritten hat.
Zeigt bei Aufleuchten an, daß der Strom den
Einstellungswert Set Point 1 überschritten hat.
Pumpe aufgenommene Spannung anzeigt.
Controller abgegebene Spannung anzeigt.
Abbildung der vom Controller abgegebenen Spannung oder
des von der Pumpe aufgenommenen Stroms.
Das jeweils aufleuchtende LED entspricht der maximalen
Abgabespannung des Controllers.
Zeigt bei Aufleuchten an, daß die Betriebsart “Schutzbetrieb”
zugeschaltet ist.
Zeigt bei Aufleuchten an, daß der Controller über die
Betriebsart “Fernsteuerung” betrieben wird.
Ermöglicht bei Betätigung die Zuschaltung der Betriebsart
“Schutzbetrieb”.
Ermöglicht in der Betriebsart “Fernsteuerung” den Übergang
auf die Betriebsart “lokale Steuerung”.
Ermöglicht in der Betriebsart “lokale Steuerung” den
Übergang auf die Betriebsart “Fernsteuerung”.
10 87-900-080-01 (C)
Page 16

GEBRAUCHSANLEITUNG
BEDIENUNG
Bedienungsarten
Der MidiVac-Controller kann im lokalen Modus vom
Frontpaneel aus (Modus "Local") oder im Fernmodus
über einen Computer (Modus "Remote") gesteuert
werden.
Wenn keine Dialogkarte installiert ist, kann der Modus
"Remote" nicht verwendet werden. Falls eine serielle
Karte installiert ist, kann der Modus "Local" mittels der
Taste "Menü" am Frontpaneel forciert werden, zur
Bestätigung blinkt die LED "REMOTE".
Wenn HV ON und "Local" aktiviert sind, können alle in
diesem Status vorgesehenen Operationen ausgeführt
werden (siehe Tabelle der Steuereinrichtungen und anzeigen). Nach Abschluß der Operationen kann durch
erneutes Betätigen der Taste "Menü" zum Modus
"Remote" zurückgekehrt werden. Die LED "REMOTE"
zeigt daraufhin die normale Funktionsweise an.
Wenn HV OFF und "Local" aktiviert sind, erhält man nur
Zugriff auf die Funktionen für die Parametereinstellung,
nach deren Abschluß die Einheit im Modus "Local"
bleibt. Um zum Modus "Remote" zurückzukehren, ist
die Hochspannung einzuschalten und anschließend
Taste "Menü" zu betätigen.
Wenn sich die Einheit im Modus "Remote" befindet und
die Hochspannung eingeschaltet ist, ist die reale
Einschaltung der Hochspannung von dem letzten, über
den angeschlossenen Computer zur Fernsteuerung
gegebenen Steuerbefehl (Zuschaltung / Abschaltung)
abhängig. Die werkseitige Einstellung erfolgt auf die
Abschaltung, so daß zur Zuschaltung der
Hochspannung die Umschaltung auf den Modus "Local"
mittels der Taste "Menü" am Frontpaneel erforderlich ist
oder der Steuerbefehl zur Zuschaltung der
Hochspannung per Fernsteuerung über den
angeschlossenen Computer zu geben ist.
Wenn sich die Einheit im Modus "Remote" befindet und
die Hochspannung ausgeschaltet ist, ist die
Zuschaltung der Hochspannung nur über den dafür
vorgesehenen Steuerbefehl vom Computer zur
Fernsteuerung möglich.
Der MidiVac-Controller kann in den Betriebsarten
"Start" und "Sicherheitsbetrieb" arbeiten.
In der Betriebsart "Start" versorgt der Controller nach
der Zuschaltung der Hochspannung die Pumpe mit dem
erforderlichen Speisestrom, solang keine
Fehlerbedingung eintritt.
Die Betriebsart “Sicherheitsbetrieb” bietet zwei
Möglichkeiten den Betriebs:
1. Bei Einschaltung liegt der abgegebene Strom
überhalb des eingestellten Schwellenwertes; auf
diese Art wird der ausgehende Strom solange
abgegeben, bis daß der Ausgangsstrom nicht unter
den eingestellten Grenzwert abfällt; danach
schaltet sich der Controller automatisch in die
Betriebsart “Sicherheitsbetrieb”, so daß die
Hochspannung bei einer Überschreitung des
Grenzwertes
Fehlermeldung “Err2” erscheint.
2. Bei Einschaltung liegt der abgegebene Strom
unterhalb des eingestellten Schwellenwertes; auf
diese Art wird die Hochspannung nach einem
Stabilisierungszyklus von 30 Sekunden, in dem
keine Kontrolle des abgegebenen Stroms
stattfindet, abgeschaltet, wenn der Ausgangsstrom
den eingestellten Grenzwert überschreitet und auf
dem Display die Fehlermeldung “Err2” erscheint.
abgeschaltet wird und auf dem Display die
Ein - und Abschaltung des Controllers
Stellen Sie zur Einschaltung des Controllers den auf der
hinteren Schalttafel präsenten Hauptschalter auf “1”
(siehe vorstehende Abb.). Stellen Sie zur Zuschaltung
der Hochspannungs-versorgung den auf der vorderen
Schalttafel präsenten Schalter (12) auf “ON”. Nach
Zuschaltung der Hochspannungs-versorgung zeigen die
auf der vorderen Schalttafel präsenten LEDs (10) den
jeweils eingestellten Höchstspannungswert an. Zur
Abbildung des Wertes der Ausgangsspannung muß der
auf der vorderen Schalttafel präsente Schalter (3)
gedrückt werden; zur Abbildung des Stromwertes muß
der Schalter (4) betätigt werden.
ANMERKUNG
Der Wert der Ausgangsspannung kann in Abhängigkeit
zum Strom variieren; in diesem Zusammenhang wird
auf das Kapitel “MidiVac Controller Description” des
Anhangs “Technical Information” verwiesen.
Wenn lediglich die Hochspannungsversorgung
unterbrochen werden soll, muß der auf der vorderen
Schalttafel präsente Schalter (12) auf “OFF” gestellt
werden. Zur Abschaltung des Controllers muß der auf
der hinteren Schalttafel präsente Hauptschalter auf “0”
gestellt werden.
WARTUNG
Die MidiVac-Controller sind wartungsfrei. Eventuell
erforderliche Eingriffe müssen von dazu befugtem
Fachpersonal ausgeführt werden. Bei Störungen kann
der Varian-Reparaturdienst bzw. der "Varian advanced
exchange service" in Anspruch genommen werden, der
für den Austausch defekter Controller sorgt.
!
Vor jedem Eingriff am Controller muß der Netzstecker
gezogen werden.
Eine eventuelle Verschrottung muß unter Einhaltung
der einschlägigen landesüblichen Vorschriften erfolgen.
GEFAHR!
11 87-900-080-01 (C)
Page 17

GEBRAUCHSANLEITUNG
FEHLERMELDUNGEN
In einigen Störungsfällen zeigt das Selbstdiagnosesystem des Controllers die in der nachstehenden
Tabelle zusammengefaßten Meldungen an.
Bei einem Durchbrennen der im Controller installierten
Sicherung F1 erscheint auf der Anzeige für einige
Sekunden die Meldung “Vout=0.0”, gefolgt von der
Fehlermeldung “Err3”.
Die Entfernung der Abdeckung vom MidiVac-Controller
bewirkt die Öffnung des Sicherheitsschalters und damit
die Unterbrechung der Stromversorgung, wodurch der
MidiVac-Controller und alle seine Anzeigen
ausgeschaltet werden und keine Meldung mehr am
Display erscheint.
ANMERKUNG
FEHLERMELDUNG BESCHREIBUNG STÖRUNGSBEHEBUNG
Err 1 Es wurde ein über 3 Minuten präsenter
Kurzschluß festgestellt (Fehlermeldung SCr).
Der Betriebsdruck der Pumpe ist zu hoch.
Err 2 Abschaltung der Hochspannungs-versorgung
über “Schutzbetrieb”.
Err 3 Allgemeine Störung im Hochspannungssteuer-
kreis.
Err 5 Öffnung des im Hochspannungskabel
präsenten Sperrleiters.
SCr Kurzschluß im Hochspannungsausgang.
Betriebsdruck der Pumpe zu hoch.
Sollte diese Störung länger als 3 Minuten
vorliegen, so wir die Hochspannungsversorgung
automatisch abgeschaltet, und auf der Anzeige
erscheint die Fehlermeldung “Err 1”.
Schalten Sie die Hochspannungsversorgung ab,
und vergewissern Sie sich, daß im
Hochspannungskabel kein Kurzschluß vorliegt.
Verbessern Sie den Grobbetriebsdruck (Roughing
Pressure) der Pumpe.
Schalten Sie die Hochspannungsversorgung ab
und anschließend wieder ein. Sollte die Störung
weiterhin vorliegen, so wenden Sie sich an den
Varian-Kundendienst.
Wählen Sie die Betriebsart “Start”.
Stellen Sie den HV-Schalter (12) auf “OFF”. Wenn
die Hochspannungsversorgung auch bei
Überschreitung des für den Schutzbetrieb
eingestellten Grenzwertes zugeschaltet werden
soll, muß der HV-Schalter (12) auf “ON” gestellt
werden.
Schalten Sie den Controller aus und anschließend
wieder ein.
Sollte die Störung weiterhin vorliegen, so wenden
Sie sich an den Varian-Kundendienst.
Vergewissern Sie sich bei Präsenz eines
Sperrleiters im Hochspannungskabel vom
vorschriftsmäßigen Anschluß des pumpenseitigen
Steckverbinders.
Sollte dieses Kabel nicht vorhanden sein, so
kontrollieren Sie, ob der mit dem Controller
mitgelieferte Leiter zwischen dem Massepol und
der unterhalb des Hochspannungssteckverbinders
befindlichen Buchse angeschlossen ist.
Schalten Sie den Controller aus und anschließend
wieder ein.
Sollte die Störung weiterhin vorliegen, so wenden
Sie sich an den Varian-Kundendienst.
Schalten Sie den Controller aus, kontrollieren Sie
den Hochspannungsausgang auf Kurzschluß, und
beheben Sie die Ursache der Störung.
Verbessern Sie den Grobbetriebsdruck (Roughing
Pressure) der Pumpe.
Schalten Sie den Controller aus und anschließend
wieder ein. Sollte die Störung weiterhin vorliegen,
so wenden Sie sich an den Varian-Kundendienst.
12 87-900-080-01 (C)
Page 18

MODE D'EMPLOI
INDICATIONS GENERALES
Cet appareillage a été conçu en vue d'une utilisation
professionnelle. Il est conseillé à l'utilisateur de lire
attentivement cette notice d'instructions ainsi que toute
autre indication supplémentaire fournie par Varian,
avant l'utilisation de l'appareillage.
Varian décline toute responsabilité en cas
d'inobservation totale ou partielle des instructions
données, d'utilisation incorrecte de la part d'un
personnel non formé, d'opérations non autorisées ou
d'un emploi contraire aux réglementations nationales
spécifiques.
Des renseignements plus détaillés se trouvent dans
l'appendice "Technical Informations".
Cette notice utilise les signes conventionnels suivants:
!
DANGER!
I messaggi di pericolo attirano l'attenzione
dell'operatore su una procedura o una pratica specifica
che, se non eseguita in modo corretto, potrebbe
provocare gravi lesioni personali.
ATTENTION!
Les messages de danger attirent l'attention de l'opérateur
sur une procédure ou une manoeuvre spéciale qui, si elle
n'est pas effectuée correctement, risque de provoquer de
graves lésions.
NOTE
Les message d'attention apparaissent avant certaines
procédures dont le non respect pourrait endommager
sérieusement l'appareillage.
DESCRIPTION DU CONTROLEUR
Le contrôleur MidiVac de la société Varian est un
contrôleur pour les pompes ioniques. Cette unité peut
être préconfigurée en usine selon les exigences du
client qui peut également commander les différentes
cartes en option relatives à la communication sérielle et
au "Set point".
Le contrôleur peut être configuré avec double
connecteur de façon à alimenter deux pompes
ioniques. Dans ce cas, les valeurs de courant
visualisées correspondent à la somme des deux
valeurs de courant relatives à chaque pompe.
Les versions de base du MidiVac sont détaillées dans
le tableau suivant (la polarité ne peut être configurée):
DESCRIPTION P/N
Unité de base avec tension
d'alimentation à 120 Vca et
polarité négative
Unité de base avec tension
d'alimentation à 120 Vca et
polarité positive
Unité de base avec tension
d'alimentation à 230 Vca et
polarité négative
Unité de base avec tension
d'alimentation à 230V ca et
polarité positive
929-5000
(connecteur
simple))
929-5001
(connecteur
simple)
929-5002
(connecteur
simple)
929-5003
(connecteur
simple)
929-5004
(double
connecteur)
929-5005
(double
connecteur)
929-5006
(double
connecteur)
929-5007
(double
connecteur)
EMMAGASINAGE
Pendant le transport et l'emmagasinage du contrôleur,
il faudra veiller à respecter les conditions
environnementales suivantes:
• température: de -20°C à +70°C
• humidité relative: 0 - 95% (non condensante).
13 87-900-080-01 (C)
Page 19

MODE D'EMPLOI
PREPARATION POUR L'INSTALLATION
Le contrôleur est livré dans un emballage de protection
spécial; si l'on constate des marques de dommages
pouvant s'être produits pendant le transport, contacter
aussitôt le bureau de vente local.
Pendant l'opération d'ouverture de l'emballage, veiller tout
particulièrement à ne pas laisser tomber le contrôleur et à
ne lui faire subir aucun choc.
Ne pas jeter l'emballage dans la nature. Le matériel est
entièrement recyclable et il est conforme aux directives
CEE 83/399 en matière de protection de l'environnement.
INSTALLATION
!
Le contrôleur est pourvu d'un câble d'alimentation à 3
fils avec fiche de sécurité (approuvée à l'échelle
internationale). Utiliser ce câble d'alimentation ainsi
que la fiche avec une prise munie de connexion à la
terre, pour éviter tout risque d'électrocution. S'assurer
que la connexion à la terre est correctement effectuée.
A l'intérieur du contrôleur se développent de hautes
tensions qui peuvent causer de graves dommages,
voire la mort. Avant d'effectuer toute opération
d'installation ou d'entretien du contrôleur, le débrancher
de la prise d'alimentation.
DANGER!
ATTENTION!
Le contrôleur peut être utilisé aussi bien comme unité
de table que comme module à rack. Il doit, quoi qu'il en
soit, être placé de façon à ce que l'air puisse circuler
librement à travers les trous d'aération ménagés sur la
partie supérieure et inférieure du boîtier.
Si le contrôleur est utilisé comme module à rack, il
DOIT être inséré dans un adaptateur d'une hauteur de
quatre unités de rack, pour éviter qu'il ne tombe à
l'intérieur du rack lui-même. Le panneau frontal du
MidiVac n'est pas conçu pour supporter le poids de
l'unité.
Ne pas installer ni utiliser le contrôleur dans des
milieux exposés aux agents atmosphériques (pluie, gel,
neige), aux poussières, aux gaz corrosifs ni dans des
milieux explosifs ou à risque d'incendie élevé .
NOTE
Si le contrôleur est utilisé comme unité de table,
extraire les deux pieds avant. Si le contrôleur est
installé dans un rack, enlever les quatre pieds et le
placer de manière à avoir un espace libre d'au moins
30 mm (1,2 pouces) au-dessus et au-dessous.
Pendant le fonctionnement, toujours respecter les
conditions environnementales suivantes:
• température: de 0°C à +45°C
• humidité relative: 0 - 95% (non condensante).
Pour brancher le contrôleur à la pompe, utiliser le câble
spécifique non fourni.
NOTE
Le MidiVac est livré avec un câble de sécurité relié
entre la vis (4) et la bague (8) (consulter la figure du
panneau arrière): ce câble ne doit pas être retiré sinon
il ne sera pas possible d'allumer la haute tension.
NOTE
Sans la connexion de sécurité entre le plot 13 et 14 du
connecteur entrée/sortie, le contrôleur ne peut pas
fonctionner. Pour allumer ou éteindre la haute tension il
est nécessaire d'installer un contact à voltage flottant
entre le plot 13 et 14.
Pour allumer la haute tension, les plots doivent être
courtcircuités (avec la haute tension allumée/éteinte,
placer l'interrupteur du panneau frontal en position
ON).
Consulter l'appendice "Technical Information" pour
toute information détaillée sur les connexions possibles
ainsi que sur l'installation des cartes en option.
14 87-900-080-01 (C)
Page 20

MODE D'EMPLOI
UTILISATION
Ce paragraphe reporte les principales procédures
opérationnelles. Pour tout autre détail et pour les
procédures concernant des connexions ou des
éléments en option, se reporter au paragraphe "USE"
de l'appendice "Technical Informations".
Avant d'utiliser le contrôleur, effectuer toutes les
connexions électriques et pneumatiques et se reporter
à la notice de la pompe connectée.
!
Pour éviter tout dommage aux personnes et à
l'appareil, si la pompe est placée sur une table,
s'assurer que celle-ci est parfaitement stable.
DANGER!
Commandes et Diodes du Panneau Frontal
du MidiVac
La figure ci-après
contrôleur MidiVac ainsi que la signification et la
fonction des commandes et des
Certaines commandes et diodes changent en fonction
de la position de l'interrupteur HV ON - OFF. Le
tableau reporte les deux significations et les deux
fonctions.
présente le panneau frontal du
diodes
NOTE
Panneau Arrière du MidiVac
La figure suivante indique les commandes et les
connexions du panneau arrière du contrôleur MidiVac.
Pour plus de détails sur les connexions illustrées,
consulter l'appendice "Technical informations".
1. Connecteur "Remote I/O" pour contrôle à distance
2. Prééquipement pour connecteur "Set Point" (option)
3. Prééquipement pour connecteur sériel (option)
4. Vis pour connexion du câble de sécurité
5. Prééquipement pour deuxième entrée câble de sécurité
(option)
6. Prééquipement pour deuxième connecteur HV
7. Connecteur HV
8. Entrée câble de sécurité
9. Câble de sécurité
10. Fusibles
11. Prise d'alimentation réseau
12. Interrupteur d'alimentation
Panneau arrière du MidiVac
15 87-900-080-01 (C)
Page 21

MODE D'EMPLOI
REF. DESCRIPTION
1 Flèche en bas Permet de diminuer la valeur de la fonction
sélectionnée à l'aide de la touche (16).
2 Flèche en haut Permet d'augmenter la valeur de la fonction
sélectionnée à l'aide de la touche (16).
3 V Commande hors service. Permet de visualiser sur l'afficheur (9) la valeur de la
4 I Commande hors service. Permet de visualiser sur l'afficheur (9) la valeur du
5 Set 2 Touche allumée indique que l'afficheur (9) visualise
la valeur du Set Point 2 lorsqu'il est sélectionné à
l'aide de la touche (16).
6 Set 1 Touche allumée indique que l'afficheur (9) visualise
la valeur du Set Point 1 lorsqu'il est sélectionné à
l'aide de la touche (16).
7 Amp Touche allumée indique que l'afficheur (9) affiche le
8 kV Touche allumée indique que l'afficheur (9) affiche la
9 Afficheur Visualise les valeurs des tensions et des courants
sélectionnés à l'aide de la touche (16).
10 3 kVv/5 kV/7 kV La LED allumée correspond à la tension maximum
pouvant être fournie par le contrôleur.
11 PROTECT Touche allumée indique que le fonctionnement en
mode "Protect" a été activé. La touche clignote
pendant la phase d'introduction des paramètres.
12 HV ON/OFF Allume la haute tension. Coupe la haute tension.
13 HV Touche allumée indique la présence de la haute
14 REMOTE Touche allumée indique que le contrôleur est géré
par un ordinateur à distance.
15 START PROT. Permet d'activer le mode "Protect".
La LED (11) clignote pendant l'introduction des
paramètres.
16 MENU Si le MidiVac est en mode "Remote", cette touche
permet de passer en mode "Local".
Si le MidiVac est en mode "Local, cette touche
permet d'accéder aux fonctions d'introduction des
paramètres.
Avec (12) sur OFF Avec (12) sur ON
DESCRIPTION
Modifie la valeur de la tension maximum à la sortie
du contrôleur de 7 kV à 5 kV et de 5 kV à 3 kV.
Modifie la valeur de la tension maximum à la sortie
du contrôleur de 3 kV à 5 kV et de 5 kV à 7 kV.
tension fournie à la pompe.
courant absorbé par la pompe.
Touche allumée indique que la valeur de courant a
atteint la valeur préétablie du Set Point 2.
Touche allumée indique que la valeur de courant a
atteint la valeur préétablie du Set Point 1.
courant absorbé par la pompe.
tension fournie par le contrôleur.
Affiche la valeur de la tension fournie par le
contrôleur ou le courant absorbé par la pompe.
La LED allumée correspond à la tension maximale
pouvant être fournie par le contrôleur.
Touche allumée indique que le fonctionnement en
mode "Protect" a été activé.
tension.
Touche allumée indique que le contrôleur est géré
par un ordinateur à distance.
Permet d'activer le mode "Protect".
Si le MidiVac est en mode "Remote", cette touche
permet de passer en mode "Local".
Si le MidiVac est en mode "Local", cette touche
permet de passer en mode "Remote.
16 87-900-080-01 (C)
Page 22

MODE D'EMPLOI
UTILISATION
Modes de Fonctionnement
Le contrôleur MidiVac peut être commandé en local par
le panneau frontal (mode "Local") ou à distance à
travers un ordinateur (mode "Remote").
Si aucune carte de communication n'est installée le
mode “Remote” n’est pas disponible. Au cas où une
carte sérielle est installée, il est possible de forcer le
mode “Local” en appuyant sur la touche “Menu” du
panneau frontal: la LED “REMOTE” clignotera.
Avec HV ON et “Local” temporairement activé, il est
possible d’effectuer toutes les opérations prévues pour
cette condition (Consulter le tableau des commandes et
indicateurs suivants); au terme des opérations il est
possible de retourner au mode “Remote” en appuyant à
nouveau sur la touche “Menu”: la LED “REMOTE”
indiquera le fonctionnement normal.
Avec HV OFF et “Local” temporairement activé, il n’est
possible d’accéder qu’aux seules fonctions
d’introduction des paramètres au terme desquelles
l’unité reste en mode “Local”. Pour retourner au mode
“Remote”, il faut allumer la haute tension et appuyer sur
la touche “Menu”.
Si l’unité est en mode “Remote” et que la haute tension
est allumée, l’allumage réel de la haute tension dépend
de la dernière commande (allumage ou coupure)
donnée à l’ordinateur à distance. La condition initiale
pré-configurée en usine est d’arrêt et pour allumer la
haute tension il faut donc passer en mode “Local” en
appuyant sur la touche “Menu” du panneau frontal ou
envoyer la commande d’allumage de la haute tension
depuis l’ordinateur à distance.
Si l’unité est en mode “Remote” et que la haute tension
est éteinte, la mise en route de la haute tension n’est
possible qu’à travers la commande spécifique envoyée
par l’ordinateur à distance.
Le contrôleur MidiVac peut opérer en mode “Start” ou
“Protect”. En mode “Start”, après l’allumage de la haute
tension le contrôleur alimente la pompe avec le courant
nécessaire jusqu’à ce qu’intervienne une condition
d’erreur.
En mode "Protect" il exite deux conditions possibles:
1. Lors de la mise en route, le courant fourni est
supérieur à la valeur de seuil préétablie: dans ce
cas le contrôler fournit en sortie le courant demandé
jusqu'à ce que celui-ci ne descende en-dessous la
valeur de seuil préétablie; ensuite, le contrôleur
entre véritablement en mode "Protect" et coupe la
haute tension lorsque le courant fourni dépasse la
valeur de seuil et visualise sur l'afficheur le
message d'erreur "Err2".
2. Lors de la mise en route, le courant fourni est
inférieur à la valeur de seuil préétablie: dans ce cas,
après une période de pose de 30 secondes au
cours de laquelle le courant n'est pas contrôlé, le
contrôleur coupe la haute tension dans le cas où le
courant fourni dépasse la valeur de seuil et
visualise sur l'afficheur le message d'erreur "Err2".
Allumage et Coupure
Pour allumer le contrôler, porter l'interrupteur
d'alimentation placé sur le panneau arrière sur 1 (Cf.
figure ci-avant). Pour allumer la haute tension, il suffit
de porter sur ON l'interrupteur (12) du panneau frontal.
Une fois la haute tension allumée, les LED (10) du
panneau frontal indiquent la valeur de tension maximum
introduite. Pour visualiser la valeur de la tension en
sortie sur l'afficheur, appuyer sur la touche (3) du
panneau frontal. Pour visualiser le courant appuyer sur
la touche (4).
NOTE
La valeur de la tension en sortie peut varier en fonction
du courant: se reporter au diagramme tension/courant
du paragraphe "MidiVac controller description" de
l'appendice "Technical Information".
Pour couper uniquement la haute tension, placer
l'interrupteur (12) du panneau frontal sur OFF. Pour
éteindre le contrôleur, porter l'interrupteur d'alimentation
placé sur le panneau arrière sur O.
ENTRETIEN
Le contrôleur MidiVac n'exige aucun entretien. Toute
opération doit être effectuée par un personnel agréé.
En cas de panne, il est possible de s'adresser au
Service de réparation Varian ou au "Varian advance
exchange service" qui permet d'obtenir un contrôleur
neuf à la place du contrôleur endommagé.
!
Avant d'effectuer toute opération sur le contrôleur,
débrancher le câble d'alimentation.
En cas de mise au rebut du contrôleur, procéder à son
élimination conformément aux réglementations
nationales en la matière.
DANGER!
17 87-900-080-01 (C)
Page 23

MODE D'EMPLOI
MESSAGES D'ERREUR
Pour certains types de panne, le contrôleur procède à
un autodiagnostic et affiche l'un des messages d'erreur
indiqués dans le tableau suivant.
Au cas où le fusible F1 placé à l'intérieur du contrôleur
se brûle, l'afficheur visualise, pendant quelques
secondes le message de Vout=0.0 puis le message
"Err 3".
MESSAGE DESCRIPTION ACTION DE CORRECTION
Err 1
Err 2
Err 3
Err 5
SCr
Une condition de court-circuit a été détectée
(message "SCr") pendant plus de 3 minutes.
La pression dans la pompe est trop élevée.
Le contrôller a coupé la haute tension suite à
l'intervention du "Protect".
Panne quelconque des circuits de contrôle de
la haute tension.
L'interlock du câble de la haute tension est
ouvert.
La sortie de la haute tension est en courtcircuit.
La pression de la pompe est trop élevée.
Si cette condition dure pendant plus de 3
minutes, le contrôleur coupe la haute tension
et affiche le message "Err 1".
NOTE
Le démontage du boîtier du MidiVac entraîne
l'ouverture du minirupteur de sécurité donc
l'interruption de l'alimentation. De ce fait, le MidiVac et
tous ses indicateurs s'éteignent et plus aucun signal
n’apparaît sur l'afficheur.
Eteindre la haute tension et contrôler que le
câble de la haute tension ne soit pas en courtcircuit. Améliorer la pression de roughing dans
la pompe.
Eteindre et rallumer la haute tension. Si l'erreur
persiste, contacter le service assistance
Varian.
Sélectionner le mode de fonctionnement
"Start". Porter l'interrupteur HV (12) sur OFF.
Pour allumer la haute tension même si le
courant est supérieur au niveau de "Protect",
porter l'interrupteur HV (12) sur ON.
Eteindre et rallumer le contrôleur. Si l'erreur
persiste, contacter le service assistance
Varian.
Si on dispose d'un câble haute tension avec le
fil d'interlock, contrôler que le connecteur côté
pompe soit correctement branché.
Au cas où on ne dispose pas de câble de haute
tension, contrôler que le cordon fourni avec
l'unité soit branché entre la masse et la douille
placée sous le connecteur de haute tension.
Eteindre et rallumer le contrôler. Si l'erreur
persiste, contacter le service assistance
Varian.
Eteindre le contrôleur, contrôler l'état de la
sortie de la haute tension et supprimer la cause
du court-circuit. Améliorer la pression de
roughing de la pompe.
Eteindre et rallumer le contrôleur. Si l'erreur
persiste, contacter le service assistance
Varian.
18 87-900-080-01 (C)
Page 24

INSTRUCTIONS FOR USE
GENERAL INFORMATION
This equipment should only be used by trained
professionals. The user should read this instruction
manual and any other additional information supplied
by Varian before operating the equipment.
Varian will not be responsible for an events caused by
non-compliance to operational procedures, non
authorised modifications of the equipment, or any
action not sanctioned by national standards.
Detailed information is supplied in the appendix
"Technical Information".
This manual uses the following standard protocol:
!
The warning messages are for attracting the attention
of the operator to a particular procedure or practice
which, if not followed correctly, could lead to serious
injury.
The caution messages are displayed before
procedures which, if not followed, could cause damage
to the equipment.
The notes contain important information taken from the
text.
WARNING!
CAUTION!
NOTE
CONTROLLER DESCRIPTION
Varian’s MidiVac controller is a ion pump controller.
The unit can be factory configured according to the
customer’s needs, or the user can order separately the
option cards relevant to the serial communication and
the Set Point function.
The controller can be configured with two connectors in
order to power two ion pumps. In this case the
displayed current values are the sum of the currents
relevant to the two pumps.
The base versions of the MidiVac are detailed in the
following table (the polarity of the voltage is not user
configurable):
DESCRIPTION P/N
Base unit with 120 Vac
power supply and
negative polarity
Base unit with 120 Vac
power supply and positive
polarity
Base unit with 230 Vac
power supply and
negative polarity
Base unit with 230 Vac
power supply and positive
polarity
929-5000
(single
connector)
929-5001
(single
connector)
929-5002
(single
connector)
929-5003
(single
connector)
929-5004
(double
connector)
929-5005
(double
connector)
929-5006
(double
connector)
929-5007
(double
connector)
STORAGE
When transporting and storing the controllers, the
following environmental requirements should not be
exceeded:
• Temperature: from -20 °C to +70 °C
• Relative humidity: 0 to 95% (without condensing)
19 87-900-080-01 (C)
Page 25

INSTRUCTIONS FOR USE
PREPARATION FOR INSTALLATION
The controller is supplied in a special protective
packing. If this shows signs of damage which may have
occurred during transport, contact your local sales
office.
When unpacking the controller, be sure not to drop it
and avoid any kind of sudden impact or shock
vibration.
Do not dispose of the packing materials in an
unauthorized manner. The material is 100% recyclable
and complies with EEC Directive 85/399.
INSTALLATION
!
The controller is equipped with a 3-wire power cord and
plug (internationally approved) for user’s safety. Use
this power cord and plug in conjunction with a properly
grounded power socket to avoid electrical shock.
Verify that the ground connections are properly
connected.High voltage developed in the controller can
cause severe injury or death. Before servicing the unit,
disconnect the power cable.
WARNING!
CAUTION!
The controller can be used as a bench unit or as a rack
module, but it must be positioned so that free air can
flow through the holes of the top and the side cover.
If the controller is used as a rack module, it MUST be
inserted in a 4 unit height rack adapter chassis due to
the weight of the controller.
The MidiVac front panel is not designed to support the
unit weight. Do not install or use the controller in an
environment exposed to atmospheric agents (rain,
snow, ice), dust, aggressive gases, in explosive
environments, or those with a high fire risk.
NOTE
If the controller is used as a bench unit, extend the two
front legs. If the controller is installed on a rack, remove
the four feet and position it with at least 30 mm (1.2
inches) of clearance on top and bottom.
During operation, the following environmental
conditions must be met:
• temperature: from 0 °C to +45 °C
• relative humidity: 0 - 95% (non-condensing)
To connect the controller to the pump use the specific
cable not supplied.
NOTE
The MidiVac is supplied with an interlock cable
connected between the screw (4) and the cable input
(8) (see the rear panel figure): do not remove this cable
otherwise the high voltage cannot be switched on.
NOTE
Without the interlock connection between pins 13 and
14 of the remote I/O connector the controller cannot
operate. To remotely switch ON or OFF the HV, a
voltage free contact must be applied between pins 13
and 14.
To switch ON the HV, the pins must be short circuited
(with the HV ON/OFF switch on the front panel in ON
position).
See the appendix “Technical Information” for detailed
information about the above mentioned and the other
connectors, and about the optional cards installation.
20 87-900-080-01 (C)
Page 26

INSTRUCTIONS FOR USE
USE
This paragraph describes the fundamental operating
procedures. Detailed information and operating
procedures that involve optional connections or options
are supplied in the paragraph “USE” of the appendix
“Technical Information”.
Make all vacuum manifold and electrical connections
and refer to the connected pump instruction manual
prior to operating the controller.
!
To avoid injury to personnel and damage to the
equipment, if the controller is laying on a table make
sure it is steady.
WARNING!
MidiVac Front Panel Controls and Indicators
The figure and the table of the following page illustrate
the MidiVac front panel controls and indicators with
relevant description and function.
NOTE
Some controls and indicators change their function and
meaning according to the position of HV ON OFF
switch. The table describes all function and meaning.
MidiVac Rear Panel
The MidiVac controller rear panel controls and
connections are shown in the following figure.
For detailed information about the connections see the
appendix “Technical Information”.
1) “Remote I/O” connector for remote control
2) Port available for “Set Point” connector (optional)
3) Port available for serial connector (optional)
4) Screw for interlock cable connection
5) Port available for second interlock cable input (optional)
6) Port available for second HV connector (optional)
7) HV connector
8) Interlock cable input
9) Interlock cable
10) Fuses
11) Mains plug
12) Mains switch
Controller Rear Panel
21 87-900-080-01 (C)
Page 27

INSTRUCTIONS FOR USE
REF. DESCRIPTION
Downwards arrow When pressed, it decreases the value of the
1
Upwards arrow When pressed, it increases the value of the
2
V Control disabled. When pressed the display (9) shows the value of the
3
I Control disabled. When pressed the display (9) shows the pump
4
Set 2 When it lights up the display (9) shows the Set
5
Set 1 When it lights up the display (9) shows the Set
6
Amp When it lights up the display (9) shows the pump
7
KV When it lights up the display (9) shows controller
8
Display It shows the voltage or current value selected by
9
3Kv / 5Kv / 7Kv The LED on corresponds to the maximum controller
10
PROTECT When it lights up the “Protect” operating mode is
11
HV ON/OFF It switches on the high voltage. It switched off the high voltage.
12
HV When it lights up the high voltage is present.
13
REMOTE When it lights up the MidiVac is controlled by an
14
START
15
PROT
MENU If the MidiVac is in “Remote” mode, when pressed
16
DESCRIPTION
with (12) set to OFF with (12) set to ON
function selected by means of the (16) pushbutton.
function selected by means of the (16) pushbutton.
Point 2 value when selected by means of the (16)
pushbutton.
Point 1 value when selected by means of the (16)
pushbutton.
means of the pushbutton (16).
output voltage.
activated.
When it flashes the controller is in setting mode.
host computer.
When pressed it activates the “Protect” operating
mode.
LED (11) flashes during the setting operations.
it switches the operating mode to “Local”.
If the MidiVac is in “Local” mode, when pressed it
allows to access to the setting functions.
When pressed it changes the maximum output
voltage from 7 kV to 5 kV and from 5 kV to 3 kV.
When pressed it changes the maximum output
voltage from 3 kV to 5 kV and from 5 kV to 7 kV.
output voltage to the pump.
absorbed current.
When it lights up the current value has reached the
Set Point 2 value.
When it lights up the current value has reached the
Set Point 1 value.
absorbed current.
output voltage.
It shows the controller output voltage, or the pump
absorbed current.
The LED on corresponds to the maximum controller
output voltage.
When it lights up the “Protect” operating mode is
activated.
When it lights up the MidiVac is controlled by an host
computer.
When pressed it activates the “Protect” operating
mode.
If the MidiVac is in “Remote” mode, when pressed it
switches the operating mode to “Local”.
If the MidiVac is in “Local” mode, when pressed it
allows to switch to “Remote”.
22 87-900-080-01 (C)
Page 28

INSTRUCTIONS FOR USE
USE PROCEDURE
Operating Modes
The MidiVac controller can be set to operate in front
panel mode (“Local” mode), or by host computer
(“Remote” mode).
If no optional serial card is installed in the controller, the
“Remote” mode is unavailable.
If the serial card is installed, the “Local” mode can be
forced by pressing the “Menu” push-button on the front
panel: the “REMOTE” LED will blink.
If the HV is on and the temporary “Local” mode is
activated, all the operations in the normal “Local” mode
can be executed (see the following table regarding
controls and indicators). “Remote” mode can be
restored by pressing the “Menu” push-button. The
“REMOTE” LED should indicate normal operation.
When the HV is OFF and the temporary “Local” mode is
activated, only the setting operations can be accessed.
At the end of the settings menu, the unit will default to
true “Local” mode. To restore the “Remote” mode,
switch the HV on and press the “Menu” push-button.
If the controller is set to “Remote” mode and the HV is
on, the high voltage signal will depend on the last
command (on or off) from the host computer. The initial
condition from the factory is an off signal. To turn ON
the HV it is necessary to switch to “Local” mode by
pressing the “Menu” push-button and engaging the HV
or to send the appropriate signal from the host
computer.
If the controller is set to “Remote” mode and the HV is
off, the high voltage signal can only be switched on by
an appropriate serial command from the host computer.
The MidiVac controller can operate in “Start” or
“Protect” modes.
In the “Start” mode, when the high voltage is switched
on, the controller feeds the pump with the required
current until a fault condition is detected.
In the “Protect” mode two different conditions are
possible:
1. When the High Voltage is switched on the current
value exceeds the set trip current: while the
controller feeds the pump with the required current
until its value falls under the set threshold value, at
this time the controller operates with a “real
Protect” mode and it switches off the High Voltage
when the current exceeds its set threshold value
and displays the “Err2” message.
2. When the controller is switched on the current
value is less than the threshold value: in this case,
after a settling time of about 30 seconds when the
current is not controlled, the controller switches off
when the current value exceeds the set threshold
value and displays the “Err2” message.
Switching On and Off
To switch on the controller, it is necessary set to I
position the mains switch of the rear panel (see the
above figure).
To switch on the high voltage it is necessary to set to
ON position the front panel switch (12).
When the high voltage is switched on, the front panel
LEDs (10) show the preset maximum voltage value.
To show on the display the output voltage you must
push the front panel pushbutton (3); to show the current
you must press the (4) pushbutton.
NOTE
The output voltage value can change according to the
current: see the paragraph “MidiVac controller
description” of appendix “Technical information”.
switch off the high voltage set to OFF position the
To
front panel switch (12). To switch off the controller set to
0 position the mains switch of the rear panel.
MAINTENANCE
The MidiVac controller does not require any
maintenance. Any work performed on the controller
must be carried out by authorized personnel. When a
fault has occurred it is possible to use the Varian repair
service. Replacement controllers are available on an
advance exchange basis through Varian.
!
To avoid injury to personnel and damage to the
equipment, if the controller is laying on a table make
sure it is steady.
Before carrying out any work on the controller,
disconnect it from the supply. If a controller is to be
disposed, do so in accordance with the specific national
standards.
WARNING!
23 87-900-080-01 (C)
Page 29

INSTRUCTIONS FOR USE
ERROR MESSAGES
For a certain type of failure, the controller will selfdiagnose the error and the messages described in the
following table are displayed.
When the internal F1 fuse is broken, the display shows
the message Vout=0.0 from a few seconds and the
shows the message “Err 3”.
MESSAGE DESCRIPTION REPAIR ACTION
Err 1 A short circuit condition (message “SCr”) has
been detected for more than 3 minutes.
The pump pressure is too high.
Err 2 The controller has switched off the High
Voltage for the “Protect” intervention.
Err 3 Controller generic fault of the High Voltage
control circuitry.
Err 5 The interlock cable is not installed. When an High Voltage cable with the interlock
SCr The high voltage output is short-circuited.
The pump pressure is too high.
This condition can be present for a maximum
of 3 minutes, then the controller switches off
the high voltage and the message “Err 1” is
displayed.
NOTE
When the MidiVac cover is removed the internal
security microswitch is open and the supply to the
controller is interrupted: the controller and all its
indicators are switched off and no message is
displayed on the display
Turn off the high voltage and check the HV
cable against short circuits.
Improve the pump roughing pressure.
Switch off and on again the high voltage.
Should the error still be present, call the Varian
offices.
Select the “Start” operating mode.
Set to OFF position the HV (12) switch. If you
want to switch on the high voltage even when
the current is higher than the “Protect” level, set
to the ON position the HV (12) switch.
Switch the controller off and on again. Should
the error still be present, call the Varian offices.
cable is available, check that the pump
connector is correctly inserted.
When the above mentioned cable is not
available, check that the interlock cable
supplied with the controller is connected
between ground and the jack connector under
the High Voltage connector.
Switch off and on again the controller. Should
the error still be present, call the Varian offices.
Switch off the controller and check the high
voltage output status and remove the short
circuit condition.
Improve the pump roughing pressure.
Switch off and on again the controller. Should
the error still be present, call the Varian offices.
24 87-900-080-01 (C)
Page 30

TECHNICAL INFORMATION
MIDIVAC CONTROLLER DESCRIPTION
The MidiVac Controller base is available in eight
versions which differ in the factory set input voltage, the
polarity and the number of High Voltage output
connectors.
• Model 929-5000 set for 120 Vac negative polarity and
single HV output connector
• Model 929-5001 set for 120 Vac positive polarity and
single HV output connector
• Model 929-5002 set for 230 Vac negative polarity and
single HV output connector
• Model 929-5003 set for 230 Vac positive polarity and
single HV output connector
• Model 929-5004 set for 120 Vac negative polarity and
double HV output connector
• Model 929-5005 set for 120 Vac positive polarity and
double HV output connector
• Model 929-5006 set for 230 Vac negative polarity and
double HV output connector
• Model 929-5007 set for 230 Vac positive polarity and
double HV output connector
MidiVac Controller
25 87-900-080-01 (C)
Page 31

TECHNICAL INFORMATION
It consist of various boards. The following figure shows
the minimum configuration.
MidiVac Controller Boards (Top view)
1. Dc power supply board: it contains the EMI filter.
The ac input voltage is rectified and the needed
DC output voltages are generated.
2. Microprocessor board (located on front panel: it is
based on a single chip microprocessor with a large
input/output capability. It manages commands
coming from the front panel keyboard and drives
the front panel display and the high voltage output.
3. Voltage multiplier board: it multiplies four times the
voltage from the transformer.
4. Display and front panel keyboard: it contains the
functional push buttons, the LEDs indicating active
operating mode and the LCD display.
The high voltage circuitry receives the ac voltage from
the mains and converts it into an high voltage to drive
the pump. The output voltage and current are
continuously measured and displayed on the front
panel display. The controller automatically limits the
output voltage according to the following voltage versus
current diagram.
An analog signals output connector allows the user to
control the MidiVac operation (see the following
paragraph for more information about the signals
available on this connector).
NOTE
Leave at least 30 mm (1.2 inches) of free air circulation
on top and bottom of the unit for an efficient cooling of
the unit. Blind the unused slots on rear panel with the
provided covers.
7000
6000
)
5000
V
(
e
g
4000
a
t
l
o
V
3000
2000
1000
0
10
-4
10
-3
10
-2
10
-1
1
Current (A)
26 87-900-080-01 (C)
Page 32

TECHNICAL INFORMATION
MIDIVAC CONTROLLER SPECIFICATION
Input:
− Voltage
(factory preset)
− Frequency
− Power
− Fuses
90 to 130 Vac - 1 phase
180 to 265 Vac - 1 phase
47 to 63 Hz
310 W
2 x 1.6 A external
1 x 1.6 A internal
(for 230 Vac models)
Operating:
− Temperature
− Humidity
Recorder outputs
(analog signals)
(minimum recorder
impedance 1 MΩ)
0 to + 45 °C
90% maximum non
condensing
− 0 to +5 Vdc logarithmic
− 0 to +0.1 Vdc
2 x 2.5 A external
1 x 2.5 A internal
(for 120 Vac models)
Output:
− Voltage
(selectable)
(polarity not
selectable)
− Current max
(short circuit)
− Power max
(3kV at 50mA)
Pos. Output
+ 7000 Vdc
(+2% -10%)
+ 5000 Vdc
(+/- 5%)
+ 3000 Vdc
(+/- 5%)
120 mA
150 W
Neg. Output
- 7000 Vdc
(+2% -10%)
- 5000 Vdc
(+/- 5%)
- 3000 Vdc
(+/- 5%)
120 mA
150 W
Radio interference
suppression
Safety requirements Conforms to:
Installation category II
Pollution degree 2
Cables Mains (2 m long, 3 wires)
Weight 6 Kg (13.2 lbs)
− 0 to +7 V linear
Conforms to:
EN 61000-4.3
EN 61010-1
MIDIVAC CONTROLLER OUTLINE
The outline dimensions for the MidiVac Controller base unit are shown in the following figure.
corresponding to 1x10
-1
to 1x10
A
logarithmic
corresponding to 1x10
-1
to 1x10
A
-7
-7
proportional to 0 to 7 kV
High Voltage output
MidiVac Controller Outline
27 87-900-080-01 (C)
Page 33

TECHNICAL INFORMATION
PUMP CONNECTION
The pump is connected to the controller rear panel via
HV connector by a coaxial high voltage cable assembly
(cable to be separately ordered).
!
High voltage can cause severe injury or death.
When installing the high power cable:
− Turn the power off.
− Plug the cable on the pump side.
− Plug the cable on the controller side and secure it.
When removing the cable make sure that the power is
off.
The controller is able to accommodate cables which
contain an interlock circuit. Such an interlock will
disable the High Voltage if the cable is not connected
to the pump (or switch off if the High Voltage is already
on). This interlock cable must be connected to the
provided connector under the HV connector of the
MidiVac rear panel.
If there is no interlock circuit in the ion pump cable,
there is an interlock short attached to the MidiVac. The
cable is connected to the back of the rear chassis and
must be inserted into the corresponding jack.
Otherwise there will be an interlock fault on the control
unit.
WARNING!
REMOTE I/O CONNECTOR
The Remote I/O connector layout is shown in the
following figure.
The signals available on the connector pins are
detailed in the following table.
PIN DESCRIPTION
1 ON/OFF status (normally open)
2 ON/OFF status (normally closed)
3 Fault signal (normally open)
4 Fault signal (normally closed)
5 Start/Protect signal (normally open)
6 Start/Protect signal (normally closed)
7 Recorder output: 0 to +5 Vdc logarithmic
(see diagram)
8 Recorder output: 0 to +0.1 Vdc logarithmic
(see diagram)
9 Common of ON/OFF status signal
10 Common of fault signal
11 Common of Start/Protect signal
12 Recorder output: 0 to +7 Vdc linear
13 Interlock input/Remote HV ON/OFF
command
14 Ground
15 Ground
NOTE
Without the interlock connection between pins 13 and
14 of the remote I/O connector the controller cannot
operate. To remotely switch ON or OFF the HV, a
voltage free contact must be applied between pins 13
and 14.
To switch ON the HV, the pins must be short circuited
(with the HV ON/OFF switch on the front panel in ON
position).
Remote I/O Connector
28 87-900-080-01 (C)
Page 34

TECHNICAL INFORMATION
Recorder Output Diagram from 0 to 5 V
Recorder Output Diagram from 0 to 0.1 V
29 87-900-080-01 (C)
Page 35

TECHNICAL INFORMATION
USE
The controller can be used in two different modes:
• setting mode
• operating mode
The first mode enables the user to set some operating
parameters, the second one is the normal operating
condition.
Setting Mode
To access the setting mode the HV ON/OFF switch
must be set to the OFF position.
The parameters that can be set are accessed by
repeatedly pressing the “MENU” pushbutton of the front
panel. At this time the “START/PROT” pushbutton can
be pressed to select the “Protect” mode at the switching
ON.
1. The first selection of the “MENU” push-button to
sets the Set point 1 value. The display shows the
stored value and the flashing exponent can be
changed by the “Arrow” push-button. Pressing the
“I” pushbutton you can select another figure to be
modified. The default value is 1.0 x 10
setting value are from 0.0 x 10
-7
to 9.9 x 10⁻². Note
-3
and the
that values equal to 0 are meaningless.
2. Pushing the “MENU” push-button a second time
shows the Set point 2 value. The display shows the
stored value and the flashing exponent can be
changed by the “Arrow” push-button. Pressing the
“I” pushbutton you can select another figure to be
modified. The default value is 1.0 x 10
setting value are from 0.0 x 10
-7
to 9.9 x 10⁻². Note
-3
and the
that values equal to 0 are meaningless.
3. Pushing the “MENU” push-button a third time
shows the Protect value. The display shows the
stored value and the flashing figures can be
changed by the “Arrow” push-button. The only
figures that can be changed are the units and the
tens, while the exponent is fixed to 10
-2
. By
pressing the “I” pushbutton you can select the
figure to be modified.
The default value is 1.0 x 10
-2
.
4. Pushing the “MENU” push-button a fourth time
stores the set values.
NOTE
The “MENU” push-button must be always pressed until
the last step to store the new values.
The settings remain stored even when the controller is
switched off.
Operating Mode
During the normal operating condition the only available
operations are:
1. Switching on/off of the high voltage
2. Selection of the value (voltage or current) to be
displayed
3. Selection of the maximum output voltage value.
To switch on the high voltage the front panel switch HV
ON/OFF must be set in ON position.
When the high voltage is switched on the front panel
LEDs 3Kv/5Kv/7Kv show the preset maximum voltage
value.
To change the maximum output voltage value, press
the “Arrow” push-buttons in the front panel: the
“Upwards arrow” push-button increases the value, the
“Downwards arrow” push-button decreases it.
To display the output voltage, press the “V” push-button
in the front panel; to show the current the “I” pushbutton must be pressed.
To switch off the high voltage the HV ON/OFF switch
must be set to OFF position.
PRESSURE VS CURRENT DIAGRAMS
In the following pages are shown the pressure vs
current diagrams of MidiVac for all VacIon pumps.
If two ion pumps are connected to the MidiVac, the
displayed current will be a sum of the two currents
drawn by the pumps.
ACCESSORIES AND SPARE PARTS
The MidiVac accessories and spare parts are detailed
in the following table.
DESCRIPTION P.N.
MD-RS232 serial communication
card
MD-RS422 serial communication
card
MD-RS485 serial communication
card
MD-Set Point card 929-5020
Rack adapter 929-0064
HV bakeable cable, radiation
resistant, 4 m (13 ft.) long, with
interlock
HV bakeable cable, radiation
resistant, 7 m (23 ft.) long, with
interlock
HV bakeable cable, radiation
resistant, 10 m (33 ft.) long, with
interlock
HV bakeable cable, radiation
resistant, 20 m (66 ft.) long, with
interlock
929-5010
929-5011
929-5012
929-0705
929-0707
929-0708
929-0709
30 87-900-080-01 (C)
Page 36

TECHNICAL INFORMATION
VacIon Plus 500 Pressure Vs Current Diagram
VacIon Plus 300 Pressure Vs Current Diagram
31 87-900-080-01 (C)
Page 37

TECHNICAL INFORMATION
VacIon Plus 150 Pressure vs Current Diagram
VacIon Plus 75 Pressure vs Current Diagram
32 87-900-080-01 (C)
Page 38

TECHNICAL INFORMATION
VacIon Plus 55 Pressure Vs Current Diagram
VacIon Plus 40 Pressure Vs Current Diagram
33 87-900-080-01 (C)
Page 39

TECHNICAL INFORMATION
VacIon Plus 25 Pressure Vs Current Diagram
VacIon Plus 20 Pressure Vs Current Diagram
34 87-900-080-01 (C)
Page 40

Request for Return
1. A Return Authorization Number (RA#) WILL NOT be issued until this Request for Return is completely filled out,
signed and returned to Varian Customer Service.
2. Return shipments shall be made in compliance with local and international Shipping Regulations (IATA, DOT, UN).
3. The customer is expected to take the following actions to ensure the
of workers at Varian: (a) Drain any oils or
Safety
other liquids, (b) Purge or flush all gasses, (c) Wipe off any excess residues in or on the equipment, (d) Package the
equipment to prevent shipping damage, (for Advance Exchanges please use packing material from replacement unit).
4. Make sure the shipping documents clearly show the RA# and then return the package to the Varian location nearest you.
North and South America
Varian Vacuum Technologies
121 Hartwell Ave
Lexington, MA 02421
Phone : +1 781 8617200
Fax: +1 781 8609252
Europe and Middle East
Varian SpA
Via Flli Varian 54
Asia and ROW
Varian Vacuum Technologies
Local Office
10040 Leini (TO) – ITALY
Phone: +39 011 9979111
Fax: +39 011 9979330
CUSTOMER INFORMATION
Company name: ..………………….……..……………….………………………………..……………………...…………..….
Contact person: Name: ……………………………………..… Tel: ……………………….…...…………….….…....
Fax: …………………………….…...…..…… E-Mail: ..……………………..…………..…..…..…..
Ship Method: …………….……....…… Shipping Collect #: ………….…..………… P.O.#: ………………….…......………..
Europe only: VAT reg. Number: ………………..……………... USA only: Taxable Non-taxable
Customer Ship To: ………………………….……… Customer Bill To: …………………..……………...
……………..…………………... ..………………………………...
………………..………………... ..………………………………...
PRODUCT IDENTIFICATION
Product Description Varian P/N Varian S/N Purchase Reference
TYPE OF RETURN (check appropriate box)
Paid Exchange Paid Repair
Credit Shipping Error
Warranty Exchange
Evaluation Return
Warranty Repair
Calibration
Loaner Return
Other ……………….
HEALTH and SAFETY CERTIFICATION
Varian Vacuum Technologies CAN NOT ACCEPT any equipment which contains BIOLOGICAL HAZARDS or
RADIOACTIVITY. Call Varian Customer Service to discuss alternatives if this requirement presents a problem.
The equipment listed above (check one):
HAS NOT
been exposed to any toxic or hazardous materials
OR
been exposed to any toxic or hazardous materials. In case of this selection, check boxes for any materials that
HAS
equipment was exposed to, check all categories that apply:
Toxic Corrosive Reactive Flammable Explosive Biological Radioactive
List all toxic or hazardous materials. Include product name, chemical name and chemical symbol or formula.
.……………………………………………………………………………………………………………………..
Print Name: …………………………………. Customer Authorized Signature: ……………...…………………….
Print Title: …………………………………... Date: ..…../..…../……
If a product is received at Varian which is contaminated with a toxic or hazardous material that was not disclosed,
NOTE:
will be held responsible
employees as well as to any third party occurring as a result of exposure to toxic or hazardous materials present in the product.
for all costs incurred to ensure the safe handling of the product, and
for any harm or injury to Varian
is liable
the customer
Do not write below this line
Notification (RA)#: ……………………….……….. Customer ID#: ……….…………. Equipment #: ……………………..
Page 41

Request for Return
FAILURE REPORT
TURBO PUMPS and TURBOCONTROLLERS
POSITION PARAMETERS
Does not start
Does not spin freely
Does not reach full speed
Mechanical Contact
Cooling defective …………………. OPERATION TIME:
Noise
Vibrations
Leak
Overtemperature
Vertical
Horizontal
Upside-down
Other: Temp 2: Purge flow:
TURBOCONTROLLER ERROR MESSAGE:
ION PUMPS/CONTROLLERS VALVES/COMPONENTS
Bad feedthrough
Vacuum leak
Error code on display
Customer application:
Poor vacuum
High voltage problem
Other
Customer application:
LEAK DETECTORS INSTRUMENTS
Cannot calibrate
Vacuum system unstable
Failed to start
Customer application:
No zero/high backround
Cannot reach test mode
Other
Customer application:
PRIMARY PUMPS DIFFUSION PUMPS
Pump doesn’t start
Doesn’t reach vacuum
Pump seized
Customer application:
Noisy pump (describe)
Over temperature
Other
Customer application:
FAILURE DESCRIPTION
(Please describe in detail the nature of the malfunction to assist us in performing failure analysis):
Power: Rotational Speed:
Current: Inlet Pressure:
Temp 1: Foreline Pressure:
Main seal leak
Solenoid failure
Damaged sealing area
Gauge tube not working
Communication failure
Error code on display
Heater failure
Doesn’t reach vacuum
Vacuum leak
Bellows leak
Damaged flange
Other
Display problem
Degas not working
Other
Electrical problem
Cooling coil damage
Other
NOTA: Su richiesta questo documento è disponibile anche in Tedesco, Italiano e Francese.
REMARQUE : Sur demande ce document est également disponible en allemand, italien et français.
HINWEIS: Auf Aufrage ist diese Unterlage auch auf Deutsch, Italienisch und Französisch erhältlich.
Page 42

Argentina
Varian Argentina Ltd.
Sucursal Argentina
Av. Ricardo Balbin 2316
1428 Buenos Aires
Argentina
Tel: (54) 1 783 5306
Fax: (54) 1 786 5172
Benelux
Varian Vacuum Technologies
Rijksstraatweg 269 H,
3956 CP Leersum
The Netherlands
Tel: (31) 343 469910
Fax: (31) 343 469961
Brazil
Varian Industria e Comercio Ltda.
Avenida Dr. Cardoso de Mello 1644
Vila Olimpia
Sao Paulo 04548 005
Brazil
Tel: (55) 11 3845 0444
Fax: (55) 11 3845 9350
Canada
Central coordination through:
Varian Vacuum Technologies
121 Hartwell Avenue
Lexington, MA 02421
USA
Tel: (781) 861 7200
Fax: (781) 860 5437
Toll Free # 1 (800) 882 7426
China
Varian Technologies - Beijing
Room 1201, Jinyu Mansion
No. 129A, Xuanwumen Xidajie
Xicheng District
Beijing 100031 P.R. China
Tel: (86) 10 6641 1530
Fax: (86) 10 6641 1534
France and Wallonie
Varian s.a.
7 avenue des Tropiques
Z.A. de Courtaboeuf - B.P. 12
Les Ulis cedex (Orsay) 91941
France
Tel: (33) 1 69 86 38 13
Fax: (33) 1 69 28 23 08
Germany and Austria
Varian Deutschland GmbH
Alsfelder Strasse 6
Postfach 11 14 35
64289 Darmstadt
Germany
Tel: (49) 6151 703 353
Fax: (49) 6151 703 302
07/03
Sales and Service Offices
India
Varian India PVT LTD
101-108, 1st Floor
1010 Competent House
7, Nangal Raya Business Centre
New Delhi 110 046
India
Tel: (91) 11 5548444
Fax: (91) 11 5548445
Italy
Varian Vacuum Technologies
via F.lli Varian 54
10040 Leini, (Torino)
Italy
Tel: (39) 011 997 9 111
Fax: (39) 011 997 9 350
Japan
Varian Vacuum Technologies
Sumitomo Shibaura Building, 8th Floor
4-16-36 Shibaura
Minato-ku, Tokyo 108
Japan
Tel: (81) 3 5232 1253
Fax: (81) 3 5232 1263
Korea
Varian Technologies Korea, Ltd
Shinsa 2nd Bldg. 2F
966-5 Daechi-dong
Kangnam-gu, Seoul
Korea 135-280
Tel: (82) 2 3452 2452
Fax: (82) 2 3452 2451
Mexico
Varian, S. de R.L. de C.V.
Concepcion Beistegui No 109
Col Del Valle
C.P. 03100
Mexico, D.F.
Tel: (52) 5 523 9465
Fax: (52) 5 523 9472
Taiwan
Varian Technologies Asia Ltd.
14F-6, No.77, Hsin Tai Wu Rd., Sec. 1
Hsi chih, Taipei Hsien
Taiwan, R.O.C.
Tel: (886) 2 2698 9555
Fax: (886) 2 2698 9678
UK and Ireland
Varian Ltd.
28 Manor Road
Walton-On-Thames
Surrey KT 12 2QF
England
Tel: (44) 1932 89 8000
Fax: (44) 1932 22 8769
United States
Varian Vacuum Technologies
121 Hartwell Avenue
Lexington, MA 02421
USA
Tel: (781) 861 7200
Fax: (781) 860 5437
Other Countries
Varian Vacuum Technologies
via F.lli Varian 54
10040 Leini, (Torino)
Italy
Tel: (39) 011 997 9 111
Fax: (39) 011 997 9 350
Customer Support & Service:
North America
Tel: 1 (800) 882 7426 (toll-free)
vtl.technical.support@varianinc.com
Europe
Tel: 00 (800) 234 234 00 (toll-free)
vtt.technical.support@varianinc.com
Japan
Tel: (81) 3 5232 1253 (dedicated line)
vtj.technical.support@varianinc.com
Korea
Tel: (82) 2 3452 2452 (dedicated line)
vtk.technical.support@varianinc.com
Taiwan
Tel: 0 (800) 051 342 (toll-free)
vtw.technical.support@varianinc.com
Worldwide Web Site, Catalog
and Order On-line:
www.varianinc.com
Representative in most countries
 Loading...