

Page 1

USER’S GUIDE 2.0
VAPIR
®
OXYGEN MINI
Page 2

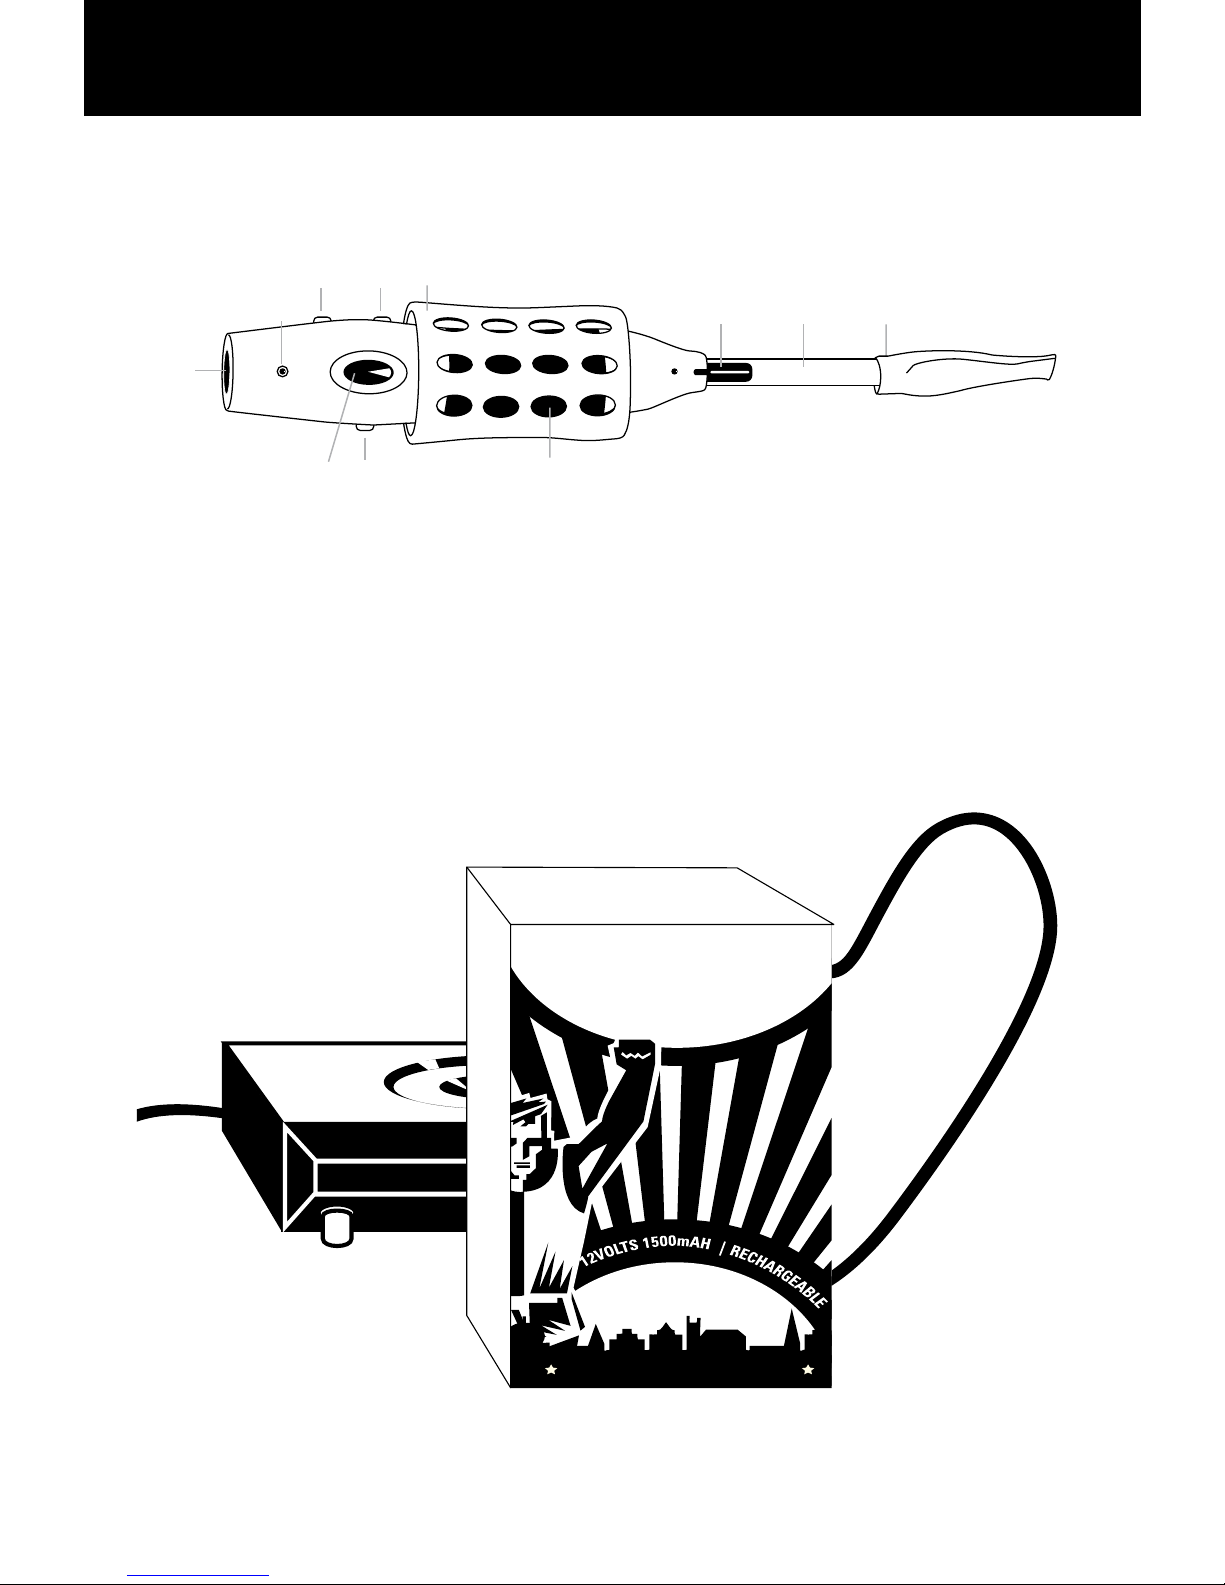
1. Mouthpiece. Enjoy avor of vapor.
2. Heating chamber.
Caution: This area gets hot.
3. Protective heat shield. Always use the
protective heat shield to prevent injury.
4. LCD Display. Display toggles between set
temperature and actual temperature.
5. Power input.
6. Heat. Activate heating.
7. Temperature +.
8. Temperature –.
9. LED Light. Red indicates unit is heating up.
Green indicates set temperature has been
reached.
10. Tube
11. X-Tip Mouthpiece
12. Optional rechargeable battery and charger.
IDENTIFYING THE PARTS
Page 3
1
2
3
4 6
7
9
10 11
5
8
Ultra Long Life Super Heavy Duty
0
2
MINI VAPORIZER
NiMH BATTERY
DESIGNED IN USA
MADE IN
THE PEOPLES REPUBLIC OF CHINA
KEEP OUT OF REACH OF CHILDREN
Battery
12. Charger
Page 4
It’s as easy as 1, 2, 3
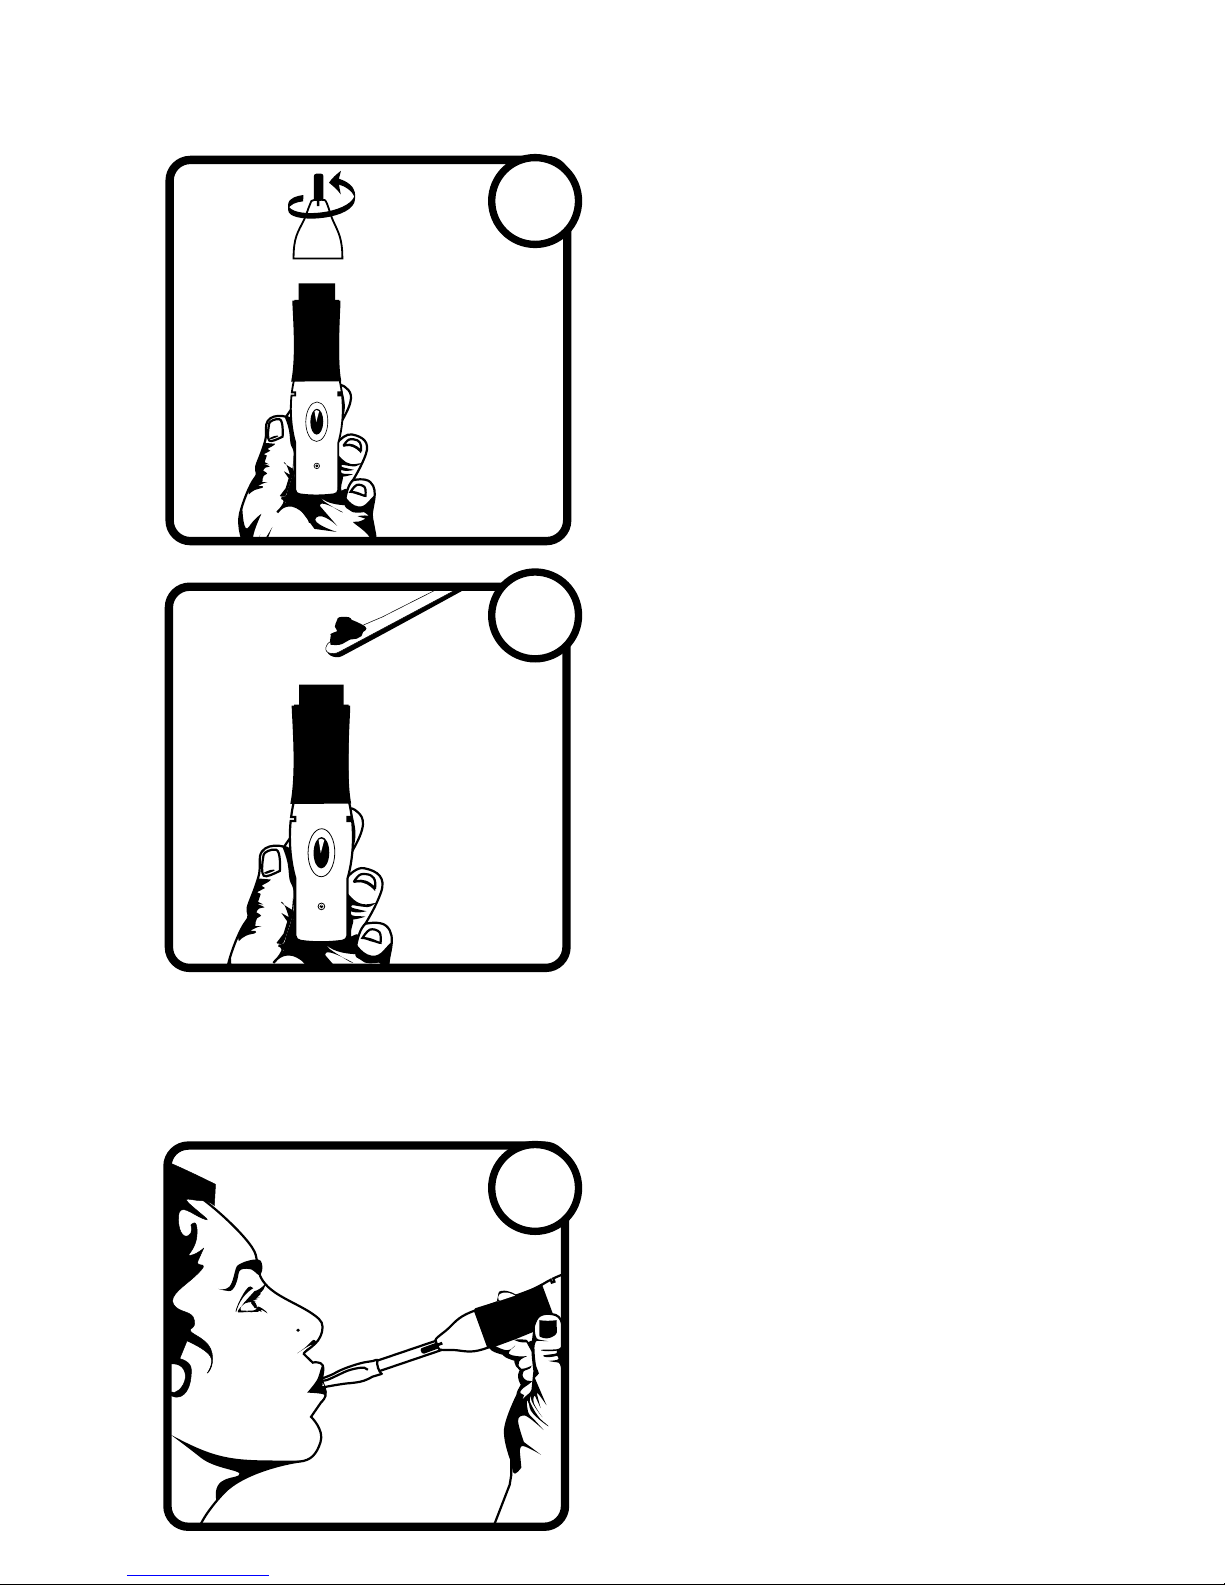
Once desired temperature
is reached, then insert
herbs
Remove mouthpiece, set
desired temperature and
activate heat.
Put mouthpiece back on
vaporizer, begin inhaling
and enjoy the avor.
3
2
1
Tip: Always lightly ll the
heating chamber with
nely grinded herbs. If
you put too much, you
risk overheating your herbs. Air must be able to
ow evenly through your herbs. Less is always
more here.
Page 5
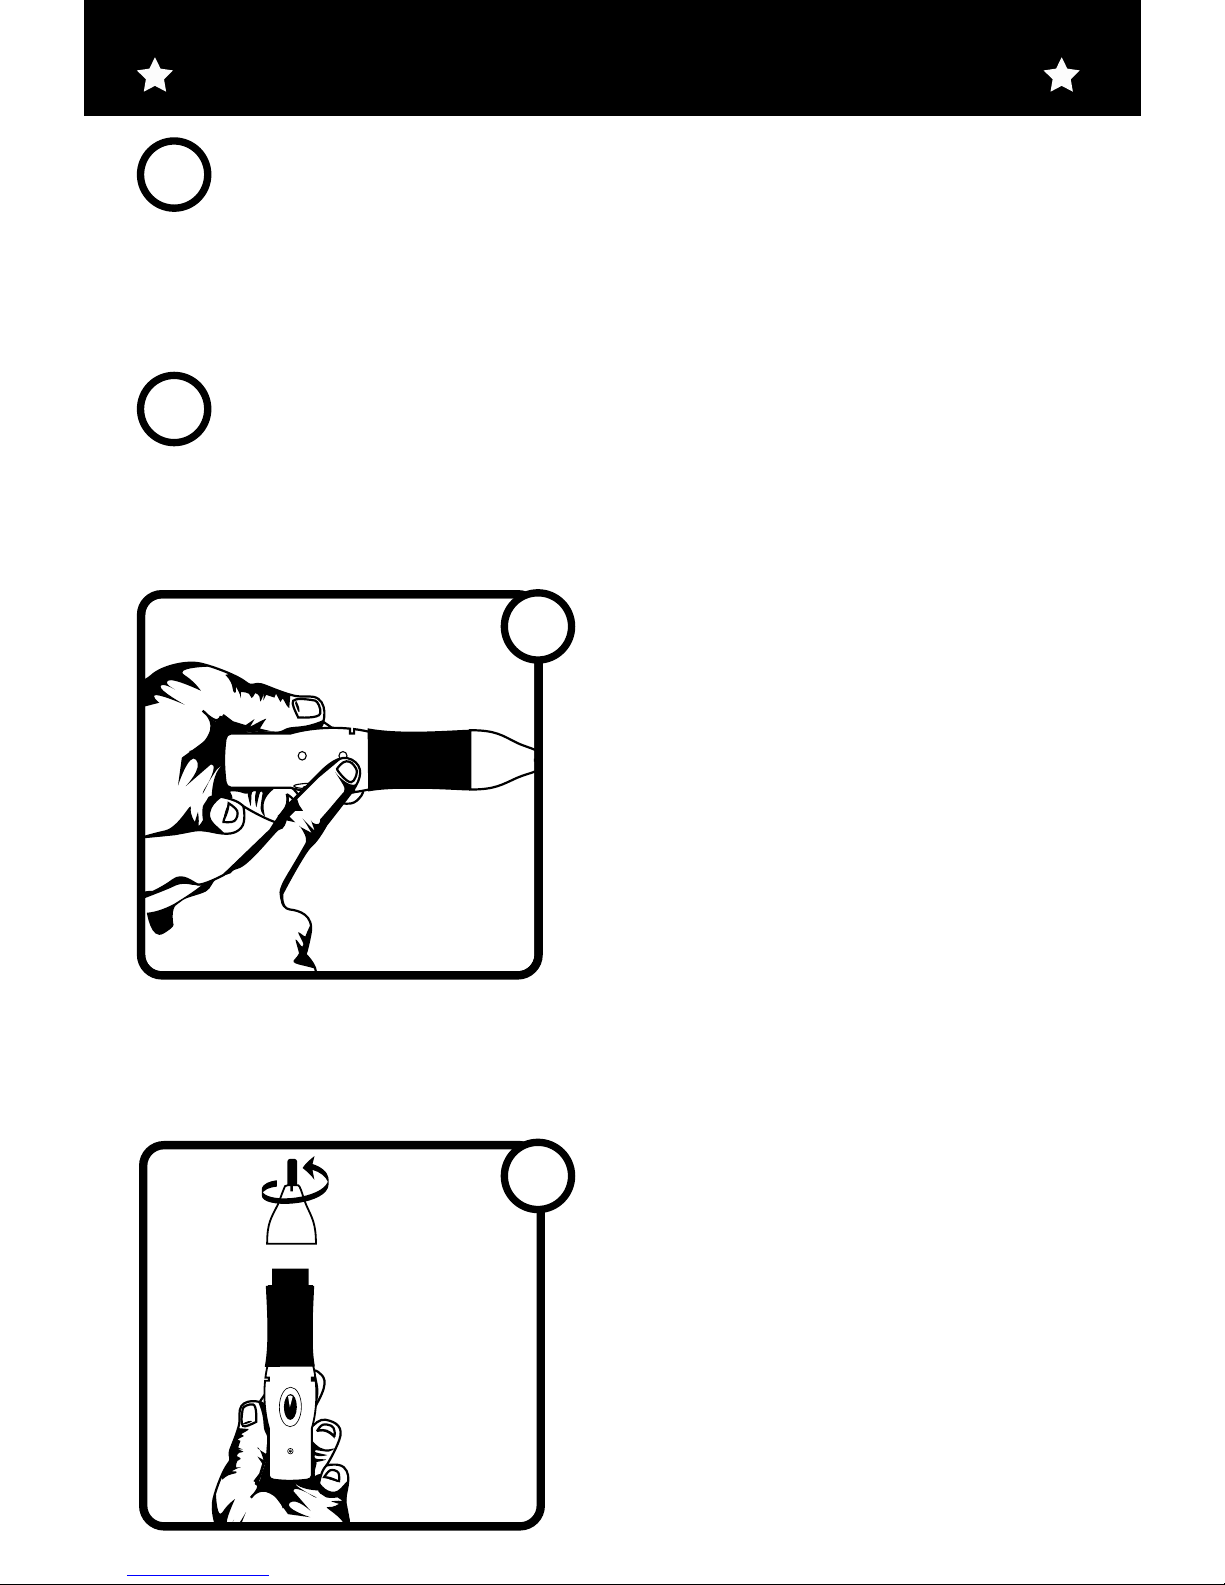
1. Pre-grind you herbs, it is important to nely
grind you herbs for maximum benets - you want
to grind you herbs to almost powder form.
Preheat unit to desired temperature.
Recommended Approximate temperature is
360ºF/192ºC to 375ºF/207ºC.
DETAILED DIRECTIONS FOR USE
Set desired temperature
using the Temperature
+/- buttons.
It takes practice to get the
perfect temperature for your
specic herbs. This will
require some trial and error on
your part. If you are getting
Remove mouthpiece and
set desire temperature.
Press heat button to activate
heat. The red LED will
indicate the unit is heating.
The screen will display rst
the set temperature and then
the actual temperature
1
2
3
4
smoke, turn the temperature down. If you are not getting
enough avor turn the temperature up.
Page 6
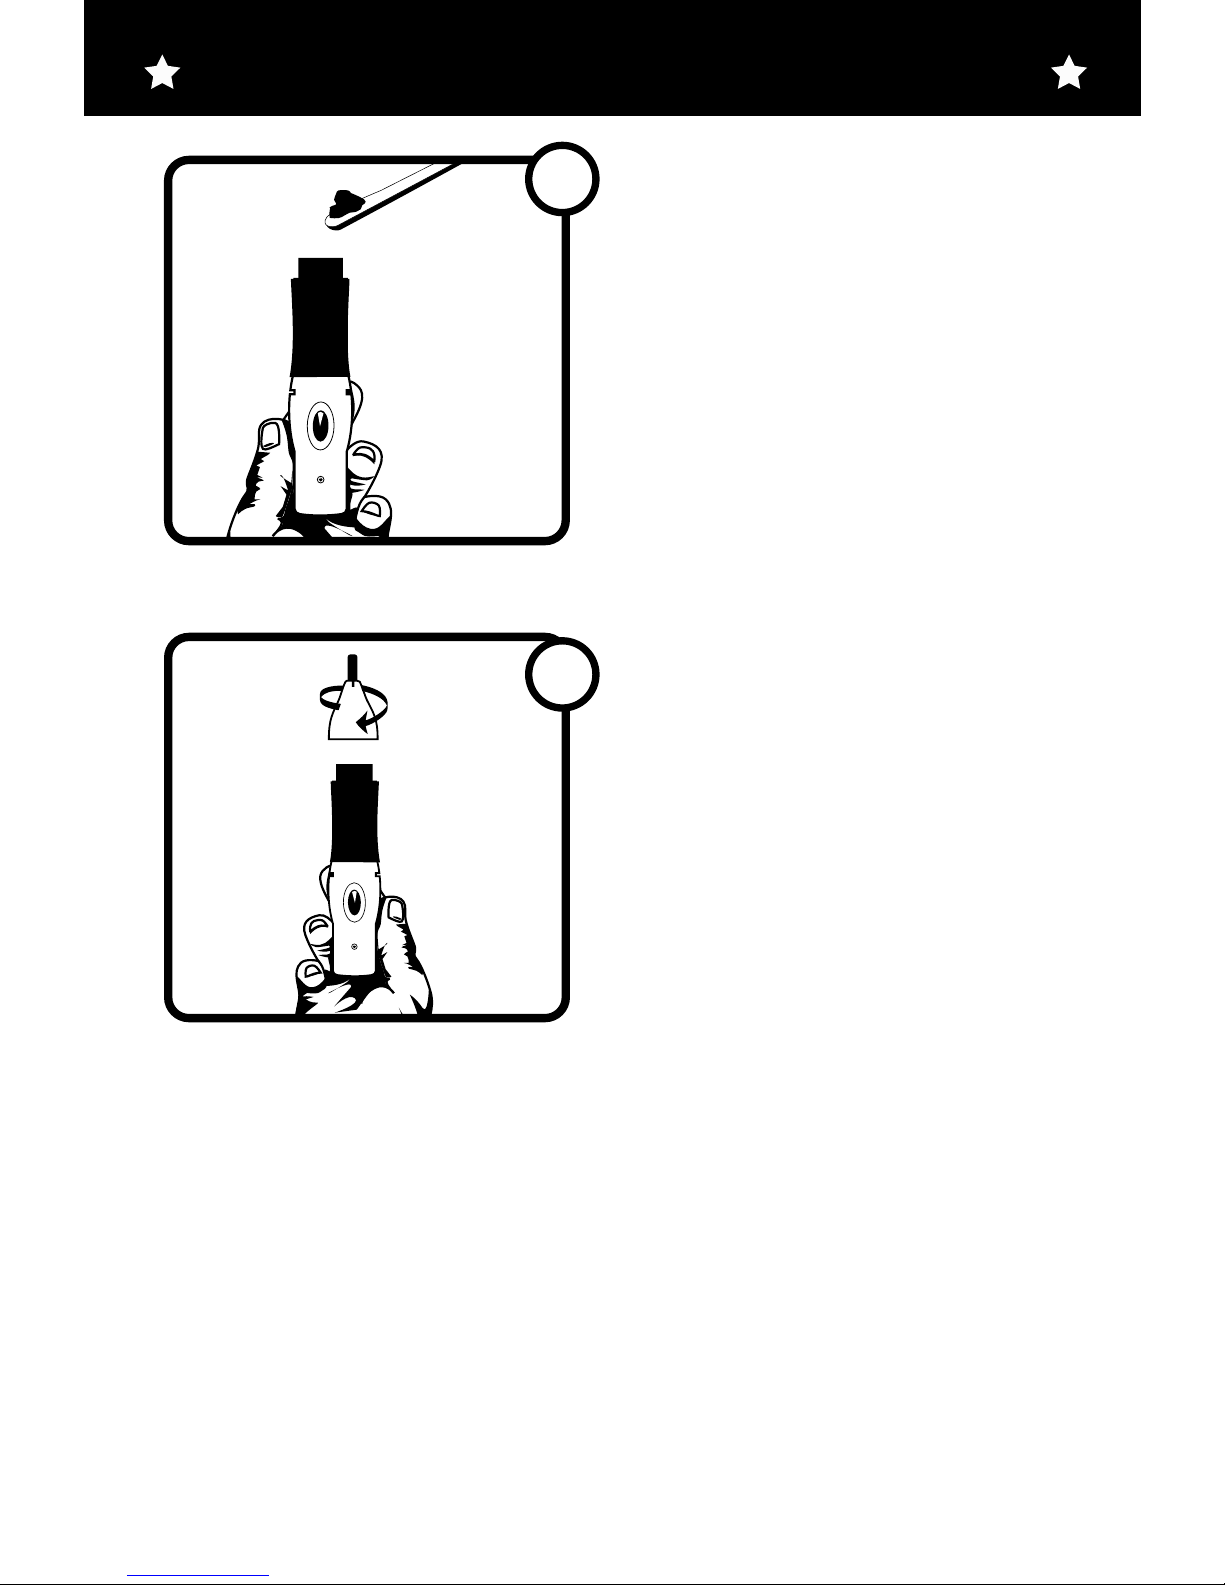
Once unit is preheated
insert herbs using the
included long spoon.
Never touch near or inside
the unit when it is hot.
Make sure to only ll the
unit 1/2 full or less.
Attach mouthpiece by
turning it clockwise.
5
6
DETAILED DIRECTIONS FOR USE
Page 7
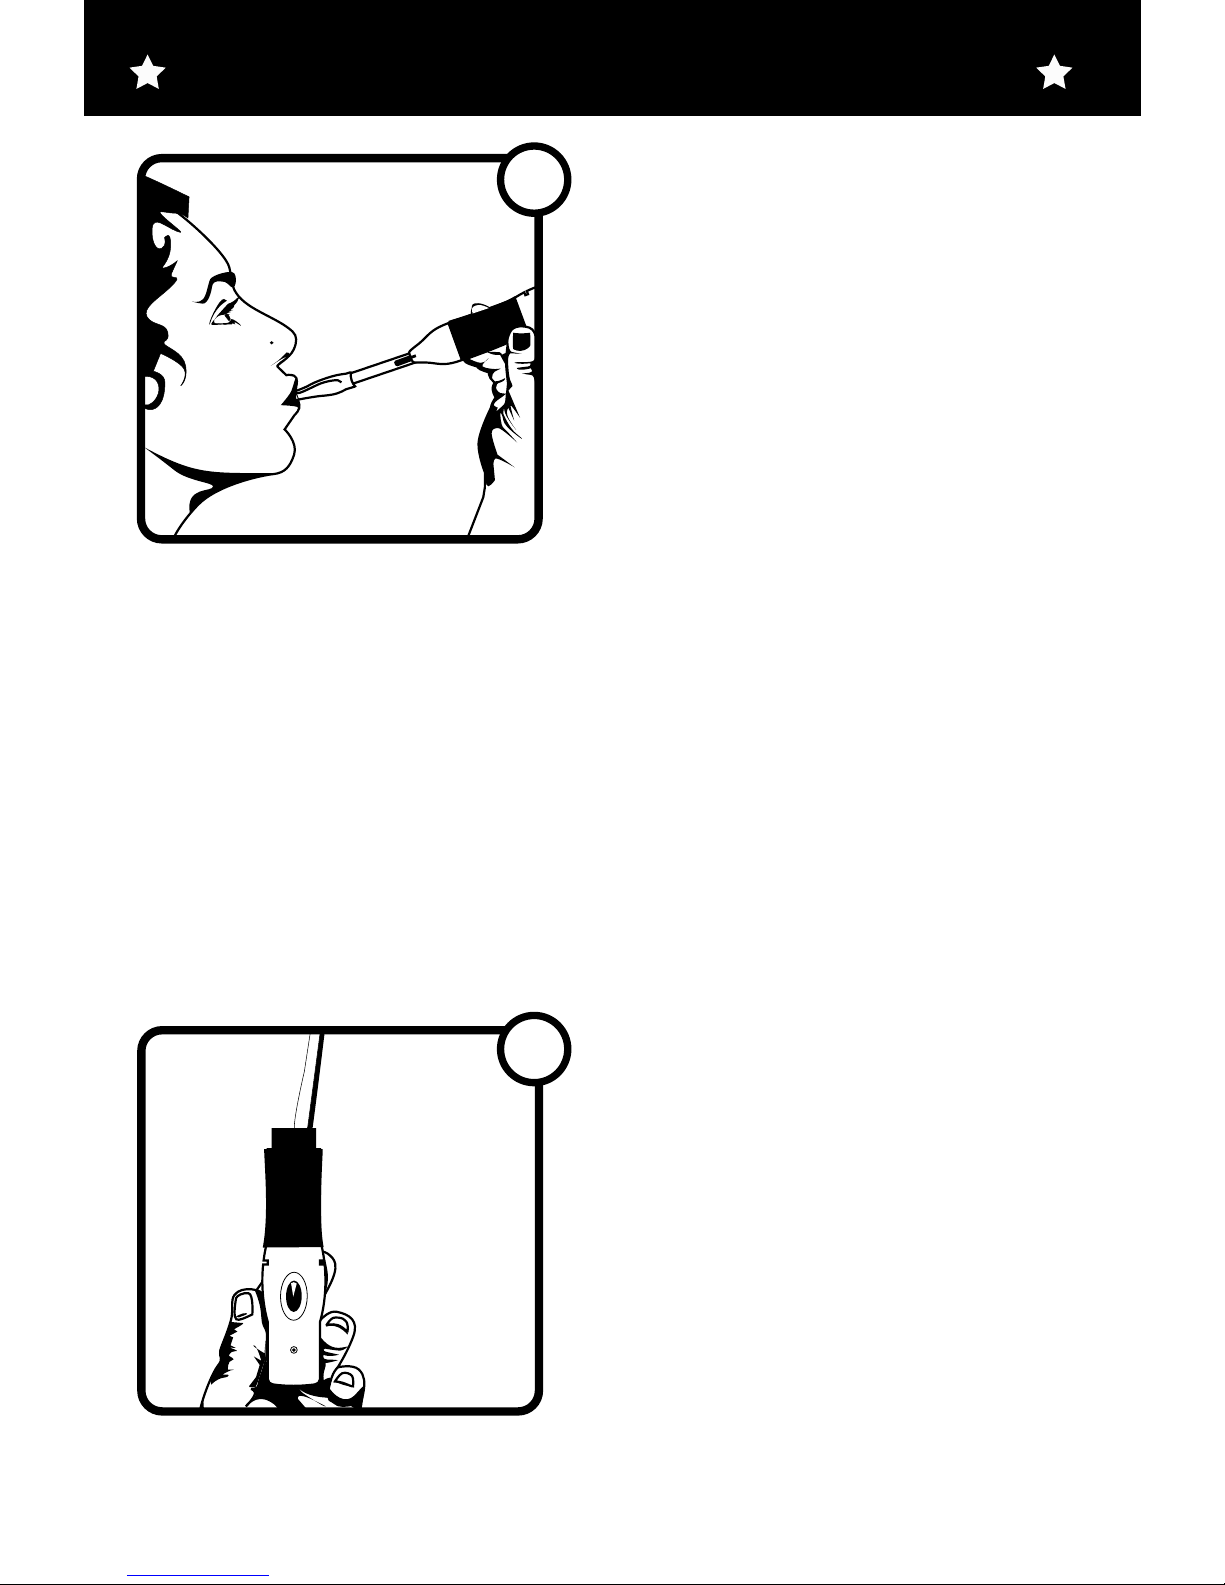
NOTE: Included with the
Oxygen Mini Vaporizer is
a Matrix Tube Attachment
and X-Tip Mouth-piece
which can be attached
and used with the Oxygen
Once you are nished,
use the included spoon
to remove any herbs and
herbal residue. When
cleaning the inside of
your Oxygen be careful
not to damage the
internal mesh.
8
9
Mini Vaporizer. The tip of the vaporizer can also
be inhaled from directly. However, when using the
vaporizer for extended periods of time it can become
hot so we suggest using the Matrix Tube Attachment
and X-Tip Mouth-piece instead.
Prior to using the Matrix Tube Attachment make sure
to soak the tube in warm water to clean out.
TIP: DO NOT USE BOILING WATER.
DETAILED DIRECTIONS FOR USE
Begin inhaling and enjoy
avor.
If the mesh comes out of the unit, clean and re-insert
into unit prior to use.
Page 8

This unit can be used with a power adaptor (included)
or with an optional rechargeable battery.
To use the battery simply attach battery to unit and
use as directed.
Our standard battery pack, when fully charged, will
usually last for 1 hour of continuous heating. Battery
must be charged 8-12 hours each time to full charge.
For rst use please charge overnight for no less than
12 hours.
Caution: Never charge battery for more than 24 hours.
This will overcharge it and void the warranty.
This unit can be used with a 12V (Optional) car adaptor.
To use the car adaptor simply attach car adaptor to
unit and use as directed. Never use this or any other
aromatherapy device while driving or while operating
heavy machinery. (Optional) car adaptor/power inverter.
We strongly recommend that you nely grind your
herbs prior to use in this unit. Grinding your herbs
allows for air to ow evenly through them and will
give you an optimal vaporization experience. Quality
digital grinders can be acquired from www.vapir.com
or by calling 1-800-841-1022.
BATTERY OPERATION
CAR ADAPTOR OPERATION
GRINDERS
Page 9
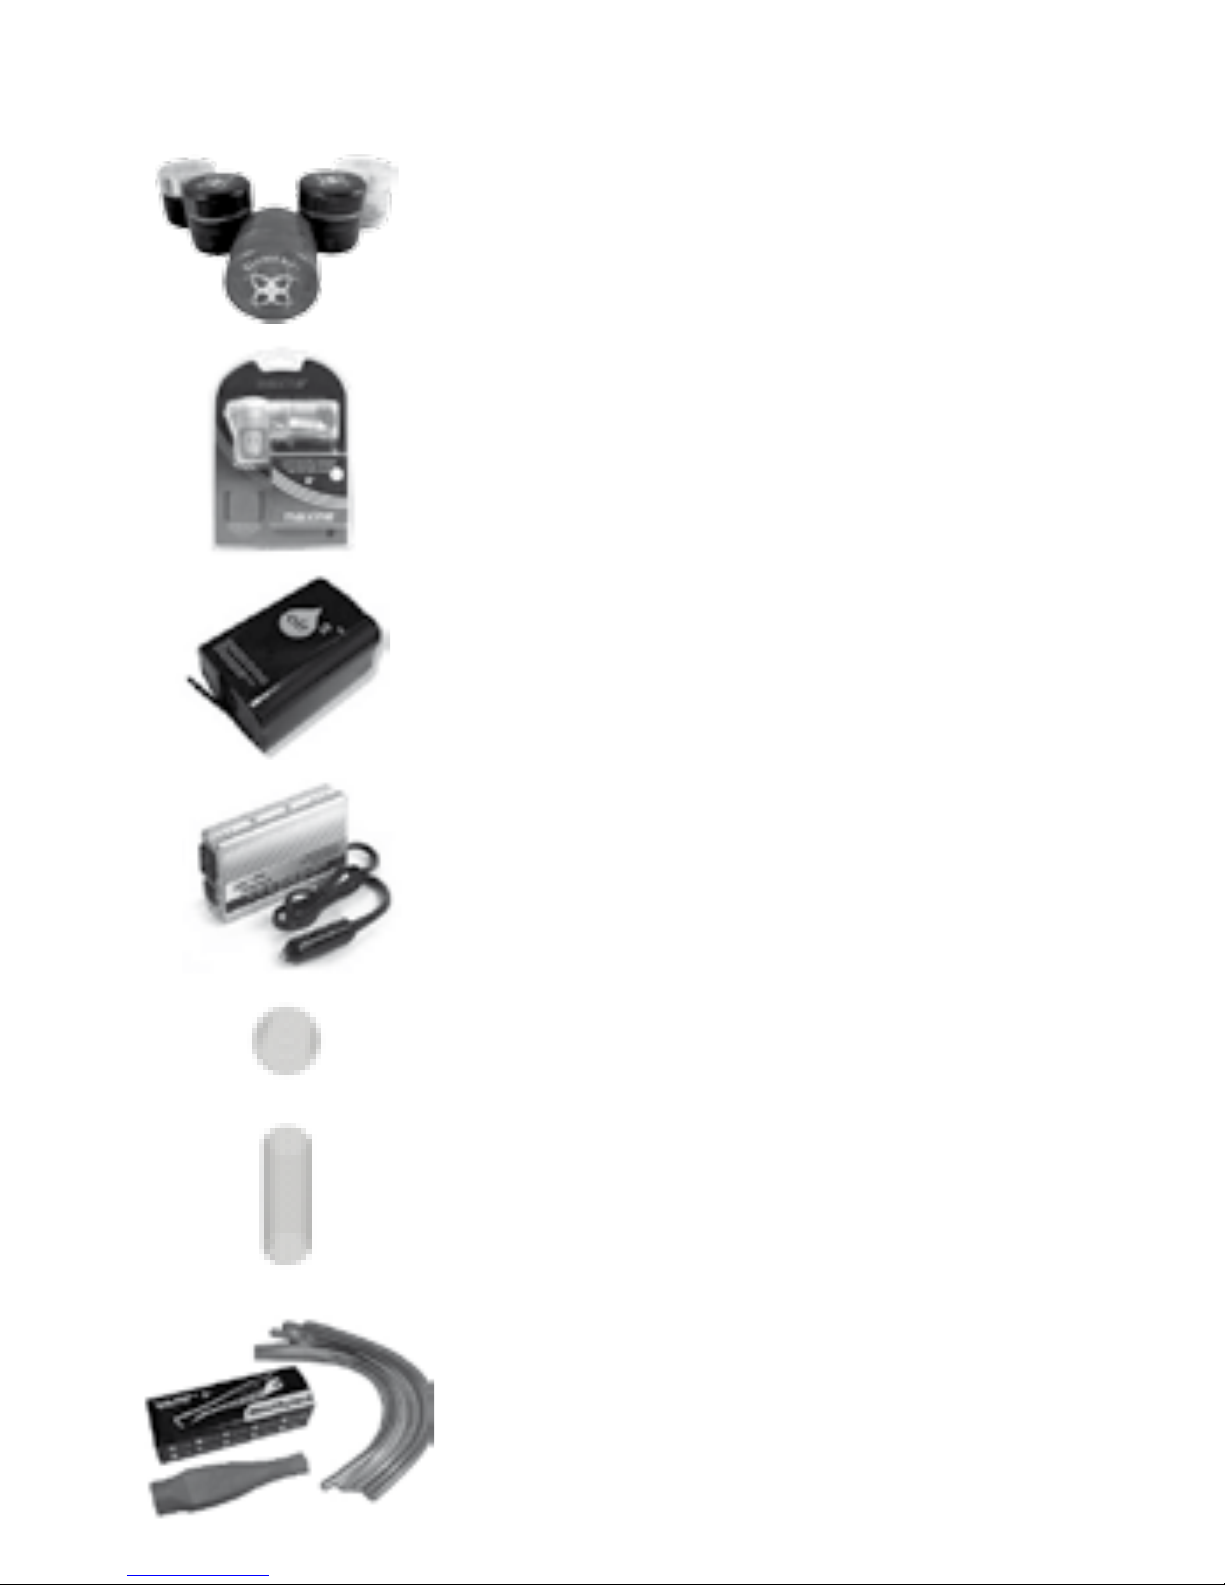
Replacement Mouthpiece Mesh
Motorized Element Herb Grinders
Max Gourmet Herb Grinder
Maxine Gourmet Herb Grinder +
Re-Chargeable Battery
REPLACEMENT PARTS & ACCESSORIES
Car Charger/Power Inverter
5 Pack of Tubes and X-Tip
Mouthpieces
All Products Made By Vapir, Inc.
Replacement Internal Mesh
Page 10

WARRANTY
90 Day Limited Warranty
Vapir, Inc.
www.vapir.com/warranty
Toll Free + 1 800 841 1022
© Vapir, Inc. ALL RIGHTS RESERVED
Replacement parts and accessories for this unit
can be can be purchased from www.vapir.com or by
calling 1-800-841-1022.
NOTE
To stop the heating process, press the Heat button.
This unit has a safety default heating time of 20
minutes. It will automatically shut off after 20 minutes
of continuous use.
If unit overheats: For added safety there is a
protective thermal switch inside the unit to prevent
damage to the unit from overheating. When it is over
heated, the thermal switch will cut off power to the
heater. The unit will cease to function until it has
sufciently cooled down. The heating process can
only be restarted after the unit is cooled. This will
usually take 15 – 20 minutes.
REPLACEMENT PARTS & ACCESSORIES
 Loading...