

Page 1
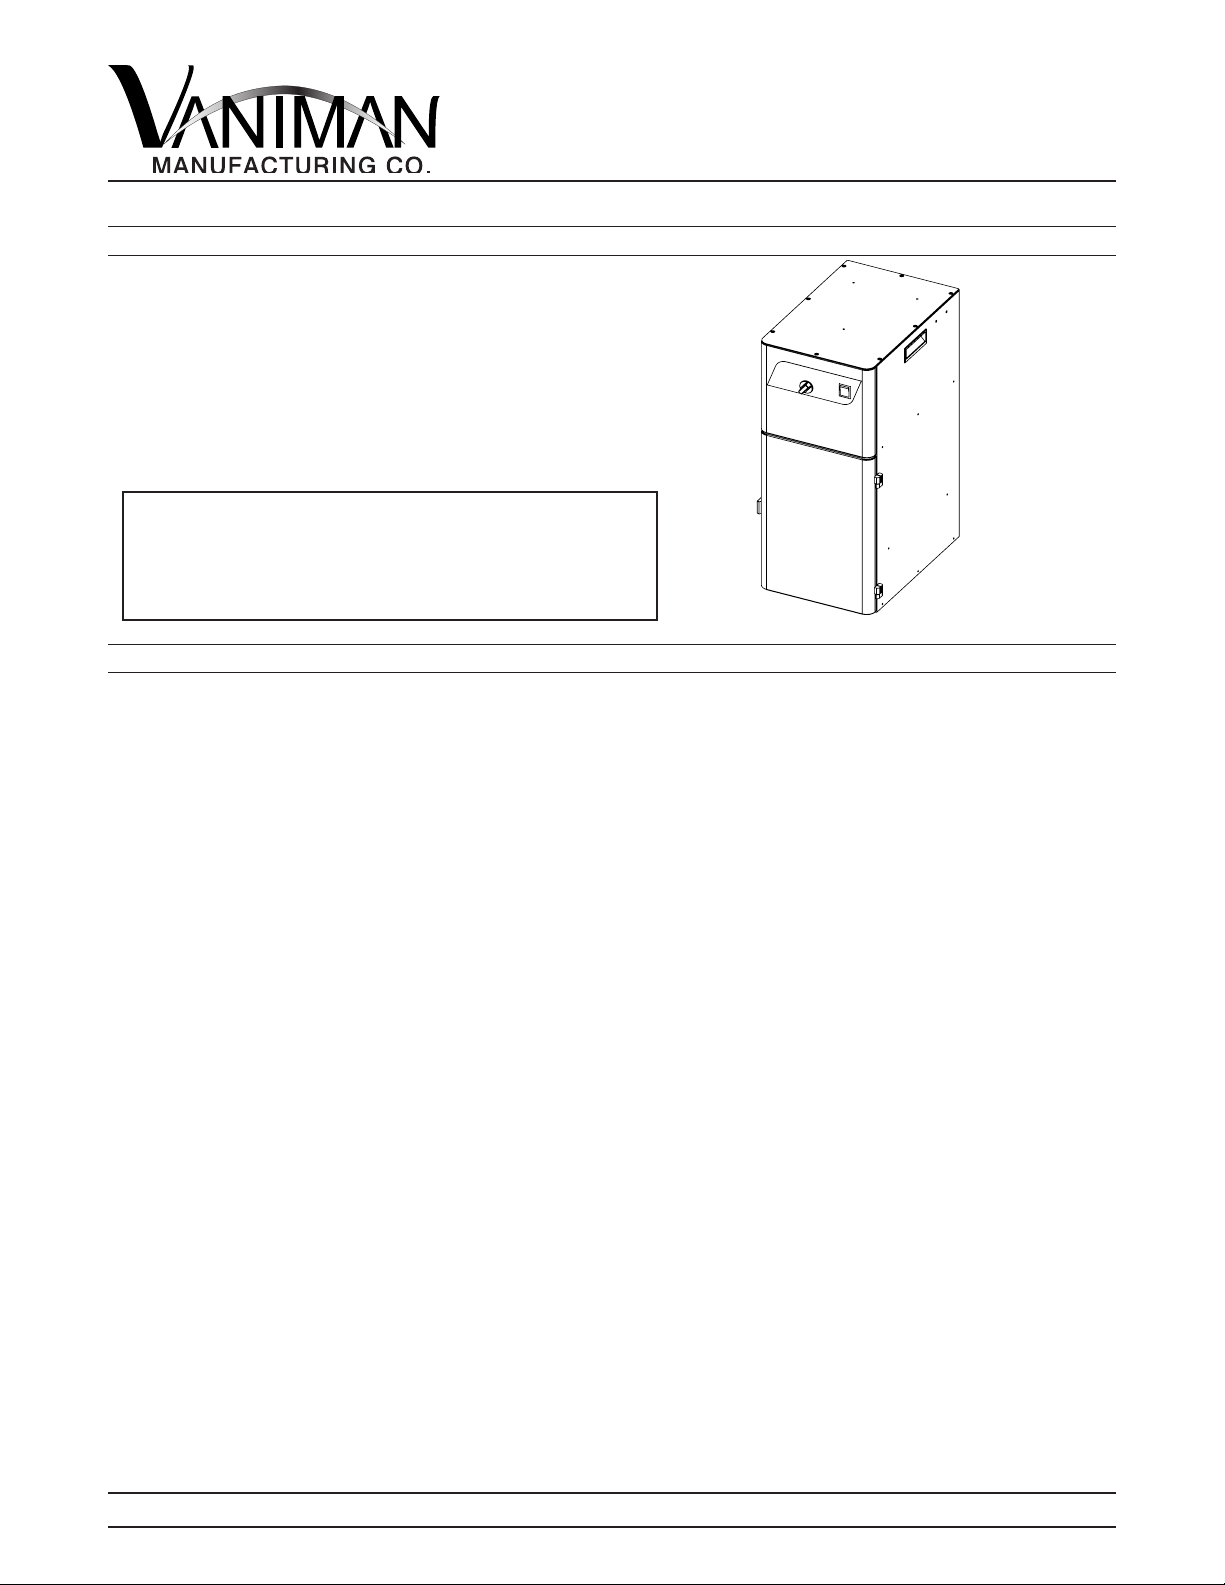
STONEVAC MILLSYNC
PACKING LIST
1 - StoneVac MillSync
2 - 2½” x 6’ Hose
1 - Plastic Disposal Bag
1 - Power Cord
1 - Accumulator
1 - 2½” Elbow (black)
1 - Mill Remote
IMPORTANT SERVICE INFORMATION:
SAVE SHIPPING BOX AND FOAM FOR FUTURE
SERVICE. SHIPPING WITHOUT PROPER FOAM
MAY CAUSE DAMAGE TO UNIT
INSTRUCTIONS
1. Remove the unit and other parts from the box and check against the packing list.
Remove the hose from inside the dust bin as well as any protective paper packing material.
120V
2. Plug the power cord into a designated 15 AMP circuit. Turn on the StoneVac by pushing the switch to
the “ON” position. Use the rotary switch to control the speed of the motor.
3. Mount the Accumulator according to the mounting instructions included with it or assemble the bracket
to the dust collector as illustrated. Remove the two screws provided on the side of the unit and use
them to fasten the bracket to the vacuum.
4. Insert the black 2½” Elbow into the top of the Accumulator. Connect one of the 2½” x 6’ Hoses to the
back of the StoneVac then into the 2½” Elbow. The second 2½” x 6’ Hose should be inserted into the
horizontal arm of the Accumulator then to the mill.
5. With the StoneVac off, plug the Mill Remote into the remote port of the dust collector then to the Mill.
Dry run the mill to test the collection to the StoneVac.
140 N. Brandon P.O. Box 74, Fallbrook, CA 92088 1-800-VANIMAN (826-4626)
SV-MS-04/18 Page 1
Page 2

STONEVAC MILLSYNC
120V
MAINTENANCE
1. Cleaning the Filter - When a noticeable drop in suction occurs in the unit, it is time to clean the lter.
To use the self-cleaning feature of the StoneVac, push and hold the Power switch in the “CLEAN”
position for several seconds. Optimum cleaning takes place in within 5 seconds. For best results, wait
an additional 10-15 seconds with the Power switch in the “OFF” or center position, this allows the dust
cleaned from the lter to fall into the dust bin before turning the unit on again.
2. Emptying the Dust Bin - Depending on usage, the unit will need to be emptied at different intervals.
To check the level of dust in the bin, open the door and observe the dust level. To empty, open the door
and slide the bin from the unit. Pull the edges of the bag together to close the bag for disposal. Replace
the bag with a Vaniman replacement and carefully slide the dust bin back into the unit. Replacement
bag re-order number P/N 97002 (pack of 12).
3. Servicing or Replacing the Filter Cartridge - Regularly check the lter to make sure it is secure and
properly seated against the lter mounting/sealing plate. Periodically, the lter cartridge will become
worn or clogged beyond the use of the “CLEAN” feature. In cases when dust collector usage is heavy,
changing interval may be as frequent as 3-6 months. To replace the lter, follow the instructions above
to remove and empty the dust bin. With the dust bin removed, reach underneath the Filter Cartridge
and unscrew the lter retaining nut. Remove the nut and washers and pull the lter downward then
forward out of the unit. Replace the lter with a new lter cartridge then reverse removal instructions
for proper installation. Filter Cartridge re-order P/N 97001.
NOTE: Be sure to replace the rubber washer FIRST and the metal washer SECOND. Securely fasten
the lter retaining nut. Improper installation may cause dust to pass into the air.
4. Electrical Protection - The StoneVac is protected by a circuit breaker. If the unit is plugged in and
does not operate, check to see if the circuit breaker was activated by inspecting it on the back of the unit
where the power cord enters the unit. If the circuit breaker was activated, push the button in the center
to reset it. If the unit still does not operate, contact your dealer or call the factory at 1-800-VANIMAN for
technical assistance.
5. Thermal Protection - The brushless motor is thermally protected is virtually maintenance free. However,
if improper ventilation is not provided to the unit, it may overheat and shut down. Allow the unit to cool
fully, correct the ventilation problem and restart the unit.
140 N. Brandon P.O. Box 74, Fallbrook, CA 92088 1-800-VANIMAN (826-4626)
SV-MS-04/18 Page 2
Page 3
STONEVAC MILLSYNC
1
2
3
4
5
6
7
8
9
10
11
12
13
14
15
16
17
120V
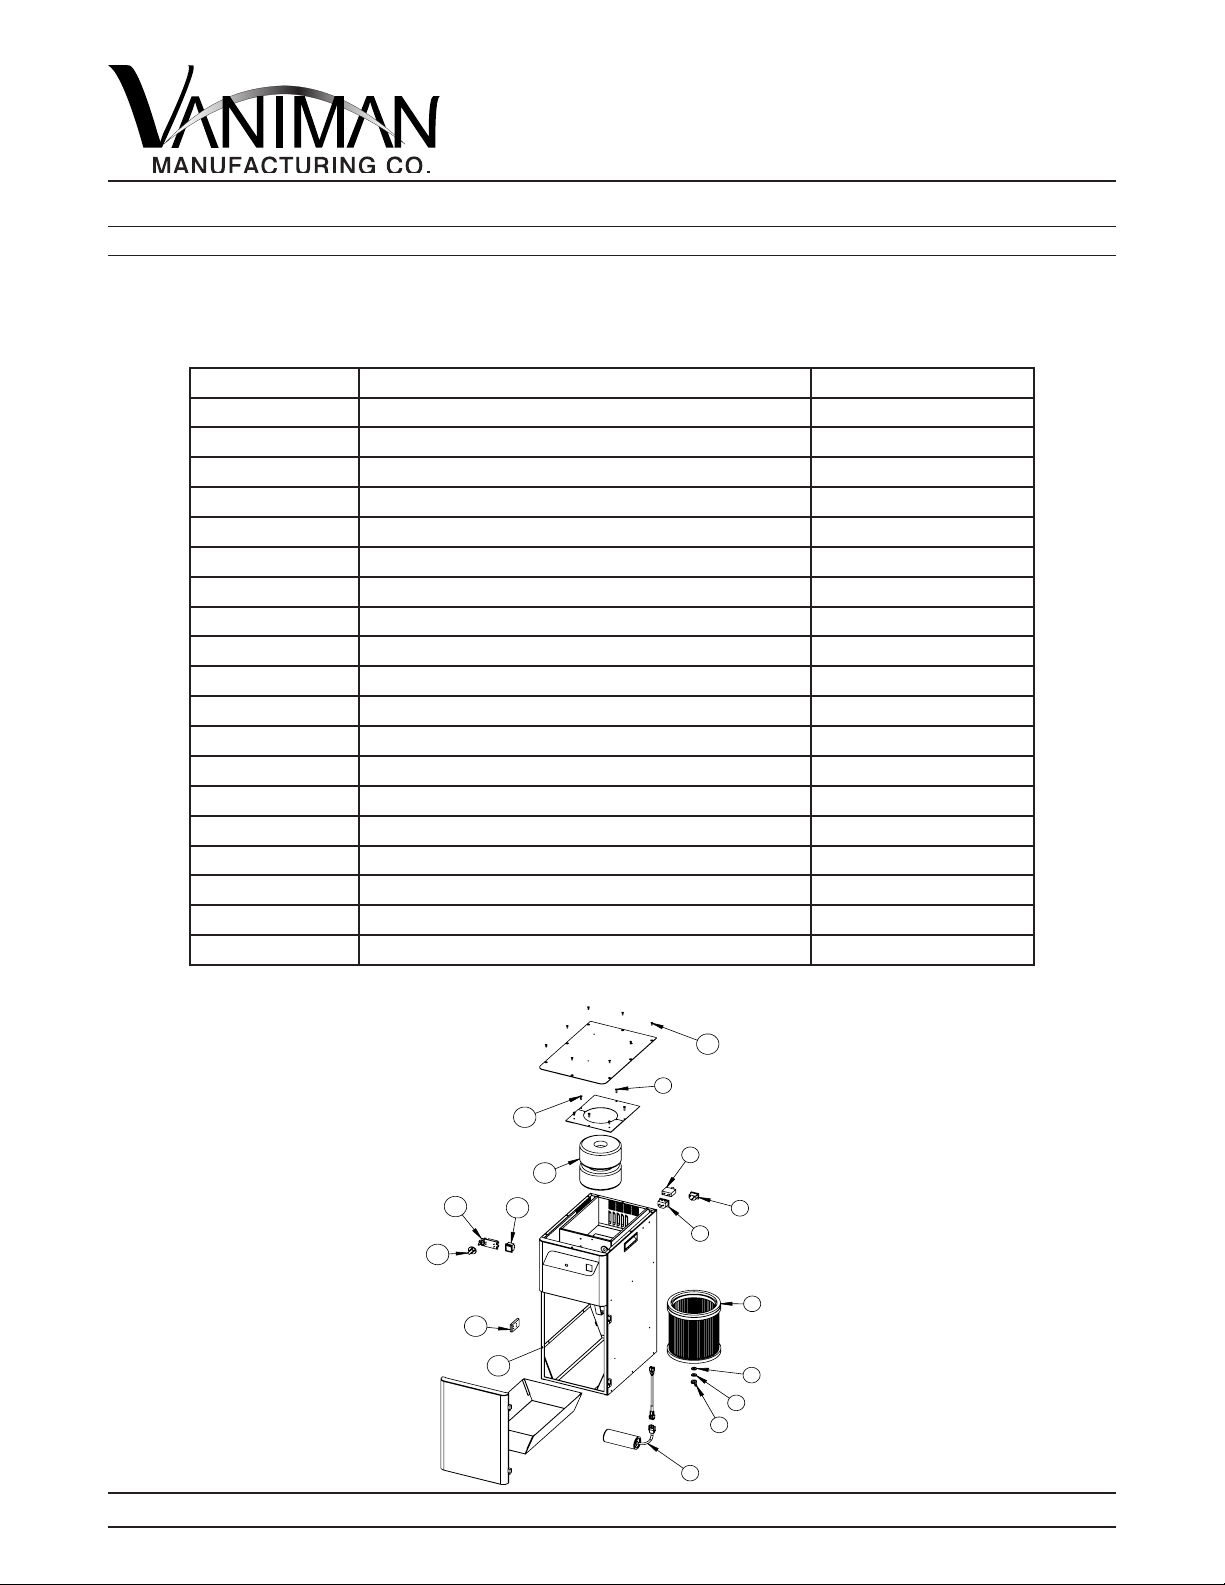
REPLACEMENT PARTS
The following items are offered to enhance the usage of your quality Vaniman unit. These items can be
order through your supplier using the following part numbers. Please feel free to contact Vaniman Mfg.
Co. with questions regarding our products.
Fig. # Description Reorder Part Number
1 Replacement Shaker Motor 97003
Not Shown Shaker Clamp 3526
2 Wing Nut 2847
3 Washer 2868
4 Rubber Washer 1783
5 Replacement Filter (includes rubber washer) 97001
6 Remote Plug 1427
7 Power Connector 3010
8 Circuit Breaker, 15Amp 2869
9 Motor Plate Screw, 6-32 x 1/2” Pan MS 2080
10 Top Panel Screw, 6-32 x 3/8” FHMS 3005
11 Motor Plate Joining Screw, 6-32 x 3/8” Pan SMS 1421A
12 Replacement Speed Control Motor 97035
13 Switch ON/OFF/CLEAN 3282
14 Speed Control Board 5046
15 Rotary Knob 1471
16 Door Latch 3040
17 Door Gasket 97150
Not Shown Power Cord 3006
140 N. Brandon P.O. Box 74, Fallbrook, CA 92088 1-800-VANIMAN (826-4626)
SV-MS-04/18 Page 3
 Loading...