

Page 1
ABRASIVE VAC
120V
PACKING LIST
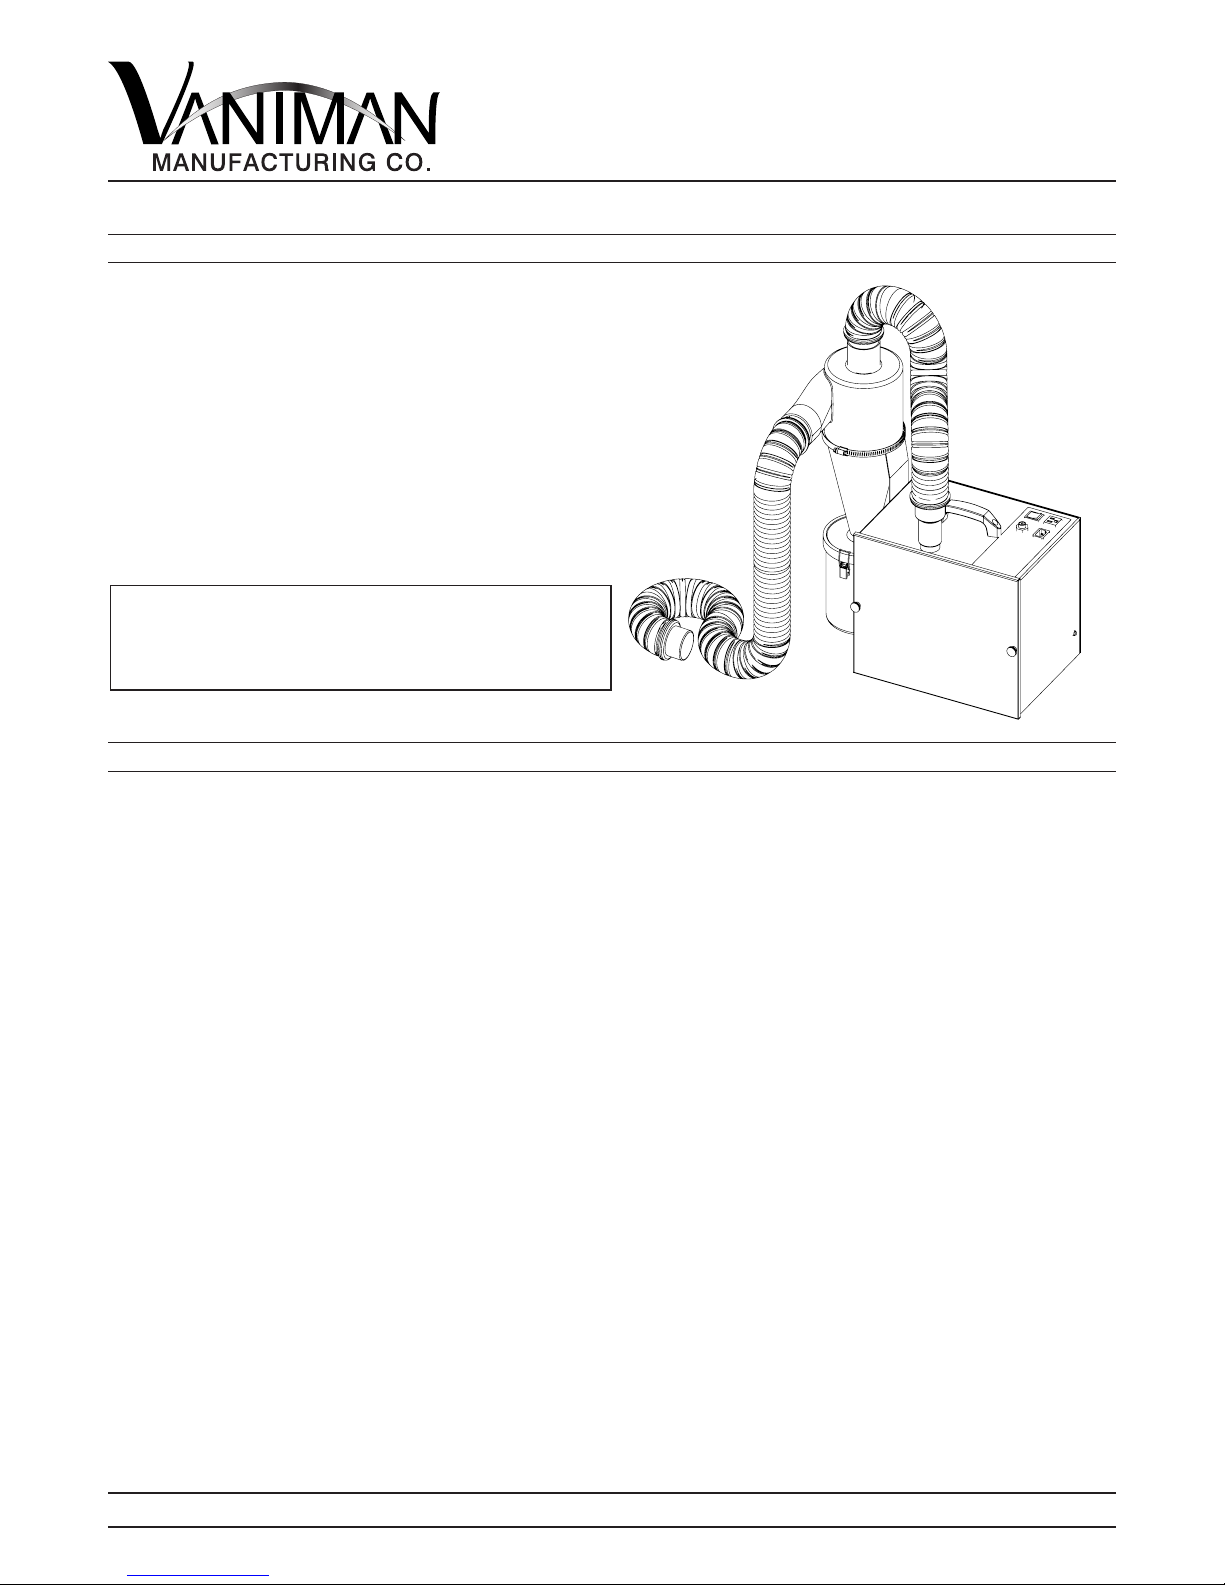
1 - AbrasiveVac unit
1 - Power Cord
1 - Foot Remote
1 - Pre-Filter/Accumulator
1 - 2½”x 3’ Hose with 1½” Hose End
1 - 2½”x 6’ Hose with 1½” Hose End
IMPORTANT SERVICE INFORMATION:
SAVE SHIPPING BOX AND FOAM FOR FUTURE
SERVICE. SHIPPING WITHOUT PROPER FOAM
MAY CAUSE DAMAGE TO UNIT
ASSEMBLY INSTRUCTIONS
1. Remove the unit and all additional parts from the two boxes. Check against the packing list.
2. Mount the Accumulator angle bracket on the side of the vacuum unit as shown by using the two
screws provided. Assemble the Accumulator to the bracket with the circular clamp provided. Rotate
the Accumulator to best route the hose then tighten the clamp.
3. Assemble the three foot hose, with the 1½” hose end, to the vacuum unit and the other end to the
top of the Accumulator. Gently rotate and push the hose end into the black foam gasket. If the hose
has difculty connecting to the Accumulator, moisten the foam gasket with a small amount of water;
the water will help ease the hose into place. Connect the other hose from the side of the Accumulator to the abrasive blaster. Use the grey hose end to connect to the Vaniman Sandstorm series or
ports of 1½”. For 2½” hose connections, remove the grey hose end and use the remaining white
hose connector.
4. Plug the removable power cord into the socket on the top of the AbrasiveVac then plug the other
end into a standard 110 Volt wall socket. Connect the black remote switch tube to the black remote
switch connector on the unit; test by turning the power switch on or by pressing the remote switch.
140 N. Brandon P.O. Box 74, Fallbrook, CA 92028 1-800-VANIMAN (826-4626) www.vaniman.com [email protected]
ABRASIVEVAC-I-08/15 Page 1
Page 2

ABRASIVE VAC
120V
MAINTENANCE
1. Filter Bag Replacement - When a noticeable drop in suction occurs in the unit or it shuts down,
it may be time to replace the lter bag. Remove the thumb screws on the front of the unit to
remove the front cover plate, exposing the lter bag. Remove the lter bag by sliding it off the inlet
tube; the front of the cardboard reinforcement may need to be tilted downward slightly to remove
the bag easily. Check the inside of the lter bag compartment, if dust is present please clean the
compartment. Cause for residual dust may be the lter bag had been improperly installed. Vacuum
out any dust before putting in a new bag, this will increase the life of the unit. Filter bag reorder
number is VMC-A400-5, which can be ordered through your supplier.
2. Installing a new lter bag - Slip the cardboard reinforcement, with rubber seal, over the inlet
tube. Tilt the front of the cardboard downward and slip the back edge up past the tube end; then
rotate upward over the tube end. Then carefully tuck the edges of the lter bag into the lter bag
compartment. Replace the cover plate and gently tighten the screw knobs. Only gentle pressure
need be used to make the gasket seal as the vacuum pressure will draw the cover tightly.
CAUTION: Operating the vacuum with a plugged lter bag can cause permanent damage to the motor.
3. Empty Accumulator Cup - The accumulator has a cup on the bottom held in place with two toggle
latches. The majority of dust collected will fall into this cup. Empty when ½ full; it is recommended to
empty the cup DAILY. Turn the unit off before removing the cup. Gently tap the sides of the Accu-
mulator to shake down dust into the cup. Hold the collection cup with a hand on each side directly
below the toggle latches. With your index ngers, ip the toggles upward and then swing the wire
bales outward. Lower the cup and empty the contents. Replace the cup onto the bottom of the Accumulator, swing the wire bales over the bottom rim of the Accumulator and snap the toggle latches
down to secure the cup in place.
4. Circuit Protector - The unit is protected by a circuit breaker. Push in to reset.
5. For other maintenance problems or questions consult your dealer or call 1-800-VANIMAN and ask
for SERVICE.
RECOMMENDED USAGE
To evacuate the blasting dust from an abrasive blaster such as aluminum oxide and silica sand.
140 N. Brandon P.O. Box 74, Fallbrook, CA 92028 1-800-VANIMAN (826-4626) www.vaniman.com [email protected]
ABRASIVEVAC-I-08/15 Page 2
Page 3
ABRASIVE VAC
1
2
3
4
5
6
7
8
9
10
120V
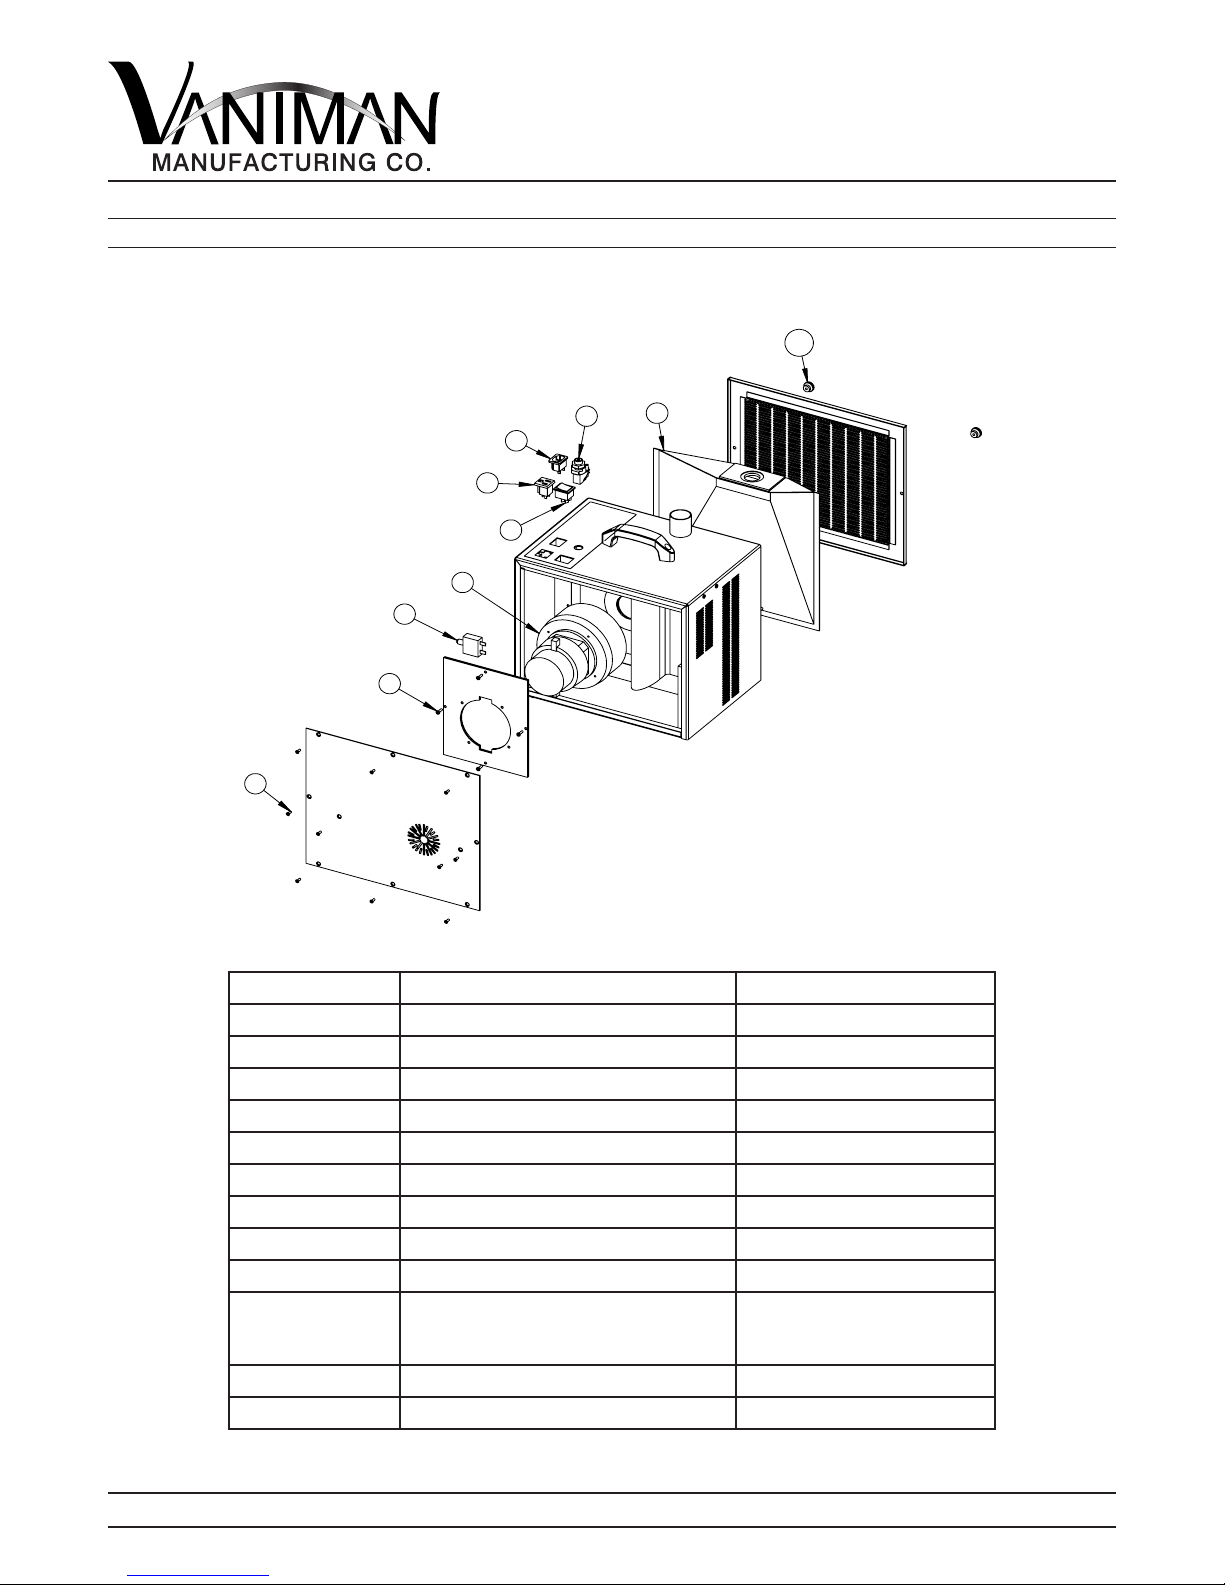
ACCESSORIES & REPLACEMENT PARTS
The following items are offered to enhance the usage of your quality Vaniman unit. These items can be
order through your supplier using the following part numbers. Please feel free to contact Vaniman Mfg.
Co. with questions regarding our products.
Fig. # Description Reorder Part Number
1 Screw, 6-32 x 3/8” FHSMS 1448A
2 Screw, 6-32 x 1/2” Pan MS 2080
3 Circuit Breaker, 10 Amp 2807
4 Motor Assembly 97019
5 Switch, ON/OFF/REMOTE 3283
6 Outlet Receptacle 1832
7 Power Connector 3010
8 Remote Air Switch 1442
Not Shown Foot Pedal Bellows 1443
9 Replacement Bags 3-pack
Replacement Bags 5-pack
10 Front Cover Thumbscrew 1449
Not Shown Power Cord 1422
140 N. Brandon P.O. Box 74, Fallbrook, CA 92028 1-800-VANIMAN (826-4626) www.vaniman.com [email protected]
VMC-A400-3
VMC-A400-5
ABRASIVEVAC-I-08/15 Page 3
 Loading...