

Page 1
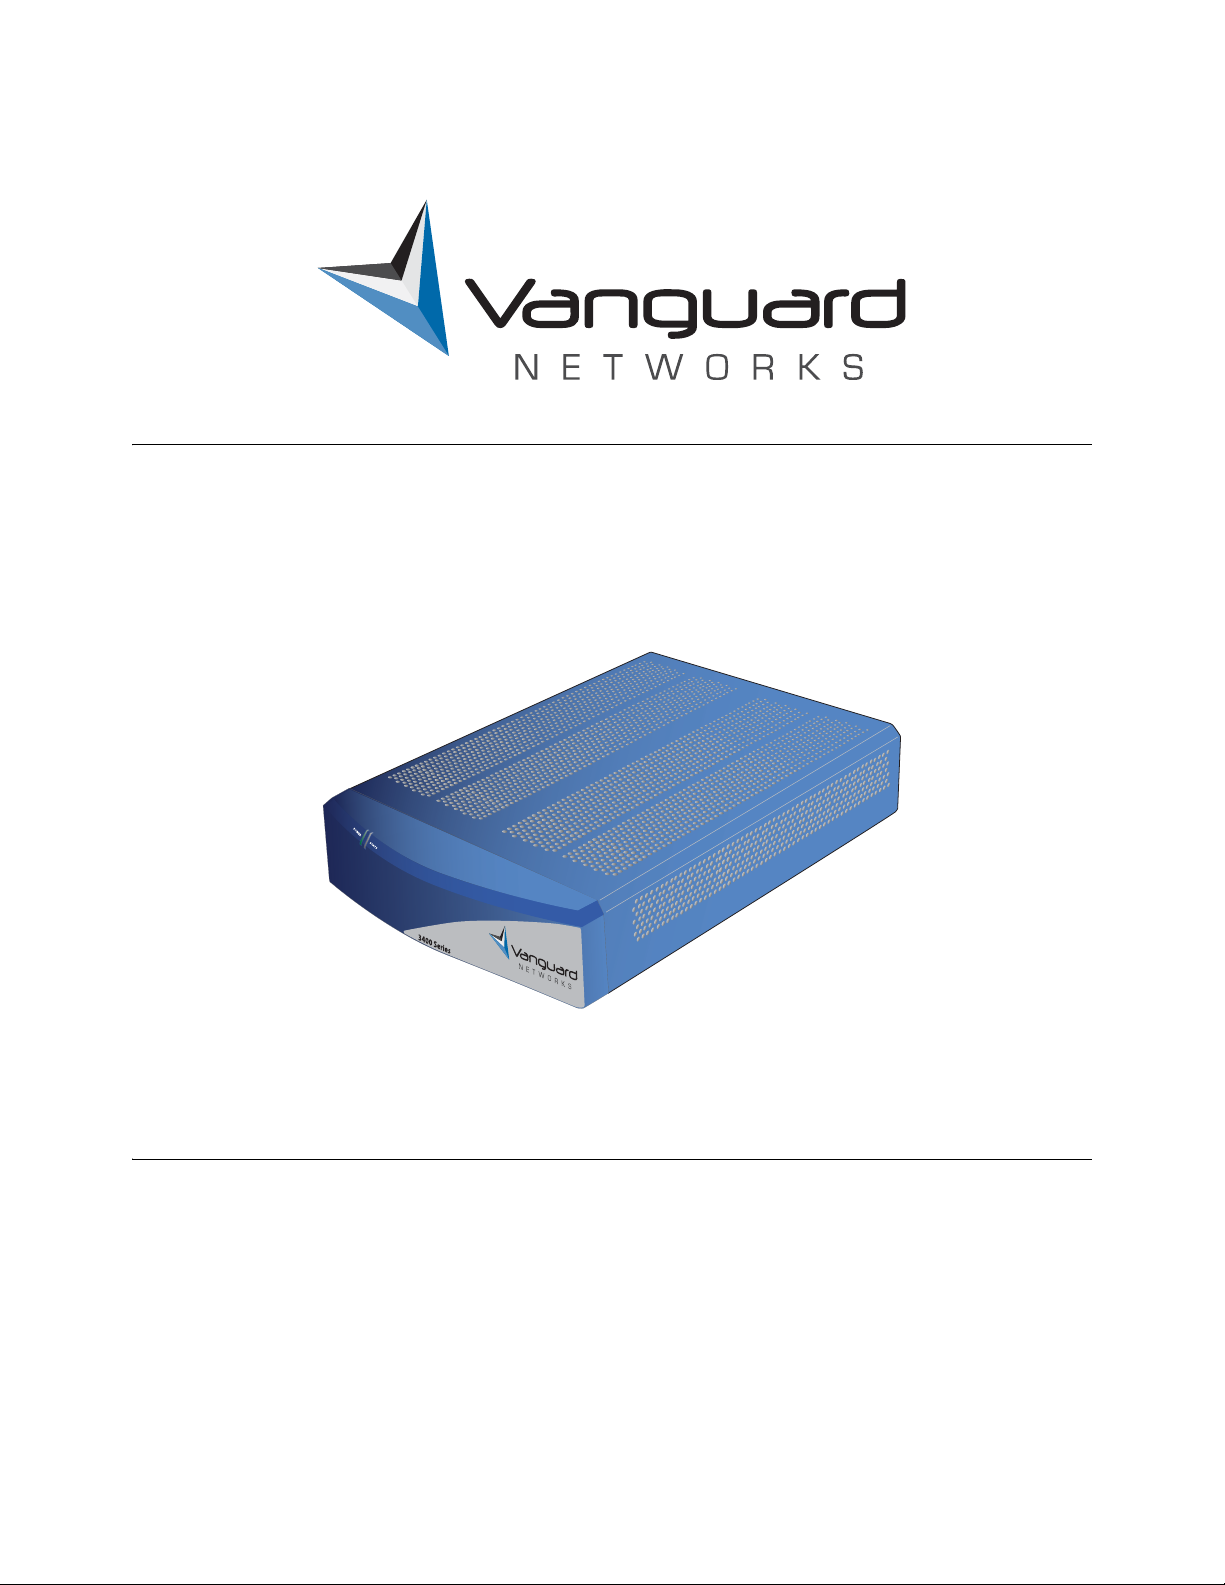
Vanguard 3400 Access Services
Gateway Series
Installation Manual
Page 2

Notice
©Copyright © 200X-2007 Vanguard Networks Solutions, LLC. All rights reserved.
25 Forbes Boulevard
Foxboro, Massachusetts 02035
+1 (508) 964-6200
All rights reserved
Printed in U.S.A.
Restricted Rights Notification for U.S. Government Users
The software (including firmware) addressed in this manual is a "commercial item" as that
term is defined in 48 C.F.R. 2.101, consisting of "commercial computer software" and "com
mercial computer software documentation" as such terms are used in 48 C.F.R. 12.212. Consistent with 48 C.F.R. 12.212 and 48 C.F.R. 227-7202-1 through 227-7202-4, and their
successors as applicable, Customer will provide the Software and/or software documentation
to U.S. Government End Users only pursuant to the terms and conditions therein.
Unpublished - rights reserved under the copyright laws of the United States.
-
Page 3

Notice (continued)
Proprietary Material
Information and software in this document are proprietary to Vanguard Networks (or its
Suppliers) and without the express prior permission of an officer of Vanguard Networks may
not be copied, reproduced, disclosed to others, published, or used, in whole or in part, for any
purpose other than that for which it is being made available. Use of software described in this
document is subject to the terms and conditions of the Software License Agreement.
This document is for information purposes only and is subject to change without notice.
Radio Frequency Interference Regulations
This equipment has been tested and found to comply with the limits for a Class A digital
device, pursuant to Part 15 of the FCC Rules. These limits are designed to provide reasonable
protection against interference when the equipment is operated in a commercial environment.
This equipment generates, uses, and can radiate radio frequency energy and, if not installed
and used in accordance with the instruction manual, may cause harmful interference to radio
communications.
Changes or modifications not expressly approved by Vanguard Networks could void the
user's authority to operate the equipment.
This Class A digital apparatus meets all requirements of the Canadian Interference-Causing
Equipment Regulations.
This is a Class A product. Operation of this equipment in a residential environment may
cause radio interference, in which case the user may be required to take adequate measures to
correct the interference at his/her own expense.
This product was verified under test conditions that included use of shielded DCE cable(s),
and shielded Ethernet cables. Use of different cables will invalidate verification and increase
the risk of causing interference to radio and TV reception.
You can obtain the proper cables from Vanguard Networks.
Telecommunications Regulations
Equipment that complies with Part 68 of the FCC rules includes a label or permanent
marking on the printed circuit board that connects to the network that contains, among other
information, the FCC registration number and ringer equivalence number (REN) for this
equipment. If requested, this information must be provided to the telephone company. A plug
and jack used to connect this equipment to the premises wiring and telephone network must
comply with the applicable FCC Part 68 rules and requirements adopted by the ACTA.
The REN is used to determine the number of devices that may be connected to a telephone
line. Excessive RENs on a telephone line may result in the devices not ringing in response to
an incoming call. In most but not all areas, the sum of RENs should not exceed five (5.0). To
be certain of the number of devices that may be connected to a line, as determined by the total
RENs, contact the local telephone company. The REN for this product is part of the product
identifier that has the format US:AAAEQ##TXXXX. The digits represented by ## are the
REN without a decimal point (e.g., 03 is a REN of 0.3).
Page 4

If this equipment causes harm to the telephone network, the telephone company will notify
you in advance that temporary discontinuance of service may be required. But if advance
notice isn't practical, the telephone company will notify the customer as soon as possible.
Also, you will be advised of your right to file a complaint with the FCC if you believe it is
necessary. The telephone company may make changes in its facilities, equipment, operations
or procedures that could affect the operation of the equipment. If this happens the telephone
company will provide advance notice in order for you to make necessary modifications to
maintain uninterrupted service. If the equipment is causing harm to the telephone network,
the telephone company may request that you disconnect the equipment until the problem is
resolved. Connection to party line service is subject to state tariffs. Contact the state public
utility commission, public service commission or corporation commission for information. If
your home has specially wired alarm equipment connected to the telephone line, ensure the
installation of this equipment does not disable your alarm equipment. If you have questions
about what will disable alarm equipment, consult a trained technician.
Equipment that meets the applicable Industry Canada Terminal Equipment Technical
Specifications is conformed by the registration number. Equipment that complies with
Industry rules includes a label or permanent marking on the printed circuit board that
connects to the network. The abbreviation, IC, before the registration number signifies that
the registration was performed based on a Declaration of Conformity indicating that Industry
Canada technical specifications were met. It does not imply that Industry Canada approved
the equipment.
Part Number T0288 First Printing March 2008
Page 5

About this Manual
Overview ...................................................................................................... vii
Chapter 1.
About the Vanguard 3400 Series
Overview ...................................................................................................... 1-1
Features ......................................................................................................... 1-2
Applications .................................................................................................. 1-5
Chapter 2.
Hardware Description
Overview ...................................................................................................... 2-1
Enclosure ...................................................................................................... 2-2
Motherboard ................................................................................................. 2-4
Vanguard Networks Daughtercards .............................................................. 2-6
Contents
Chapter 3.
Installation and Replacement
Overview ...................................................................................................... 3-1
Checking Your Shipment Contents .............................................................. 3-2
Installing The Vanguard 3400 Series ............................................................ 3-3
Installation ................................................................................................ 3-4
Thermal Considerations ........................................................................... 3-6
Cabling Your Vanguard 3400 Series ........................................................ 3-7
Cable Adapters and Special Cables ...................................................... 3-9
Modifying Your Vanguard 3400 Series ........................................................ 3-12
Installing a Daughtercard ......................................................................... 3-12
Accessing the Motherboard ...................................................................... 3-13
Installing and Removing the Encryption PCI Mezzanine Card ............... 3-17
Installing/Removing the Lithium Battery ................................................ 3-19
Chapter 4.
Powering Up Your Vanguard 3400 Series
Overview ...................................................................................................... 4-1
Power Up Procedure ..................................................................................... 4-2
Loading the Software ................................................................................... 4-3
v
Page 6

Contents (continued)
Appendix A.
Specifications
Overview ...................................................................................................... A-1
Appendix B.
Software License and Regulatory Information
Overview ...................................................................................................... B-1
FCC Part 68 and Telephone Company Procedures and Requirements for
DSU and T1 Interfaces ............................................................................. B-2
Product Declarations and Regulatory Information ....................................... B-4
Return Procedures
Introduction .................................................................................................. Return-1
vi
Page 7

About This Manual
Note
Overview
Introduction This installation manual describes features, hardware, specifications, and
applications for the Vanguard 3400 Series.
For information on operating system software and configuration, see the
Vanguard Basic Configuration Manual (Part Number T0113).
Audience This manual is intended for people who install and operate the Vanguard 3400 Series
products.
How to Use This
Manual
The following table describes the contents of this manual:
This Chapter Description
Chapter 1 Vanguard 3400 Series’ hardware and software features.
Chapter 2 Description of the Vanguard 3400 Series hardware
features and components.
Chapter 3 Installing and replacing Vanguard 3400 Series hard-
ware including cards and motherboard.
Chapter 4 Powerup procedures and software loading.
Appendix A Product specifications.
Appendix B FCC and Telephone Company procedures and
requirements.
vii
Page 8

This Page Intentionally Left Blank
Page 9
Special Notices and Translations
Note
Caution
Warning
Bemærk
Forsigtig
Advarsel
Special Notices The following notices emphasize certain information in the guide. Each serves a
special purpose and is displayed in the format shown:
Note is used to emphasize any significant information.
Caution provides you with information that, if not followed, can result in damage to
software, hardware, or data.
Warning is the most serious notice, indicating that you can be physically hurt.
Simplified Chinese
Danish
Særlige
overskrifter
Følgende overskrifter fremhæver nogle af oplysningerne i vejledningen. De tjener
hvert et specifikt formål og vises i følgende format:
Bemærk anvendes til at fremhæve vigtig information.
Forsigtig understreger oplysninger, som, hvis de ikke bliver fulgt, kan føre til
beskadigelse af software, hardware eller data.
Advarsel er den mest alvorlige overskrift, og tilkendegiver mulig personskade.
ix
Page 10

Opmerking
Let op
Waarschuwing
Huomaa
Vaara
Varoitus
Important
Mise en Garde
Dutch
Bijzondere
vermeldingen
Finnish
Erityisilmoitukset Seuraavat ilmoitukset korostavat tiettyjä oppaan tietoja. Kullakin on oma
De volgende vermeldingen besteden extra aandacht aan bepaalde informatie in
de handleiding. Elke vermelding heeft een eigen nut en wordt in de volgende
opmaak weergegeven:
Een opmerking wordt gebruikt om belangrijke informatie te benadrukken.
Dit kopje geeft aan dat u de beschreven instructies moet volgen om schade aan
de software, hardware of gegevens te vermijden.
Een waarschuwing is de belangrijkste vermelding. Indien u deze niet volgt, kan
dit tot lichamelijke verwondingen leiden.
erikoistarkoituksensa ja ne esitetään seuraavassa muodossa:
Huomautusta käytetään korostamaan tärkeätä tietoa.
French
Messages
spéciaux
Vaarailmoitus antaa tietoa, jonka huomiotta jättäminen voi johtaa ohjelmiston,
laitteiston tai tietojen vahingoittumiseen.
Varoitus on kaikkein vakavin ilmoitus ja se kertoo mahdollisesta
loukkaantumisriskistä.
Les messages suivants mettent en valeur certaines informations dans le guide.
Chacun d’eux remplit une fonction spéciale et est affiché dans le format indiqué :
Important est utilisé pour souligner des informations critiques au sujet d’une
procédure.
Une mise en garde vous fournit des informations qui, si elles ne sont pas observées,
peuvent se traduire par des dommages pour le logiciel, le matériel ou les données.
x
Page 11
Avertissement
German
Wichtig
Vorsicht
Warnung
Nota
Attenzione
Avvertenza
Un avertissement constitue le message le plus sérieux, indiquant que vous pouvez
subir des blessures corporelles.
Besondere
Hinweise
Italian
Simboli speciali I seguenti simboli, ciascuno con una speciale funzione, evidenziano determinate
Durch die folgenden Hinweise werden bestimmte Informationen in diesem
Handbuch hervorgehoben. Jeder Hinweis dient einem bestimmten Zweck und
wird im dargestellten Format angezeigt:
WICHTIG wird zur Betonung signifikanter Angaben zu Vorgehensweisen
verwendet.
Ein Vorsichtshinweis macht Sie darauf aufmerksam, daß Nichtbefolgung zu
Software-, Hardware- oder Datenschäden führen kann.
Eine Warnung weist Sie darauf hin, daß ernsthafte Körperverletzungsgefahr besteht.
informazioni all’interno del manuale. Il formato è quello riportato qui di seguito.
Questo tipo di avvertimento viene utilizzato per evidenziare tutte le informazioni
significative relative ad una procedura.
Questo tipo di avvertimento fornisce informazioni che, se non vengono seguite,
possono provocare danni al software, all’hardware o ai dati.
Questo tipo di avvertimento indica la presenza di condizioni di rischio che
possono causare lesioni fisiche. Si tratta del simbolo più importante al quale
prestare attenzione.
xi
Page 12
Merk
Forsiktig
Advarsel
Japanese
Korean
Norwegian
Spesielle
merknader
xii
Merknadstypene nedenfor representerer en bestemt type informasjon i håndboken.
Hver merknadstype har en spesiell hensikt og vises på følgende format:
Merk brukes for å fremheve viktig informasjon.
Forsiktig gir deg informasjon om situasjoner som kan føre til skade på programvare,
datamaskin eller data dersom den blir fulgt.
Advarsel er den mest alvorlige merknaden og indikerer at du kan bli fysisk skadet.
Page 13
Portuguese/
Nota
Atenção
Cuidado
Nota
Advertencia
Aviso
OBS!
Viktigt
Portugal
Avisos Especiais Os avisos que se seguem realçam certas informações neste guia. Cada um deles serve
um objectivo especial e é visualizado no formato apresentado:
Nota é utilizado para realçar qualquer informação importante.
Atenção faculta-lhe informações que, se não forem cumpridas, poderão provocar
danos no software, hardware ou nos dados.
Cuidado constitui o aviso mais grave, o qual indica que poderá ficar
fisicamente ferido.
Spanish/Spain
Notificaciones
especiales
Swedish
Speciella
beteckningar
Las siguientes notificaciones ponen énfasis sobre determinada información de la
guía. Todas tienen un propósito especial y se muestran con el formato siguiente:
Las notas se utilizan para destacar determinada información de importancia.
Las advertencias le proporcionan información que debe seguirse, si no desea que el
software, el hardware o los datos puedan verse dañados.
Los avisos son las notificaciones de carácter más importante e indican la posibilidad
de daños físicos para el usuario.
Följande beteckningar betonar viss information i handboken. Var och en har ett
speciellt syfte och visas i formatet nedan:
OBS! används för att betona viktig information.
Viktigt ger dig information som, om den inte följs, kan resultera i skada i
programvara, maskinvara eller data.
xiii
Page 14

Varning
Varning är den mest allvarliga beteckningen och den indikerar att du kan
skadas fysiskt.
xiv
Page 15

Customer Information
Customer
Questions
Comments About
This Manual
Customers who have questions about Vanguard Networks products or services
should contact your Vanguard Networks representative or visit this website for
product, sales, support, documentation, or training information:
http://www.vanguardnetworks.com/
To help us improve our product documentation, please complete the comment card
included with this manual and return it by fax to (508) 543-0237. If you prefer,
provide your name, company, and telephone number, and someone in the
documentation group will contact you to discuss your comments.
Customer Information xv
Page 16

This Page Intentionally Left Blank
Page 17

Customer Response Card
Vanguard Networks would like your help in improving its product documentation. Please complete and
return this card by fax to (508) 543-0237; Attention: Product Documentaton, to provide your feedback.
To discuss comments with a member of the documentation group, provide telephone information at the
bottom of this page. Thank you for your help.
Name _________________________________________________________________________
Company Name _________________________________________________________________
Address _______________________________________________________________________
_______________________________________________________________________
_______________________________________________________________________
Document Title: Vanguard 3400 Series Installation Manual
Part Number:
Please rate this document for usability:
Excellent Good Average Below Average Poor
What did you like about the document? ______________________________________________
______________________________________________________________________________
Cut Here
______________________________________________________________________________
______________________________________________________________________________
______________________________________________________________________________
What information, if any, is missing from the document? _________________________________
______________________________________________________________________________
______________________________________________________________________________
______________________________________________________________________________
______________________________________________________________________________
Please identify any sections/concepts that are unclear or explained inadequately.
______________________________________________________________________________
______________________________________________________________________________
______________________________________________________________________________
______________________________________________________________________________
Additional comments/suggestions. __________________________________________________
______________________________________________________________________________
______________________________________________________________________________
______________________________________________________________________________
______________________________________________________________________________
Telephone ________________________ Ext. _________________ Best time to call __________
Page 18

This Page Intentionally Left Blank
Page 19
Chapter 1
About the V anguard 3400 Series
Overview
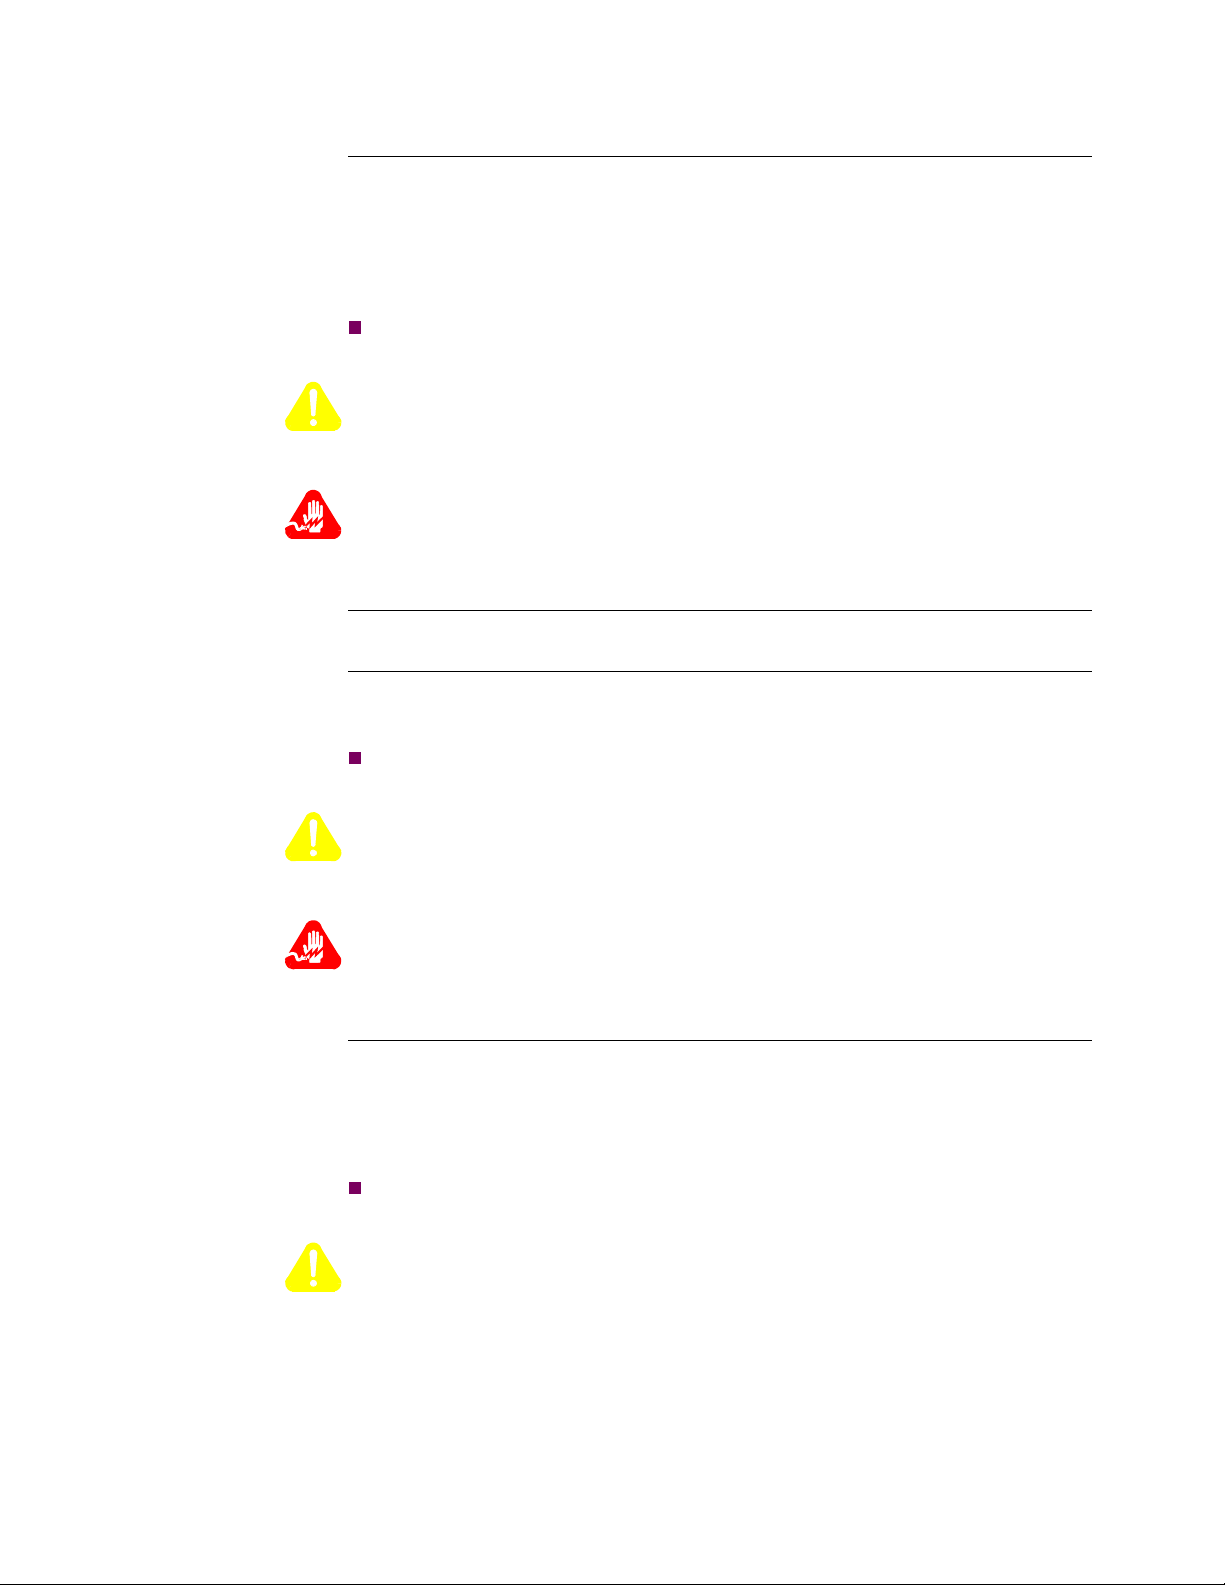
Description The Vanguard 3400 Access Services Gateway Series is a single platform that can
support any application to any service, providing wide area network (WAN) access
for service provider and enterprise customers.
Figure 1-1. Vanguard 3400 Series
For a detailed description of the Vanguard 3400 Series and its features, refer to the
“Features” section on page 1-2.
For descriptions of the Vanguard 3400 Series Daughtercards and other hardware
components, refer to the appropriate sections in Chapter 2, Hardware Description.
About the Vanguard 3400 Series 1-1
Page 20

Features
Features
Introduction This section summarizes the features available with your Vanguard 3410 and
Vanguard 3460. For descriptions of the software running on your Vanguard 3410/
3460, refer to the appropriate protocol document.
This table lists the hardware features of the Vanguard 3400 Series:
Hardware Features
Product
Target
Memory 64 MB SDRAM 64 MB SDRAM
OnBoard Flash 16 MB 16 MB
Compact Flash N N
Form Factor Modular Modular
Daughter Card Slots 1 2
Mini PCI Card Slots 1 1
Ethernet Ports (Total)
10/100BT
Serial Ports
MB Serial Ports
CTP
DC Serial Ports
V. 90 P or t s
2
2
1
1 (RS232)
1x
0
0
DSU Ports 1 2
ISDN (S/T & U) Ports 0 0
FT1/FE1 Ports 1 2
Digital Voice
T1/E1 Channels
T1/E1 Ports
Analog Voice Ports
FXS Ports
E&M Ports
FXO Ports
BRI-Voice Ports
N
0
0
0
0
0
0
0
(ISDN)
Compression N N
Encryption Y Y
Applications Ware Y Y
Performance (PPS) (LAN
40k 40k
to WAN)
S/W IP Sec VPN Y
Available in software bundles
VG 3410
Small Branch FSP
Data Only
VG 3460
Small Branch
IPT Gateway
2
2
3
1 (Universal)
1x
2
2
E1 PRI channel density limited to 46
N
0
0
8
8
4
8
0
Y
1-2 About the Vanguard 3400 Series
Page 21

Features
Hardware Features (continued)
Product
Target
VG 3410
Small Branch FSP
Data Only
VG 3460
Small Branch
IPT Gateway
Power (DC) N N
Redundant Power N N
For additional information about the rear panel ports and the daughtercards, refer to
appropriate section in
Chapter 2, Hardware Description.
For information about the physical specifications of the Vanguard 3400 Series, refer
Appendix A, Specifications.
to
Daughtercards You can purchase daughtercards to expand the capability of your Vanguard 3400
Series.
Vanguard 3400 Series Daughtercard Matrix
Description Product
Code
Assembly
Number
3410 3460
DC
Site
DC
Site 1
DC
Site 2
2P-SDC (2-Port Serial) 1130-10004 --- Yes ---
56K DSU 68472 Ye s Yes Ye s
Dual E&M 65729 --- Yes Ye s
Dual FXS 68372 --- --- ---
FT1 - 120 Ohm 49666 Ye s Ye s Ye s
FE1 - 120 Ohm 49669 Ye s Ye s Ye s
FE1 - 75 Ohm 49716 Ye s Ye s Ye s
FXS/FXO 80019 --- --- ---
G.SHDSL 1152-10009 --- --- ---
Quad FXO 1152-10035 --- Yes Yes
Quad FXS 1152-10034 --- Yes Ye s
ISDN BRI S/T 68525 --- --- ---
ISDN BRI S/T 1152-10005 --- --- ---
ISDN BRI-U 68434 --- --- ---
V.11 DCE (Serial) 49649 --- --- ---
V. 24 DC E (S e r i al ) 49646 --- --- ---
V. 35 DC E (S e r i al ) 49647 --- --- ---
V. 36 DC E (S e r i al ) 49648 --- --- ---
V.11 DTE (Serial) 49661 --- --- ---
V.24 DTE (Serial) 49658 --- --- ---
V.35 DTE (Serial) 49659 --- --- ---
V.36 DTE (Serial) 49660 --- --- ---
About the Vanguard 3400 Series 1-3
Page 22

Features
Note
Note
Vanguard 3400 Series Daughtercard Matrix (continued)
Description Product
Code
Assembly
Number
3410 3460
DC
Site
DC
Site 1
V. 90 (M o de m) 1152-10003 --- Yes Yes
If a table entry contains the value "Yes", the daughtercard type will be supported
in the DC Site for that platform.
If a table entry contains the entry " --- ", the daughtercard type will not be
supported in that DC Site of that platform.
Software Support The Vanguard 3410/60 requires Release 7.0.P12A or greater software.
You can obtain Applications Ware Packages that can be tailored to your specific
needs. Vanguard Networks Applications Ware packages are divided into licenses
available for Vanguard Networks products. These licenses include the following
packages:
•IPSAFE
• SNA+
• Multiservice
Optional licenses include:
• Security
• Voice Applications Ware
• Advanced Voice Applications
For details about the contents of the license upgrade packages and how they can be
obtained, refer to the latest Software Release Notice.
DC
Site 2
A license refers to both a legal document that allows you to use features and to
the software that contains those features. For license features, please consult the
software matrix or call your sales representative."
Vanguard 3400 Series Licenses
LICENSE 3410 3460
Base
IP Safe X X
SNA+ X X
MS X X
Upgrade License
Vo i c e X
Security X X
Advance Voice X
1-4 About the Vanguard 3400 Series
Page 23
Applications
MPLS/FR
Vanguard 3410
Ethernet
BSC
FT1
Vanguard 6841
Corporate Data
Center
Multiple Devices
Back Up
Vanguard 3410
xDSL Modem
Applications
Introduction This section illustrates some typical applications of the Vanguard 3410/60.
Figure 1-2. ATM/Small Bank Branch Application
About the Vanguard 3400 Series 1-5
Page 24

Applications
IPSec
IPSec
IPSec
MPLS/FR
Vanguard 3410
Serial
FT1
Vanguard 6841
Corporate Data
Center
Multiple Devices
Back Up
Vanguard 3410
xDSL Modem
Figure 1-3. Retail Transaction Application
1-6 About the Vanguard 3400 Series
Page 25

Applications
WAN
(IP/MPLS)
PSTN
FaxLaptop
Main Office
Small/Medium Branch Office
6800 Series
PRI
FXO
3460ASG
Soft Switch
Analog
Phone
IP Telephone
Figure 1-4. Hosted, SIP-based IP Telephony Application for Small/ Medium Branch Offices
About the Vanguard 3400 Series 1-7
Page 26

Applications
WAN
PSTN
FaxLaptop
SIP IPPBX
Data Center
Small/Medium Branch Office
7300 Series
IPSec
IPSec
PRI
FXO
3460ASG
Analog
Phone
IP Telephone
1-8 About the Vanguard 3400 Series
Figure 1-5. SIP IPPBX-based, Centralized Telephony Application for Small/Medium Branch Offices
Page 27

Overview
Introduction This chapter describes the Vanguard 3400 Series.
•Enclosure
• Motherboard
• Vanguard Daughtercards
• Vanguard Modules
Chapter 2
Hardware Description
Hardware Description 2-1
Page 28

Enclosure
Enclosure
Introduction This section describes the components of the Vanguard 3400 Series enclosure.
Enclosure The Vanguard 3400 Series models are standalone units with an external 110/220
VAC power supply that can be used either on a desktop or installed on a rack shelf.
The enclosures contain a motherboard, (optional) daughtercards, and optional mini
PCI modules.
Front Panel The front panel of the Vanguard 3400 Series (see Figure 2-1) has two LEDs that
provide node status. For a description of the LEDs refer to the “Powering Up Your
Vanguard 3400 Series” section in Chapter 4.
Figure 2-1. Vanguard 3400 Series Front Panel
Rear Panel Figure 2-2 shows the Vanguard 3400 Series rear panels. The available ports on the
rear panel for the 3400 models are listed in the table below.
Port 3410 3460
Serial Port 1 Async Ye s Yes
Serial Port 1 Sync Ye s Yes
CTP Port 4 Ye s Yes
Routed Ethernet Port 23 Yes Yes
Routed Ethernet Port 24 Yes Yes
Daughtercard Site Port 7 Ye s Yes
Daughtercard Site Port 10 --- Ye s
2-2 Hardware Description
Page 29

Enclosure
Note
Caution
Serial Number Label
3410
5V DC
Power
Input
5V DC
Power
Input
DC Site 1
Ports 7-9
RS-232 Serial
(Sync/Async)
Port 1
DC Site 1
(Ports 7-9, 51-54)3460
Multi-Function
Serial
Port 1
CTP
Port 4
(Ports 10-12, 61-64)
CTP
Port 4
Routed
Ethernet Ports
Ports 23, 24
DC Site 2
Routed
Ethernet Ports
Ports 23, 24
Figure 2-2. Vanguard 3400 Series Rear Panels
For information about cabling, refer to the “Cabling Your Vanguard 3400
Series” section in Chapter 3.
Do not connect Ports 4, 23, or 24 to the Public Communications Network.
Serial Numbers The Hardware Serial Number indicates the version of hardware in your unit. The
serial number label is located on ther rear panel of the Vanguard 3400 Series.
Refer to the serial number when contacting your Vanguard Networks Service
Representatives.
Figure 2-3. Vanguard 3400 Series Serial Number Label Location
Hardware Description 2-3
Page 30

Motherboard
Motherboard
General Description
The Vanguard 3400 Series motherboard contains 16 MB flash and 64 MB of
SDRAM memory. It uses the MPC8270 CPU operated in single MPC 8270 mode.
Additionally, the motherboard supports the following:
• One or two daughtercards, depending on which model you have (see daughtercard matrix on page 2-6 for model-specific support)
• One Serial Port, depending on which model you have
• Up to two 10/100 Base T auto-sensing Ethernet ports. (Refer to rear panel
matrix on
page 2-2 for support by model)
• One CTP port
• Two Front Panel green LEDS; Power and Status
• Connector for external 5V power supply
• Encryption PCI Mezzanine card
• Real Time clock battery
Figure 2-4 shows the location of the 3410 motherboard components and Figure 2-5
shows the location of the 3460 motherboard components.
Future Expansion Connection for Upgradeablity
Daughtercard Slot 1
Encryption Module
Serial Number
Label
Battery
Figure 2-4. Vanguard 3410 Series Motherboard
2-4 Hardware Description
Page 31

Future Expansion Connection for Upgradeablity
Daughtercard Slot 1
Motherboard
Encryption Module
Accessing the Motherboard
Serial Number
Label
Daughtercard Slot 2 Fan
Battery
Figure 2-5. Vanguard 3460 Series Motherboard
To access the motherboard components you must remove the motherboard from the
enclosure.
• For information about removing and installing the motherboard refer to the
“Accessing the Motherboard” section in Chapter 3.
• For information about removing or installing motherboard components, refer
“Modifying Your Vanguard 3400 Series” section in Chapter 3.
to the
Hardware Description 2-5
Page 32

Vanguard Networks Daughtercards
Note
V anguard Networks Daughtercards
Supported Daughtercards
The table below identifies the daughtercards supported by each 3400 series model, as
well as any daughtercard slot restrictions that may apply.
Vanguard 3410 Daughtercard Matrix
Description Product
Code
2P-SDC (2-Port Serial) 1130-10004 --- Yes ---
56K DSU 68472 Ye s Ye s Ye s
Dual E&M 65729 --- Ye s Ye s
Dual FXS 68372 --- --- ---
FT1 - 120 Ohm 49666 Ye s Ye s Ye s
FE1 - 120 Ohm 49669 Ye s Ye s Ye s
FE1 - 75 Ohm 49716 Ye s Ye s Ye s
FXS/FXO 80019 --- --- ---
G.SHDSL 1152-10009 --- --- ---
Quad FXO 1152-10035 --- Ye s Ye s
Quad FXS 1152-10034 --- Yes Ye s
ISDN BRI S/T 68525 --- --- ---
ISDN BRI S/T 1152-10005 --- --- ---
ISDN BRI-U 68434 --- --- ---
V.11 DCE (Serial) 49649 --- --- ---
V. 24 DC E (S e r i al ) 49646 --- --- ---
V. 35 DC E (S e r i al ) 49647 --- --- ---
V. 36 DC E (S e r i al ) 49648 --- --- ---
V.11 DTE (Serial) 49661 --- --- ---
V.24 DTE (Serial) 49658 --- --- ---
V.35 DTE (Serial) 49659 --- --- ---
V.36 DTE (Serial) 49660 --- --- ---
V. 90 (M o de m) 1152-10003 --- Yes Yes
Assembly
Number
3410 3460
DC
Site
DC
Site 1
DC
Site 2
If a table entry contains the value "Yes", the daughtercard type will be supported
in the DC Site for that platform.
If a table entry contains the entry " --- ", the daughtercard type will not be
supported in that DC Site of that platform
2-6 Hardware Description
Page 33

Vanguard Networks Daughtercards
Caution
DSU
Dimple
DSU
Daughtercard Compatibility
Older Vanguard Networks Daughtercards do not fit into the Vanguard 3400 Series.
You can only use the newer daughtercards which are identified by a dimple as shown
in Figure 2-5. If the dimple is not present, do not attempt to use the Daughtercard in
the Vanguard 3400 Series.
Also, when installing a Vanguard Networks Daughtercard into a 3400 Series, you
must use the shorter two-sided header. The taller header is used with other Vanguard
Networks units.
Figure 2-6. New Vanguard 3400 Series Daughtercard Example
If you attempt to force an older Vanguard Networks Daughtercard into a Vanguard
3400 Series, the equipment will be damaged.
If you have an older Vanguard Networks Daughtercard and would like to use it in a
Vanguard 3400 Series, contact your service representative about having the card
reworked.
56K DSU/CSU Daughtercard
The 56K DSU Daughtercard provides an RJ48S connector and can support speeds of
56 kbps (synchronous). It conforms to AT&T 62310 point-to-point and multipoint,
and to ANSI T1/E1.4/91-006 56 kbps. The card supports the following capabilities:
• Internal/external clocking
• Internal/external loopback
• 4-wire line driver operation
The card also supports multidrop DSUs when either of these conditions exist:
• If a MARK Idle protocol is used (such as MX25).
• If the Telco uses an OR'ed or Data Contention is used to mix individual DRU
drops.
Figure 2-7 shows the 56K DSU/CSU Daughtercard connector as it appears on the
back panel.
Figure 2-7. 56K DSU/CSU Daughtercard Connector
Hardware Description 2-7
Page 34

Vanguard Networks Daughtercards
Note
T1
NTWK
ALARM
E1
RX TX
NTWK
ALARM
LOC
REM
E&M1 E&M2
FXS-1 FXS-2 FXS-3 FXS-4
FT1/FE1 Daughtercards
The FT1/FE1 Daughtercards allow a Vanguard 3410 to transfer data over a T1 or E1
network. The daughtercards support full and fractional, channelized, T1 or E1, and
PRI ISDN speeds.
• The E1 Daughtercard provides line rates 2.048 Mbps and data rates of n x 64
kbps (where n is 1 to 31) per channel.
• The T1 Daughtercard provides line rates 1.544 Mbps and data rates of n x 64
kbps (where n is 1 to 24) per channel.
Figure 2-8 shows the T1 and the E1 Daughtercard connectors as they appear on the
back panels. The T1 Daughtercard has a single RJ48C connector while the E1
Daughtercard has two BNC connectors along with one RJ48C connector.
\
Figure 2-8. FT1 and FE1 Daughtercard Connectors
The E1 Daughtercard comes with this label which specifies that the E1
interface complies with the Australian requirements ACA TS 016 - 1997 for
connection to E1 SELV services. Also the E1 interface meets the IEC950
specifications for TNV1.
Dual E&M Daughtercard
4-Port Voice FXS Daughtercard
The Dual E&M Daughtercard has two E&M interfaces. The ports use RJ11
connectors.
Figure 2-9 shows the Dual E&M Daughtercard connectors as they appear on the
back panel.
Figure 2-9. Dual E&M Daughtercard Connectors
The Vanguard Quad FXS Daughter Card is supported on the Vanguard 3460/3480.
The 4-Port Voice FXS Daughtercard has four RJ11 connectors for four FXS Ports.
Figure 2-10 shows the 4-Port Voice FXS Daughtercard connectors as they appear on
the back panel.
.
Figure 2-10. FXS Daughtercard
2-8 Hardware Description
Page 35

Vanguard Networks Daughtercards
FXO-1 FXO-2 FXO-3 FXO-4
RI OH
CD
.
MR
RXD
LINE
PHONE
4-Port Voice FXO Daughtercard
V.90 Modem Daughtercard
The Vanguard Quad FXO Daughter Card is supported on the Vanguard 3460/3480.
The 4-Port Voice FXO Daughtercard has four RJ11 connectors for four FXO Ports.
Figure 2-11 shows the 4-Port Voice FXO Daughtercard connectors as they appear on
the back panel.
Figure 2-11. FXO Daughtercard
The V.90 modem daughtercard provides Async PPP dial back-up for a customers’
applications or can be used for Async dial connections such as remote CTP access.
The V.90 uses a dual RJ-11 for connection to central offices, PBXs or telephone
systems.
Figure 2-12 shows the rear panel connectors on the V.90 modem daughtercard. For
installation instructions, refer to the Vanguard Daughtercard Installation Guide
(Part Number T0020).
Figure 2-12. V.90 Modem Daughtercard Connectors
Hardware Description 2-9
Page 36

Vanguard Networks Daughtercards
This Page Intentionally Left Blank
2-10 Hardware Description
Page 37

Installation and Replacement
Overview
Introduction This chapter provides instructions for the following tasks:
• Checking Your Shipment Contents.
• Installing the Vanguard 3400 Series.
• Cabling the Vanguard 3400 Series.
• Modifying Your Vanguard 3400 Series.
Chapter 3
Installation and Replacement 3-1
Page 38

Checking Your Shipment Contents
Vanguard 3400 Series Power Supply
Vanguard 3400 Series Shipping Contents
• Vanguard 3400 Series enclosure
• Power Supply
Vanguard 3400 Series
Power Cord
(Optional)
Checking Your Shipment Contents
List of Contents Before you install the Vanguard 3400 Series, make sure your shipment contents are
complete.
The Vanguard 3400 Series is packaged in shock-absorbent packing material. Inside
your shipping carton, you should find the contents shown in
Figure 3-1.
Figure 3-1. Vanguard 3400 Series Shipping Contents
3-2 Installation and Replacement
Page 39

Installing The Vanguard 3400 Series
Installing The Vanguard 3400 Series
Introduction This section explains how to install the Vanguard 3400 Series. It consists of these
sections:
• Selecting and preparing the installation site.
• Installation.
• Thermal considerations.
• Cabling.
After the Vanguard 3400 Series is installed and cabled, go to Chapter 4, Powering
Up Your Vanguard 3400 Series for instructions for powering-up the unit.
Installation and Replacement 3-3
Page 40

Installing The Vanguard 3400 Series
Caution
Minimum 2-inches (5 cm) Front
and 6-inches (15 cm) Rear
Note: Do not remove the rubber
feet from the bottom of the
unit. They allow for proper
air flow.
Minimum 2-inches (5 cm)
on either side for ventilation.
Installation
How to Choose a Site
Before you install the Vanguard 3400 Series, select a site for the device.
Choose a site that is within an appropriate distance of a power source. Depending on
your application, and the country in which the Vanguard 3400 Series is to operate,
the power source must be a grounded 110 to 220 Vac outlet.
Leave at least 2 inches (5 cm) of clearance in front of the front panel, to allow you to
see the front panel LEDs, and 6-inches behind the unit for cable clearances (see
Figure 3-2). For proper ventilation, leave 2 inches (5 cm) of clearance on the sides.
The site should be free of accumulated dust and environmental extremes. Refer to
Appendix A, Specifications for details.
Figure 3-2. Proper Cable and Air Clearance
Vanguard 3400 Series devices should be used in environments designed for
computers and electronic equipment. In areas susceptible to lightning, take
precautions to prevent damage to electronic equipment. Contact your telephone
company or an electronic accessories vendor for information on lightning protection
equipment. Customers experiencing problems caused by surges from lightning have
eliminated such problems by installing appropriate surge suppressors on power and
data lines.
3-4 Installation and Replacement
Page 41

Installation Complete these steps to install the unit:
Note
Caution
Step Action
1 Unpack the Vanguard 3400 Series, and inspect the unit to ensure you have
all the components.
2 Install any daughtercards that you need to add to the unit, as necessary.
3 Be sure that the four rubber feet are on the bottom of the enclosure.
4 Attach the power cord and cables to the rear panel. Refer to the “Cabling
Your Vanguard 3400 Series” section on page 3-7 for cabling information.
5 Place the enclosure in the selected site, and power unit on. Do not block
the chassis vents.
6 Ensure that the ambient temperature is within the temperature range speci-
fied in Appendix A.
You can stack as many as three Vanguard 3400 Series units on top of each other.
Installing The Vanguard 3400 Series
Do not place items weighing more than 20 pounds (9 kg) on top of a Vanguard
3400 Series enclosure.
Installation and Replacement 3-5
Page 42

Installing The Vanguard 3400 Series
Thermal Considerations
Introduction This section explains some of the heat and temperature factors that can affect your
Vanguard 3400 Series.
Temperature After the unit is running, check the ambient air temperature. Make sure it does not
exceed the operating temperature limits specified in Appendix A.
Other conditions that could impact internal temperature of the Vanguard 3400 Series
include:
• Blocked vents
• Insufficient clearance around the unit
• Fan (if this unit is provided with one) is not working properly
• Rubber feet (4) not installed on bottom of chassis
3-6 Installation and Replacement
Page 43

Installing The Vanguard 3400 Series
Caution
Caution
Cabling Y our Vanguard 3400 Series
Introduction This section provides information to help you cable your Vanguard 3400 Series.
Before connecting cables to the motherboard or daughtercard ports, be sure that the
screws holding the motherboard in place are installed. Otherwise, the motherboard
could loosen under the weight of the cables and cause damage to the equipment.
Also use proper cable strain relief to prevent damage due to excessive cable weight.
Rear Panel Port Numbering
Figure 3-3 shows the port numbering on the Vanguard 3400 Series rear panels.
DC Site 1
Ports 7-93410
5V DC
Power
Input
RS-232 Serial
(Sync/Async)
Port 1
DC Site 1
(Ports 7-9, 51-54)3460
CTP
Port 4
(Ports 10-12, 61-64)
Routed
Ethernet Ports
Ports 23, 24
DC Site 2
5V DC
Power
Input
Multi-Function
Serial
Port 1
CTP
Port 4
Routed
Ethernet Ports
Ports 23, 24
Figure 3-3. Vanguard 3400 Series Rear Panel Port Numbers
Do not connect the Ports 4, 23, or 24 to the Public Communications Network.
Installation and Replacement 3-7
Page 44

Installing The Vanguard 3400 Series
Rear Panel Ports There are up to twelve physical ports (8 voice, 2 LAN, 1 Serial, and 1 CTP) on the
Vanguard 3400 Series rear panel. Some physical port numbers may vary from model
to model.
Port 1
Port 1 of the 3410 is a RS232 Serial Interface. Port 1 of the 3460 is a Universal
(V.24/RS232, V.35/V.36, or V.11/X.21) Serial Interface..
.
3410 Motherboard Port 1
Cabling
DCE-DTE Crossover Cable Cable
Interface Type
Motherboard Port 1
V. 24 /R S 23 2 D C E N/A 80113 15' DB25M-DB25F
V. 24 /R S 23 2 D T E 80110 3' DB25M-DB25M
N/A
or 80109 15' DB25M-DB25M
The table below provides a description with part numbers of the Cable Adapter and
special cables (see
“Cable Adapters and Special Cables” section on page 3-9). The
paragraphs that follow provide more detailed information and pinouts.
3460 Motherboard Port 1 and 2-Port Serial Data Card Interface
Cabling
Interface Type
Y-Cable
(one per
Cable Adapter
(one per port)
DCE-DTE crossover
Cable (one per port)
Adapter Cable
(one per port)
2-PSDC)
Motherboard Port 1
V. 24 /R S 23 2 D C E N/A N/A N/A 80113
15' DB25M-DB25F
V. 24 /R S 23 2 D T E N/A N/A 80110
N/A
3' DB25M-DB25M
or 80109
15' DB25M-DB25M
V.35 or V.36 DCE N/A 1152-10021
DB25M-DB25F
N/A 92104
7' DB25M-M34F
V.35 or V.36 DTE N/A 1152-10021
DB25M-DB25F
V. 11 / X. 21 D CE N/A 1152-10022
DB25M-DB25F
V. 11 / X. 21 D TE N/A 1152-10022
DB25M-DB25F
51177
1' DB25M-DB25F
91917
7' DB25M-M34M
N/A 92089
7' DB25M-DB15F
51176
1' DB25M-DB25F
91918
7' DB25M-DB15M
2-Port Serial Data Card
V. 24 /R S 23 2 D C E 62026-01 DB50M-
two DB25Fs
3-8 Installation and Replacement
N/A N/A 80113
15' DB25M-DB25F
Page 45

Installing The Vanguard 3400 Series
3460 Motherboard Port 1 and 2-Port Serial Data Card Interface
(continued)
Cabling
Interface Type
Y-Cable
(one per
2-PSDC)
V. 24 /R S 23 2 D T E 62026-01 DB50M-
two DB25Fs
V.35 or V.36 DCE 62026-01
DB50M-two
DB25Fs
V.35 or V.36 DTE 62026-01
DB50M-two
DB25Fs
V. 11 / X. 21 D CE 62026-01
DB50M-two
DB25Fs
V. 11 / X. 21 D TE 62026-01
DB50M-two
DB25Fs
Cable Adapters and Special Cables
To emulate a high speed DTE interface V.11/X.21, V.35, or V.36 on any 3460 Series
Universal Serial Port requires the use of a Cable Adapter (
cables.
Cable Adapter
(one per port)
DCE-DTE crossover
Cable (one per port)
N/A 80110
3' DB25M-DB25M
or 80109
15' DB25M-DB25M
1152-10021
N/A 92104
DB25M-DB25F
1152-10021
DB25M-DB25F
1152-10022
51177
1' DB25M-DB25F
N/A 92089
DB25M-DB25F
1152-10022
DB25M-DB25F
51176
1' DB25M-DB25F
Adapter Cable
(one per port)
N/A
7' DB25M-M34F
91917
7' DB25M-M34M
7' DB25M-DB15F
91918
7' DB25M-DB15M
Figure 3-4) and special
1152-10022
REV. 1
V.11
X.21
1152-10021
REV. 1
V.35
V.36
Figure 3-4. Cable Adapters
Installation and Replacement 3-9
Page 46

Installing The Vanguard 3400 Series
Pin 8
Pin 1
This table describes the DB25 connector pinouts for port 1:
DB25 V.24 Pinouts (DCE)
Pin ITU Circuit I/O Signal Name
1 --- ----- Protective Ground
2 103 INPUT Transmitted data
3 104 OUTPUT Received data
4 105 INPUT Request To Send
5 106 OUTPUT Clear To Send
6 107 OUTPUT Data Set Ready
7 102 ----- Signal Ground
8 109 OUTPUT Data Carrier Detect
14 --- INPUT Data Restraint Out
15 114 OUTPUT Transmitted Clock
16 --- ----- N/C
17 115 OUTPUT Received Clock
18 --- INPUT External Rx Clock
20 108/2 INPUT Data Terminal Ready
21 --- ----- N/C
22 125 OUTPUT Ring Indicator
24 113 INPUT External Tx Clock
25 142 INPUT Make Busy
Port 4 This port has an RJ-45 connector. Use Port 4 as the CTP for Use Port 4 as the CTP
for communicating with, configuring, monitoring, and for coldloading the node.
Figure 3-5 shows the pin numbers for port 4.
Figure 3-5. Port 4 Pin Numbers
3-10 Installation and Replacement
Page 47

Installing The Vanguard 3400 Series
Note
This table shows the pinouts for RJ-45 connectors for port 4:
Pin Number Port 4 (CTP)
Signal DCE
1 RTS Input
2 DTR Input
3 RXD Output
4 DCD Output
5 GND -------
6 TXD Input
7 DSR Output
8 CTS Output
Use Port 4 only with low speed asynchronous protocols. Running asynchronous
protocols at speeds greater than 19.2 kbps may degrade node performance.
Port 23 and Port 24 This table shows the pinouts for the RJ45 Ethernet connector for Ports 23 and 24:
Pin Signal
1 Transmit Positive
2 Transmit Negative
3 Receive Data Positive
4 Not Used
5 Not Used
6 Receive Data Negative
7 Not Used
8 Not Used
Installation and Replacement 3-11
Page 48

Modifying Your Vanguard 3400 Series
Note
Remove a Daughtercard
Locate the Daughtercard you want to remove
and loosen the screws that are holding it to the
back panel.
Loosen and remove the mounting screw(s).
Carefully lift out the daughtercard.
123
Install a Daughtercard
Locate the slot where you want to install the Daughtercard and remove the filler
panel by loosening the screws.
Note
If original Blank Panel is installed, insert a screwdriver into the slot at the center
(as shown in inset) of the filler panel and work the screwdriver up and down to
loosen the panel. Detach the filler panel from the tabs at each end and remove.
Carefully position the Daughtercard over the connector. Press down firmly so the
daughtercard connector seats properly with the motherboard connector.
Secure the Daughtercard with the mounting screws on the back panel as well as
either 1 on 2 screws to the internal card stand-offs.
CAUTION: Ensure that daughtercard connector pins are properly aligned with
the corresponding motherboard connector to prevent damage to the card when
power is applied.
1
2
3
Modifying Y o ur V anguard 3400 Series
Introduction You can modify your Vanguard 3400 Series by adding or replacing daughtercards or
mini-PCI modules. This section explains how to make these modifications.
Installing a Daughtercard
Introduction You can install one Vanguard Networks Daughtercards in the Vanguard 3410 and
two Vanguard Networks Daughtercards in the 3460.
For information about installing a standard Vanguard Daughtercard, refer to the
sample daughtercard installation illustration in
Daughtercard Installation Guide (Part Number T0020).
When installing a Vanguard Daughtercard into a 3400 Series, you must use the
shorter two-sided header. The taller header is used with other Vanguard units.
Figure 3-6 or the Vanguard
Sample Daughtercard
Two-Sided Header
Blank Filler Panel
3-12 Installation and Replacement
Figure 3-6. Sample Daughtercard Installation
Page 49

Modifying Your Vanguard 3400 Series
Warning
Avertissement
Warnung
Caution
Caution
Mise en Garde
Vorsicht
Accessing the Motherboard
Introduction This section explains how to access the motherboard for the Vanguard 3400 Series. It
also identifies the location of the key motherboard components.
Before replacing modules, batteries, or daughtercards, you must access the Vanguard
3400 Series motherboard.
Instructions for the 3400 Series
Figure 3-7 shows how to remove and install the Vanguard 3400 Series motherboard.
Figure 3-8 shows the location of the components on the motherboard.
To prevent injury and damage to the equipment, power down the unit and disconnect
the power cord before you remove or install the motherboard.
Pour éviter toute blessure ou endommagement de l’équipement, éteignez l’unité et
déconnectez le cordon d’alimentation avant d’enlever ou d’installer la carte mère.
Um persönliche Verletzungen und Schäden am Gerät zu verhindern, schalten Sie das
Gerät ab, und ziehen Sie den Netzstecker aus, bevor Sie die Hauptplatine entfernen
oder installieren.
Use care when handling and placing the motherboard on a surface. There are
components on the bottom of the motherboard that can be damaged.
Some components used in the 3400 Series are sensitive to static electric discharges;
static electric discharges can cause damage to internal components. Use proper
handling and grounding precautions whenever handling cards and components.
Certains composants du 3400 Series sont sensibles aux décharges électrostatiques
qui peuvent les endommager. Prenez les dispositions et précautions de mise à la terre
nécessaires lors de la manipulation de cartes et de composants.
Einige im 3400 Series verwendeten Komponenten sollten keinen elektrostatischen
Entladungen ausgesetzt werden, durch die interne Bauteile beschädigt werden
können. Wenden Sie die entsprechenden Maßnahmen zur Erdung und zum Schutz
vor statischen Ladungen bei der Handhabung von Karten und Komponenten an.
Installation and Replacement 3-13
Page 50

Modifying Your Vanguard 3400 Series
Removing the Motherboard
Power down the unit and remove the cables
and power cord.
Remove the two screws on either side of the
motherboard rear panel.
Pull motherboard out of chassis by grabbing
the bottom edge of rear panel and carefully
sliding it out of chassis.
Place the motherboard on a clean flat surface.
123
4
Installing the Motherboard
Carefully slide the motherboard into the card guides within the
chassis opening, then push the motherboard into the enclosure.
Install and tighten screws on both sides of the rear panel. Be sure
the screws are snug.
Reconnect the cables and power cord and power up the unit.
123
Caution
When handling any components or cards, use ESD protection.
3-14 Installation and Replacement
Figure 3-7. Vanguard 3400 Series Motherboard Removal and Replacement
Page 51

Modifying Your Vanguard 3400 Series
Motherboard Components
Figure 3-8 shows the components on a Vanguard 3410 Series motherboard and
Figure 3-9 shows the components on a Vanguard 3460 Series motherboard.
Future Expansion Connection for Upgradeablity
Daughtercard Slot 1
Encryption Module
Serial Number
Label
Figure 3-8. Location of 3410 Motherboard Components
Battery
Installation and Replacement 3-15
Page 52

Modifying Your Vanguard 3400 Series
Future Expansion Connection for Upgradeablity
Daughtercard Slot 1
Encryption Module
Serial Number
Label
Daughtercard Slot 2 Fan
Figure 3-9. Location of 3460 Motherboard Components
Battery
3-16 Installation and Replacement
Page 53

Modifying Your Vanguard 3400 Series
Caution
Mise en Garde
Vorsicht
Note
Installing and Removing the Encryption PCI Mezzanine Card
Introduction The Encryption PCI Mezzanine card is an option and may have been installed on the
motherboard at the factory. If not, you can install or replace the card.
This section explains how to:
• Add and remove Encryption PCI Mezzanine Card.
For instructions for removing the motherboard, refer to the “Accessing the
Motherboard” section on page 3-13.
Adding or Removing Encryption PCI Mezzanine Card
Figure 3-10 shows how to add or remove an Encryption PCI Mezzanine Card. Refer
to Figure 3-8 for the location of the Encryption PCI Mezzanine Card.
For instructions for removing the motherboard, refer to the “Accessing the
Motherboard” section on page 3-13.
Some components used in the 3400 Series are sensitive to static electric discharges;
static electric discharges can cause damage to internal components. Use proper
handling and grounding precautions whenever handling cards and components.
Certains composants du 3400 Series sont sensibles aux décharges électrostatiques
qui peuvent les endommager. Prenez les dispositions et précautions de mise à la terre
nécessaires lors de la manipulation de cartes et de composants.
Einige im 3400 Series verwendeten Komponenten sollten keinen elektrostatischen
Entladungen ausgesetzt werden, durch die interne Bauteile beschädigt werden
können. Wenden Sie die entsprechenden Maßnahmen zur Erdung und zum Schutz
vor statischen Ladungen bei der Handhabung von Karten und Komponenten an.
The location of the Encryption PCI Mezzanine Card is indicated on the
motherboard as shown in
Figure 3-8.
Installation and Replacement 3-17
Page 54

Modifying Your Vanguard 3400 Series
Adding Encryption PCI Mezzanine Card
Insert the module into the connector at an angle as shown.
Push down on the module so that it is parallel to the motherboard
and the release levers lock it into place.
1
2
Removing Encryption PCI Mezzanine Card
Pull outward on the release levers at the side of the card, to allow the module to be removed
from the connector.
Raise the leading edge of module so that it is at an angle to the motherboard and remove it
from the connector.
1
2
Release Lever
Inserting Encryption
PCI Mezzanine Card
Removing Encryption
PCI Mezzanine Card
Figure 3-10. Encryption PCI Mezzanine Card Installation/Replacement
3-18 Installation and Replacement
Page 55

Modifying Your Vanguard 3400 Series
Warning
Avertissement
Warnung
Note
Installing/Removing the Lithium Battery
Introduction Vanguard 3400 Series uses a lithium battery on the motherboard to maintain the
node’s realtime clock. The battery is not used to store the configuration memory.
This section explains how to replace the battery.
Only qualified service personnel should perform the procedure described in this
section. If the battery is installed incorrectly, it could explode after the Vanguard
product is powered up, damaging the unit.
Seules des personnes qualifiées peuvent mettre en pratique les procédures décrites
dans cette section. Si la batterie n’est pas correctement installée, elle risque
d’exploser après la mise en marche du produit Vanguard et d’endommager l’unité.
Die in diesem Abschnitt aufgeführten Vorgänge sollten ausschließlich von
qualifiziertem Servicepersonal durchgeführt werden. Wenn die Batterie
unsachgemäß installiert wird, kann sie nach dem Einschalten des Vanguard-Produkts
explodieren und das Gerät beschädigen.
After installing the battery, set the Vanguard 3400 Series’s date and time. This is
done via the CTP in the Update System Parameter menu.
Battery Type Replace the lithium battery with lithium coin cell type CR1225 or its equivalent.
These can be obtained where watch batteries are sold.
Battery Disposal Dispose of the battery in compliance with applicable local regulations.
Installation and Replacement 3-19
Page 56

Modifying Your Vanguard 3400 Series
To remove the battery
Using your fingers, push the retaining tabs upwards and
pry the battery out of the holder.
To install the battery
Place the battery in the holder with the positive (+) side
up,.
Note
When done, replace the motherboard as explained in the
“Accessing the Motherboard” section on page 3-13.
Routine Battery Replacement
Before Removing/ Installing the Battery
Removing/ Installing the Battery
The lithium battery should be replaced every two years. Follow the instructions in
Figure 3-11 to replace the battery.
Before you remove or install the battery, you must access the Vanguard 3400 Series
motherboard as described in the
“Accessing the Motherboard” section on page 3-13.
Once you can see the motherboard, locate the battery as shown in Figure 3-11.
Figure 3-11 shows how to install and replace the battery.
Retaining Tabs
Battery
Battery
Holder
Figure 3-11. Replacing the Battery
Lithium Battery
3-20 Installation and Replacement
Page 57

Powering Up Your Vanguard 3400 Series
Overview
Introduction This chapter explains how to:
• Power up your Vanguard 3400 Series.
• Ensure that the unit powered up correctly and is up and running by reading the
front panel LEDs.
• Load the Vanguard 3400 Series software.
Chapter 4
Powering Up Your Vanguard 3400 Series 4-1
Page 58

Power Up Procedure
Power Stats
Power Up Procedure
Introduction This section explains how to power up the Vanguard 3400 Series.
Procedure Follow these steps to power up your Vanguard 3400 Series.
Step Action
1 Ensure that all the cards are fully inserted and secure.
2 Ensure that the AC power cord is plugged in.
3 Ensure the front panel power LED is on.
To power d o wn th e Vanguard 3400 Series, unplug the power supply AC power cord
from the power receptacle.
LEDs Figure 4-1 shows the Vanguard 3400 Series LEDs and the table that follows
describes them.
Power Power OK On On On On
Stats Diagnostics/SW
4-2 Powering Up Your Vanguard 3400 Series
Figure 4-1. Vanguard 3400 Series LEDs
LED Description
Loading
3400 Series System State
Initial
PowerON
On Off Blinking On
Diagnostics
Executing
SW Loading Operational
Status
Page 59

Loading the Software
Note
Note
Note
Loading the Software
Introduction This section briefly describes how to load the software into your Vanguard 3400
Series.
After the software has been loaded, refer to the appropriate user document to
configure and use the different software options.
Operating Software The operating software is compressed in FLASH and loaded into SDRAM for
execution. There are a variety of operating software feature sets available for the
Vanguard 3400 Series.
See the Software Installation and Download Guide (Part Number T0028) for
information on installing the operating software.
Optional Software You can obtain Applications Ware Packages that can be tailored to your specific
needs. The Applications Ware licenses available for Vanguard products are:
•IPSAFE
• SNA+
• Multi-Service
For details about the contents of the license upgrade packages and how they can
be obtained, refer to the latest Software Release Notice. A license refers to both a
legal document that allows a customer to use features and to the software that
contains the features.
Powering Up Your Vanguard 3400 Series 4-3
Page 60

Loading the Software
This Page Intentionally Left Blank
4-4 Powering Up Your Vanguard 3400 Series
Page 61

Appendix A
Specifications
Overview
Introduction This appendix describes the physical and electrical specifications for the Vanguard
3400 Series.
Dimensions Figure A-1 shows the exterior dimensions of the Vanguard 3400 Series.
Width: 8.4 in.
(21.3 cm)
Height: 2.6 in.
(6.6 cm)
Length: 11.6 in.
(29.5 cm)
Figure A-1. Vanguard 3400 Series Exterior Dimensions
Weight The Vanguard 3400 Series/ weights are listed below:
Vanguard Weight
3400 Series with one daughtercard installed. 8 lbs
Environment Operating temperature: 32° to 98° F (0° to 40° C)
Storage temperature: -40° to 158° F (-40° to 70° C)
Relative humidity: 5% to 90% (non-condensing)
A-1
Page 62

Power Requirements
Input voltage: 5 VDC Nom.
Input current: 3400 Series: 4 A Max.
Maximum input power consumption: 3400 Series: 20 W
A-2
Page 63

Software License and Regulatory Inf ormation
Overview
Introduction This appendix provides information about the following:
• FCC Part 68 and Telephone Company Procedures and Requirements
• Product Declarations and Regulatory Information
Appendix B
B-1
Page 64

FCC Part 68 and Telephone Company Procedures and Requirements for DSU and T1 Interfaces
FCC Part 68 and Telephone Company Procedures and
Requirements for DSU and T1 Interfaces
Before You Begin Before a Vanguard 3400 Series can be connected to the network, you must do the
following:
• Provide the local telephone company with the equipment’s registration number.
• Order the proper connections
How to Order Connections
Troubleshooting Your Connection
To order the proper connections, provide the telephone company with the following
information:
• Interface type
• Required USOC jack connector number
• Service code
• Facility interface codes
Interface Type USOC Jack
Connector
56-kbps digital interface RJ48S 6.0F 04DU5-56
Fractional T1 Interface RJ48C 6.0F 04DU9-BN
If any of your equipment is not operating correctly, immediately remove it from the
telephone line before damaging the network. If the telephone company is aware of
the problem, they may temporarily disconnect your service. Whenever possible, the
telephone company notifies you in advance of the disconnection.
If advance notice is not feasible, you are notified as soon as possible. Once notified,
you can correct the problem. If necessary, it is your right to file a complaint with the
FCC.
Service
Code
Facility Interface
Code
04DU9-2SN
B-2
Page 65

FCC Part 68 and Telephone Company Procedures and Requirements for DSU and T1 Interfaces
Customer-Provided Telephone Equipment
FCC regulations and telephone company procedures prohibit connection of
customer-provided equipment to telephone company-provided coin service
(central office-implemented systems). Connection to party lines is subject to
state tariffs.
Occasionally, the telephone company may make changes in their equipment,
operations, or procedures. If these changes can affect your equipment or service,
the telephone company provides written notice so that you can make the necessary
changes to maintain uninterrupted service.
Contact your telephone company if you have any questions about your telephone
line.
In some circumstances, the telephone company may ask you for information about
the equipment that is connected to the telephone line. Within the United States
(at the request of the telephone company), you should provide your equipment’s
FCC registration number. This number is located on the unit’s label on the bottom
of the unit.
B-3
Page 66

Product Declarations and Regulatory Information
Warning
Avertissement
Warnung
Product Declarations and Regulatory Information
The following sections provide information about standards compliance, safety
statements, and ISDN Type Approvals.
Warnings And Cautions
CE Marking One of the marks in the following diagram appears on each of the Vanguard products
The following special notices apply to all equipment handling procedures in this
installation guide.
Ports capable of connecting to ports on other apparatus are defined as Safety Extra
Low Voltage (SELV). To conform with EN60950, ensure that these ports are only
connected to ports of the same type on other apparatus.
Les ports qui sont susceptibles d’être connectés à des équipements sont désignés
comme TBTS. Pour garantir la conformité à la norme EN 60950, n’interconnecte ces
ports qu’avec des ports du même type sur des autres matériels.
Anschlusse, die mit anderen Geraten verbindet werden konnen, sind als SELV
beschrieben. Um Konformitat mit EN 60950 zu versichern, sichern Sie es, daß diese
Anschlusse nur mit den des selben Type auf anderen Geraten verbindet werden.
that are ISDN compatible, and the statement that follows explains its significance.
B-4
Figure B-1. CE Mark
This product is CE marked to indicate compliance with the following European
Directives:
• 73/23/EECLow Voltage Directive (Safety)
• 1999/5/EC Radio & Telecom Terminal Equipment (R&TTE)
• 89/336/EECEMC Directive
Copies of the full Declaration of Conformity are available at the following URL:
http://www.vanguardnetworks.com/
Page 67

Declarations of
Declaration of Conformity:
Hereby, Vanguard Networks declares that this Vanguard Router is in compliance with the
requirement and other relevant provisions of Directive 1999/5/EC.
:
Herm ed erklærer V anguard Networks at indestående Vanguard Router er i
overensstemm else med de grundlæggende krav og de relevante punkter i direktiv
1999/5/EF.
Verklaring van overeenstemming:
Hierbij verklaart Vanguard Networks dat diens Vanguard Router voldoet aan de basisvereisten en
andere relevante voorwaarden van EG-richtlijn 1999/5/EG.
Vaatimustenmukaisuusvakuutus:
Vanguard Networks vakuuttaa täten, että Vanguard Router on direktiivin 1999/5/EC keskeisten
vaatimusten ja sen muiden tätä koskevien säännösten mukainen
:
Par la présente, Vanguard Networks déclare que ce routeur Vanguard est conforme aux
conditions essentielles et à toute autre modalité pertinente de la Directive 1999/5/CE.
:
Hiermit erklärt Vanguard Networks dass der Vanguard Router die grundlegenden Anforderungen
und sonstige maßgebliche Bestimmungen der Richtlinie 1999/5/EG erfüllt.
:
Δια του παρόντος, η εταιρεία Vanguard Networks δηλώνει ότι η παρούσα συσκευή
(δρομολογητής) Vanguard Router πληροί τις βασικές απαιτήσεις και άλλες βασικές
προϋποθέσεις της Οδηγίας 1999/5/Ε K.
Conformity
Product Declarations and Regulatory Information
English
Danish
Konformitetserklæring
Dutch
Finnish
French
German
Greek
Déclaration de conformité
Konformitätserklärung
Δήλωση Συμμόρφωσης
B-5
Page 68

Product Declarations and Regulatory Information
:
Con la presente Vanguard Networks dichiara che il router Vanguard soddisfa i requisiti essenzial
e le altre disposizioni pertinenti della direttiva 1999/5/CE.
:
Através da presente, a Vanguard Networks declara que este encaminhador Vanguard se encontra
em conformidade com os requisitos essenciais e outras disposições relevantes da Directiva
1999/5/CE.
:
Por la presente declaración, Vanguard Networks declara que este encaminador Vanguard cumple
los requisitos esenciales y otras cláusulas importantes de la directiva 1999/5/CE.
Överensstämmelseförklaring:
Vanguard Networks förklarar härmed att denna Vanguardrouter överensstämmer med de
väsentliga kraven och övriga relevanta stadganden i direktiv 1999/5/EG.
Italian
Dichiarazione di conformità
Portuguese
Declaração de Conformidade
Spanish
Declaración de conformidad
Swedish
B-6
Page 69

Product Declarations and Regulatory Information
Caution
Mise en Garde
Vorsicht
Industry Canada The following information includes the Industry Canada statement regarding ISDN
and T1 equipment use.
The Industry Canada label identifies certified equipment. This certification means
that the equipment meets certain telecommunications network protective,
operational, and safety requirements. The Department does not guarantee the
equipment will operate to the user’s satisfaction.
Before installing this equipment, users should ensure that it is permissible to be
connected to the facilities of the local telecommunications company. The equipment
must also be installed using an acceptable method of connection. In some cases, the
company’s inside wiring associated with a single line individual service might be
extended by means of a certified connector assembly (telephone extension cord).
The customer should be aware that compliance with the above conditions might not
prevent degradation of service in some situations.
Repairs to certified equipment should be made by an authorized Canadian
maintenance facility designated by the supplier. Any repairs or alterations made by
the user to this equipment, or equipment malfunctions, could give the
telecommunications company cause to request the user to disconnect the equipment.
Users should ensure for their own protection that the electrical ground connections of
the power utility, telephone lines, and internal metallic water pipe system, if present,
are connected together. This precaution can be particularly important in rural areas.
Notification of Canadian Requirements
Users must not attempt to make such connection themselves, but must contact the
appropriate electric inspection authority, or electrician, as appropriate.
Les utilisateurs ne doivent pas établir de telles connexions eux-mêmes. Ils doivent
contacter une personne compétente ou un électricien.
Benutzer sollten nicht versuchen, diese Verbindung selbst herzustellen, sondern
dazu die zuständige Aufsichtsbehörde für Elektroinstallationen bzw. einen
Elektroinstallateur kontaktieren.
This digital apparatus does not exceed the Class A limits for radio noise emissions
from digital apparatus as set out in the Radio Interference Regulations of the
Canadian Department of Communications.
Le présent appareil numérique n’émet pas de bruits radioélectriques dépassant les
limites applicables aux appareils numériques de classe A prescrites dans le règlement
sur le brouillage radioélectrique édicté par le Ministère des Communications du
Canada.
B-7
Page 70

Product Declarations and Regulatory Information
Radio Frequency Interference Regulations
This equipment has been tested and found to comply with the limits for a Class A
digital device, pursuant to Part 15 of the FCC Rules, CISPR 22 and EN 55022. These
limits are designed to provide reasonable protection against interference in a
residential installation. This equipment generates, uses, and can radiate radio
frequency energy and, if not installed and used in accordance with the instructions,
may cause harmful interference to radio communications. However, there is no
guarantee that interference will not occur in a particular installation. If this
equipment does cause harmful interference to radio or television reception, which
can be determined by turning the equipment off and on, the user is encouraged to try
to correct the interference by one or more of the following measures:
• Reorient or relocate the receiving antenna.
• Increase the separation between the equipment and receiver.
• Connect the equipment into an outlet on a circuit different from that to which
the receiver is connected.
• Consult the dealer or an experienced radio/TV technician to help.
Changes or modifications not expressly approved by Vanguard Networks could void
the user's authority to operate the equipment.
This Class A digital apparatus meets all requirements of the Canadian InterferenceCausing Equipment Regulations.
This product was FCC certified under test conditions that included use of shielded
data terminal equipment cables. Use of different cables will invalidate FCC
certification and increase the risk of causing interference to radio and TV reception.
You can obtain the proper cables from Vanguard Networks.
B-8
Page 71

Introduction
Return Procedures
The following sections apply to U.S.A. customers only. Non-U.S.A. customers with
questions or concerns regarding return procedures should contact their Vanguard
Networks subsidiary or distributor.
Equipment Return Procedures
In Case of Damage If the equipment is damaged in transit, contact the shipper.
Expiration of Lease To return equipment upon expiration of a lease agreement, contact the Vanguard
If you have questions about equipment return procedures, on-site service or unit
exchange service call the Vanguard Networks Technical Support Center at (800)
544-0062 for advice and assistance.
If you have additional concerns in case of failure, about missing parts, or to return
equipment, contact your nearest Vanguard Networks representative.
For Locations Contact...
Inside the United States Vanguard Networks
25 Forbes Boulevard
Foxboro, MA 02035
Phone (508) 964-6200.
Outside the United States the nearest Vanguard Networks distributor.
For a listing of our Sales and Service Offices,
visit our Web site at:
http://www.vanguardnetworks.com/
Networks Support Center at (800) 544-0062 for return authorization and
instructions. You will be asked to provide the following information:
• Product name and description
• Serial number
• Customer order number
• Reason for return
Return Procedures-1
Page 72

Factory Repair To return equipment for factory repair, call the Vanguard Networks Technical
Support Center at (800) 544-0062, for return authorization and instructions. When
you call, you will be given a Return Material Authorization (RMA) control number.
Mark this number clearly on the shipping container for ease of identification and
faster service. The RMA control number provides a convenient tracking reference
for both parties. Please have the following information available for each piece of
equipment you return:
• Product name and description
• Serial number
• Failure symptoms
Packaging Guidelines for Equipment Return
Data communications equipment or parts that are to be returned to Vanguard
Networks for any reason must be properly packaged to prevent damage in shipment
and handling.
If the original packing material and shipping container are available, reuse these
items to return equipment. If these items are not available, it is your responsibility to
package the contents in a manner that protects the equipment from damage during
normal shipping and handling. Responsibility for damage to equipment during
transit must be resolved between you and the carrier. Vanguard Networks can
provide you with specific packaging instructions upon request.
Return Procedures-2
Page 73

Index
Numerics
1- and 2-Port Serial Card Interface 3-8
2 Port Voice FXS Daughtercard 2-8, 2-9
56 K DSU/CSU Daughtercard 2-7
A
Adding Components 3-12
Applications 1-5
IPT Gateway 1-7
Audience 1-vii
B
Battery
Disposal 3-19
Removal and Replacement 3-19
Remove/Replace 3-19
Replacement Type 3-19
C
Cable Adapters 3-9
Cabling 3-7
Cable Adapters 3-9
Canadian Regulatory Requirements B-7
Choosing a site 3-4
Components
Motherboard 3-15
Conformity Declarations B-5
Connections
Ordering B-2
Contents 3-2
Shipping 3-2
Customer Information 1-xv
Customer Provided Telephone Equipment B-3
Customer Reponse Card 1-xvii
D
Daughtercards 1-3
2 Port Voice FXS 2-8, 2-9
56K DSU/CSU 2-7
Compatibility 2-7
Dual E&M 2-8
FT1/FE1 2-8
Remove/Replace 3-12
Supported 2-6
Declarations of Conformity B-5
Dimensions and Weight A-1
Disposal
Battery 3-19
Dual E&M Daughtercard 2-8
E
Electromagnetic Radiation
requirements B-7
Enclosure 2-2
Encryption PCI Mezzanine card Removal and
Replacement 3-17
Equipment Return
Packaging 1-2
Equipment return 1-1
F
Factory repair 1-2
Features 1-2
Front Panel 1-1
FT1/FE1 Daghtercard 2-8
H
Hardware Specifications A-1
Heat 3-6
High-Speed DTE Interface 3-9
I
Installation 3-3
Cabling 3-7
Choosing a site 3-4
Port Numbering 3-7
Thermal Considerations 3-6
Installation and Replacement 3-1
Interface
1- and 2-Port Serial Card 3-8
L
Lease Expirations 1-1
Loading Software 4-3
M
Motherboard 2-4
components 2-4
Remove/Replace 3-13
Motherboard Components 3-15
O
Operating Environment 3-4
Index-1
Page 74

Optional Software 4-3
Ordering Connections B-2
facility interface code B-2
interface type B-2
service code B-2
USOC jack connector B-2
Overview 1-1
Special notices
description 1-ix
Specifications A-1
Physical and Electrical A-1
Supported Daughtercards 2-6
T
P
Pinouts
DB25 connector 3-10
RJ-45 connector. 3-10
Port Numbering 3-7
Ports
numbers 3-7
Rear 3-8
Power Requirements A-2
Power Up LEDs
LEDs 4-2
Power Up Sequence 4-2
Powering Up 4-1
Product Declarations B-4
R
Rear Panel 2-3
Regulartory Information B-1
Regulations
Radio Frequency B-8
Regulatory Information B-4
Canadian requirements B-7
Industry Canada B-7
Removal and Replacement
Battery 3-19
Encryption PCI Mezzanine card 3-17
Remove/Replace
Battery 3-19
Components 3-12
Daughtercard 3-12
Motherboard 3-13
Requirements
Power A-2
Telephone Company Procedures B-2
Temperature
3-6
Thermal Considerations 3-6
Translations 1-ix
Troubleshooting
connections B-2
U
Unpacking
parts list 3-2
W
Weight and Dimensions A-1
S
Shipping Contents 3-2
Software
Operating 4-3
Optional 4-3
Software Licenses 1-4
Software Loading 4-3
Software Support 1-4
SoftwareLicense and Regulartory Information B-1
Special Cables 3-9
Index-2
 Loading...