

Valor MADRONA MFCS01, MADRONA MFCS02 Installation Instructions Manual
MADRONA
Madrona Traditional Stove Casing
MFCS01
CSA approved for use with Valor Models MF28 Heaters ONLY
(black - 2 styles)
or MFCS02
(Majolica brown - 2 styles)
Installation Instructions
!
A barrier designed to reduce the risk of burns from the hot
viewing glass is provided with this appliance and shall be
installed for the protection of children and other at-risk
individuals.
Notes: This kit must be installed or serviced by a qualifi ed in-
staller, service agency or gas supplier. These instructions are to
be used in conjunction with the main installation instructions
for the above listed heater models.
The application of this kit does not affect the venting capa-
bilities or method of preparation of the MF28 heater as described in the MF28 heater installation manual.
DANGER
HOT GLASS WILL
CAUSE BURNS.
DO NOT TOUCH GLASS
UNTIL COOLED.
NEVER ALLOW CHILDREN
TO TOUCH GLASS.
INSTALLER
Leave this manual
with the appliance.
CONSUMER
Retain this manual
for future reference.
To complete the installation
of this kit you need the
following items:
• MF28 Madrona Engine
• Black Arched model:
• MFCS01-1 + MFCS01-2
• Black Square model:
• MFCS01-1 + MFCS01-3
• Majolica Arched model:
• MFCS02-1 + MFCS02-2
• Majolica Square model:
• MFCS02-1 + MFCS02-3
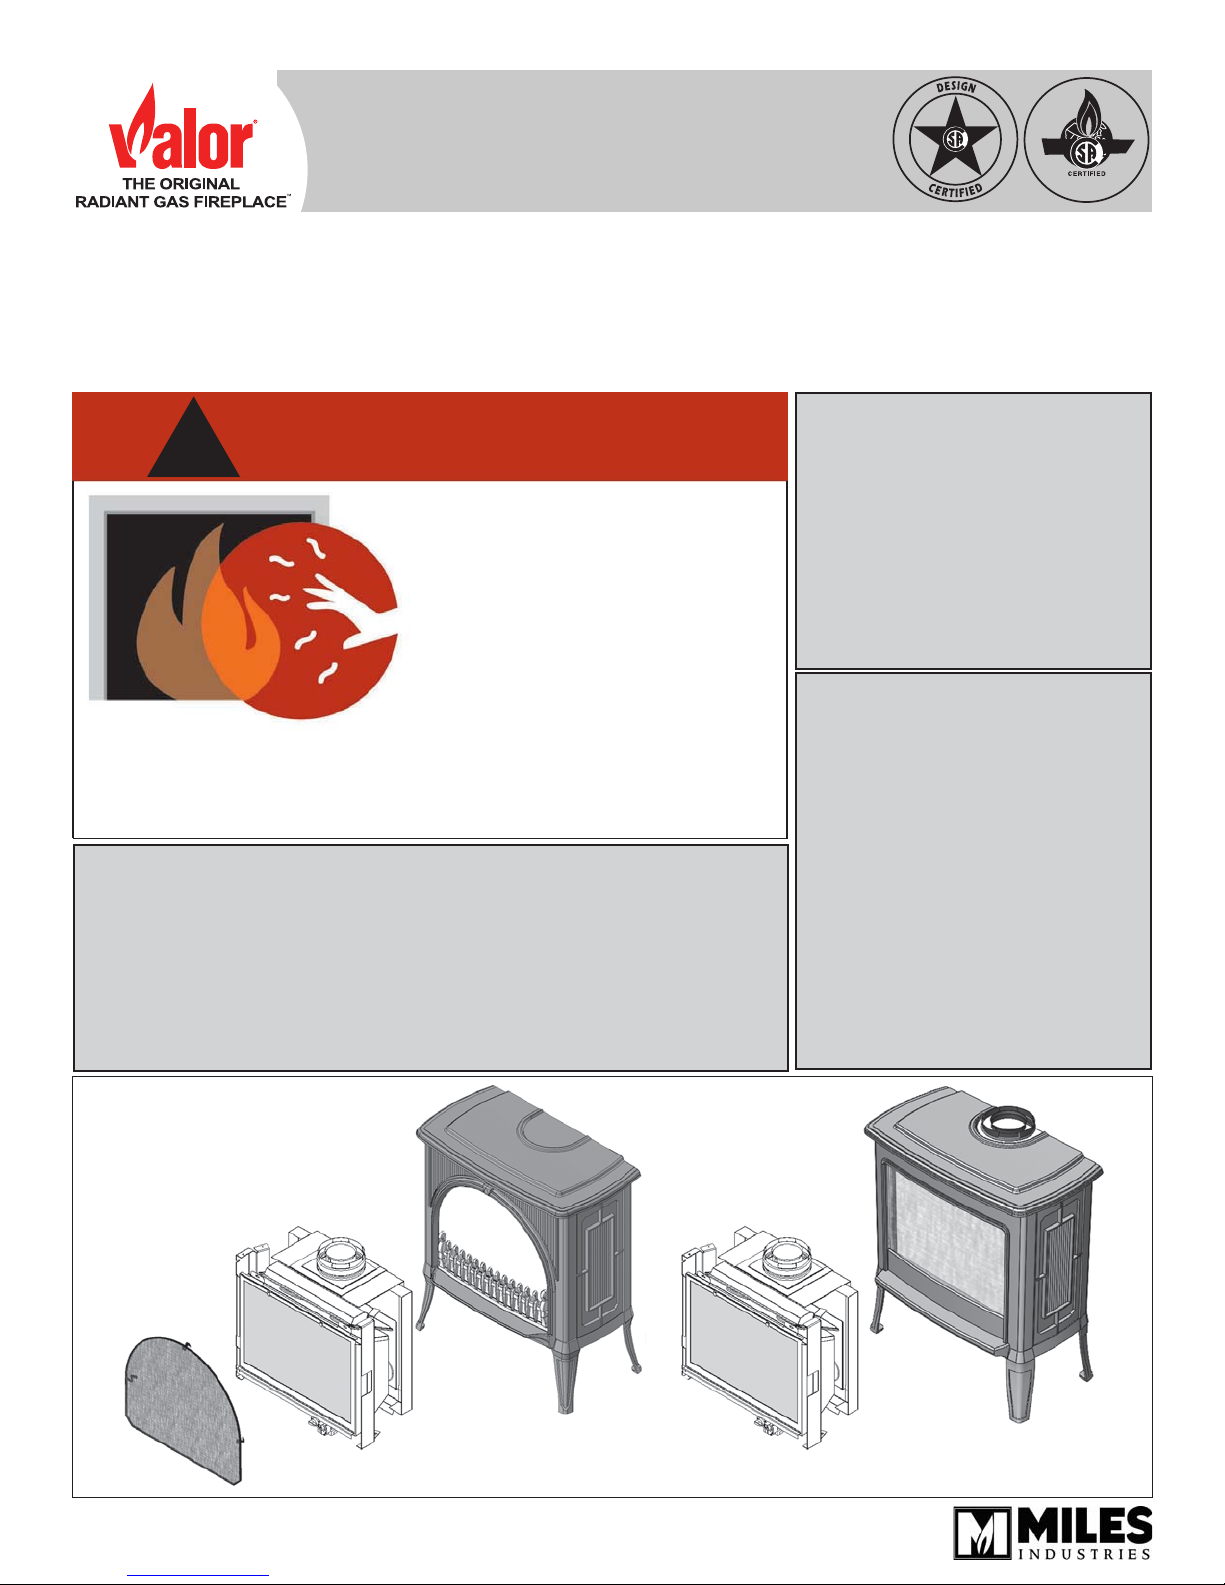
MFCS01 or MFCS02
Madrona Traditional Stove
Casting - Arched front
MF28—Madrona Engine
sold separately)
Overview
4003648-04
© Copyright Miles Industries Ltd., 2015
(
MFCS01 or MFCS02
Madrona Traditional Stove
Casting - Square front
MF28—Madrona Engine
sold separately)
(
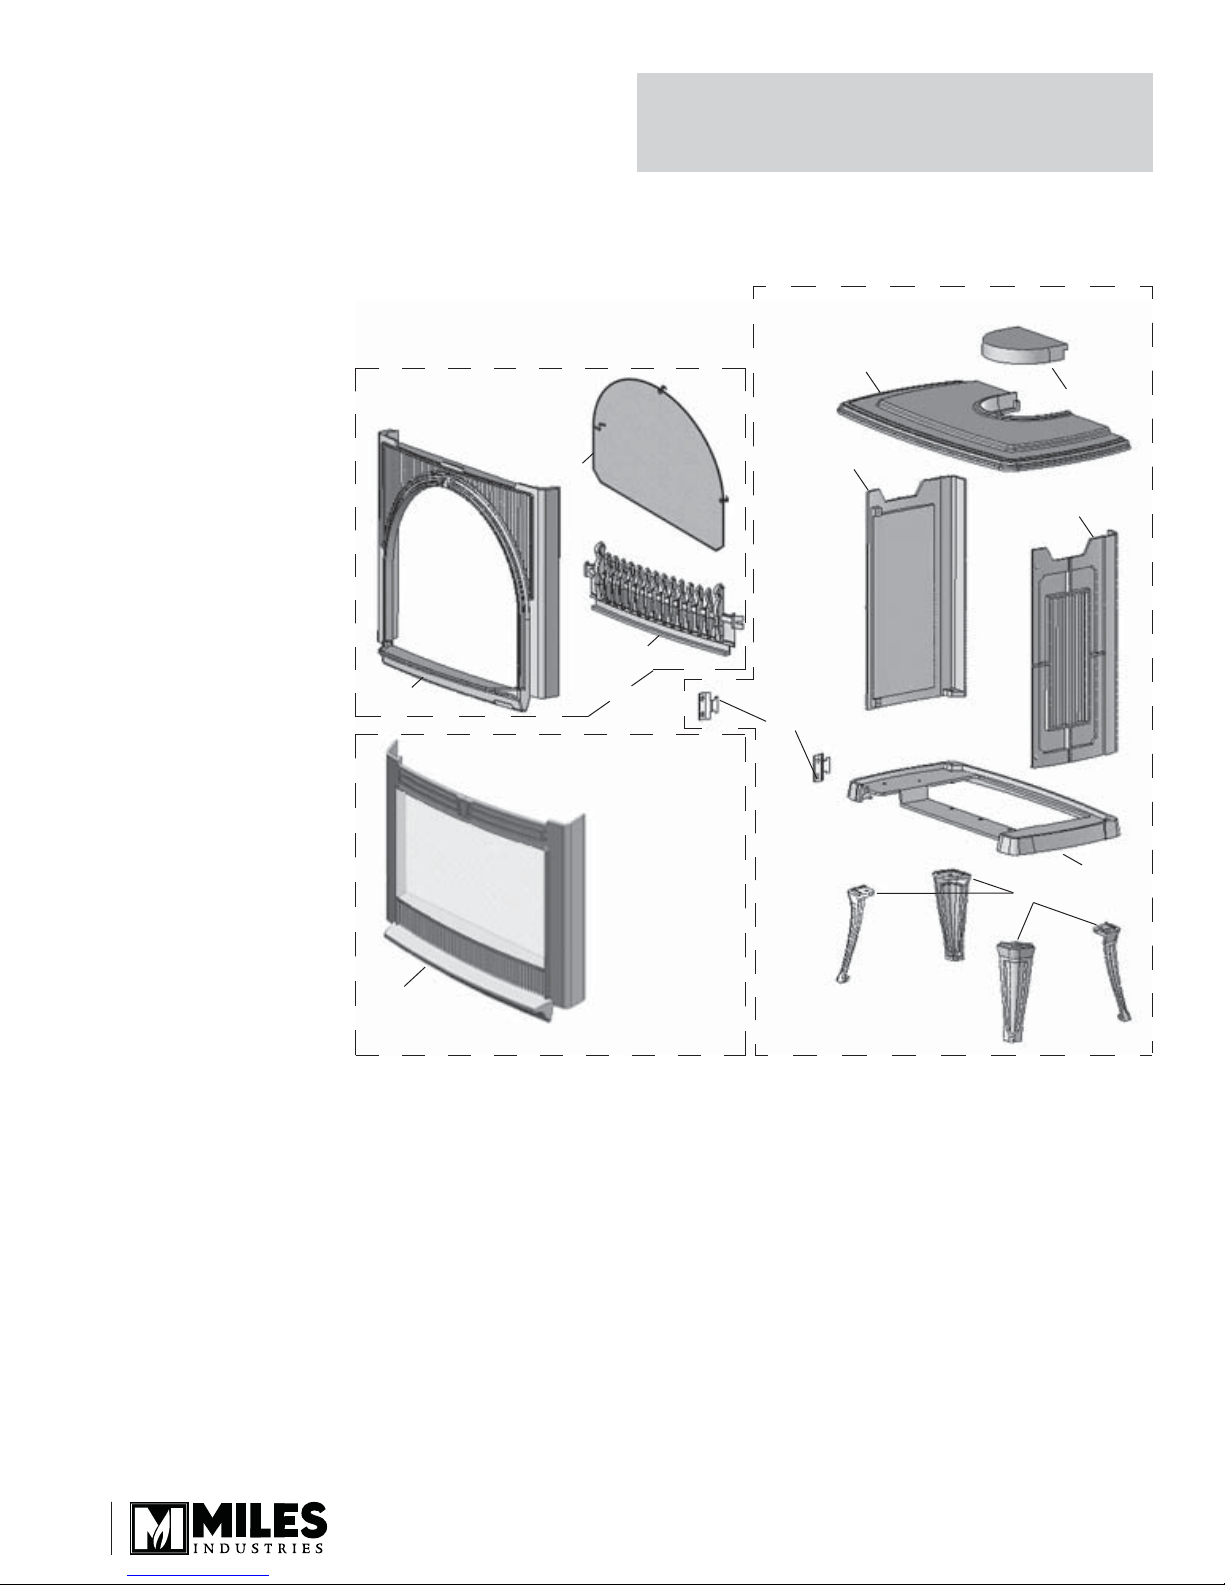
Kits Contents
BLACK STOVE:
Arched version MFCS01-1 + MFCS01-2
Square version MFCS01-1 + MFCS01-3
MAJOLICA BROWN STOVE:
Arched version MFCS02-1 + MFCS02-2
Square version MFCS02-1 + MFCS02-3
Tip
• Remove the MF28 window and all items inside
the appliance before installing to lighten it.
MFCS01-1 - black
• Infi ll plate
• Top panel
• Legs (4)
• RH side panel
• LH side panel
• Hardware pack
MFCS01-2 - black
• Base panel
• Arched front panel
• Arched barrier screen
• Fret traditional
MFCS01-3 - black
• Base panel
• Square front panel with
square barrier screen
MFCS02-1 - majolica
• Infi ll plate
• Top panel
• Legs (4)
• RH side panel
• LH side panel
• Hardware pack
MFCS02-2 - majolica
• Base panel
• Arched front panel
• Arched barrier screen
• Fret traditional
MFCS02-3 - majolica
• Base panel
• Square front panel with
square barrier screen
MFCS01-2 or MFCS02-2
Barrier
screen
Arched
Front
Square Front
with Barrier screen
MFCS01-3 or MFCS02-3
MFCS01-1 or MFCS02-1
Top panel
Infi ll plate
LH Side panel
RH Side panel
Fret
Hooks
Base
Legs
2
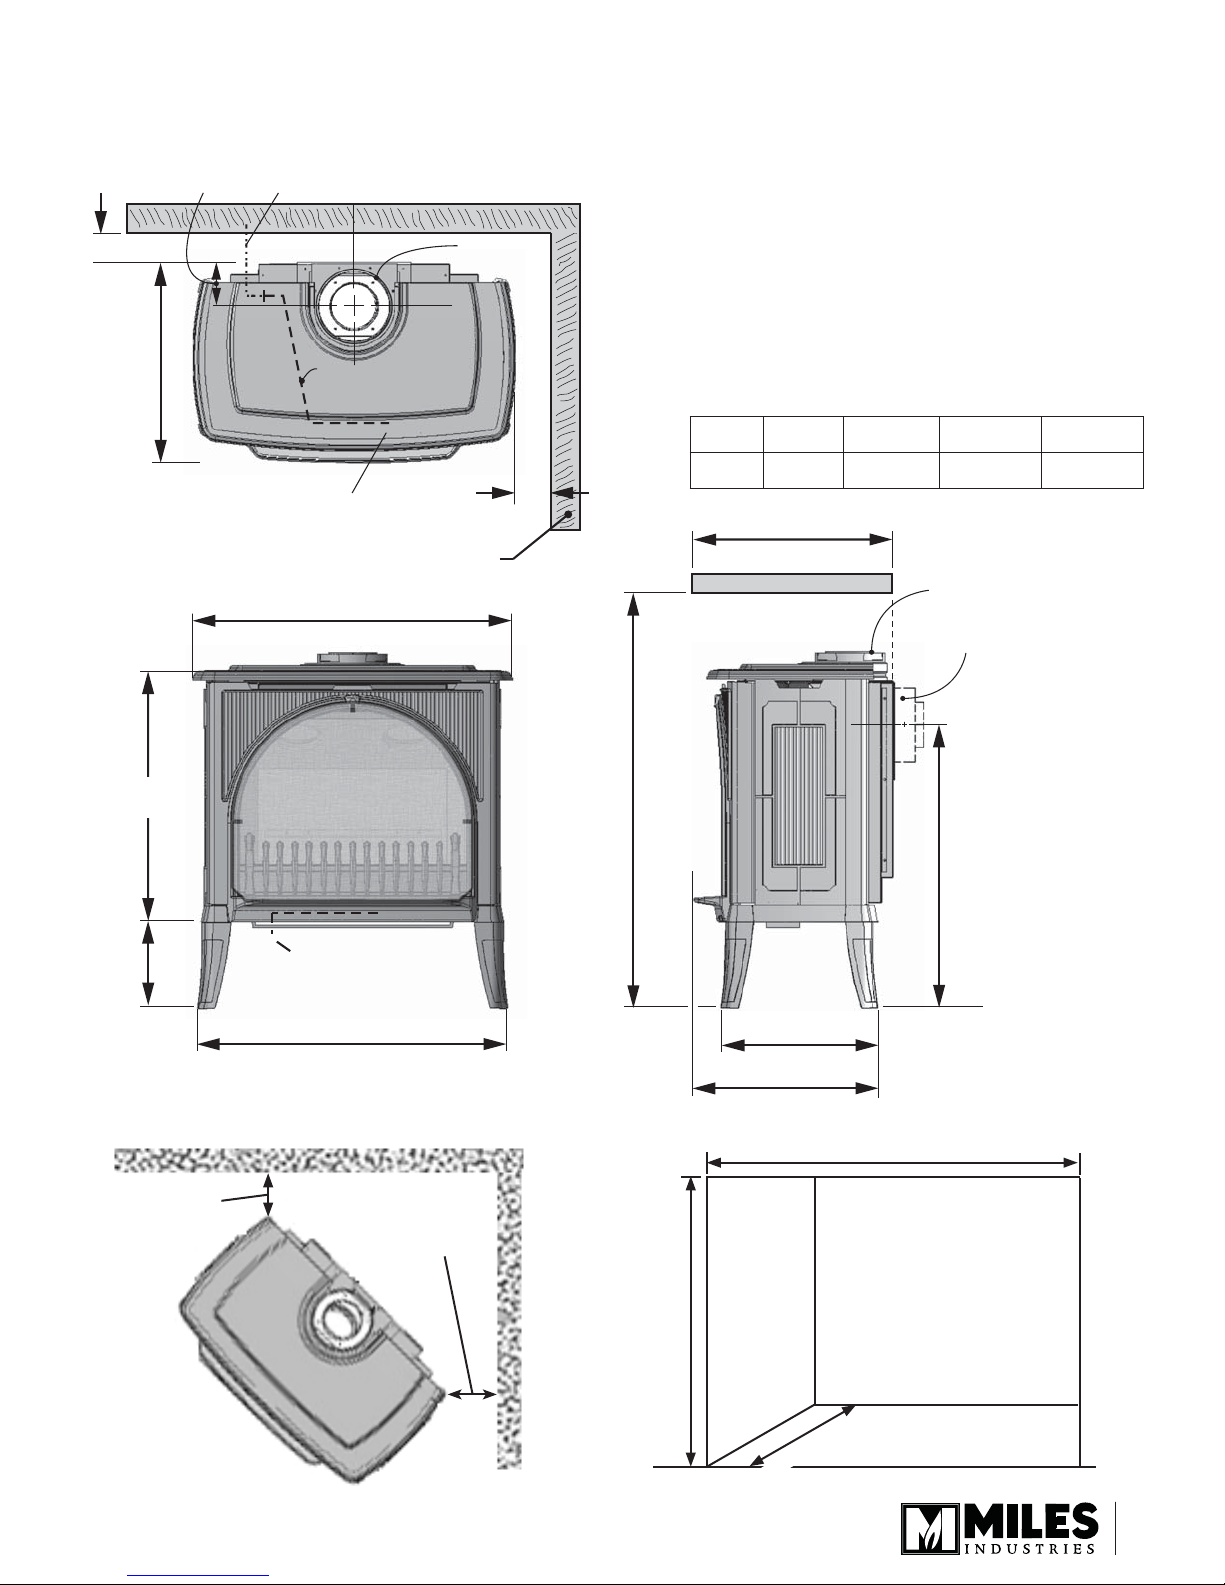
Dimensions & Clearances
2” (52 mm)
minimum
4”
(102 mm)
Suggested gas line
access point through wall.
Route to avoid optional fan.
17-7/8” (454 mm)
Gas line connection point
3/8” NPT FEMALE at valve
28-1/2 ” (724 mm)
Pipe supplied with
engine (see engine
manual p. 18)
x
x
Ø 6-5/8”
venting
2”
(52 mm)
minimum
Sidewall
For installation purposes, diagrams
represented by the arched front
Mantel / shelf clearances
Mantel
Depth ‘A’
Mantel
Height ‘B’
0–1”
(0–26 mm)
34”
(864 mm)
A
Mantel
2–5”
(51–127 mm)
36”
(914 mm)
6–18”
(152–457 mm)
38”
(965 mm)
Supplied with
top vent; field
convertible to
rear vent
Ø 6-5/8”
venting
Centre of vent
19–24”
(483–610 mm)
42”
(1067 mm)
(584 mm)
7-1/2”
(191 mm)
combustible
23”
Min. 2”
between
wall and
stove
x
Gas inlet position
3/8” fem. NPT
27-1/2” (699 mm)
Min. 2” between
combustible wall
and stove
B
25-1/8” (638 mm)
14”
(356 mm)
17-7/8”
(454 mm)
32-1/2” minimum
Corner clearances
42” minimum
26” maximum
Alcove clearances
3

Casting Tolerances
Due to the nature of cast iron and concrete, dimensional consistency may vary from one unit to the
next and some variation in surface fi nish and fl at-
ness is to be expected. We have done our best to
control and make allowance for this; however some
variation is inevitable.
Floor Requirements
The Madrona heater is approved for installation
directly on any combustible material other than soft
fl ooring material such as carpet or vinyl.
Mobile Home Floor Fixing
The Madrona stove must be fi xed to the fl oor
through the fl oor when used in a mobile home.
Mantel Requirements
The Madrona stove may be installed with a
combustible mantel provided clearances are
maintained as indicated above. Be aware that
although safe, some combustible materials and
fi nishes at the listed clearances may, over time,
discolor, warp, or show cracks. Care should be
taken when choosing materials—consult your
fi replace dealer.
Installation
Unpack the appliance and stove casing
The Madrona engine is supplied separately from the
stove casings. The Traditional stove—MFCS01 (black)
or MFCS02 (majolica brown)—and the Contemporary
stove MFCS04 are each supplied in two cartons. You
must have in hand the stove casing before starting the
assembly of the appliance.
Unpack the carton carefully. We strongly recommend
that you leave the engine sitting on the packaging
base in which it came to avoid damaging the
control valve, wires and pipes already attached
to the engine until it is ready to insert in the stove
casing.
Some parts are packed in the cardboard sleeve around
the engine; make sure you take them all out of the
packaging. Make sure you have all the components
including the stove casing components before you start
the installation.
CAUTION
LEAVE THE ENGINE ON ITS PACKAGING
BASE to avoid damage to the control valve,
wires and pipes until ready to insert into
stove casing.
4
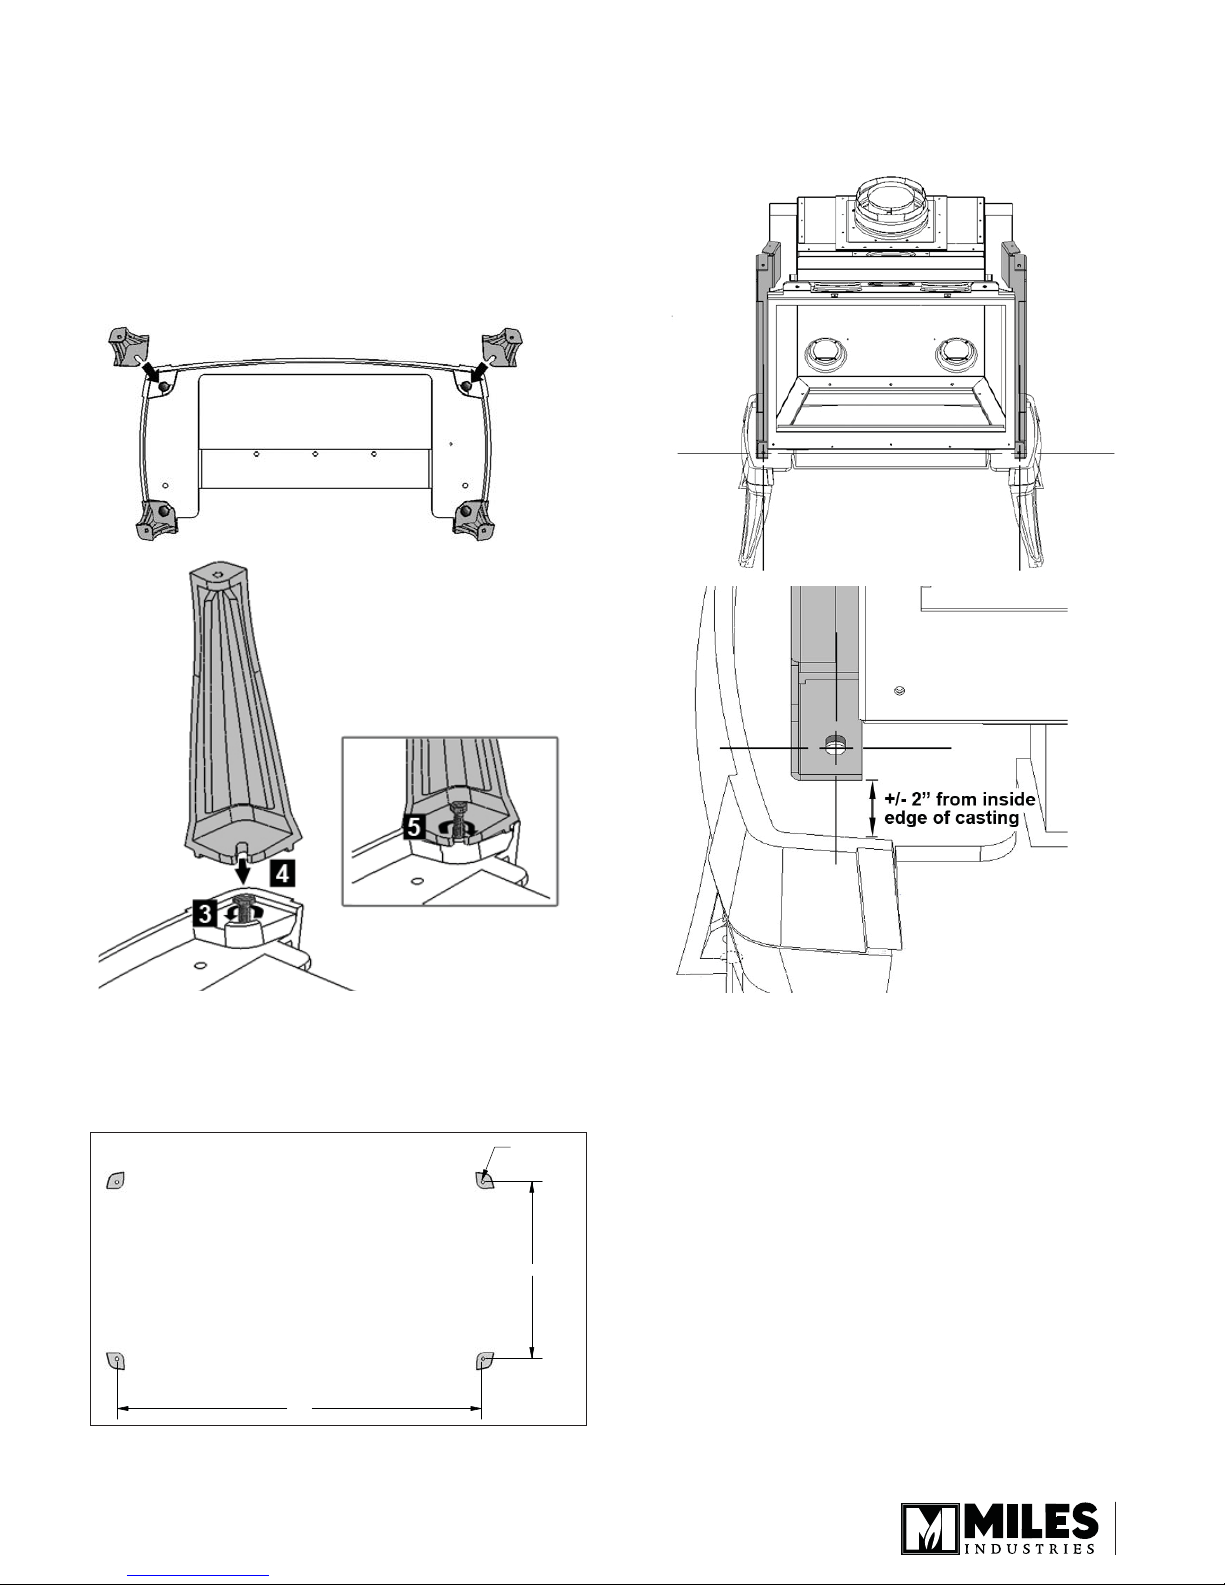
Casting Base
1. Rough-in the gas line and electrical wiring for a fan
(if any).
2. Decide where the stove should be positioned to
avoid moving it once all the casting pieces are
attached together.
3. Place the casting base upside down. Unscrew the
bolts to insert the legs.
4. Slide each leg under the head of its bolt.
7. Flip the base up. Place the engine on the base at its
approximate fi nal position—see detail below. Center
the engine using the holes at front of the base as
guidelines.
Detail
5. Tighten the bolts securely with a wrench.
6. Fix the casting base to the fl oor or hearth using bolts
(not supplied) through the casting feet—see the
bolting pattern below. (Required for mobile homes
only).
%ROWV
Appliance’s foot print
Detail
5
 Loading...