

Valor ALTON DIMENSION, BAUHAUS DIMENSION, DOWNTON DIMENSION, CLIFTON DIMENSION, BLENHEIM DIMENSION User Manual
The product complies with the European Safety Standards EN60335-2-30 and the European Standard Electromagnetic Compatibility (EMC)
EN55014, EN60555-2 and EN60555-3. These cover the essential requirements of EEC Directives 2006/95/EC and 2006/108/EC
8/53139/0 (UK) Issue 2
DIMENSION ELECTRIC RANGE
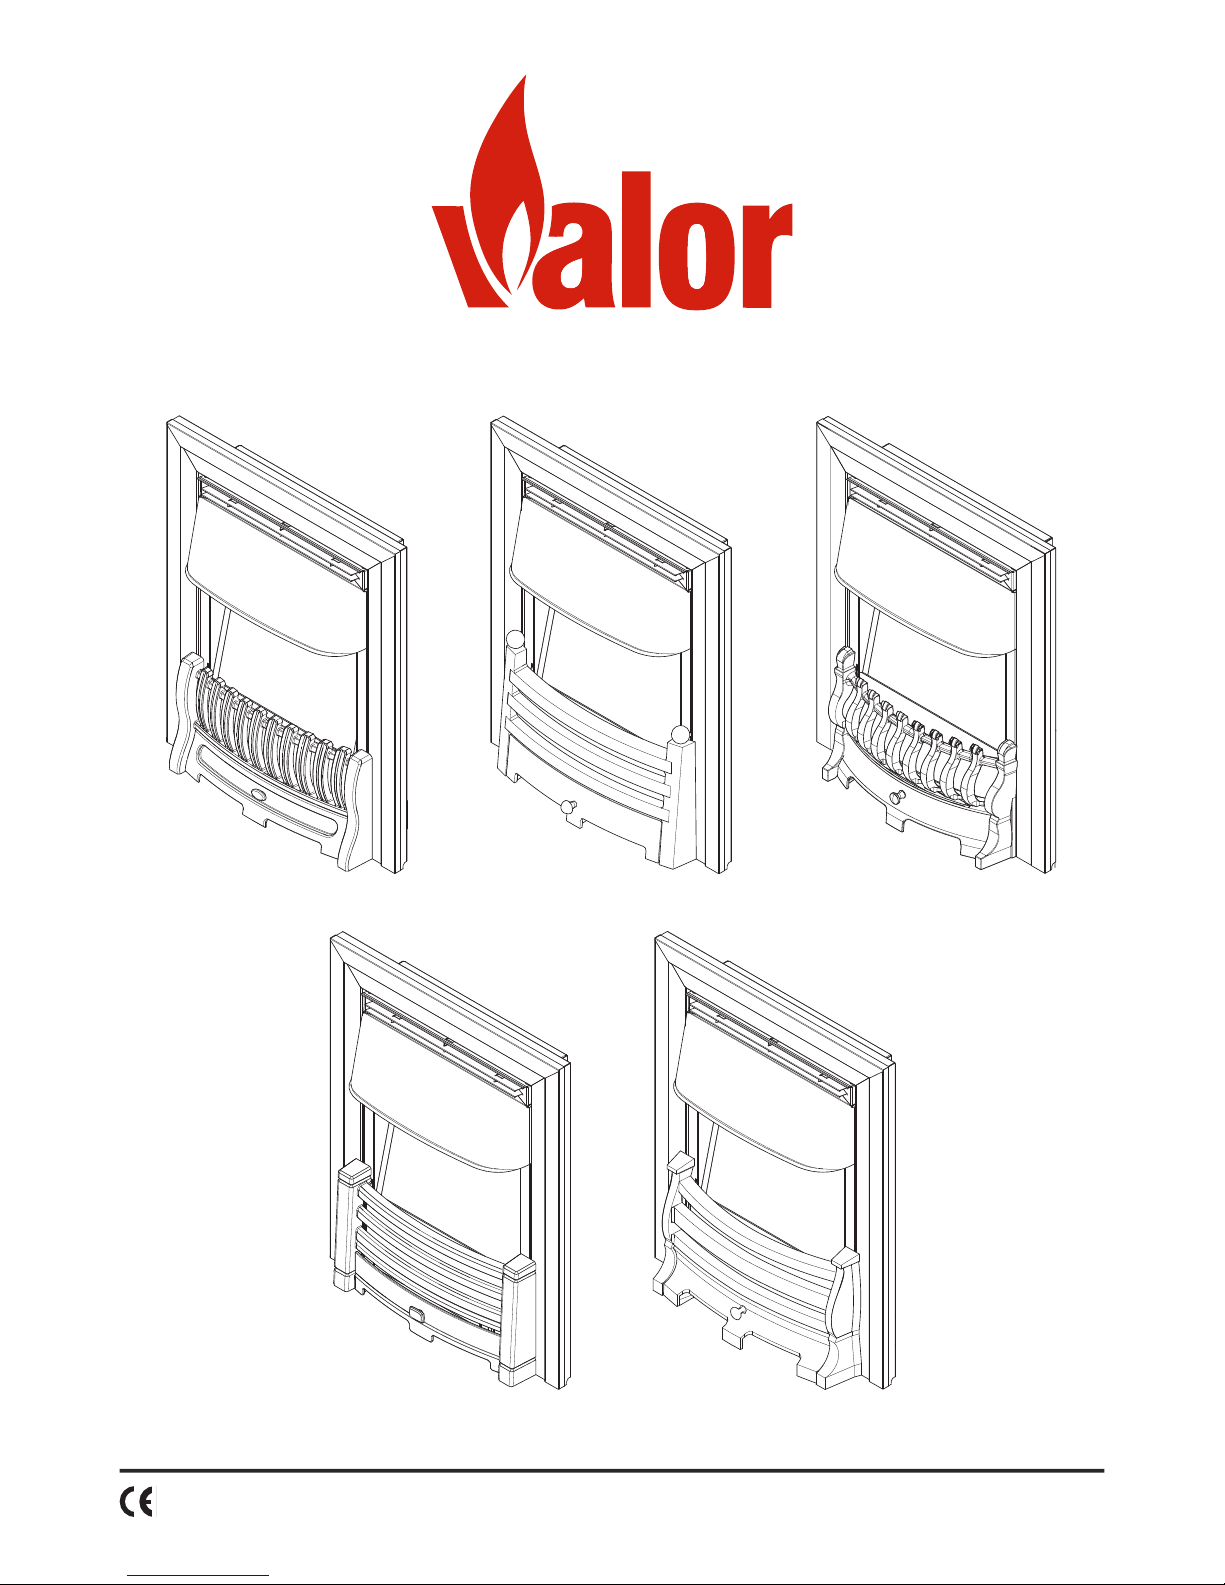
ALTON DIMENSION
CLIFTON DIMENSION DOWNTON DIMENSION
BAUHAUS DIMENSION BLENHEIM DIMENSION

Dimension Inset Electric Fire
Introduction
Thank you for choosing this Valor electric re. Please read this information guide carefully in order to safely install, use
and maintain your product.
Important Safety Advice
When using electrical appliances, basic precautions should always be followed to reduce the risk of
re, electrical shock and injury to persons, including the following:
1. OVERHEATING
WARNING: In order to avoid overheating, do not cover the heater. Do not place material or garments
on the heater, or obstruct the air circulation around the heater. The heater carries a DO NOT
COVER warning.
2. DAMAGE.
If the appliance is damaged, check with the supplier before installation and operation. If the supply
cord is damaged it must be replaced by the manufacturer or service agent or a similarly qualied
person in order to avoid a hazard.
3. LOCATION
Do not use outdoors.
Do not use in the immediate surroundings of a bath, shower or swimming pool.
Do not locate the heater immediately below a xed socket outlet or connection box.
Ensure that furniture, curtains or other combustible material are positioned no closer than 1 metre
from the heater.
4. PLUG POSITIONING
The appliance must be positioned so that the plug is accessible.
Keep the supply cord away from the front of the heater.
5. USE OF OTHER CONTROLS
Do not use this heater in series with a thermal control, a program controller, a timer or any other
device that switches on the heat automatically, since a re risk exists when the heater is accidentally
covered or displaced.
6. UNPLUGGING
In the event of a fault unplug the device. Unplug the device when not required for long periods.
7. OWNER/USER
WARNING: This heater is not equipped with a device to control the room temperature. Do not use
this heater in small rooms when they are occupied by persons not capable of leaving the room on
their own, unless constant supervision is provided.
This appliance can be used by children aged from 8 years and above and persons with reduced
physical, sensory or mental capabilities or lack of experience and knowledge if they have been given
supervision or instruction concerning use of the appliance in a safe way and understand the hazards
involved. Children shall not play with the appliance. Cleaning and user maintenance shall not be
made by Children without supervision. Children of less than 3 years should be kept away unless
continuously supervised. Children aged from 3 years and less than 8 years shall only switch on/off
the appliance provided that it has been placed or installed in its intended normal operating position
and they have been given supervision or instruction concerning use of the appliance in a safe way
and understanding the hazards involved. Children aged from 3 years and less than 8 years shall not
plug in, regulate and clean the appliance or perform user maintenance.
CAUTION - Some parts of this product can become very hot and cause burns. Particular
attention has to be given where children and vulnerable people are present.
8. ELECTRICITY
WARNING – THIS APPLIANCE MUST BE EARTHED.
This heater must be used on an AC ~ supply only and the voltage marked on the heater must
correspond to the supply voltage. Before switching on, please read the safety advice and operating
instructions.

General Information
The re incorporates a ame effect, which can be used with or without heating, so that the comforting effect may be
enjoyed at any time of the year. Using the ame effect on its own requires little electricity. A choice of 650W or 1.3kW
heat output is provided by the fan heater which is located at the top of the unit.
Please note: If used in an environment where background noise is very low, it may be possible to hear a sound which is
related to the operation of the ame effect. This is normal and should not be a cause for concern.
Before switching on the appliance, please read the safety warnings and operating instructions.
Installation Instructions
This section describes how to set up your re.
Before installing this appliance in an existing chimney, we recommend that;
1. You have your chimney cleaned by a competent chimney sweep.
2. You block off the chimney ue.
This procedure is important for the efcient operation of the heating unit and will also reduce heat loss up the chimney.
BEFORE YOU START
1. Ensure that all packing items are removed (read any warning labels carefully) and retain all packing for possible future
use e.g. in the event of moving house or returning the appliance to your supplier.
2. Ensure the appliance is disconnected from the power supply before installation.
3. Before connecting the appliance, check that the supply voltage is the same as that stated on the heater.
INSTALLATION
The appliance must be secured into position to prevent it from being tipped over. There are a number of methods to x
the appliance in place.
- Method A - Screwing the appliance to the replace surround
- Method B - Securing the appliance to the back of the replace with the steel cable and clamp
- Method C - Securing the appliance with optional spacer frame
Note - If xing to a marble replace surround, it is recommend that Method B is used.
The appliance can be tted into replaces or surrounds where the following dimension are available (Fig. 1).
Width: 410mm - 450mm Height: 560mm - 590mm Depth: 65mm (Minimum)
Method A (Fig. 2)
Place the appliance into the replace opening and ensure the appliance is positioned in the middle of the opening.
Locate the four xing holes in the side anges (Fig. 2). Mark the holes so that their position is clear when the appliance
is removed. With the appliance removed, drill an appropriate size hole in each of the marked positions for the wall plug
supplied. Insert the four wall plugs and reposition the appliance, aligning the holes with the wall plugs. Using the four
wood screws supplied, secure the appliance in position.
Method B (Fig. 3 & Fig. 4)
Note: This method of securing is recommended when it is not suitable to screw the appliance to the replace surround.
The xing kit supplied with the appliance includes a steel cable, eyescrew and cable clamp. These items can be used
to secure the appliance in place. Begin by marking a hole in the centre of the back of the replace approximately 565575mm from the bottom of the replace (Fig. 3). Drill an appropriate size hole in the marked position, insert a wall plug
and screw the eyescrew into the wall plug. Re-position the appliance in front of the opening but do not insert it into the
opening. Locate the two same sized small holes at the top of the side anges of the re chassis. Thread about 300mm
of the steel cable into the bottom small hole on the left hand side ange of the appliance (Fig. 4 - Step 1). Thread the
other end of the cable through the remaining small hole directly above the other small hole. Continue to push the cable
through this hole until the cable locks into place (Fig 4a). (In order to get the cable to snap into place, both ends of the
cable may need to be pulled from the rear of the appliance.)
Next, thread the longer piece of cable through the eyescrew at the back of the replace opening (Fig. 4 - Step 2). From
the back of the appliance, thread the longer piece of wire through the top small hole on the right hand side ange of the
re chassis (Fig. 4 - Step 3).
Locate the appliance in the replace opening. From the front of the appliance, gently pull the longer piece of cable
that should be coming out the top small hole on the right hand side. Gather up the excess in the cable until the cable
becomes taut and the appliance is secured. Thread the clamp over the end of the cable and push it so that it rests on
the side ange of the re chassis. While pulling the longer piece of cable tight, screw the small screw supplied with the
cable and clamp into the clamp so that it secures the cable in place. Thread the remaining piece of cable through the
large hole to the left of the small hole. (Fig 4b).
 Loading...