

Addendum
Installation Instructions - Logs
For Valor heaters Legend G3, models 738JL and 739JL
Note: This installation must be performed by a qualied installer, service agency or gas supplier.
Installation
This Addendum revises the installation of the logs in
the Installation and Owner’s Manual supplied with the
Valor heater models 738JL and 739JL.
This document replaces pages 24‑25 of the 738JL
manual and pages 26‑27 of the 739JL manual.
Ceramic Logs Installation (738JL and 739JL)
Use the installation manual to install the appliance.
Once you have tted the ceramic walls, proceed with
the installation of the logs as shown below instead of
following the installation manual.
After installing the logs, continue the installation as
indicated in the manual.
Unpack the ceramic logs very carefully to avoid damaging the fragile material. Install the logs as shown below.
Please note that the position of the logs is critical to ensure proper performance of the appliance.
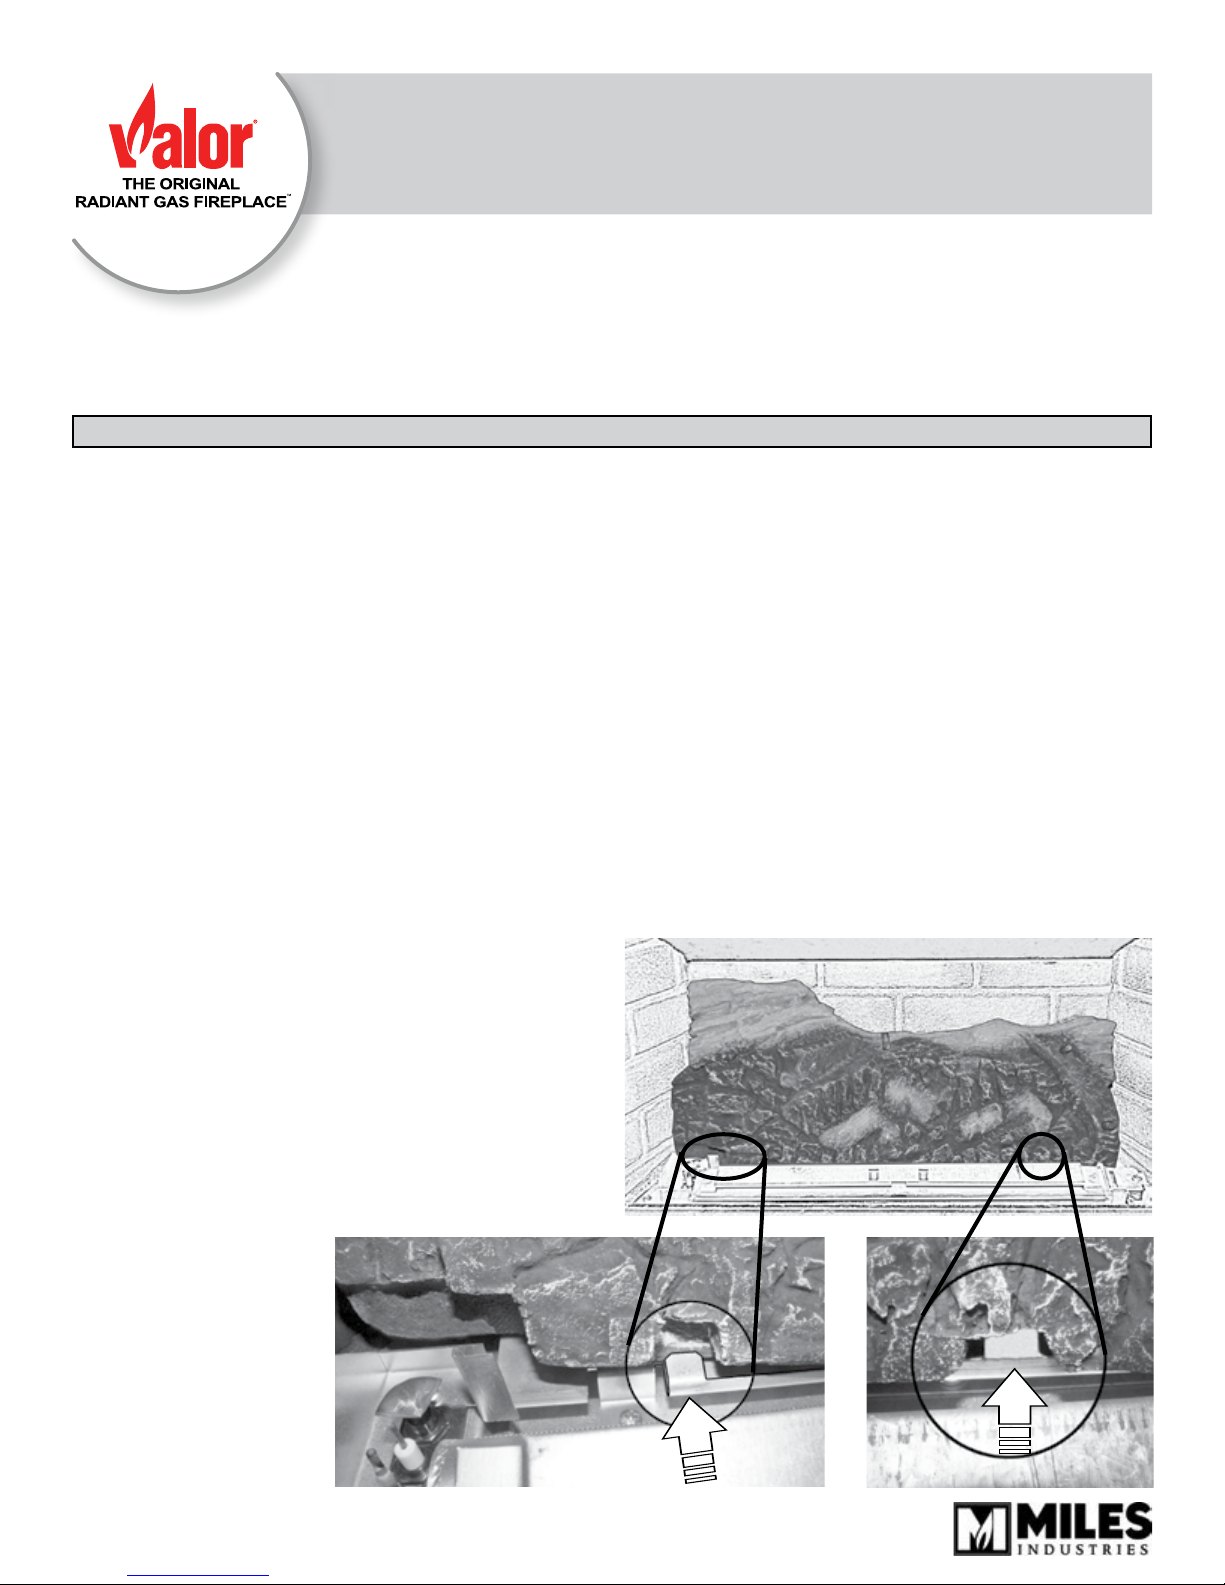
1. Place the rear log on the sheet metal support
aligning its notches at the bottom with the tabs on
the sheet metal support. Pull the log’s right‑hand
side forward until the notch at the bottom right of
the log sits against front edge of the right‑hand
metal tab as indicated. Pull the left‑hand side until
its notch at the bottom left sits against the bent
metal tab. Ensure log is not sitting on top of the tab.
NOTE: The log will be slightly angled backward
behind the burner on the left-hand side as
shown.
© Copyright Miles Industries Ltd., 2013
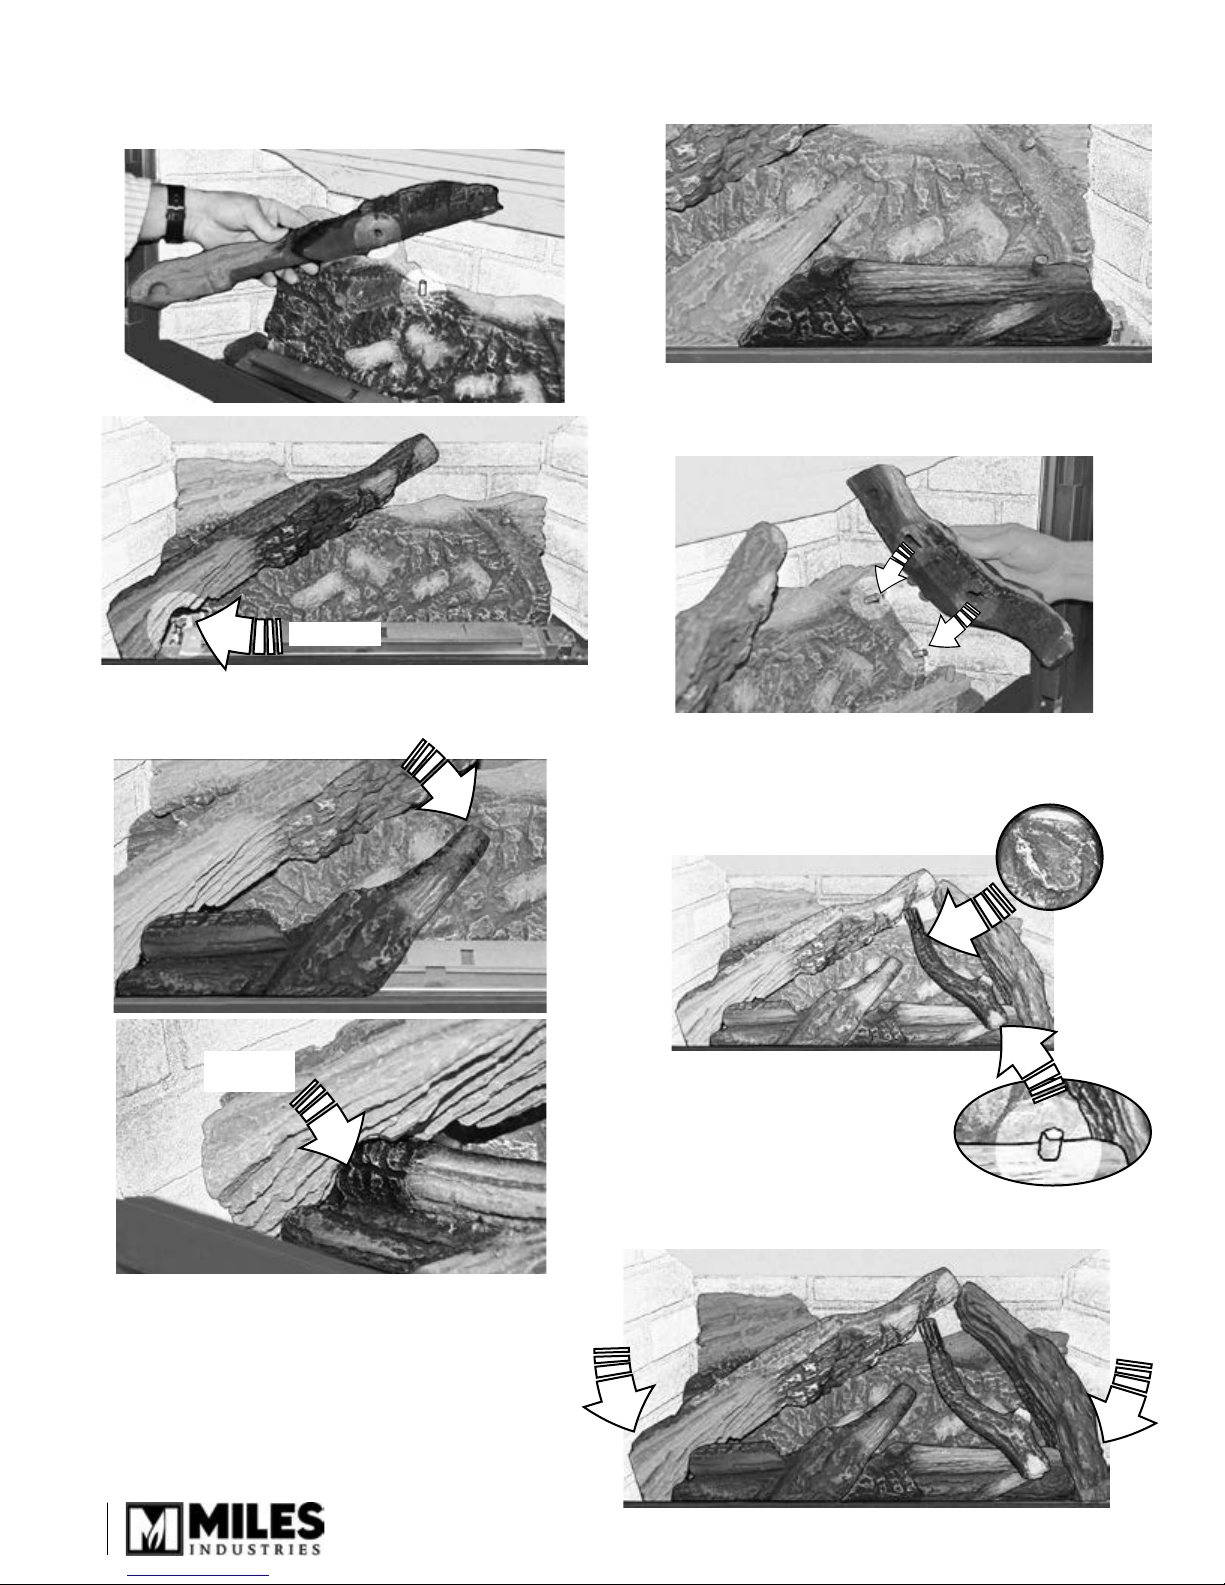
2. Place the top left log on the pin of the rear log. The
bottom of the log rests against the left of the pilot
shield and slightly above.
Pilot area
4. Place the front right log on the burner and slide it to
the left against the front left log.
5. Locate the top right log on the two pins on the right
side of the rear log. Ensure a tight t against the at
area around the pins in the rear log.
3. Place the front left log on the burner. Slide it to the
left against the top left log. The narrow end should
rest in the notch in the rear log.
Pilot area
6. Place the lower end of the center right log onto the
pin on the front right log. Rest the narrow end in the
notch into the rear log.
Notch in rear log
Pin in front right log
7. Pour some ceramic loose
coals on each side of the
logs to hide the sheet metal
work. Do NOT put any coal
into the pilot area.
2
 Loading...