

Valor 2200USB, 2200LSB Installation Manual
INSTALLATION MANUAL
LX2 Series
2200USB—Upper Shelf Black
2200LSB—Lower Shelf Black
For use with Valor models LX2 2200J Fireplaces ONLY
Note: This kit must be installed by a qualifi ed installer. These instructions are to be used in
conjunction with the main installation instructions for the above listed models.
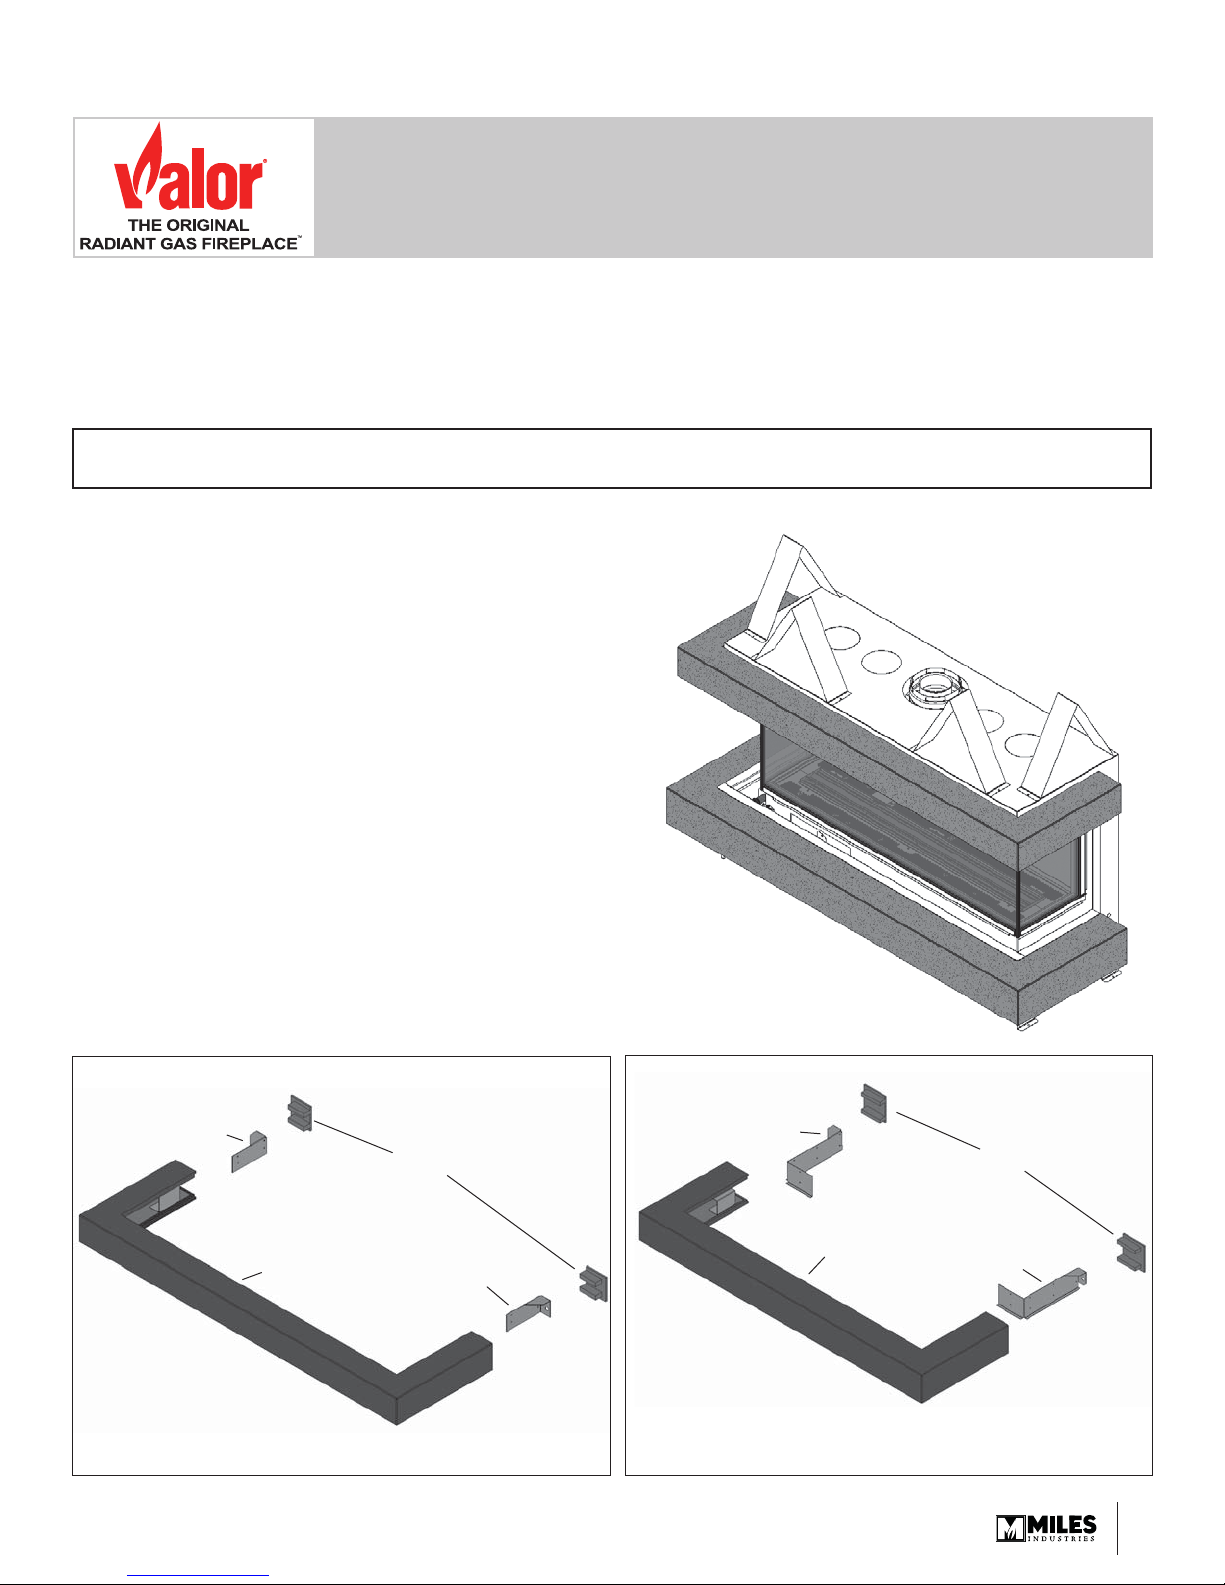
Description of Kit
These instructions cover the installation of both shelf
kits on the 3-sided LX2 fi replace.
The 2200USB—Upper Shelf Kit is installed above the
opening of the LX2 3-sided fi replace.
The 2200LSB—Lower Shelf Kit is installed below the
opening of the LX2 3-sided fi replace.
Each kit contains the shelf and the mounting brackets.
The shelves should be installed BEFORE
the wall fi nish is applied. Wall fi nish then
butts up to the shelves. Shelves CANNOT
!
be installed over top of wall fi nish material.
Overview
Kits Contents
2200USB—Upper Shelf 2200LSB—Lower Shelf
LH bracket
End caps (2)
Upper shelf
Hardware
• 8 #8-3/8 sheet metal screws
• 2 M6 x 30 mm bolts
• 2 Washers
4007177-01
© 2018, Miles Industries Ltd. All rights reserved.
RH bracket
LH bracket
Lower shelf
Hardware
• 16 #8-3/8 sheet metal screws
• 2 M6 x 30mm bolts
• 2 Washers
End caps (2)
RH bracket
1
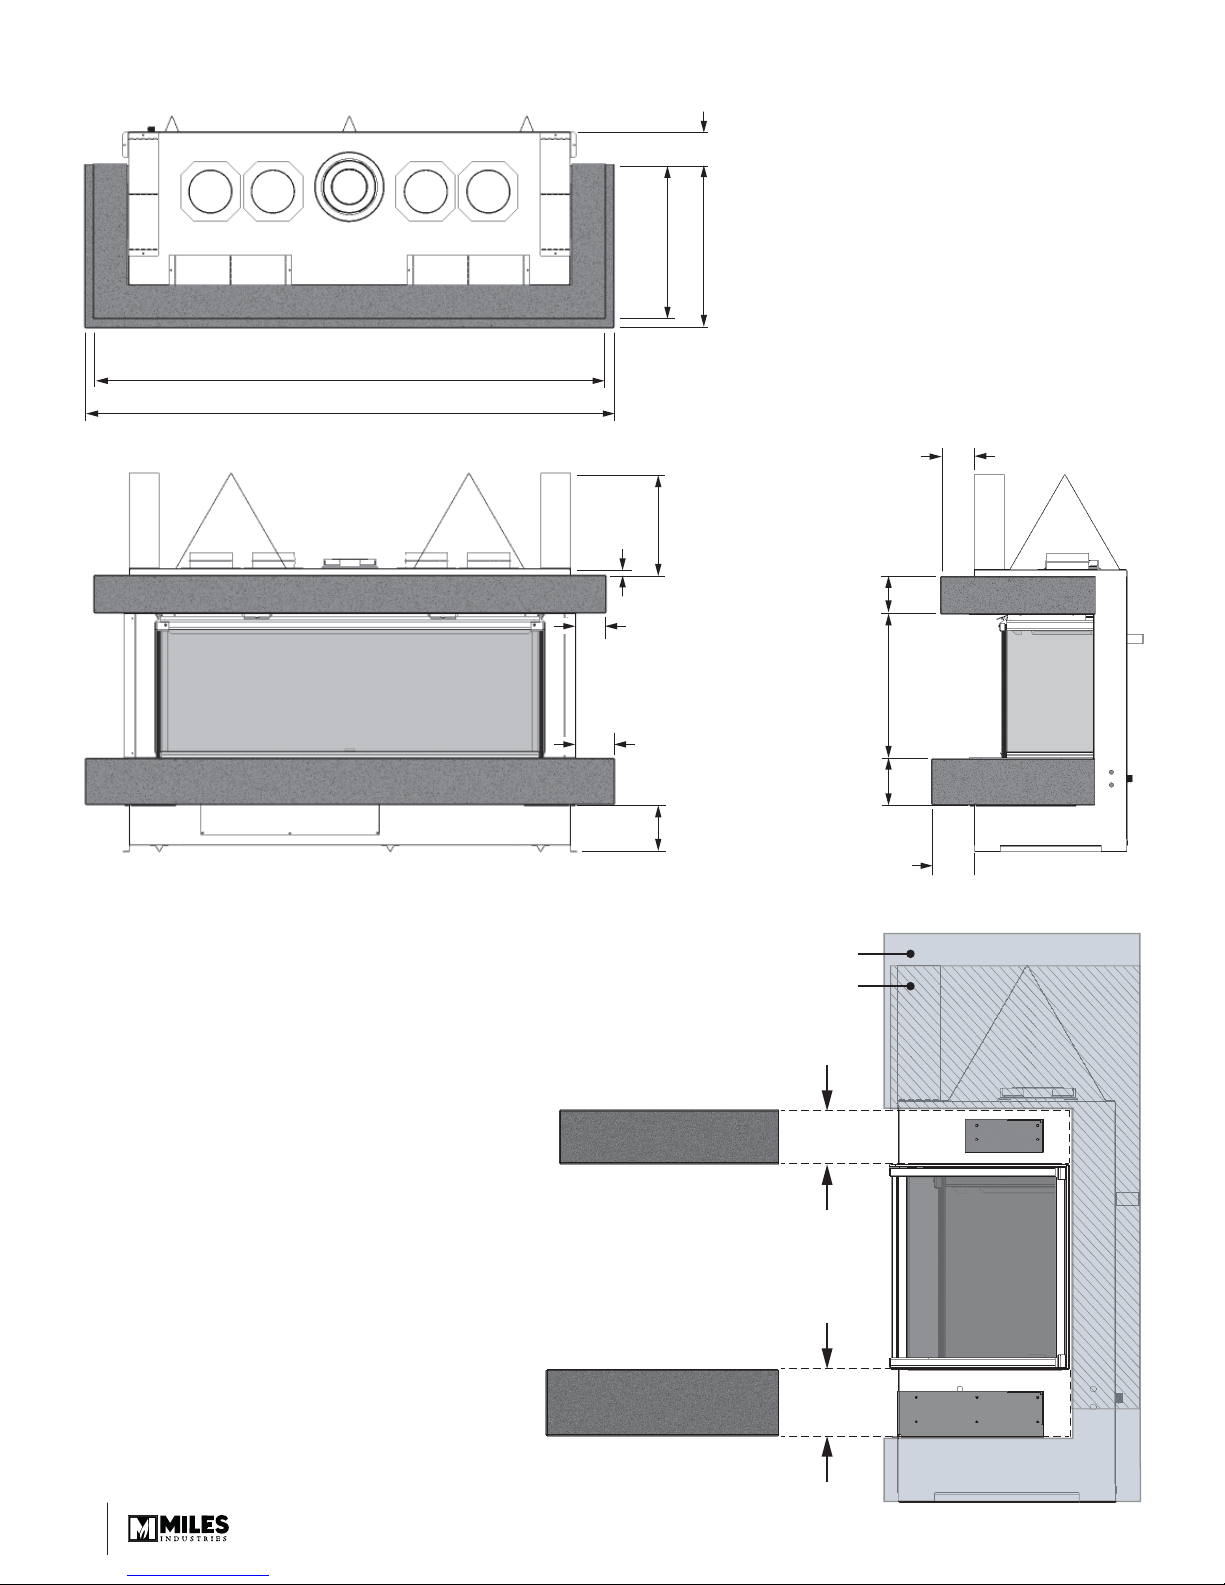
Dimensions
Upper shelf 60-3/8 (1533 mm)
Lower shelf 62-3/8 (1585 mm)
3/4”
(19 mm)
4-3/16” (106 mm)
3-3/4”
(96 mm)
19-1/4”
18-1/2”
(463 mm)
12” (305 mm)
(489 mm)
(102 mm)
4-1/2”
(114 mm)
4”
Wall fi nish considerations around shelves
Shelves are installed directly over fi replace
outer case They should be installed BEFORE
the wall fi nish is applied. Wall fi nish then
butts up to the shelves. Shelves CANNOT be
installed over top of wall fi nish material.
(432 mm)
5-3/16” (132 mm)
(143 mm)
4-11/16” (119 mm)
Wall finish material
Non-combustible materials
Upper shelf thickness
4-1/2” (114 mm)
17”
5-5/8”
5-1/16”
(129 mm)
2
Lower shelf thickness
5-5/8” (143 mm)
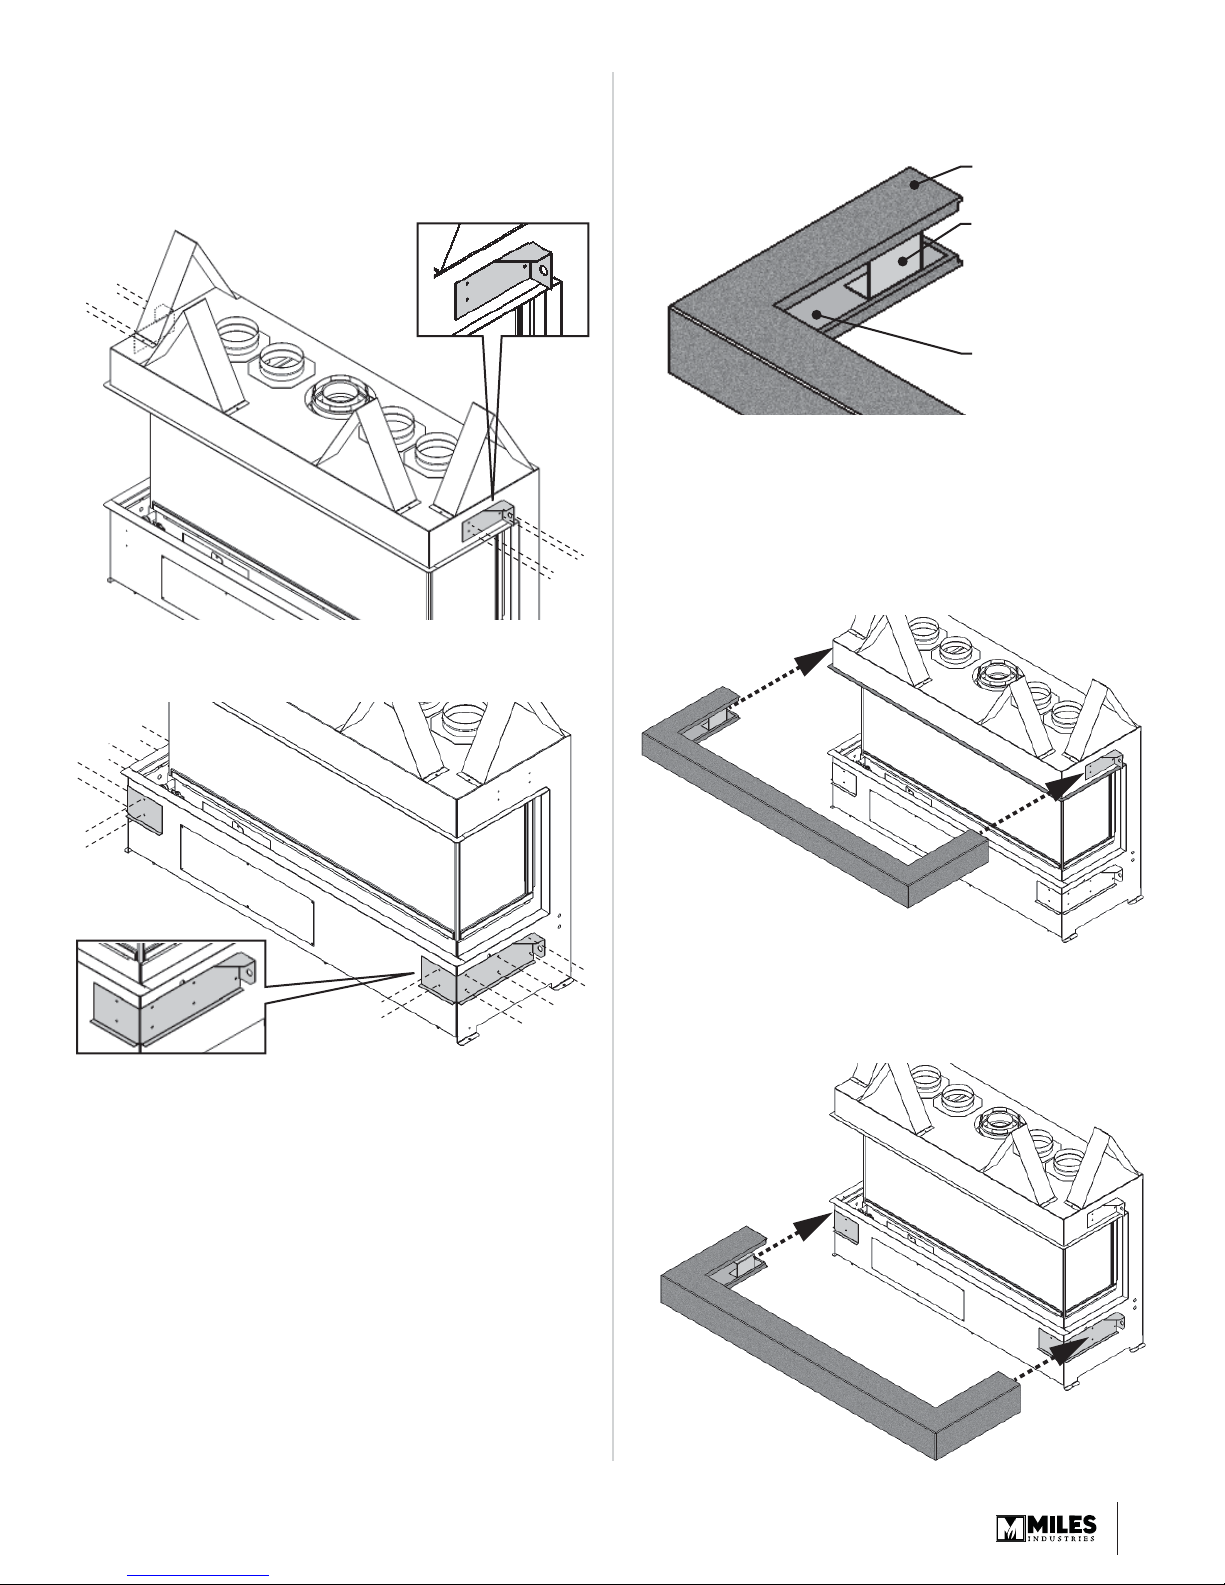
Installation
1. Install brackets to liner box. Ensure proper
orientation of brackets.
Upper shelf: one bracket secured by 4 sheet metal
screws each side.
Lower shelf: one bracket secured by 8 sheet metal
screws each side.
2. Orientation of shelf can be identifi ed from its internal
support bracket: bracket is attached to bottom of
shelf.
top
Internal support
brackets attached
to the bottom of the
shelf
bottom
Identify top and bottom of shelf to install. Line up
shelf and slide it over brackets on each side of
appliance case.
Upper shelf: Upper shelf rests on fi replace opening’s upper fl ange. Do not force shelf into place
as this may cause cracking.
Lower shelf: Lower shelf rests on brackets’ fl ange.
Do not force shelf into place as this may cause
cracking.
3
 Loading...