

Val-Matic 4-12 in VentSafe Security Cage User Manual

Manual No.
VS-OM1-2
4-12 in. VentSafe® Security Cage
Operation, Maintenance and
Installation Manual
INTRODUCTION..................................1
RECEIVING AND STORAGE...............1
DESCRIPTION OF OPERATION.........1
INSTALLATION....................................1
CONSTRUCTION.................................2
MAINTENANCE ...................................2
TROUBLESHOOTING .........................2
PARTS AND SERVICE........................2
WARRANTY.........................................3
®
VAL-MATIC® VALVE AND MANUFACTURING CORP.
905 RIVERSIDE DR. ELMHURST, IL. 60126
TEL. 630 / 941-7600 FAX. 630 / 941-8042
4-12 in. VentSafe® Security Cage
OPERATION, MAINTENANCE AND INSTALLATION
INTRODUCTION
This manual will provide you with the information to
properly install, maintain and ensure a long service
life for the VentSafe
installed in vent pipes used to vent vaults, reservoirs
and air valves to prevent the entrance of foreign
objects and to provide a barrier against the
intentional introduction of liquids into the vent pipe
(see figure 1).
RECEIVING AND STORAGE
Inspect the VentSafe
shipment. Unload all devices carefully to the ground
without dropping.
The devices should remain boxed, clean and dry
until installed to prevent weather related damage.
DESCRIPTION OF OPERATION
The VentSafe
deter unauthorized access and to prevent foreign
objects from entering the valve, vault or reservoir
®
is a wafer-style, screened cage to
®
. The VentSafe® is to be
®
upon receipt for damage in
CAUTION: The use of excessive bolt torque
may damage the device.
Mounting Flange Bolts
Device
Size
Bolt
Size
Recommended
Torque (ft-lbs)
Maximum
Torque (ft-lbs)
4 5/8” 20 30
8 3/4” 30 40
12 7/8" 60 70
TABLE 1. FLANGE BOLT TORQUES
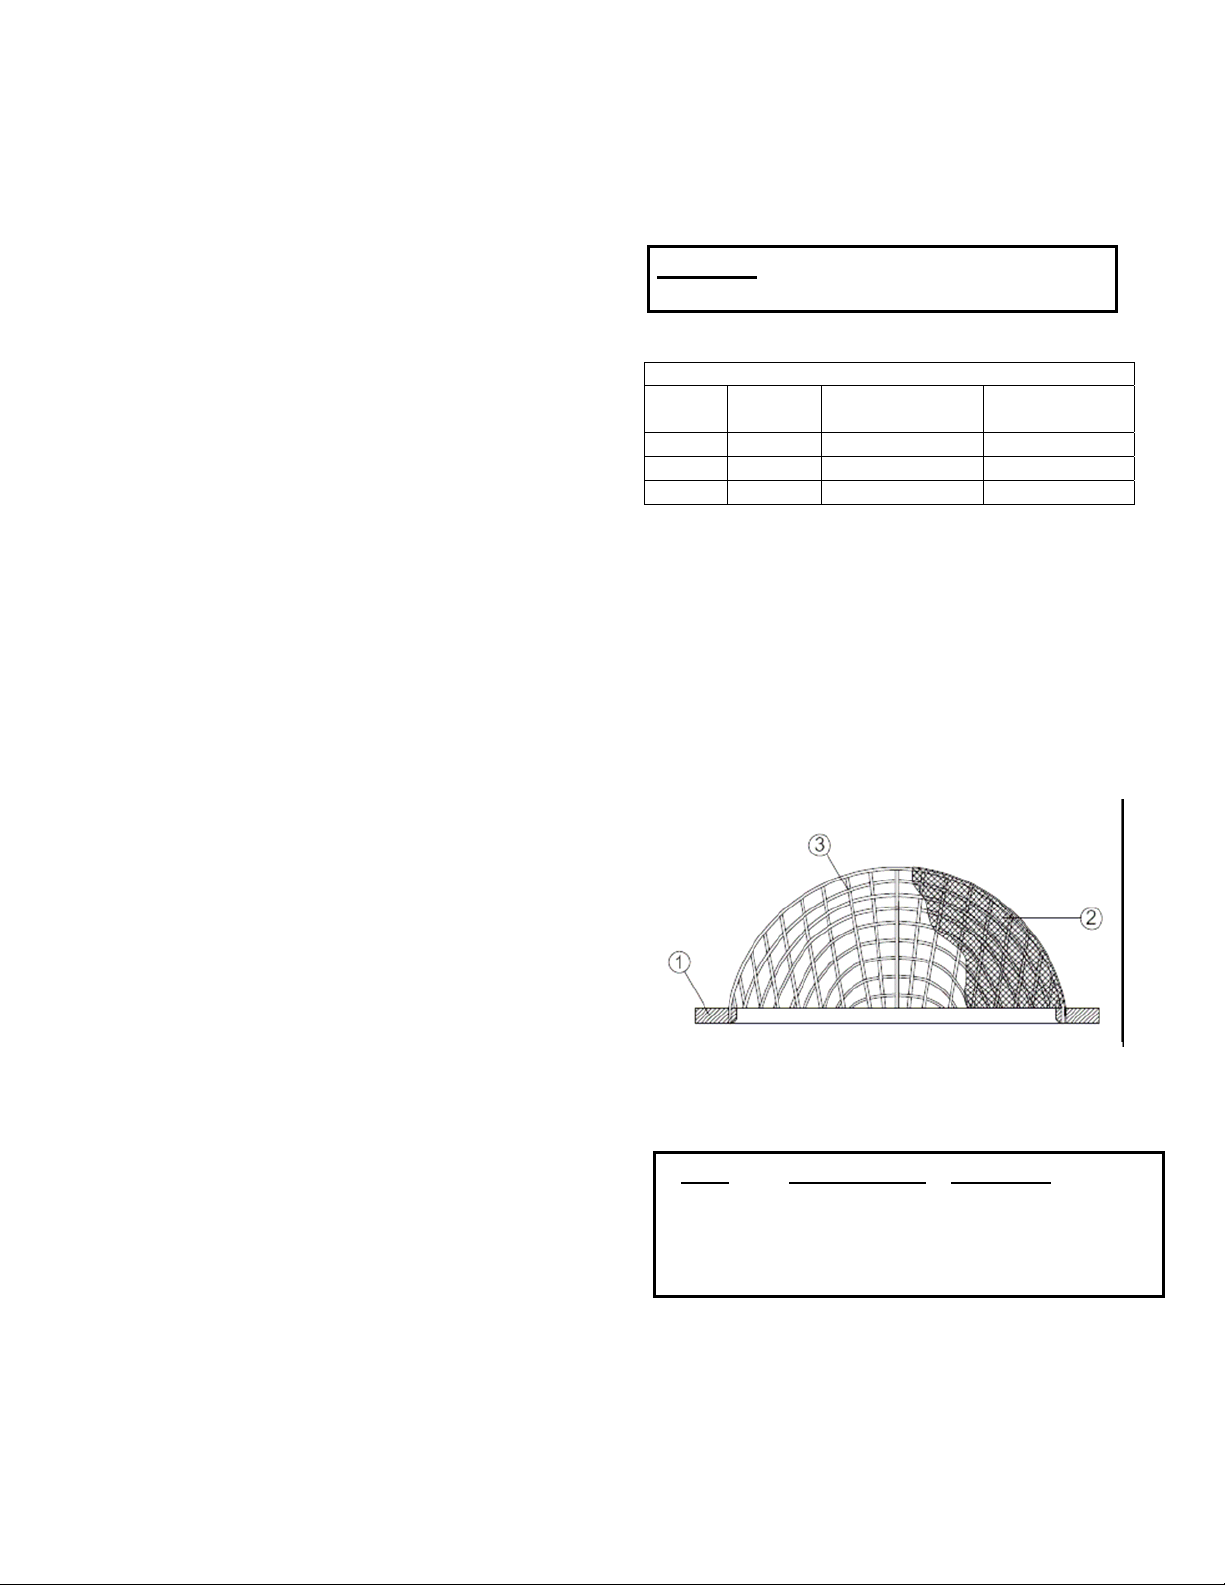
VENTSAFE® CONSTRUCTION
The standard VentSafe
corrosion resistant materials including polyvinyl
chloride (PVC) and stainless steel type 304. The
general details of construction are illustrated in
Figure 1 and identified in Table 2.
®
is constructed of quality
vent, but still allow the vent to perform its function of
admitting and expelling air under normal operating
conditions.
INSTALLATION
The installation of the VentSafe
proper operation. The VentSafe
®
is important for its
®
can be installed in
the vertical or horizontal position between typical
ANSI Class 125 flanges using standard connection
practices. The VentSafe
located above ground as shown in Figure 2. The
device can also be placed in series at both locations
for added protection. When installed at the end of
the vent pipe a ring-type flange is needed on the end
of the pipe to secure the device in place,
Flanged connections should only be mated with flatfaced pipe flanges. The bolts should be tightened in
gradual steps using the crossover method.
Recommended torque values are given in Table 1.
The VentSafe
®
can be used with or without flange
gaskets since the vent piping is not pressurized.
®
Security Cage can be
®
Figure 1: VentSafe
Cross Section of
Components
ITEM DESCRIPTION MATERIAL
1 Body PVC
2 Screen, 20 Mesh 304 Stainless Steel
3 Cage, 2 Mesh 304 Stainless Steel
Table 2: VentSafe
®
Parts List
1
 Loading...