

Page 1
3CX SIP Configuration Guide
Valcom Session Initiation Protocol (SIP) VIP devices are compatible with 3CX SIP Phone
Systems. The Valcom device is added to the 3CX as a standard SIP extension (generic SIP
phone).
The following steps outline the typical configuration process:
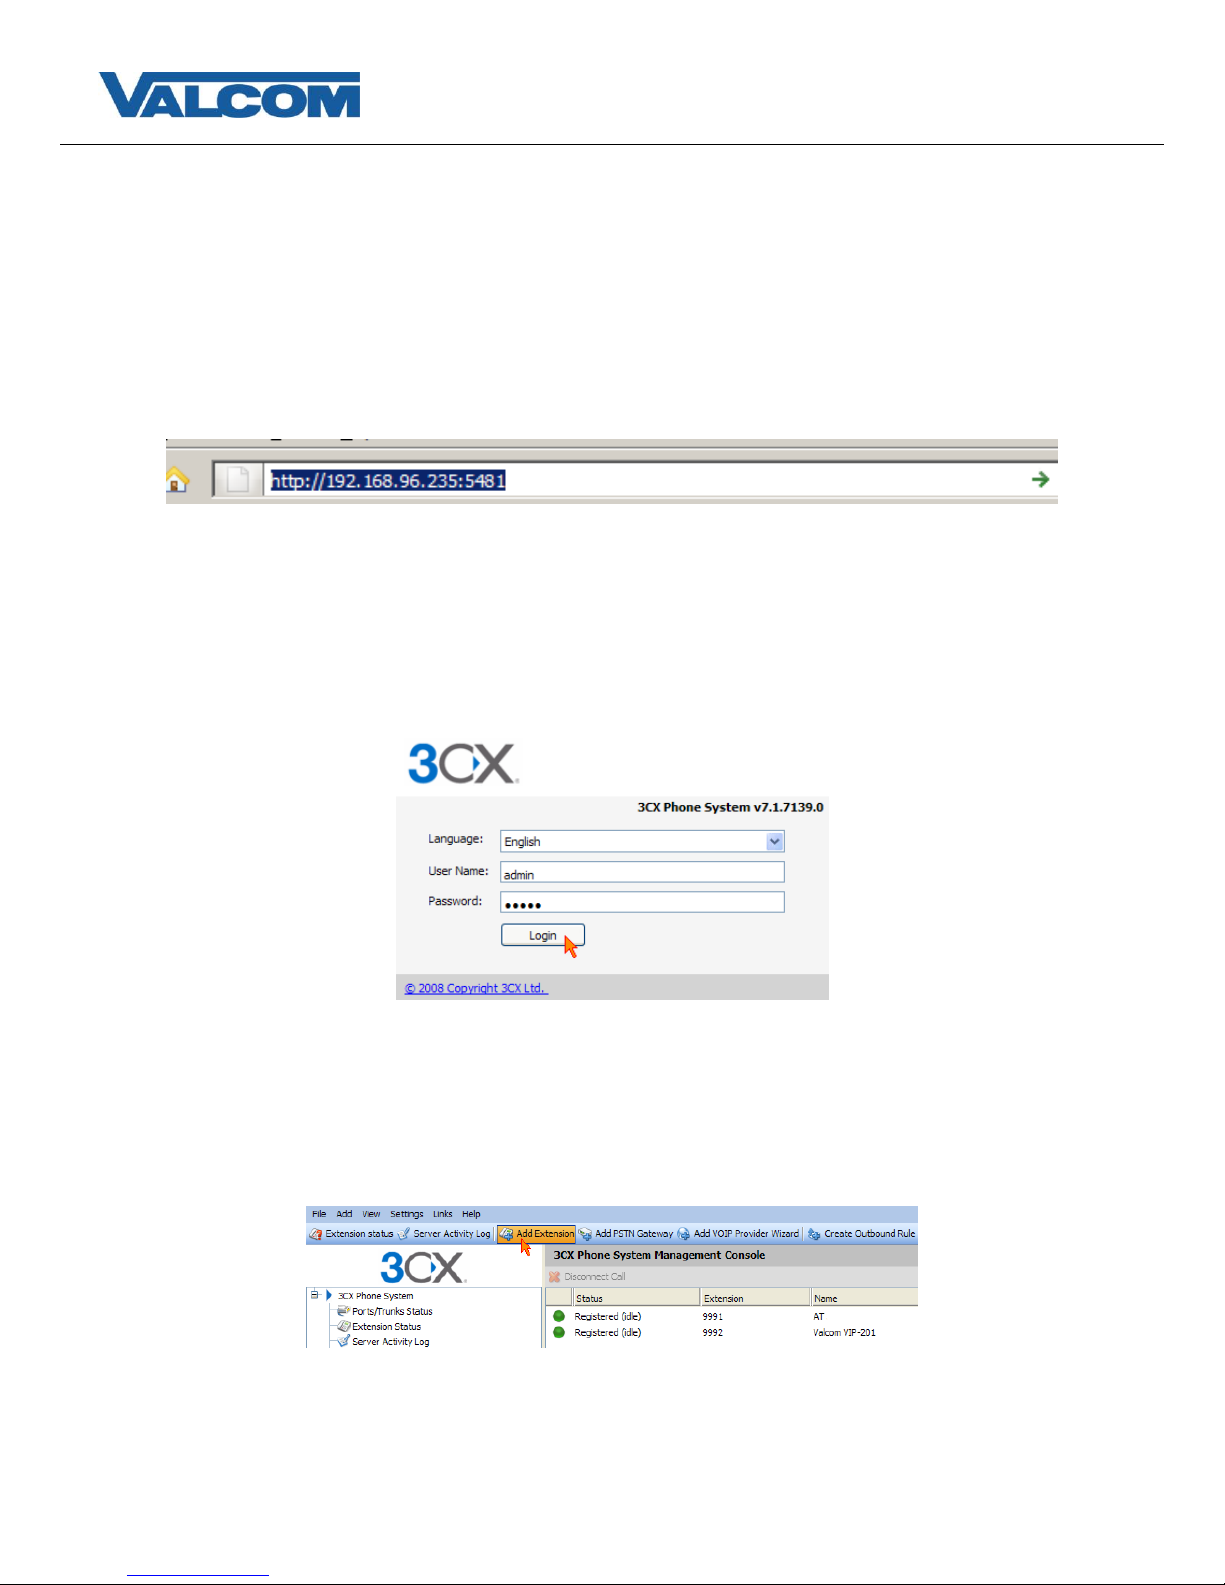
1. Navigate your web browser to the IP address of your 3CX SIP Server.
In this example the 3CX Phone System IP address is: 192.168.96.235
The 3CX SIP Server web access port number is “5481”, by default.
2. Login, using the proper credentials.
In this example we use a default of “admin” for the username and “admin” for the password.
3. Select “Add Extension” from the toolbar in your web browser window.
Page 1 of 5
Page 2
3CX SIP Configuration Guide
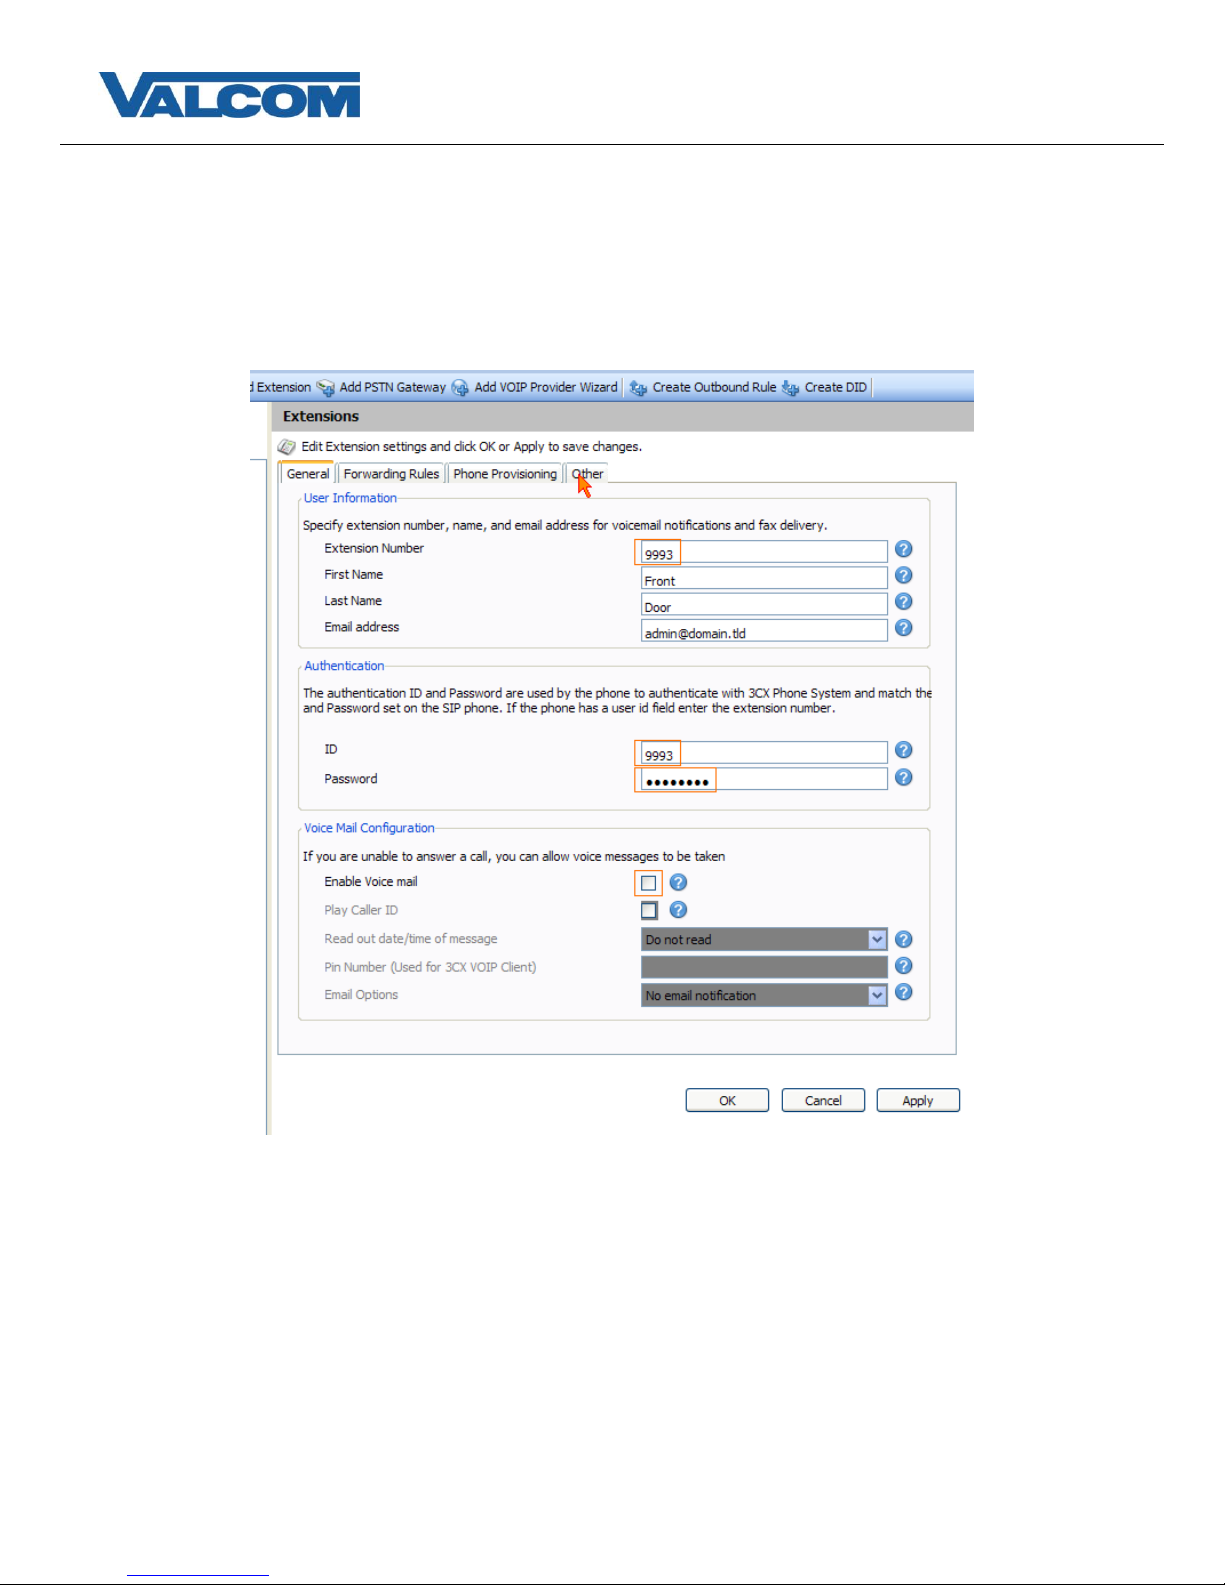
4. Enter the appropriate values for the “Add Extension” page fields.
In this example, our user will be “9993” and this user’s password will be “password”.
Required Fields: Extension Number, ID, & Password
Optional fields are used to make administration tasks easier, but are not required. They are, however,
recommended.
When complete, select the “Other” tab at the top of the “Add Extension” interface.
Page 2 of 5
Page 3

3CX SIP Configuration Guide
5. Change the “SIP ID” field to the SIP extension given to the Valcom SIP enabled VIP device.
In this example, we will fill in “9993” for the SIP ID, the same as our “Extension Number” field on the “General”
tab.
Select “OK”, at the bottom of the page, to apply and activate this configuration.
6. After selecting “OK” you will be taken to an “Extension Created” screen which contains the Proxy server IP, SIP
ID, Authentication ID, & Password. You will want to make note of this information.
Page 3 of 5
Page 4

3CX SIP Configuration Guide
7. Open the VIP-102B tool interface for the Valcom SIP enabled VIP device.
Note: The information contained in this guide is limited to configuration of the “SIP” tab in the VIP-102B IP
Solutions Setup Tool for the Valcom VIP device that is to be registered to the SIP server. More information on
Valcom VIP device configuration, such as IP address assignment, relay activation, etc, may be found in the VIP102B Reference Manual. This document may be downloaded from our website at http://www.valcom.com
Required Fields: Phone Number, Secret, SIP Server, Register, SIP Server Port, SIP Port,
RTP Port, Auto Destination
Optional Fields: Authentication Name, CID Name, CID Number
In our example, the SIP Server IP address is the same as our 3CX SIP PBX, “192.168.96.235”.
Phone Number is the same as our Extension Number in the 3CX configuration, “9993”.
Secret is the same as our Password in the 3CX configuration, “password”.
SIP Server Port is the port number, on which the 3CX SIP server is listening for SIP data, as seen in the
“Extension Created” dialog.
SIP Port is the port number, on which the Valcom VIP device is listening for SIP data. By default this is set for
“5060”.
RTP Port is the port number, on which the Valcom VIP device is set to send/receive audio packets, via SIP. By
default this is set for “20000”.
When the Valcom VIP device configuration is complete, select the “Update Changed Devices” button, at the
upper left.
Page 4 of 5
Page 5

3CX SIP Configuration Guide
8. After updating your VIP device, you will be prompted to reset your device. Select “Yes”.
9. Back to our 3CX web interface, select “Extension status” from the toolbar.
10. After getting the VIP device assigned the proper information, updated and reset, you will be able to view the
registration status of the device.
Successful registrations are listed with a green dot in the left column, next to “Status”, with “Registered” in the
“Status” column.
Below is a successful SIP registration:
Page 5 of 5
 Loading...