


Get$a$better$inbox!$
Administration guide – MailCube

VADE RETRO TECHNOLOGY, SASU Au capital de 268 831€
3 avenue Antoine Pinay, Parc d'activité des 4 vents, 59 510 HEM – France – RCS Rbx – Tourcoing - 509 568 416
10C 1V2 01/11 FR
2
TABLE OF CONTENTS
1 INTRODUCTION ............................................................................................................................................... 4$
2 GENERAL PRINCIPLES .................................................................................................................................. 5$
ABOUT SPAM ........................................................................................................................................................ 5$
ABOUT COMMERCIAL E-MAILS AND SOCIAL NETWORK NOTIFICATIONS ............................................................... 5$
VADE RETRO’S TECHNOLOGY .............................................................................................................................. 5$
VADE RETRO TECHNOLOGY’S STRENGTH: ........................................................................................................... 6$
PREDICTIVE HEURISTIC ANALYSIS ........................................................................................................................ 6$
SAFE UNSUBSCRIBE ............................................................................................................................................. 6$
3 GETTING STARTED ........................................................................................................................................ 7$
INITIAL STARTUP .................................................................................................................................................. 8$
4 ADMINISTRATE YOUR MAILCUBE ............................................................................................................ 9$
5 CONFIGURING YOUR MAILCUBE ............................................................................................................ 11$
HTTPS Web Interface ................................................................................................................................................ 12$
Activating TLS on inbound email streaming .............................................................................................................. 13$
Activating TLS on outbound email streaming ............................................................................................................ 14$
6 CONFIGURE YOUR INTEGRATED MAIL RELAY ................................................................................. 16$
Receiving messages .................................................................................................................................................... 16$
Queuing ....................................................................................................................................................................... 17$
Sending messages ....................................................................................................................................................... 18$
Activation of outgoing filter ....................................................................................................................................... 19$
Receiving messages .................................................................................................................................................... 19$
Queuing ....................................................................................................................................................................... 20$
Sending messages ....................................................................................................................................................... 21$
7 CONFIGURING YOUR FILTER ENGINE .................................................................................................. 22$
IP filtering ................................................................................................................................................................... 22$
Protocol filtering ......................................................................................................................................................... 23$
Domain filtering .......................................................................................................................................................... 23$
Address filtering ......................................................................................................................................................... 25$
Content filtering .......................................................................................................................................................... 26$
Antivirus filtering ....................................................................................................................................................... 27$
Domain filtering .......................................................................................................................................................... 28$
Address filtering ......................................................................................................................................................... 29$
Content filtering .......................................................................................................................................................... 30$
Antivirus filtering ....................................................................................................................................................... 31$
Custom added headers ................................................................................................................................................ 31$
8 MONITORING CONFIGURATION INTERFACE ..................................................................................... 32$
MONITORING ...................................................................................................................................................... 32$
SYSLOG EXPORT ................................................................................................................................................. 32$
ALERTS ............................................................................................................................................................... 33$
9 AUTOMATIC UPDATES ................................................................................................................................ 34$
10 USER ACCOUNTS MANAGEMENT .......................................................................................................... 35$
Settings for account reports .......................................................................................................................... 35$
General settings ............................................................................................................................................ 35$
User settings ................................................................................................................................................. 36$
Settings of mutual account reports (Administrator Access) ......................................................................... 37$

VADE RETRO TECHNOLOGY, SASU Au capital de 268 831€
3 avenue Antoine Pinay, Parc d'activité des 4 vents, 59 510 HEM – France – RCS Rbx – Tourcoing - 509 568 416
10C 1V2 01/11 FR
3
Known mailboxes .......................................................................................................................................... 38$
Accounts discovery ....................................................................................................................................... 39$
ALIASES ............................................................................................................................................................. 40$
THE MUTUAL ACCOUNT ...................................................................................................................................... 41$
ACCOUNT REPORTS ............................................................................................................................................ 42$
11 DOMAIN MANAGEMENT AREA .............................................................................................................. 46$
Routing .......................................................................................................................................................... 46$
Filtering ........................................................................................................................................................ 47$
User accounts ............................................................................................................................................... 48$
Mailboxes ...................................................................................................................................................... 49$
12 MAINTENANCE ............................................................................................................................................ 49$
PRESENTATION OF THE MAINTENANCE INTERFACE ............................................................................................ 49$
Backup .......................................................................................................................................................... 51$
Configuration export .................................................................................................................................... 51$
Update ........................................................................................................................................................... 52$
System ........................................................................................................................................................... 52$
General information ..................................................................................................................................... 53$
13 HIGH AVAILABILITY CONFIGURATION ............................................................................................. 53$
14 ACCESS TO LOGS ........................................................................................................................................ 56$
15 ACCESS TO STATISTICS ............................................................................................................................ 58$
STATISTICS HOMEPAGE INTERFACE .................................................................................................................... 58$
PRESENTATION OF THE INTERFACE FOR CHRONOLOGICAL CONSULTATION OF STATISTICS ................................ 59$
16 HOMEPAGE ................................................................................................................................................... 60$
PRESENTATION OF THE HOMEPAGE INTERFACE .................................................................................................. 60$
Homepage ..................................................................................................................................................... 60$
The dashboard .............................................................................................................................................. 61$
17 FAQ ................................................................................................................................................................... 62$
WHAT IF AN UNWANTED MESSAGE HAS NOT BEEN BLOCKED? ........................................................................... 62$
WHAT IF A MESSAGE IS BLOCKED BY MISTAKE? ................................................................................................. 62$
HOW DO I ACCESS USER ACCOUNTS FROM OUTSIDE MY NETWORK? ................................................................... 62$
18 APPENDICES ................................................................................................................................................. 63$
DIAGRAM OF RELATIONSHIPS BETWEEN THE APPLIANCE AND RELATED SYSTEMS ............................................. 63$
DEPLOYING THE FEEDBACK TOOLBAR WITH WINDOWS SERVER ....................................................................... 64$
Requirements ................................................................................................................................................ 64$
Creating the deployment policy (GPO) ........................................................................................................ 65$
Results of the configuration .......................................................................................................................... 68$

VADE RETRO TECHNOLOGY, SASU Au capital de 268 831€
3 avenue Antoine Pinay, Parc d'activité des 4 vents, 59 510 HEM – France – RCS Rbx – Tourcoing - 509 568 416
10C 1V2 01/11 FR
4
1 Introduction
Welcome to a spam-free world!
Thank you for choosing MailCube to protect your messaging system while filing away all low-priority
messages.
The MailCube appliance relies on the unique filtering technology developed by Vade Retro
Technology, which integrates several thousand rules that our experts refresh in real time. MailCube
also integrates a predictive heuristic filter, a Vade Retro exclusivity that allows anticipating and
blocking certain categories of new-generation spam even before they spread on your network.
Heuristic technology also allows Vade Retro Technology to provide a classification for commercial
messages and social network notifications, thereby allowing you to get a pleasant and uncluttered
mailbox.
Furthermore, Vade Retro Technology solutions offer a unique feature on the market: safe
unsubscription. It allows users to unsubscribe from unwanted commercial e-mails in a single click
directly in the area where e-mails are classified and from generated reports.
The aim of this manual is to explain how to operate physical and virtual MailCube appliances, how to
integrate them into your messaging system and how to customize them accordingly.

VADE RETRO TECHNOLOGY, SASU Au capital de 268 831€
3 avenue Antoine Pinay, Parc d'activité des 4 vents, 59 510 HEM – France – RCS Rbx – Tourcoing - 509 568 416
10C 1V2 01/11 FR
5
2 General principles
Vade Retro, a French software vendor with technology ahead of its
time…
The information in this chapter will allow you to find out more about spam-related threats
and the antispam technology implemented on your MailCube.
About spam
Did you know that more than 90% of electronic messages circulating worldwide are spam?
E-mail within a company is as much an indispensable tool as it is a major source of spending (loss of
employee productivity and even a breach of your company’s security).
Many studies have highlighted the cost of spam – on average, it represents a cost of 2.5 man-days a
year for the company! This cost includes both the direct cost (bandwidth consumption, storage of
undesirable mail, etc.) and indirect cost (employee’s time wasted processing spam). This works out to
about 250,000€ per year for a company of 100 employees
(1)
.
(1) Source: Radicati group
About commercial e-mails and social network notifications
Even after a powerful antispam has done its job, commercial e-mails and social network notifications
still represent more than 50% of the messages that reach your inbox. At Vade Retro, we call these
“graymail”. Graymail refers to low-priority messages that are occupying an increasing amount of space
in inboxes.
Commercial e-mails provide ways to unsubscribe in order to stop receiving them. However, these links
are sometimes not clearly visible to the user, or the unsubscription process is tedious and many users
dread the inappropriate use of information or the insertion of viruses/malware.
However, unsubscribing is still the best way to optimize the contents of a mailbox. It just has to be
simple and safe.
Vade Retro’s technology
Technology is the catchword at Vade Retro. 60% of its employees are dedicated to the research and
development of Vade Retro’s filter kernel.
Vade Retro’s antispam technology uses thousands of rules, each contributing to a comprehensive
assessment of every message, without the need to learn the specifics of each deployment site
and without querying an external reference server.
The main advantages of Vade Retro technology are:
! Immediately operational processing, no learning time required
! No external connection to analyze messages.
! Very high processing speed.
! Small amount of system resources required.
! Compact and universal development.
! Innovative technologies such as graymail classification (Commercial e-mails, Newsletters and
social network notifications) as well as safe unsubscription in one click.

VADE RETRO TECHNOLOGY, SASU Au capital de 268 831€
3 avenue Antoine Pinay, Parc d'activité des 4 vents, 59 510 HEM – France – RCS Rbx – Tourcoing - 509 568 416
10C 1V2 01/11 FR
6
Vade Retro Technology’s strength:
Predictive heuristic analysis
The engine uses a complex system of unpredictable heuristic rules deduced from the analysis of all
the components of a message (header, subject, body text, html, attachments,etc).
Heuristic rules are determined by our experts who look for unique features typical of certain types of
messages (often sent by robots) in order to identify future messages with the same
characteristics (predictive heuristic filter).
Determining such rules requires complete familiarity with the techniques used in the e-mails as well as
broad general knowledge of spamming practices.
Our experts are assisted in their research by tools that have been developed specifically for this
purpose, which allow new hypotheses to be tested quickly. They also continuously use collections of
spam and legitimate messages that help in validating rules. These collections have been built up
progressively since the beginning of Vade Retro’s development.
With the implementation of a predictive heuristic analysis, Vade Retro technology is able to
anticipate certain types of undesirable mail and viruses before they spread on your network. This new
feature intends to meet publishers’ minimum intervention time limit which imperatively requires an
upgrade of the engine or of signatures during an attack.
With MailCube you will benefit from the latest technological advances from our laboratory experts.
Safe Unsubscribe
Safe Unsubscribe is an exclusive Vade Retro Technology service that automatically detects
unsubscription links in the contents or headers of messages in order to offer the user a safe and
simplified unsubscription.
After it detects unsubscription links, the Safe Unsubscribe technology will browse web pages by
executing all the actions needed for a proper unsubscription with the automatic detection of an
unsubscription confirmation. In the case of unsubscriptions by e-mail, Safe Unsubscribe will send a
formatted e-mail to the advertiser for an automatic unsubscription. This whole process is fully
seamless for the user.
For quicker execution, the browsing process is outsourced so that is takes place in the Vade Retro
Technology datacenter. In less than 2 seconds, the user will be able to see the status of his
unsubscription in his interface:
! Successful
! In progress
! Failed

VADE RETRO TECHNOLOGY, SASU Au capital de 268 831€
3 avenue Antoine Pinay, Parc d'activité des 4 vents, 59 510 HEM – France – RCS Rbx – Tourcoing - 509 568 416
10C 1V2 01/11 FR
7
3 Getting started
Understanding the solution in just a few clicks…
The instructions contained in this chapter allow you to master the use of your new antispam device in
just a few minutes. They are based on the default settings of the appliance, which provides you with
the immediate maximum protection of your mail server.
MailCube MC2 requires no intervention on your part – it analyzes and processes content and sets
aside undesirable mail from your mailbox 24 hours a day, with total autonomy
MailCube MC2 will inform users of its activities through reports that they will receive regularly in their
mailboxes.
General recommended architecture
The MailCube MC ² appliance fits into your architecture by being placed in the path of
SMTP traffic. The figure below (Figure 3-1) shows the architecture recommended by Vade Retro
Technology.
Figure 3-1 Architecture recommended for MailCube MC ² (Pro)
The integration of the appliance requires certain ports to be opened on your firewall and e-mail
server (to update connectors) in order for MailCube to run properly. Details of these elements are
given in Appendix 18.1
Standard Model
SC510-200BM SuperMicro server
X8SIL-F motherboard
Intel CI3-550 Dual Core processor
2048 MB of 1333Mhz DDR3 RAM (1x2GB)
500GB hard disk
7200 tpm non-hotplug SATA3
2 Gbps network interfaces
200W non-hotplug power supply
Size: 19’’
Virtual Appliance
! 64 bit dual core (1 core for Hyper-V)
! 2GB of RAM
! 60GB of storage
! Delivery format: .ova / .vhd
Pro Model
SC815TQ-R650UBK SuperMicro server
X8SIU-F motherboard
Intel Pentium XEON X3450 Quad Core
processor
4096MB of DDR3 1333Mhz RAM (2x2GB)
2 x 500GB hard disks
7200 tpm RAID 1 hotplug SATA3
2 Gbps network interfaces
2 650W hotplug supplies
Size: 19”
Compatible hypervisors:
! ESX 3.X, 4.X, 5.X
! Hyper-V 2008 - 2012
! Xen Server
! QUEMU

VADE RETRO TECHNOLOGY, SASU Au capital de 268 831€
3 avenue Antoine Pinay, Parc d'activité des 4 vents, 59 510 HEM – France – RCS Rbx – Tourcoing - 509 568 416
10C 1V2 01/11 FR
8
Initial startup
Upon receipt of your MailCube, you will be provided with a Getting Started guide. This guide
explains step by step the prerequisites to check and basic actions to perform in order to
access the administration interface (Figure 3-1).
Figure 3-2 Getting Started guide, Virtual Edition
The elements shown in the initial startup are not set. They may be modified later from the
administration interface.
Warning: The items shown in step 7 and 8 must allow access to internet. Internet access is needed
in order to activate MailCube as shown in step 10.
Once the startup process is over, you can access your MailCube from the defined IP
address or hostname (Chapter 4).

VADE RETRO TECHNOLOGY, SASU Au capital de 268 831€
3 avenue Antoine Pinay, Parc d'activité des 4 vents, 59 510 HEM – France – RCS Rbx – Tourcoing - 509 568 416
10C 1V2 01/11 FR
9
4 Administrate your MailCube
A streamlined interface allowing you to get to the point
In this chapter you will find the information allowing you to access your MailCube administration area.
Connecting to the administration interface
To log on to your administration interface, enter in your web browser the IP address assigned to
your MailCube during startup (or the DNS equivalent), followed by the port 8080. You will then reach a
home page asking you to enter your username and password (Figure 4-1). The input should be in this
format: http://XXX.XXX.XXX.XXX:8080 or http://appliancename:8080/
The default username and password are: admin / admin
During your first login you will be asked to modify your password (Figure 4-2).
You can already choose the language you wish to browse in. While you browse, the menu to select
the language will be displayed at the top right.
Figure 4-1 Login screen
You can always change this password later by clicking on the small yellow key above the
navigation bar of the interface (Figure 4-3)

VADE RETRO TECHNOLOGY, SASU Au capital de 268 831€
3 avenue Antoine Pinay, Parc d'activité des 4 vents, 59 510 HEM – France – RCS Rbx – Tourcoing - 509 568 416
10C 1V2 01/11 FR
10
Figure 4-2 Password personalization screen
Figure 4-3 Password modification button
Sections of the administration area
The administration area consists of:
! The home page with indicators regarding message processing and the
licenses associated with your MailCube.
! The configuration interface where you can change the appliance’s network settings and
configure and customize your overall mail security policy (define filter rules).
! The domain management interface where you can customize your mail security policy by
domain
! The statistics interface allowing you to configure dashboards.
! The filter logs interface.
! The interface to access information and maintenance options: appliance’s backup
policy, exporting configurations.
! The user account settings interface.
! The interface to configure high availability.
Logging off from the administration area
To end your session, click on the “Logout" button located in the upper right side of your interface.
Figure 4-3 Button to log out from the administration interface
VADE RETRO TECHNOLOGY, SASU Au capital de 268 831€
3 avenue Antoine Pinay, Parc d'activité des 4 vents, 59 510 HEM – France – RCS Rbx – Tourcoing - 509 568 416
10C 1V2 01/11 FR
11
5 Configuring your MailCube
Integrate the appliance completely into your architecture
This chapter explains the fields to enter during the configuration of your MailCube so that it can filter
incoming mail according to Vade Retro’s predefined settings.
Network settings interface
To access the settings interface, click on "Configuration" then "Network". See Figure 5-1.
Figure 5-1 Network settings interface
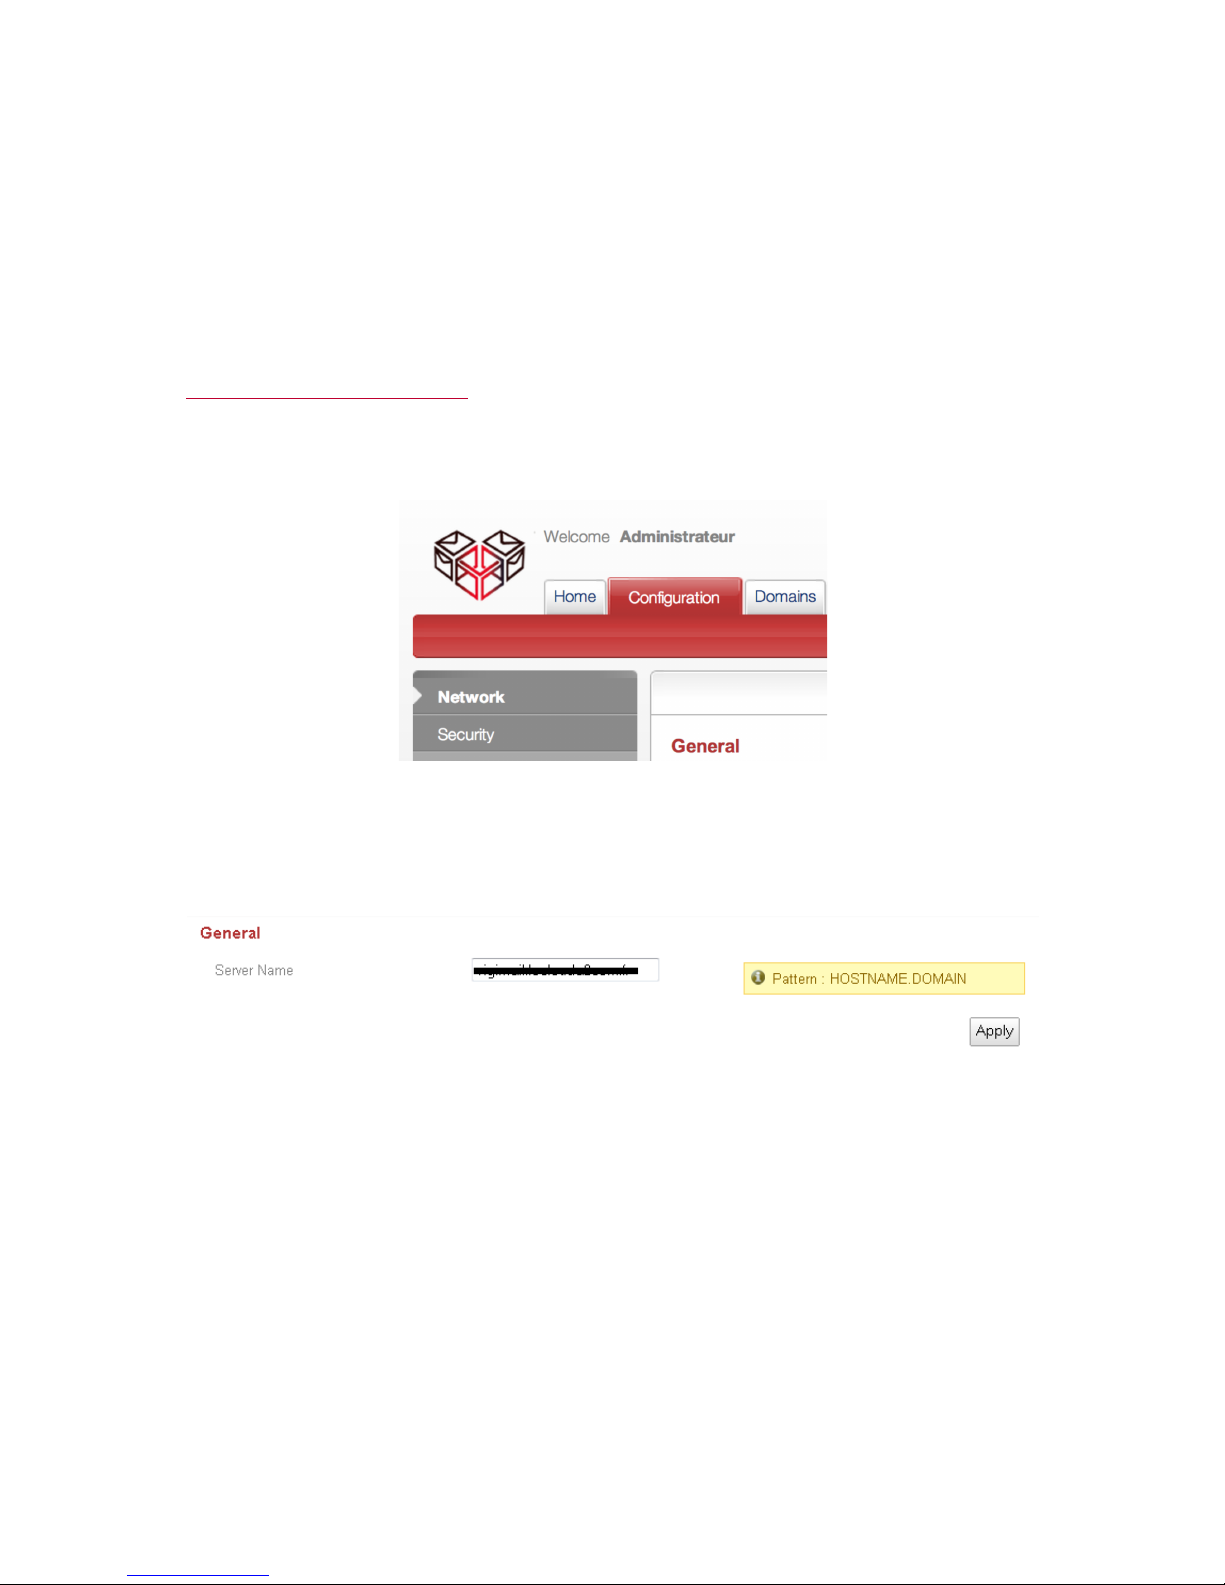
The settings interface offers a mask during the validation or modification of the network settings
defined the first time the solution was powered up. Each time information is entered, a tooltip will
define the type of content to enter in the text box (Figure 5-2).
Figure 5-2 “Server name” field and the associated tooltip
Here you will be able to validate the following information:
• Server name: the name you would like to give with your domain extension (e.g.
mailcubename.yourdomain.com).
• Primary Network Interface: Network information for the first interface of the appliance (IP
address, Subnet Mask, IP Gateway).
• Secondary Network Interface: network information for the second interface of the appliance (IP
address, Subnet Mask, IP Gateway). This interface has a DHCP server. It will allow you
to physically take control of the appliance in case you misplace the configuration of
the primary interface.
• DNS Server: The domain name servers (DNS) entered will allow the appliance to communicate with
other devices on your network (e-mail server, etc...) using the DNS name.
• Proxy Server: This field must be entered if you use a proxy server to access the internet.
• NTP Clock Synchronization: This setting will allow the appliance’s clock to synchronize with your
network clock and especially with the e-mail server.

VADE RETRO TECHNOLOGY, SASU Au capital de 268 831€
3 avenue Antoine Pinay, Parc d'activité des 4 vents, 59 510 HEM – France – RCS Rbx – Tourcoing - 509 568 416
10C 1V2 01/11 FR
12
Definition of the appliance’s access policy
To access the settings interface, click on "Configuration" then "Security". See Figure 5-3.
Figure 5-3 Security settings interface
In the Security menu, you can implement security policy for these following flows:
! Web interface including SSL and certificates management
! TLS on the inbound email flow
! TLS on the outbound email flow
HTTPS Web Interface
This interface offers a security policy on the web interface access using the connection IP and a SSL
management in order to activate the HTTPS by using either an auto-signed certificate or a certificate
provided by an authority of certification
Figure 5-4 Access to the security settings interface (HTTPS)
When the "IPs or networks authorized to connect" list is empty, IP addresses trying to log on
to the administration interface will not be checked. If you add an address, the list
becomes restrictive and only addresses present in this list can access the MailCube administration
interface.
Be carefull, by activating HTTPS, it is mandatory to set up a certificate. Without any certificate, the
browser shows a security warning before showing the webpage.

VADE RETRO TECHNOLOGY, SASU Au capital de 268 831€
3 avenue Antoine Pinay, Parc d'activité des 4 vents, 59 510 HEM – France – RCS Rbx – Tourcoing - 509 568 416
10C 1V2 01/11 FR
13
Activating TLS on inbound email streaming
The TLS is a security protocol for exchanges on the Internet. Activating the TLS on the email
streaming turns on the encryption of SMTP connections.
TLS Mode:
! The “permissive” mode makes the MailCube compatible with encrypted inbound connections
by receiving the content of these connections and receiving also non-encrypted connections.
! The restrictive mode makes the MaiLCube compatible with encrypted inbound connetions but,
by activating this setting, the mailcube received only encrypted connections and rejects all
non-encrypted connections.
Figure 5-5 Access to the security settings interface (Inbound TLS)
Be carefull, by activating TLS on inbound streaming, it is mandatory to set up a certificate. Without any
certificate and the TLS activated, the inbound streaming doesn’t work. Emails are not received.

VADE RETRO TECHNOLOGY, SASU Au capital de 268 831€
3 avenue Antoine Pinay, Parc d'activité des 4 vents, 59 510 HEM – France – RCS Rbx – Tourcoing - 509 568 416
10C 1V2 01/11 FR
14
Activating TLS on outbound email streaming
The TLS is a security protocol for exchanges on the Internet. Activating the TLS on the email
streaming turns on encryption of outbound SMTP connections.
TLS Mode:
! The “permissive” mode makes the MailCube adaptative to the recipient’s server. If the
recipient’s server is compatible with TLS, MailCube sends emails using an encrypted
connection. If not, the MailCube sends emails using a normal connection.
! The restrictive mode allows sending emails only when the recipient’s server is compatible with
TLS. This restrictive mode can be applied only for a list of domain names.
Figure 5-5 Access to the security settings interface (Outbound TLS)
Domain declaration interface
Declaring domains will allow MailCube to intercept e-mails you wish to filter. The appliance will
analyze received traffic, apply the configured actions and send the remaining e-mails to the defined email server. Figure 5-5 shows the domain administration interface.
Figure 5-5 Domain configuration interface
Be carefull, by activating TLS on outbound streaming, it is mandatory to set up a certificate. Without
any certificate and the TLS activated, the outbound streaming doesn’t work.

VADE RETRO TECHNOLOGY, SASU Au capital de 268 831€
3 avenue Antoine Pinay, Parc d'activité des 4 vents, 59 510 HEM – France – RCS Rbx – Tourcoing - 509 568 416
10C 1V2 01/11 FR
15
By clicking on "Add", you will reach an interface in which you will enter domain names. The syntax to
follow is the one shown in Figure 5-6.
Figure 5-6 Adding new domains
The IP address to enter is the address of your mail server or a router that redirects traffic to your mail
server.
The “Default Route(s)” will define an e-mail server/router common to all domains.
Your MailCube appliance will now filter your e-mail traffic. An advanced setup interface allows you to
define your own filter rules (Chapter 7).

VADE RETRO TECHNOLOGY, SASU Au capital de 268 831€
3 avenue Antoine Pinay, Parc d'activité des 4 vents, 59 510 HEM – France – RCS Rbx – Tourcoing - 509 568 416
10C 1V2 01/11 FR
16
6 Configure your integrated mail relay
Vade Retro Technology stays by your side
In this section, all settings are pre-entered with the values recommended by VadeRetro Technology.
You can of course customize these values to adapt the solution to your needs.
Interface for incoming server configuration
To access the integrated e-mail server configuration in the left menu, click on “Mail Server”
under "Incoming". (Figure 6-1).
Figure 6-1 Configuration of the incoming server
This section allows you to configure 3 elements of your e-mail server:
! Receiving messages
! Queuing messages
! Sending messages
The terms “Receiving” and “Sending are to be taken into account for the direction of e-mail
traffic. Thus for the incoming traffic, what is received is what enters the MailCube appliance,
what is sent is what goes out to your e-mail server.
Receiving messages
Several elements can be customized here: (figure 6-2)
! The server name sent to the server that sends the message during the HELO command.
Some servers check whether the domain shown in the HELO and sender domain match. To
be more efficient in monitoring remote senders, feel free to add your domain name (eg.
mailcube.domainname.com).
! The maximum incoming message size accepted.
! The list of IP addresses allowed to relay messages if a system is upstream from your
MailCube (eg. firewall).
! The number of concurrent sessions available for each sending SMTP server.
! The number of connections opened by the same sender address.

VADE RETRO TECHNOLOGY, SASU Au capital de 268 831€
3 avenue Antoine Pinay, Parc d'activité des 4 vents, 59 510 HEM – France – RCS Rbx – Tourcoing - 509 568 416
10C 1V2 01/11 FR
17
Figure 6-2 E-mail server section –sub-section: Reception
Queuing
In this sub-section, you can customize queue management on your MailCube: (Figure 6-3)
! Maximum number of queued messages.
! Maximum retention time of a queued message.
! Maximum retention time of a queued non-delivery notification message.
Please note that when the queue is full, new messages are automatically rejected.
Figure 6-3 E-mail server section – sub-section: Queue

VADE RETRO TECHNOLOGY, SASU Au capital de 268 831€
3 avenue Antoine Pinay, Parc d'activité des 4 vents, 59 510 HEM – France – RCS Rbx – Tourcoing - 509 568 416
10C 1V2 01/11 FR
18
Sending messages
In this sub-section, you have a number of options for sending messages: (Figure 6-4)
! Customization of the default outgoing route (your e-mail server or a router for example).
! Enabling the sending of non-delivery notifications.
Figure 6-4 E-mail server section – sub-section: Sending
Interface for outgoing server configuration
To access the integrated e-mail server configuration in the left menu, click on “Mail Server”
under "Outgoing". (Figure 6-5).
Figure 6-5 Outgoing server configuration
This section allows you to set 4 elements of your e-mail server:
! Activation and configuration of the outgoing routing filter
! Receiving messages
! Queuing messages
! Sending messages
The terms “Receiving” and “Sending are to be taken into account for the
direction of e-mail traffic. Thus for the outgoing traffic, what is received
is what enters the MailCube appliance from your mail server, what is sent is
what goes out to the internet.

VADE RETRO TECHNOLOGY, SASU Au capital de 268 831€
3 avenue Antoine Pinay, Parc d'activité des 4 vents, 59 510 HEM – France – RCS Rbx – Tourcoing - 509 568 416
10C 1V2 01/11 FR
19
Activation of outgoing filter
MailCube offers two modes of outgoing routing (figure 6-6):
- One routing + filtering of e-mails to preserve your domain reputation,
- One routing in transparent mode to centralize your internal traffic.
By enabling the outgoing server (Figure 6-6), you will filter outgoing traffic with the Vade Retro
engine. If you want to use the MailCube in routing mode only, you must select "Transparent
mode (routing only)".
The prerequisite for this feature is the redirection of the connectors coming out of your e-mail
server towards MailCube’s IP address.
Figure 6-6 Outgoing e-mail server configuration
Receiving messages
Several elements can be customized here: (figure 6-8)
! The server name sent to the server that sends the message during the HELO command.
Some servers check whether the domain shown in the HELO and sender domain match. To
be more efficient in monitoring remote senders, feel free to add your domain name (eg.
mailcube.domainname.com).
! The maximum incoming message size accepted.
! The list of IP addresses allowed to relay messages if a system is upstream from your
MailCube (eg. firewall).
! The number of concurrent sessions available for each sending SMTP server
! The number of connections opened by the same sender address.

VADE RETRO TECHNOLOGY, SASU Au capital de 268 831€
3 avenue Antoine Pinay, Parc d'activité des 4 vents, 59 510 HEM – France – RCS Rbx – Tourcoing - 509 568 416
10C 1V2 01/11 FR
20
Figure 6-8 Outgoing e-mail server section –sub-section: Reception
Queuing
In this sub-section, you can customize queue management on your MailCube: (Figure 6-9)
! Maximum number of queued messages.
! Maximum retention time of a queued message.
! Maximum retention time of a queued non-delivery notification message .
Please note that when the queue is full, new messages are automatically rejected.
Figure 6-9 E-mail server section –sub-section: Queue

VADE RETRO TECHNOLOGY, SASU Au capital de 268 831€
3 avenue Antoine Pinay, Parc d'activité des 4 vents, 59 510 HEM – France – RCS Rbx – Tourcoing - 509 568 416
10C 1V2 01/11 FR
21
Sending messages
In this sub-section, you have an option to configure the default outgoing route (your firewall for
instance to redirect traffic towards the internet).
Figure 6-10 E-mail server section – sub-section: Sending

VADE RETRO TECHNOLOGY, SASU Au capital de 268 831€
3 avenue Antoine Pinay, Parc d'activité des 4 vents, 59 510 HEM – France – RCS Rbx – Tourcoing - 509 568 416
10C 1V2 01/11 FR
22
7 Configuring your filter engine
Capitalize on the power of Vade Retro’s filter engine
This is the heart of the antispam filter system. From this chapter onwards, you will find all
the technical details you need to configure your MailCube’s filter engine.
Interface for incoming filter configuration
This section allows you to configure and customize your antispam filter. Several levels of filters are
available: IP filtering, protocol filtering, domain filtering, address filtering, content filtering and
finally virus detection filtering in an e-mail or its attachment.
IP filtering
In this sub-section you have the various following configuration options: (Figure 7-1)
! Activation of RBLs (Real-time Blackhole Lists). A number of providers offer lists of IP
addresses from servers reputed for sending spam. This option is blank by default. Before
activating a server, ensure that you read their sales policy first as some are fee-based
(spamhaus ...).
! The addition of IP addresses known to be spam sources.
! The addition of IP addresses known to be reliable (credible IPs). Connections from these
servers will always be accepted. In this case, these IPs will pass through RBL filtering, if
defined in the previous section. However the content of e-mails and their protocol context will
be scanned.
! The addition of IP addresses from secure proxy servers that are known to be reliable. In this
context, messages from these servers will be systematically accepted without being
scanned. This option may be useful for transferring e-mails filtered by another server.
Figure 7-1 Filtering section – IP filtering

VADE RETRO TECHNOLOGY, SASU Au capital de 268 831€
3 avenue Antoine Pinay, Parc d'activité des 4 vents, 59 510 HEM – France – RCS Rbx – Tourcoing - 509 568 416
10C 1V2 01/11 FR
23
Protocol filtering
This sub-section allows you to define protocol filtering and block spam sent by certain botnets
(Figure 7-2):
The following actions are possible:
! Delaying.
! The number of minor stretches to the protocol accepted.
! The number of major stretches to the protocol accepted.
Figure 7-2 Filtering section – Protocol filtering
Domain filtering
This sub-section allows you to act on a number of domain filter settings: (Figures 7-3 and 7-4)
! Protocol senders (Mail From:). You can deny or allow certain mail domains. If allowed, the
messages will be tested by sender domains.
! Message senders (From:). You can deny or allow certain message senders (the name is the
one seen in the e-mail software)
! DNS. You can enable this check which ensures that the domain name announced exists in the
DNS entries. You can also enable SPF (Sender Policy Framework) to compare IP addresses
of legitimate servers for a domain name and the announced server.
Do note that automated spam robots tend to rush the connection when they do not get an
immediate response. This option allows delaying the response to a connection request and to
close the connection if the remote server rushes sending.

VADE RETRO TECHNOLOGY, SASU Au capital de 268 831€
3 avenue Antoine Pinay, Parc d'activité des 4 vents, 59 510 HEM – France – RCS Rbx – Tourcoing - 509 568 416
10C 1V2 01/11 FR
24
! DKIM (Domain Key Identified Mail). You can enable DKIM, the standard for authenticating the
domain name of an e-mail sender. This is an additional effective protection against spam and
phishing.
Figure 7-3 Filtering section – sub-section: Domain filtering (1st part)

VADE RETRO TECHNOLOGY, SASU Au capital de 268 831€
3 avenue Antoine Pinay, Parc d'activité des 4 vents, 59 510 HEM – France – RCS Rbx – Tourcoing - 509 568 416
10C 1V2 01/11 FR
25
Figure 7-4 Filtering section – sub-section: Domain filtering (2
nd
part)
Address filtering
This sub-section allows you to perform actions on e-mail sender addresses: (Figure 7-5)
! Protocol senders: You can deny or allow certain sending addresses. If allowed, these
addresses will not be tested by sender domains (DKIM,SPF, DNS, etc.).
! Message senders: You can deny or allow certain message senders (the name is the one seen
in the e-mail software). If allowed, the messages from these addresses will be
accepted without scanning content.
! Remember protected addresses: To reduce message traffic, it is possible to filter
recipients using either an LDAP directory (Active Directory) or a relay server able to return a
message indicating the existence of a recipient (SMTP Check), or by using the local database
after having manually imported addresses. This option can also enable the automatic creation
of user accounts after each validation of a recipient).

VADE RETRO TECHNOLOGY, SASU Au capital de 268 831€
3 avenue Antoine Pinay, Parc d'activité des 4 vents, 59 510 HEM – France – RCS Rbx – Tourcoing - 509 568 416
10C 1V2 01/11 FR
26
Figure 7-5 Filtering section –sub-section: Address filtering
Figure 7-5(2) Filtering section –sub-section: Address filtering
Content filtering
This sub-section allows you to more finely customize content filtering. You can perform the following
actions once you have subscribed to the corresponding options: (Figure 7-6)
! Enable additional filters (heuristic antivirus, commercial messages, non-delivery notifications
or social network notifications).
The heuristic virus search analyzes message contents to identify behavior similar to
viruses. It is possible to activate a second antivirus signature comparison (DrWeb) in
the menu "Antivirus" - Document section: Antivirus filtering.

VADE RETRO TECHNOLOGY, SASU Au capital de 268 831€
3 avenue Antoine Pinay, Parc d'activité des 4 vents, 59 510 HEM – France – RCS Rbx – Tourcoing - 509 568 416
10C 1V2 01/11 FR
27
! Regional options: allow or deny messages with Cyrillic or Asian characters. This option is
used when the e-mail exchanges (in Russian, Chinese, Japanese, etc.) are regular for a user
or domain. These e-mails will then not receive a high score because they are
written with a non-Latin alphabet and will not be considered spam.
! Actions: Configuration of an action as a consequence of an e-mail categorization
(advertising, low, medium or high spam probability, etc.). Thus, it will be possible to apply a
specific action for each type of e-mail: route, delete, tag (then route), retain (in user
account). This setting is valid for all domains. You can refine it by customizing the
configuration of each domain (see Chapter 11).
! Attachments: Accept or reject messages with attachments (customized according to the
type of attachments: pdf. exe., jpeg, etc.)
Figure 7-6 Filtering section– sub-section: Content filtering
Antivirus filtering
In this sub-section (Figure 7-7) you can decide whether to enable the antivirus filter (if you chose the
option Dr. Web antivirus). You can also choose what action to take when such messages are
detected: delete, retain or tag. (Figure 7-7).

VADE RETRO TECHNOLOGY, SASU Au capital de 268 831€
3 avenue Antoine Pinay, Parc d'activité des 4 vents, 59 510 HEM – France – RCS Rbx – Tourcoing - 509 568 416
10C 1V2 01/11 FR
28
Figure 7-7 Filtering section –sub-section: Antivirus filtering
Interface for outgoing filter configuration
This section allows you to configure and customize your antispam filter. Several levels of filters are
available: domain filtering, address filtering, content filtering and virus detection filtering in an email or its attachment.
Domain filtering
This sub-section allows you to act on a number of domain filter settings: (Figure 7-8)
! Authorizations: This setting allows you to limit the routing and filtering of outgoing e-mails to
the domains entered in the "Domains" tab.
! Message senders (From:). You can deny or allow certain message senders (the name is the
one seen in the e-mail software)
! Message recipients (To:). You can deny or allow certain message recipient domains (the
name is the one seen in the e-mail software), allowing you to implement a real mail usage
policy.

VADE RETRO TECHNOLOGY, SASU Au capital de 268 831€
3 avenue Antoine Pinay, Parc d'activité des 4 vents, 59 510 HEM – France – RCS Rbx – Tourcoing - 509 568 416
10C 1V2 01/11 FR
29
Figure 7-8 Outgoing filter section – sub-section: Domain filtering (1
st
part)
Address filtering
This sub-section allows you to modify the settings of e-mail sending addresses: (Figure 7-9)
! Message senders: You can deny or allow certain message senders (the name is the one
seen in the e-mail software). If allowed, the messages from these addresses will be
accepted without scanning content.
! Message recipients (To:). You can deny or allow certain message recipient domains (the
name is the one seen in the e-mail software), allowing you to implement a real mail usage
policy.
Figure 7-9 Outgoing filter section – sub-section: Address filtering

VADE RETRO TECHNOLOGY, SASU Au capital de 268 831€
3 avenue Antoine Pinay, Parc d'activité des 4 vents, 59 510 HEM – France – RCS Rbx – Tourcoing - 509 568 416
10C 1V2 01/11 FR
30
Content filtering
This sub-section allows you to more finely customize content filtering. You can perform the following
actions once you have subscribed to the corresponding options: (Figure 7-10)
! Enable heuristic virus detection filters
o The heuristic virus search analyzes message contents to identify behavior similar to
viruses. It is possible to activate a second antivirus signature comparison (DrWeb) in
the menu "Antivirus" - Document section: Antivirus filtering.
! Regional options: allow or deny messages with Cyrillic or Asian characters. This option is
used when the e-mail exchanges (in Russian, Chinese, Japanese, etc.) are regular for a user
or domain. These e-mails will then not receive a high score because they are
written with a non-Latin alphabet and will not be considered spam
! Actions: Configuration of an action as a consequence of an e-mail categorization
(advertising, low, medium or high spam probability, etc.). Thus, it will be possible to apply a
specific action for each type of e-mail: route, delete, tag (then route), retain (in user
account). This setting is valid for all domains. You can refine it by customizing the
configuration of each domain (see Chapter 11).
! Attachments: Accept or reject messages with attachments (customized according to the
type of attachments: pdf. exe., jpeg, etc)
Figure 7-10 Outgoing filter section – sub-section: Content filtering

VADE RETRO TECHNOLOGY, SASU Au capital de 268 831€
3 avenue Antoine Pinay, Parc d'activité des 4 vents, 59 510 HEM – France – RCS Rbx – Tourcoing - 509 568 416
10C 1V2 01/11 FR
31
Antivirus filtering
In this sub-section (Figure 7-11) you can decide whether to enable the antivirus filter (if you
chose the option Dr. Web antivirus). You can also choose what action to take when such
messages are detected: delete, retain or tag. (Figure 7-11).
Figure 7-11 Outgoing filter section – sub-section: Antivirus filtering
Custom added headers
Each analyzed messages, MailCube add these followind headers:
X-VRSPAM-SCORE : [Integer from minus infinity to plus infinity indicating
the spammicity]
X-VRSPAM-STATE : [Classification of the message. This header can show these
values :
legit,spam,probablyvirus,bounce,virus,uce,error,blacklisted,whitelisted,sus
picious,social]
X-VRSPAM-CAUSE : [encrypted string allowing post-filtering analysis.]
X-VRSPAM-UNSUBSCRIBE-DATA : [encrypted string containing unsubscribe
information used by Safe Unsubscribe]
X-VRSPAM-EXTCAUSE : [encrypted string allowing post-filtering analysys
focused on the context of the analysis]
X-DRWEB-SCAN : [Result of the DrWeb Analysis]
These headers can be used for processing messages after MailCube analysis.

VADE RETRO TECHNOLOGY, SASU Au capital de 268 831€
3 avenue Antoine Pinay, Parc d'activité des 4 vents, 59 510 HEM – France – RCS Rbx – Tourcoing - 509 568 416
10C 1V2 01/11 FR
32
8 Monitoring configuration interface
Implement real service continuity for the security of your e-mails.
Monitoring
In this section you can configure the SNMP protocol to monitor the MailCube and prevent incidents:
(see Figure 8-1)
! Enable SNMP,
! Select community: The community entered must be the one you have configured on
your SNMP server,
! Select SNMP port: the default SNMP port used by the protocol is 161.
! IP addresses authorized to connect: To secure SNMP queries sent to the appliance.
(Recommended setting: enter only your SNMP server).
Figure 8-1 Monitoring section – Activation of SNMP
Syslog export
The Syslog export function allows you to extract log files written by MailCube in real time. Reading
the logs will allow you to better analyze the behavior of e-mails when needed or as a source
of analysis for Vade Retro Technology’s support.
Syslog can be enabled by selecting the checkbox “Use an external Syslog server" (Figure 8-2).

VADE RETRO TECHNOLOGY, SASU Au capital de 268 831€
3 avenue Antoine Pinay, Parc d'activité des 4 vents, 59 510 HEM – France – RCS Rbx – Tourcoing - 509 568 416
10C 1V2 01/11 FR
33
Figure 8-2 Monitoring section – Enabling Syslog export
! Server name or IP: Enter the IP address of the Syslog server.
! Port: listening port of the Syslog server. By default, the Syslog port is 514.
! Use the TCP protocol: Allows you to use a Syslog transmission with data control.
Alerts
Alerts can notify a contact that the appliance has raised an alarm. This feature is very simple to
configure (Figure 8-2):
! Select the checkbox “Enable system alerts” to activate the feature,
! Enter recipient e-mail addresses to receive alerts.
Figure 8-3 Monitoring section – Activation of system alerts

VADE RETRO TECHNOLOGY, SASU Au capital de 268 831€
3 avenue Antoine Pinay, Parc d'activité des 4 vents, 59 510 HEM – France – RCS Rbx – Tourcoing - 509 568 416
10C 1V2 01/11 FR
34
9 Automatic updates
This section covers updates of your antispam and Dr Web antivirus filters (Figure 9-1).
You can opt for an automatic update of these filters (highly recommended) with a search
frequency that suits your bandwidth.
The latest version of filters installed is also indicated here.
Figure 9-1 Automatic update section

VADE RETRO TECHNOLOGY, SASU Au capital de 268 831€
3 avenue Antoine Pinay, Parc d'activité des 4 vents, 59 510 HEM – France – RCS Rbx – Tourcoing - 509 568 416
10C 1V2 01/11 FR
35
10 User accounts management
Configuring your users’ accounts
After integrating the MailCube in your environment and adapting filters to your needs, we will see how
to configure your user accounts. You can set the frequency with which reports will be sent as well
as the duration for which an e-mail will be retained in the personal area. Your users
can still customize these items at their convenience directly in their own personal area.
The administration interface of user accounts can be accessed by clicking on the tab "User Accounts":
Figure 10-1 “User accounts” section
This screen contains 4 items:
! Reports
! Purge
! Mailboxes
! Aliases
Settings for account reports
General settings
(Figure 10-2)
In the account reports received by e-mail, the user will find a link allowing him to log on to his
account. To display this link, three options are available:
! use the IP address configured on the primary interface,
! use the fully qualified host name (entry in your DNS required)
! there is also the possibility of entering an address or name of your choice.

VADE RETRO TECHNOLOGY, SASU Au capital de 268 831€
3 avenue Antoine Pinay, Parc d'activité des 4 vents, 59 510 HEM – France – RCS Rbx – Tourcoing - 509 568 416
10C 1V2 01/11 FR
36
Figure 10-2 “User accounts” section – general settings
User settings
The User reports section allows you to define a number of settings for the reports sent to users. You
can modify the following elements: time at which reports will be sent, frequency, number of
messages to warrant the sending of a report, number of messages listed per report and retention
time of an e-mail in the user account (Figure 10-3).
You can also set the title of e-mails sent to notify a user that his account has been activated
(depending on the learning settings selected), as well as the alert issued after the merge of multiple
accounts (if the user has aliases).
Figure 10-3 “User accounts” section – User settings

VADE RETRO TECHNOLOGY, SASU Au capital de 268 831€
3 avenue Antoine Pinay, Parc d'activité des 4 vents, 59 510 HEM – France – RCS Rbx – Tourcoing - 509 568 416
10C 1V2 01/11 FR
37
Settings of mutual account reports (Administrator Access)
You can define a centralized administration for selected e-mails. To doso, MailCube offers an interface
to manage admin reports (Figure 10-4). The mutual account will contain all e-mails that have been
withheld from the user.
You can modify the following elements: time at which reports will be sent, frequency, number of
messages to warrant the sending of a report, number of messages listed per report.
Figure 10-4 “User accounts” section – Mutual account settings
Defining the purge
In this section, you can specify the maximum storage time of e-mails in the user account or mutual
account.
Figure 10-5 “User accounts” section – definition of purge

VADE RETRO TECHNOLOGY, SASU Au capital de 268 831€
3 avenue Antoine Pinay, Parc d'activité des 4 vents, 59 510 HEM – France – RCS Rbx – Tourcoing - 509 568 416
10C 1V2 01/11 FR
38
Mailboxes
This section will allow you to manage accounts for your users and define the learning mode of the
mailbox to create accounts.
Known mailboxes
This section allows you to manage e-mail accounts protected by MailCube. You can delete the user
account of a mailbox you no longer wish to protect, force the activation of a mailbox or force the
sending of e-mail alerts.
The sections "Select a domain" and "Search" can make reading easier by providing display
filters (Figure 10-6).
Figure 10-6 User accounts” section – users mailboxes

VADE RETRO TECHNOLOGY, SASU Au capital de 268 831€
3 avenue Antoine Pinay, Parc d'activité des 4 vents, 59 510 HEM – France – RCS Rbx – Tourcoing - 509 568 416
10C 1V2 01/11 FR
39
Accounts discovery
The method of remembering accounts can be defined when configuring address filtering (see Chapter
5). If you select address verification, the user account will automatically be in automatic
mailbox creation mode after its authenticity has been verified.
You can choose not to have user accounts using the checkbox "Create User Accounts" (Figure 10-7).
Figure 10-7 “User accounts” section – mailboxes
Deleting
This section enables you to set the method of removing mailboxes that no longer exist on the e-mail
server or LDAP directory from the list of authorized mailboxes. They may be automatically or manually
deleted and adjustment settings are offered to define the automatic action policy for any mailbox that
is no longer on your servers.

VADE RETRO TECHNOLOGY, SASU Au capital de 268 831€
3 avenue Antoine Pinay, Parc d'activité des 4 vents, 59 510 HEM – France – RCS Rbx – Tourcoing - 509 568 416
10C 1V2 01/11 FR
40
Figure 10-8 “User accounts” section – deletion of mailboxes
Aliases
This section offers you a global view of all mailbox aliases. You can delete an alias so that it will no
longer be associated with the main mailbox.
Figure 10-9 “User accounts” section, list of aliases

VADE RETRO TECHNOLOGY, SASU Au capital de 268 831€
3 avenue Antoine Pinay, Parc d'activité des 4 vents, 59 510 HEM – France – RCS Rbx – Tourcoing - 509 568 416
10C 1V2 01/11 FR
41
The mutual account
The mutual account (figure 10-10) is the personal area reserved for the administrator. It has 3
categories:
! Incoming
o Graymail: in this category are e-mails identified as commercial emails, newsletters or
social network notifications that could not be sent to user accounts (choice to not
create user accounts).
o Spam: in this category are all the e-mails - identified as spam or containing a virus –
that could not be sent to user accounts (choice to not create user accounts).
! Outgoing
o Spam: e-mails identified as spam sent by a user from your domain.
o Graymail: e-mails identified as commercial emails or newsletters sent by a user from
your domain(s). Social network notifications are not filtered by the outgoing filter.
! Ham in progress
o E-mails for which the recipient user account has not yet been activated.
To obtain access, click on “Mutual account” on the top right section of your administration interface.
Figure 10-9 Opening a “Mutual account”
Figure 10-10 Opening a “Mutual account”

VADE RETRO TECHNOLOGY, SASU Au capital de 268 831€
3 avenue Antoine Pinay, Parc d'activité des 4 vents, 59 510 HEM – France – RCS Rbx – Tourcoing - 509 568 416
10C 1V2 01/11 FR
42
Account reports
After the first message is received, a report is sent to each of the user’s main addresses (figure 10-
11). The frequency with which these reports are sent can be configured by the user or administrator
according to the management policy defined. This report lists all messages considered unwanted and
are therefore retained in each individual user’s personal area, ie, an isolation area outside his
messaging system.
This report allows viewing blocked e-mails and accessing the user account.
The report in both tables
- Graymail
- Spam
Figure 10-11 A user account report
On each listed e-mail, the following actions can be performed directly:
: Receive the message
: Whitelist the sender and receive the message
: Unsubscribe from the advertising campaign

VADE RETRO TECHNOLOGY, SASU Au capital de 268 831€
3 avenue Antoine Pinay, Parc d'activité des 4 vents, 59 510 HEM – France – RCS Rbx – Tourcoing - 509 568 416
10C 1V2 01/11 FR
43
The user may view blocked messages and access the following information in his personal area
(Figure 10-12): message contents, sender name, sender address, message subject, recipient
address, message size, date received, and spam score assigned to the message.
Unique on the market: The user can also unsubscribe from all unwanted commercial e-mails in a
single click. The screenshot below represents the low-priority e-mails in the user’s area. The green
ticks indicate that the unsubscription from the selected newsletters was successful.
Figure 10-12 A user’s personal area
From his personal area, the user can configure a number of items only available for his profile. By
clicking on the left menu "Settings" (Figure 10-13), the user can configure the sending of reports but
also enable the absence manager (Figure 10-14).
Figure 10-13 User account configuration
Encourage your users to check this area regularly in order to clean up low-priority e-mails. By
using this unsubscription service, they will have a better view of the newsletters that truly interest
them. In this way, these low-priority e-mails will not distract them during the workday and can be
read at any time.

VADE RETRO TECHNOLOGY, SASU Au capital de 268 831€
3 avenue Antoine Pinay, Parc d'activité des 4 vents, 59 510 HEM – France – RCS Rbx – Tourcoing - 509 568 416
10C 1V2 01/11 FR
44
Figure 10-14 User account configuration area
By selecting "I am away", the user cancels the frequency of the purge of his personal area defined in
the global administration, allowing him to manage his user account on his return without losing emails.
The menu "Filtering Options" allows the user to manage his own authorized and prohibited address
lists (Figure 10-15).
Figure 10-15 Space for user account filtering options
From this interface, the user can manage his own aliases to merge his accounts into one. From the link
"Merge accounts", the user will access the following interface (Figure 10-16) which allows associating
an alias with his main mailbox.

VADE RETRO TECHNOLOGY, SASU Au capital de 268 831€
3 avenue Antoine Pinay, Parc d'activité des 4 vents, 59 510 HEM – France – RCS Rbx – Tourcoing - 509 568 416
10C 1V2 01/11 FR
45
Figure 10-16 User alias management

VADE RETRO TECHNOLOGY, SASU Au capital de 268 831€
3 avenue Antoine Pinay, Parc d'activité des 4 vents, 59 510 HEM – France – RCS Rbx – Tourcoing - 509 568 416
10C 1V2 01/11 FR
46
11 Domain management area
Take control of all your domains
Instructions in this chapter will show you how to adjust the antispam configuration of all the domains
you want to protect.
You can refine protection domain by domain. However, it is important to note that the configuration per
domain cannot contradict the global configuration (seen in Chapter 6).
This configuration per domain allows you to clarify certain points according to the domain to protect.
Introduction to domain management interface
When you select the tab “Domains”, the interface shows all domains protected by MailCube (figure 11-
1). You can add or delete a domain to protect using the relevant buttons.
Figure 11-1 Interface to manage domains
When you click on a domain, you can access its security settings.
This area consists of 4 items (situated on the left side of the interface):
! Routing
! Filtering
! User accounts
! Mailboxes
Routing
(Figure 11-2)
This is the routing table, specific to each domain protected by MailCube.
For a given domain, you can define one or several e-mail server IP addresses, the priorities and
related ports.
For instance, addresses entered in this form may be those of your e-mail servers or of a router
enabling access to e-mail servers.

VADE RETRO TECHNOLOGY, SASU Au capital de 268 831€
3 avenue Antoine Pinay, Parc d'activité des 4 vents, 59 510 HEM – France – RCS Rbx – Tourcoing - 509 568 416
10C 1V2 01/11 FR
47
Figure 11-2 Routing
Filtering
(Figure 11-3)
In this section, you can refine the filtering strategy to apply to each selected domain. You have the
following sub-sections: “Domain filtering”, “Address filtering”, “Content filtering” and “Antivirus filtering”.
For more information regarding the configuration of these sections, please refer to chapter 6 of this
guide.
Figure 11-3 Filtering

VADE RETRO TECHNOLOGY, SASU Au capital de 268 831€
3 avenue Antoine Pinay, Parc d'activité des 4 vents, 59 510 HEM – France – RCS Rbx – Tourcoing - 509 568 416
10C 1V2 01/11 FR
48
User accounts
(Figure 11-4)
This section allows you to exclude mailboxes for which you do not want activation alerts to be sent to
users of this mailbox.
This could be particularly useful for mailboxes with multiple recipients. For instance, mail sent to an
address such as contact@xxx.fr may have multiple recipients.
Assuming that a mailbox can only have one user account, if an activation alert is sent to a group of
users accessing this mailbox, the first user who activates the account of the related e-mail address will
automatically be assigned this account.
For such cases it is advisable not to send an activation alert and consequently exclude the mailboxes
with multiple recipients. Thus, e-mails filtered by your MailCube will automatically be routed towards
the mutual account – accessible only by the MailCube administrator.
Figure 11-4 “User account” section

VADE RETRO TECHNOLOGY, SASU Au capital de 268 831€
3 avenue Antoine Pinay, Parc d'activité des 4 vents, 59 510 HEM – France – RCS Rbx – Tourcoing - 509 568 416
10C 1V2 01/11 FR
49
Mailboxes
This section allows you to build a list of e-mail addresses which will never receive any e-mail.
Figure 11-5 Mailboxes section
12 Maintenance
Back up & restore your configuration in a few clicks
In this chapter you will learn how to access the maintenance area of your MailCube to back up or
restore your configuration in the event of a system failure.
Presentation of the maintenance interface
This maintenance screen consists of 4 items:
! Queue management
! Backup
! Export configuration
! System update
! General information

VADE RETRO TECHNOLOGY, SASU Au capital de 268 831€
3 avenue Antoine Pinay, Parc d'activité des 4 vents, 59 510 HEM – France – RCS Rbx – Tourcoing - 509 568 416
10C 1V2 01/11 FR
50
Queue management
The queue management interface captures the content of the queue when you access the page. The
table lists messages in the queue and the action buttons on the right enable you to:
! Force the sending of the e-mail
! View the queued e-mail
! Read the error message.
Figure 12-1 Queue

VADE RETRO TECHNOLOGY, SASU Au capital de 268 831€
3 avenue Antoine Pinay, Parc d'activité des 4 vents, 59 510 HEM – France – RCS Rbx – Tourcoing - 509 568 416
10C 1V2 01/11 FR
51
Backup
(Figure 12-2)
This section allows you to manage configuration backups of your MailCube.
You can launch a backup by clicking on “Initiate backup”. You can also launch a restoration of your
MailCube based on an old backup by clicking on “Restore”.
In the unlikely event of a technical failure regarding network and cluster settings, you can choose to
restore these settings to the last backup done.
Figure 12-2 Backup section
Configuration export
(Figure 12-3)
This section allows you to export the configuration of your MailCube towards an external peripheral
(USB key, external hard drive). To do so, click on “Initiate export”.
In case of a technical failure of your MailCube, you can restore the configuration settings based on
your backup. To restore your configuration, click on “choose a file” then on “apply”.
Figure 12-3 Configuration export section

VADE RETRO TECHNOLOGY, SASU Au capital de 268 831€
3 avenue Antoine Pinay, Parc d'activité des 4 vents, 59 510 HEM – France – RCS Rbx – Tourcoing - 509 568 416
10C 1V2 01/11 FR
52
Update
(Figure 12-4)
On this mask, you can view available firmware versions and activate an update. Caution: updating the
firmware of the appliance will force it to restart.
Figure 12-4 Update section
System
This menu allows you to Shut down or Restart the system.
Figure 12-5 System section

VADE RETRO TECHNOLOGY, SASU Au capital de 268 831€
3 avenue Antoine Pinay, Parc d'activité des 4 vents, 59 510 HEM – France – RCS Rbx – Tourcoing - 509 568 416
10C 1V2 01/11 FR
53
General information
(Figure 12-5)
This section enables you to view a lot of information about your MailCube: model, serial number,
product version, number of domains & mailboxes eligible for protection and license information
(antispam filter, anti-ad, antivirus).
Figure 12-5 General information section
13 High availability configuration
Secure your e-mail filter architecture
In this chapter you will learn how to set the High Availability mode on your MailCube. This method only
works if you have a second MailCube to secure your architecture.
Cluster mode settings
The cluster function offers three operating modes:
! Autonomous
o The autonomous function is automatically selected when you only have one MailCube.
! Master
o By selecting “Master”, you are choosing to use this MailCube to centralize your
configurations. The other MailCube will receive the configurations by synchronization.
! Slave
o By selecting “Slave”, you are choosing to use this MailCube as a slave of another
Master MailCube for its configuration.

VADE RETRO TECHNOLOGY, SASU Au capital de 268 831€
3 avenue Antoine Pinay, Parc d'activité des 4 vents, 59 510 HEM – France – RCS Rbx – Tourcoing - 509 568 416
10C 1V2 01/11 FR
54
Figure 13-1 High availability – Cluster settings
When you enable the Master Cluster mode, the left hand menu opens new configuration options.
(Figure 13-2).
Figure 13-2 High availability –Extra menus
The “Slave” access will allow you to identify IP addresses of MailCubes configured as slaves (figure
13-3).

VADE RETRO TECHNOLOGY, SASU Au capital de 268 831€
3 avenue Antoine Pinay, Parc d'activité des 4 vents, 59 510 HEM – France – RCS Rbx – Tourcoing - 509 568 416
10C 1V2 01/11 FR
55
Figure 13-3 High availability – Slaves settings
“Quarantine” access enables you to setup an external MailCube as the external storage for user
accounts and for mutual accounts (figure 13-4).
Figure 13-4 High availability – Configuration of externalized quarantine
On the MailCube configured as a slave, an “M/S Synchronization” menu enables you to launch
synchronizations among appliances.
Figure 13-4 High availability – Slave mode – M/S synchronization

VADE RETRO TECHNOLOGY, SASU Au capital de 268 831€
3 avenue Antoine Pinay, Parc d'activité des 4 vents, 59 510 HEM – France – RCS Rbx – Tourcoing - 509 568 416
10C 1V2 01/11 FR
56
14 Access to logs
Easily view logs relating to your corporate mail system
In this chapter you will learn how to access the logs allowing you to know details of all e-mails
processed by your MailCube. You can access the following information: message transmission date,
sender, recipient, message ID, status, but also details of e-mail processing performed by your
MailCube.
Presentation of the log access interface
This screen allows you to quickly view the processing performed by your MailCube after an e-mail
arrives. You can easily conduct searches using the available dialog box (Figure 14-1). You can look
for messages by recipient, sender, message ID or by date. You can also perform a multi-criteria
search.
Figure 14-1 Log consultation interface
Once the search has been carried out (Figure 14-2), the results will appear in the dialog box. All
results matching your search will be displayed.
Figure 14-2 Log consultation interface 2

VADE RETRO TECHNOLOGY, SASU Au capital de 268 831€
3 avenue Antoine Pinay, Parc d'activité des 4 vents, 59 510 HEM – France – RCS Rbx – Tourcoing - 509 568 416
10C 1V2 01/11 FR
57
By clicking on the small arrow to the left of the date (Figure 14-3), you will get full details of the
processing done by your MailCube: details of the message header, spam score and action taken
(delivered, tagged, retained, deleted).
Figure 14-3 Log consultation interface 3
Log download interface
If you wish to do so, you can also download the entire log file (figure 14-4) to process it using an
appropriate tool or to forward it to Vade Retro Technology’s support for an advanced behavior
analysis.
Figure 14-4 Log download interface

VADE RETRO TECHNOLOGY, SASU Au capital de 268 831€
3 avenue Antoine Pinay, Parc d'activité des 4 vents, 59 510 HEM – France – RCS Rbx – Tourcoing - 509 568 416
10C 1V2 01/11 FR
58
15 Access to statistics
View the status of your e-mail traffic at a glance
In this chapter you will discover how relevant reports allow you to learn more about the status, nature
and actions performed by MailCube regarding your e-mail traffic. These reports can be easily used as
real dashboards over a given period of time. You can thus determine whether you are a prime target
for spammers, refine your filter settings and further secure your messaging system.
Statistics homepage interface
(Figure 15-1)
The homepage of the statistics interface is organized under two main menus:
♣ Incoming
♣ Outgoing
To synthesize traffic in each direction, the interface displays in four graphs the current status of your
SMTP traffic.
You can view two major groups of information:
♣ Traffic volume per hour and by type of message (legitimate or spam, viruses, etc.).
♣ Actions taken displayed in chronological order then by distribution.
Figure 15-1 Statistics interface

VADE RETRO TECHNOLOGY, SASU Au capital de 268 831€
3 avenue Antoine Pinay, Parc d'activité des 4 vents, 59 510 HEM – France – RCS Rbx – Tourcoing - 509 568 416
10C 1V2 01/11 FR
59
Presentation of the interface for chronological consultation of statistics
In this synthetic view, there are 3 sections allowing you to obtain a statistical view from different
angles: the last hour, the current day or the past month.
For these three items, you have the following information: (Figure 15-2)
! traffic status
! traffic divided by types of messages (delivered, deleted, tagged, retained)
! percentage of deleted messages during the period
! percentage of retained messages during the period
! percentage of tagged messages during the period
! percentage of messages delivered during the period
! percentage of notification messages
! volume of incoming SMTP final errors
! volume of incoming SMTP temporary errors
! volume of outgoing SMTP final errors
! volume of outgoing SMTP temporary errors
Figure 15-2 Example of statistics details

VADE RETRO TECHNOLOGY, SASU Au capital de 268 831€
3 avenue Antoine Pinay, Parc d'activité des 4 vents, 59 510 HEM – France – RCS Rbx – Tourcoing - 509 568 416
10C 1V2 01/11 FR
60
16 Homepage
The bare essentials
The instructions in this chapter will allow you to synthetically view in a single web page all the
information required to manage your traffic and MailCube.
Presentation of the homepage interface
This area is divided into three parts: the homepage and a dashboard by type of traffic (incoming &
outgoing).
Homepage
The following are presented on this page:
! A summarized status of the analysis performed by the filter engine over the day. You will find the
following indicators:
o Total: Number of e-mails received by MailCube
o Deleted: Number of e-mails deleted. These e-mails are definitely spam. The sender is not
informed of the deletion and the recipient will never retrieve these e-mails.
o Retained: Messages delivered to user or mutual accounts.
o Rejected: Number of messages refused by the MailCube because the e-mail server did
not find the recipient. The sender is notified about the rejection by an SMTP error number.
o Tagged: Number of messages for which the subject was modified by adding a
customized “tag”. Example [NEWSLETTER].
o To be delivered: Messages placed in the MailCube queue to be delivered to the e-mail
server.
o Awaiting activation: E-mails for which recipients have not activated their user account.
This indicator will only rise if the account creation is in manual learning mode. (see
chapter 11).
! The status of updates on your MailCube by service and by expiry date.
! A graphical view of traffic distribution (legitimate messages, spam, viruses, others) for incoming
and outgoing traffic.

VADE RETRO TECHNOLOGY, SASU Au capital de 268 831€
3 avenue Antoine Pinay, Parc d'activité des 4 vents, 59 510 HEM – France – RCS Rbx – Tourcoing - 509 568 416
10C 1V2 01/11 FR
61
Figure 16-1 Homepage screen
The dashboard
In the left menu you will see the item “dashboard” (figure 16-1).
This item enables you to get more details regarding the activity of your messaging system and
MailCube.
This dashboard shows complete encrypted information for protocol and content filtering. The sending
and receiving sections relate to steps in the SMTP protocol in the direction of the traffic and the
rejections received for each of them. You will also find indications about the types of messages
received and their qualification.
This page is regularly refreshed and enables you to see the traffic passing through your MailCube in
almost real time.
Figure 16-2 Dashboard screen

VADE RETRO TECHNOLOGY, SASU Au capital de 268 831€
3 avenue Antoine Pinay, Parc d'activité des 4 vents, 59 510 HEM – France – RCS Rbx – Tourcoing - 509 568 416
10C 1V2 01/11 FR
62
17 FAQ
Tailored Vade Retro Technology support
The instructions in this chapter will give you an idea of the majority of issues encountered and their
solutions. If you do not find your solution in this FAQ, please contact Vade Retro Technology support
at the following e-mail address: support-mailcube@vade-retro.com.
What if an unwanted message has not been blocked?
If an unwanted e-mail goes through the MailCube filters and arrives in the user’s inbox, this means
that the difference between this message and a legitimate one is extremely thin. In this case,
MailCube will evaluate the danger of this message as negligible or even nonexistent and considers in
this case that it is less important to receive spam than to not receive a relevant message.
Please inform us whenever you receive unwanted e-mail by sending it as an e-mail attachment to
support-mailcube@vade-retro.com.
Our experts will analyze such messages in detail and therefore optimize our filter engine.
What if a message is blocked by mistake?
Very rarely, a legitimate e-mail can be blocked in user account. Many reasons can lead to this
situation: the reputation of the sending server, the message format or its contents. It is therefore not a
malfunction of Vade Retro’s filter but rather a safety action against a message with doubtful
characteristics.
In this case, the user can choose to release the message from the user’s account to be delivered
within his messaging system.
To view the contents of a message, the user can double-click on it in his personal area. If he wishes to
release it, he can simply select this message and click on “release”.
Two other buttons are available: “release all messages from same user” or “release all messages from
same domain” allowing white lists of addresses or domains to be built.
The user can decide to select several messages to release them at the same time.
How do I access user accounts from outside my network?
MailCube allows you to access your user account from inside and outside your network. For this
access to be functional, you must define – in the network configuration interface – a public device
name at the DNS level.
After this, in the general settings for user account, tick “use configured server name” and the link in
user account reports will be accessible from inside as well as outside.

VADE RETRO TECHNOLOGY, SASU Au capital de 268 831€
3 avenue Antoine Pinay, Parc d'activité des 4 vents, 59 510 HEM – France – RCS Rbx – Tourcoing - 509 568 416
10C 1V2 01/11 FR
63
18 Appendices
Diagram of relationships between the appliance and related systems
In this case, the appliance is in the demilitarized zone. It is thus protected by the firewall within which
some ports are to be opened to ensure the solution operates:
Between the appliance and Internet:
! 25 in both directions to ensure incoming and outgoing e-mail filtering,
! 80 in outgoing for filter engine updates in incoming for the user account to be accessible from
outside,
! 8666 to enable Vade Retro Technology support to connect to the appliance and to diagnose
problems.
Between the appliance and your local network:
! 25 from appliance to your e-mail servers,
! 8025 from your e-mail server to your appliance,
! 8080 between the administration PC and the appliance.
These elements are valid for architectures similar to the one in the diagram. For any specific requests
demand during the implementation stage, Vade Retro Technology’s support will assist you in the
definition of your security policy relating to the appliance.

VADE RETRO TECHNOLOGY, SASU Au capital de 268 831€
3 avenue Antoine Pinay, Parc d'activité des 4 vents, 59 510 HEM – France – RCS Rbx – Tourcoing - 509 568 416
10C 1V2 01/11 FR
64
Deploying the Feedback Toolbar with Windows Server
Requirements
1 – Execution privileges
The user who is intending to use the task bar must have a login with a “User with permissions” level on his
workstation in order for the MSI package to be installed.
To check or activate this mode, in the Windows Server administration interface, click on “Start” => “Launch”
then type “lusmgr”.
Select “Users with permissions” and ensure that the users concerned are associated with this group.
2 – Provisioning in a shared area
The .msi must be provisioned in a shared area that complies with the security policies shown in the screenshot
below.

VADE RETRO TECHNOLOGY, SASU Au capital de 268 831€
3 avenue Antoine Pinay, Parc d'activité des 4 vents, 59 510 HEM – France – RCS Rbx – Tourcoing - 509 568 416
10C 1V2 01/11 FR
65
3 – Organizational unit
The organization of Active Directory must allow relying on an OU (Organizational unit) that makes it possible to
apply the GPO on a group of workstations.
Creating the deployment policy (GPO)
1 - Naming
In Windows Server, open the “Group Policy Management” tool. To do so, click on “Start” -> “Launch” then
enter “gpmc.msc”. Once you are in the group policy manager, select the target OU then create the GPO by
clicking on “Create a GPO in this domain and link it here”, then on “OK”.
2 – Targets
In the GPO, select the “Scope” tab then in the “Security filtering” zone, select the target users.

VADE RETRO TECHNOLOGY, SASU Au capital de 268 831€
3 avenue Antoine Pinay, Parc d'activité des 4 vents, 59 510 HEM – France – RCS Rbx – Tourcoing - 509 568 416
10C 1V2 01/11 FR
66
3 – Settings
To configure the deployment behavior, go to the group policy tree at the following location:
“User configuration” -> “Policies” -> “Software settings” -> “Software installation”.
Right-click on “Software installation” then on “Properties” in order to select the location where the .msi package
was provisioned earlier.
Select the location using the “Browse” button, click on “Apply”, then “OK”.
Back in the group policy interface after having selected “Software installation”, right-click in the section on the
right and click on “New”, then “Package”.

VADE RETRO TECHNOLOGY, SASU Au capital de 268 831€
3 avenue Antoine Pinay, Parc d'activité des 4 vents, 59 510 HEM – France – RCS Rbx – Tourcoing - 509 568 416
10C 1V2 01/11 FR
67
Select the package to install in the folder, then click on “Open”.
Select the “Advanced” deployment method, then click on “OK”.
Next, right-click on the new package configured in the group policy environment, click on “Properties”, then on
the “Deployment” tab.
In the Deployment tab, select the following deployment options:
! “Assigned”, `
! “Uninstall this application when it falls out of the scope of management”,
! “Install this application at logon”
! “Maximum”

VADE RETRO TECHNOLOGY, SASU Au capital de 268 831€
3 avenue Antoine Pinay, Parc d'activité des 4 vents, 59 510 HEM – France – RCS Rbx – Tourcoing - 509 568 416
10C 1V2 01/11 FR
68
Then confirm by clicking on “OK”.
Link the GPO so that it will be applied. To do so, right-click on “Link enabled”.
Results of the configuration
The next time a session is opened on each workstation, the toolbar will run as a background task. Then in the
Outlook environment, it will be offered in the form of an additional tab like this:
 Loading...