

Page 1
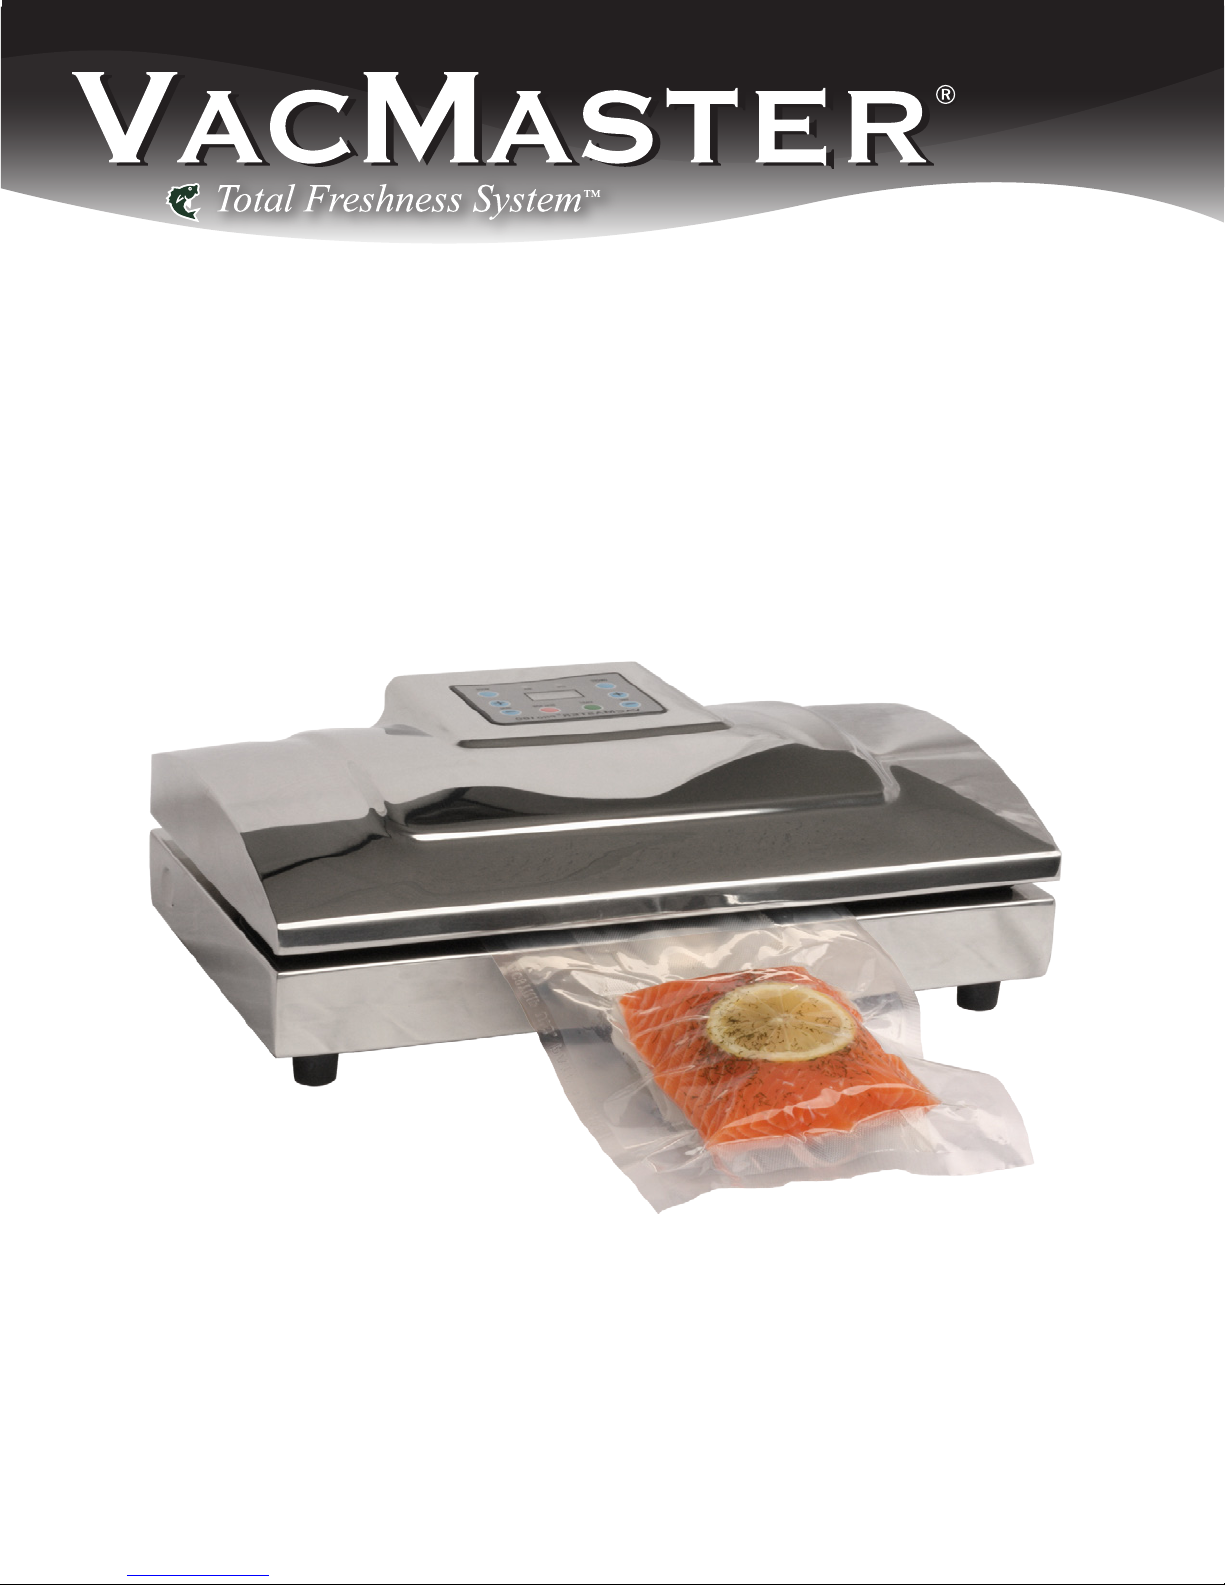
Pro160
User Manual
Page 2

1
Thank you for purchasing the VacMaster® Pro160 Vacuum Packaging
Unit. You are about to revolutionize your home with one of the strongest
vacuum packaging systems available. With the help of the Pro160, you
will now be able to keep food fresher, longer in the refrigerator, freezer and
pantry. The Pro160 system effectively removes air and extends freshness
up to ve times longer than normal preservation methods. Beyond that,
the Pro160 can be used to preserve and organize household items like
keepsakes, small toys and easy-to-lose items. You will soon nd your Pro160
to be so versatile and convenient, it will never leave your countertop.
By using VacMaster® vacuum bags and canisters, you can
signicantly extend food life, maintain food quality, reduce freezer burn and
food waste while keeping your food costs down. VacMaster® bags
are boilable and mircowavable.
The style of the Pro160 is clean and simple with a lightweight, compact
design. Its unique slanted layout design and wide vacuum trough makes it
easy to load bags and ensure a positive seal every time. Only high quality,
fully tested and rated components have been used in the construction in
order to ensure the best performance.
Read and follow all directions for usage and maintenance carefully and you’ll
benet from years of trouble-free and cost effective vacuum packaging.
Page 3

Table of Contents
Pro160 Features . . . . . . . . . . . . . . . . . . . . . . . . . . . . . . . . . . . . . . . . . . . . . . . . . . . 3
Safety & Maintenance . . . . . . . . . . . . . . . . . . . . . . . . . . . . . . . . . . . . . . . . . . . . . . 4
Operating Instructions . . . . . . . . . . . . . . . . . . . . . . . . . . . . . . . . . . . . . . . . . . . 5 - 6
Food Storage & Safety Information . . . . . . . . . . . . . . . . . . . . . . . . . . . . . . . . 7
2
Packaging with VacMaster® Bags . . . . . . . . . . . . . . . . . . . . . . . . . . . . . 8
Packaging with VacMaster® Canisters . . . . . . . . . . . . . . . . . . . . . . . 9 - 1 0
Vacuum Packaging Tips . . . . . . . . . . . . . . . . . . . . . . . . . . . . . . . . . . . . . . . . 1 1 - 1 2
Troubleshooting . . . . . . . . . . . . . . . . . . . . . . . . . . . . . . . . . . . . . . . . . . . . . . 1 3 - 1 4
Page 4
3
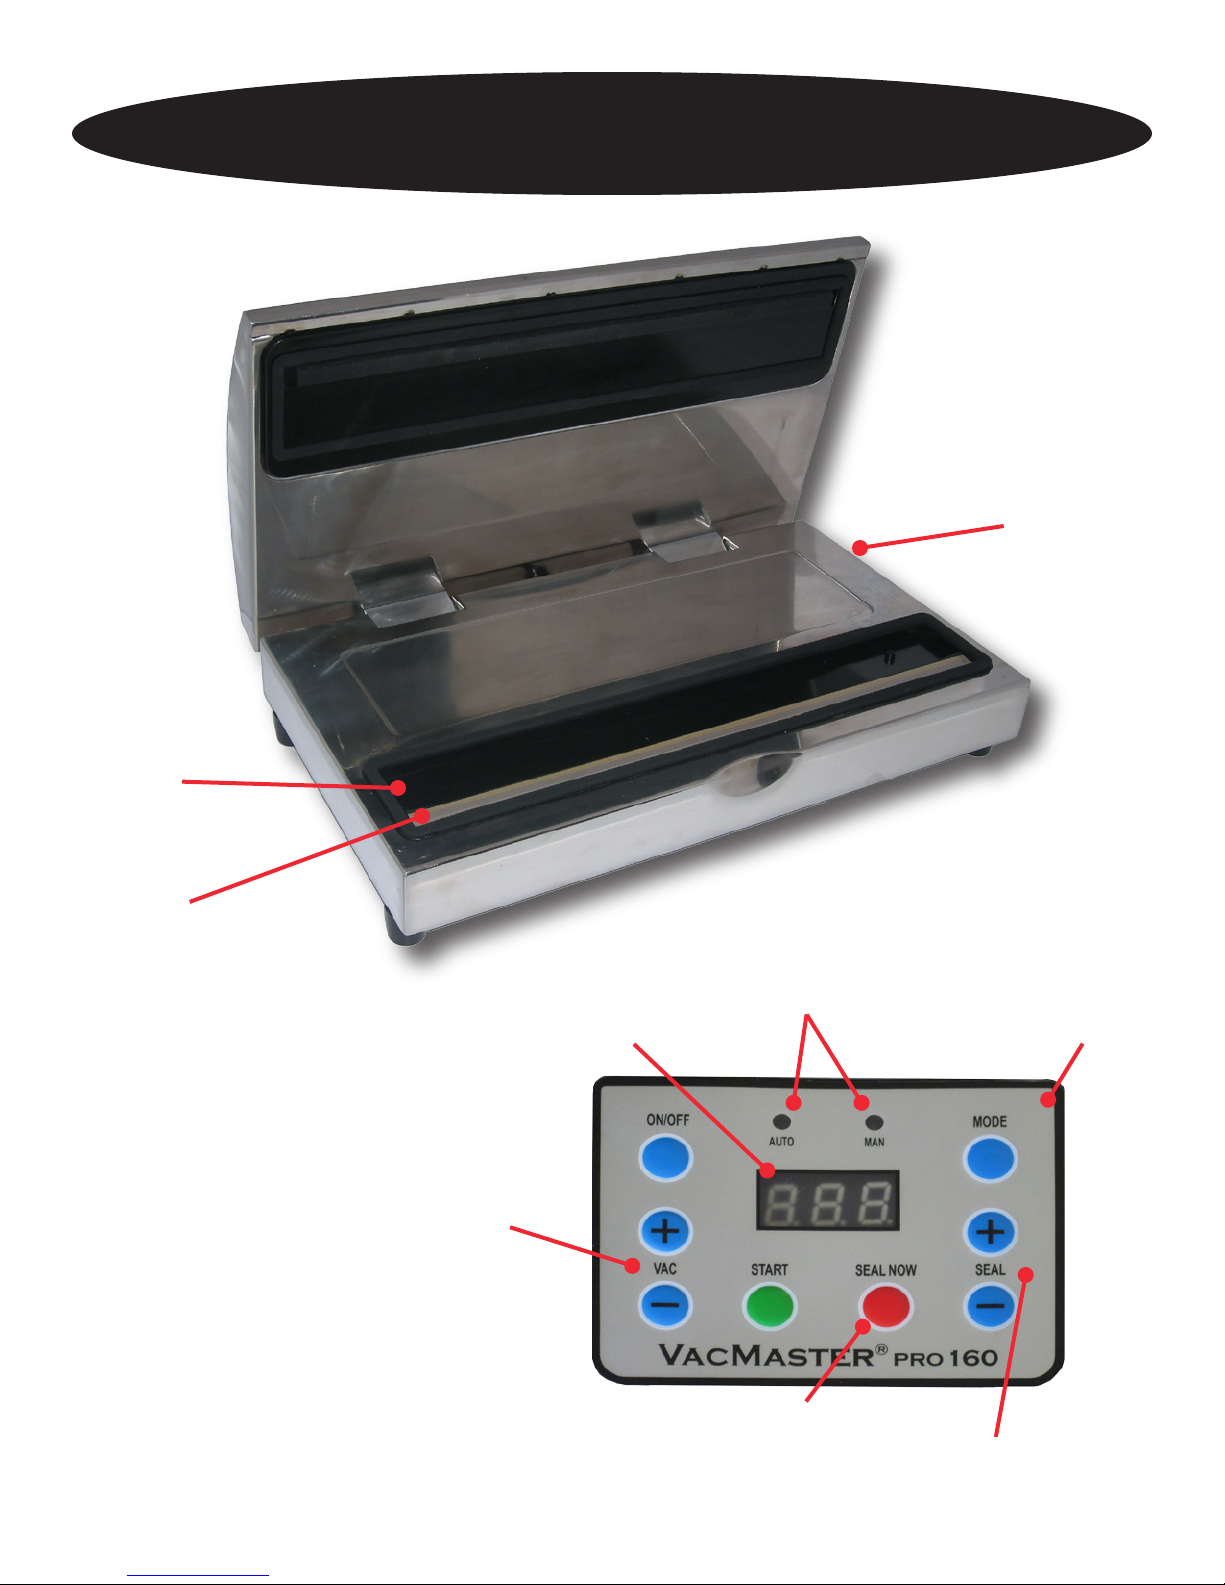
VacMaster® Pro160 Features
Accessory
Port
Vacuum
Channel
Seal Bar
Vacuum
Increase/Decrease
LED Screen
Mode Indicator Lights
Control Panel
Seal Now
Button
Seal
Increase/Decrease
Page 5

Safety
For your safety, follow these precautions when using your Pro160:
▪ Read Owner’s Manual and QuickStart guide carefully before using the
machine for the rst time.
▪ Do not use the Pro160 on wet or hot surfaces, or near a heat source.
▪ Do not immerse machine or power cord in water or any other liquid.
▪ Plug Pro160 into grounded power sources only, do not use extension
cord.
4
▪ To disconnect, unplug directly from power source. Do not disconnect
by pulling on cord.
▪ Do not operate appliance with damaged power cord.
▪ Only use the Pro160 for its intended use.
▪ Only use VacMaster® bags, accessories and attachments.
Maintenance
▪ Unplug before cleaning.
▪ Regularly clean appliance with damp cloth and mild soap to remove
crumbs, dust, debris.
▪ Chamber Ring is removable to clean any liquids that may have
escaped from VacMaster® bag during process.
Page 6

5
Operating Instructions
Machine Setup
▪ Read all instructions before operating Pro160.
▪ Plug Pro160 into grounded electrical outlet.
▪ Turn Pro160 ON. Push the blue “ON/OFF” button at the top left corner of the
control panel. **NOTE** Pro160 will be in AUTO MODE when rst turned on.
▪ To switch between AUTO and MANUAL modes, press the blue MODE button
to the right of the LED screen. Pro160 is now ready for use.
Operating Machine in AUTO MODE
1. Turn machine “ON” by pressing the blue “ON/OFF” button.
**NOTE** Machine is set to AUTO MODE when turned on each time.
2. Refer to the indicator lights labeled AUTO and MANUAL above of the
LED screen to check vacuum mode. The light will shine above the word
AUTO when in AUTO mode.
3. Select proper size VacMaster® barrier vacuum bag and insert product
to be packaged. Allow minimum of 1”-2” of extra headspace at top of bag to
ensure a quality, air-tight seal.
4. Lay open end of bag across Seal Bar, keeping opening within the perimeter
of the Vacuum Channel.
5. Close lid. Press the green START button to engage vacuum pump.
6. Press and hold down lid (with slight pressure) to start vacuum cycle. Release
when bag collapses on product.
7. The Pro160 will go through the vacuum process until an internal sensor
indicates all air has been removed from the bag or canister. Machine will
automatically switch to seal function when vacuum is complete.
Machine will stop automatically.
8. Remove bag and inspect bag and seal.
(Note: A positive seal will look clear upon inspection. If the seal is spotty, incomplete, wrinkled,
white or milky, remove sealed portion and run vacuum and seal process again.)
Page 7

Operating Machine in MANUAL MODE
6
1. Turn machine “ON” by pressing the blue “ON/OFF” button.
2. Press the blue MODE button to the right of the LED screen to switch between
AUTO and MANUAL modes. Refer to the indicator lights labeled AUTO and
MANUAL above the LED screen to check vacuum mode. The light will shine
above the word MANUAL when in MANUAL mode.
3. Select proper size VacMaster® barrier vacuum bag & insert product
to be packaged. Allow minimum of 1”-2” of extra headspace at top of bag to
ensure a quality, air-tight seal.
4. Lay open end of bag across Seal Bar, keeping opening within the perimeter
of the Vacuum Channel.
5. Use the VAC and SEAL plus/minus buttons to increase or decrease the
vacuum and sealing times. The numbers you set in the MANUAL mode will
determine the time (in seconds) each process will run. **NOTE** The control
panel remembers the last setting used in manual mode.
6. Once the settings have been programmed, press the green START button to
engage the vacuum pump.
7. Press and hold down lid (with slight pressure) to start vacuum cycle. Release
when bag collapses on product.
8. The Pro160 will count down the vacuum process and sealing process as set
in MANUAL mode. When the machine stops, the process is complete.
9. Remove bag and inspect bag and seal.
(Note: A positive seal will look clear upon inspection. If the seal is spotty, incomplete,
wrinkled, white or milky, remove sealed portion and run vacuum and seal process again.)
Using the SEAL NOW Function
If at any time you want to interrupt the vacuum process, simply press the red SEAL
NOW button. This stops the vacuum process and immediately seals the bag. To
prevent the vacuum from crushing delicate foods, press the SEAL NOW button
until the process is complete. The SEAL NOW function will only work with lid
closed and during the vacuuming process.
Page 8
7
Food Storage and Safety Information
The Pro160 will revolutionize the way you buy and store food. Because vacuum
packaging works to eliminate freezer burn and slow food spoilage, you are now
able to take advantage of buying food in bulk without the threat of food waste.
Vacuum packaging with the Pro160 removes up to 90% of the air from the
package. This will help keep food fresher up to 5 times longer than under normal
circumstances. Dry foods like pasta, cereals and our will stay fresh from start to
nish. Plus vacuum packaging prevents weevils and other insects from infesting
dry goods. Package only the freshest foods possible.
However, please keep in mind that not all foods benet from vacuum packaging.
Never vacuum package garlic or fungi like mushrooms. A dangerous chemical
reaction takes place when air is removed, causing these foods to be dangerous if
ingested. Vegetables should be blanched before packaging to kill any enzymes
that may cause deterioration of out-gassing when vacuumed.
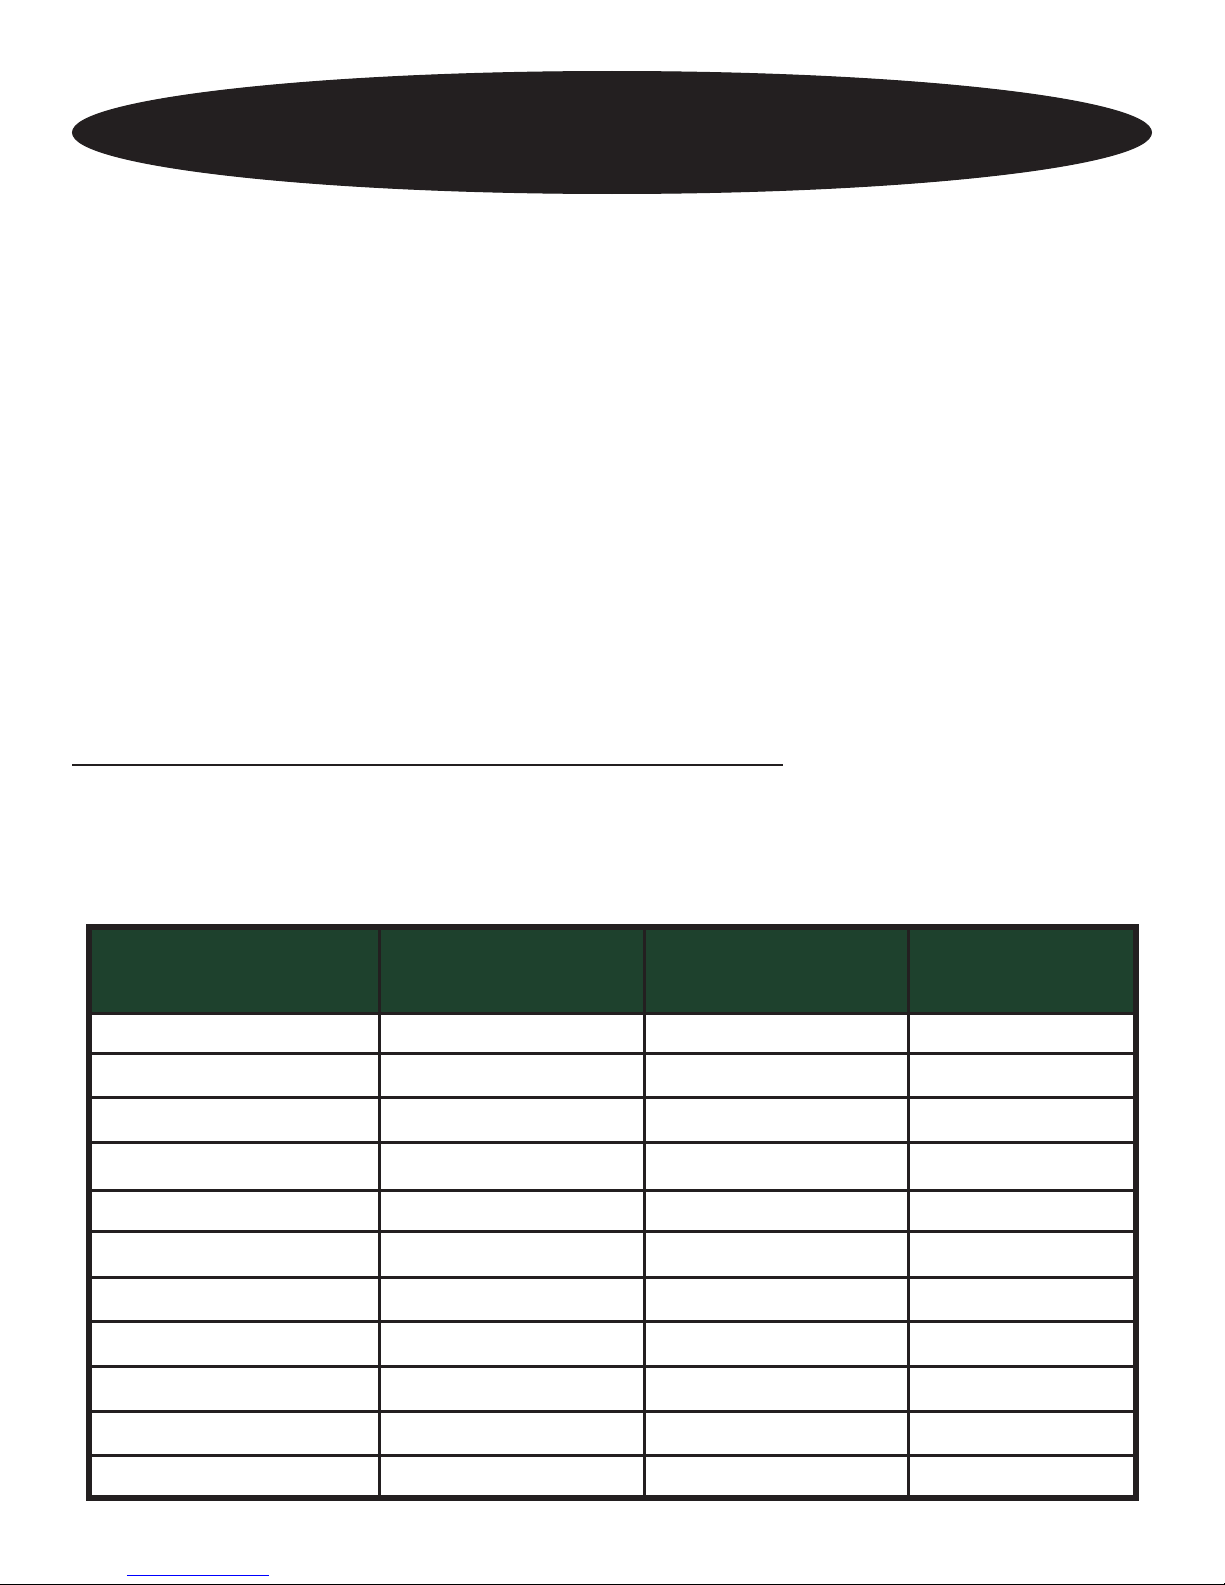
Foods
Vacuum Freezer
Storage
Fresh Beef & Veal 1-3 years 1 month 1-2 weeks
Ground Meat 1 year 1 month 1-2 weeks
Fresh Pork 2-3 years 2-4 weeks 1 week
Fresh Fish 2 years 2 weeks 3-4 days
Fresh Poultry 2-3 years 2-4 weeks 1 week
Smoked Meats 3 years 6-12 weeks 2-4 weeks
Vacuum Fridge
Storage
Typical
Storage
Fresh Produce, Blanched 2-3 years 2-4 weeks 1-2 weeks
Fresh Fruits 2-3 years 2 weeks 3-4 days
Hard Cheeses 6 months 6-12 weeks 2-4 days
Sliced Deli Meats not recommended 6-12 weeks 1-2 weeks
Fresh Pasta 6 months 2-3 weeks 1 week
Page 9

Packaging with VacMaster® Bags & Rolls
The following instructions apply to vacuum packaging foods and other items with
pre-cut or roll bags. For best results, only use VacMaster® bags.
Pre-Cut Bags
Select the proper bag size for items being packaged. An assortment of pre-cut
bags are available, including Pint, Quart and Gallon sizes. Be sure to allow 1”-2”
of headspace for sealing, and an extra 1” for every time resealing is expected.
Place item in bag and follow the AUTO or MANUAL function instructions.
8
Roll Bags
Before cutting bag to length, seal the open end of roll.
Sealing Roll Bags
1. Set Machine to AUTO MODE. Refer to the indicator lights above the
LED screen to check vacuum mode. The light will shine above the word
AUTO when in AUTO mode.
2. Lay open end of roll across Seal Bar, keeping opening within the perimeter
of the Vacuum Channel.
3. Close lid. Press the green START button to engage vacuum pump.
5. Press lid down to engage vacuum (with slight pressure).
6. Press SEAL NOW when lid draws down.
7. Machine will automatically seal roll and stop automatically.
8. Remove roll and inspect seal.
9. After one end is sealed, measure bag to size of item, allowing 1”-2” of space
and cut roll. Place item in bag and follow either the AUTO or MANUAL
instructions.
(Note: A positive seal will look clear upon inspection. If the seal is spotty, incomplete,
wrinkled, white or milky, remove sealed portion and run vacuum and seal process again.)
Page 10
9
Packaging with VacMaster® Canisters
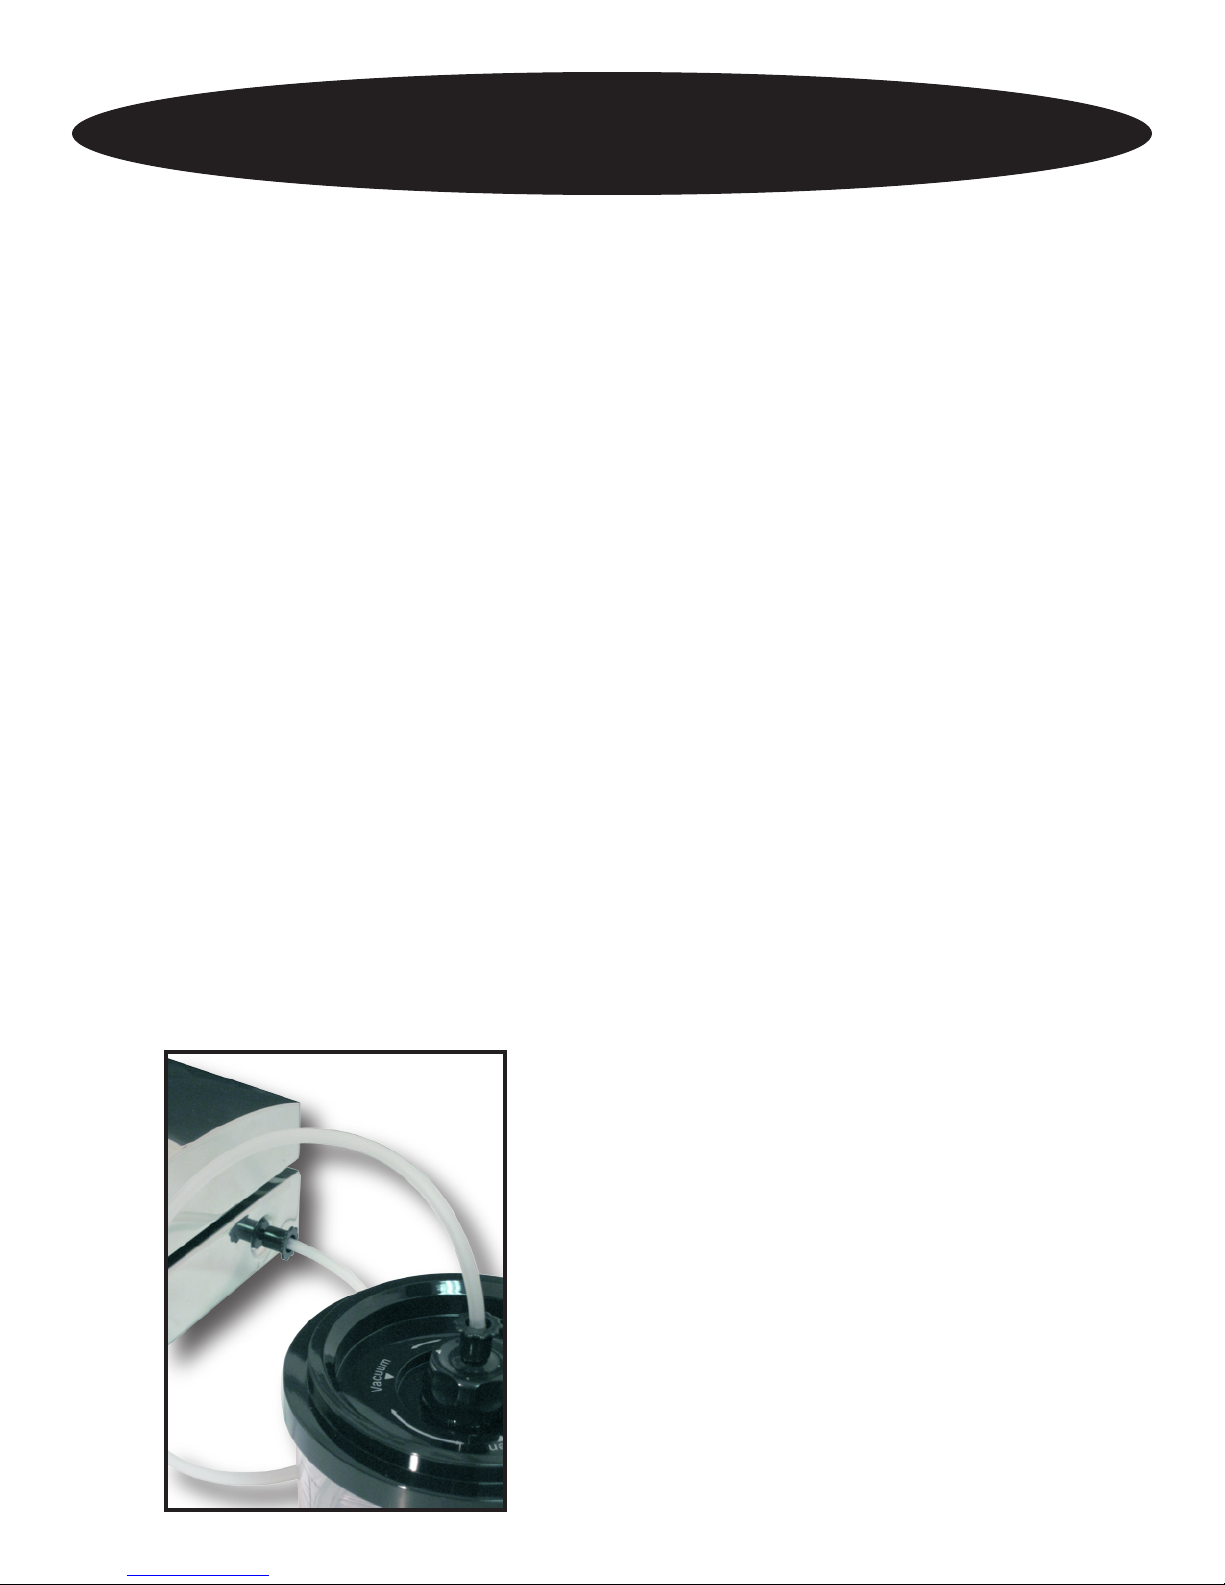
Your Pro160 is also equipped to vacuum package VacMaster® canisters
specically designed for vacuum packaging. The knob on the top of the lid
controls vacuuming, closes and locks vents inside lid after vacuuming, and opens
the vents to allow air back in the canister and releases the lid to access the
contents.
▪ Place items to be packaged in canister. Make sure lid of canister is
dry and free of food particles and debris. Do not overll.
▪ Place lid on top of canister. **NOTE** Lid sits on rim of canister until vacuum
process begins.** Turn knob so arrow points at “vacuum”.
▪ Attach accessory hose to canister port on lid of machine.
▪ Set machine to AUTO mode.
▪ Press START to begin vacuuming process. **NOTE** It might be necessary
to press down on lid at beginning of vacuum process to engage vacuum.**
▪ When process is complete, remove hose from canister lid and turn
knob to “lock” position. Store canister in refrigerator. DO NOT FREEZE.
To open vacuum canister, twist knob to
“open” position. With proper care, your
designer vacuum canisters may be reused
many times.
**Canister colors subject to change.**
Page 11

10
Canister Guidelines
▪ Use only canisters designed for vacuum packaging. Other containers can
implode under the pressure of the Pro160 vacuum.
▪ Do not freeze vacuum canisters.
▪ Cool liquids in refrigerator before vacuum packaging.
▪ Hand wash canister lid. Do not put in dishwasher. The canister itself is
dishwasher safe.
▪ If liquids are caught in the accessory hose, run warm water through hose. Be
sure hose is not attached to accessory port when washing.
▪ Powdered or granulated foods should be covered with a paper towel before
vacuuming to prevent food from traveling into the vacuum mechanism.
▪ Vacuum packaging is not a substitute for canning. Perishable foods still need
to be refrigerated or frozen.
▪ Hot foods should be cooled before vacuuming; the vacuum effect will be
inuenced if not cooled.
▪ Because of the different air pressure, the canister lid should be removed when
putting the canister in the microwave.
▪ Foods in canister should be thawed or at room temperature before heating in
the microwave.
Page 12

11
Vacuum Packaging Tips
Vacuum packaging greatly extends the shelf life of foods, but your Pro160 can
also be used in many other areas of the house besides the kitchen.
Vacuum packaging is great for camping and outdoor activities!
▪ For a quick ice pack, fill a vacuum bag about half full with
water and a few tablespoons of rubbing alcohol. Seal the bag - don’t
vacuum it. **NOTE** To do this, use AUTO mode and simply press START
and then immediately press SEAL NOW. The alcohol keeps the water from
freezing completely, resulting in a flexible ice pack to wrap around sore joints
and minor injuries.
▪ If you are going camping, vacuum package pre-made meals in advance for
quick and easy dinners in the great outdoors.
▪ Vacuum package meats and other items for scent-free storage.
▪ Create your own dry packs by vacuum packaging essentials like matches, dry
socks and a map for emergencies.
Around The House
▪ Organize ‘junk’ drawers and keep easy to lose items like nails and screws
safe by vacuum packaging them in a vacuum bag. That way, items are clearly
visible and organized within the bag.
▪ Don’t worry about polishing silver ever again! Simply vacuum package rarely
used silverware in vacuum bags to prevent the oxidation that causes
tarnishing. **NOTE** Place a folded paper towel between sharp edges of the
silverware and the vacuum bag to prevent puncturing.
Page 13
More Tips
▪ Package the freshest foods possible. The Pro160 allows you to
maintain the food’s freshness up to ve times longer than under
properly stored conditions.
▪ Delicate foods, moist foods and foods that need to hold their shape
require pre-freezing. Meats, berries and breads can be frozen for up to
24 hours without harm of freezer burn. Once food is hard, it is ready to be
vacuum packaged.
▪ If packaging fresh meats without pre-freezing, place a folded paper
towel in between the meat and the top of the bag. This will help
absorb moisture.
12
▪ To vacuum liquids like soups, stews and casseroles, pre-freeze in a
dish or ice cube tray. Once frozen, vacuum package, label and stack
in your freezer.
▪ For objects with sharp points or edges (bones, pastas, rices) pad the
edges with paper towels to prevent the bag from puncturing.
▪ VacMaster® bags are boilable and microwavable.
▪ Vegetables must be blanched before being packaged. Place in
boiling water or microwave until heated through but still crunchy.
Vacuum package as normal.
Page 14

13
Trouble Shooting
Under the proper circumstances, your Pro160 will give you top-notch vacuum
performance. In some instances, problems may arise. Please consult the trouble
shooting menu before calling customer support.
Pro160 will not turn on
▪ Ensure that the machine is properly plugged into a grounded outlet.
▪ Check the power cord for tears and frays. Do not use machine if power cord
is damaged.
▪ Make sure the ON/OFF button was properly pressed. Green light will be on
and LED screen will be illuminated when on.
▪ If the LED screen displays “EO2”. Allow the machine to rest for 3 minutes.
Then press ON/OFF button to resume.
Pro160 does not pull a complete vacuum with bag
▪ If using MANUAL mode, vacuum/seal time may not be set high enough. Set
vacuum and seal times higher, or use AUTO mode, and vacuum again.
▪ To vacuum and seal properly, the edge of bag must be within the sealing strip/
vacuum channel. Make sure bag is inside the sealing strip/vacuum channel
and there are no wrinkles in the bag along the seal bar.
▪ If packaging from a roll bag, make sure the first seal is complete.
▪ Pro160 and vacuum bag need to be clean, dry and free of debris for the
vacuum process to be successful. Wipe surface of seal bar and inside of
bag and try again.
Vacuum bag loses vacuum after being sealed
▪ Sharp items can puncture small holes in bags. To prevent this, cover
sharp edges with paper towel and vacuum in a new bag.
Page 15

Troubleshooting
▪ Some fruits and vegetables can release gases (out-gassing) if not properly
blanched or frozen before packaging. Open bag. If you think food
spoilage has begun, discard food. If food spoilage has not yet begun,
consume immediately. If in doubt, discard food.
Trouble Shooting
Pro160 is not sealing bag properly
▪ If using MANUAL mode, seal time may not be long enough. Increase seal
time and try again.
▪ Bags will not seal if any moisture, food particles or debris are present in
the seal area. Wipe the inside of the bag clean and try again.
14
▪ Bag must be properly placed along the seal bar. Make sure the entire bag
is over the seal bar and there are no wrinkles in bag material.
Pro160 is not vacuuming canister properly
▪ The accessory hose may not be properly attached. Ensure the hose is
completely attached to the lid of the canister and the accessory port, try again.
▪ Make sure the canister lid is turned to the “vacuum” setting.
▪ During the vacuum process, it might be necessary to press down on lid of the
Pro160to
engage vacuum.
▪ Leave adequate head space at the top of the canister.
▪ Make sure there isn’t any damage to the canister or lid. Sometimes hairline
cracks can develop in canisters. When this happens the canister is no longer
air tight and should be discarded.
▪ Twist knob on lid of canister to make sure it is attached securely.
If problems persist, contact customer support at 800.821.7849 for further
assistance. Thank you for purchasing the all-new VacMaster
Happy Vacuuming!
®
Pro160.
Page 16

Limited Warranty
ARY, Inc. a distributor and manufacturer of vacuum packaging and other machines (collectively, the
“Goods”), extends to the purchaser of the Goods a Limited One Year Warranty, from the receipt of the
Goods, under terms and conditions set out herein.
All Goods sold by ARY, Inc. are warranted to be free from defects in material and workmanship at the
time of delivery to purchaser. Defective material may be returned to ARY, Inc. after inspection by an
agent of ARY, Inc. and upon receipt from ARY, Inc. of shipping instructions specic to the defective Goods
authorized by ARY, Inc. to be returned. ARY, Inc. at its sole option, may either (i) replace or repair any
defective materials and workmanship (and return the Goods to purchaser without charge), (ii) refund the
purchase price, or (iii) grant a reasonable allowance with the foregoing procedure.
This warranty is subject to the following limitations:
i. ARY, Inc.’s responsibility and the purchaser’s exclusive remedy under this warranty is limited to the
repair or replacement of defects in material and workmanship, refund of the purchase price, or grant of a
reasonable allowance on account of such defects, all as set forth above. ARY, Inc. is not responsible for
any consequential damages resulting from the breach of this or any other express or implied warranty with
respect to the Goods.
ii. This express warranty is the only warranty applicable. It excludes all other express oral or written
warranties and all warranties implied by law with respect to the Goods, including any warranties or
merchantability or tness for a particular purpose.
iii. Every claim under this warranty shall be deemed waived by purchaser unless made in writing within
one (1) year of the receipt of the Goods to which such claim relates.
iv. This warranty, as to the Goods, is void (a) to repairs made by anyone other than ARY, Inc. without
prior authorization from ARY, Inc., (b) to performance of any system of which ARY, Inc.’s Goods are a
component part, (c) to deterioration by corrosion or any cause of failure other than defect of material or
workmanship, (d) to any components of the Goods, including, without limitation, Teon tape, lid gaskets
and seal wire, or (e) if any of the Good or parts thereof have been tampered with or altered by someone
other than ARY, Inc., or subjected to misuse, neglect, abuse, or misuse in application.
ARY, Inc.’s maximum liability hereunder, arising from any cause whatsoever, whether based in contract,
tort (including negligence), strict liability, or any other theory of law, shall not exceed the purchase price. A
suit based on any aforementioned cause of action must be commenced within one year from the date said
action accrues.
ARY, Inc.
P.O. Box 412888
Kansas City, MO 64141
A leading supplier of commercial
products since 1939.
www.aryinc.com
800.821.7849
All Rights Reserved. GameMaster™, VacMaster®, VacStrip®, Total Freshness System™ and Commercial Culinary Concepts
are trademarks or registered trademarks of ARY, Inc. in the United States and other countries.
**Vacuum packaging is not a substitute for canning.
 Loading...