

Page 1
www.v7devices.com
ZYRO
User Guide
Page 2

To ensure safe and proper use, please read all the safety precautions and this manual carefully before using your
device.
The descriptions in this manual are based on the default settings of your device. The available features and
additional services may vary by device, software version and service provider. Applications and their functions may
vary based on the country, region, software or hardware specifications. V7 is not liable for performance issues
caused by third-party applications.
Talk and standby times are affected by network preferences, type of SIM cards, connected accessories and
individual usage patterns. The colours, specifications, functions and graphics shown/mentioned in the user manual
may differ from the actual product. In such a case, the latter shall govern. Images shown are for representation
purpose only. Specifications are subject to change without prior notice. V7 keeps the right to modify the content in
this user guide without prior notice.
Other product logos and company names mentioned herein may be trademarks or trade names of their respective
owners.
EN
Page 3

Contents
• What’s in the box
• Before you turn on your phone
• Get to know your phone
EN
Page 4

What’s in the box
• V7 Zyro 4G Smartphone
o Qualcomm Quad Core Processor
o 5.0” High Definition Screen
o 16GB Internal Memory
o 1GB RAM
o 13 MP Rear Camera (5MP Front Camera)
o 2100mAh Battery
o Android 6.0 Marshmallow Operating System
• Micro USB Charge and Sync cable
• USB wall plug adapter
• Earphones with in-line mic
• Quick Start Guide
• Safety information
EN
Page 5
Before you turn on your phone
We’re sure you’re keen to start using your phone, but before you do, you will need to install
your chosen Micro SIM(s) as well as insert and charge the battery. It’s also a great time to
insert a TFlash-card (Sold separately) to expand your storage by up to 32GB, while the back
cover is off.
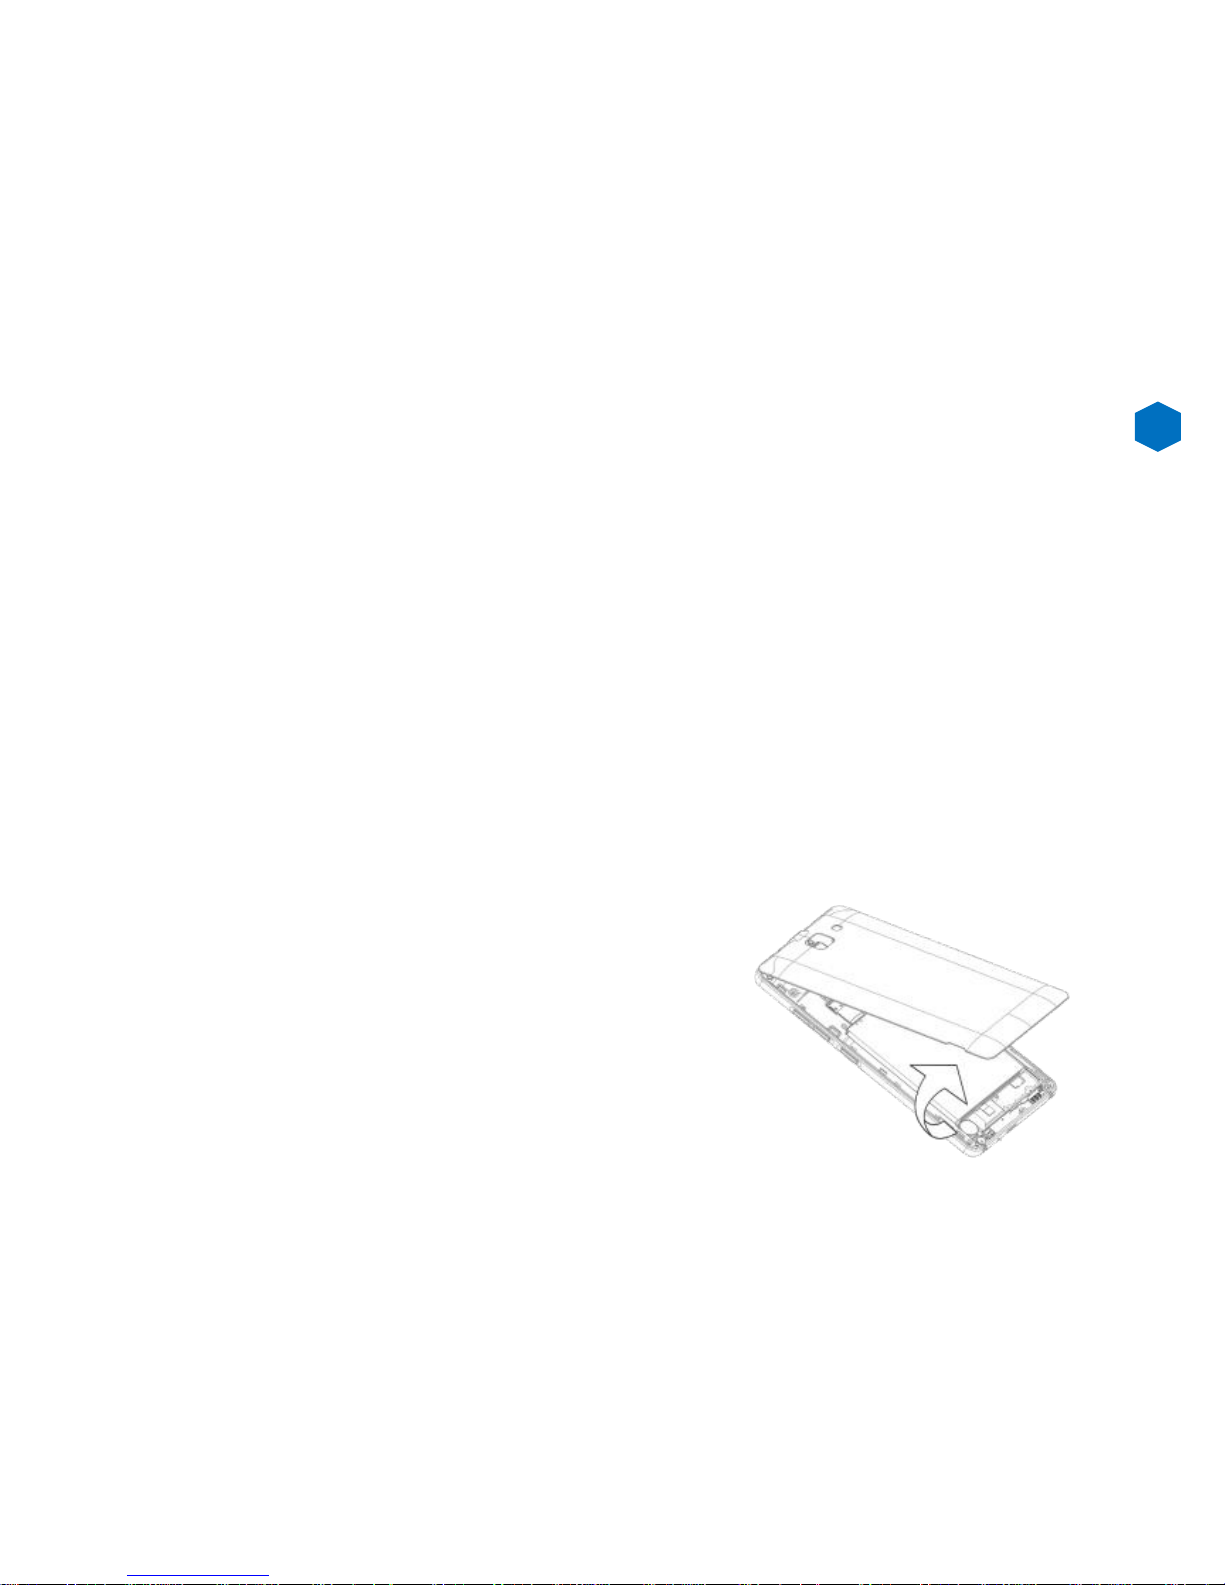
Removing the back cover
Your Zyro smartphone comes with an easy to remove back cover to make it quick to insert your
battery and SIM cards.
To remove the back cover, find the indent on the bottom left of the rear cover. Simply use your
fingernail to prise open the cover slightly, then work along the sides and bottom to remove the
remaining clasps.
EN
Page 6
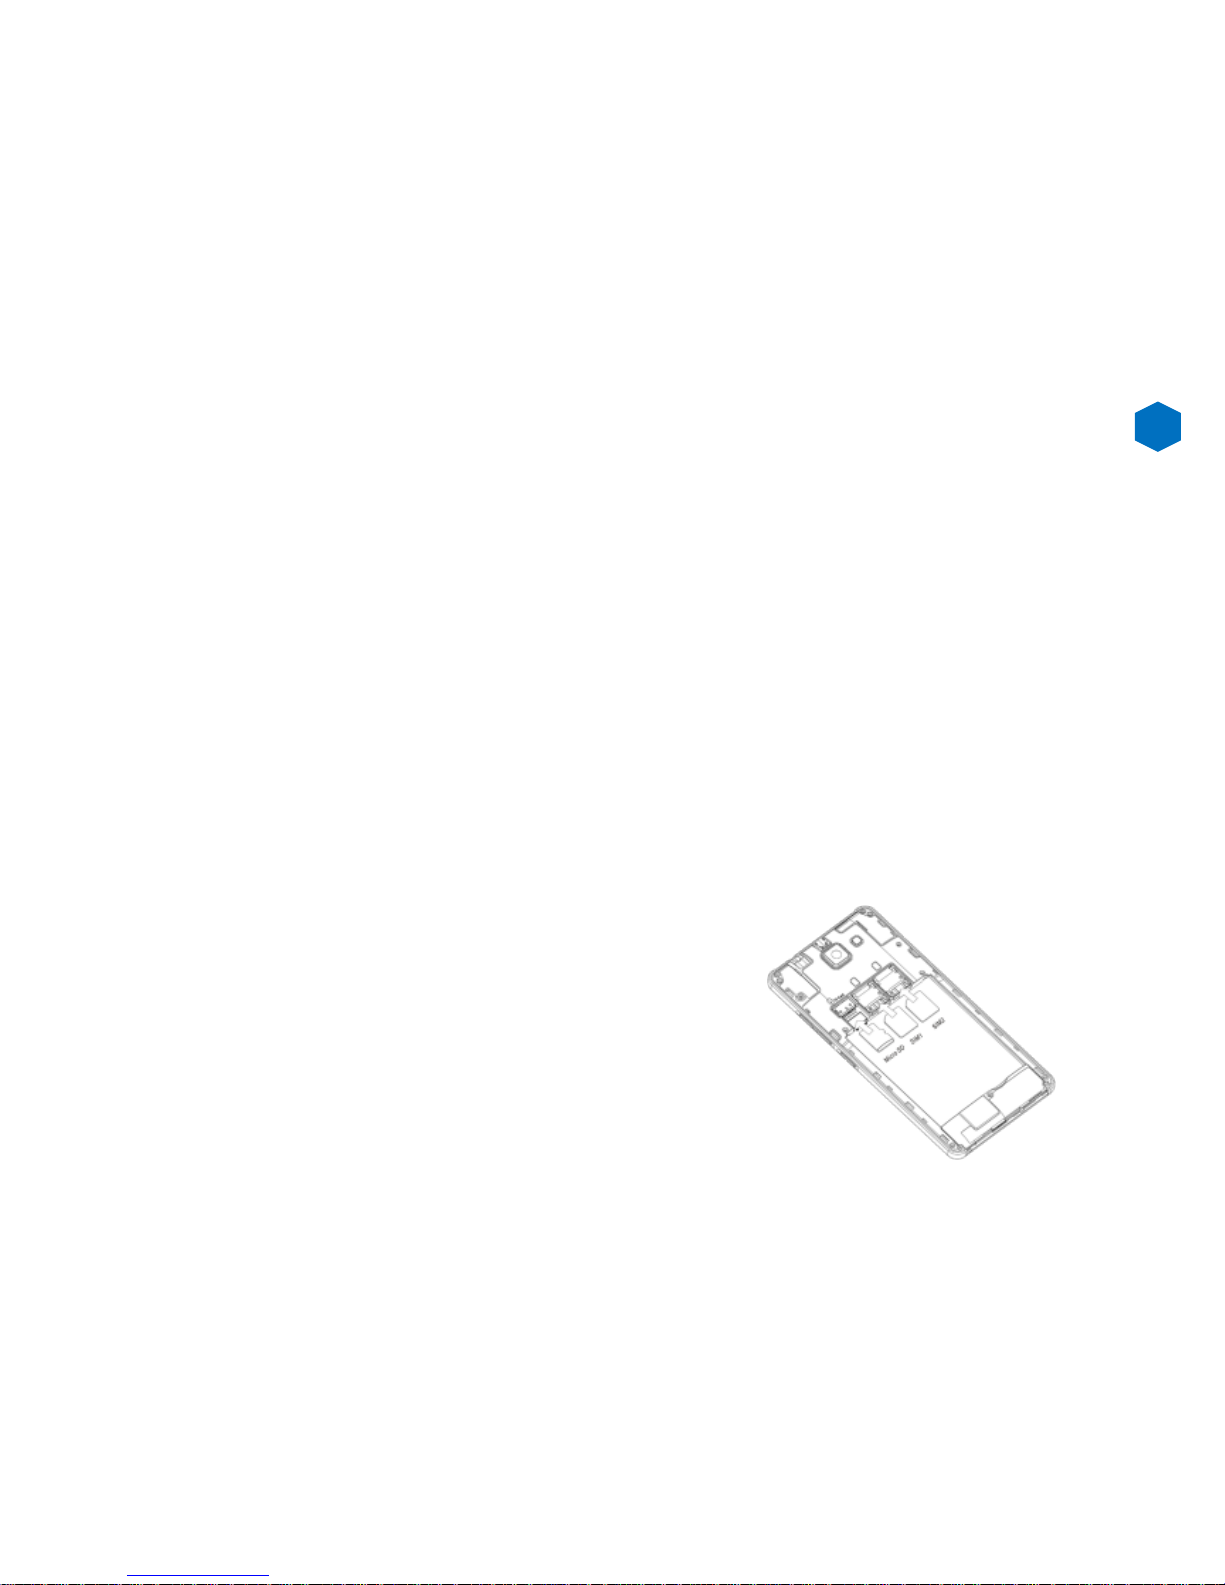
Inserting the Micro SIM
To use all the features of your Zyro phone you will need to have a micro SIM which you can get
from your local mobile network provider. Unlike many phones, your Zyro smartphone has 2
micro SIM slots to make it even more convenient to manage your calls all from one device.
Slot 1 - (4G/3G/2G) This is for your primary SIM for Calls, SMS and Data services.
Slot 2 – (2G) This will accept the same micro SIMs as Slot 1 (4G/3G/2G), but functionality is
limited to 2G services (Calls and SMS).
To insert, remove the back of the phone and make sure the battery is not in place. Slot in the
SIM with the chip face down as shown on the diagram just below the SIM slot.
EN
Page 7

Insert and Charge the Battery
To insert your battery, simply place the battery into your phone starting with the top side with
the power connectors and then slide up into place. Once done replace the back cover.
Before using the phone for the first time we recommend you charge the battery for a minimum
of 3 hours. Simply connect the included Micro USB cable to the USB wall plug adapter and plug
into the phone.
It is recommended that you use the included USB wall adapter to charge your phone, but if this
is not possible, you can also charge the Zyro by connecting the cable to another suitable USB
power source such as a port on a computer. Charging times may vary.
Once charged, you’re ready to start using your Zyro.
EN
Page 8

Knowing Your Phone
Earpiece Front Camera
Touchscreen
Recent Apps
Home
Back
Power
Volume +/-
Rear Camera
LED Flash
Loudspeaker
Micro USB Port
3.5mm headphone jack
EN
Page 9

Knowing the Buttons of Your Phone
Return: Returns to previous screen, or minimizes on-screen keyboard.
Home: Returns to home screen. Opens Google Now (Press and hold this button).
Recent App: Overview of recent apps.
Power Button: Press and hold to turn phone on/off. Press the button lightly to lock/unlock
screen.
Volume +/-: Increase/decrease call volume, ringtone volume or media volume.
EN
Page 10

Knowing the Notification Icons
4G
3G
New voicemail
Airplane mode on
Battery level
Connected to computer
Downloading
New SMS or MMS
Silent mode on
Alarm on
New mail
Synchronising
Missed call
Call waiting
Voice call in progress
GPS in use
Bluetooth enabled
Connected to Wi-Fi
Wi-Fi available
Roaming
Signal Strength
Connected to GPRS
Connected to EDGE
Connected to HSPA (3.5G)
Connected to HSPA+ (3.5G+)
Connected to 4G
Connected to 3G
No signal
H
E
G
H+
R
EN
Page 11

Apps
Your Zyro smartphone comes with a range of apps pre-installed with millions more
accessible through the Google Play store. This allows you to truly make the phone
your own with a huge amount of customization options. Once you set up your
Google Play account, you can download and install apps and arrange them on
your phone. On the next pages we’ll highlight some of the key features with some
of the pre-installed apps to get you started, but please visit www.v7devices.com to
view more detailed information on what you can do with apps.
EN
Page 12

Home Screen
Read your notifications
Notifications appear in the status bar, touch the bar and slide your finger down the screen to
open the list of notifications. To open a message, reminder or other notification, you can touch
the item. To close the notifications window, slide your finger up the screen. You can clear the
notifications list by selecting ‘Clear’ at the top of the notifications window.
Create Home screen shortcuts and widgets:
From the Home screen, touch and hold the blank screen, or click the MENU Key and select
‘Wallpaper’. Enter the main menu screen, slide your fingertip left to reveal the widget, select a
shortcut to some of your saved information (such as a playlist), a widget (a clock) for your Home
screen.
Move objects on the Home screen
To move an icon or other item on the Home screen, you must first touch & hold it to enter move
mode. The object will magnify when it’s ready to be moved.
EN
Page 13

Calling and Messaging
Make a Call
Tap on the menu screen or the home screen. By default, the dialer will display a list of your
most called contacts.
Tap to view the dialer
Contacts
Go to
Store, use, and synchronize contact details in your contact list. You can now create contact
groups or mark contacts as favorites in your phonebook. Use tabs or swipe through to view the
list of contacts, and favorite contacts list.
Airplane Mode
Some locations may require you to disable all wireless features of your device. Airplane Mode
enables you to disable all incoming and outgoing calls, Wi-Fi, and Bluetooth connections.
To activate airplane mode: Press and hold the Power button and then select Airplane mode.
Or, Drag notification panel down, and select Airplane mode.
EN
Page 14

Send a Message
Tap on the screen or home screen and then tap to compose a message
Tap icon to view the types of files that can be attached and select the desired type of
multimedia file
Tap to select the composition text box and enter your message body in it
Enter the contact name (if it exists) or enter the phone number. You can also tap the icon
to view and select a contact from the contact list
Tap to send the message
EN
Page 15

Multimedia
Camera Go to
Once in the app, click on the camera icon to change between photo, panorama and video. You
can tap on the screen to focus the camera or pinch to zoom. To take a picture you can use the
icon on screen or the volume buttons on the side. You’ll also find additional setting and effects
at the top of the screen so you can get the picture you really want.
Gallery Go to
You can view your pictures and videos from the Gallery. Tap an album to open and view its
contents. Gallery allows you to organise and share your photo’s and videos.
Music Player Go to
Songs are categorized by Artist, Albums and Songs. You can make your favourite playlist by
long tapping on a song and selecting Add to Playlist. Music supports various audio formats,
including: MP3, arm, ogg, and wav, etc.
FM Radio Go to
You can listen to your favourite FM channels using the inbuilt FM receiver of your phone.
Before starting the FM, plug-in the headset as it works as antenna for the FM radio. Use the
intuitive buttons and icons on the phone in the radio interface to enjoy the features of your
inbuilt FM radio.
EN
Page 16

Settings, Networks
Your phone can connect to various networks and devices, including Internet, Wi-Fi, GPRS,
Bluetooth, devices, such as headsets. You can also transfer files to/from your PC through the
data cable.
Connect to the Internet
Go to Data usage → Cellular and select the SIM on which data connection is to be
enabled.
You may also need to configure the access point name for the data connection to work.
To configure the access point name:
Go to → → More → cellular networks → Access Point Names and select the SIM for
which access point name is to be configured. Select the access point name from the list.
By default, the access point name gets configured once you insert the SIM, Or, your network
provider sends the access point name settings via SMS. You may need to install these settings.
If the access point names are not listed by default, please contact your network provider for the
same.
EN
Page 17

Tethering & Portability
You can use your device as a modem and connect your PC or laptop to the Internet, when
required. Start using your SIM data pack on your PC or Laptop now!
Go to → → More → Tethering & portable hotspot
USB Tethering
1.Connect your phone with your PC/Laptop via USB cable.
2. Select the USB tethering option.
3. Select your phone network as the network connection in your PC/laptop and get access to
the Internet.
Bluetooth Tethering
1. Pair your phone with the Bluetooth enabled PC/laptop via Bluetooth pairing option.
2. Select the Bluetooth tethering option in your phone.
3. On the paired PC/laptop, select the Bluetooth device (your phone) and choose to connect to
the internet.
EN
Page 18

Wi-Fi Hotspot
1. Turn on the Wi-Fi hotspot option in your phone.
2. On the other Wi-Fi enabled PC/laptop/handset, choose your phone as a Wi-Fi network to
connect with it.
3. View and configure Wi-Fi hotspot settings by tapping the Wi-Fi hotspot option.
Your mobile operator will charge you based on your GPRS data usage.
Pair With Bluetooth Devices
Go to → → Bluetooth
1. If Bluetooth is off, turn it on and then tap Bluetooth. Your phone scans and displays the
Bluetooth devices in range.
2. Tap the ID of the other device in the list to pair with it.
3. You will be prompted to confirm passkey on both devices.
4. Tap Pair to confirm the passkey and pair the devices. On successful pairing, your phone
connects to the device.
EN
Page 19

Taking Care of your device
Your device is a product of superior design and craftsmanship and should be handled with
care. The following suggestions will help you protect your phone.
Keep the device dry. Precipitation, humidity, and all types of liquids or moisture can rust the
electronic circuits. If your device gets wet, remove the battery, wipe it with a dry cloth and allow
it to dry. If you have any problems contact us on our website www.v7devices.com
Do not use or store the device in dusty, dirty areas. Its moving parts and electronic components
can get damaged.
Do not attempt to open the device other than as instructed in this guide.
Do not use harsh chemicals, cleaning solvents, or strong detergents to clean the device. Only
use a soft, clean, dry cloth to clean the surface of the device.
Do not store your device near magnetic fields or allow your device to come in contact with
magnetic fields for extended period of time.
EN
Page 20

Battery Recommendations
Batteries have a finite life span. If you feel your battery is not performing as it was when new,
please contact us on our website. www.v7devices.com Do not discard the battery with
household trash. Please dispose of used battery according to your local environmental laws
and guidelines.
Recycle your Phone
The WEEE logo appears on the product (battery, handset, and charger) to indicate that this
product must not be disposed of or dumped with your other household waste. You are liable to
dispose of all your electronic or electrical waste equipment by taking them to an appropriate
collection point for recycling of such hazardous waste.
Collection and proper recovery of your electronic waste equipment at the time of disposal will
allow us to help preserve the environment. Recycling of the electronic waste equipment will
ensure safety of human health and environment. For more information on best practices for
disposal of electronic and electrical waste, please visit to our web site: www.v7devices.com
Note: V7 will not bear any responsibility for any incompliance with the above mentioned
guidelines or improper usage of the mobile phone.
EN
 Loading...