

Page 1

Rhein Tech Laboratories, Inc. Client: UTStarcom
360 Herndon Parkway Model: UT106
Suite 1400 FCC ID: O6Y-UT106
Herndon, VA 20170
http://www.rheintech.com
Standard:
Report #:
Part 24
2004125
APPENDIX I: MANUAL
Please see the following pages.
Page 37 of 55
Page 2
UT106
USER GUIDE
Page 3

Page 4

_______________________________________
Trademark Statement: “‘UTStarcom’, ‘iPAS’, and the UTStarcom logo are
trademarks of UTStarcom, Inc.”
Copyright Statement: “©UTStarcom, Inc. 2004. All rights reserved. No
part of this publication may be reproduced in any form or by any means
without the prior written permission of UTStarcom, Inc.”
Warranty Language: “The contents of this manual, whether in whole or in
part, do not constitute any express or implied warranty with respect to any
products of UTStarcom, Inc., or its subsidiaries.”
i
Page 5

Table of Contents
SAFETY PRECAUTIONS.................................................... 1
1. GETTING STARTED ....................................................... 7
1.1 PACKAGE CONTENTS.....................................................................7
1.2 PHONE SPECIFICATIONS ................................................................8
1.3 HANDSET DESCRIPTION ................................................................. 9
1.4 ATTACH THE HAND STRAP............................................................ 11
1.5 DISPLAY INDICATORS ...................................................................11
1.6 CHARGE THE BAT TER Y ................................................................12
1.7 REPLACE THE BAT TER Y ............................................................... 14
1.8 CONVENTIONS IN THIS GUIDE ....................................................... 15
1.9 ACCESS MENU/LIST OPTIONS ......................................................16
2. BASIC OPERATIONS ................................................... 17
2.1 SWITCH THE PHONE ON/OFF .......................................................17
2.2 MAKE A CALL...............................................................................17
2.3 SPEED DIAL A PHONE NUMBER ....................................................17
2.4 MAKE AN IP CALL ........................................................................18
2.5 ANSWER A CALL ..........................................................................18
2.6 REJECT A CALL............................................................................ 19
2.7 HOLD A CALL ............................................................................... 19
2.8 CALL WAITING.............................................................................19
2.9 THREE WAY CALLING ................................................................... 20
2.10 ACCESS PHONEBOOK DURING A CALL ........................................21
2.11 ADJUST EARPIECE VOLUME DURING A CALL................................ 21
2.12 STORE A PHONE NUMBER ..........................................................22
2.13 CALL LOG SHORTCUT ................................................................ 22
2.14 CUSTOM FUNCTIONS SHORTCUT................................................ 23
2.15 CURRENT PROFILE SHORTCUT...................................................23
2.16 MEETING PROFILE SHORTCUT ...................................................23
2.17 KEYPAD LOCK ...........................................................................24
ii
Page 6

3. PHONEBOOK (NAMES) ............................................... 25
3.1 SEARCH ...................................................................................... 25
3.1.1 Quick Search .................................................................................26
3.1.2 Edit ................................................................................................26
3.1.3 Delete Entry................................................................................... 27
3.2 ADD ENTRY................................................................................. 27
3.3 DELETE ENTRY............................................................................28
3.3.1 One by One ...................................................................................28
3.3.2 All...................................................................................................28
3.4 GROUP INFO ...............................................................................29
3.4.1 Browse...........................................................................................29
3.4.2 Ring Tone.......................................................................................29
3.5 SPEED DIAL ................................................................................ 29
3.6 MEMORY..................................................................................... 30
4. MENU ............................................................................ 31
4.1 SMS........................................................................................... 31
4.1.1 Edit Message.................................................................................31
4.1.2 Inbox..............................................................................................32
4.1.3 Outbox...........................................................................................34
4.1.4 Draft...............................................................................................35
4.1.5 Clear..............................................................................................36
4.1.6 Memory..........................................................................................37
4.2 CALL LOG ................................................................................... 38
4.2.1 Missed Log ....................................................................................38
4.2.2 Received Log.................................................................................39
4.2.3 Dialed log.......................................................................................40
4.2.4 Delete Log .....................................................................................42
4.2.5 Duration .........................................................................................42
4.3 PROFILES.................................................................................... 43
4.3.1 Standard ........................................................................................43
4.3.2 Meeting..........................................................................................46
4.3.3 Silent..............................................................................................46
4.3.4 Outdoor..........................................................................................46
4.3.5 User Define....................................................................................46
4.4 SETTINGS ...................................................................................47
iii
Page 7

4.4.1 Own Number..................................................................................47
4.4.2 Scheme .........................................................................................47
4.4.3 Date/Time ......................................................................................48
4.4.4 Alarm .............................................................................................49
4.4.5 Answer Mode .................................................................................51
4.4.6 Language.......................................................................................52
4.4.7 Display...........................................................................................52
4.4.8 IP Phone........................................................................................54
4.4.9 Set Security ...................................................................................55
4.4.10 Input Method................................................................................59
4.4.11 Call Forwarding............................................................................59
4.5 TOOLS ........................................................................................62
4.5.1 Calculator ......................................................................................62
4.5.2 Calendar ........................................................................................63
4.5.3 Memo.............................................................................................63
4.6 GAME .........................................................................................66
4.6.1 Black-white Chess ......................................................................... 66
4.6.2 Whammy .......................................................................................67
4.6.3 BJK................................................................................................ 68
5. DATA TRANSFER ......................................................... 70
6. INPUT METHOD............................................................ 71
6.1 SWITCH INPUT METHOD...............................................................71
6.2 PINYIN AND SIM STROKE .............................................................71
6.3 ENGLISH .....................................................................................71
6.4 LETTER .......................................................................................73
6.5 DIGIT ..........................................................................................74
6.6 INPUT METHODS IN SMS .............................................................74
7. TROUBLESHOOTING................................................... 75
iv
Page 8

Safety Precautions
SAFETY PRECAUTIONS
FCC RF Exposure Compliance
This PCS phone has been tested and complies with the Federal
Communications Commission (FCC) RF exposure limits for General
Population/Uncontrolled exposure environment. In addition, it complies
with the following Standards and Guidelines:
z FCC 96-326, Guidelines for Evaluating the Environmental Effects of
Radio-Frequency Radiation
z FCC OET Bulletin 65 Edition 01-01 (2001) Supplement C, Evaluating
Compliance with FCC Guidelines for Human Exposure to Radio
Frequency Electromagnetic Fields
z ANSI/IEEE C95.1-1992, IEEE Standard for Safety Levels with
Respect to Human Exposure to Radio Frequency Electromagnetic
Fields, 3 kHz to 300 GHz
z ANSI/IEEE C95.3-1992, IEEE Recommended Practice for the
Measurement of Potentially Hazardous Electromagnetic Fields - RF
and Microwave
1
Page 9
Safety Precautions
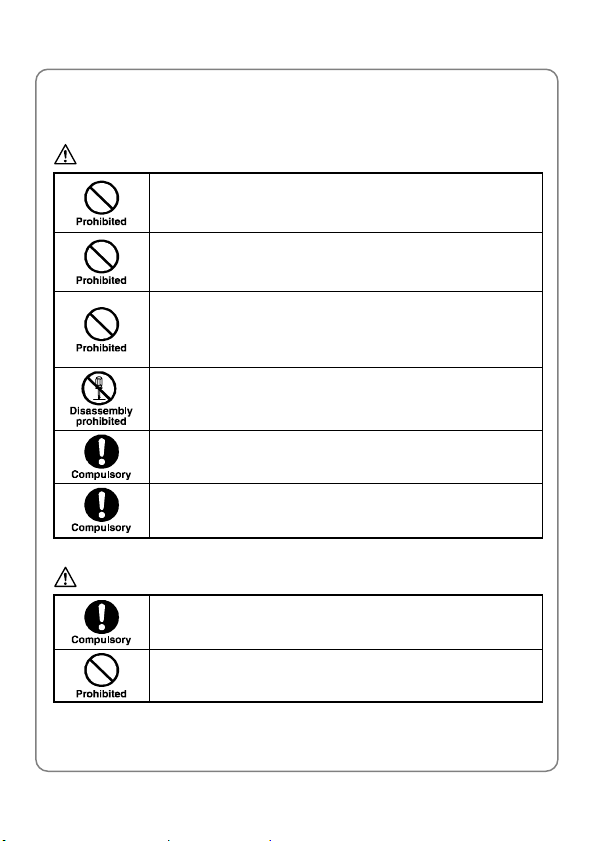
Handling the Phone, Battery and Charger
DANGER
Only use the battery and charger specified for the
phone. Failure to do so can result in damage to the
phone, electric shock or fire.
CAUTION
Do not store or operate the phone or charger in hot,
damp, or dusty areas, which can damage electrical and
mechanical components. Avoid prolonged exposure to
temperatures below 5°C or in excess of 35°C.
DANGER
Do not drop, shake or throw the phone or charger.
Rough handling can damage internal circuit boards and
the battery pack.
Do not use the phone in the vicinity of volatile gases.
Leave the area before using the phone. Failure to leave
the area can result in the risk of fire or an explosion.
Do not disassemble or modify the phone, charger, or
battery. Incorrect modifications, reassembly, or
tampering may result in malfunction or personal injury.
2
Page 10
Handling the Phone
DANGER
Do not use the phone while operating a vehicle.
Observe local regulations for specialized areas
(hospital, aircraft, etc) when using the phone.
This phone has been tested and found to comply with
the limits for a Class B digital device, pursuant to Part
15 of the FCC Rules. These limits are designed to
provide reasonable protection against harmful
interference in a residential installation. This phone
generates, uses and can radiate radio frequency energy
and, if not installed and used in accordance with the
instructions, may cause harmful interference to radio
communications. However, there is no guarantee that
interference will not occur in a particular installation. If
this phone does cause harmful interference to radio or
television reception, which can be determined by
turning the phone off and on, the user is encouraged to
try to correct the interference by one or more of the
following measures:
- Reorient or relocate the receiving antenna
- Increase the separation between the phone and
receiver
- Connect the phone into an outlet on a circuit different
from that to which the receiver is connected
- Consult the dealer or an experienced radio/TV
technician for help
Safety Precautions
3
Page 11
Safety Precautions
CAUTION
Changes or modifications not expressly approved by
UTStarcom, Inc. could void the user’s authority to
operate the phone.
Keep all storage media (magnetic cards, floppy disks,
credit cards, etc.) away from the phone. Close
encounters or contact can erase or damage the storage
media.
Keep all sharp metal objects (pins, nails, hairpins etc.)
away from the phone handset. The handset earpiece
contains a strong magnet that can attract and hold
metal objects. Remove any objects from the handset
earpiece before using, to avoid personal injury.
In case of emergency, key in the emergency number
(911 for example in US), then press the Talk key and let
the operator know your specific location. Don’t hang up
until you are told to do so.
4
Page 12
Handling the Battery
DANGER
Do not dispose of the battery pack in a fire. It may
explode. Check with local waste management codes for
disposal instructions.
Do not force the battery pack into the phone. Improper
installation can cause malfunctions or damage the
battery pack. This may result in fire or personal injury.
Use caution in handling batteries in order not to short
the battery on conductive materials such as rings,
bracelets, and keys. The battery and/or conductor may
overheat and cause burns.
If the battery becomes too hot while recharging, it
should be removed immediately from the charger.
When clothes or skin are exposed to battery leakage,
rinse with clean water at once to prevent skin irritation.
Do not use a cracked, leaking or odor-emitting battery
pack near an open flame or high temperatures.
CAUTION
If a fully discharged battery is stored for a long period of
time, it may not be possible to recharge the battery.
Observe local waste management codes for proper
battery disposal instructions.
Safety Precautions
5
Page 13
Safety Precautions
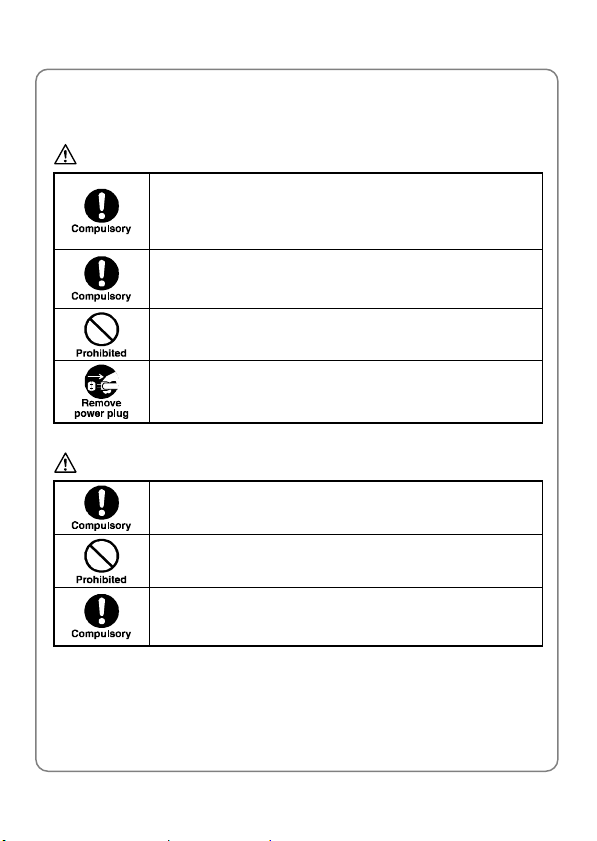
Handling the Charger
DANGER
Only use a power source that provides the appropriate
voltage (AC100~240 V) for the charger. An unsuitable
power source can result in damage to the charger,
electric shock or fire.
Do not use the charger if the power supply cord or plug
is damaged or frayed (exposed or broken wires, etc).
This can result in the risk of fire or electric shock.
Do not short circuit the charger connector jack. This may
result in fire or electric shock.
Immediately unplug the charger from the wall outlet in
the event that liquid is spilled into the unit to prevent fire
or electric shock.
CAUTION
Always unplug the charger from the wall outlet before
cleaning to avoid the risk of electric shock.
Do not place heavy objects on the cord to avoid
damage.
Always grip the power plug when removing the charger
from the wall outlet. Do not pull on the power supply
cord to avoid damage and the risk of electric shock.
6
Page 14
Getting Started
1. GETTING STARTED
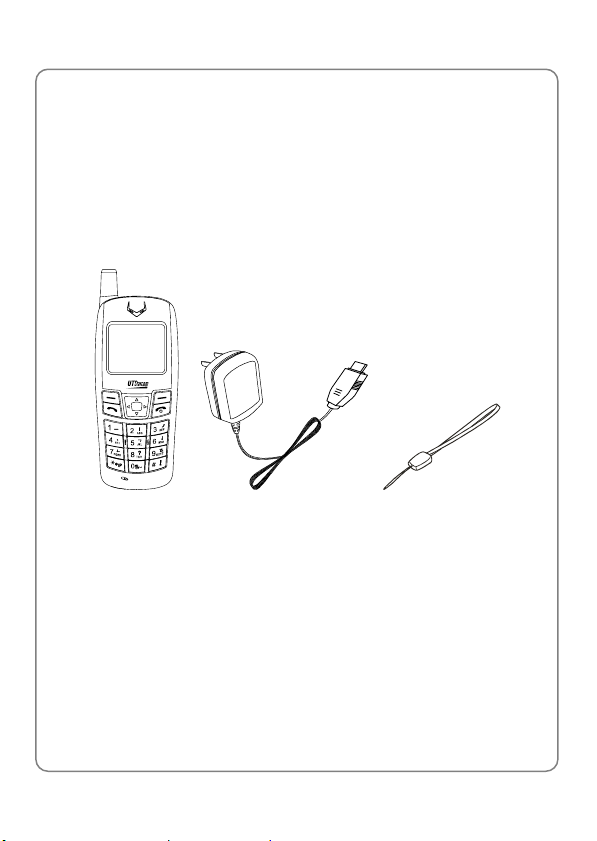
1.1 Package Contents
Please check the package contents by comparing them with the following
list. If you find anything missing or if the documentation set is incomplete,
contact your local phone dealer immediately
z Model UT106 (with one battery)
z Charger (one)
z Hand strap (one)
z User guide (one)
z Quick Start guide (one)
z Instructions for post-sale support
z Certificate of quality
7
Page 15
Getting Started
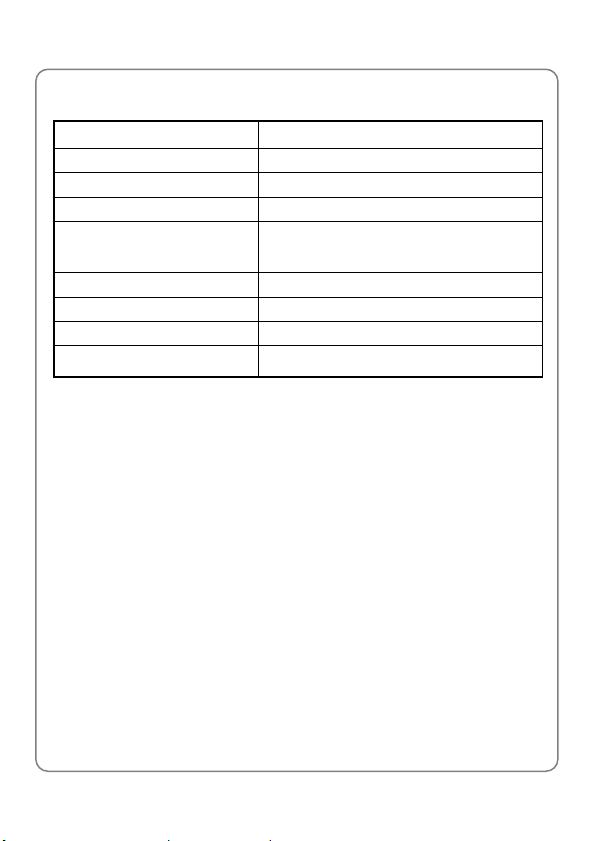
1.2 Phone Specifications
Dimensions
Weight Approximately 70g
Transmission Voltage Approximately 10mW
Battery DC 3.6V 550mAh Li-ion battery
Charger
Charger Model S523205A
Charger Weight About 50g
Charging Time 2.5~3.5 hours
Standby Time
z Standby time refers to the state in which the phone is on continuously
without being used for calls or moved to different service areas
z The standby time depends on the network conditions, phone usage
and surrounding area. The phone consumes more battery power
under the following conditions:
- In areas with weak signals, with high or low temperatures, or when
used outside the service coverage area
- When the phone frequently searches for network signal due to
location changes
- When you talk on the phone for long periods of time
- When features such as SMS and game are being used for long time
- The Alarm, Backlight or Vibration function is active
- Ring or earpiece volume is set to maximum
About 99.5×42×17.5 (L×W×H) mm
Input: 100~240V AC, 50~60Hz
Output: 5.2V DC, 320mA
48~200 hours
8
Page 16
Getting Started
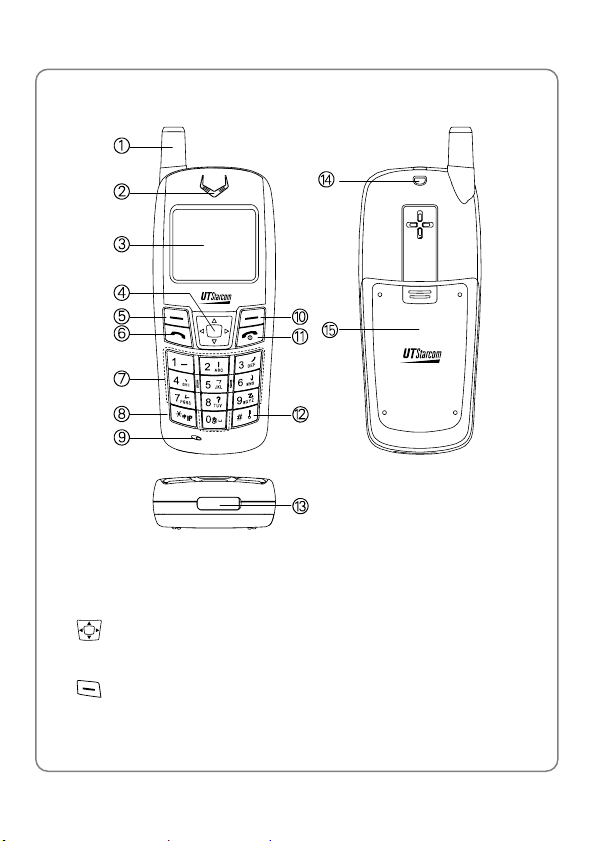
1.3 Handset Description
1. Fixed antenna
2. Earpiece
3. LCD Screen
Navigation Key:
4.
This key is used to scroll up and down through menu lists
Left Soft Key:
5.
This key is used to perform the function indicated on the screen above
it
9
Page 17
Getting Started
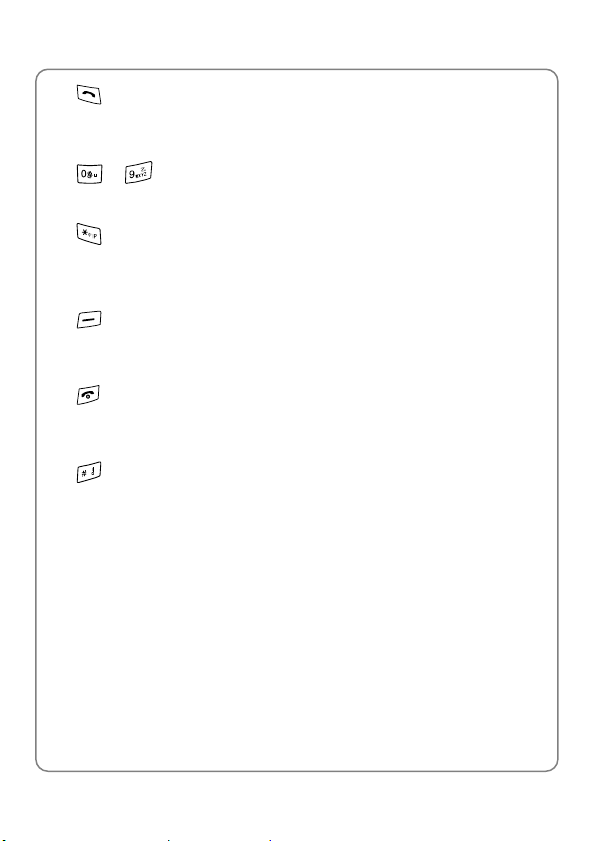
Talk Key:
6.
This key is used to make or receive a call. It can also be used to
access outgoing call logs in standby mode
~ Number Keypad:
7.
These keys are used to enter numbers and characters
IP Key/Switch Key:
8.
This key is used to make IP calls or to change the text input method
9. Microphone
10.
Right Soft Key:
This key is used to perform the function indicated on the screen above
it
Power Key:
11.
This key is used to switch the phone on and off, to end a call, or to
return to standby mode
12.
# Key/Lock Key:
This key is used to key in “#” or pause symbol “P” (by pressing and
holding the key), or to lock the keypad
13. Charging Socket/Data Socket
14. Slot for Hand Strap
15. Battery Cover
~ Note: This is only a brief introduction to the keypad functions.
Please refer to the contents of this user guide for detailed
descriptions and operations
10
Page 18
Getting Started
k
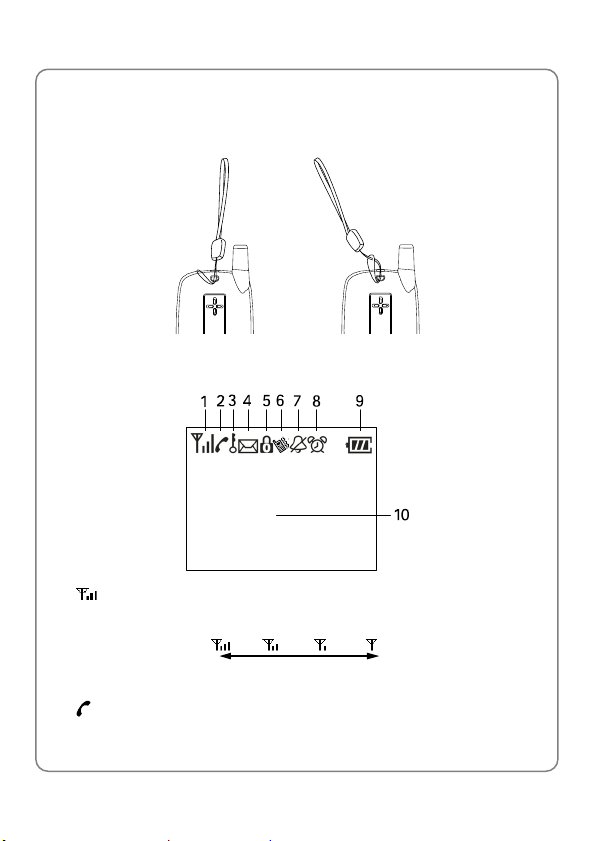
1.4 Attach the Hand Strap
Fasten the hand strap as shown in the figures below:
1.5 Display Indicators
Shows the current signal strength. The higher the bar, the stronger
1.
the signal
Strong Wea
Refers to the calling or connecting mode
2.
11
Page 19
Getting Started
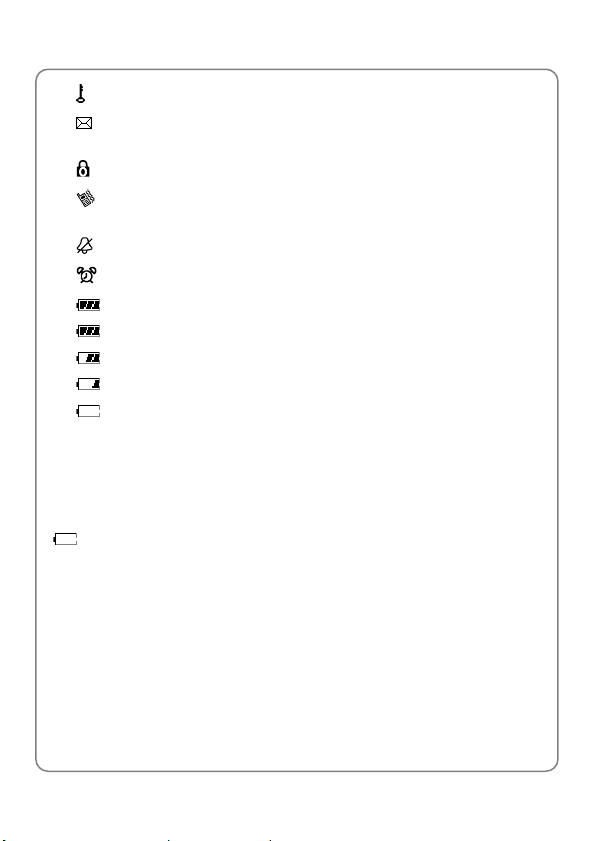
3. Indicates the keypad is locked
Indicates a new short message has been received. It will flash
4.
when the message box (Inbox) is full
5. Indicates the Toll Lock function is active
6.
Means the Ring Mode is set to Vibrate, Vibrate And Ring or
Vibrate Then Ring
Means the Ring Mode is set to Mute or Vibrate
7.
8.
Indicates the Alarm function is active
9.
Indicates the battery charge level:
- Fully charged
- Fair
- Low, not much power left
- Power exhausted
10. Content Display Area: Shows the phone numbers, short messages,
characters, etc.
1.6 Charge the Battery
When the battery power is low and needs recharging, the battery indicator
will flash continuously, and the phone will sound a low battery alarm
(if the ring mode is set to neither Vibrate nor Mute), reminding you that
the battery is running low and the phone will be switched off automatically.
To charge the battery, follow the steps below:
1. Connect the charger to an AC wall outlet (100~240V)
12
Page 20
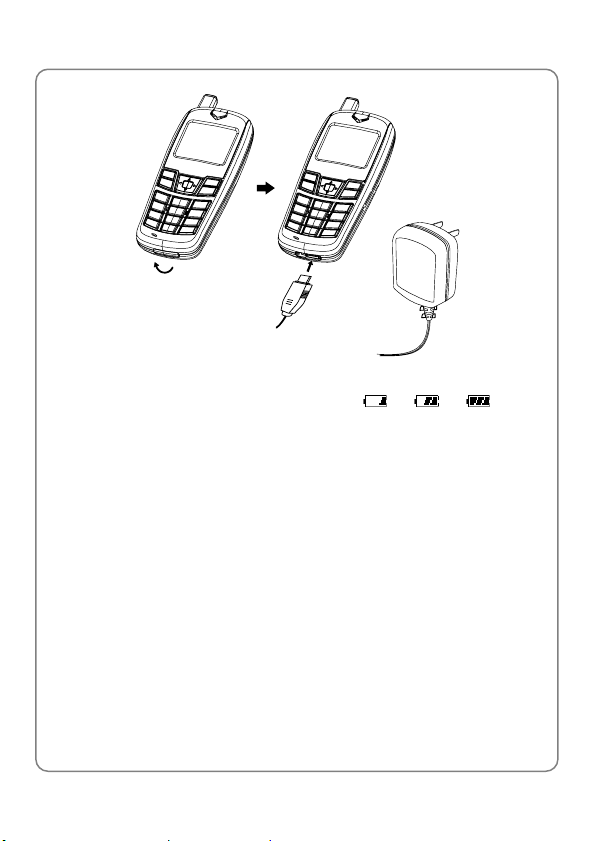
Getting Started
2. Connect the lead from the charger to the charging socket of the phone.
The battery indicator bar starts to scroll (
Æ Æ ). If the
phone is off, the text “Charging…” is also displayed on the LCD screen
3. When the battery indicator bar stops scrolling, charging is complete.
The text “Fully Charged!” is also displayed on the LCD screen, if the
phone is off
z The phone takes about 2.5~3.5 hours to charge and the exact time
may vary depending on the circumstances
z With your phone turned off, charge your new battery for 6~7 hours
before its first use
z When the battery is being charged, it is normal that your charger and
phone become warm to the touch
z If the phone is turned on while charging, you can still make and
receive calls as usual, but this will consume battery power, thus
extending the charging time
13
Page 21
Getting Started
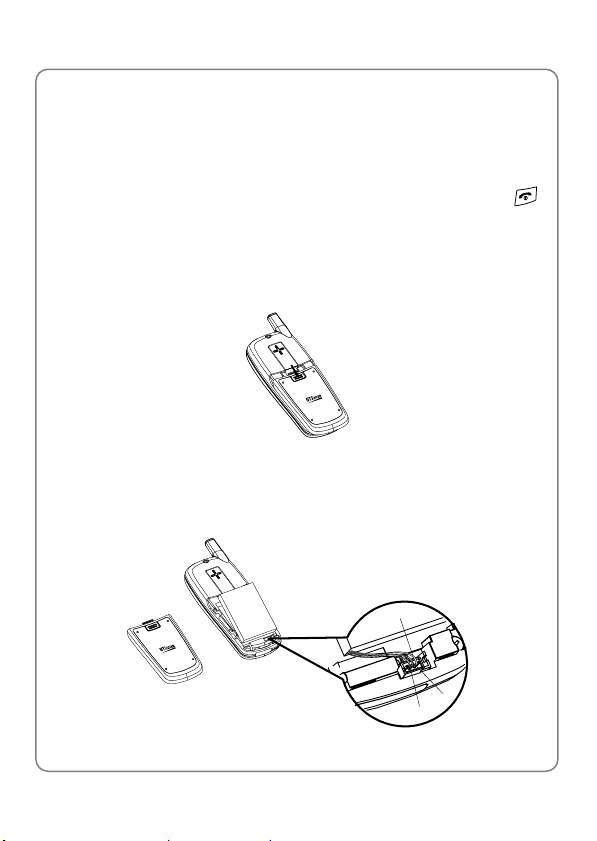
1.7 Replace the Battery
Since battery power is easily consumed, when you find the battery power
diminishes quickly after full charging, please replace your battery. After
replacing the battery, you will need to reset the date and time
1. In standby mode, switch the phone off by pressing and holding
(Otherwise, some user settings will be lost.)
2. Remove the battery cover
With the back of the phone facing you, press the top of the battery
cover and slide the cover off in the direction of the arrow
3. Remove the old battery
Disconnect the cord by firmly gripping the connector (not the battery
connection wire) and pulling gently as illustrated
Black
.
14
Red
Yellow
Page 22
Getting Started
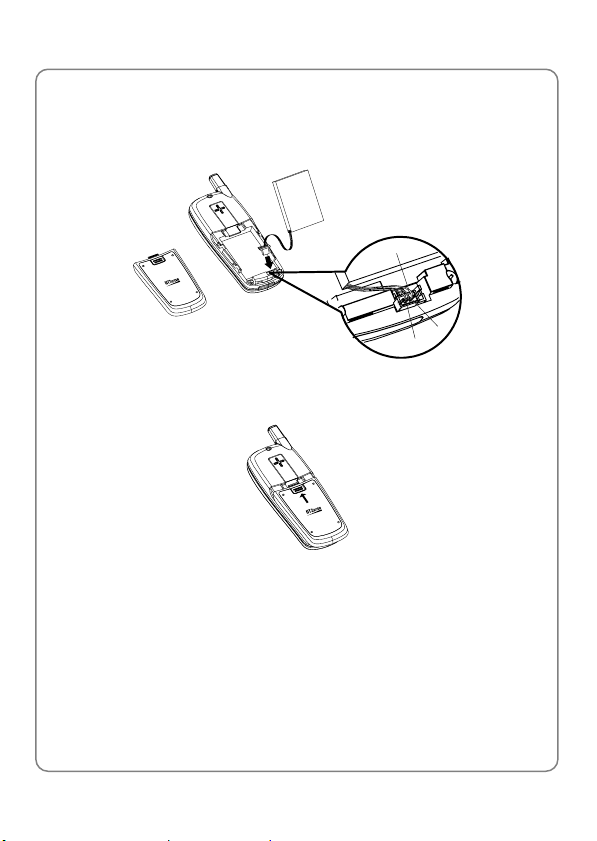
4. Install the new battery
Connect the cord of the new battery by firmly inserting the connector
into its place. Do not reverse the connector
Black
Yellow
Red
5. Slide the battery cover until it clicks into place
1.8 Conventions in this Guide
z In this guide, “press the key” means to release the key after you press
it; “press and hold the key” means to press the key for over 2 seconds
before releasing it
z The text displayed on the screen is indicated in bold in this guide, for
example Menu
15
Page 23
Getting Started
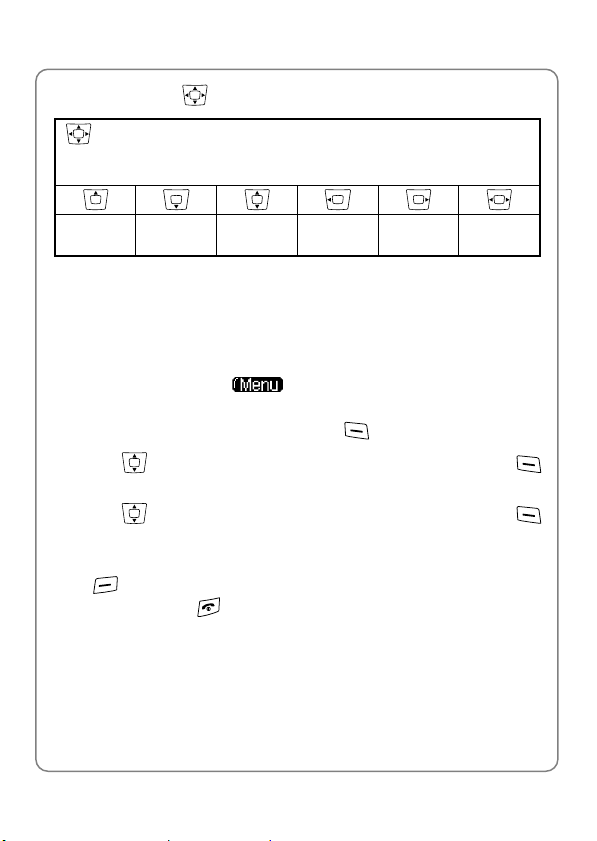
z Navigation key operations follow:
Press the “Up”, “Down”, “Left”, and “Right” directions on the
Navigation key to execute operations such as browsing, selecting,
adjusting and setup; key directions are as follows:
Up Down
Up or
Down
Left Right
Left or
Right
1.9 Access Menu/List Options
A variety of options are available for the menus and lists, such as: Menu
and Names
For example, to access
below:
1. In standby mode, press the left soft key
2. Press
(OK)
3. Press
(OK)
to reach Settings, and then press the left soft key
to highlight Alar m, and then press the left soft key
ÆSettingsÆAlarm, follow the steps
(Menu)
~ Note: To return to the previous menu level, press the right soft key
(Exit). To return to standby mode without changing the menu
settings, press
.
16
Page 24
2. BASIC OPERATIONS
2.1 Switch the Phone On/Off
Basic Operations
Press and hold the power key
power-on/off animation and sound the power-on/off melody (if the Keypad
Tone is set to ON)
If the PowerOn Code function is active, after switching on the phone,
enter the security code (displayed as *) and press the left soft key
(Ok). If correct, the power-on animation will be displayed; otherwise Code
Error will be displayed
. The phone will display the
2.2 Make a Call
1. Key in the phone number
Press
delete the character or digit to the left of the cursor. To delete all the
numbers or characters, press and hold the right soft key
2. Press
To cancel the call attempt, press the right soft key
time display of 00:00:00 will appear
3. When the call is connected, the call timer is displayed
4. To end the call, press the right soft key
to move the cursor. Press the right soft key
to call the number. “Connecting..” will be displayed
(Hangup) or the
(Clear) to
(Clear)
(Cancel). A
key
2.3 Speed Dial a Phone Number
If you have assigned a phone number to one of the speed dial keys
, you can quickly call that phone number:
~
17
Page 25
Basic Operations
1. In standby mode, press and hold the corresponding speed dial key to
automatically display the phone number
2. Press
If you have configured the IP Phone function, you can press and hold
to call the number
to call the number in IP mode. See also “Make an IP Call”
2.4 Make an IP Call
This function requires network support. If the IP Phone function has been
correctly configured, you can call a phone number in IP mode by pressing
and holding
z Enter the phone number; press and hold to call the number. IP
Call will be displayed
z Press and hold . After successfully connecting to the IP network,
begin to dial by following the network instructions
, in either of the following ways:
~ Note: When you are making an IP call, only the IP access number
and the text IP Call are displayed
~ Prior to using this function, the IP access number, account number
(accounts) and password must be correctly pre-configured (see “IP
Phone” for details). Otherwise, IP Not Set will be briefly displayed
after you press and hold
2.5 Answer a Call
.
z If the Answer Mode is set to Talk Key, press the left soft key
(Answer) or the
z If the Answer Mode is set to Any Key, press any key to answer an
incoming call except the right soft key
key
key to answer an incoming call
, the
key or the
18
Page 26
Basic Operations
z When there is an incoming call, you may press and hold
to stop
the vibration or ring alert without picking up the call
z To end an ongoing call, press the right soft key
(Hangup) or the
key
2.6 Reject a Call
z When there is an incoming call, press the right soft key
or the
z If you press the right soft key
key to reject the call
(Hangup) to reject an incoming call,
the call duration 00:00:00 will be displayed
z When there are missed calls (excluding rejected calls), the number of
missed calls will be displayed, for example Missed Log 3. In this case,
press the left soft key
(View) to enter the missed call log (Missed
Log)
(Hangup)
2.7 Hold a Call
You can place an ongoing call temporarily on hold
1. During a call, press the left soft key
(Hold). “Holding…” will be
displayed, and the other party will hear the on hold sound
2. To take the call off hold, press the left soft key
(Talk)
2.8 Call Waiting
Call Waiting requires network support. The function may vary depending
on the network. Contact your local service provider for assistance
While you have a call in progress, if there is an incoming call from the third
party, the earpiece will sound a waiting tone. The following operations are
available:
z Press
, and then press
to reject the incoming third party call
19
Page 27

Basic Operations
z Press
, and then press to end the current call and answer
the incoming third party call
z Press
, and then press to hold the current call and answer
the incoming third party call
~ Note: If the Unconditional call forwarding function or the call
forwarding on Busy function is active, the call waiting function will be
inactive
2.9 Three Way Calling
Three Way Calling requires network support. The function may vary
depending on the network. Contact your local service provider for
assistance
While on a call with user B, if you need to connect to user C, press
put B on hold. After hearing the dial tone, key in user C’s number and
speak to C when connected. If you fail to connect to C, press
continue the call with B
During the call with C, the following operations are available:
z Press
, and then press to end the call with C and resume the
call with B
z Press
, and then press to hold the call with C and resume
the call with B
z Press
, and then press
to initiate the Three Party Call
function
z Press
, and then press to hold the call with B and resume
the call with C
to
to
20
Page 28

Basic Operations
2.10 Access Phonebook During a Call
While on a call, press to access the phonebook entry list
z When you press to access the phonebook, the last phonebook
entry will be highlighted; when you press
phonebook, the first entry will be highlighted
z After entering the phonebook, press to scroll through the entries.
Press the left soft key
phone number and group) for the highlighted entry
z In the phonebook entry list, press keys ~ to select the first
letter of the entry you are seeking (pressing the key once corresponds
to the first letter on the key, pressing the key twice corresponds to the
second letter, and so on). All the English names sharing the same first
letter in the phonebook will be displayed
(Details) to check the details (name,
to access the
~ Note: If there are no entries in the phonebook, when you press ,
the error tone will sound
2.11 Adjust Earpiece Volume During a Call
1. During a call, press to access the earpiece volume adjusting
screen
2. There are six volume levels. Press
decrease the volume
If the volume is at the highest level, the volume level will not change
when
level will not change when
3. After completing the volume selection, press the right soft key
(Exit) or wait for two seconds to return to the call timer mode. The
phone will save the adjusted volume level
is pressed; if the volume is at the lowest level, the volume
is pressed
to increase or
to
21
Page 29

Basic Operations
2.12 Store a Phone Number
In standby mode, new entries can be added to the phonebook
1. Enter the desired phone number and press the left soft key
2. Enter the name according to the prompts and press the left soft key
(Ok)
3. Press
press the left soft key
to highlight the desired group for this phone number and
(Ok) to complete the operation
(Save)
~ Note: The phone number and name of the newly added record
cannot be identical to those of an existing record. Otherwise, the
text Exists will be displayed after you enter the name and press the
left soft key
2.13 Call Log Shortcut
In standby mode, you can quickly view the call logs: outgoing call log
(Dialed Log), received call log (Received Log) and missed call log
(Missed Log)
z Press
through other outgoing call records
z Press to display the latest received call. Press to scroll
through other received call records
z Press
through other missed call records
After the intended record is displayed, you can press
number. If the IP Phone function is pre-configured, you can press and
hold
To perform other operations for the record, press the left soft key
(Option). (See “Call Log” for details)
to call the number in IP mode
(Ok)
to display the latest outgoing call. Press to scroll
to display the latest missed call. Press to scroll
to call the
22
Page 30

2.14 Custom Functions Shortcut
Basic Operations
1. In standby mode, press
2. Press
Screen Saver (3), Scheme (4), Calculator (5) or Calendar (6), and
then press the left soft key
You can also access an option by pressing its corresponding number
key
to highlight the desired option: Edit Message (1), Inbox (2),
to access the menu of custom functions
(Ok) to access the option
2.15 Current Profile Shortcut
In standby mode, press to access the menu of the current profile (if
the current profile is not Meeting or Silent). Press
desired option, and then press the left soft key
option
z See “Profiles” for detailed operations
z If the profile is set to Meeting or Silent, when you press , Meeting
Mode Activated or Mute Mode Activated will be displayed
to highlight the
(Ok) to access the
2.16 Meeting Profile Shortcut
In standby mode, press and hold
Meeting
z Press and hold
z If you have activated the Meeting profile from the Profiles submenu
(see “Profiles”), when you press and hold
current profile will be changed to Standard
again to resume the previous profile
to change the current profile to
in standby mode, the
23
Page 31

Basic Operations
2.17 Keypad Lock
The keypad lock prevents the keys from being accidentally pressed,
resulting in unintentional operations
z In standby mode, press and hold
to lock the keypad. The
indicator will be displayed
z To unlock the keypad, press and hold
z When the keypad is locked, you can answer a call as usual. During the
again in standby mode
call, you can operate the phone normally. However, the keypad will
automatically be locked when the call ends or if the call is rejected
z When the keypad is locked, even if the Backlight is not set to OFF, the
LCD screen and keypad will not light when keys are pressed
24
Page 32

Phonebook (Names)
3. PHONEBOOK (NAMES)
You can store frequently used phone numbers and names in the memory
of the phone (phonebook). The phonebook can store up to 200 entries.
Each entry may contain name, phone number and group information
You can enter the phonebook in either of the following ways:
z In standby mode, press the right soft key
z In standby mode, press the left soft key
scroll to Phonebook and press the left soft key
From the phonebook menu, you can select from the following options:
3.1 Search
ÆSearch
After accessing this option, the prompt Name will be displayed. Key in the
name that you are searching for, or the first character(s) of the name, and
then press the left soft key
records in the phonebook, and highlight the matched name
z If no names match the entered characters, the entry nearest matching
the searched record will be highlighted; if no characters are entered,
the phone will highlight the first entry in the phonebook
z You can press to scroll through other names, or press the right
soft key
z If no records are stored in the phonebook, No Record will be
displayed, and an error tone will sound (if the Keypad Tone is set to
ON)
(Exit) to return to standby mode
(Ok). The phone will search through the
(Names)
(Menu), press to
(Ok)
25
Page 33

Phonebook (Names)
z If a matched name is highlighted, you can press
corresponding phone number, or press and hold
number in IP mode (if the IP Phone function is pre-configured)
to call the
to call the
3.1.1 Quick Search
You can press number keys ~ to quickly search English
names from the phonebook entry list. A quick search operates as follows:
z When the key is pressed once, the name that starts with the first letter
of that key will be displayed; when pressed twice, the name that starts
with the second letter of that key will be displayed. The third and/or
fourth letter may be similarly accessed
z When the key is pressed once, if no name corresponds to the first
letter of that key, the name that starts with the second letter of that key
will be displayed and so on
z Press keys ~ to display the corresponding records, and
press
keeps track of the number of times the key is pressed automatically,
and the name will be highlighted accordingly
When an entry (name) is highlighted, press the left soft key
to see the detailed information: name, phone number and group category.
You can press
~ Note: When the entry details are displayed, you can press
When the entry details are displayed, you can press the left soft key
(Option) to select from the following options:
to browse. If you continue to press the key, the phone
to browse through the text
call the phone number, or press and hold
IP mode (if the IP Phone function is pre-configured)
to call the number in
(Details)
to
3.1.2 Edit
Change names, numbers and group categories by following the screen
26
Page 34

Phonebook (Names)
prompts
3.1.3 Delete Entry
After this option is selected, “Delete?” will be displayed. Press the left soft
(Yes ) to confirm the deletion
key
3.2 Add Entry
ÆAdd Entry
Select this option to add new entries into the phonebook
1. Key in the name, and press the left soft key
maximum of 12 English letters or 6 Chinese characters (see “Input
Method”)
2. Enter the phone number (24 digits maximum), and press the left soft
(Ok)
key
The phone number cannot be left blank; otherwise Number Error will
be displayed
3. Press
Colleague, Classmate, VIP, Partner, Others or Blacklist. Press the
left soft key
z If the name is not filled in, the phone will use the first 12 digits from the
phone number as the name
z The phone number and name of the newly added record cannot be
identical to those of an existing record. Otherwise, the text Exists will
be displayed after you enter the name and press the left soft key
(Ok)
z The phone will automatically reject any incoming caller whose number
is on the Blacklist. No response will be displayed. (Caller ID service
needs to be activated)
to highlight the desired group category: Family, Friend,
(Ok) to complete the operation
(Ok). You can input a
27
Page 35

Phonebook (Names)
z No more entries can be added if the phonebook memory is full. When
Add Entry is selected, the phone will remind you that the phonebook
memory is full
z In standby mode, you can add a new entry by entering the phone
number and pressing the left soft key
name and press the left soft key
desired group category and press the left soft key
complete the operation
(Save). Then, enter the
(Ok); press to highlight the
(Ok) to
3.3 Delete Entry
ÆDelete Entry
You can select from the following options to delete entries one by one or
all at once
3.3.1 One by One
ÆDelete EntryÆOne by one
When you access this option, the phonebook entry list will be displayed
Press
key
3.3.2 All
When you access this option, the prompt Enter Code will be displayed
Enter the security code, and press the left soft key
is correct, all the phonebook entries will be deleted; otherwise Code Error
will be displayed
to highlight the entry to be deleted, and then press the left soft
(Delete). When “Delete?” is displayed, press the left soft key
(Yes ) to confirm the deletion
ÆDelete EntryÆAll
(Ok). If the code
28
Page 36

Phonebook (Names)
3.4 Group Info
ÆGroup Info
After accessing this option, press
category: Family, Friend, Colleague, Classmate, VIP, Partner, Others
or Blacklist, and press the left soft key
from the following options:
to highlight the desired group
(Ok). Then, you can select
3.4.1 Browse
When you access this option, the list of entries in the selected group
category will be displayed
Press
(Details) to view the details for the entry. Press the left soft key
(Option), and select Edit or Delete Entry to edit or delete this entry
to highlight the desired entry, and press the left soft key
3.4.2 Ring Tone
Select this option to specify a ring tone for the particular group category
Press
left soft key
to highlight and sample the ring tone options. Then press the
(Ok) to complete your selection
~ Note: The Blacklist only has a Browse function because the
phone will automatically reject any call from this group. Thus, it is
not necessary to set a ring tone for the Blacklist group
3.5 Speed Dial
ÆSpeed Dial
Select this option to assign a phone number in the phonebook to one of
the speed dial k e y s
(see “Speed Dial a Phone Number”)
~ for greater convenience when dialing
29
Page 37

Phonebook (Names)
After you access this option, the setting status for key #1 ( ) will be
displayed. Press
z If no phone number is assigned to the key, Unset will be displayed.
Press the left soft key
displayed (if there are no entries in the phonebook, No Record will be
displayed). Press
press the left soft key
z If a phone number has been assigned to the key, the corresponding
name and group category will be displayed. To change or cancel the
setting for this key, press the left soft key
select Edit or Cancel
to browse through the speed dial key settings
(Set); the phonebook entry list will be
to highlight the desired entry (name), and
(Ok) to assign the number to the key
(Option), and then
~ Note: If the record for a speed dial key is modified in the phonebook,
it will automatically be updated for the speed dial key function
~ If the record for a speed dial key is deleted from the phonebook, it
will also be cancelled for the speed dial key function
3.6 Memory
ÆMemory
Select this option to view the number of records in each group category,
totally stored records (Used) and available records (Unused)
30
Page 38

4. MENU
Menu
In standby mode, press the left soft key
Press
(Ok) to access the submenu
to reach the desired submenu, and press the left soft key
(Menu) to access the menu.
4.1 SMS
ÆSMS
Select this submenu to read, edit, save and send short messages
The Short Message Service (SMS) requires network support. Please
consult your local service provider for assistance
4.1.1 Edit Message
ÆSMSÆEdit Message
After you access this option, the last edited message will be displayed.
You can modify that message or delete it by pressing and holding the right
soft key
characters or 116 English letters). Next, press the left soft key
(Option), and select Send or Save
z The message cannot be empty; otherwise Empty will be displayed
when you press the left soft key
4.1.1.1 Send
After selecting this option, you can send the message in either of the
following ways:
z Key in the receiver’s phone number, and press the left soft key
(Send) or the
(Clear) and re-enter a new message (up to 58 Chinese
(Option)
key to send the message
31
Page 39

Menu
z Press the left soft key
list. Highlight the desired entry and press the left soft key
(Search) to access the phonebook entry
(Ok),
the corresponding phone number will be displayed. Press the left soft
key
(Send) or the
key to send the message
4.1.1.2 Save
After you access this option, the message will be saved in Draft
z Draft can store a maximum of 10 messages. If it is full, when you
select Save to store a newly edited message, “Update?” will be displayed. You can press the left soft key
(Yes) to overwrite the
oldest message
4.1.2 Inbox
ÆSMSÆInbox
When a new message is received, the message tone will sound, and the
indicator will be displayed. After a new message is received, press the
left soft key
z The Inbox can store up to 100 messages. When the 100
received, the
message is received, the phone will replace the oldest message with
the newly received message. To avoid losing important messages in
the Inbox, periodically erase some existing messages
z When Inbox is highlighted, the number of unread messages will be
displayed in the right upper corner of the screen, e.g. New5. Press the
left soft key
message senders’ phone numbers or names (if stored in the
phonebook). The icon in front of each message:
message has not yet been read;
read
z If there are no messages in the Inbox, when you select Inbox, No
Record will be displayed
(View) to access the Inbox message list
th
message is
indicator will flash. If the Inbox is full, when a new
(Ok) to access the message list, which shows the
indicates the
indicates the message has been
32
Page 40

Menu
z Press to scroll to the intended message, and then press the left
soft key
details (the sender and received time). Press the left soft key
(Option) to select from the following options:
4.1.2.1 Reply
Select this option to reply to the message. The steps to reply to a
message are similar to those for Edit Message
The only difference is that, when you select Send, the sender’s phone
number will be displayed automatically. You can edit the phone number,
and press the left soft key
4.1.2.2 Forward
After accessing this option, you can edit and forward the message. The
steps to forward a message are the same to those for Edit Message
4.1.2.3 Delete
When you access this option, “Delete?” will be displayed. Press the left
soft key
(Ok). Press to view the message contents and
(Send) or the
key to send the reply
(Yes) to complete the deletion
4.1.2.4 Call Back
Accessing this option will display the sender’s phone number. You can
edit the phone number and press the left soft key
(Ok) or the
key to call the number
4.1.2.5 Extract Number
Select this option to extract numbers (5~24 digits each) from the message
contents, and to store the numbers to the phonebook
33
Page 41

Menu
z If there are numbers with 5~24 digits in the message contents, when
you select this option, the numbers will be listed; otherwise Empty will
be displayed
z In the number list, press to highlight the number to be stored,
and press the left soft key
left soft key
(Ok). The selected number will be displayed. Edit the
number and press the left soft key
the desired group category and press the left soft key
(Save). Enter the name and press the
(Ok). Press to highlight
(Ok) to
complete the operation
4.1.2.6 Save Number
Select this option to edit the sender’s phone number and store it to the
phonebook
After accessing this option, follow the prompts to key in the name and
press the left soft key
displayed. Edit the phone number and press the left soft key
Press
key
z The phone number and name cannot be identical to those of an
to highlight the desired group category and press the left soft
(Ok) to complete the operation
(Ok). The sender’s phone number will be
(Ok).
existing phonebook entry. Otherwise, the text Exists will be displayed
after you enter the name and press the left soft key
z If the phonebook memory is full, when you select Save Number, the
(Ok)
phone will remind you with a message
4.1.3 Outbox
ÆSMSÆOutbox
The last 100 messages you have sent are stored in the Outbox
When Outbox is selected, the sent message list will be displayed (if there
are no messages in the Outbox, No Record will be displayed). The list
shows the receivers’ phone numbers or names (if stored in the
34
Page 42

Menu
phonebook). Messages are listed chronologically; the most recent
message sent is highlighted at the top of the list
Press
(Ok). Press
and sending time). Press the left soft key
following options:
4.1.3.1 Delete
When you access this option, “Delete?” will be displayed. Press the left
soft key
4.1.3.2 Forward
After accessing this option, you can edit and forward the message. The
steps to forward a message are the same as those for Edit Message
z After the message is forwarded, the contents and details of this sent
to reach the desired message and press the left soft key
to view the message contents and details (the receiver
(Option) to select from the
(Yes) to complete the deletion
message will be updated
4.1.4 Draft
ÆSMSÆDraft
Up to 10 edited messages can be stored in Draft
When you access the Draft option, the draft message list will be displayed
(if there are no messages in Draft, No Record will be displayed). The
highlighted draft message will scroll to display the message contents.
Press
key
While reading the message, you can press the left soft key
and select from the following options:
to highlight the desired draft message and press the left soft
(Ok) to read it
(Option)
35
Page 43

Menu
4.1.4.1 Edit
Select this option to edit the draft message. See “Edit Message” for details
4.1.4.2 Send
Select this option to send the draft message. See “Send” under the Edit
Message option for details
z After the message has been sent, it will be deleted from Draft
4.1.4.3 Delete
When you access this option, “Delete?” will be displayed. Press the left
soft key
(Yes) to complete the deletion
4.1.5 Clear
ÆSMSÆClear
After accessing the Clear option, you can perform the following functions:
4.1.5.1 Clear Inbox
Select this option to delete all the messages in the Inbox. Key in the
security code and press the left soft key
deletion. If the security code is incorrect, Code Error will be displayed
4.1.5.2 Clear Outbox
Select this option to delete all the messages in the Outbox. Key in the
security code and press the left soft key
deletion. If the security code is incorrect, Code Error will be displayed
4.1.5.3 Clear Draft
Select this option to delete all the messages in Draft. Key in the security
code and press the left soft key
(Ok) to complete the deletion. If the
(Ok) to complete the
(Ok) to complete the
36
Page 44

Menu
security code is incorrect, Code Error will be displayed
4.1.5.4 Clear All
Select this option to delete all the messages in the Inbox, Outbox and
Draft. Key in the security code and press the left soft key
complete the deletion. If the security code is incorrect, Code Error will be
displayed
(Ok) to
4.1.6 Memory
ÆSMSÆMemory
Select this option to view the Inbox/Outbox/Draft capacity, including the
number of stored messages
37
Page 45

Menu
4.2 Call Log
ÆCall Log
Your phone records missed, received and dialed calls as well as their call
durations
In standby mode, you can press
Missed Log, Received Log or Dialed Log (see “Call Log Shortcut”)
, or
to quickly access
4.2.1 Missed Log
ÆCall LogÆMissed Log
This option enables you to view the last 20 missed calls
After you access this option, the phone will display the information of the
most recent missed call Missed 1: the caller’s phone number or name
and group category (if the number is stored in the phonebook). Press
to view other missed calls
~ Note: This function only works in networks that support Caller ID
service; otherwise No Caller ID will be displayed in the missed log.
If the caller’s phone is set to block the caller’s number, No Caller ID
will also be displayed
When viewing a log, you can dial the caller’s phone number by pressing
. If the IP Phone function is pre-configured, you can press and hold
to call the number in IP mode
When a call log is displayed, press the left soft key
following options will be available:
4.2.1.1 Save
Select this option to edit the caller’s phone number and store it to the
phonebook
After you access this option, the caller’s phone number will be displayed.
(Option). The
38
Page 46

Menu
Edit the number and press the left soft key
and press the left soft key
group category, and then press the left soft key
operation
z If No Caller ID is shown in the log, when you select Save, Number
Error will be displayed
z The phone number and name cannot be identical to those of an
existing phonebook entry. Otherwise, the text Exists will be displayed
after you enter the name and press the left soft key
4.2.1.2 Delete
When you access this option, “Delete?” will be displayed. Press the left
soft key
4.2.1.3 Time
Select this option to view the time the call came in
4.2.1.4 Number
Select this option to view the caller’s phone number
(Yes) to complete the deletion
(Ok). Press to highlight the desired
(Ok). Key in the name
(Ok) to complete the
(Ok)
4.2.2 Received Log
ÆCall LogÆReceived Log
This option enables you to view the last 20 received calls
After you access this option, the phone will display the information of the
most recent received call Received 1: the caller’s phone number or name
and group category (if the number is stored in the phonebook). Press
to view other received calls
~ Note: This function only works in networks that support Caller ID
service; otherwise No Caller ID will be displayed in the received log.
If the caller’s phone is set to block the caller’s number, No Caller ID
39
Page 47

Menu
will also be displayed
When viewing a log, you can dial the caller’s phone number by pressing
. If the IP Phone function is pre-configured, you can press and hold
to call the number in IP mode
When a call log is displayed, press the left soft key
following options will be available:
4.2.2.1 Save
Select this option to edit the caller’s phone number and store it to the
phonebook. See “Save” under the Missed Log option for details
4.2.2.2 Delete
When you access this option, “Delete?” will be displayed. Press the left
soft key
4.2.2.3 Time
Select this option to view the time the call came in
4.2.2.4 Number
Select this option to view the caller’s phone number
4.2.2.5 Duration
Select this option to view the duration of the received call
(Yes) to complete the deletion
(Option). The
4.2.3 Dialed log
ÆCall LogÆDialed Log
This option enables you to view the last 20 dialed calls
After you access this option, the phone will display the information of the
most recent outgoing call Dialed 1: the dialed phone number or name and
40
Page 48

Menu
group category (if the number is stored in the phonebook). Press to
view other outgoing calls
~ Note: If you dial a number that has been recorded in the Dialed Log,
the phone will update the log after the call ends
When viewing a log, you can call the dialed phone number by pressing
. If the IP Phone function is pre-configured, you can press and hold
to call the number in IP mode
When a call log is displayed, press the left soft key
following options will be available:
4.2.3.1 Save
Select this option to edit the dialed phone number and store it to the
phonebook
After you access this option, the dialed phone number will be displayed.
Edit the number and press the left soft key
and press the left soft key
group category, and then press the left soft key
operation
z The phone number and name cannot be identical to those of an
existing phonebook entry. Otherwise, the text Exists will be displayed
after you enter the name and press the left soft key
4.2.3.2 Delete
When you access this option, “Delete?” will be displayed. Press the left
soft key
(Yes) to complete the deletion
(Ok). Press to highlight the desired
(Option). The
(Ok). Key in the name
(Ok) to complete the
(Ok)
4.2.3.3 Time
Select this option to view the time the call was dialed
41
Page 49

Menu
4.2.3.4 Number
Select this option to view the dialed phone number
4.2.3.5 Duration
Select this option to view the duration of the dialed call
4.2.4 Delete Log
ÆCall LogÆDelete Log
This option enables you to delete all missed calls, received calls, dialed
calls, or to delete all
z If you select Missed Log, Received Log or Dialed Log, the text
“Delete?” will be displayed. Press the left soft key
complete the deletion
z If Delete All is selected, follow the prompts to enter the security code
and press the left soft key
security code is incorrect, Code Error will be displayed
(Ok) to delete all the call logs. If the
(Yes) to
4.2.5 Duration
ÆCall LogÆDuration
This option enables you to view the approximate duration of received calls,
dialed calls, or the duration of all calls
After accessing this option, you can press
received calls (Received), dialed calls (Dialed), as well as the duration of
all calls (Tot a l Ti me ). The time will be displayed in “h:mm:ss” format
To clear the timer, press the left soft key
will be displayed. Press the left soft key
operation
to view the duration of
(Reset). The text “Reset?”
(Yes ) to complete the
42
Page 50

Menu
4.3 Profiles
ÆProfiles
This submenu enables you to customize the phone alert settings to suit a
variety of environments
When you access this submenu, the profile list will be displayed; the
current profile will be highlighted. You can activate a profile to suit your
environment. The phone will utilize all the current profile’s settings
Standard, Outdoor and User Define can be customized to meets your
needs. However, the settings for Meeting and Silent are unchangeable
Standard is the factory-preset profile
4.3.1 Standard
ÆProfilesÆStandard
4.3.1.1 Enable
ÆProfilesÆStandardÆEnable
Select this option to activate the selected profile
4.3.1.2 Set
ÆProfilesÆStandardÆSet
This option enables you to change the selected profile’s settings
When you press
highlighted option will be displayed in the adjacent bubble. Press the left
soft key
Ring Volume
Select this option to adjust the ring volume level for incoming calls, new
messages, memo alert and the alarm clock
(Ok) to access the highlighted option
to browse though the options, the setting of the
43
Page 51

Menu
There are five volume levels. Press to increase or
to decrease
the volume. As you scroll through the volume levels, a sample of each will
sound. After reaching the desired volume level, press the left soft key
(Ok) to complete the operation
Ring Mode
This function enables you to define how the phone will notify you of
incoming calls, new messages, memo alert and the alarm clock. The
available options include: Ringing, Vibrate, Vibrate And Ring, Vibrate
Then Ring and Mute
z If the Ring Mode is set to Vibrate Then Ring, when a new message is
received, the phone will vibrate for 5 seconds
z If the Ring Mode is set to Vibrate or Mute, the low battery alarm
function will be deactivated. Other options will activate the low battery
warning function
Ring Tone
This option enables you to select a special electronic ring tone or melody
for incoming calls. Press
to scroll through the ring tones and listen to
a sample of each. After highlighting the desired ring tone, press the left
soft key
(Ok) to complete the operation
Message Tone
Select this option to specify the incoming message alert tone. Press
to scroll through the message tones and listen to a sample of each. After
highlighting the desired message tone, press the left soft key
(Ok) to
complete the operation
Memo Alert
Select this option to specify the memo alert tone. Press
to scroll
through the memo alert tones and listen to a sample of each. After
44
Page 52

Menu
highlighting the desired memo alert tone, press the left soft key
to complete the operation
Alarm Tone
This option enables you to select an alarm tone for the alarm clock. Press
to scroll through the alarm tones and listen to a sample of each. After
highlighting the desired alarm tone, press the left soft key
complete the operation
Keypad Tone
If this function is activated, when you press any key, the phone will sound
a tone; when the phone is switched on/off, the power-on/off melody will
sound; when an operation on the phone is completed or fails, the
success/failure tone will sound
Select ON or OFF to activate or deactivate this function
Alert Tone
If this function is activated, a warning tone will sound when the phone is
outside of the service area range or a network handover occurs during a
call
Select ON or OFF to activate or deactivate this function
Whisper Mode
This function enables you to lower your speaking voice in an environment
unsuitable for normal conversation without reducing the quality of phone
call for the other party
Select ON or OFF to activate or deactivate this function
(Ok)
(Ok) to
45
Page 53

Menu
4.3.2 Meeting
ÆProfilesÆMeeting
This profile is suitable for meeting environments. Its settings cannot be
changed
After you highlight this option and press the left soft key
this profile will be activated
(Enable),
4.3.3 Silent
ÆProfilesÆSilent
This profile is suitable for silent environments. Its settings cannot be
changed
After you highlight this option and press the left soft key
this profile will be activated
(Enable),
4.3.4 Outdoor
ÆProfilesÆOutdoor
This profile is suitable for outdoor environments. You can preset this
option to meet your needs by following the same steps specified in
“Standard”
4.3.5 User Define
ÆProfilesÆUser Define
This profile can be tailored for other environments. You can preset this
option to meet your needs by following the same steps specified in
“Standard”
46
Page 54

Menu
4.4 Settings
ÆSettings
From this submenu, you can perform various phone settings
4.4.1 Own Number
ÆSettingsÆOwn Number
Select this option to view the phone’s number
~ Note: The number displayed may be different from the actual phone
number, which is assigned locally
4.4.2 Scheme
ÆSettingsÆScheme
When this option is highlighted, the current setting will be displayed in the
adjacent bubble. After accessing this option, you can select from the
following options:
4.4.2.1 Static Picture
The standby display will become static after you set this option
After this option is selected, its current setting will be highlighted. To
customize a text and display it in standby mode, select User-defined; to
select and display a picture in standby mode, select from the options
Photograph1~Photograph24
z If User-defined is selected, enter up to 6 Chinese characters or 12
English letters (see “Input Method”), and then press the left soft key
(Ok) to complete the operation
z If one of the options Photograph1~Photograph24 is selected, the
corresponding picture will be displayed. You can press
through other pictures. When the desired picture is displayed, press
the left soft key
(Ok) to complete the operation
to browse
47
Page 55

Menu
4.4.2.2 Every Hour
The standby display will change every hour in a 24-hour cycle after you
set this option. When this option is accessed, the options will be available:
Default
The standby display will change every hour in the default picture
sequence after you select this option
User Edit
This option enables you to specify the picture or text for each hour
(Picture1~Picture24)
Select from the options Picture1~Picture24, and then edit text or select a
picture by following the same operations specified in “Static Picture”.
Default pictures will remain for unedited options
Change Preview
Select this option to preview the current setting for Every Hour. You can press the left soft key
4.4.2.3 Every 3 Hours
The standby display will change every three hours in a 24-hour cycle after
you set this option. Follow the same operations specified in “Every Hour”
4.4.2.4 Every Day
The standby display will change every day in a 7-day cycle after you set
this option. Follow the same operations specified in “Every Hour”
(Replay) to re-preview the pictures or text
4.4.3 Date/Time
ÆSettingsÆDate/Time
This option enables you to set the phone’s date and time. When you
48
Page 56

Menu
highlight this option, the current date and time will be displayed in the
adjacent bubble
After accessing the option, enter a date from 2000-01-01 to 2049-12-31,
and then enter the time in 24-hour format. Press the left soft key
(Ok)
to complete the operation
z When you key in the date or time, you can press to move the
cursor and modify the number
z The cursor will advance if the number entered is valid; otherwise, the
phone will sound an error tone (if the Keypad Tone is set to ON)
4.4.4 Alarm
ÆSettingsÆAlarm
This function enables you to set the alarm for a specified time. Once
activated, the alarm indicator
z When the preset alarm time expires, the phone will sound the alarm;
an alarm icon and the current time will be displayed. The alarm will
sound for 30 seconds unless you dismiss it
z To dismiss the alarm and return to standby mode, press any key
z If the alarm time expires during a call, the alarm will not sound
When you highlight one of the following options, its current setting will be
displayed in the adjacent bubble
You can set the alarm function by observing the following operations:
4.4.4.1 On/Off
ÆSettingsÆAlarmÆOn/Off
After accessing this option, select ON or OFF to activate or deactivate the
alarm function
will be displayed
49
Page 57

Menu
4.4.4.2 Set Time
ÆSettingsÆAlarmÆSet Time
Select this option to set the alarm time. Enter the time in 24-hour format,
and then press the left soft key
z When you key in the time, you can press to move the cursor and
(Ok) to complete the operation
modify the number
z The cursor will advance if the number entered is valid; otherwise, the
phone will sound an error tone (if the Keypad Tone is set to ON)
4.4.4.3 Repeat Type
ÆSettingsÆAlarmÆRepeat Type
This option enables you to set the alarm cycle period
Once
The alarm sounds only once. The setting will only be valid for 24 hours
after the alarm function has been activated and the alarm time has been
set
After the alarm stops, the alarm function will be deactivated; the
indicator will disappear
Everyday
The alarm sounds every day at the preset time
Mon. ~ Fri.
The alarm sounds at the preset time on weekdays
Mon. ~ Sat.
The alarm sounds at the preset time from Monday to Saturday
50
Page 58

Menu
Every Sat.
The alarm sounds at the preset time every Saturday
Every Sun.
The alarm sounds at the preset time every Sunday
4.4.4.4 Snooze
ÆSettingsÆAlarmÆSnooze
If this function is activated, the alarm will repeat 3 times at 5-minute
intervals after the original alarm time expires
You can select ON or OFF to activate or deactivate this function
z When the snooze function is activated, if the 2
nd
or 3rd alarm happens
at the same time as the memo reminder time, the phone will not
display the memo animation, and the memo alert tone will not sound
4.4.5 Answer Mode
ÆSettingsÆAnswer Mode
This option enables you to select how to answer an incoming call. When
you highlight this option, its current setting will be displayed in the
adjacent bubble. After you access this option, the following will be
available:
4.4.5.1 Any Key
Press any key to answer an incoming call except the right soft key
the
key and the
key
4.4.5.2 Talk Key
Press the left soft key
(Answer) or the
key to answer an
incoming call
,
51
Page 59

Menu
4.4.6 Language
ÆSettingsÆLanguage
This option enables you to select the language of the phone’s text display.
When you highlight this option, the current language setting will be
displayed in the adjacent bubble
You can select 简体中文 (Simplified Chinese) or English
4.4.7 Display
ÆSettingsÆDisplay
You may set the display for the LCD screen as follows:
4.4.7.1 Backlight
ÆSettingsÆDisplayÆBacklight
When you highlight this option, the current setting will be displayed in the
adjacent bubble
If the Backlight is not set to OFF, the LCD screen and keypad will light
when you press keys or the phone receives a call or message
The following options are available:
OFF
Select this option to deactivate the backlight
Battery Saving
In this mode, the backlight will last for 5 seconds after the last keystroke
Normal
In this mode, the backlight will last for 15 seconds after the last keystroke
52
Page 60

Menu
4.4.7.2 Contrast
ÆSettingsÆDisplayÆContrast
This option enables you to specify the contrast level for the LCD screen.
When you highlight this option, the current setting will be displayed in the
adjacent bubble
There are six contrast levels. Press
the contrast. The screen display will reflect the contrast setting. After
reaching the desired contrast level, press the left soft key
complete the operation
4.4.7.3 Screen Saver
ÆSettingsÆDisplayÆScreen Saver
When you highlight this option, the current setting will be displayed in the
adjacent bubble
If the Screen Saver is not set to Off, the clock screen saver will be
displayed after the phone has been in standby mode for one minute. The
screen saver will disappear when you press keys
The following options are available:
Digital Mode
In this mode, the screen saver will display a digital clock
Analog Mode
In this mode, the screen saver will display an analog clock
Off
Select this option to deactivate the Screen Saver function
to increase or
to decrease
(Ok) to
53
Page 61

Menu
4.4.7.4 On/Off Animation
ÆSettingsÆDisplayÆOn/Off Animation
This option enables you to select the power-on/off animation. When this
option is highlighted, its current setting will be displayed in the adjacent
bubble
Select one of the options Animation 1 ~ Animation 4; the corresponding
animation will be displayed. Press the left soft key
the operation
(Ok) to complete
4.4.8 IP Phone
ÆSettingsÆIP Phone
This option enables you to configure the IP Phone function. After you set
this function, you can make an IP call by pressing and holding
“Make an IP Call”). This function requires network support
After accessing this option, observe the following steps:
1. Enter the IP access number (Access No) and the language code, e.g.
“17908P1P”. Press the left soft key
- According to different response time from the network server, you
can enter one or more pause symbols “P”s (each “P” means a
pause for approximate 1.5 seconds) by pressing and holding
to coincide with the server response time. A maximum of 14 digits
(including “P”s) can be entered
2. Enter the IP account number (Accounts), and then press the left soft
(Ok)
key
- According to the network requirements, if a “#” is required for the
account number, you can simply press
and hold
digits (including “P”s and “#”s) can be entered
to input the pause symbol “P”. A maximum of 24
(Ok)
. You can also press
(see
54
Page 62

Menu
3. Enter the password (Password) and press the left soft key
to complete the IP Phone setting
- Your input keystrokes will be encrypted and displayed with “*”. A
maximum of 10 digits (including “P”s, “#”s and “*”s) can be entered
(Ok)
~ Note: To cancel the IP Phone setting, follow the same steps. In
each step, press and hold the right soft key
the input digits, and then press the left soft key
4.4.9 Set Security
ÆSettingsÆSet Security
This option enables you to set the security level to protect your phone
After accessing this option, you will be prompted to enter the security
code. Key in the security code and press the left soft key
correct, the following options will be available (otherwise Code Error will
be displayed)
4.4.9.1 Toll Lock
This function enables you to protect against someone using your phone to
make a long distance phone call without permission. When this option is
highlighted, its current setting will be displayed in the adjacent bubble
After accessing this option, select ON or OFF to activate or deactivate
z If this function is activated, the indicator will be displayed; when
you try to make a long distance call, Toll Call Locked will be
displayed
4.4.9.2 PowerOn Code
If this function is active, the security code will need to be entered each
time you switch on the phone. When this option is highlighted, its current
setting will be displayed in the adjacent bubble
After accessing this option, select ON or OFF to activate or deactivate
(Clear) to erase
(Ok)
(Ok). If
55
Page 63

Menu
4.4.9.3 Change Code
Select this option to change the security code. Observe the following
steps:
1. When New Code is displayed, enter a new security code (0~6 digits
long, using numbers 0~9), and then press the left soft key
(Ok).
Confirm Code will be displayed
2. Enter the new security code again and press the left soft key
(Ok)
to complete the operation
z The security code is “888888” by default
z If the new security code entered in step 2 is different from that entered
in step 1, when you press the left soft key
(Ok), Not Matched will
be displayed
z To avoid any inconvenience, please remember the new security code
4.4.9.4 Reset All
Select this option to restore your phone’s default settings
When you access this option, “Reset All?” will be displayed. Press the
left soft key
(Yes ) to complete the operation
This operation will not delete the phonebook entries, short message
records, or call logs. It cannot change the phone’s date and time either
Phone Default Settings
Functions Default Settings
Profiles Standard
Earpiece Volume 3
Call Log (Duration) 0:00:00
Speed Dial Setting No
56
Page 64

Menu
Functions Default Settings
Phonebook Group (Ring Tone) Gather Happily
Security Code 888888
Toll Lock OFF
PowerOn Code OFF
Alarm (On/Off) OFF
Alarm (Set Time) 08:00
Alarm (Repeat Type) Once
Alarm (Snooze) OFF
Scheme Static Picture
Scheme (Static Picture) Photograph1
Scheme (User-defined) (Blank)
Scheme (Every Hour) Default
Scheme (Every 3 Hours) Default
Scheme (Every Day) Default
Answer Mode Talk Key
IP Phone Setting No
Backlight Battery Saving
Contrast 3
Screen Saver Analog Mode
On/Off Animation Animation 1
Input Method ON (All Activated)
Black-white Chess (Set Level) Easy
Black-white Chess (Set First) Player First
Black-white Chess (Set Chess Manual) Chess Manual 1
57
Page 65

Menu
Functions Default Settings
Whammy (Set Speed) Slow
Whammy (Game Score) --
BJK (Game Score) --
Profiles Default Settings
Profile
Options
Ring
Volume
Ring
Mode
Ring
Tone
Message
Tone
Memo
Alert
Alarm
Tone
Keypad
Tone
Alert
Tone
Whisper
Mode
Standard Meeting Silent Outdoor User
3 -- -- 3 3
Ringing Vibrate Mute
Gather
Happily
Ring 2 -- -- Ring 2 Ring 2
Espanol
Matador
William
Tell
Overture
ON OFF OFF ON ON
ON OFF OFF ON ON
OFF ON OFF ON OFF
-- --
-- --
-- --
Vibrate
And Ring
Gather
Happily
Espanol
Matador
William
Tell
Overture
Define
Ringing
Gather
Happily
Espanol
Matador
William
Tell
Overture
58
Page 66

Menu
4.4.10 Input Method
ÆSettingsÆInput Method
In addition to digit input method, the phone supports four kinds of input
methods including PinYin, Sim Stroke, English and Letter. You can
choose to activate or deactivate these four methods. Consequently, on
the character input interface (such as writing messages and inputting
phonebook entry names), you can switch between the activated input
methods and digit input method
After you access this option, press
method option. The current setting will be displayed in the adjacent
bubble. Press the left soft key
option, and then select ON or OFF to activate or deactivate
to highlight the intended input
(Ok) to access this input method
4.4.11 Call Forwarding
ÆSettingsÆCall Forwarding
Through this option, you can set the phone to forward incoming calls to
the specified phone number
z This function requires network support
After accessing this option, the following will be available:
4.4.11.1 Unconditional
ÆSettingsÆCall ForwardingÆUnconditional
This function enables you to have all incoming calls forwarded to the
specified phone number. The service provider must preset the access
number to activate/deactivate this function
Register
When you access this option, enter the forwarding number (15 digits
maximum) at the phone prompt, and press the left soft key
phone will automatically make calling connections with the network and
(Ok). The
59
Page 67

Menu
will display the outgoing number
When the connection is successful, the phone will prompt you to listen to
the voice instruction. Listen carefully to determine whether Unconditional
call forwarding has been successfully activated and follow the voice
prompts
z The forwarding number cannot be left blank; otherwise Number Error
will be displayed
z The outgoing number displayed during the calling connection is
comprised of the activating access number preset by the service
provider, the forwarding number and “#”. This outgoing call will not be
recorded in the Dialed Log
Cancel
After you select this option, the phone will initiate a call to the network and
display the outgoing number
When the connection is successful, the phone will prompt you to listen to
the voice instruction. Listen carefully to determine whether Unconditional
call forwarding has been successfully deactivated and follow the voice
prompts
z The outgoing number displayed during the calling connection is the
deactivating access number preset by the service provider. This
outgoing call will not be recorded in the Dialed Log
4.4.11.2 No answer
ÆSettingsÆCall ForwardingÆNo answer
If you activate this function, when there is an incoming call that remains
unanswered for a period of time, the call will be forwarded to the specified
phone number. See “Unconditional” for details
60
Page 68

Menu
4.4.11.3 Busy
ÆSettingsÆCall ForwardingÆBusy
If you activate this function, when another call comes in during a call, the
incoming call will be forwarded to the specified phone number. See
“Unconditional” for details
4.4.11.4 Unreachable
ÆSettingsÆCall ForwardingÆUnreachable
If you activate this function, when the phone is switched off or outside of
the service area range, incoming calls will be forwarded to the specified
phone number. See “Unconditional” for details
61
Page 69

Menu
4.5 Tools
ÆTools
From this submenu, you can use the Calculator, view the Calendar or set
memos
4.5.1 Calculator
ÆToolsÆCalculator
This function enables you to add, subtract, multiply and divide
1. The screen will initially display the number “0”. Enter the first number to
be calculated
- To enter a minus sign, press
made negative); to enter a decimal point, press
2. Press
or division signs respectively
3. Enter the second number
,
,
or to enter the plus, minus, multiplication
(only the first number can be
- To enter “0”, press
4. Press
- To conduct further calculations from this result, repeat steps 2~4
5. When starting a new calculation, if the result from the last calculation is
not “0”, press the right soft key
z To delete the character you just entered, press the right soft key
(Clear); to erase all entered characters, press and hold the right soft
key
z A maximum of 9 digits (including minus sign and decimal point) can be
entered at one time
to display the calculation result
(Clear)
and
; “0.0” will be displayed
(Clear) to initialize
62
Page 70

Menu
z If the formula violates mathematical principles (for example, 5/0),
Error will be displayed
z If the absolute value of the calculation result exceeds 999,999,999,
Overflow will be displayed
4.5.2 Calendar
ÆToolsÆCalendar
This function enables you to view the calendar (solar or lunar) from
January 1, 2000 to December 31, 2049
You can select from the following options:
4.5.2.1 Browse Date
z When you access this option, the solar calendar will be displayed with
the current date highlighted
z Press to highlight the desired date. Press the left soft key
(Lunar) to view the lunar year, month and day for the highlighted date
z To return to the solar calendar display, press the right soft key
(Exit)
4.5.2.2 Select Date
When you access this option, you can enter a date, and then press the left
soft key
(Lunar) to view the lunar year, month and day for the date
4.5.3 Memo
ÆToolsÆMemo
The phone can store up to 10 memos. In standby mode, if the memo
prompt time expires, the memo animation will be displayed; the memo
alert will sound (if the memo alert tone is activated). Press the left soft key
(View) to see the memo details; press the right soft key
to return to standby mode
(Exit)
63
Page 71

Menu
After you access this option, the following will be available:
4.5.3.1 Edit
Select this option to set a memo. Observe the following steps:
1. Enter the memo contents (up to 18 Chinese characters or 36 English
letters), and then press the left soft key
displayed
- The memo content cannot be empty; otherwise Empty will be
displayed when you press the left soft key
(Ok). Prompt Time will be
(Ok)
2. Enter a date from 2000-01-01 to 2049-12-31, and then enter the time in
24-hour format. Press the left soft key
(Ok). “Set Notice Tone?”
will be displayed
- When you key in the date or time, you can press
to move the
cursor and modify the number
- The cursor will advance if the number entered is valid; otherwise,
the phone will sound an error tone (if the Keypad Tone is set to ON)
3. To activate the memo alert tone, press the left soft key
deactivate the memo alert tone, press the right soft key
z If the memo memory is full, when you select this option, Memory Full
will be displayed
4.5.3.2 View
This option enables you to view the memos for the current date (Today’s
Memo) or all memos (All Memos)
After you select Toda y’s M e mo or All Memos, press
through the memos
While reading a memo, you can press
contents. To modify or delete the memo, press the left soft key
to scroll through the memo
(Yes); to
(No)
to browse
(Option), and then select Modify or Delete
64
Page 72

Menu
4.5.3.3 Delete
You can select from the following options to delete memos one by one or
all at once
One By One
After you access this function, the oldest memo will be displayed. Press
to display the intended memo, and then press the left soft key
(Delete). “Delete?” will be displayed; press the left soft key
complete the deletion
All
When you access this option, the prompt Enter Code will be displayed.
Enter the security code, and press the left soft key
is correct, all memos will be deleted; otherwise Code Error will be
displayed
(Yes ) to
(Ok). If the code
65
Page 73

Menu
4.6 Game
ÆGame
There are 3 games available: Black-white Chess, Whammy, and BJK
4.6.1 Black-white Chess
ÆGameÆBlack-white Chess
The object of the game is to capture the rival’s pieces by surrounding
them horizontally, vertically or diagonally. The player with the most pieces
at the end wins
To move upwards, downwards, leftwards or rightwards, press
or ( ,
press
left soft key
After you access this option, the following will be available:
4.6.1.1 Start Game
The piece with a dot in the middle is the latest piece placed by your rival
(phone)
z To quit the game, press the right soft key
4.6.1.2 Set Level
Select Easy or Difficult to set the play level of the game
, ,
, or respectively). To move diagonally,
or respectively. To place a piece, press the
or .
,
,
4.6.1.3 Set First
Select Player First or Player Second to determine who goes first with
black pieces
66
Page 74

Menu
4.6.1.4 Set Chess Manual
From Chess Manual 1 ~ Chess Manual 10, select one as the beginning
array
4.6.1.5 Game Rule
Select this option to view the rules of the game. Press
to scroll
though the rules
4.6.2 Whammy
ÆGameÆWhammy
Press keys
~ to hit the rat in the corresponding position. The
game is limited to 1 minute. Every time a rat is hit, one point is won. If your
score breaks the record, it will be saved as the top score
After you access this option, the following will be available:
4.6.2.1 Start Game
After accessing this option, press the left soft key
to start the game.
The number displayed next to “S:” is the current score; the number below
“T: ” is the remaining time (in seconds)
z While playing the game, you may press the left soft key
To continue the game, press the left soft key
z To quit the game, press the right soft key
again
to pause.
4.6.2.2 Set Speed
Select Slow, Medium or Fast for the game speed
4.6.2.3 Game Score
This option enables you to view the top scores based on the different
67
Page 75

Menu
speeds. For a speed that has not been selected, “--" will be displayed
4.6.2.4 Game Rule
Select this option to view the rules of the game. Press
to scroll
though the rules
4.6.3 BJK
Æ GameÆBJK
The player with cards valued closer to 21 wins. If your value exceeds 21,
you lose
After you access this option, the following will be available:
4.6.3.1 Start Game
From this option, you can select Restart or Continue
Restart
Select this option to start a new game
After accessing this option, press
chips, and press the left soft key
or to hit, stand, insure or double
z The number behind BANKER refers to the holding of the banker; the
number behind PLAYER refers to the holdings of the player; the
number in the lower right corner refers to the player’s bet. The value of
player’s current cards is displayed above the player’s bet
z To quit the game, press the right soft key
prompts you to chip in
Continue
If you exited the last game before it was over (i.e. each side’s holdings did
to move the cursor to the desired
to start the game. Press ,
when the phone
,
68
Page 76

Menu
not equal 0), this option will be displayed. You can select this option to
continue an unfinished game
4.6.3.2 Game Score
This option enables you to view the records, including Last Score (your
holdings when you quit the game last time) and High Score (the largest
amount of holdings gained)
4.6.3.3 Game Rule
Select this option to view the rules of the game. Press
though the rules
to scroll
69
Page 77

Data Transfer
5. DATA TRANSFER
You can transfer data between the phone and a computer by connecting
the phone to the computer via the DC 100 data cable. You can either
upload phone book data from the phone to the computer and edit it, or
download phone book data from the computer to the phone
See DC 100 Data Cable User Guide for details
70
Page 78

Input Method
6. INPUT METHOD
This phone supports five input methods, including PinYin, Sim Stroke,
English, Letter and Digit in order to provide easy input for letters and digits
in text editing mode. In addition, when editing short messages, you can
choose to input punctuations, Emojis, common phrases, symbols or
animations
6.1 Switch Input Method
When you enter text-editing mode, the last active input method is
displayed. Press
Method” under the Settings submenu for details) and digit input method.
The current input method indicator will be displayed at the lower left side
of the screen and include:
Input Method Indicator
PinYin
Sim Stroke
English
Letter
Digit
6.2 PinYin and Sim Stroke
These two input methods are only used for inputting Chinese characters
to switch between the input methods (see “Input
6.3 English
The phone supports intelligent English input and word association,
speeding up the input process
71
Page 79

Input Method
Switch the input method to English; will be displayed at the lower
left corner of the screen
1. To enter letters, press
the respective key; a word matching the input letters will be displayed
automatically
- When you enter the first letter of any English word, “*” will be
displayed (except
will automatically associate the matched English words
- If the letter input does not correspond with any English word in the
phone’s dictionary, this key press will have no response
- Press the right soft key
from right to left
2. Select a word and change upper/lower case: If the word displayed is
not desired, press
to switch between upper and lower cases; press once to capitalize
the initial letter; press twice to capitalize all letters; press three times to
return letters to lower case
3. Enter the selected word: Press the left soft key
confirm the selected word and to remove the underline; or press
to confirm the word and to add a space
- When no word is underlined, press
to switch input methods; press to move the cursor; press
the right soft key
the cursor; press and hold the right soft key
all characters
4. Enter symbols: When no word is underlined, press
symbol list. Press
soft key
to enter the selected symbol
~ one time for the letters labeled on
and ). As you input letters, the phone
(Clear) repeatedly to delete letters
to scroll through other word alternatives. Press
(Ok) or to
to enter a space; press
(Clear) to delete the character to the left of
(Clear) to delete
to display the
to highlight the intended symbol. Press the left
72
Page 80

Input Method
6.4 Letter
Switch to Letter input method; will be displayed at the lower left corner
of the screen
1. Press
respective key. To input a letter, press the corresponding key
repeatedly until the letter appears
For example: if you press
appear in turn:
- The letter just entered will be underlined. When the letter is
2. After you have entered the intended letter, press any other key on the
keypad to input the next letter. If the next letter and current letter share
the same key, press the left soft key
underline, and then enter the next letter; or simply wait for one second
to input again. Press
space
3. Enter symbols and spaces: After the underline disappears, press
to display the symbol list. Press
and then press the left soft key
Press
4. When no letter is underlined, press
right soft key
cursor; press and hold the right soft key
characters; press
~ to enter the corresponding letter labeled on the
repeatedly, the following letters
underlined, press
press the right soft key
to enter a space
to switch between upper and lower cases;
(Clear) to delete the letter
(Ok) or to remove the
to confirm the current letter input and enter a
to highlight the intended symbol,
to enter the selected symbol.
to move the cursor; press the
(Clear) to delete the character to the left of the
(Clear) to delete all
to switch input methods
73
Page 81

Input Method
6.5 Digit
Switch to digit input method; will be displayed in the lower left corner
of the screen
To enter digits, press the corresponding number keys
to switch input methods
~ . Press
6.6 Input Methods in SMS
In addition to the above input methods, when editing short messages, you
can choose to input punctuation marks, Emojis, common phrases,
symbols or animations
When editing a short message, press
Punctuation, Emoji, Common Phrases, Symbols and Animation
If Punctuation, Emoji, Symbols or Animation is selected, press
highlight the intended punctuation, Emoji, symbol or animation, and then
press the left soft key
If Common Phrases is selected, press
phrase category and press the left soft key
highlight the intended phrase and press the left soft key
z After input, the phone automatically returns to its previous input
method
z Only one animation can be inserted into a short message and it will be
displayed at the beginning of the message. You cannot delete an
animation by pressing the right soft key
animation, access the Animation option and select no
(Ok) to input
to display the following options:
to
to highlight the desired
(Ok). Press to
(Ok) to input
(Clear). To delete an
74
Page 82

Troubleshooting
7. TROUBLESHOOTING
When using this phone, if you run into malfunctions, please refer to the
following troubleshooting techniques before requesting help:
Symptom Diagnosis Solution
Have you pressed
The phone
cannot be
switched on
Cannot
make calls
No ring Is the ring mode of the
Strong
interference
noise during
call; or call
interrupted
and held it for more than
2 seconds?
Is the battery connector
reversed?
Is the battery low? Charge the battery
Is the phone outside of
service area range? Is
there sufficient signal
strength?
Is the keypad locked? Unlock the keypad
Is the phone number
correct?
current profile set to
Vibrate or Mute?
Is there an obstacle
nearby that is preventing
signals from passing?
Are you using the phone
while moving at high
speed?
Press and hold
more than 2 seconds
Insert the connector
correctly
Move to an area with
stronger signal
Enter the correct number
to make the call
Select different ring mode
or different profile
Move to another area
Slow down or stop moving
during call
for
75
Page 83

Troubleshooting
Symptom Diagnosis Solution
The battery
cannot be
charged
(The battery
indicator
bar does
not scroll)
If the malfunction symptoms are not listed in the above table, or the
corresponding solution is invalid, please contact your local UTStarcom
Customer Service Center.
For Technical Support and Assistance please visit the UTStarcom website
at:
http://www.utstar.com
Select “Support” and be directed to the Toll Free number of the
UTStarcom International Professional Service Regional Center that
serves your area.
Or you can call the UTStarcom North America Professional Service
organization at 1-(866) 663-3266.
Is the charger properly
connected to the
phone?
Is the charger
connected to a
100~240V AC wall
outlet?
Connect the charger and
phone correctly
Connect the charger to a
100~240V AC wall outlet
correctly
76
Page 84

Page 85

UTStarcom, Inc. USA
1275 Harbor Bay Parkway Alameda, CA 94502, USA
Tel. 510-864-8800 Fax. 510-864-8802
China
Building 3,
Yile Industrial Park
No. 129, Wenyi Road,
Hangzhou 310012 PRC
+86-21-63910500
Europe
Campus Kronberg 7,
61476 Kronberg
Germany
+49-6173-946-3461
Copyright © 2004, UTStarcom, Inc. All rights reserved.
May not be reproduced without prior written permission.
India
805 Signature Towers B,
South City I
Gurgaon,
Haryana 122001
+91-124-2805045
Latin America
2801 SW 149th Ave
Suite 100
Miramar, FL 33027, USA
954-447-3077
Japan
TT-2 Building 8th Floor,
3-8-1 Nihonbashi
Ningyo-cho, Chuo-ku, Tokyo,
Japan
+81-3-5643-8070
 Loading...