

SAFETY INFORMATION:
This wireless hand phone has been tested and
complies with the Federal Communications
Commision (FCC) RF exposure limits for General
Population/Uncontrolled exposure environment.
In August 1996 the Federal Communications
Commission (FCC) of the United States with its
action in Report and Order FCC 96-
326 adopted
an updated safety standard
for human exposure to
radio frequency electromagnetic energy emitted
by FCC regulated transmitters. Those guidelines
are consistent with the safety standard previously
set by both U.S. and international standards
bodies. The design of this phone complies w
ith
the FCC guidelines and these international
standards. Use only the supplied or an approved
antenna. Unauthorized antennas,
modifications, or
attachments could impair call quality, damage the
phone, or result in violation of FCC regulations.
Do not use
the phone with a damaged antenna. If
a damaged antenna comes into contact with the
skin, a minor burn may result. Please contact your
local dealer for replacement antenna.
For body worn operation, this phone has been
tested and meets FCC RF exposure guidelines
when used with an accessory that contains no
metal and when the back of the phone faces your
body. Use of other accessories may not ensure
compliance with FCC RF exposure guidelines.

32
continued to next page
3. Basic operations
Placing a call. . . . . . . . . . . . . . . . . . . . . . . . . . . . . . . . . . . . . . . . . . . . . . . . 39
Selecting the strongest signal (Power Search) . . . . . . . . . . . . . . . . . . . . . . . 41
Accepting a call. . . . . . . . . . . . . . . . . . . . . . . . . . . . . . . . . . . . . . . . . . . . . . 42
Redialing. . . . . . . . . . . . . . . . . . . . . . . . . . . . . . . . . . . . . . . . . . . . . . . . . . . 43
Dialing from the incoming calls log . . . . . . . . . . . . . . . . . . . . . . . . . . . . . . . 45
Storing a number while talking (number memo). . . . . . . . . . . . . . . . . . . . . . 47
Placing a call on hold . . . . . . . . . . . . . . . . . . . . . . . . . . . . . . . . . . . . . . . . . 48
Ear speaker volume . . . . . . . . . . . . . . . . . . . . . . . . . . . . . . . . . . . . . . . . . . 48
Whisper mode. . . . . . . . . . . . . . . . . . . . . . . . . . . . . . . . . . . . . . . . . . . . . . . 49
Hands-free calling, using the speaker phone . . . . . . . . . . . . . . . . . . . . . . . . 50
Adjusting the speaker phone volume. . . . . . . . . . . . . . . . . . . . . . . . . . . . . . 51
Using a headset . . . . . . . . . . . . . . . . . . . . . . . . . . . . . . . . . . . . . . . . . . . . . 52
Using the vibration ringer mode . . . . . . . . . . . . . . . . . . . . . . . . . . . . . . . . . . 53
Using the call-answered vibration mode. . . . . . . . . . . . . . . . . . . . . . . . . . . . 54
Ringer volume adjustment . . . . . . . . . . . . . . . . . . . . . . . . . . . . . . . . . . . . . . 55
Selecting the ringer type . . . . . . . . . . . . . . . . . . . . . . . . . . . . . . . . . . . . . . . 56
Composing a ringer melody. . . . . . . . . . . . . . . . . . . . . . . . . . . . . . . . . . . . . 57
Using the good manners features . . . . . . . . . . . . . . . . . . . . . . . . . . . . . . . . 60
Using custom functions . . . . . . . . . . . . . . . . . . . . . . . . . . . . . . . . . . . . . . . . 61
Telephone and accessories. . . . . . . . . . . . . . . . . . . . . . . . . . . . . . . . . . . . . . 6
Attach the hand strap . . . . . . . . . . . . . . . . . . . . . . . . . . . . . . . . . . . . . . . . . . 6
Important features . . . . . . . . . . . . . . . . . . . . . . . . . . . . . . . . . . . . . . . . . . . . . 7
1. Introduction
What is a PAS. . . . . . . . . . . . . . . . . . . . . . . . . . . . . . . . . . . . . . . . . . . . . . . 10
For your safety . . . . . . . . . . . . . . . . . . . . . . . . . . . . . . . . . . . . . . . . . . . . . . 11
Cautions on use . . . . . . . . . . . . . . . . . . . . . . . . . . . . . . . . . . . . . . . . . . . . . 15
Using this manual . . . . . . . . . . . . . . . . . . . . . . . . . . . . . . . . . . . . . . . . . . . . 17
Part names and their functions . . . . . . . . . . . . . . . . . . . . . . . . . . . . . . . . . . 18
Reading the display. . . . . . . . . . . . . . . . . . . . . . . . . . . . . . . . . . . . . . . . . . . 20
You can’t use the phone while; . . . . . . . . . . . . . . . . . . . . . . . . . . . . . . . . . . 21
2. Before using your phone
Charging the battery . . . . . . . . . . . . . . . . . . . . . . . . . . . . . . . . . . . . . . . . . . 22
Replacing the battery . . . . . . . . . . . . . . . . . . . . . . . . . . . . . . . . . . . . . . . . . 25
Turning the power on/off . . . . . . . . . . . . . . . . . . . . . . . . . . . . . . . . . . . . . . . 26
Selecting a function. . . . . . . . . . . . . . . . . . . . . . . . . . . . . . . . . . . . . . . . . . . 27
Table of functions . . . . . . . . . . . . . . . . . . . . . . . . . . . . . . . . . . . . . . . . . . . . 29
Animation display . . . . . . . . . . . . . . . . . . . . . . . . . . . . . . . . . . . . . . . . . . . . 30
Setting the key beep . . . . . . . . . . . . . . . . . . . . . . . . . . . . . . . . . . . . . . . . . . 31
Setting key guard . . . . . . . . . . . . . . . . . . . . . . . . . . . . . . . . . . . . . . . . . . . . 32
Confirming your phone number . . . . . . . . . . . . . . . . . . . . . . . . . . . . . . . . . . 33
Caller ID . . . . . . . . . . . . . . . . . . . . . . . . . . . . . . . . . . . . . . . . . . . . . . . . . . . 34
Displaying time and date. . . . . . . . . . . . . . . . . . . . . . . . . . . . . . . . . . . . . . . 35
Setting a lock code . . . . . . . . . . . . . . . . . . . . . . . . . . . . . . . . . . . . . . . . . . . 36
Preventing someone to use your phone (lock phone). . . . . . . . . . . . . . . . . . 37
Setting the usage mode . . . . . . . . . . . . . . . . . . . . . . . . . . . . . . . . . . . . . . . 38
CONTENTS
*SM-801 PHS/sec1(GB) 00.3.9 4:16 PM Page 2

54
Quick search. . . . . . . . . . . . . . . . . . . . . . . . . . . . . . . . . . . . . . . . . . . . . . . . 92
Storing a secret phone book . . . . . . . . . . . . . . . . . . . . . . . . . . . . . . . . . . . . 93
Editing, adding data to the secret phone book . . . . . . . . . . . . . . . . . . . . . . . 95
6. Recording functions
Recording a call . . . . . . . . . . . . . . . . . . . . . . . . . . . . . . . . . . . . . . . . . . . . . 96
Playing, deleting a message . . . . . . . . . . . . . . . . . . . . . . . . . . . . . . . . . . . . 97
7. Use your phone as a digital cordless extension phone
Functions for registration with the base phone. . . . . . . . . . . . . . . . . . . . . . . 99
How to register your phone to home base unit (HBU). . . . . . . . . . . . . . . . . 100
Selecting the base phone . . . . . . . . . . . . . . . . . . . . . . . . . . . . . . . . . . . . . 102
Talking with other extensions. . . . . . . . . . . . . . . . . . . . . . . . . . . . . . . . . . . 103
Transferring an incoming call (transferring on hold) . . . . . . . . . . . . . . . . . . 104
Placing all extensions on hold . . . . . . . . . . . . . . . . . . . . . . . . . . . . . . . . . . 105
Using the call waiting. . . . . . . . . . . . . . . . . . . . . . . . . . . . . . . . . . . . . . . . . 106
Deleting registered extensions. . . . . . . . . . . . . . . . . . . . . . . . . . . . . . . . . . 107
Transceiver mode operation. . . . . . . . . . . . . . . . . . . . . . . . . . . . . . . . . . . . 108
8. Other features
Restoring individual default settings. . . . . . . . . . . . . . . . . . . . . . . . . . . . . . 110
Restoring all default settings . . . . . . . . . . . . . . . . . . . . . . . . . . . . . . . . . . . 111
Specifications . . . . . . . . . . . . . . . . . . . . . . . . . . . . . . . . . . . . . . . . . . . . . . 113
Troubleshooting . . . . . . . . . . . . . . . . . . . . . . . . . . . . . . . . . . . . . . . . . . . . . 114
4. Convenience features
Switching input modes . . . . . . . . . . . . . . . . . . . . . . . . . . . . . . . . . . . . . . . . 63
Entering text . . . . . . . . . . . . . . . . . . . . . . . . . . . . . . . . . . . . . . . . . . . . . . . . 64
Using the copy, cut, and paste functions . . . . . . . . . . . . . . . . . . . . . . . . . . . 65
Displaying the calendar. . . . . . . . . . . . . . . . . . . . . . . . . . . . . . . . . . . . . . . . 67
Using the scheduler . . . . . . . . . . . . . . . . . . . . . . . . . . . . . . . . . . . . . . . . . . 68
Viewing and deleting scheduled events . . . . . . . . . . . . . . . . . . . . . . . . . . . . 70
Using the memo pad. . . . . . . . . . . . . . . . . . . . . . . . . . . . . . . . . . . . . . . . . . 71
Anniversary dates . . . . . . . . . . . . . . . . . . . . . . . . . . . . . . . . . . . . . . . . . . . . 72
Alarm clock features . . . . . . . . . . . . . . . . . . . . . . . . . . . . . . . . . . . . . . . . . . 74
Calculator . . . . . . . . . . . . . . . . . . . . . . . . . . . . . . . . . . . . . . . . . . . . . . . . . . 76
Adjusting the display . . . . . . . . . . . . . . . . . . . . . . . . . . . . . . . . . . . . . . . . . . 77
Playing a game. . . . . . . . . . . . . . . . . . . . . . . . . . . . . . . . . . . . . . . . . . . . . . 78
How to data communication . . . . . . . . . . . . . . . . . . . . . . . . . . . . . . . . . . . . 80
Transmitting data. . . . . . . . . . . . . . . . . . . . . . . . . . . . . . . . . . . . . . . . . . . . . 81
Receiving data . . . . . . . . . . . . . . . . . . . . . . . . . . . . . . . . . . . . . . . . . . . . . . 82
MWI (Message waitting indicator) . . . . . . . . . . . . . . . . . . . . . . . . . . . . . . . . 83
Hooking . . . . . . . . . . . . . . . . . . . . . . . . . . . . . . . . . . . . . . . . . . . . . . . . . . . 83
5. Using the phone book
Storing entries. . . . . . . . . . . . . . . . . . . . . . . . . . . . . . . . . . . . . . . . . . . . . . . 84
Storing numbers from the redial memory, number memo,
and incoming calls log . . . . . . . . . . . . . . . . . . . . . . . . . . . . . . . . . . . . . . . . 86
Editing and adding data. . . . . . . . . . . . . . . . . . . . . . . . . . . . . . . . . . . . . . . . 87
Deleting data (selected, or clear all). . . . . . . . . . . . . . . . . . . . . . . . . . . . . . . 88
Search for a name. . . . . . . . . . . . . . . . . . . . . . . . . . . . . . . . . . . . . . . . . . . . 90
CONTENTS
*SM-801 PHS/sec1(GB) 00.3.9 4:16 PM Page 4
7
1 .Introduction
6
IMPORTANT FEATURES continued to next page
Data communications (p. 80)
Data communications, at a maximum 32 kbps, are possible by using the
data communication card.
Retractable antenna, power search (p. 18, 41)
Diversity receiver technology switches automatically between signals
received via the retractable antenna and the internal antenna to assure the
best possible reception at all times, while Power Search feature captures the
strongest signals (while talking or waiting for a call in the public mode).
Directory function (p. 84)
The phone directory holds a maximum 500 entries, and includes a quicksearch, and secret address book functions.
Time and date (p. 35)
Setting the time and date enables such features as displaying the time and
date during standby and confirming the time for redialing, keeping a record
of incoming calls.
Redialing and logging received calls (p. 43, 45)
Numbers can be stored for up to ten calls placed and ten calls received.
Numbers can then be easily redialed or recorded in your phone book.
Whisper mode (p. 49)
When necessary, you can talk in a whisper but the party on the other end
can hear your voice as usual.
Manner mode (p. 60)
The manner mode lets you control easily how the phone responds when
dialing and receiving calls.
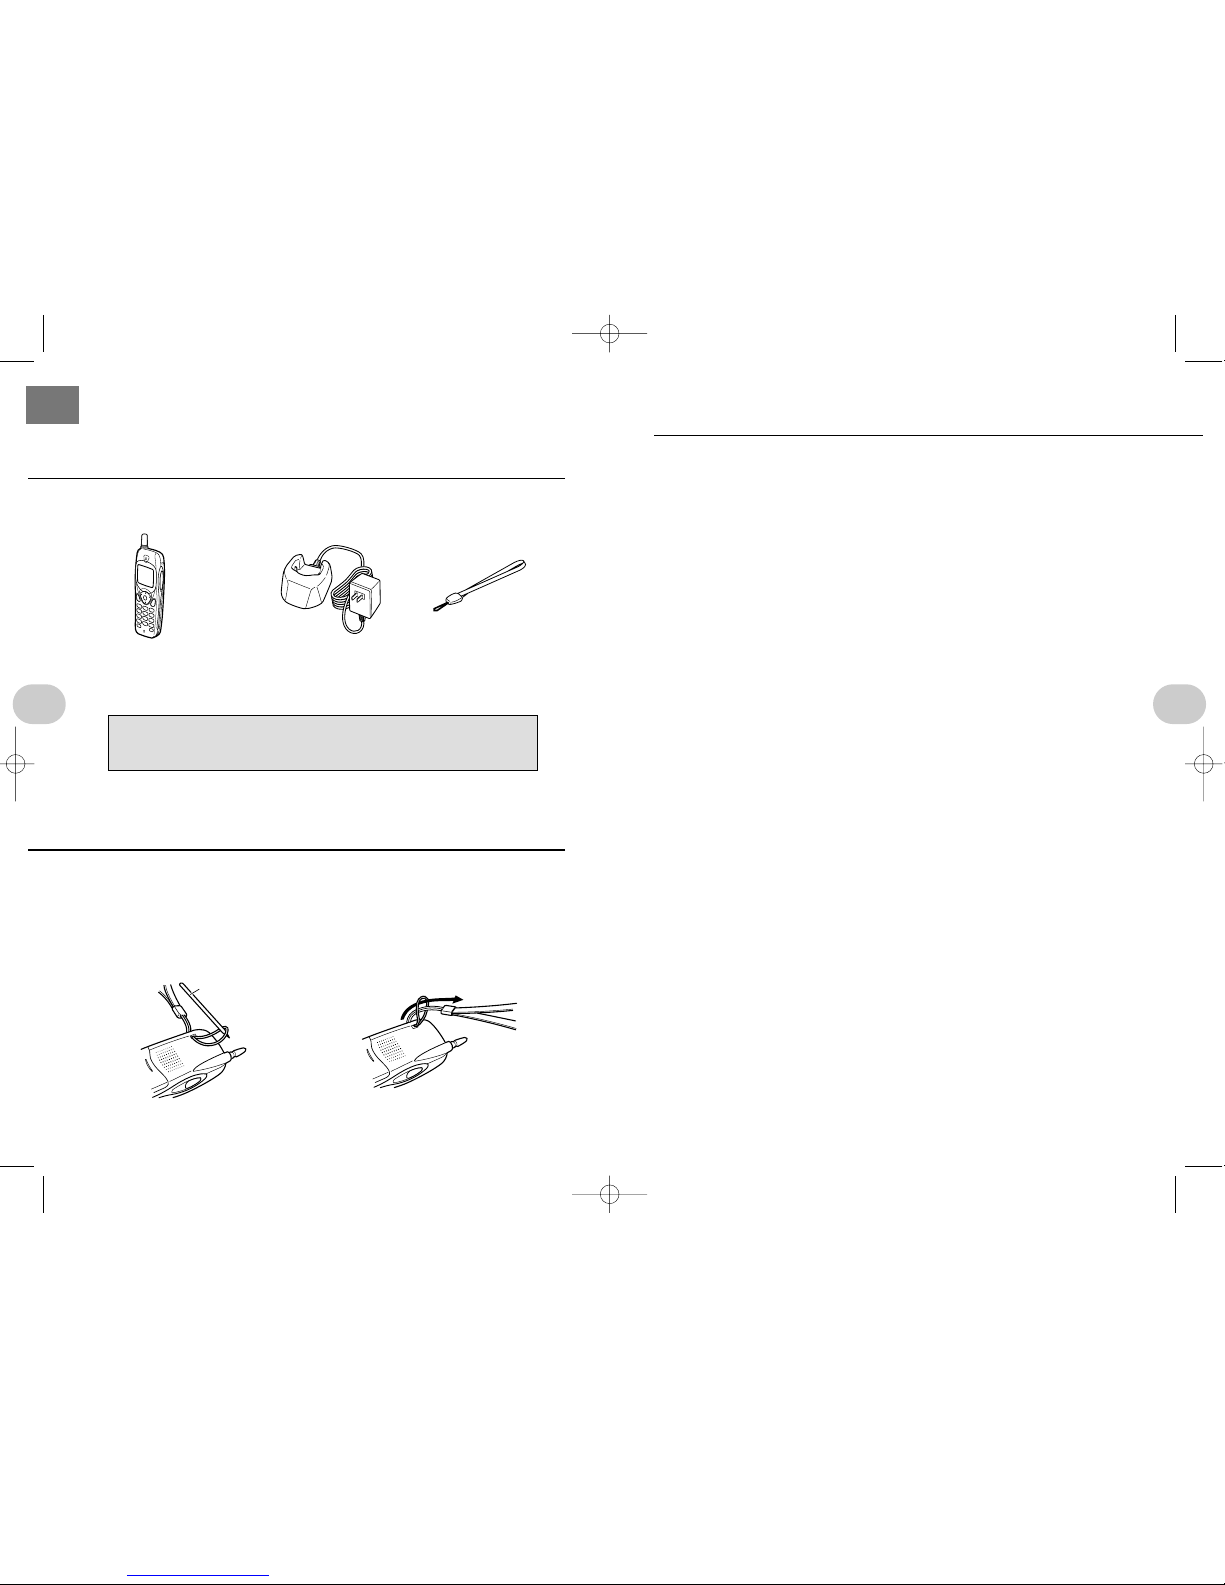
TELEPHONE AND ACCESSORIES
ATTACH THE HAND STRAP
• T elephone
• Charger • Hand strap (1)
• This instruction manual
The battery is factory installed in the telephone.
Be sure to fully charge the battery before using the telephone the first
time, and whenever it has not been used for an extended period of time.
1
Pass the small end of the
strap through the hole in the
telephone as shown, and pull
it through using a toothpick
or similar pointed object.
2
Pass the opposite end of the
strap through the end loop,
and then pull tightly.
Toothpick
1. INTRODUCTION
*SM-801 PHS/sec1(GB) 00.3.9 4:16 PM Page 6

9
1 .Introduction
8
1. Introduction
Memo pad (p. 71)
Store five memos of up to 72 characters each. Convenient for remembering
train schedules and quick reminders.
Anniversary dates (p. 72)
Register important dates, and a message and icon will be displayed to
remind you.
Alarm clock (p. 74)
Up to 11 alarms can be set. A snooze mode sounds 5 times every five minutes.
Calculator (p. 76)
Basic calculator includes the four basic operations with a maximum 8 digit
display.
Game mode (p. 78)
Catch the falling persimmons with crabs.Persimmons fall faster as you
advance.
Recording function (p. 96)
Digital recorder stores voices during conversations.
Headset connector (p. 52)
Connect any digital headset to talk with your hands free.
Vibration mode ringer (p. 53)
The phone vibrates when a call is received.
Vibration mode dialing (p. 54)
When you place a call and the other party answers, the phone vibrates.
Select the ringer tone (p. 56)
Compose your own ringer melody (p.57)
Select a conventional tone or a melody for the ringer.You can even compose ten different ringer melodies.
Hands-free talking (p. 50)
Built-in speaker lets you talk without holding the phone.
Speaker monitor (p. 50)
Listen to the other party through a speaker on the back of the phone.
Key guard (p. 32)
Protect against unintended operations when the phone is not in use.
Lock phone (p. 37)
Secure your phone with a Lock code to prevent unauthorized calls.
Calendar (p. 67)
Enter a year and month to display the monthly calendar.
Scheduler (p. 68)
Reminders for up to twenty events occurring in the next month can be
stored (max. 3 per day)
IMPORTANT FEATURES
*SM-801 PHS/sec1(GB) 00.3.9 4:16 PM Page 8

11
1 .Introduction
10
1. Introduction
Remember the following when handling the battery.
• DO NOT disassemble, modify, or attempt to repair the battery.
• DO NOT throw the battery in a fire or heat the battery.
• DO NOT leave the battery beside a fire or other high heat source.
• DO NOT short circuit the battery terminals, or carry a loose battery
with metal necklaces, change, or other metal objects.
• DO NOT solder the battery.
• DO NOT connect the (+) and (–) terminals with wire or other metal
object.
FAILURE TO HEED THE ABOVE COULD RESULT IN EXCESS
HEAT, LEAKAGE, OR EXPLOSION, RESULTING IN FIRE OR BODILY HARM.
• This section includes impor tant information to prevent harm or damage to the user
or other persons.
• Some of the problems that can arise from improper use as a result of not reading
these precautions are described below.
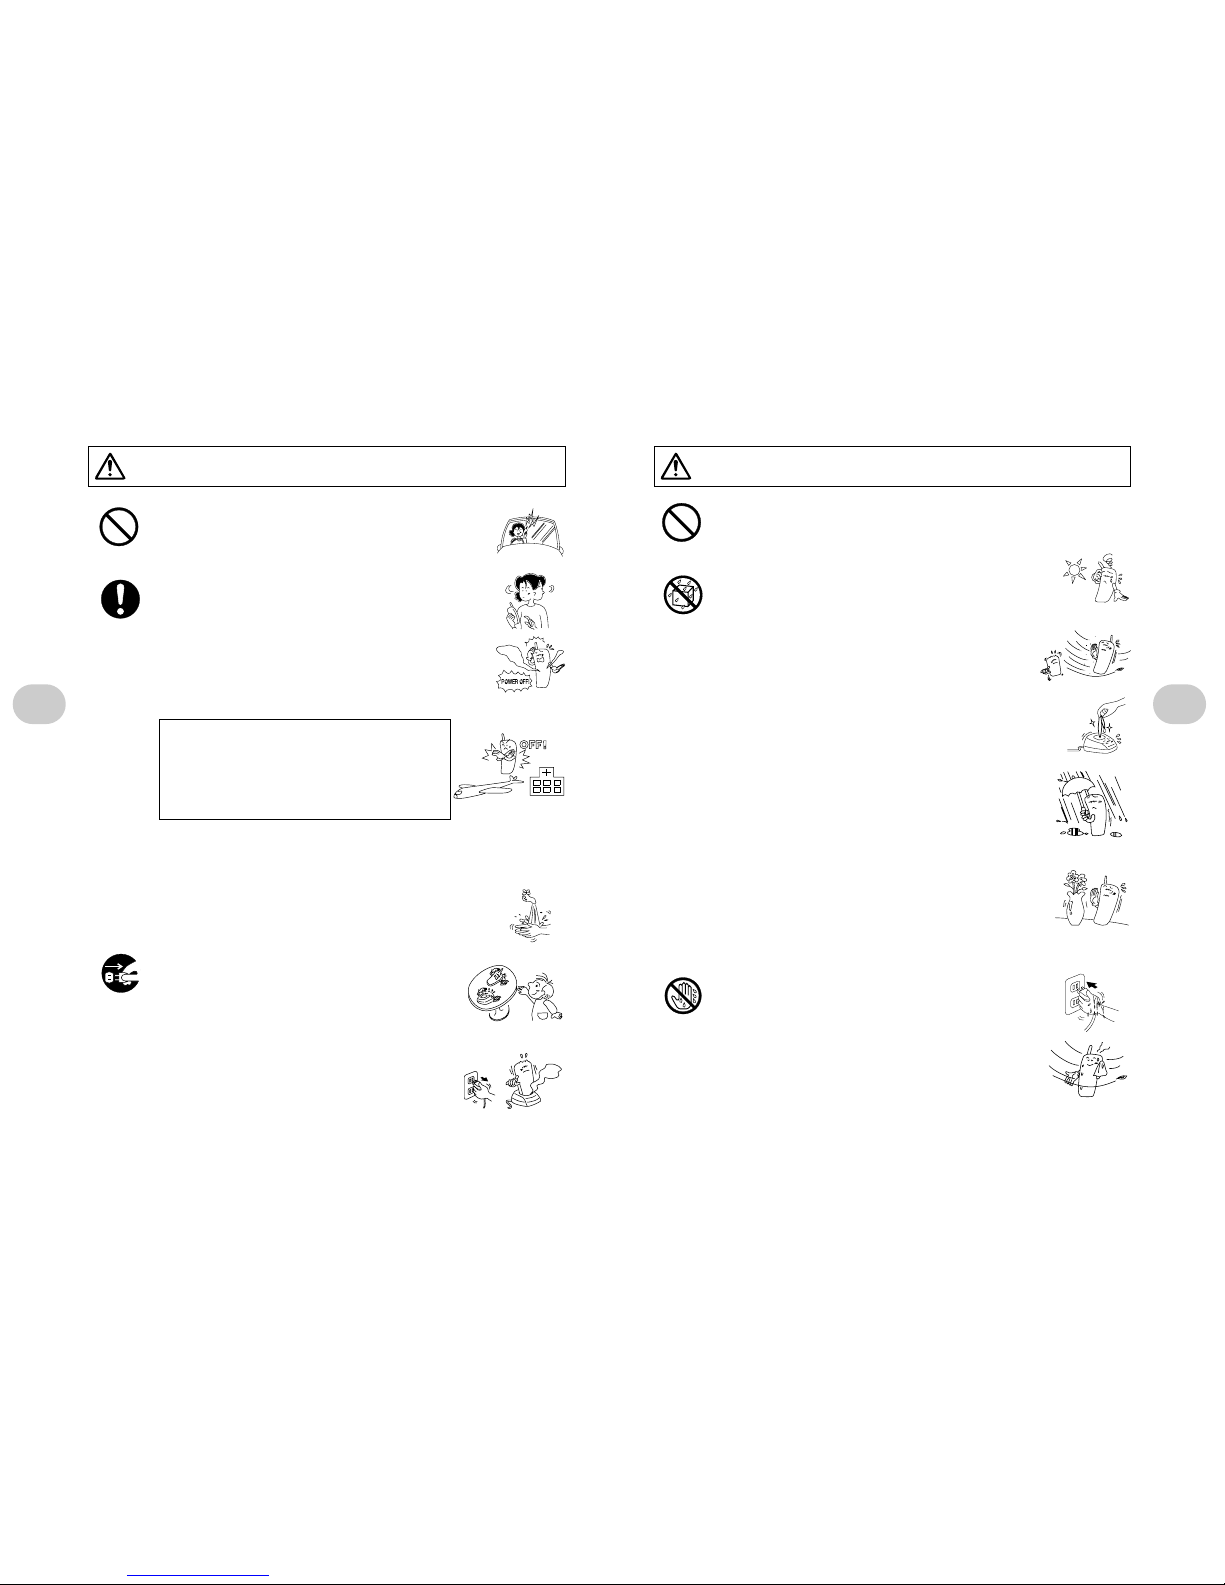
DANGER: Failure to heed the following could result in death or severe bodily harm.
FOR Y OUR SAFETY
(BE SURE TO READ THESE WARNINGS)
PROHIBITED
PROHIBITED
• Do not place the battery charger near fire or wherever
a temperture is extremely high
Exposure to heat could cause the battery to overheat,
leak fluid, or even explode, resulting in fire or bodily harm.
ALWAYS
DO NOT
DISASSEMBLE
• USE ONLY the specified battery
Using other batteries could cause the battery to overheat,
leak fluid, or even explode, resulting in fire or bodily harm.
• ONLY USE the battery with this product.
Using the battery with other products could cause the battery to overheat, leak fluid, or even explode, resulting in fire or bodily harm.
• ONLY USE the battery charger with this battery.
Using the charger to charge batteries for other products could cause
the battery to overheat, leak fluid, or even explode, resulting in fire or
bodily harm.
• IMMEDIATELY flush the eye(s) with clean water and
see a physician if battery fluid should get in the eye.
Failure to see a doctor could result in loss of eyesight.
• DO NOT disassemble, modify, or attempt to repair the
phone or charger.
An electrical short could occur. Modifying the phone may
also be in violation of telecommunications laws.
Talk on the street,in the office
With your PAS, you can talk on the phone
just about anywhere, on the street, in the
office, or even at home (within your service
provider area).
• Note that reception may not be possible
even in the service area depending on signal conditions.
Digital signals mean better signal quality,improved security
Your digital PCT handset offers clearer reception with little noise compared with conventional analog cordless phones.Security is
also better, so electronic eavesdropping is
more difficult.
• Remember that with the certain equipment,
other parties can electronically tap into
your conversations. Total security is difficult
to achieve.
WHAT IS A PAS
What?
I can’t
listen
in?
*SM-801 PHS/sec1(GB) 00.3.9 4:16 PM Page 10
13
1 .Introduction
12
1. Introduction
• DO NOT USE in extremely hot or cold conditions.
Using the phone at 45°C or above or –5°C or below, or the charger at
35°C or above or 5°C or below, could result in malfunction or product
failure.
• DO NOT leave the phone or batteries in direct sunlight
or in a closed car even on a cloudy day.
The battery could overheat, leak fluid, or explode, resulting
in damage to other goods, fire, or bodily harm.
• DO NOT store where subject to excessive vibration
or dust.
Product malfunction or failure could result.
• DO NOT leave coins or other metal objects inside the
charger socket.
The metal may cause excessive heat and possibly burns or
fire.
• DO NOT store or use the phone, charger, or battery
where exposed to water, other fluids, or high humidity.
The battery could overheat, causing burns or malfunction.
The charger could overheat, explode, short, or otherwise
malfunction.
• DO NOT leave containers with water or other fluid
beside the phone, charger, or batteries.
If the container should spill water or fluid, and gets on the
battery or charger, they could short, produce excess heat,
and cause burns. If water should get inside the phone,
immediately turn the phone off or unplug the charger.
Failure to do these could result in electrical shorts and
even fire. Contact your dealer for repairs.
• DO NOT plug/unplug the charger or replace the battery with wet hands.
Electrical shorts and malfunction may occur.
• If coming inside from the cold weather, and surface
of the phone gets dewy, let it dry naturally before
attempting to use the phone.
Using the phone with dewdrops could cause malfunction
or product failure.
CAUTION: Failure to heed the following could result in bodily harm or prop-
erty damage.
PROHIBITED
DO NOT
USE
WHERE
EXPOSED
TO WATER
DO NOT
USE WITH
WET HANDS
WARNING: Failure to heed the following could result in death or severe bodi-
ly harm.
PROHIBITED
ALWAYS
UNPLUG
• DO NOT TALK while riding a bicycle or driving a car,
motorcycle, or other motor vehicle.
Keep your eyes and attention on the road. ALWAYS stop
in a safe, legal area if you must use the phone.
• PAY ATTENTION to your surroundings while talking
on the phone.
You could easily trip or walk into traffic unless you pay
sufficient attention to your surroundings while talking.
• If you notice smoke, unusual heat, or an odd smell
while using the phone, turn it off immediately and
remove the battery.
Continued use could result in getting burnt. Take the
phone for repair.
• ALWAYS TURN THE POWER OFF when
instructed while on an airplane, in the hospital, or other designated areas.
Failure to turn the power off could interfere with
other electronic instruments and medical equipment, resulting in an accident or harm to others.
• CONNECT the AC power supply to a normal household outlet
(110 V)
The charger may malfunction or cause a fire if used with other power
sources.
• IMMEDIATELY WASH with clean water if any skin or
clothing exposed to battery fluid.
Failure to wash could cause skin problems and destroy
the fabric.
• KEEP the phone out of the reach of small children.
They could get hurt.
IMMEDIATELY UNPLUG the charger if you notice
smoke, unusual heat, or an odd smell while
recharging a battery.
Continued use could result in fire. Take the charger
for repair.
FOR YOUR SAFETY
(BE SURE TO READ THESE WARNINGS)
15
1 .Introduction
14
1. Introduction
• When handling the AC cord:
Do not fold it. Do not cut it.
Do not heat it. Do not twist it.
Do not pull it. Do not keep it near high heat.
Otherwise the cord could be damaged and short.
• Do not pull on the cord when unplugging.
Always hold the plug.Otherwise the cord could be damaged and shor t.
• Do not drop the phone or charger.
Product failure could occur.
• Do not expose to water, including sea water.
Product failure could occur.Your phone and charger are not waterproof.
• Do not force the antenna.
Even the antenna is retractable, do not pull too hard on it.Product failure could
occur.Bending the antenna too hard could also break it. See page 1-12 for
proper use of the antenna.
• Protect the phone from salt water and sea spray on the beach.
Salt could corrode internal parts.
• When programming the phone, enter numbers and letters within 60 sec.
intervals.
If more than 60 sec. passes between entering letters, the entry will be automatically cancelled.You will then need to repeat the entry from the beginning.
• Avoid using the phone near fax machines, personal computers, word
processors, radios, televisions, ham radios, stereos, refrigerators,
microwaves, fluorescent lights, hair driers, automobiles, motorcycles, and
trains.
Signal reception may be poor, preventing calls from being placed and causing
calls to be dropped.
• Do not keep ATM cards, credit cards, and other magnetic strip cards near
the charger or phone.
Data on the magnetic strips may be scrambled and the cards ma y become unusable.
• Clean with a dry or damp cloth.
NEVER use benzene, paint thinner, or other such solvents.They will discolor
and damage the surface.
CAUTIONS ON USE continued to next page
• DO NOT throw old batteries away in the trash.
Take the batteries to a recycling center.
Put a piece of tape across the battery terminals to
prevent shorting, and dispose of the battery in
accordance with local regulations.
If none of the keys works, remove the battery, wait at least
one minute, and then reinstall the battery properly (p. 2-5).
The phone will be reset to the default settings. Read the
cautions on page 2-4 before using the phone.
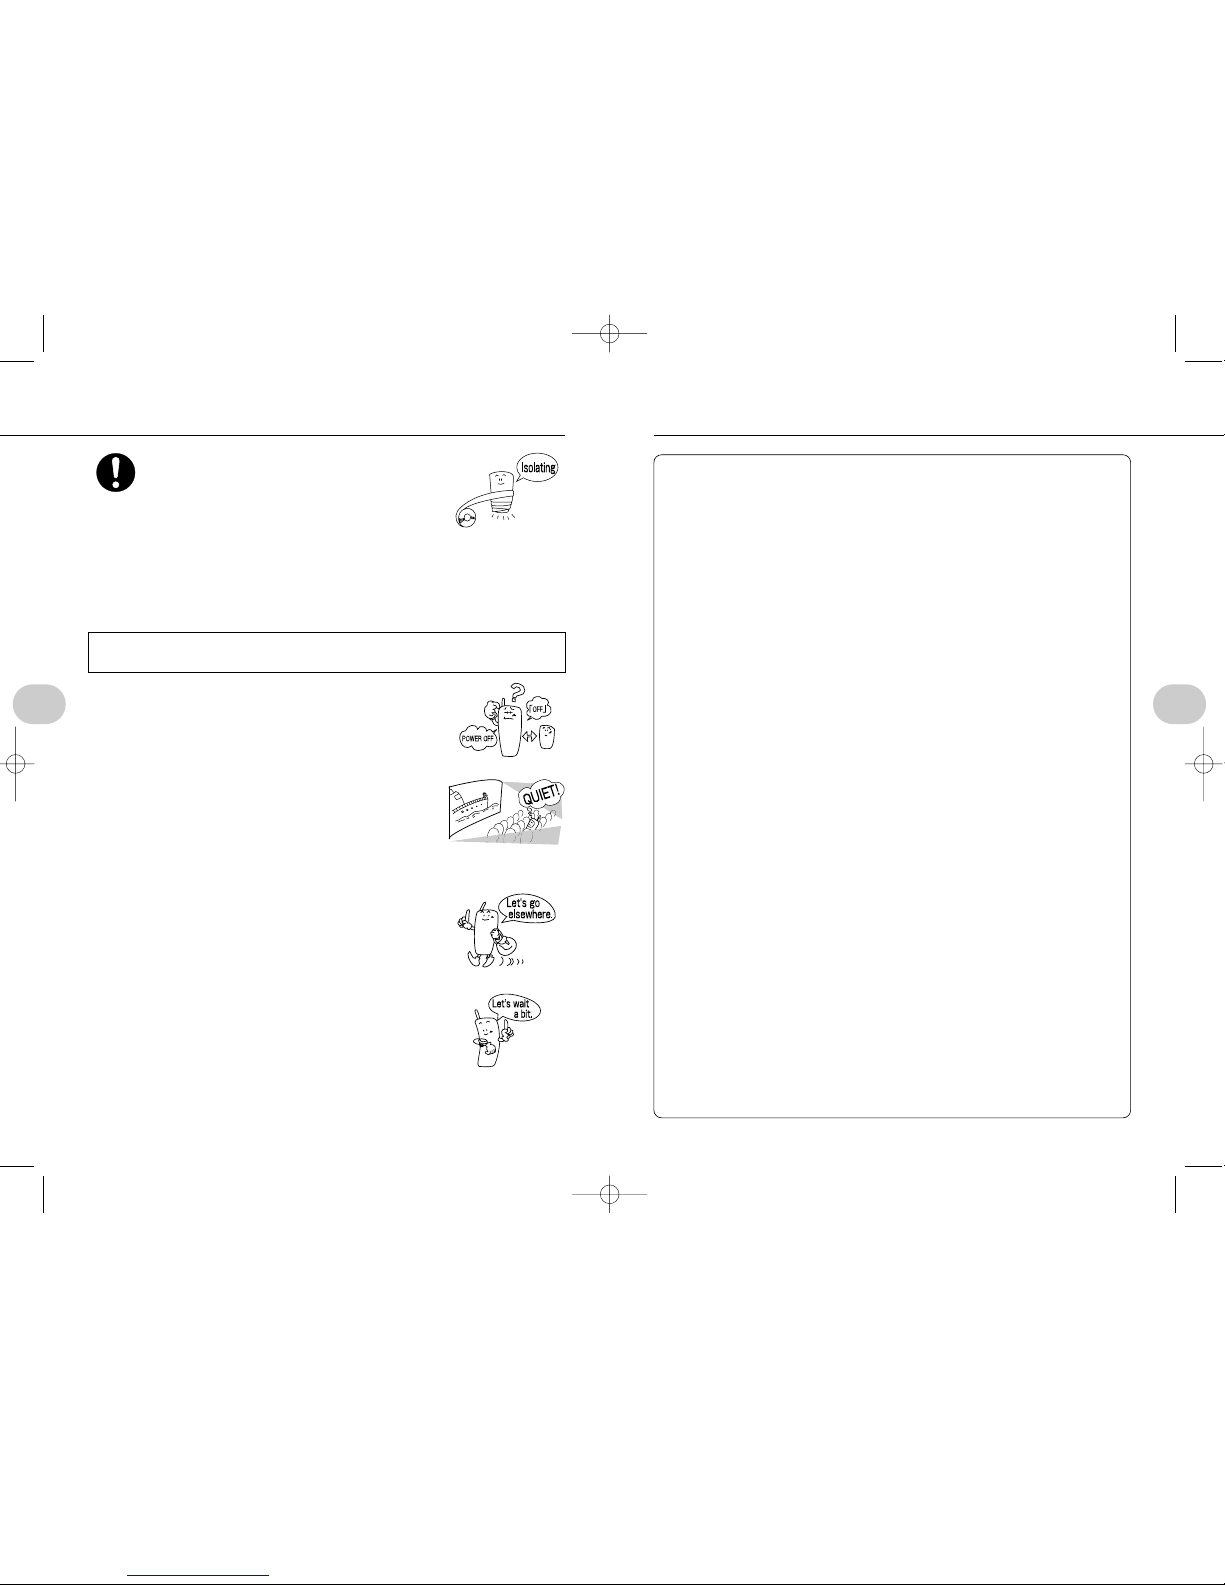
Be considerate of others. Avoid using your phone in theaters, movie theaters, restaurants, hotel lobbies, libraries,
the hospital, and other quiet public places with lots of people.
Move to another location if you cannot dial or calls are
interrupted while in your service area.
• You may not be able to use the phone in the shadow of tall
buildings or other places where signal reception is poor.
If the display says signal strength is good but you get a
busy signal when trying to dial, the circuits are busy.
Wait a few minutes and try again.
ALWAYS
FOR Y OUR SAFETY
(BE SURE TO READ THESE WARNINGS)
Please note...
*SM-801 PHS/sec1(GB) 00.3.9 4:16 PM Page 14
17
1 .Introduction
16
1. Introduction
Using the cursor
Search, selection, adjustment, and setting operations can be per-
formed by pressing and pressing the cursor up, down, left, or
right. The direction of the cursor pressed is shown throughout this
manual using the illustrations below.
Cursor operation is described more fully in the specific functions.
Key operating sequence
A number of keys must usually be pressed for specific operations. The sequence in
which the keys are pressed is shown throughout this manual as follows.
ex.: .> >
In this case, first press , then , then .
Note: If no key is pressed for a specific time while using a selected function, the
phone will automatically return to the standby mode or in-use display. The
system is called “time out” when this happens.
The time out delay: approximately 60 seconds.
Some operations do not, however, return to the standby mode automatically.
To return to the standby mode in these cases, press after completing the oper-
ation. Continuing to display the control screen will reduce the battery power faster.
To return to the previous screen
Press .
To interrupt a function and return to the standby mode
Press and hold .
USING THIS MANUAL
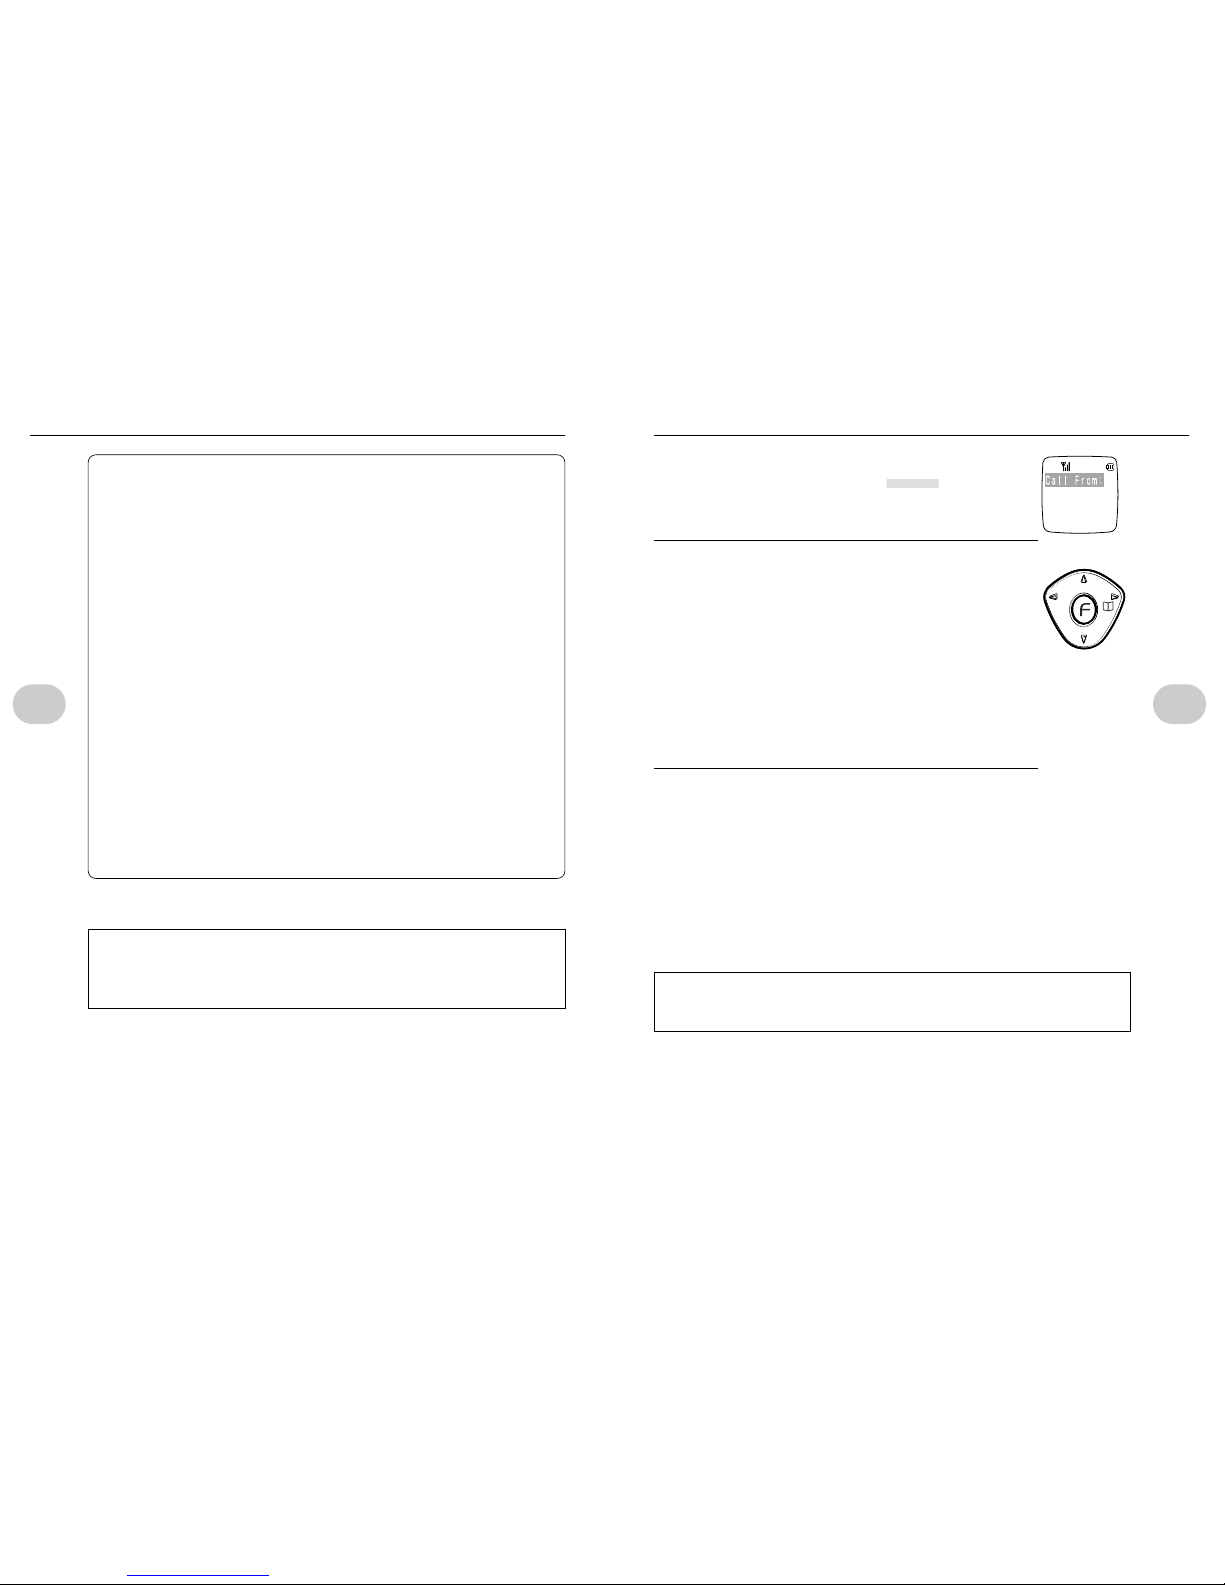
Reading the display
The flashing on the display is shown as .
ex.:
Up Down Up or down Right Left Riht or left
REMEMBER: Press the cursor lightly.
• Do not scrape the phone against hard surfaces.
The finish could be damaged.
• Batteries are consumables.
Batteries wear out in time. The battery should be replaced when it can only be
used for about half as long as a new battery. See page 2-4.
• Electronic eavesdropping
This product digitally processes your voice before transmission.This increases
security and makes it more difficult for someone to electronically eavesdrop on
your conversation. Electronic eavesdropping cannot, however, be entirely prevented if someone has the certain equipment. Remember this before talking
about sensitive matters over your PHS phone.
• Standby time
Standby time in the public mode within your service area is approximately 700
hours at 25°C with good, stable signal quality. Standby time will decrease
depending on current conditions, particularly outside your service area and in
areas where reception is not possible. Using the phone book, programming
entries, and using the game feature will also shorten the standby time.
•
NOTICE
This product is for use in THAILAND only. Use outside THAILAND is
prohibited.
CAUTIONS ON USE
UTSTARCOM EXPRESSLY TAKES NO RESPONSIBILITY FOR ANY
ECONOMIC LOSSES OR DAMAGES THAT MIGHT OCCUR AS A RESULT
OF PRODUCT FAILURE, IMPROPER OPERATION, DEFECTS, POWER
FAILURES, OR OTHER FACTORS THAT MIGHT PREVENT THE USER
FROM PLACING OR RECIEVING A CALL.

19
1 .Introduction
18
1. Introduction
u Function selection key (p. 17, 27)
Used to select and set each function.
i Cursor (p. 17, 27)
Press up, down, right, or left to select a function. Also used for
cursor movement.
o Talk/hands-free mode selection (p.39, 49 to 51)
Used when placing and answering incoming calls.Also used to
switch to the hands-free, speakerphone, and whisper modes.
!0 Power on/off (p.26)
Turns the power on/off, hangs up the phone, and interrupts any
selected functions.
!1 Dialing keys
Used to dial a number, as well as program various numbers and
letters, and for function selection.
!2 [ ] (asterisk) key (p. 78, 90, 103, 104)
!3 [
#
] (pound) key (p. 65)
!4 Recording, text mode key (p. 96)
Recording a call, and the text entry mode.
!5 Hold, clear,Intercom key (p. 48)
Puts a call on hold, and cancels hold. Also used to delete entries
in the phone book, incoming calls log, and individual letters.
!6 Microphone
!7 Ear speaker
!8 Display (p. 20)
!9 Data communications card slot
(data communications terminal) (p. 80)
]
Q
0–9
-
=
R
t
e
q Retractable antenna
The phone can be used with the antenna retracted.
For better reception, extend the antenna.
w Hole for attaching the hand strap (p. 6)
e Power Search key (p. 41)
Selects the strongest signal for best reception.
r Speaker
Used for the ringer, warning tones, and other system alerts.Also used for handsfree and speakerphone reception.
t Battery cover
y Headset jack (p. 52)
Lets you use a headset to converse without holding the phone.
PART NAMES AND THEIR FUNCTIONS
Extend Shrink
*SM-801 PHS/sec1(GB) 00.3.9 4:16 PM Page 18
21
1 .Introduction
20
1. Introduction
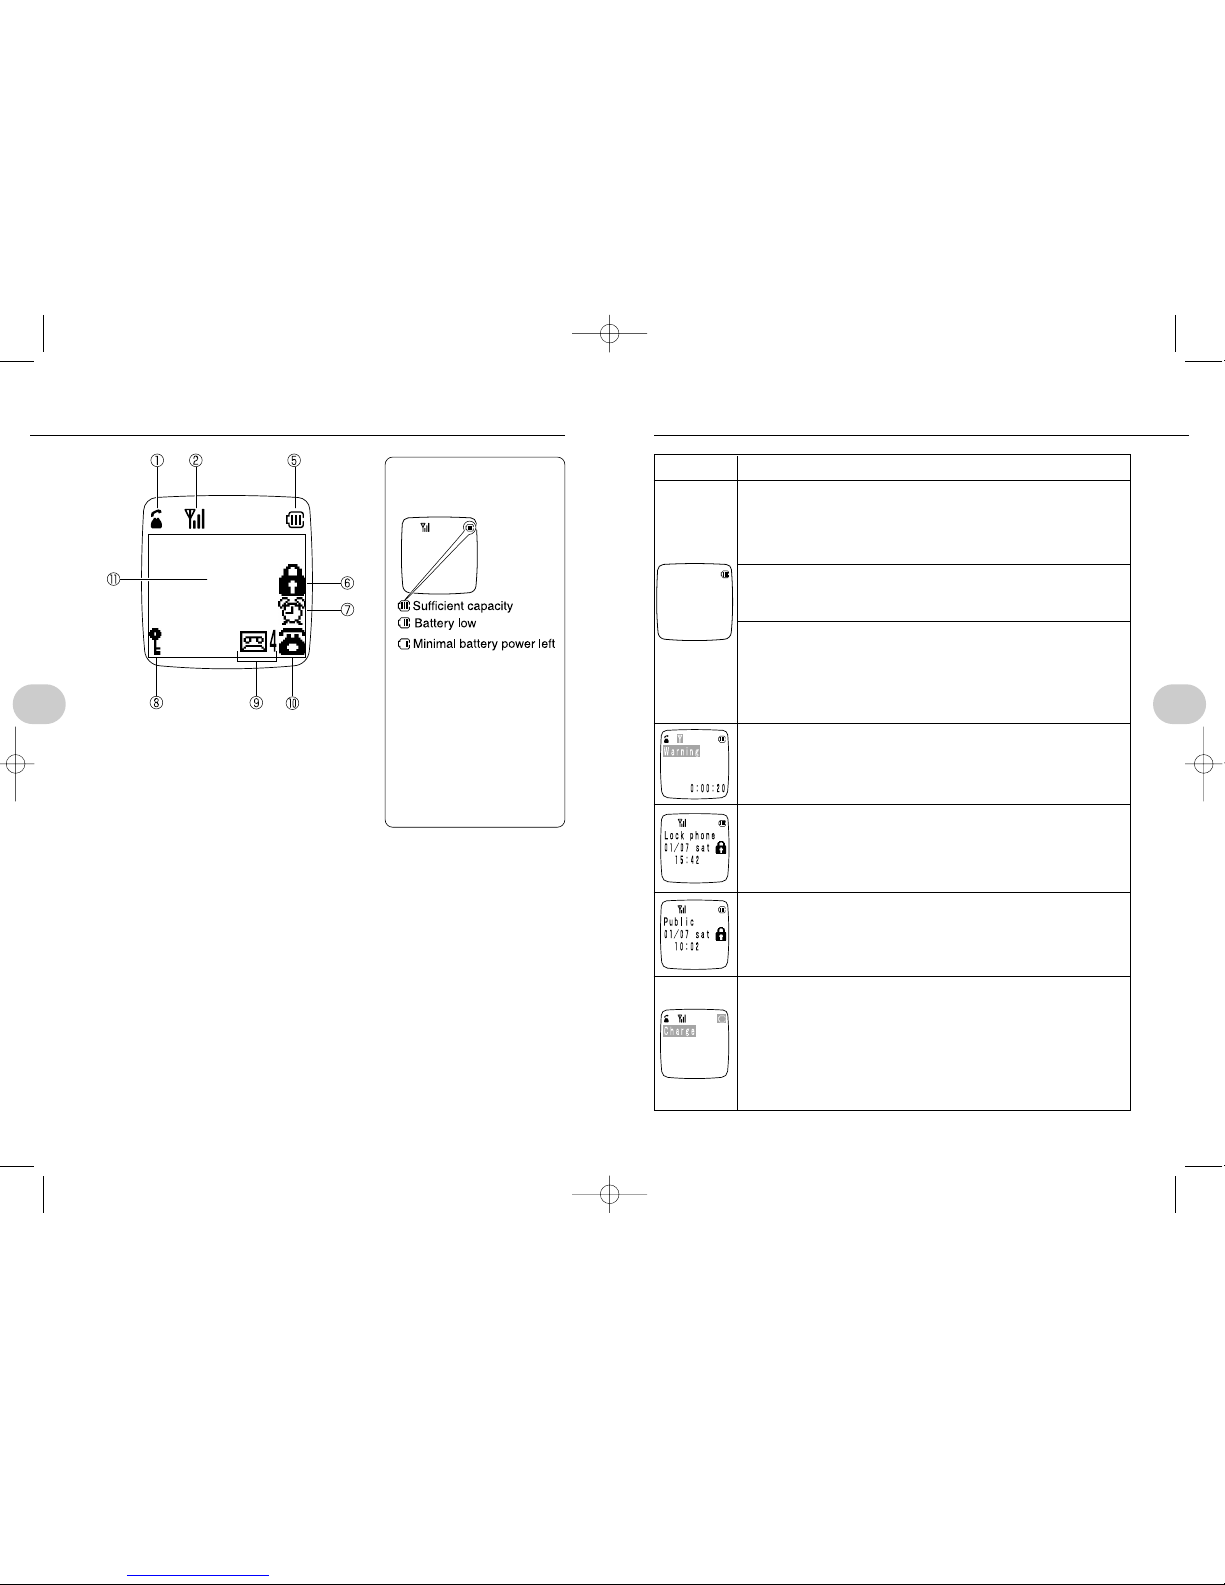
WHAT T O DO
Move to a location within the service area or where reception is
better so that the indicator goes
out.
Move closer to the base station.
Move to a location within the service area or where reception is
better so that the indicator goes
out. Move closer to the base station.
Move to a location where reception is better.
Cancel the lock phone mode.
See p. 37.
Cancel key guard.See p. 32.
Recharge the battery.
CAUSE
Public mode
Outside the service area (or
signal reception is too poor).
Home mode
Signals not received from the
base station.
Home/public mode
Outside the service area (or
signal reception is too poor), or
signals not received from the
base station.
WARNING will flash when in
the public mode and you
approach an area where
dropped calls are likely, and an
alarm will sound.
Lock phone is on to prevent key
operations.
Key guard is on to prevent dialing.
Charge will flash when battery
capacity is low.If the phone is
in use, an alarm will sound and
about 1 minute later, the call
will be cut off. If in the standby
mode, a beep will sound for
about 15 seconds, and the
power will be then turned off.
YOU CAN’T USE THE PHONE WHILE;
DISPLAY
q Either dialing or a call is connected. If not visi-
ble, calls cannot be made (e.g., you are out
of range).
w Indicates signal quality.The more bars there
are displayed, the better the signal quality is.
e Digital cordless extension phone
r Transceiver mode
t Battery level indicator.Indicates remaining
battery capacity in the standby mode. (p. 20, 24)
y Dial lock or key lock function has been set.
u Indicates the alarm clock has been turned on. Flashes when the set time is
reached.
i Indicates the secret phone book feature has been turned on.
o Indicates a message has been recorded.The number of messages is shown on
the right.
!0 Lights when a call was received but not answered.
!1 Display
Displays entered phone numbers and text.
NOTES
• Pressing any key causes the key and the display backlight to turn on for
approximately 10 seconds.The display backlight is always on when the game
mode is selected. (p.77)
READING THE DISPLA Y
BATTERY INDICATOR
DURING STANDBY MODE
NOTES
•The battery level indicator
is only a guide.
The level indicator will vary
depending on operating
conditions.
•If CHARGE BATTERY is
displayed
Only the wcan be used.
*SM-801 PHS/sec1(GB) 00.3.9 4:16 PM Page 20
How long can a fully charged battery be used?
Continuous standby time is the time the phone is left continuously in the standby
mode without the phone being used to place a call or use any features or functions.
Continuous calling time is the total time the battery can be used if a call is continued
without interruption.
• Times shown in the table are for
public mode using immediately after
fully charging the battery.
• The continuous calling time is calculated with the phone at rest and no
handovers performed.
• Actual usage is a combination of
standby mode and calling. Standby
mode time decreases as calling time
increases. The available calling time is also shortened when the user moves
around while calling.
• Usable battery time is based on use at 25°C with stable signal reception. Use
in poor signal quality conditions and at lower or higher temperatures, or outside the service area, consumes more battery power. The times shown in the
table will therefore be shorter.
• Using the phone book, entering text, and playing the game for extended periods also consume more power and shorten battery life.
Cautions on use
• DO NOT put coins, bracelets, or other metal objects inside the charger socket.
This could cause burns or even fire.
• It is normal for the charger and phone to feel warm during charging.
• If a TV or radio gets static while charging, plug the charger into a different outlet, or move the charger away from the antenna.
• If the charge indicator flashes when the phone is not in the charger, plug the
phone into the charger to charge the battery. If the indicator continues to flash,
it's time to buy a new battery. Use only batteries rated for your phone.
• Initial charging time will be longer for a new battery and before the phone is
used for the first time.
• If charging is completed, and the phone is removed and then plugged into the
socket again, the charge indicator will light and then go out.
• Depending on charging conditions, it is normal for the charge indicator to go
out and then turn on again.
• will flash on the display during charging even if the phone is turned off.
However, no keys on the phone can be operated.
23
2. Before using your phone
Simply plug the phone into the charger socket to recharge the battery.
The battery remains in the phone for charging.
1
Plug the charger cord into a 110 VAC
household outlet.
2
Insert the phone into the charger socket.
• Completely seat the phone in the socket.
• The charge indicator will light red.
• Time to full charge: approx. 6 hours (time will vary depending on use)
• Calls can be received while the phone is charging if the phone power is on.
This will slightly increase the required charging time.
3
Charging is completed when the charging indicator goes out.
• The phone can be left plugged into the charger.
• If significantly longer than 6 hours is required for charging, see your dealer.
22
CHARGING THE BATTERY
2. BEFORE USING YOUR PHONE
CHARGING THE BATTERY continued to next page
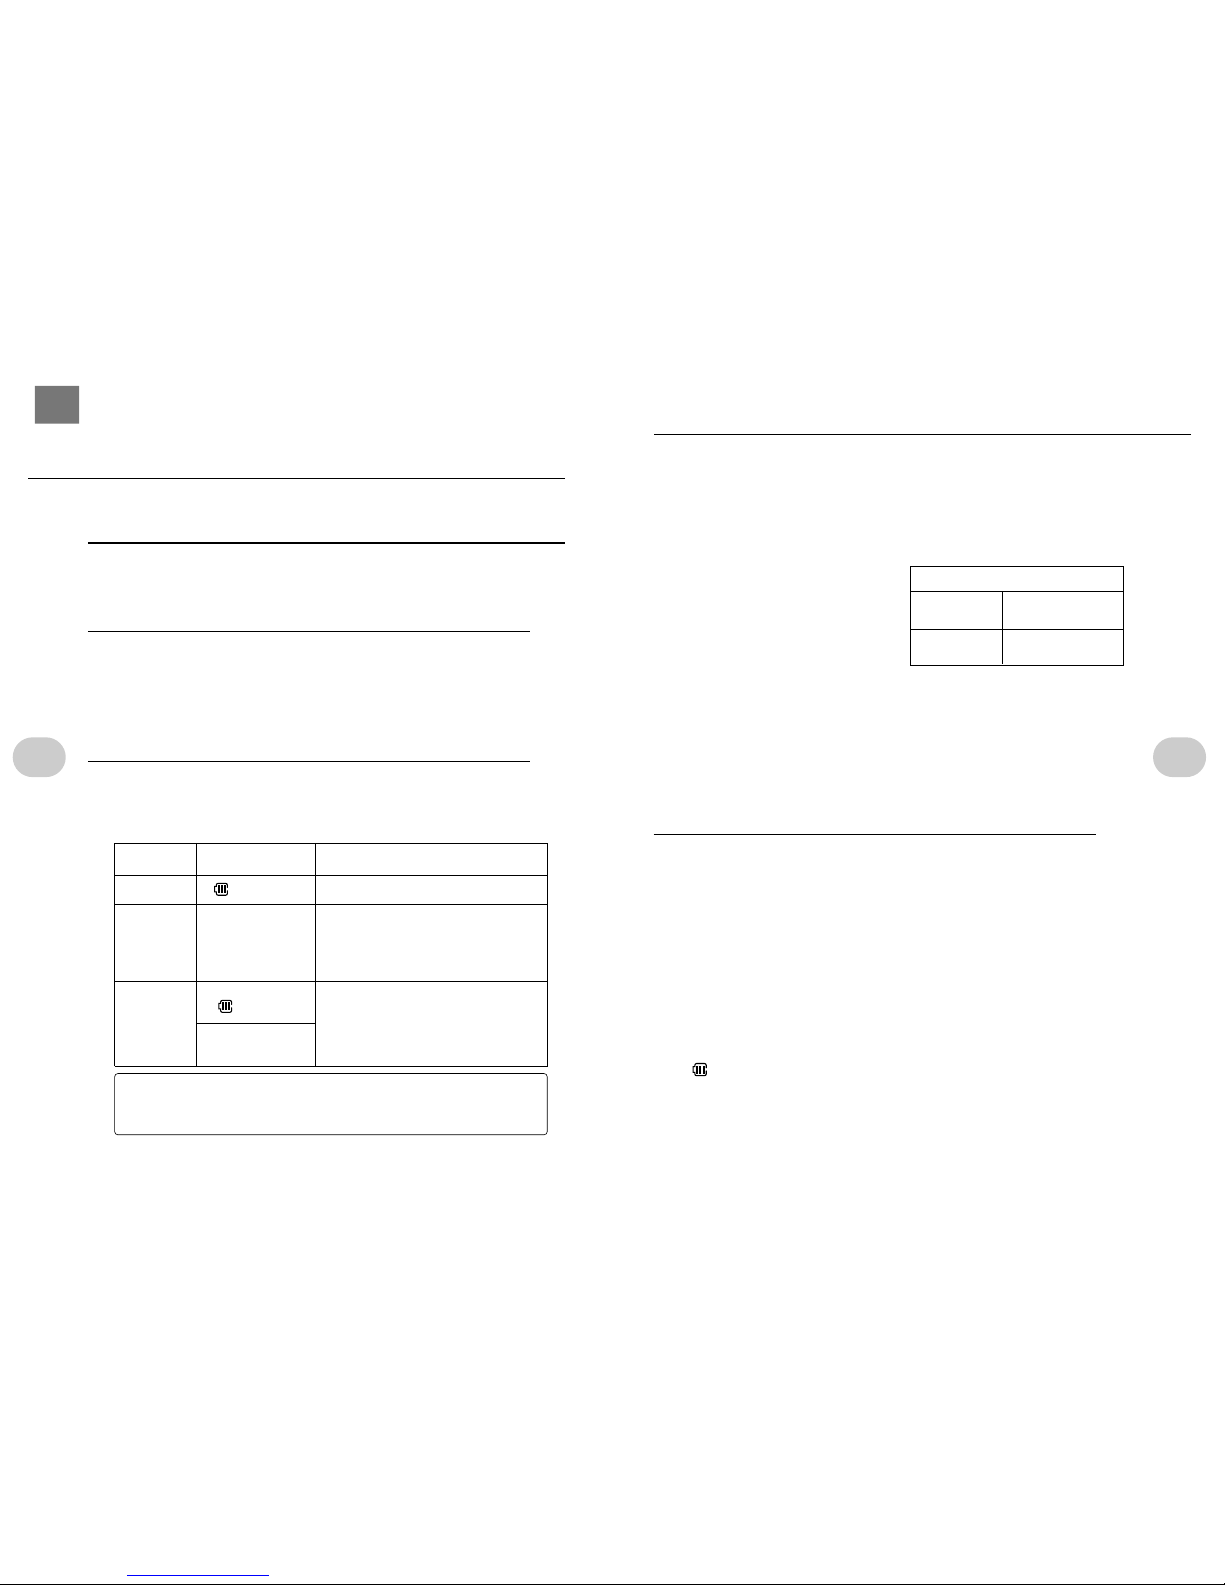
CAUTION: If the charging/call indicator flashes
• If the indicator flashes red during charging, there may be a problem with
the battery or the charger. Immediately stop charging.
INDICATOR
STATE
DISPLAY BATTERY STATE
LIGHTS RED
FLASHES Charging
FLASHES
RED
–
ERROR: The phone is not correctly
seated in the socket. Remove
and reinsert. If the indicator still
flashes, there is a problem with
the battery or the charger.
OFF
IF POWER IS ON:
LIGHTS
IF POWER IS OFF:
–
Charging completed.
USABLE BATTERY TIMES
Continuous
standby time
Continuous
calling time
Approx. 700 hours
Approx. 6 hours
• Be sure to buy new batteries from your dealer. Only buy batteries rated for
your phone.
• Replace the batter y when frequent charging is necessar y.
• DO NOT remove the battery cover unless replacing the battery or there is an
emergency.See p. 11 and 112.
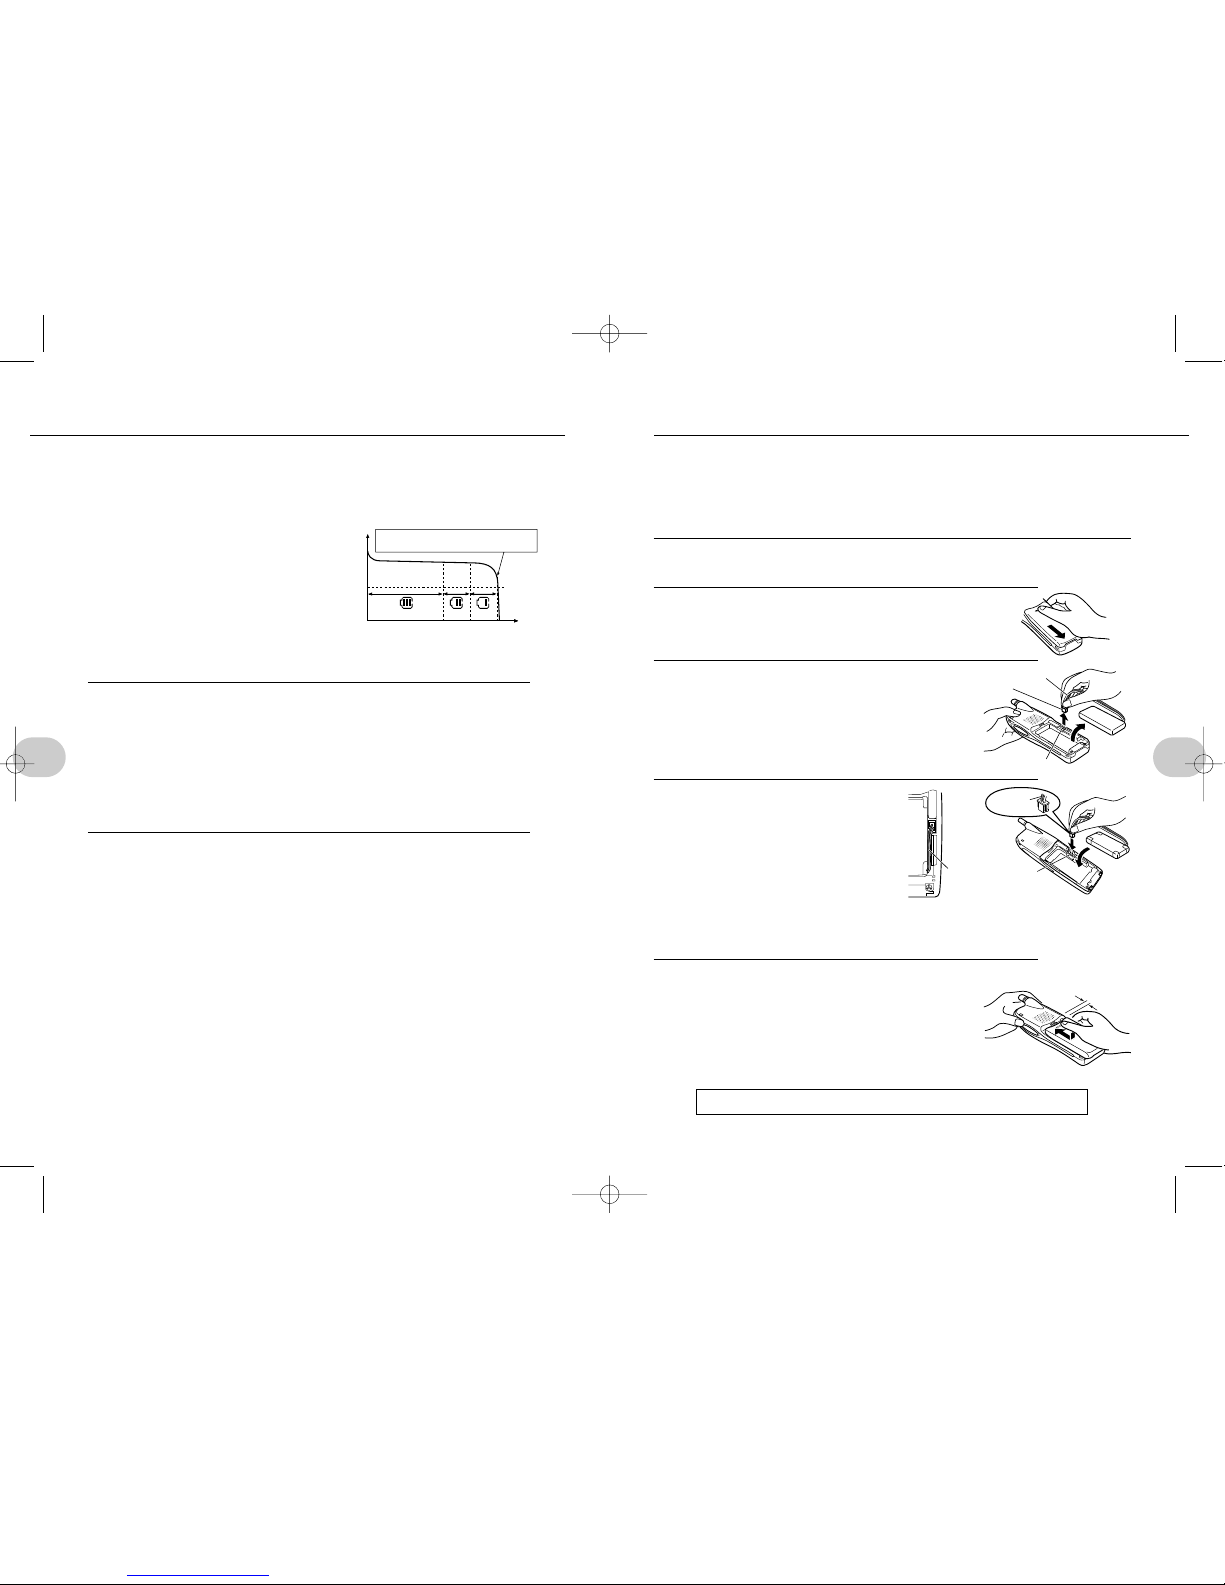
1
(press and hold) w to turn the power off.
2
Remove the battery cover.
• Hold the finger depression and slide fir mly back as
shown in the figure.
3
Remove the old battery,and disconnect the
connector from the socket.
• Hold the plug to disconnect. Do not pull on the
wires.This could cause a connector failure.
4
Wait about a minute.Then connect the plug of the new battery
into the socket.
1. Hold the plug with the red wire on top.
Then insert firmly.
2. Hold the battery with the label up.
Insert the bottom of the battery first,
then press the top into place.
3. Fit the wires into the space between
the battery and case. Do not leave the wires sticking out.
5
Replace the battery cover.
• Place the cover as shown with about a 3 mm gap,
then slide it into place. Be careful not to pinch the
wires.
ALWAYS RECHARGE THE NEW BATTERY BEFORE USE.
25
2. Before using your phone
Battery level
The battery level is monitored as shown below.The battery level shown on the display can be used as a guide for recharging and replacing the battery.
• The batter y level indicator changes as
follows depending on the operating conditions.
At low temperature: level 1 is indicated
sooner
At high temperature: level 1 is indicated
later
• Usable time decreases quickly as the
temperature drops. Batter y performance
will be recovered when the battery
warms up again.
Battery life
• Batteries are consumable. The battery's usable time will be shortened with
repeated charging and discharging.The battery should be replaced when it
can only be used for about half as long as a new battery.
• Leaving the battery unused in a fully charged state for an extended period of
time shortens battery life.
• The batter y will naturally discharge gradually when left unused. It will discharge
approximately 10% to 20% in one month, and 50% in six months.It may
become unusable if left unused for a year or more.
Cautions when replacing and removing the battery
The following data will be lost from memory when the battery is removed.
Be sure to write down any important information.
• Numbers in the redial log, incoming calls number memo, and incoming calls
log
Reset default values
• The date and time will be reset to the defaults.
24
2. Before using your phone
REPLACING THE BATTERYCHARGING THE BA TTER Y
Guide to remaining battery capacity (at 25°C)
level 3 level 2 level 1
approx.
30%
approx.
15%
0%100%
Battery voltage
"Charge" is displayed at about this charge
level. Start charging soon.
Voltage level at
which phone
can be used
Usable time
plug
wire
socket
red wire
plug
socket
wires
about 3 mm
*SM-801 PHS/sec2(GB) 00.3.9 4:31 PM Page 24
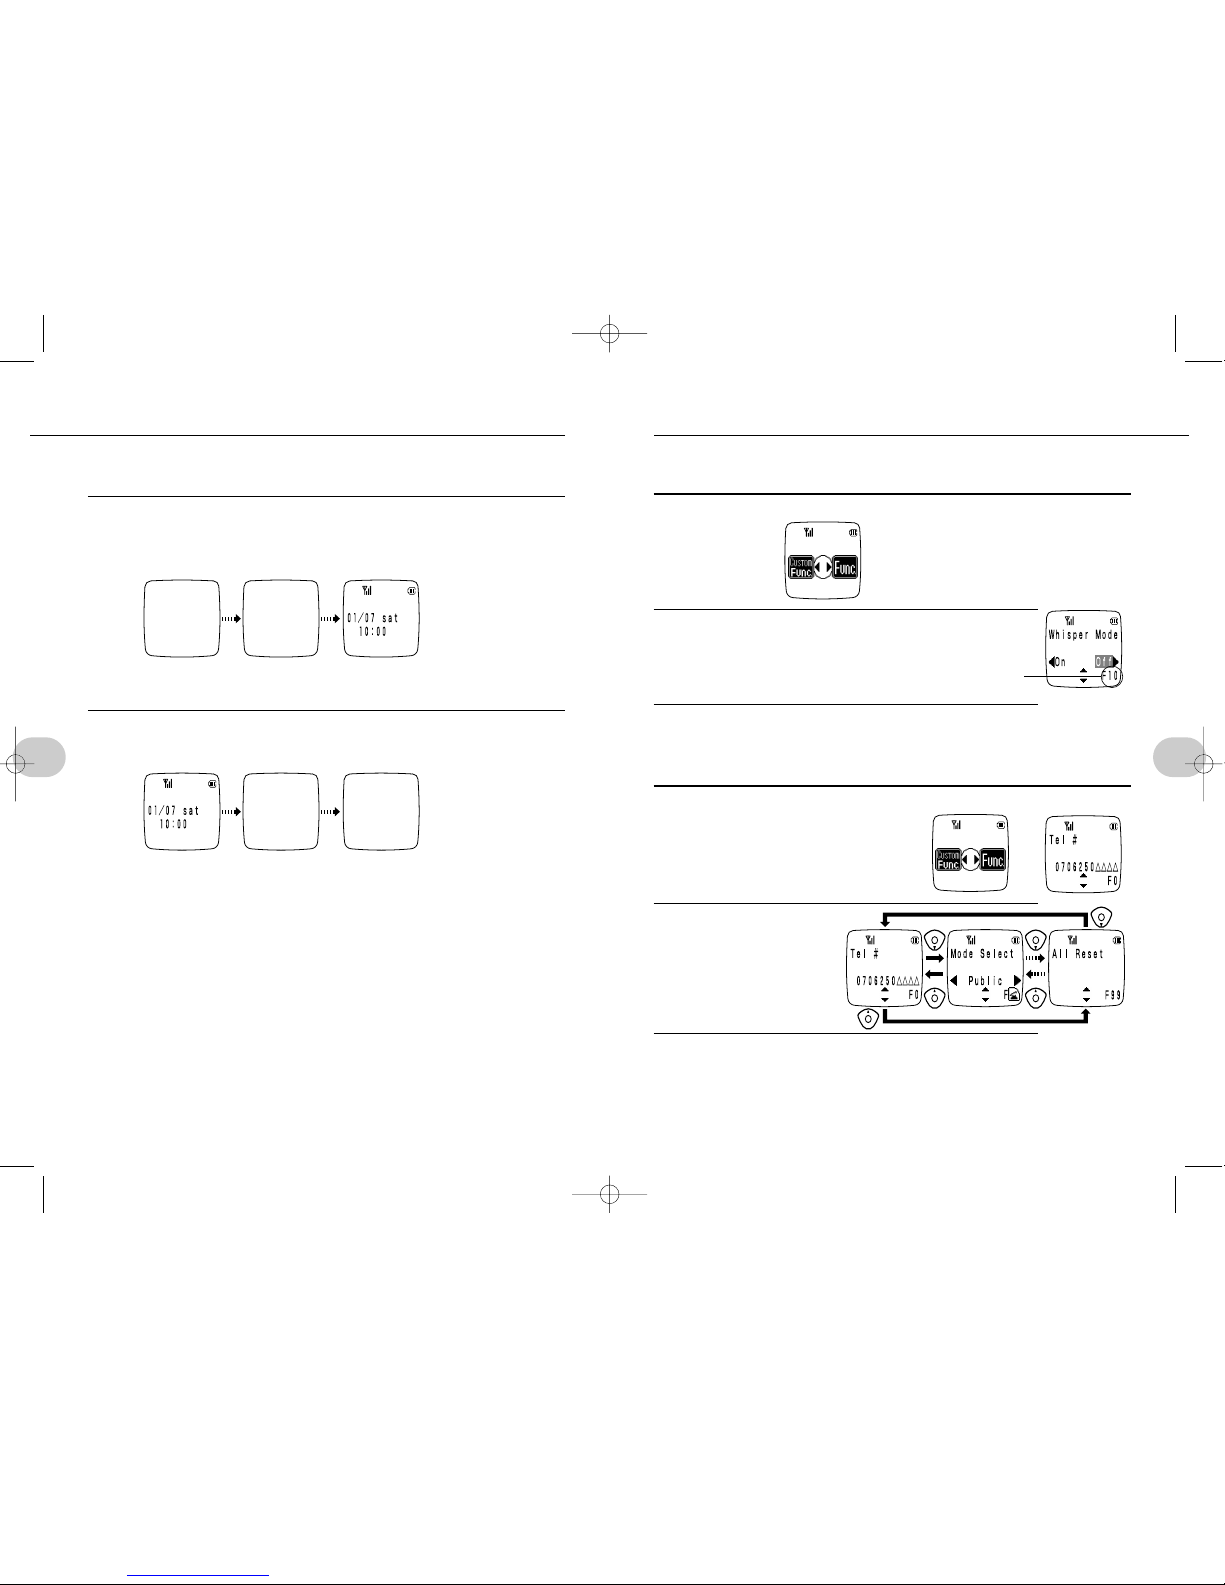
Functions can be selected directly by entering a number, or by searching from another function.
Direct selection by entering a number (ex.:F10, whisper mode)
1
Press e
2
Enter the number of the function.
ex.:1s0
3
Perform operations.
• Operation varies according to the selected function.
Search from another function
(ex.: F# functions)
1
Press esu
3
Perform operations.
• Operation varies according to the selected function.
• Custom F# functions can be accessed in the same way.
• Custom F# functions cannot be accessed until they are programmed.
See p.61.
2
[Select function.
27
2. Before using your phone
Always charge the battery before using the phone for the first time and when it has
been unused for an extended period.(p. 22)
Turning the power on
w(press and hold)
26
2. Before using your phone
SELECTING A FUNCTION continued to next pageTURNING THE POWER ON/OFF
• The backlight for the display and key will light for about 10 seconds.
NOTES
In the default mode
• “Wait Please” will flash when the power is turned on for the first time after
replacing the battery and being recharged. Information required for phone operation is being loaded into memory. The delay until the phone can be used will
vary with how much information has been stored.
function number
➔
Turning the power off
w(press and hold)
*SM-801 PHS/sec2(GB) 00.3.9 4:31 PM Page 26
29
2. Before using your phone
Quick scroll access (ex.:Select the whisper mode function)
1
Display functions[(press and hold)
• Display starts to scroll quickly.
2
Release
[
s Press e
• Scrolling stops. Select the top (highlighted) function.
• If you have gone too far, press
[ once to scroll back.
• If
e
is not pressed, the highlighted function will be automatically selected
after about 2 seconds.
3
Perform operations.
• Operation varies according to the selected function.
28
2. Before using your phone
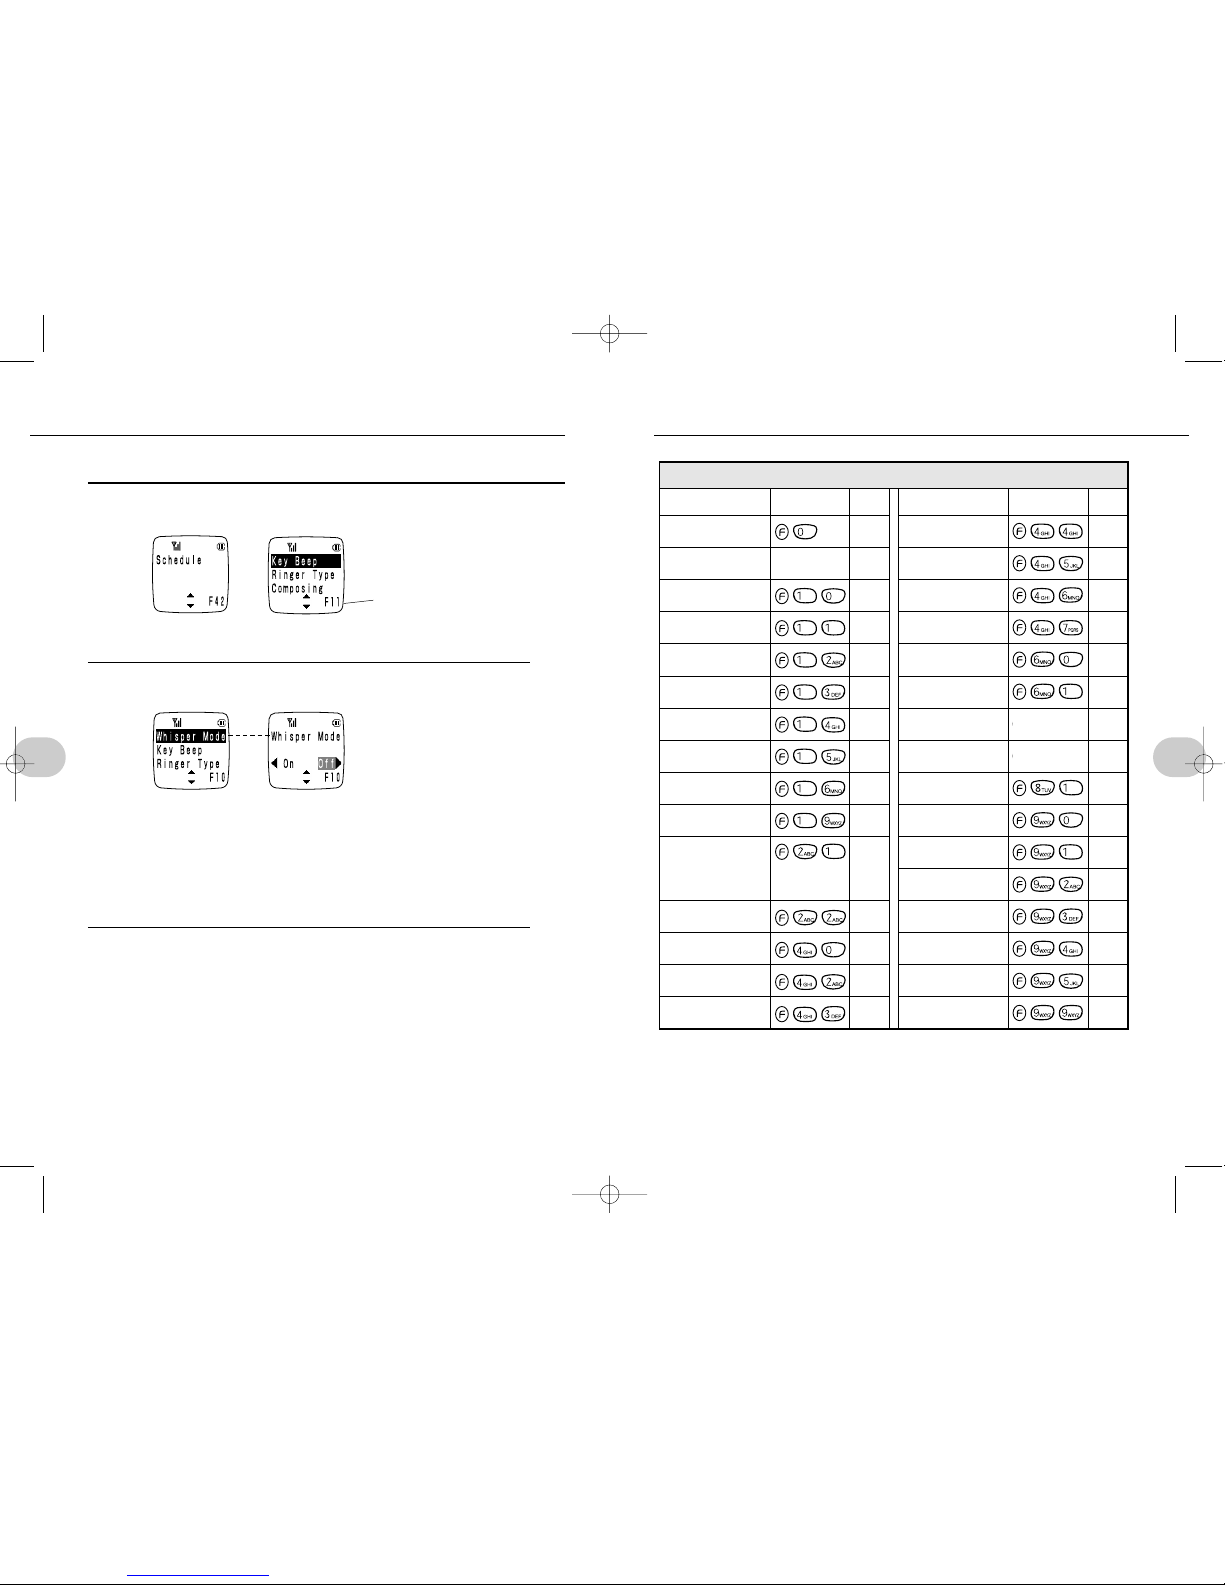
TABLE OF FUNCTIONSSELECTING A FUNCTION
➔
➔
Number of highlighted function
PageFunction Keys to press PageFunction Keys to press
Tel #
Mode Select
Whisper Mode
Key Beep
Ringer T ype
Composing
Ringer Vol.
Vibration
Vib. Call
Reset
Erase phone B.
(Erase all phone
book entries)
Secret Mode
Time/Date
Schedule
Alarm Adjust
33
38
49
31
56
57
55
53
54
108
89
93
35
68–70
74
75
71
72
67
36
37
102
107
34
76
77
77
30
60
78
111
Alarm
Memo Pad
Annivers.
( Anniversaries )
Calendar
Change Lock
Lock Phone
HBU Select
Cancel Remote
Caller ID
Calculator
LCD Contrast
BackLight
Animation
Manner Func.
Game
All Reset
F# functions
*SM-801 PHS/sec2(GB) 00.3.9 4:31 PM Page 28
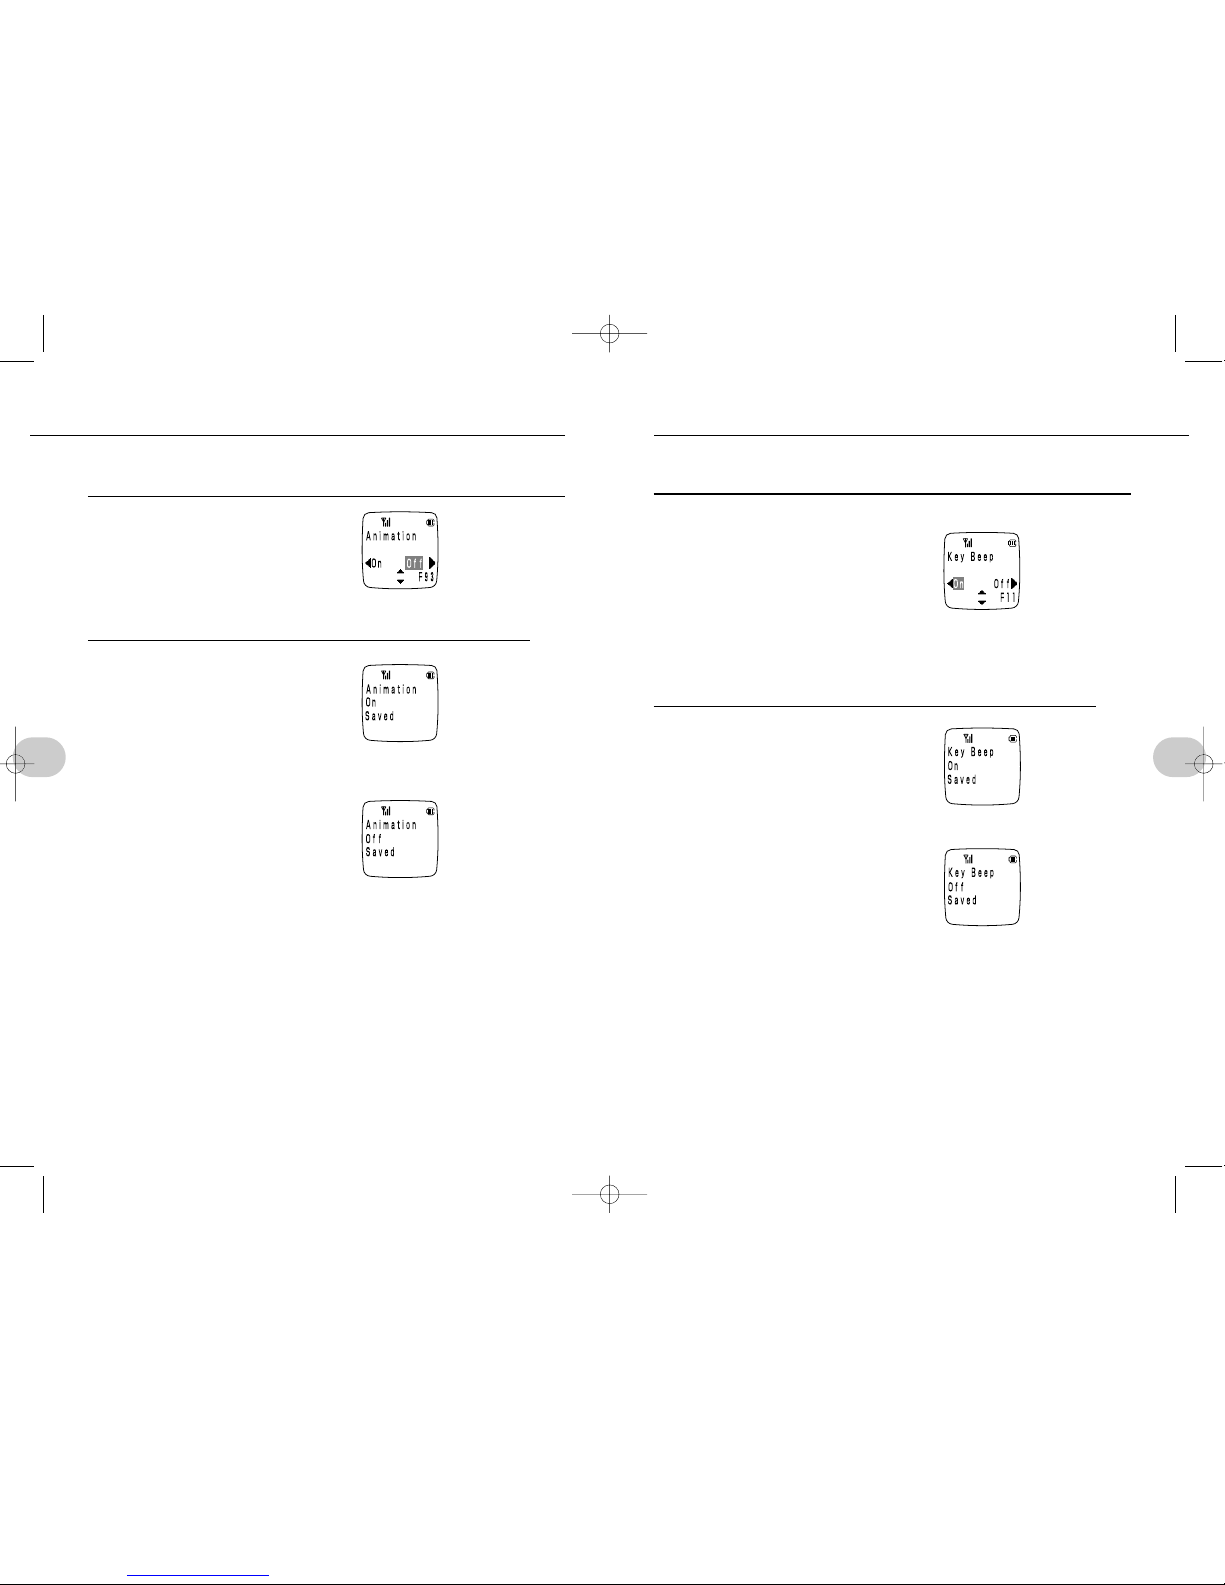
You can set the keys to beep or not to beep as they are pressed.
This function is turned on so the keys beep by default.
The current setting flashes.
1
Press es1s1
or esus[
• The current setting flashes.
2
Press o(On)
Press u(Off)
• When tur ned off, there is no audible confirmation that functions have been successfully set, that an error occurred, or the power was turned on.
• The following functions still beep when the key beep is turned off: low battery
alarm, all hold, ringer, alarms
31
2. Before using your phone
Animation is displayed when a call ends if the date and time have been set (p. 35).
Animation is turned off by default.
1
Press es9s3
or esus[
• The current setting flashes.
2
Press o(On)
Press u(Off)
30
2. Before using your phone
SETTING THE KEY BEEPANIMATION DISPLAY
*SM-801 PHS/sec2(GB) 00.3.9 4:31 PM Page 30
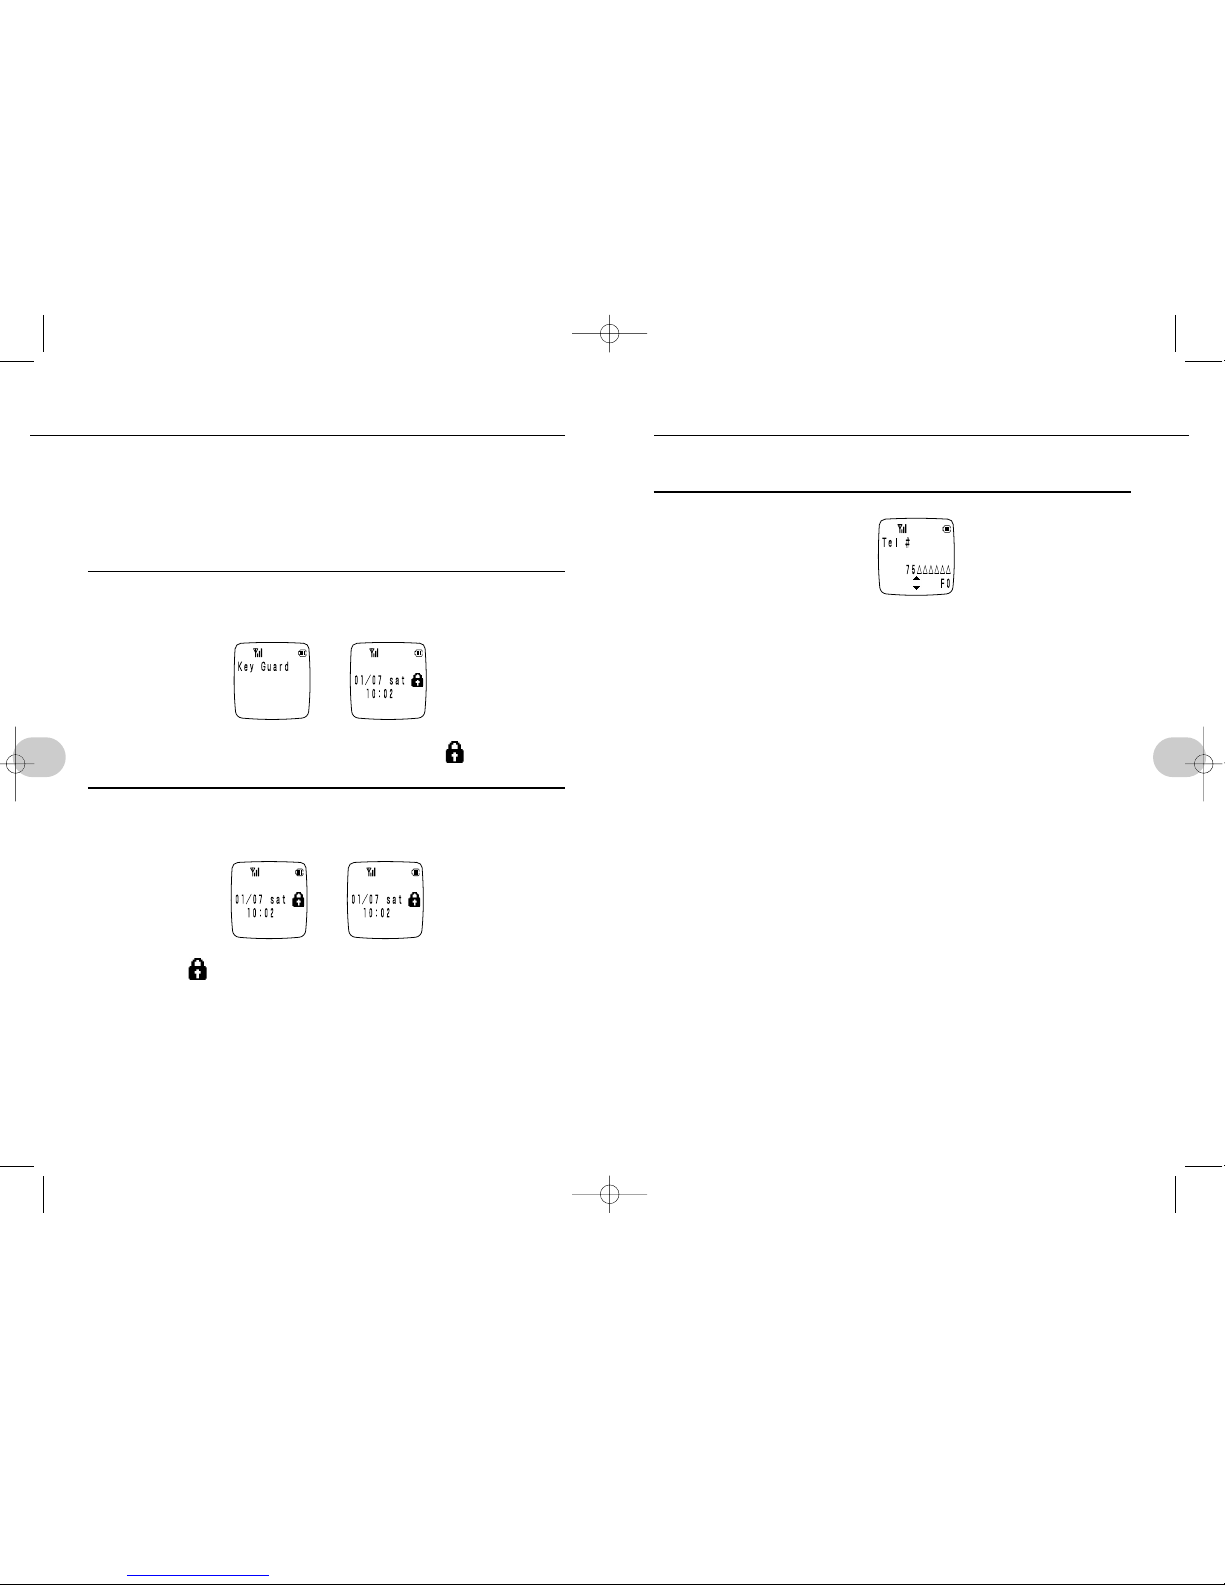
Display your own phone number.When the phone is in use, the number can be displayed by direct function selection only.
1
Press es0
or esu
NOTES:
• Selecting this function in the home mode still displays the public number.
33
2. Before using your phone
Prevent keys from working when in standby
• Calls can still be received when key guard is on.
All keys other than wand tfunction, and the phone can be removed from
the charger to answer a call, even when key guard is on.The key guard mode is
automatically resumed when the call ends.
Turn key guard on
1
Press e(press and hold)
• In the standby mode, press until Key_Guard is displayed. will be displayed.
Turn key guard off
1
Press e(press and hold)
• Press until goes out.
32
2. Before using your phone
➔
➔
CONFIRMING YOUR PHONE NUMBERSETTING KEY GUARD
*SM-801 PHS/sec2(GB) 00.3.9 4:31 PM Page 32

Once the date and time have been set, they can be displayed when in the standby
mode.The default date and time are January 1, 2000, 00:00.
• The date and time recorded in the redial log and incoming call log will be displayed once the date and time are set.
• The time and date must be set for the scheduler (p. 68), anniversary (p.72),
and alarm (p. 74) functions.
1
Press es4s0
or esus[
• If already set, the stored date and time will be displayed.
2
Press esEnter date and timese ex.: July 1, 2000, 12:30
1. Enter the last two degits of the year,month, day.
0
s0s0s7s0s1
2. Enter the hour and minute.
1s2s3s0
• To edit
Use
p or -= to move the cursor, and enter the date or time.
• If an invalid date or time is entered
An alarm will beep. Enter it again.
Date and time display
• Date and time are set. • Date and time are not set.
NOTES
• The date and time will be reset to the default values if the battery is removed
or completely discharged. Simply reset the date and time.
• The clock is accurate to within approximately 60 seconds a month at 25˚C.
35
2. Before using your phone
Your number is very important. Be sure to register it correctly.
Caller ID lets the party you call know who's calling.
This function is turned on by default.
1
Press es8s1
or esus[
• The current setting flashes.
2
Press o(On)
Press u(Off)
NOTES
• If the par ty you are calling does not have a phone with Caller ID, they will not
know who is calling even if this function is on.
34
2. Before using your phone
DISPLAYING TIME AND DATECALLER ID
➔
*SM-801 PHS/sec2(GB) 00.3.9 4:31 PM Page 34

The phone lock feature lets you prevent unauthorized callers to use your phone by
requiring your lock code to dial. Calls can still be received without the lock code.
The phone lock feature is off by default.
Phone lock
1
Press es6s1
or esus[
2
esEnter the lock code.
• appear in sequence from the r ight.
3
Press 1 (Lock)
• Press 0 or w to cancel and retur n to 1
Cancel phone lock
1
Enter the lock code.
• appear in sequence
from the right.
NOTES
• If the phone lock is turned on....
Lock_Phone and appear on the display.
• If a call comes in when Lock_Phone is on...
Lift the phone from the charger socket, or press any key except
wt
to
answer.Lock Phone will not be cancelled when the phone is hung up.
• Lock_Phone takes precedence over the anniversary (p. 72) settings.
• If you enter the wrong number...
This display appears and the standby mode resumes.
37
2. Before using your phone
Set the four digit lock code to your favorite code.This code is used for the following
functions: phone lock (p.37), erase all phone book entries (p.89), secret mode (p. 93),
reset (p.110), and reset all (p. 101).
The lock code is factory set to 3210.
• When you change the Lock Code, be sure to write it down somewhere so you
don't forget it.
1
Press es6s0
or esus[
2
Press esEnter the current 4-digit Lock code.
3
Enter the new 4-digit Lock code.
• appear in sequence from the r ight.
4
Re-enter the new 4-digit Lock code.
• appear in sequence from the r ight.
NOTES
• If you forget your lock code...
All functions that require the lock code (phone lock, erase all
phone book entries, secret mode, reset, and reset) will be inaccessible. If this happens, take your phone together with your
service agreement or contract and personal identification to
your dealer.
• If you enter the wrong number...
This display appears and the standby mode resumes.
36
2. Before using your phone
PREVENTING SOMEONE TO USE YOUR PHONE (LOCK PHONE)
SETTING AN LOCK CODE
➔
➔
➔
➔
➔➔
➔➔
*SM-801 PHS/sec2(GB) 00.3.9 4:32 PM Page 36

Setting the operating mode
Any of five modes can be selected as desired.
1. Public; 2. Home; 3. Trn (transceiver); 4. Home/Pub.; 5. Pub./Trn.
1
Press esq
or esus[
• The current setting flashes.
• ts is not displayed if only the public number is set.
2
Select the desired mode with p, and press e.
• Select the desired mode directly with 1-5
Public mode: ..........
1
Home mode: ..........2
Trn. mode: ..............3
Home/Pub.mode: ..4
Pub./Trn. mode: ......5
NOTES
• If not registered as an extension phone...
Home, Tr n, Home/Pub, Pub/Trn will not be displayed.
• The standby mode time is shor ter in the Trn, Home/Pub, and Pub/Trn modes
than in the Public mode.
38
2. Before using your phone
SETTING THE USAGE MODE
When set to the
public mode
*SM-801 PHS/sec2(GB) 00.3.9 4:32 PM Page 38

39
PLACING A CALL continued to next page
Example: Dial: 900-9888
1
Enter the number to dial.
• BE SURE TO INCLUDE THE AREA CODE.
Mistakes can be corrected as follow.
t (press) Deletes the last digit.
t (press and hold) Deletes the entire number.
• DIALING AN ISDN TERMINAL
phone number s
- s subaddress s q
This sequence will dial a specific ISDN terminal. (Note that the specific operation may vary with the ISDN equipment used.)
2
Press q
• The number dialed will scroll across the screen.
• If Caller ID is tur ned off, the called party's number will not be displayed while
talking.
3
Talk
4
Hang up.
• The standby mode is resumed after displaying the time connected.
3. BASIC OPERATIONS
• In Use and the approximate time connected are displayed.(Not displayed in
the home mode.)
*SM-801 PHS/sec3(GB) 00.3.9 4:52 PM Page 39

Select the best possible reception, even while talking on the phone.
In standby mode
1
In standby mode s (press and hold)
• Power_Search will flash on the display.
• The standby mode resumes when done.
While on the phone
1
When the phone is in use spress
• Continue talking when done.
• Power_Search can be attempted 3 times during any single connection.
NOTES
• Power Search disables all keys.
• Depending on reception conditions, Power Search may have no effect on signal reception.
• If transmission signals are weak...
You may be out of the service area even after Power Search.
41
3. Basic operations
IF THESE SCREENS APPEAR (using the Public mode)
40
3. Basic operations
PLACING A CALL
SELECTING THE STRONGEST SIGNAL (POWER SEARCH)
Dialing an
unused number.Call the
correct number.
Circuits are
busy.Try again
later.
The number
dialed is busy.
NOTES
• Dialing when Warning is displayed will cause a "Out of Use" error to be displayed and a beep will sound.Display will be returned to the original screen.
• If sending a tone signal to operate a pager or remotely operate your answering
machine, you must be where signal reception is stable.
• Calls can also be dialed by pressing qfirst and then dialing the number.This
method may take a little longer to call the party.
DIALING EMERGENCY NUMBERS: XXXXXXX
1. Stop and stand still when dialing.
Moving while talking could cause the call to be dropped. Stop and stand still
when calling for help.
2. Tell the operator that you are calling from a mobile phone.
If you don't know where you are, identify some nearby landmarks or ask some-
one first before calling.
3. Don't turn the power off after hanging up.Wait for help.
The operator may call you back. Wait at least 10 minutes.
4. If you don't know where you are, call from the nearest pay phone.
➔
➔➔➔
The Power Search button
is on the side.
*SM-801 PHS/sec3(GB) 00.3.9 4:52 PM Page 40

Dialed numbers are logged in sequence together with the date and time the call was
placed. Numbers in this redialing log can be easily redialed. Numbers stay in the log
when the phone is turned off.
•
Up to ten numbers can be kept in the redial log (including the number memo pad (p.47)).
•
Numbers can also be redialed by pressing qand then following the sequence below.
Reminder: The date and time must first be set (see p.35) to use this feature.
Redial a number
1
Press y
•
Numbers are displayed in sequence from the last number dialed.
• If no numbers are in the Redial No Data will be displayed and
the standby mode will resume.
• The cursor arrows will not be displayed if there is only one
number in the log.
2
Press
[
to display the number to redial.
•y: displays numbers from oldest to most recent
i: displays numbers from most recent to oldest
• If a number is also in your phone book, the name will be
displayed.If the same number is entered twice in the
phone book, one of the names will be displayed.
• If a number is also in your secret phone book, only the
number will be displayed.
3
Press q
• The displayed number is dialed.
• Press r to transfer and store the number in the phone
book (p.84).
NOTES
•
The same number will not be stored twice in the redial log.
A number is stored only once in the log together with the date and time the
number was last dialed.
• Maximum 32 digits per number
If a number is in the phone book, a name and up to 12-digit number will be
displayed.If a number is not in the phone book, numbers in the redial log can
have up to 24 digits.For longer numbers, press
p either way to display all
digits; press it again to return to the previous display.
43
3. Basic operations
The ringer will sound and the display will flash when a call is received.
1
Call is received.
2
Press qand talk.
• In Use and the approximate time connected are displayed.
• In Use and the approximate time connected are not displayed
in the home mode.
• If the phone is in the charger socket, simply remove the phone
from the socket to answer a call.
3
To hang up w
• The standby mode resumes.
• The phone will be also hung up automatically
when it is returned to the charger socket.
When a call is received from;
• The caller who is on your phone book
• The caller who has caller ID turned on
• If the name in the entry has 12 or more letters, the phone number will not be displayed.The same number can also be stored
several times.In this case, only one of the names will be displayed.
IF THE CALLER IS NOT IN THE PHONE BOOK, OR IS IN
YOUR SECRET PHONE BOOK
• If the caller has Caller ID turned off
NOTES
• When the phone rings
Press any key except
w
and rto answer the phone immediately. If the
phone is not answered, Missed_Calls will be displayed.Refer to the incoming
calls log to see who called. (p.45)
• If the number dialed from exceeds 12 digits
The last 12 digits of the received number will be displayed.
• If the phone rings while composing a melody
The composition will be saved to that point. You can resume composition after
completing the call.
42
3. Basic operations
ACCEPTING A CALL REDIALING continued to next page
Indicates the
time connected.
*SM-801 PHS/sec3(GB) 00.3.9 4:52 PM Page 42

45
3. Basic operations
Deleting numbers from the redial log
1
Display the number to delete.
s
t
(press and hold)
• Press t to delete the last digit of the displayed number.
2
o(to delete one number)
• When numbers are deleted one by one
The standby mode resumes when the last number in the redial
log is deleted.The next number in the log is otherwise displayed.
u(to delete all numbers)
• When all numbers are deleted
The standby mode resumes after deleting all numbers in the
redial log.
NOTES
• If more than 10 numbers are dialed (including number memos), the oldest
number will be deleted.
• Maximum 32 digits per number
If a number is in the phone book, a name and up to 12-digit number will be
displayed.If a number is not in the phone book, numbers in the redial log can
have up to 24 digits.For longer numbers, press
p either way to display all
digits; press it again to return to the previous display.
• Numbers can be transferred from the redial log to the phone book (p. 86).
If a name is changed in the phone book, the redial log is also changed to
reflect the new name.
44
3. Basic operations
REDIALING
DIALING FROM THE INCOMING CALLS LOG (continued to next page)
Incoming calls are also logged in sequence together with the date and time the call
was received.Numbers in this incoming calls log can be easily called back. Numbers
remain in the log when the phone is turned off.
• Up to ten numbers can be kept in the incoming calls log.
• Numbers can also be called back by pressing qand then following the sequence
below.
Reminder: The date and time must first be set (see p.35) to use this feature.
Call a number from the incoming calls log
1
Press i
• Numbers are displayed in sequence from the last call received.
• If no numbers are in the IncomingCall No Data will be displayed and the standby mode will resume.
• The cursor arrows will not be displayed if there is only one number in the
log.
2
[s to display the number to redial.
•y: displays numbers from oldest to most recent
i: displays numbers from most recent to oldest
• : indicates a call was answered by the user
: indicates the call was not answered
• If Caller ID was on and the caller is in your phone book, the caller's name will
be displayed.If the same number is entered twice in the phone book, one of
the names will be displayed.
• If Caller ID is on and the caller is either not in your phone book or is in your
secret phone book, only the number will be displayed.(When the secret
mode is off)
If the caller has
Caller ID turned off
*SM-801 PHS/sec3(GB) 00.3.9 4:52 PM Page 44

3
Press q
• The displayed number is dialed.
• Press r to transfer and store the number in the phone
book (p. 86).
Deleting numbers from the incoming calls log
1
Display the number to delete s t
2
Presso(to delete one number)
Pressu(to delete all number)
Note:
• If a call comes in but is not answered
The display shown at right will be presented in the standby mode.
Press i to check the incoming calls log, or press w,t to
clear the screen. Check who called in the incoming calls log.
• The same number will not be stored twice in the incoming
calls log.
A number is stored only once in the log together with the date and time a call
was last received from that number.
• If a number is stored with multiple names.
Only one name will be displayed.
• If more than 10 numbers are dialed (including number memos).
The oldest number will be deleted.
• Maximum 32 digits per number
If a number is in the phone book, a name and up to 12-digit number will be
displayed.If a number is not in the phone book, numbers in the redial log can
have up to 24 digits.For longer numbers, press p either way to display all
digits; press it again to return to the previous display.
• Numbers can be transferred from the redial log to the phone book (p. 86).
If a name is changed in the phone book, the redial log is also changed to
reflect the new name.
46
3. Basic operations
A quick memo of up to 32 digits containing a phone number and other numbers can
be stored while talking.The contents of this quick memo log are stored even if the
power is turned off.This quick memo log and the redial log together can contain up to
ten entries (p. 43).
Reminder: The date and time must first be set (see p.35) to use this feature.
Take a memo
1
While talking o
• To stop, press o.
2
Enter a number.
• The following keys will be stored:
0 to 9, -, =, r(P).
To delete one digit: press
t.
To delete all digits: press and hold t.
3
Press o
• In Use is displayed again.
To view a memo
Pressys[sdisplay the desired memo.
• If an entr y contains more than 12 digits,
press
u
to display all places.
NOTES
•rcannot be pressed to enter a pause (P) as the first digit in a number.
• If 25 or more digits are entered
The entered sequence will be displayed as shown here.
• If more than 10 numbers are logged (including the redial log)
The oldest number will be deleted.
• While “Number Memo” is displayed
A call cannot be placed on hold by
t
.
The memo will be stored when w is pressed to return to the standby mode.
47
3. Basic operations
STORING A NUMBER WHILE TALKING (NUMBER MEMO)
➔
DIALING FROM THE INCOMING CALLS LOG
*SM-801 PHS/sec3(GB) 00.3.9 4:52 PM Page 46

You can talk in a whisper while the other party hears you as usual.The whisper
mode is turned off by default.
To answer all calls in the whisper mode
1
Press es1s0
or esus[
2
Select o…“On”
Select u…“Off”
To switch to whisper mode while talking
1
While talkingsesq
• Turns whisper mode on
• To cancel…
Press e and q again.
NOTES
• When whisper mode is on, you can hear the other par ty's voice as usual.
49
3. Basic operations
The other party will hear a hold signal when placed on hold.
1
While talking st
• A hold tone will be sent to the other par ty
and the call will be placed on hold.
• In Use and the time connected will not be
displayed when in the home mode.
2
While on hold stq
• Cancels hold. Resume talking.
EAR SPEAKER VOLUME
The earphone volume can be set to one of three levels. The setting is retained when
the power is turned off.The default setting is the second (medium) level.
1
Press[While connected
When set to medium
2
Press[to adjust
• The current setting will be displayed
48
3. Basic operations
PLACING A CALL ON HOLD WHISPER MODE
➔
➔
➔ ➔
LowMediumHigh
*SM-801 PHS/sec3(GB) 00.3.9 4:52 PM Page 48

Speaker volume can be adjusted to one of three levels while talking in the handsfree/speaker monitor mode.The volume is always set to low when switching into the
hands-free mode
1
While using the hands-free mode or
speaker monitor mode
2
Press [to adjust
51
3. Basic operations
Carry on a conversation without holding the phone.
Convenient when you need to do something else at the same time.
You can also hear the other party through the rear speaker.
Turn the hands-free mode on
1
While talkingsQ(press and hold)
• The volume is set to low whenever switch-
ing to the hands-free mode.
• To cancel the hands-free mode…
After pressingQto enter the hands-free mode,
press and holdQto cancel and return to the normal hands-on mode.
Using the speaker to listen
1
While talking sQ(press and hold) to select hands-free
sQ(press and hold) to select speaker
• Hands-free must be
selected before selecting speaker monitor.
• To cancel speaker
monitor mode:
Press and hold Qto resume the normal hands-on mode.
The other party cannot hear you when in the speaker monitor mode.
NOTES
• The out-of-area and low battery war ning alar ms may not be heard when in the
hands-free mode.
• The whisper mode (p. 49) cannot be selected from the hands-free mode and
speaker monitor mode.
• Talking in the hands-free mode
Voices are not transmitted in both directions when in the hands-free mode.
Wait for the other party to stop talking before speaking, and the conversation
will go more smoothly.If you speak while the other party is still talking, speaker
output will be broken up and you may not hear the other party.
• In noisy surroundings…
It may be difficult to hear the other party. The hands-free mode is best in quiet
surroundings.
50
3. Basic operations
HANDS-FREE CALLING, USING THE SPEAKER PHONE
ADJUSTING THE SPEAKER PHONE VOLUME
➔
➔ ➔
➔
LowMediumHigh
*SM-801 PHS/sec3(GB) 00.3.9 4:53 PM Page 50

When the vibrating ringer is turned on, the phone will vibrate to let you know the
phone is ringing.The vibrating ringer is turned off by default.
1
Press es1s5
or esus[
2
Select o…“On” (Vibrating ring)
Select u…“Off”
NOTES
• When the vibrating ringer is on…
V is displayed in the standby mode.
• To turn the audible ringer off…
Set the ringer volume to off (p.55).
• When the phone is in the charger socket
The ringer will not vibrate even when the vibrating ringer is turned on.The
ringer will sound audibly at the volume setting. If the ringer volume is turned
off, it will ring at the medium volume level.
• If the vibrating ringer is turned off and the ringer volume is turned off, the
ringer will neither vibrate nor sound audibly when a call comes in.
53
3. Basic operations
52
3. Basic operations
A digital headset (sold separately) can be connected to the headset jack to talk without holding the phone. Particular ly convenient when you must use both hands while
using the phone.
Connecting a headset
1
Plug the headset into the jack.
NOTES
• If you select the hands-free mode or speaker monitor mode while a headset is
plugged in (p.50)
You will not be able to hear anything through the headset.
• Analog headsets should not be used and may not work properly.
• The r inger is heard only from the phone and not through the headset.
• The headset jack is compatible with three-terminal headset plugs only.
Analog modems and audio equipment cannot be used through the headset
jack.
• Headsets with switches may be used but the switches will not be operative.
USING A HEADSET USING THE VIBRATION RINGER MODE
*SM-801 PHS/sec3(GB) 00.3.9 4:53 PM Page 52

Adjust the ringer volume.The setting is retained when the phone is turned off. The
ringer volume is set to medium by default.
1
Press es1s4
or esus[
• The current setting is displayed.
2
Press es
p
to
select the volume.
What is sliding volume?
The ringer volume gradually
increases or decreases,
depending on the setting.
3
Press eto set.
When set to High.
NOTES
• When the ringer volume is turned off…
S will be displayed when in the standby mode.Incoming calls
will be indicated by a flashing e button and backlight display,
or by a Vibration (if turned on, see p.53).
• Confirm the ringer volume.
Check the ringer volume using the ringer type selection (p.56).
• The ringer volume setting will also be used for the scheduler (p. 70) and alarm
clock (p.74).
55
3. Basic operations
The phone will vibrate for approximately 0.5 second when you place a call and the
other party answers.This mode is turned off by default.
1
Press es1s6
or esus[
2
Select o…“On” (Phone vibrates.)
Select u…“Off”
NOTES
• Depending on the type of phone used by the other par ty, there may be a brief
pause between when the phone vibrates to indicate he/she has answered the
phone, even if the Vib.Call mode is turned on.
54
3. Basic operations
USING THE CALL-ANSWERED VIBRATION MODE
RINGER VOLUME ADJUSTMENT
Low
Off
Sliding volume Sliding volume
Medium High
*SM-801 PHS/sec3(GB) 00.3.9 4:53 PM Page 54

Compose up to ten of your own ringer melodies.
• A melody can contain up to 255 notes with eight different tempos.
• After composing a melody, you must select as the ringer type (see p. 56) to
use it for the ringer.
Compose a ringer melody
1
Press es1s3
or esus[
2
esIf no ringer melodies have been composed s step 3
sIf in the middle of composing a melody
(for example, if the phone rang while composing
a melody, or if composition was interrupted in step 4
by pressing w)
1: “Continue” (read melody) s step 4
0: “Erase” (delete the melody being composed)s step 3
3
Press
[
sSelect the number of the melody (press rto
play the selected melody)s
e
57
3. Basic operations
Select the type of ringer used to signal incoming calls from among six different patterns, six melodies, and up to ten melodies that you can compose.The selected
ringer type is used in public and home modes. Pattern 1 is the default ringer type.
1
Press es1s2
or esus[
• The current setting is displayed.
2
Press es]to select the ringer type.
• p has no effect if no custom
melodies have been composed.
• The selected ringer pattern or
melody is played twice.
Press ] while a melody is playing to hear another ringer type.
• When the ringer volume is set to
sliding volume ↑, the ringer will
sound once each at low, medium,
and high volume.
• When the ringer volume is set to
sliding volume ↓, the ringer will
sound once each at high, medium,
and low volume.
3
Press eor wto save the setting.
• The setting will be saved even if the key is pressed after the
ringer stops.
NOTES
• Types of patterns
Patterns 1 to 6
• Types of prerecorded melodies
Radetzky March
Farandole
Dance of the Four Swans
Ode T o JO Y
Bolero
Saints Go Marching In The
56
3. Basic operations
SELECTING THE RINGER TYPE
COMPOSING A RINGER MELODY
(continued to next page)
Pattern or melody
Your own composition
*SM-801 PHS/sec3(GB) 00.3.9 4:53 PM Page 56

6
Enter title se
See p.63 to 66 for how to enter text.
• Up to 24 letters can be entered.
NOTES
• If a melody is selected as the ringer type and then deleted…
Ringer pattern 1 will be automatically selected as the ringer type.
• If the phone rings in the middle of composing a melody…
The composition is saved as you write it.See page 57, step 2, for how to
resume composing.
• Press
1 or 0 while reading a melody and it will be deleted.
59
3. Basic operations
4
Select a note and its length.
ex.: To select q Press 3 times the 3.
s is added.
w 1once. sCwill be added.
ex.: Add a dot q Press once the
1. s
C
is added.
w Press 9 s - once
An 1/8 note will be added.
Repeat this procedure to add other notes.
Refer to the table on the next page.
NOTE:
• The first note cannot be a rest.
• The score will scroll up one line when more than 18 notes are written, but you
can continue adding notes.
• To undot a note, move the cursor to the dotted note and press 9.
5
Press rto play, then press [to select
tempo.
s e to save
• Select from eight different tempos.
58
3. Basic operations
COMPOSING A RINGER MELODY
➔
TABLE
*SM-801 PHS/sec3(GB) 00.3.9 4:53 PM Page 58

A group of functions that you use frequently can be stored as a custom function for
quick, easy access.A maximum of 20 custom functions can be programmed.
• Functions can be selected from the F# functions.
Program a custom function
1
Display functions from the F# menu.
ex.: Select ringer type
2
Press rse
• The lowest unused custom function number will be automatically selected.
• Up to 20 custom functions can be programmed.
• If a previously saved custom function is selected
The following display is presented.
1: Displays the number of the custom function.Enter a
new function number to change the number of the
custom function.
0: Return to the selection screen.
61
3. Basic operations
By adjusting the manner mode settings, you can quickly and easily adjust the key
beep, Vibration, answered-call vibrator (Vib.Call), and ringer volume settings. There
is only one group of manner mode settings.
Manner function setup
1
Press es9s4
or esus[
2
Press es[sTo select each function (p)
3
Press e
To use and cancel manner mode settings
1
Press es
• Use the same procedure to cancel manner mode settings.
60
3. Basic operations
➔
➔
USING THE GOOD MANNERS FEATURES
USING CUSTOM FUNCTIONS
continued to next page
*SM-801 PHS/sec3(GB) 00.3.9 4:53 PM Page 60

Access and cancel functions using a custom function
1
Press eso
2
[select the function which you would like to use.
1: Clear the custom function and return
to the custom function selection
screen. If the last custom function is
cleared, the standby mode is
resumed.
0:To cancel clearing a custom function,
simply return to the custom function
selection screen.
62
3. Basic operations
USING CUSTOM FUNCTIONS
➔
To clear a custom function,
select the custom function to clear,
and then press t.
*SM-801 PHS/sec3(GB) 00.3.9 4:53 PM Page 62

63
4. CONVENIENCE FEATURES
Press Rto change the text input mode.
Character input key list
SWITCHING INPUT MODES
1
2
3
4
5
6
7
8
9
0
*SM-801 PHS/sec4(GB) 00.3.9 5:04 PM Page 63

65
4. Convenience features
Copy, cut, and paste functions are provided for convenient editing during text input.
• Copy: Copies the selected text.
Ex: “ABCDEFG” ➔ “ABCD ” ➔ “ | ABCDEFG” ➔ “EFGABCDEFG”
• Cut: Copies and deletes the selected text.
Ex: “ABCDEFG” ➔ “ABCD ” ➔ “ | ABCD” ➔ “EFGABCD”
• Paste: Inserts the text stored by the Copy or Cut functions at the designated position.
• Only one text string can be stored by the Copy and Cut functions. Previously stored
text is deleted each time they are used.
• The maximum number of characters that can be stored differs depending on the text
input application.
Copy and Paste
1
Use the ]key to position the cursor at the
start of the first character of the text string that you
wish to copy.
2
Press =s u(]) to specify the rang e of text to
copy.
• Press either =or wto cancel the
editing function and return to normal text
editing.
3
Press 1(copy), then ]to move the cursor to the position where you want to paste the copied text.
• After the text is copied, you are returned
to normal text editing.
EFG
EFG
USING THE COPY, CUT, AND PASTE FUNCTIONS (continued to next page)
64
4. Convenience features
◆Character entry by number of key pushes
Example: If the button that you are pressing is 2.
◆Alphabetic input
Example: To input "Dog"
ENTERING TEXT
◆Numeric input
Example: To input "12345"
◆Character deletion and insertion
Example: To change "SAMACYO" to "SANYO"
• In the case of numerical input, the number that you input is set as soon as you
press the relevant number button, and subsequent presses inputs the number
again.
• The number is set as soon as you press the button.
Copy
Cut Paste
Paste
➔
➔
*SM-801 PHS/sec4(GB) 00.3.9 5:04 PM Page 64

66
4. Convenience features
4
Press =s 3(paste)
• After the text is pasted, you are returned
to normal text editing.
Cut and Paste
1
Use the
]
key to position the cursor at the
start of the first character of the text string that you
wish to cut.
2
Press =s ]to specify the rang e of text to cut.
• Press either =or wto cancel the
editing function and return to normal text
editing.
3
Press 2(cut), then
]
to move the cursor to the position
where you want to paste the cut text.
• After the text is cut, you are returned to
normal text editing.
4
Press =s 3(paste)
• After the text is pasted, you are returned
to normal text editing.
Display the calendar for a specific month and year.
The valid range for the calendar function is January 1900 to December 2099.
1
Press es4s7
or esus[
2
Press e. Example:
• If a time and date have been set (P35),
the current month is displayed.
• If a time and date have not been set, the calendar
for January 2000 is displayed.
3
Use
p
to move the cursor and input the year and
month, then press e.
DISPLA YING THE CALENDAR
➔
u: displays the calendar for the
next month
o: displays the calendar for the
previous month
i: displays the calendar for the
same month of the following
year
y: displays the calendar for the
same month of the previous
year
• If you input a year that is out of the allowed range, or input an invalid month or
year, input again.
67
4. Convenience features
➔
➔
➔
➔
USING THE COPY, CUT, AND PASTE FUNCTIONS
*SM-801 PHS/sec4(GB) 00.3.9 5:04 PM Page 66

68
You can use the Scheduler function to sound a 30-second alarm and display a message at a specified time.
• Up to three events per day, and a total of 20 events can be scheduled.
• Schedules can be set up to one month in advance from the date of setting.
• The alar m stops automatically after 30 seconds. Press any key to stop the
alarm manually.
• Pressing either
q
or twill clear the message from the display and memo-
ry after 60 seconds.
• The date and time (P35) must be set in order to use the Scheduler function.
1
Press es4s2
or esus[
2
Presse eand use
]
to move the cursor to the mark for the
event that you want to schedule, and then press eagain.
• To register a new schedule:select space.
• To edit an existing schedule:select the mark that you want to change.
USING THE SCHEDULER
➔
Scheduled events
Cursor
• Marks for existing scheduled events are displayed.
• Up to three events can be scheduled per day, and they are displayed in order
of occurrence from the left.
• It is not possible to schedule multiple events for the same time.
3
Input the message and then press e.
• If 20 events have already
been scheduled, the message shown on the right is
displayed and you are
returned to step 1.
• If the data already exists, it is displayed.
• The message can be up to 24 characters in length.
<REF>Entering text (P63 to 66)
69
4. Convenience features 4. Convenience features
4
Use ]to select a mark, then press e.
(use 0to 9, =or -for direct selection)
• If the data already exists, the selected mark will flash.
• The mar ks provide a convenient means of distinguishing between events.
5
Press e, set the time, and then presseagain.
➔
The name for the selected
mark is displayed
NOTE
• If a call is in progress when the time for a scheduled event arrives:
The alarm sounds and the message for the scheduled event is displayed when
you finish the call.
• If several schedules are set close together, and call is in progress at the
times set for them:
The schedules are displayed in order of occurrence from the left.
(e.g. if the schedule times are set for 11:00 and 11:01)
• If the power is off:
The schedule is not displayed.
If the set time for a schedule elapses while the power is off, the schedule is
automatically erased on the following day.
• Alarms:
– The alarm volume is as adjusted in the ringer volume (P55).
– If the volume is set to "Off", the alarm does not sound.
– It is possible to set the ringer volume to "OFF" and receive alarm notification
by setting the vibrator to "On" (P53). If the telephone is in the charger unit in
the case of the above setting, the alarm will sound at the "Middle" volume
setting.
• If the date/time is modified after setting a schedule:
Be aware that this can cause schedules to be shifted or erased.
*SM-801 PHS/sec4(GB) 00.3.9 5:04 PM Page 68

The memo pad is a convenient way to store information (e.g. train schedules etc.). Up
to 5 memos, 72 characters can be entered for each memo.
Entering and viewing memo pad items
1
Press es4s5
or esus[
2
Press es ]s
[to display the memo]
3
[Select the number of the memo that you wish to input]
spress es [input the text] spress eagain.
• Up to 72 characters can be entered for each memo.
<REF>Entering text (P63 to 66)
Deleting memos
1
[Select the number of the memo that you wish to delete] spress
tspress 1to delete
• Press 0 to cancel the operation and return to the memo selection screen.
70
Viewing and deleting schedules.
◆Viewing schedules
1
Press es4s2or esus[
2
Press e, and use ] to select
the mark for the schedule
you wish to view.
3
Press eto display the message.
4
Press eto display the marks.
5
Press eto display the setting time.
◆Deleting schedules
1
Press eto display the message (as followed in step 1~3), then
press and hold down tuntil the message is cleared, and then
press eagain.
VIEWING AND DELETING SCHEDULED EVENTS
➔ ➔
➔
➔ ➔
➔ ➔
71
4. Convenience features 4. Convenience features
USING THE MEMO PAD
*SM-801 PHS/sec4(GB) 00.3.9 5:04 PM Page 70

5
Use pto select a mark.
(use 0 to 9, = or - for direct selection)
• If the data already exists, the selected mark will flash.
• The marks provide a convenient means of distinguishing between anniversary
events.
ANNIVERSARY MARKS
6
Press e
Deleting an anniversary event
1
Use the procedure in step 2 to select the anniversary that you wish
to delete, and then press tthen 1to delete it.
• Press 0 to cancel the operation and return to the anniversary selection
screen.
• When entering the text in step 4,, you can delete all text by pressing and holding t until the text is deleted, and then pressing e.
72 73
4. Convenience features 4. Convenience features
You can store up to 10 important anniversary events (birthdays etc.).When the day
specified for an anniversary event arrives, the message set for it is displayed during
standby mode for the period of that day.
Reminder: The date and time (P35) must be set in order to use the Anniversary
function.
1
Press es4s6
or esus[
2
Press es
[
[to select a
number (from 0 to 9) for the
anniversary event]spresse
again.
• If an anniversary is already set for the
number that you select, that anniversary
is displayed.
When an anniversary date arrives:
• The message for the anniversary is displayed in standby mode for that day (the
data is retained unless manually deleted).
3
Input the date s press e
• It is not possible to set more than one anniversary per day.
4
Input the message s presse
• If the data already exists, it is displayed.
• Up to 20 characters can be entered for each anniversary
item.
Entering text (P63 to 66)
ANNIVERSARY DATES
➔ ➔
When an anniversary date arrives:
• The message for the anniversary is displayed in
standby mode for that day (the data is retained unless
manually deleted).
Name of the selected mark
*SM-801 PHS/sec4(GB) 00.3.9 5:04 PM Page 72

3
Enter the time and press e (i).
• If an alar m has already been set, that setting is displayed.
• Use
y to return to the previous display.
4
Press
o
to turn the Snooze function “On”,or
u
to turn
the Snooze function “Off”.
75
4. Convenience features
• When the snooze function is 'On'
When the snooze function is turned 'On', after you stop the
alarm, it rings five times every five minutes.
• When the snooze function is 'Off'
The alarm rings at the set time, but the snooze function does
not operate.
• Before you finish the setting you can use
y to return to
the previous display.
• Press any button to stop the alarm from ringing.
• When you set an alarm adjusted, the alar m is automatically switched on.
Using the alarm clock
1
Press es4s4
or esus[
2
Presso(to turn the alar m clock “On”)
Pressu(to turn the alar m clock “Off ”)
• If you attempt to switch the alarm clock on when it has not
been set, the display on the right is shown, and you are
returned to step 1.
NOTE
• When an alarm is set…
The mark is displayed.
• If the alarm setting time arrives while a call is in progress…
The alarm rings when the call is finished.
• The alarm volume is as adjusted in the ringer volume (P55).
If the volume is set to 'Off', the alarm does not sound. It is possible to set the ringer volume to 'OFF' and receive alarm notification by setting the vibrator to 'On' (P53). If the telephone is in the
charger unit in the case of the above setting, the alarm will
sound at the "Middle" volume setting.
• Press any key to stop the alarm ringing.
74
4. Convenience features
You can use the alarm clock to set a date and time for an alarm, and then switch the
alarm setting to 'On' to have the telephone ring for 30 seconds when the set date and
times arrive.The alarm clock is set to 'Off' at the factory.
Reminder: The date and time (P35) must be set in order to use the alarm clock
function.
Setting the alarm clock
1
Press es4s3
or esus[
2
Press e and use
p
to choose the repeat set-
ting that you want for the alarm.
• The following repeat settings are available, and can be
accessed by the above procedure (the default setting is
“Once”).
ALARM CLOCK FEATURES
➔
sun
once
all
mon tue
wed
thu fri sat mon - fri
mon - sat
*SM-801 PHS/sec4(GB) 00.3.9 5:04 PM Page 74

76 77
4. Convenience features 4. Convenience features
You can use the calculator function to perform arithmetic.
• The calculation result can be up to a maximum of eight digits, and decimal calculations are possible.
Example: to calculate 180 ÷ 5 (36)
1
Press es9s0
or esus[
2
Press e, and then input the first number:
180…180
• Press e to input a decimal point.
• If you make a mistake during input, use
t to clear it.
• Press and hold t to clear the calculator.
3
Press uto select ÷
4
Input the next number: 5…5
5
Press rto calculate the result…=36
Calculation result
• To continue with a new calculation, input the next number.
• If the calculation result exceeds eight digits, "Error" is displayed.
NOTE
• If a call comes in while you are making a calculation:
You can press
q to answer the call.The calculation result is not stored.
You can adjust the contrast of the LCD to one of five levels.
The contrast is set to level 3 at the factory.It is also possible to turn the backlight
timer off so that the backlight is permanently on for the game.
Adjusting the display contrast
1
Press es9s1
or esus[
2
Use pto select the contrast level and then
press e.
• There are five contrast levels (1 to 5).
The higher the level, the darker the display (Light 1 - 2 - 3 - 4 5 Dark).
Backlight settings
BACKLIGHT SETTINGS FOR THE GAME
1
Press es9s2
or esus[
2
o(game)
• The current setting flashes.
3
o(on)
u(off)
NOTE
• If you play the game with the backlight on, the battery power
will be reduced quickly.
CALCULATOR ADJUSTING THE DISPLA Y
"Error"
*SM-801 PHS/sec4(GB) 00.3.9 5:04 PM Page 76

78 79
4. Convenience features 4. Convenience features
This phone includes a game that you can play to kill time when waiting for friends, or
when traveling.In the game, you maneuver a crab and catch persimmons with claws
that fall from above.
• After every 10th persimmon that you catch, the speed at which they fall gradually increases.
• The maximum score possible is 999. The game ends when you reach this
score.
1
Press es9s5
or esus[
2
Press eto display the best three high scores.
3
Press eto start a game.
Operate the crab using the p, -and =buttons.
• Persimmons, harpoons and rice balls fall
down from above.
• The objective is to catch the persimmons and rice
balls in the crab's claws.
You are allowed to catch the rice balls using the crab's
body (no points though!).
Avoid the harpoons.If you catch one, it counts as a
miss.
• Press
t to pause a game, and press t again to restart it.
• Misses
You lose a life if you drop a persimmon, catch a persimmon on the body, or catch a
harpoon in a claw or on the body.
• Points
Persimmons:1 point
Rice balls: If you catch in a claw you get 5 points, plus your misses are cleared
(returns to three crabs). If you catch on the body, your misses are cleared, but you
don't get points.
4
The game is over when you make three mistakes.
When a persimmon hits the ground.
A missed catch (taken on the body).
5
The display returns to the high score display (step 2).
NOTE
• To quit the game:
Press
w.The telephone returns to standby mode.
• If a call comes in during a game:
You can answer the call by pressing q, but the game is terminated.
The score is saved if it exceeds one of the three highest scores.
• To turn the backlight permanently on while playing the game:
<REF> Adjusting the display (P77).
PLAYING A GAME
Number of
remaining crabs
Score
*SM-801 PHS/sec4(GB) 00.3.9 5:04 PM Page 78

80 81
4. Convenience features 4. Convenience features
Connections for data communication
1
Insert the Data Communications card (sold separately) into the PC
card slot.
2
Carefully check the orientation of the interface connector on the
connection cable (sold separately), and then insert it into the card
while pressing the lock buttons on the sides.
3
Open the cover of data communications terminal on the telephone,
and plug the connector securely into it while pressing the lock buttons on the sides of the connector.
1
Transmitting data from a personal computer connected to the data
communications terminal.
• For information about the procedure, refer to the instruction manuals for the
data communications card and the communications software.
• If the connection is broken from the other end first, the telephone will sound a
warning (suu suu .. .. ..), and retur n to standby mode after 10 seconds.
NOTE
• Using the telephone in areas where there is a lot of electromagnetic radiation
can result in broken connections.
• Do not move the telephone during transmission. This can cause broken connections.
• The dial information in the case of data transmission is not stored in the telephone's redial memory.
• Long communication
Ensure that the telephone battery is sufficiently charged. To conserve battery
power, it is also possible to transmit from the telephone while it is seated on the
charger.
• Connection to personal computers
Even if you are not transmitting or receiving, the standby time on battery power
is reduced. Also, depending on the data communications card that you are
using, battery power may be consumed even if the telephone is switched off.
For this reason, if you do not plan to perform data communication for a time,
disconnect the communication cable from the telephone.
• Lock Phone
When Lock PHone is set, it is not possible to switch to transmission or communication mode from the personal computer.
HOW T O DA TA COMMUNICATION TRANSMITTING DATA
• To remove the cable and PC card, follow the above procedure in reverse.
• After you plug the connector into the
telephone, the following message will
be displayed, and the telephone will
make a beep (Pi-Po) sound (unless the
ringer volume is turned off).
• When you remove the cable connector from the phone, the following message will be displayed,
and the telephone will make a
beep (Pi-) sound (unless the
ringer volume is turned off).
➔➔
*SM-801 PHS/sec4(GB) 00.3.9 5:04 PM Page 80

82 83
4. Convenience features 4. Convenience features
It is possible to load data received by the telephone into a personal computer.
1
Receive data from standby mode
• The ringer sounds using a special r ing that is reser ved
for data reception.
2
Answer using the computing device (personal computer etc.)
• Communication star ts. The connection time is displayed during
communication.
• For information about the procedure, refer to the instruction
manuals for the data communications card and the communications software.
3
Communication finished.
• The connection time is displayed, and the telephone returns to
standby mode.
NOTE
• Using the telephone in areas where there is a lot of electromagnetic radiation
can result in broken connections.
• Do not move the telephone during transmission. This can cause broken connections.
• If the data transmission call comes before preparations for receiving the data
completed, you can refuse the call by pressing
q
.
• Data can be received even if Lock Phone and Key Guard are set.
With this service, calls that come in (when the telephone is switched off, when
you are outside the service or when you cannot answer the telephone for some
reason) are received by the MWI service, and the caller can leave a recorded
message.You can access to the messages,left for you at the MWI service using
a this phone.
FOR MORE DETAILS,CONTACT TELECOM ASIA
When a message has been recorded at the MWI service center...
1
When you finish a call in public mode, "MWI ON" is displayed.
• The "MWI ON" display is erased when you press any key excep - and
=.
If the message is still stored at the MWI service center, the next time you finish
a call in public mode "MWI ON" is displayed again.
1
Press r while connected to an outside line.
• The outside lineis put on hold.
2
Call a number to which you would like to transfer.
• A call will be transferred.
RECEIVING DATA MWI (MESSAGE WAITTING INDICATOR)
➔
HOOKING AND CALL TRANSFER
*SM-801 PHS/sec4(GB) 00.3.9 5:04 PM Page 82

85
5. Using the phone book
84
4
Press e
NOTE
• When 500 entries have been entered...
The message shown on the right is displayed, and the telephone returns to standby mode. Before you can add new
entries, you will have to delete some existing entries.
<REF> Deleting phonebook entries.
• The same number can be entered more than once.
• If a call comes in while you are in the middle of making an entry to the
phonebook...
You can answer the call, but the entry operation is canceled, and the data is
not stored in the phonebook.
• There is a possibility that the numbers and names stored in telephone can be
erased or altered due to incorrect operation by the user, or due to electrical
noise or static electricity.Be certain to keep a record of the information as a
backup.
You can store up to 500 names and telephone numbers in the phonebook.
• You can enter data directly into the phonebook or enter it from the redial memory, call log, or number memo (P43, 45, 47).
1
Press o
• The number of entries is displayed for about two seconds, then the display
switches to the name entry screen.
• To continue making entries in the phonebook.
is displayed.The previous name is stored until the power is switched
off or all settings are reset.
2
Input the name and then press e.
• Up to 24 characters can be entered.
<REF> Entering text (P63 to 66)
• Press to display the previously stored name entry.
This is useful when you wish to enter more than one number for the same person, or when you make entries for members of the same family or department..
3
Input the number.
• Display in the case 24 or more numbers
• Up to 32 characters can be entered.
STORING ENTRIES
5. USING THE PHONE BOOK
➔
➔
*SM-801 PHS/sec5(GB) 00.3.9 5:34 PM Page 84

87
5. Using the phone book
86
5. Using the phone book
Names, numbers, and number classifications stored in the phonebook can be edited.
• Editing method ... Press t to delete one character, and
press and hold t to delete all characters.
1
Display the number that you want to edit.
<REF> Search for a name P90
<REF> Quick search P92
2
Press r, edit the name, and then presse.
• Up to 24 characters can be entered.
[<REF>] Entering text (P63 to 66)
3
Edit the number,and then press e.
4
Press 0for a new entry, or
The original data is kept.
1to overwrite an existing entry.
The original data is overwritten.
NOTE
• If 500 entries have already been stored...
The message on the right is displayed and you are returned to
step 1.You will have to delete an entry from the phonebook
before you can add a new one.
<REF> Deleting phonebook entries P88.
EDITING AND ADDING DATA
➔
It is possible to enter data into the phone book from the redial memory,number
memo, and call log.
There must be a number in the redial memory, number memo or call log in order to
do this.
1
Display the number that you want to enter into the phonebook.
• y … display redial/number memo
<REF> P43
• i … display call log
<REF> P45
2
Press r
• The number of entries is displayed for two
seconds, and then the name entry screen
is displayed.
3
From now,follow the procedure given in steps 2, 4,
"Storing entries" (P84, 85) to enter the number into the
phonebook.
NOTE
• If 500 entries have already been stored...
The message on the right is displayed and you are returned to
step 1.You will have to delete an entry from the phonebook
before you can add a new one.
<REF> Deleting phonebook entries P88.
• When a number in the redial memory, number memo or
call log is entered into the phonebook...
The entered names are displayed when you use the search
function.
STORING NUMBERS FROM THE REDIAL MEMORY, NUMBER MEMO, AND INCOMING CALLS LOG
➔
Example:
When redial was selected
*SM-801 PHS/sec5(GB) 00.3.9 5:34 PM Page 86

DELET ING DATA
(CLEAR SELECTED)
89
5. Using the phone book
88
5. Using the phone book
Deleting all data from the phonebook
1
Press es2s1
or esus[
2
Presseand then input Lock Code (password).
The asterisks appear from the right.
• If you input an incorrect number for the Lock Code. ...
The message on the right is displayed, and you are returned
to step 1.
3
Press 1to delete.
• Press0 to cancel the operation and return to step 1.
DELET ING DATA
(CLEAR ALL)
➔
➔
It is possible to delete entries from the phonebook on an individual basis. If your
phonebook becomes full (500 entries), and you want to add new entries, you can
delete existing entries to make more rooms.It is also possible to delete all entries
from the phonebook at one time, but you are required to enter your Lock Code (password) to do this. Your secret numbers are also deleted in this case.
Individually deleting phonebook entries
1
Display the telephone number that
you want to delete and press
t.
<REF> Search for a name P90
<REF> Quick search P92
2
Press 1to delete the number.
• Press 0 to cancel the operation and return to step 1.
• If there is no data remaining in the phonebook, the telephone retur ns to standby mode.If there is still data in the phonebook, the next entry is displayed.
➔
*SM-801 PHS/sec5(GB) 00.3.9 5:34 PM Page 88

91
5. Using the phone book
90
5. Using the phone book
4
When in standby mode:
q… Dials the selected number.
r... Edit the data <REF> Editing and adding data P87.
t… Delete the data <REF> Deleting data P88
When a call is in progress:
Press the tbutton to return to the "In Use" display.
NOTE
• Searching in the secret phonebook
Set secret mode first (P93).
• When a secret number is found using a
normal search
The screen on the right is displayed
regardless of the number of digits in the
number.
• If no entry whose first character matches the character
input in step 1, the screen shown on the right is displayed, and then you are returned to step 1.
• The entries found when the phonebook is searched are displayed in
alphabetical order (P84).
1st Space
Letters (AaBbCc...Zz)
3 st Numbers (012 ... 789)
➔
➔
• When four or more matching entries have
been found, it is possible to scroll through
them quickly.
Press and hold [ to use quick
scrolling.
• Quick scrolling is selected automatically
after two seconds.To select it immediately,
press e.
3
Use [to search.
• Press - to display all digits in
the case that there are more than
12 digits. Press - again to
return to the original search screen.
It is possible to search for names stored in the phonebook, and then call, edit or
delete the number.Searching is possible even when a call is in progress.
1
Press u, and then input the first letter
of the name that you want to find.
• Press r to switch between input
modes (letter or number).
<REF> Entering text (P63 to 66)
• Use the
y and i buttons to scroll
through the entries found by the search (the display order is the same as the
order in the phonebook). (P91)
2
Press[
SEARCH FOR A NAME
➔
(when there are three or
fewer matching entries)
(when there are four or more
matching entries)
*SM-801 PHS/sec5(GB) 00.3.9 5:34 PM Page 90

93
5. Using the phone book
92
5. Using the phone book
To create a phonebook that others cannot see, it is first necessary to set secret mode
on.You can then store names and numbers in the secret phonebook.
•The number of entries for the normal phonebook and the secret phonebook
cannot exceed 500 in combination.
• It is only possible to use the secret phonebook to call when secret mode is on.
Setting secret mode
1
Press es2s2
or esus[
• The current setting is displayed.
2
Press o, and then input your
lock code.
• Press u to switch secret mode off.
3
If the lock code that you input is
correct, secret mode is set to on.
• If the lock code that you input is incorrect...
“Invalid Lock Code”is displayed, and you are returned to
step 1.
• If you turned secret mode off, “Secret Mode Cancelled”
is displayed, the telephone returns to standby mode.
STORING A SECRET PHONE BOOK (continued to next page)
➔
➔
(the asterisks appear
from the right)
[ ] mark is
displayed on
the screen.
• To cancel secret mode
In addition to canceling secret mode by switching it off, you can also switch it
off by switching the telephone off and on, by using Reset or All Reset, or by
erasing the entire phonebook or address book.
You can use the letters assigned to the number buttons (
0
to 9) for search-
ing, and calling.This quick search function is not available when a call is in progress.
1
Press and hold one of 0to 9
(the button corresponding to the first letter of the name
that you want to search for)}
Example: If you press and hold down the 7 button...
Data starting with p, q, r, s, P, Q, R, S, 7, is displayed.
2
Use[to search.
QUICK SEARCH
(when there are three or
fewer matching entries)
(when there are four or more matching
entries)
• When four or more matching entries have been found, it is possible to scroll
through them quickly.
• Press and hold
[
to use quick scrolling.
Quick scrolling is selected automatically after two seconds.To select it immediately, press e.
3
q…Dials the number found.
r…Edit the data
<REF> Editing and adding data P87
t…Delete the data <REF> Deleting data P88
NOTE
• If there is no data in the phonebook whose first character
matches the button that you pressed in step 1, the message
shown on the right is displayed, and you are returned to
standby mode.
NOTE
*SM-801 PHS/sec5(GB) 00.3.9 5:34 PM Page 92

95
5. Using the phone book
94
5. Using the phone book
STORING A SECRET PHONE BOOK
Editing and adding information in the secret phonebook
Remainder: Set secret mode to on (P93).
1
Select the phone number that you want to edit.
<REF> Searching in the secret phonebook (P91).
2
Use the procedure outlined in steps 2 to 3 of
"Editing and adding data" (P87) to edit and add
names, numbers in the secret phonebook.
3
o…"ON"
u…"OFF"
• When set to “ON”... Secret mode stays on.
• When set to “OFF”...Secret mode is cancelled.
4
Press either 0"New" or 1 "Overwrite"
• “New”…………The original data is preser ved.
• “Overwrite”…The or iginal data is overwritten.
NOTE
• When 500 entries have been input...
The message shown on the right is displayed, and you are
returned to step 1. Before you can add new entries you will
have to delete some existing entries.
<REF> Deleting phonebook entries P88.
EDITING, ADDING DATA TO THE SECRET PHONE BOOK
➔
Storing data in the secret phonebook
Reminder: Set secret mode on.
1
Use the procedure outlined in steps 1 to 4 of "Storing entries"
(P84, 85) to enter names, numbers and number type marks into the
secret phonebook.
2
o…"ON"
u…"OFF"
• When set to "ON"...
The entry is saved in the secret phonebook and you are
returned to step 1.
• When set to "OFF"...
The entry is saved in the regular phonebook.
NOTE:
• When 500 entries have been input...
The message shown on the right is displayed, and the telephone returns to standby mode. Before you can add new
entries you will have to delete some existing entries.
<REF> Deleting phonebook entries P88.
• To search the secret phonebook
Set secret mode on (P93) then perform the normal search operations.
• When you make a call using the secret phonebook
Only the number is displayed in the redial data.(P43) The name is not displayed.
➔ ➔
*SM-801 PHS/sec5(GB) 00.3.9 5:34 PM Page 94

97
6. Recording functions
Recordings can be played back later, and be erased either individually,or all at
once.
Reminder: The following operations apply to the case that a recording has been
made, and the mark and number of recordings are displayed on
right of the screen.
Playback
1
rs[
• The messages are played in order from the oldest.
• A beep sounds (Pi-) between messages.
• Press the
i button while a message is playing to jump to the next mes-
sage.
Press the
y button to return to the previous message.
• Press
w to finish.
Deleting individually
2
Playback the recording that you want to delete,and while it is
playing, press
t
and then
1
.
• When you delete a message, the next message is played.
If you press
0 to avoid deletion of a message, that message is played
again.
• If there are no more messages, "Playback End" is displayed, and you are
taken to step 3.
PLAYING, DELETING A MESSAGE (continued to next page)
➔
96
6. RECORDING FUNCTIONS
It is possible to record the voice of the person you are talking to during a call.
The recording is stored even if the power is switched off.
• Up to four recordings can be stored (the maximum length for each is 15 seconds).The total recording time allowed is 60 seconds.
Reminder: The following operations apply when a call is in progress.
1
While a call is in progress, press
r.
• If there are already four stored recordings
The message on the right is displayed, and you are returned
to the conversation. You will have to delete one of the recordings before you can make a new one (P97).
• When you return to standby mode
after making a recording...
"Message" is displayed, and the mark is displayed on the
right of the screen with the number of messages.
The "Message" and mark/number of messages displays
disappear when you play the message or remove the battery.
2
Press ragain to stop recording and return to the conversation. Recording stops automatically after 15 seconds.
• When you press w to hang up
The recording up until that time is stored.
NOTE
• Playing, deleting a message (P97)
• To make a second recording during the same call, press
r again.
• You cannot make recordings of extension conversations (P103) or transceiver
conversations (P108).
RECORDING A CALL
➔
➔
*SM-801 PHS/sec6(GB) 00.3.9 5:40 PM Page 96

98
6. Recording functions
PLAYING, DELETING A MESSAGE
Deleting all messages
3
If you playback all messages, you will be asked if you want to
erase all messages.
Press
1
to delete all messages
• After deleting all messages, the telephone returns to standby mode.
• If you press 0 to avoid the delete operation, the telephone returns to
standby mode.
NOTE
• If you play a recorded message then return to standby mode, "Messages" is
no longer displayed.
➔
*SM-801 PHS/sec6(GB) 00.3.9 5:40 PM Page 98

111
8. Other features
RESTORING ALL DEFAULT SETTINGS
It is possible to reset all settings and the settings you have made for this phone to the
default settings (settings at the time of purchase). You must input your lock code in
order to do this.
1
Press es9s9
or esus[
2
Press eand input your lock code.
3
Press 1to reset.
• Press 0 to cancel the reset operation and return to step 1.
NOTE
• If you input the incorrect lock code, the screen display on
the right is shown, and returns to standby mode.
Notes about All Reset
The following data is deleted:(Be sure to keep a record of
important data before deleting it.)
• Redial memor y and number memo/call log etc. See the
following page for details.
➔
➔ ➔
The asterisks appear
from the right.
110
8. OTHER FEATURES
It is possible to reset the settings you have made for this phone to the default settings
(settings at the time of purchase).You must input your lock code in order to do this.
1
Press es1s9
or esus[
2
Press eand input your lock code.
3
Press 1to reset.
RESTORING INDIVIDUAL DEFAULT SETTINGS
➔
➔
NOTE
• If you input the incorrect lock
code, the screen display on
the right is
shown, and
returns to
standby mode.
• Press
0to cancel the reset operation and return to step 1.
The asterisks appear
from the right.
*SM-801 PHS/sec8(GB) 00.3.9 5:38 PM Page 110

113
8. Other features
Specifications
SPECIFICATIONS
Weight
Size (W x H x D)
Transmission power
System
69g (approx.)
39mm x 119mm x 18mm (approx.)
10mW (approx.)
Digital (1.9GHz band) (TDMA method)
Continuous connection and standby times on full charge
Continuous connection Standby
Public
6 hours (approx.) 700 hours (approx.)
• The times given for battery operation in the above table have been calculated
assuming an ambient temperature of 25°C and stable signal conditions.These times
will be shorter when the ambient temperature is low, or when the signal strength is
low.Battery power consumption also increases when the telephone is used outside
the service area, or in places where the signal cannot reach.
112
8. Other features
RESTORING ALL DEFAULT SETTINGS
*SM-801 PHS/sec8(GB) 00.3.9 5:38 PM Page 112

114
8. Other features
TROUBLESHOOTING
Problem
Power won’t turned on
Cannot call
Call cuts off suddenly
Ringer does not
sound
No response to key
input
No response when the
cursor key is pressed
The display is corrupted or blank
What to check
• Is the batter y inserted?
• Is the batter y charged?
• Is the connector plug inser ted correctly?
• Did you press and hold down the
POWER button for long enough?
• Are you inside the service area?
• Did you input the phone number correctly?
• Is there a line available? If not, wait a
while then call again.
• Is the line being used by another extension?
• Did you go outside the service area, or
enter a place that the signal cannot reach
(a warning will sound)?
• Is the batter y out of charge?
• Is the r inger volume set to off?
• Is lock phone set to on?
• Is key guard set to on?
• Is the batter y out of charge?
(“Charge” will flash on the screen)?
• Are you pressing the cursor too strongly?
Press it lightly.
• Turn the power off then on again.
• Remove the battery, and then reconnect it
after waiting for one minute.Read the
warning message on P24 before doing
this.
Ref. page
25
20
25
26
21
39
40
105
21
21
55
37
32
21
17
26
14,24,25
• If the procedures in the above table do not correct the problem, stop using the telephone, and return it to the dealer where you purchased.
*SM-801 PHS/sec8(GB) 00.3.9 5:38 PM Page 114
 Loading...