

Page 1

Rhein Tech Laboratories Client: UTStarcom, Inc.
360 Herndon Parkway Model: UTS-618
Suite 1400 FCC ID: O6YUTS-618
http://www.rheintech.com
Date: June 3, 2003
FCC: Part 24 Herndon, VA 20170
APPENDIX H: MANUAL
Please see the following pages.
Page 37 of 72
Page 2
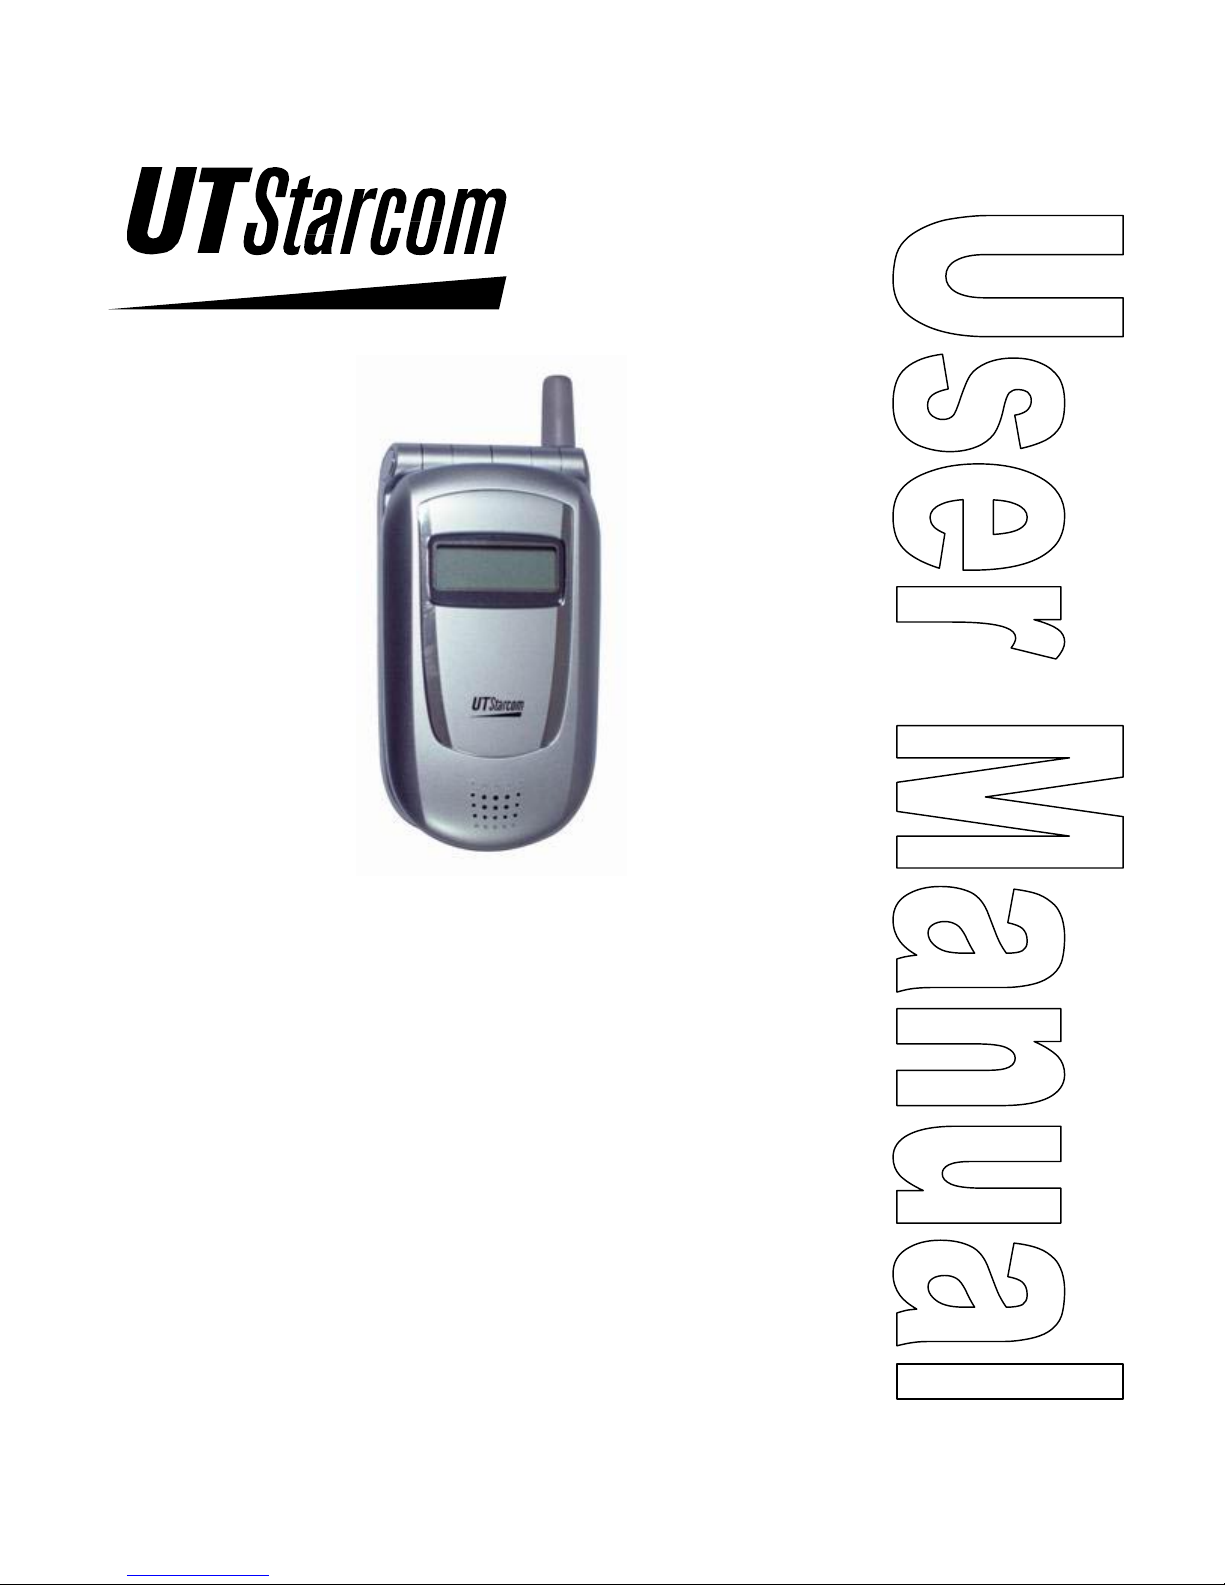
UT618
User Manual
Issue 0.2
Document No. 2XX 702 002
Page 3

ii Table of Contents UT618 User Manual
Trademark Statement: “‘UTStarcom,’ ‘AN2000,’ and the UTStarcom logo are trademarks of
UTStarcom, Inc.”
Copyright Statement: “UTStarcom, Inc. 2003. All rights reserved. No part of this publication
may be reproduced in any form or by any means without the prior written permission of UTStarcom,
Inc.”
Warranty Language: “The contents of this manual, whether in whole or in part, do not constitute
any express or implied warranty with respect to any products of UTStarcom, Inc., or it subsidiaries.”
Page 4

UT618 User Manual Table of Contents iii
Safety Precautions
Introduction
Thank you for purchasing your new UT618 phone.
Please read this instruction manual thoroughly.
The display screens, illustrations, etc., used in this document are created for instructional
purposes and can differ slightly with the actual phone.
How to Use This Instruction Manual
1. Getting Started
Includes facts you should know before using your new phone.
2. Learning to use your phone
Explains the basic operation of making and receiving calls. Explains useful convenience
functions.
3. Setting up your phone
Explains the basic operations to be carried out to setup the phone
4. Text Edition
Provides details on Text entry and edit.
5. Phone Book
Explains the management of Phone book.
6. Short Message Service
Explains SMS operations
7. Email
Provides information on setting up email service, sending and receiving mails etc.
8. Bookmark
Explains creation and management of bookmarks
9. Air Info
10. Group
Provides brief on setting up group.
11. Data Communication
12. Maintenance and Troubleshooting
Explains phone maintenance and troubleshooting procedures.
13. Index
Conventions used in the manual:
“press” : press a key and then release;
“press and hold down” : press a key for 2 sec or more and then release.
“service area” refers to a service coverage area where a handset can receive signals
effectively.
“ ” : Proceed to the next step.
Page 5
iv Table of Contents UT618 User Manual
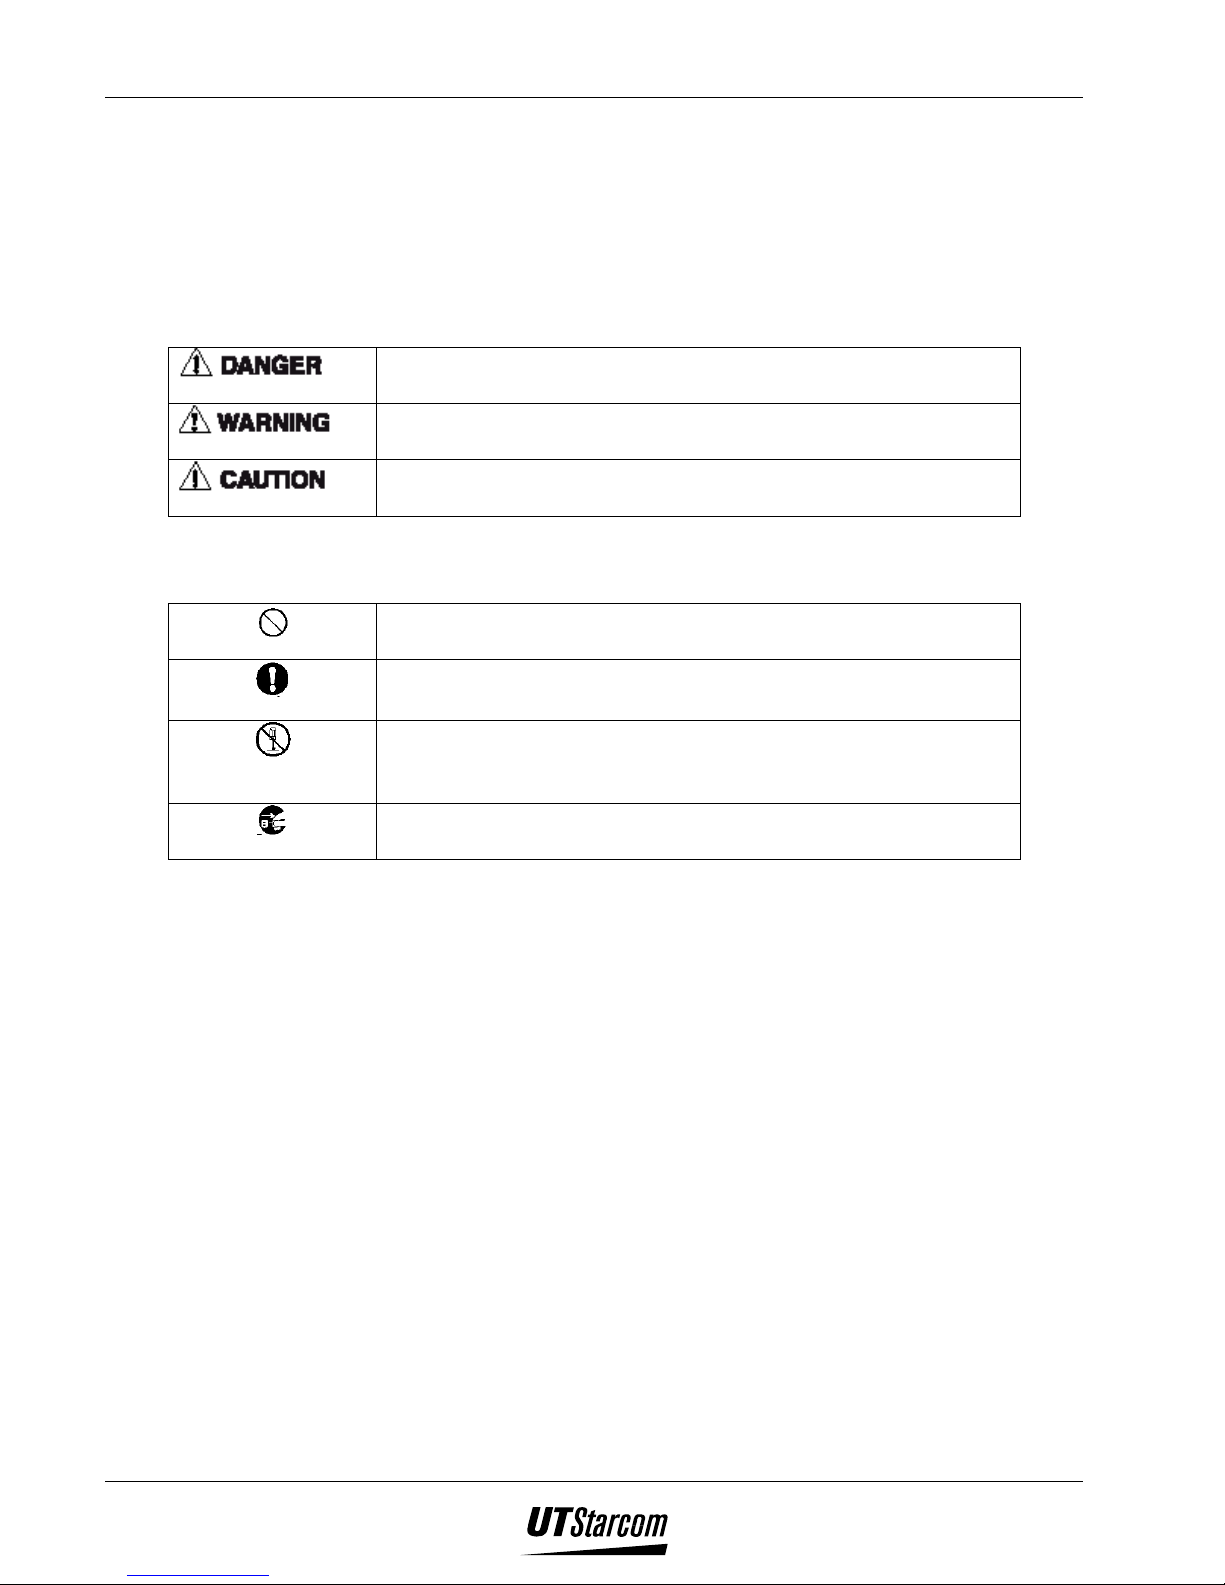
Explanation of Symbols
Before using your phone, please read the “Safety Precautions” thoroughly.
The cautions included here are provided to prevent danger to persons and property.
The following explain the degree of danger and damage that could occur if these safety
precautions are not observed.
This symbol indicates that erroneous operations may directly
result in serious personal injury or death.
This symbol indicates that erroneous operations may result in
the possibility of serious injury or death.
This symbol indicates that erroneous operations may result in
the possibility of injury or physical damage.
Explanations of other symbols used in the manual:
Prohibited
Compulsory
Disassembly
Prohibited
Remove Power Plug
This symbol indicates a prohibited action.
This symbol indicates an action that must always be performed.
This symbol indicates that disassembly is prohibited.
This symbol indicates that the power cord must be removed
from the outlet.
Page 6
UT618 User Manual Table of Contents v
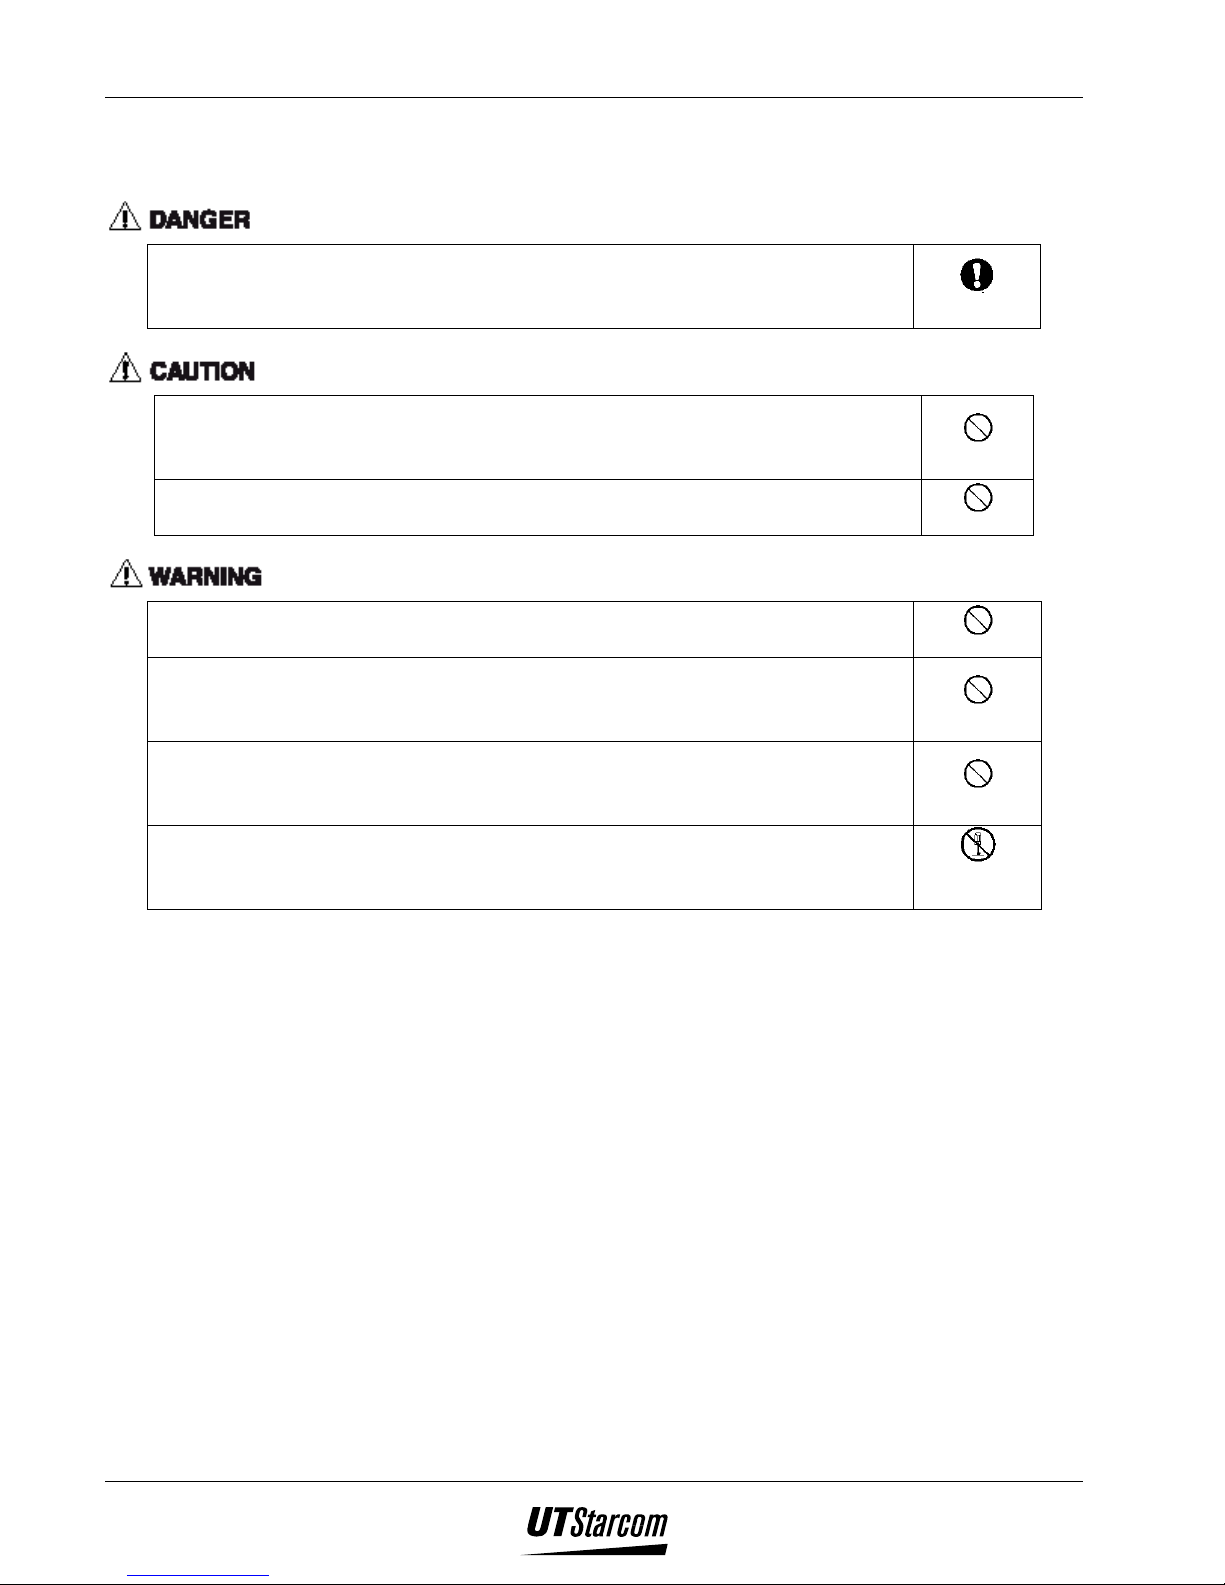
Handling the Phone, Battery, and Charger
Use only the battery and charger approved for the UT618 phone. The use of
any other types can result in damage to the phone, electric shock or the risk
of fire.
Do not store the phone or charger in hot, wet, or dusty areas. High
temperatures, humidity and dust can damage electrical and mechanical
components. This can cause the phone or charger to malfunction.
Keep the phone, battery and the charger dry. Exposure to precipitation,
humidity and liquids can damage electronic components and circuit boards.
Compulsory
Prohibited
Prohibited
Do not drop, shake or throw the phone or charger. Rough handling can break
internal circuit boards and damage the battery pack.
Do not use a microwave oven or any other type of heating equipment to dry
the phone, battery pack or charger. High temperature can shorten the life of
electronic devices, damage the battery pack, and warp or melt plastic parts.
Do not use the phone in the vicinity of volatile gases. Leave the area before
using the phone. Failure to leave the area can result in the risk of fire or an
explosion.
Do not disassemble or modify the phone or charger. Incorrect modifications
or reassembly can cause malfunctions or personal injury when the phone or
charger is used.
Prohibited
Prohibited
Prohibited
Disassembly
Prohibited
Page 7
vi Table of Contents UT618 User Manual
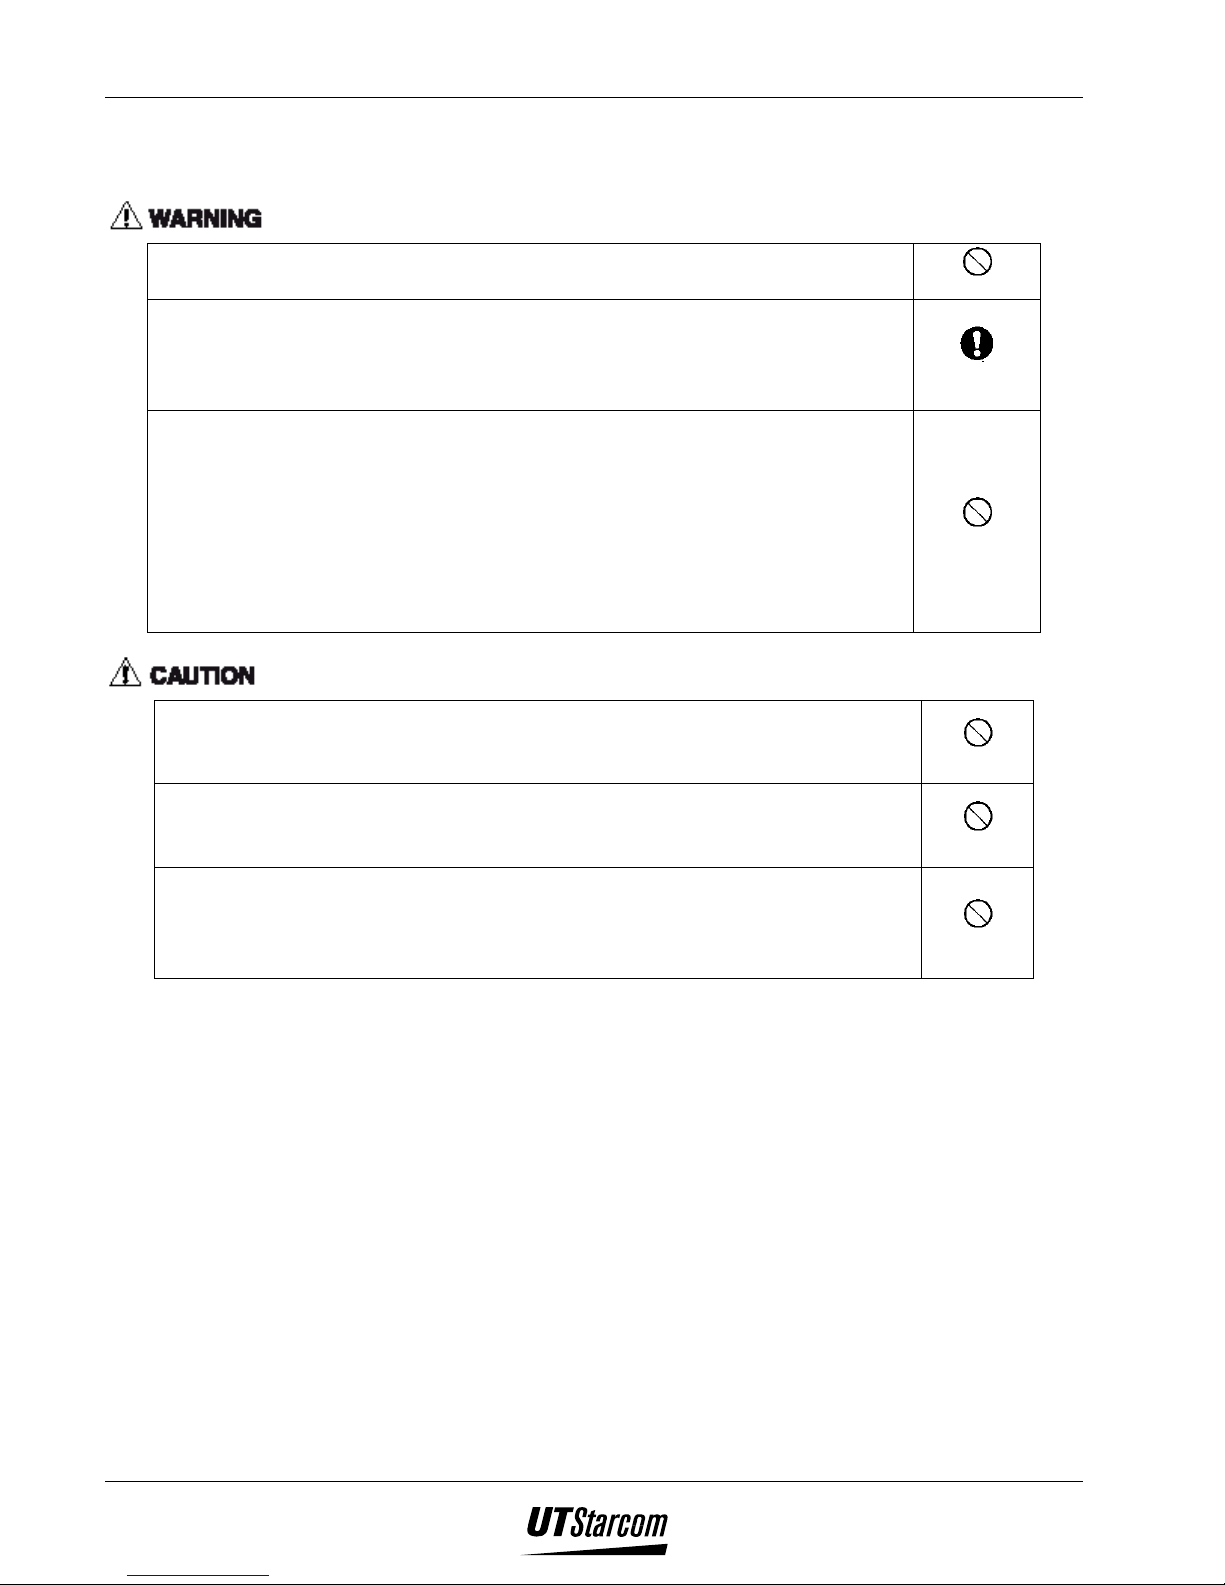
Handling the Phone
Do not use the phone while driving. Park the vehicle before using the phone.
Traffic safety first.
Observe any special regulations in effect in any area (hospital, aircraft, etc)
when you have to use the phone. Always disconnect the charger and remove
the battery of your phone whenever it is forbidden to use it, or when it may
cause interference or danger.
Do not use the phone near electronic equipment prone to interference. .
Radio frequency interference may result in malfunction of the electronic
equipment.
The following electronic equipment can be effected:
Hearing aids, pacemakers and other clinical electronic devices, fire detectors,
automatic doors and other automatically controlled devices.
If you have to use phone near electronic medical devices such as
pacemakers, please consult device manufacturer or local dealers.
In rare cases, using the phone inside certain models of vehicles can adversely
affect the electronic equipment inside the vehicle. Do not use the phone in
such cases, because it is dangerous for personal security.
Keep all storage media (magnetic cards, floppy disks, credit cards, etc.,)
away from the phone. Close encounters or contact can erase or damage the
storage media.
Keep all sharp metal objects (Pins, Nails, Hairpins etc.) away from the
handset of the phone. The earpiece of the handset contains a strong magnet
that can attract and hold metal objects. Remove any objects from the handset
earpiece before using to avoid personal injury.
Prohibited
Compulsory
Prohibited
Prohibited
Prohibited
Prohibited
Page 8
UT618 User Manual Table of Contents vii
Handling the Battery
Do not dispose of the battery pack in a fire. They may explode. Check with
local waste management codes for disposal instructions.
Do not force the battery pack into the phone. Improper installation can cause
malfunctions or damage the battery pack. This may result in the risk of fire
or personal injury.
Use caution in handling batteries in order not to short the battery to
conductive materials such as rings, bracelets, and keys. The battery and/or
conductor may overheat and cause burns.
Do not solder the battery terminals together. This may result in a cracked or
leaking battery pack or the risk of fire.
Do not open or mutilate the battery pack. Battery acid is corrosive and may
cause burns or injury to eyes. If battery acid gets into the eyes, DO NOT
RUB.
Immediately flush the eyes with clean water and call a physician.
Do not leave or store the battery pack in hot areas (Near fire, a heater, etc).
High temperature can damage and shorten the life of the battery pack. This
may result in a cracked or leaking battery pack or the risk of fire.
Do not use a discolored, deformed or damaged battery pack in the phone.
This may result in personal injury or the risk of fire.
Do not open or mutilate the battery pack. Battery acid is corrosive and may
cause burns or injury to skin or clothing. If battery acid is spilled,
immediately flush the area with clean water to prevent injury.
Do not use a cracked, leaking or odor emitting battery pack near an open
flame.
Prohibited
Prohibited
Prohibited
Prohibited
Compulsory
Prohibited
Disassembly
Prohibited
Compulsory
Compulsory
Do not leave or store the phone in areas where temperatures are more than 45
°C for a long period of time. High temperature can shorten the life of
electronic devices, damage the battery pack, and warp or melt plastic parts.
The battery cord is color-coded, the red line is positive (anode), the black
line is negative (cathode) and the yellow line is a sensor output.
Prohibited
Compulsory
Page 9
viii Table of Contents UT618 User Manual
Handling the Charger
Use only a power source that provides the appropriate voltage
(AC220V±10% or AC110V±10%) for the charger. An unsuitable power
source can result in damaging the charger, electric shock or the risk of fire.
Do not short circuit the charger connector jack. This may result in the risk of
fire or electric shock.
Do not use the charger if the power supply cord or plug is damaged or frayed
(exposed or broken wires, etc). This can result in the risk of fire or electric
shock
Unplug the charger from the outlet before cleaning. Do not use liquid or
aerosols cleaners. Use a damp cloth for cleaning to wipe off any accumulated
dust to prevent any chance of fire.
Never spill any liquid on the charger. This may result in the risk of fire or
electric shock.
Unplug the charger immediately from the wall outlet if liquid has been
spilled into the unit to prevent the risk of fire or electric shock.
Do not use the charger in areas with high humidity, such as bathrooms or the
like. This may result in malfunction, electric shock or the risk of fire.
Do not touch the charger power cord or wall outlet with wet hands. This may
result in the risk of fire or electric shock.
Compulsory
Prohibited
Prohibited
Compulsory
Prohibited
Remove
Power Plug
Prohibited
Prohibited
Always unplug the charger from the wall outlet before cleaning to avoid the
risk of electric shock.
Do not place objects on the power cord. Install the charger where no one can
step or trip on the power cord.
Always grip the power plug when removing charger from the wall outlet. Do
not pull on power supply cord to avoid damage and the risk of electric shock.
Compulsory
Prohibited
Compulsory
Page 10
UT618 User Manual Table of Contents ix
Phone Information
Avoid extremely high or low temperatures.
Always use the phone in an environment with a temperature range of 10°C~40°C and
humidity range of 45%~95%.
For maximum signal strength and noise free operation, use away from electrical
appliances such as TV, radio or personal computer.
Leaving the phone in hot or cold places such as a car will reduce the capacity and life
of the battery. A phone with a hot or cold battery may temporarily not work even
when the battery is fully charged.
Battery Information
Store the battery in a cool, well-ventilated area. Do not store in direct sunlight.
If left unused a fully charged battery will discharge itself over time. If a fully
discharge battery is stored for a long period of time, it may not be possible to recharge
the battery.
Do not discard old batteries with household trash. Where regulated, check with local
waste management codes for disposal instructions.
The Battery can be charged and discharged hundreds of times but it will eventually
wear out. When the operating time is shorter than normal it time to replace the
battery.
Warning Information for FCC RF Exposure Compliance
This PCS phone has been tested and complies with the Federal Communications
Commission (FCC) RF exposure limits for General Population/Uncontrolled exposure
environment. In addition, it complies with the following Standards and
Guidelines:
• FCC 96-326, Guidelines for Evaluating the Environmental Effects of RadioFrequency Radiation.
• FCC OET Bulletin 65 Edition 01-01 (2001) Supplement C, Evaluating Compliance
with FCC Guidelines for Human Exposure to Radio Frequency Electromagnetic
Fields.
• ANSI/IEEE C95.1-1992, IEEE Standard for Safety Levels with Respect to Human
Exposure to Radio Frequency Electromagnetic Fields, 3 kHz to 300 GHz.
• ANSI/IEEE C95.3-1992, IEEE Recommended Practice for the Measurement of
Potentially Hazardous Electromagnetic Fields - RF and Microwave.
For body worn operation, this phone has been tested and meets FCC RF exposure
guidelines when used with an accessory that contains no metal and when the back of the
phone faces your body. Use of other accessories may not ensure compliance with FCC
RF exposure guidelines.
Page 11

x Table of Contents UT618 User Manual
Table of Contents
1. GETTING STARTED ............................................................................................................................................1-1
1.1 PACKAGE CONTENTS .......................................................................................................................................... 1-1
1.2 SPECIFICATION................................................................................................................................................... 1-1
1.3 HANDSET DESCRIPTION .....................................................................................................................................1-3
1.4 SOFT KEY DESCRIPTION.....................................................................................................................................1-5
1.5 DISPLAY INDICATOR ..........................................................................................................................................1-6
1.5.1 Main Display Indicator .............................................................................................................................1-6
1.5.2 Sub Display Indicator................................................................................................................................1-9
1.6 HOW TO USE THE USER’S MANUAL ................................................................................................................. 1-10
1.6.1 Functional Key Instructions....................................................................................................................1-10
1.6.2 Conventions in the manual......................................................................................................................1-10
1.6.3 Activity status on Opening / Closing the Flip Cover...............................................................................1-11
1.6.4 Timeouts and their effect......................................................................................................................... 1-11
1.6.5 Returning to the Previous Screen............................................................................................................1-11
1.6.6 Returning to Standby Mode Screen......................................................................................................... 1-11
1.6.7 Quick Browse ..........................................................................................................................................1-12
1.7 SCENARIOS WHERE THE PHONE CAN’T BE USED ............................................................................................... 1-14
1.8 CHARGING THE BATTERY ................................................................................................................................. 1-15
1.8.1 Charging Instructions .............................................................................................................................1-15
1.8.2 Battery Life..............................................................................................................................................1-16
1.8.3 Replacing the Battery.............................................................................................................................. 1-17
1.9 CONNECTING THE PHONE HAND STRAP ...........................................................................................................1-19
1.10 SERVICE ISSUES ............................................................................................................................................... 1-20
2. LEARNING TO USE YOUR PHONE ..................................................................................................................2-1
2.1 POWER ON / POWER OFF ...................................................................................................................................2-1
2.2 INTRODUCTION TO STANDBY MODE .................................................................................................................. 2-1
2.3 FEATURE SELECTION METHODS.........................................................................................................................2-2
2.3.1 Selecting a Feature by Moving the Cursor................................................................................................2-3
2.3.2 Directly Entering the Feature Number......................................................................................................2-3
2.3.3 Table of Feature Numbers.........................................................................................................................2-3
2.4 MAKING A CALL ................................................................................................................................................ 2-5
2.5 DIALED NUMBER RECORD ................................................................................................................................. 2-7
2.5.1 Redialing a number / resending a short message......................................................................................2-7
2.5.2 Composing A New Message ......................................................................................................................2-8
2.5.3 Reading A Message ...................................................................................................................................2-8
2.5.4 Changing a Number ..................................................................................................................................2-9
2.5.5 Deleting Dialed Record Individually.........................................................................................................2-9
2.5.6 Deleting All Dialed Records......................................................................................................................2-9
2.6 ANSWERING AN INCOMING CALL.......................................................................................................................2-9
2.7 INCOMING CALL RECORD ................................................................................................................................2-10
2.7.1 Calling Back............................................................................................................................................ 2-11
2.7.2 Composing a New Message.....................................................................................................................2-12
2.7.3 Deleting Incoming Call Record Individually...........................................................................................2-12
2.7.4 Deleting All Incoming Record.................................................................................................................2-12
2.8 NUMBER MEMO ...............................................................................................................................................2-12
2.9 ADJUSTING EARPIECE VOLUME .......................................................................................................................2-13
2.10 WHISPER MODE ...............................................................................................................................................2-13
2.11 HOLDING A CALL............................................................................................................................................. 2-14
2.12 THREE PARTY CALLING (NEEDS NETWORK SUPPORT) ..................................................................................... 2-14
2.12.1 Call Waiting ............................................................................................................................................2-14
2.12.2 Three Party Calling................................................................................................................................. 2-15
Page 12

UT618 User Manual Table of Contents xi
2.13
DISPLAYING CALLER ID (NEEDS NETWORK SUPPORT).....................................................................................2-15
2.14 REJECTING UNIDENTIFIED CALL ...................................................................................................................... 2-16
2.15 SHOWING TALKING TIME .................................................................................................................................2-16
2.16 POWER SEARCHING..........................................................................................................................................2-16
3. SETTING UP YOUR PHONE (MAIN MENU) ...................................................................................................3-1
3.1 KEY BEEP .......................................................................................................................................................... 3-1
3.2 MANNER SETTING.............................................................................................................................................. 3-1
3.2.1 Manner Setting .......................................................................................................................................... 3-1
3.2.2 Setting/Canceling Manner Mode...............................................................................................................3-2
3.3 SETTING VIBRATOR ...........................................................................................................................................3-2
3.4 SETTING EARPHONE PICKU P .............................................................................................................................. 3-3
3.5 MELODY SETTING.............................................................................................................................................. 3-3
3.5.1 Melody Select ............................................................................................................................................3-4
3.5.2 Searching Melody by Category ................................................................................................................. 3-5
3.5.3 Deleting Composed Melodies Individually- method 1...............................................................................3-5
3.5.4 Deleting all Composed Melodies-method 1...............................................................................................3-5
3.6 COMPOSING A MELODY .....................................................................................................................................3-6
3.6.1 Composing a New Melody.........................................................................................................................3-6
3.6.2 Modifying a Melody ..................................................................................................................................3-8
3.6.3 Resuming Melody Composition.................................................................................................................3-9
3.6.4 Deleting Composed Melody Individually- method 2 .................................................................................3-9
3.6.5 Deleting All Composed Melodies- method 2.............................................................................................3-9
3.7 VOICE MEMO.....................................................................................................................................................3-9
3.7.1 Recording a Voice Memo ..........................................................................................................................3-9
3.7.2 Playing the Voice Memo..........................................................................................................................3-10
3.7.3 Deleting the Voice Memo ........................................................................................................................3-10
3.8 SETTING THE TIME ...........................................................................................................................................3-11
3.9 SETTING AN ALARM......................................................................................................................................... 3-11
3.9.1 Setting an Appointed Date.......................................................................................................................3-12
3.9.2 Setting an Appoint Day............................................................................................................................3-13
3.9.3 Stopping the Alarm Ring .........................................................................................................................3-13
3.10 SCHEDULE........................................................................................................................................................ 3-13
3.10.1 Setting a Schedule ...................................................................................................................................3-14
3.10.2 Searching a Schedule by Icon..................................................................................................................3-15
3.10.3 Modifying a Schedule.............................................................................................................................. 3-16
3.10.4 Deleting Schedule Individually................................................................................................................3-16
3.10.5 Deleting the Current Day Schedule.........................................................................................................3-17
3.10.6 Deleting All Past Schedules ....................................................................................................................3-17
3.10.7 Deleting All Schedules.............................................................................................................................3-18
3.11 CALENDAR .......................................................................................................................................................3-18
3.12 ANNIVERSARY .................................................................................................................................................3-19
3.12.1 Setting a New Anniversary ......................................................................................................................3-19
3.12.2 Changing an Anniversary........................................................................................................................3-20
3.12.3 Setting an Anniversary Display...............................................................................................................3-20
3.12.4 Deleting Anniversary Individually ..........................................................................................................3-21
3.12.5 Deleting All Anniversaries ......................................................................................................................3-21
3.13 SETTING THE SUB LCD.................................................................................................................................... 3-21
3.14 SETTING WALLPAPER ...................................................................................................................................... 3-22
3.14.1 Selecting Wallpaper ................................................................................................................................3-22
3.14.2 Deleting Pictures..................................................................................................................................... 3-23
3.15 SETTING LCD CONTRAST ................................................................................................................................3-23
3.15.1 Setting the Main Display Contrast .......................................................................................................... 3-23
3.15.2 Setting the sub Display Contrast............................................................................................................. 3-24
3.16 SETTING THE BACKLIGHT ................................................................................................................................3-24
3.17 SETTING A STANDBY MODE ............................................................................................................................. 3-24
Page 13

xii Table of Contents UT618 User Manual
3.18
CALCULATOR ...................................................................................................................................................3-25
3.19 LDS (NEEDS NETWORK SUPPORT).................................................................................................................... 3-26
3.20 LTS (NEEDS NETWORK SUPPORT) ....................................................................................................................3-26
3.20.1 Setting LTS ..............................................................................................................................................3-26
3.20.2 Changing the LTS Password...................................................................................................................3-27
3.21 SELECTING THE LANGUAGE ............................................................................................................................. 3-28
3.22 PHONE LOCK.................................................................................................................................................... 3-28
3.22.1 Setting Phone Lock.................................................................................................................................. 3-28
3.22.2 Canceling Phone Lock.............................................................................................................................3-28
3.23 CHANGING THE PHONE PASSWORD .................................................................................................................. 3-29
3.24 VOICE MAIL (NEEDS NETWORK SUPPORT)........................................................................................................ 3-29
3.24.1 Accessing Voice Mail ..............................................................................................................................3-30
3.24.2 Turning On/Off Voice Mail .....................................................................................................................3-30
3.24.3 Checking the Voice Mail setting.............................................................................................................. 3-30
3.24.4 New Voice Mail Reminder....................................................................................................................... 3-30
3.25 YOUR OWN NUMBER .......................................................................................................................................3-31
3.25.1 Setting Own Number ...............................................................................................................................3-31
3.25.2 Displaying Own Number.........................................................................................................................3-31
3.26 TOLL LOCK ......................................................................................................................................................3-31
3.26.1 Turning On Toll Lock..............................................................................................................................3-32
3.26.2 Turning Off Toll Lock.............................................................................................................................. 3-32
3.27 RESET ..............................................................................................................................................................3-32
3.28 ALL RESET ....................................................................................................................................................... 3-33
3.29 CUSTOM FUNCTION.......................................................................................................................................... 3-35
3.29.1 Setting Custom Function ......................................................................................................................... 3-35
3.29.2 How to Use Custom Function .................................................................................................................3-35
3.29.3 Deleting Custom Function Individually ..................................................................................................3-36
3.29.4 Deleting All Custom Functions ...............................................................................................................3-36
4. TEXT EDITION...................................................................................................................................................... 4-1
4.1 ENTERING TEXT ................................................................................................................................................. 4-1
4.1.1 Text Input Area.......................................................................................................................................... 4-1
4.1.2 Switching Input Method.............................................................................................................................4-2
4.1.3 Features Using Text Input......................................................................................................................... 4-3
4.1.4 Entering numbers, characters and symbols ..............................................................................................4-3
4.1.5 Input Method ............................................................................................................................................. 4-4
4.1.6 Entering Chinese Character......................................................................................................................4-5
4.1.7 Entering English characters and Numbers ...............................................................................................4-6
4.1.8 Deleting Words and Sentences while Editing............................................................................................ 4-6
4.2 FUNCTIONS FOR EDITING ................................................................................................................................... 4-6
4.2.1 Copying Text .............................................................................................................................................4-6
4.2.2 Cutting Text............................................................................................................................................... 4-7
4.2.3 Pasting Text............................................................................................................................................... 4-7
4.3 MARKS............................................................................................................................................................... 4-8
4.3.1 Entering marks .......................................................................................................................................... 4-8
4.3.2 Mark List ...................................................................................................................................................4-8
4.4 EMOJI................................................................................................................................................................. 4-9
4.4.1 Entering Emoji ..........................................................................................................................................4-9
4.4.2 Emoji List ................................................................................................................................................4-10
4.5 EDITING YOUR OWN MESSAGE (CANNED MSG) .............................................................................................4-10
4.5.1 Editing a Canned MSG............................................................................................................................4-10
4.5.2 Saving Canned MSG while Editing ......................................................................................................... 4-11
4.5.3 Deleting Canned MSG Individually ........................................................................................................ 4-12
4.5.4 Deleting All Canned MSG....................................................................................................................... 4-12
4.6 CANNED MSG .................................................................................................................................................4-12
4.6.1 How to use Canned MSG ........................................................................................................................4-12
Page 14

UT618 User Manual Table of Contents xiii
4.7
DISPLAY MODE................................................................................................................................................4-13
4.7.1 Scrolling ..................................................................................................................................................4-13
5. PHONE BOOK........................................................................................................................................................ 5-1
5.1 EDITING A PHONE BOOK .................................................................................................................................... 5-1
5.1.1 Editing a New Phone Book........................................................................................................................5-1
5.1.2 Resume Editing the Phone Book................................................................................................................5-3
5.1.3 Modifying the Phone Book Contents......................................................................................................... 5-3
5.1.4 Adding Data to the Phone Book................................................................................................................5-3
5.1.5 Saving a Dialed Number/Incoming Call Number into the Phone Book ....................................................5-4
5.1.6 Adding a Dialed Phone Number/Incoming Call into Phone Book............................................................ 5-4
5.1.7 Saving SMS Box Data to the Phone Book .................................................................................................5-4
5.2 DELETING PHONE BOOK ....................................................................................................................................5-5
5.2.1 Deleting Phone Book Individually.............................................................................................................5-5
5.2.2 Deleting All Phone Book...........................................................................................................................5-6
5.3 SEARCHING THE PHONE BOOK........................................................................................................................... 5-6
5.3.1 Searching by Name Search........................................................................................................................5-6
5.3.2 Searching by Group ..................................................................................................................................5-7
5.4 DIALING FROM THE PHONE BOOK/EDITING NEW MESSAGE...............................................................................5-7
5.5 GROUPING PHONES ............................................................................................................................................5-8
5.5.1 Grouping phone numbers.......................................................................................................................... 5-8
5.5.2 Modifying Group....................................................................................................................................... 5-9
5.6 SECRET PHONE NUMBER.................................................................................................................................... 5-9
5.6.1 Setting a Secret Phone Number................................................................................................................. 5-9
5.6.2 Dialing a Secret Phone Number.............................................................................................................. 5-10
5.7 FAVORITE CALL ............................................................................................................................................... 5-10
5.7.1 Setting Favorite Call ............................................................................................................................... 5-10
5.7.2 Modifying Favorite Call..........................................................................................................................5-12
5.7.3 Deleting Individual Favorite Call ...........................................................................................................5-12
5.7.4 Deleting All Favorite Calls .....................................................................................................................5-12
5.7.5 Dialing From Favorite Call ....................................................................................................................5-13
5.7.6 Answering a Favorite Call ......................................................................................................................5-13
5.8 SETTING CALL BLOCK .....................................................................................................................................5-13
6. SHORT MESSAGE SERVICE (NEEDS NETWORK SUPPORT) ................................................................... 6-1
6.1 BRIEF INTRODUCTION TO SMS ..........................................................................................................................6-1
6.2 SENDING A MESSAGE......................................................................................................................................... 6-1
6.2.1 Composing a New message ....................................................................................................................... 6-1
6.2.2 Resuming Composing a Message..............................................................................................................6-3
6.2.3 Reading/Forwarding a Message ...............................................................................................................6-3
6.3 COMPOSING AN ANIMATION MESSAGE ..............................................................................................................6-4
6.3.1 Adding an animation/frame....................................................................................................................... 6-4
6.3.2 Animation List ...........................................................................................................................................6-5
6.3.3 Frame List .................................................................................................................................................6-6
6.4 RECEIVING A MESSAGE......................................................................................................................................6-7
6.5 READING A MESSAGE ........................................................................................................................................6-7
6.6 REPLYING/FORWARDING A MESSAGE ................................................................................................................ 6-8
6.7 SETTING/CANCELING SMS PROTECT................................................................................................................. 6-9
6.8 DELETE SMS ...................................................................................................................................................6-10
6.8.1 Deleting Individual Messages .................................................................................................................6-10
6.8.2 Deleting All Messages in a Selected SMS Box- Method 1....................................................................... 6-10
6.8.3 Deleting All Messages in a Selected SMS Box- Method 1....................................................................... 6-11
6.8.4 Deleting All SMS Boxes...........................................................................................................................6-11
6.9 SETTING SENT BEEP......................................................................................................................................... 6-12
7. E-MAIL (NEEDS NETWORK SUPPORT) .........................................................................................................7-1
Page 15

xiv Table of Contents UT618 User Manual
7.1
MIMI SETUP....................................................................................................................................................... 7-1
7.1.1 Online Sign Up.......................................................................................................................................... 7-1
7.1.2 Changing/Resetting Center Number..........................................................................................................7-2
7.1.3 Sending Email Setting ...............................................................................................................................7-2
7.1.4 Receiving Email Setting.............................................................................................................................7-3
7.1.5 Signature (Sign).........................................................................................................................................7-3
7.1.6 Quote Text in Reply to an Email................................................................................................................7-3
7.2 SENDING AN EMAIL............................................................................................................................................7-4
7.2.1 Composing a New Email........................................................................................................................... 7-4
7.2.2 Receiving Emails ....................................................................................................................................... 7-6
7.2.3 Resuming Composing an Email.................................................................................................................7-6
7.2.4 Reading/Forwarding an Email..................................................................................................................7-7
7.2.5 Saving an Email ........................................................................................................................................7-7
7.2.6 Sending Waiting-for-send emails ..............................................................................................................7-8
7.2.7 Attaching an Attachment ...........................................................................................................................7-8
7.2.8 Attaching Attachments from Mail Box ......................................................................................................7-9
7.3 RECEIVING AN EMAIL ........................................................................................................................................ 7-9
7.3.1 Receiving Emails Individually................................................................................................................. 7-10
7.3.2 Receiving All Emails ...............................................................................................................................7-11
7.3.3 Auto Email............................................................................................................................................... 7-12
7.3.4 Deleting Emails in the System ................................................................................................................. 7-14
7.4 MAIL BOX........................................................................................................................................................ 7-14
7.4.1 Reading Emails in In Box........................................................................................................................ 7-14
7.4.2 Reading Emails in Out Box .....................................................................................................................7-16
7.4.3 Reading Data in Air Info Log.................................................................................................................. 7-17
7.4.4 Checking the Details of the Mail.............................................................................................................7-17
7.5 ATTACHMENT .................................................................................................................................................. 7-18
7.5.1 Viewing a Picture Attachment.................................................................................................................7-18
7.5.2 Saving Pictures You Received ................................................................................................................. 7-19
7.5.3 Playing Melody Attachment ....................................................................................................................7-20
7.5.4 Saving Downloaded Melody....................................................................................................................7-21
7.6 REPLYING/FORWARDING AN EMAIL................................................................................................................. 7-21
7.6.1 Replying to an Email...............................................................................................................................7-21
7.6.2 Forwarding an Email..............................................................................................................................7-23
7.7 SETTING FREE BOX..........................................................................................................................................7-23
7.7.1 Rename Free Box ....................................................................................................................................7-23
7.7.2 Setting Auto Saving List ..........................................................................................................................7-24
7.7.3 Deleting Auto Saving List........................................................................................................................ 7-24
7.8 SEARCHING AN EMAIL .....................................................................................................................................7-25
7.8.1 Searching an Email by Date....................................................................................................................7-25
7.8.2 Searching an Email by Subject................................................................................................................7-26
7.8.3 Searching an Email by Address...............................................................................................................7-26
7.8.4 Searching Emails that are protected....................................................................................................... 7-26
7.9 TRANSFERRING AN EMAIL BETWEEN MAIL BOX .............................................................................................. 7-27
7.10 SETTING/CANCELING EMAIL PROTECTION....................................................................................................... 7-27
7.11 DELETING EMAILS ........................................................................................................................................... 7-28
7.11.1 Deleting Emails Individually................................................................................................................... 7-28
7.11.2 Deleting All Emails In a Designated Mailbox- Method 1 .......................................................................7-28
7.11.3 Deleting All Emails In a Designated Mailbox- Method 2 .......................................................................7-29
7.11.4 Deleting All Mailboxes............................................................................................................................7-29
8. BOOKMARK .......................................................................................................................................................... 8-1
8.1 CREATING A BOOKMAR K ...................................................................................................................................8-1
8.1.1 Creating a New Bookmark ........................................................................................................................ 8-1
8.1.2 Resuming Editing the Bookmark ............................................................................................................... 8-2
8.1.3 Revising a Bookmark.................................................................................................................................8-2
Page 16

UT618 User Manual Table of Contents xv
8.1.4
Saving Bookmark From Air Info ...............................................................................................................8-2
8.1.5 Saving Air Info Address From Mailbox.....................................................................................................8-3
8.2 DELETING A BOOKMARK ...................................................................................................................................8-3
8.2.1 Deleting Bookmarks Individually..............................................................................................................8-3
8.2.2 Deleting All Bookmarks.............................................................................................................................8-4
8.2.3 Resetting Bookmark...................................................................................................................................8-4
8.3 SEARCHING A BOOKMARK .................................................................................................................................8-5
9. AIR INFO (NEEDS NETWORK SUPPORT) ...................................................................................................... 9-1
9.1 AIR INFO TEXT................................................................................................................................................... 9-1
9.2 CONNECTING FROM MIMI EXPRESS .................................................................................................................. 9-1
9.3 CONNECTING FROM AIR INFO LOG .................................................................................................................... 9-3
9.4 CONNECTING FROM MY FAVORITE.................................................................................................................... 9-4
9.5 DISPLAYING THE HEADER OF AIR INFO.............................................................................................................. 9-4
9.6 SAVING AIR INFO DATA ONLINE........................................................................................................................9-5
9.7 READING AIR INFO OFFLINE .............................................................................................................................. 9-6
10. GROUP ..............................................................................................................................................................10-1
10.1 SETTING A GROUP............................................................................................................................................10-1
10.1.1 Setting the Master Phone ........................................................................................................................10-1
10.1.2 Setting the Slave Phone........................................................................................................................... 10-2
10.2 DELETING A GROUP .........................................................................................................................................10-2
10.3 COMMUNICATION ............................................................................................................................................10-3
10.3.1 Dialing.....................................................................................................................................................10-3
10.3.2 Answering................................................................................................................................................ 10-3
10.4 TRANSFERRING A PHONE BOOK.......................................................................................................................10-4
10.4.1 Transferring select Phone Book data...................................................................................................... 10-4
10.4.2 Transferring All Phone Book Data..........................................................................................................10-5
10.5 TRANSFERRING BOOKMARKS........................................................................................................................... 10-6
10.5.1 Transferring a selected Bookmark ..........................................................................................................10-6
10.5.2 Transferring All Bookmarks....................................................................................................................10-7
10.6 RECEIVING PHONE BOOK/BOOKMARK............................................................................................................. 10-7
11. DATA COMMUNICATION............................................................................................................................ 11-1
11.1 DATA COMMUNICATION PROCEDURE (NEEDS NETWORK SUPPORT) ............................................................... 11-1
12. MAINTENANCE & TROUBLESHOOTING................................................................................................ 12-1
12.1 PHONE MAINTENANCE..................................................................................................................................... 12-1
12.2 TROUBLESHOOTING .........................................................................................................................................12-1
13. INDEX................................................................................................................................................................ 13-1
Page 17

xvi Table of Contents UT618 User Manual
BLANK PAGE
Page 18
Getting Starte
d
1. Getting Started
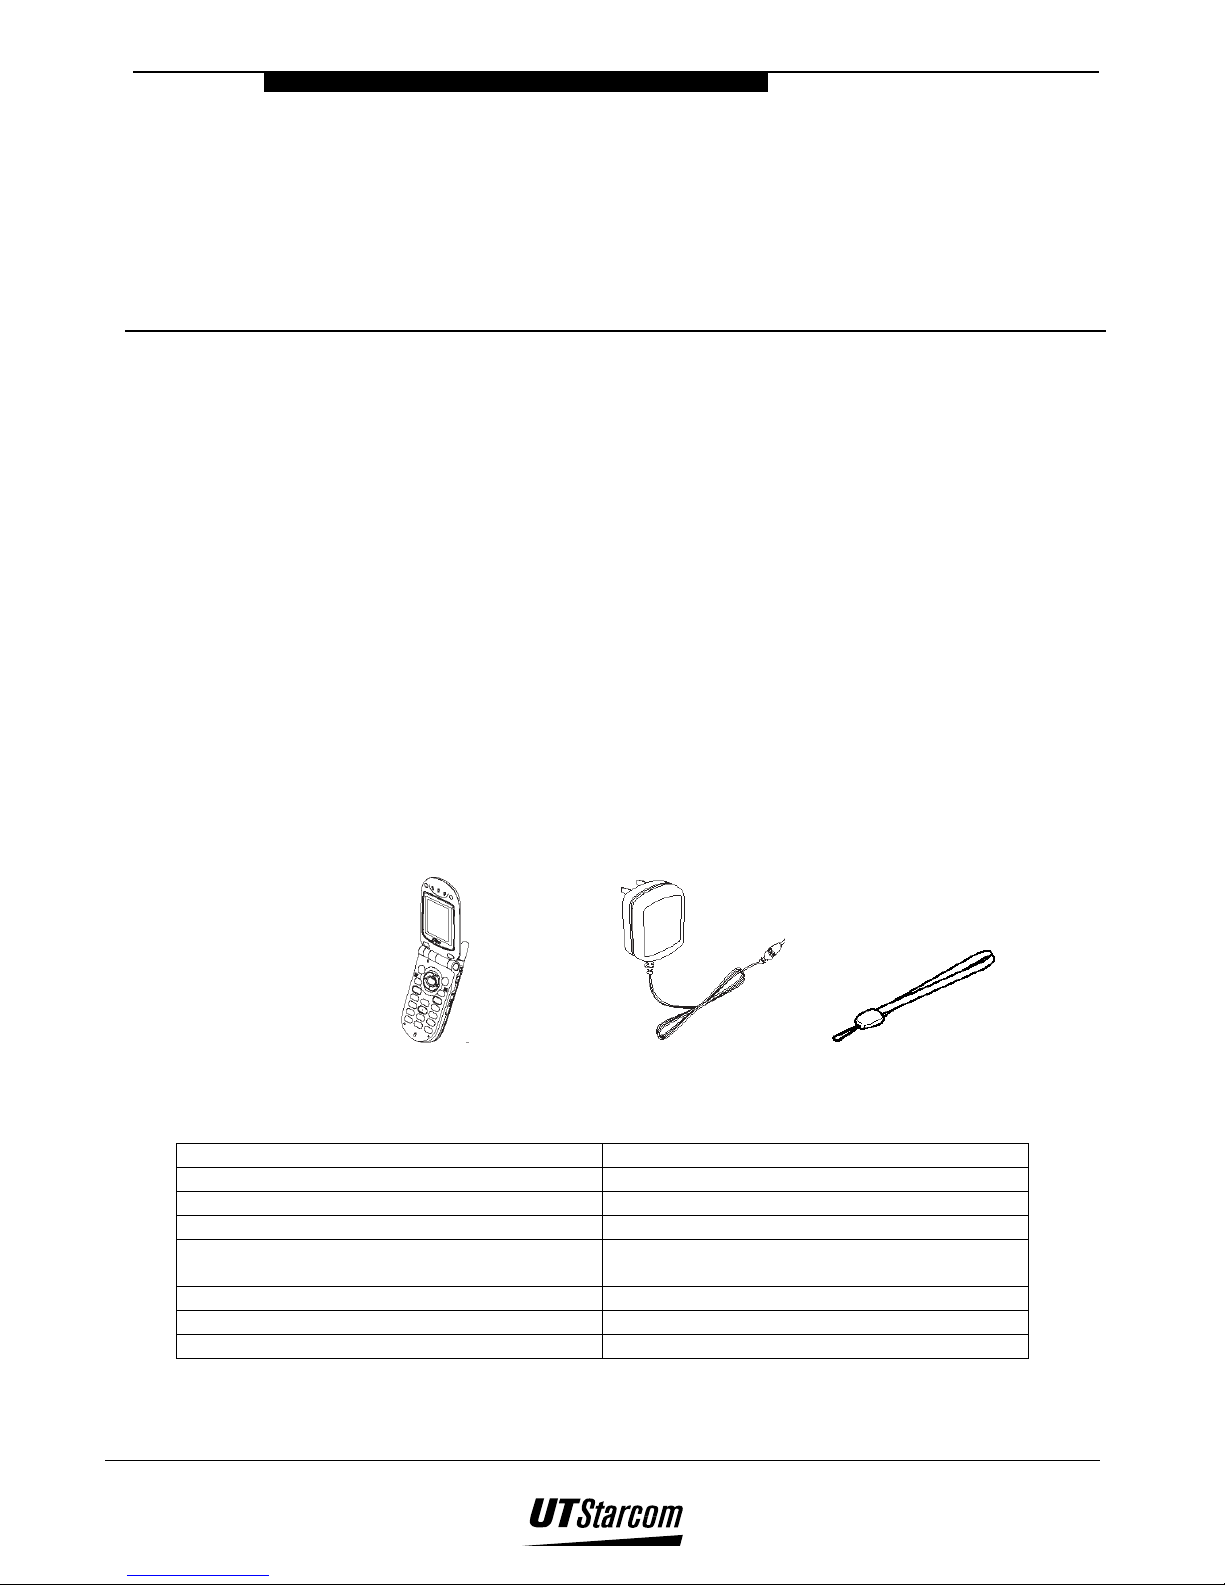
1.1 Package contents
Please check the package contents by comparing them with the following list. In
case there are missing items or product defects, please contact your local phone
dealer.
• Main unit (UT618 phone) and Lithium Ni-MH battery
• Battery charger
• Hand strap
1
• Instruction Manual
• After service guide
• Warranty certificate
• QuickStart guide for UT618
1.2 Specification
Dimension (width x length x height) About 45mm x 83mm x 23.5mm
Weight About 85g
Battery 3.6V, 580mAh lithium battery
Transmission voltage About 10mW (average)
Battery charger Input: 100-240VAC, 50-60HZ
Weight of the battery charger About 50g
Time for charging the battery 2.5-3.5 hours
Standby time in public mode 48-200 hours
Output: 5.2VCD, 320mA
Product Specifications
Page 19

1-2 Getting Started UT618 User Manual
))))Note: The length of standby time the battery can supply power is determined by the telephone
usage. The following actions or situations can consume more power and reduce the
standby time.
• Migration to areas where signal strength is weak.
• Moving through the service area.
• Talking on the phone for long periods of time.
• Ringing volume is set to the maximum.
• Earpiece volume is set to the maximum.
• Leaving the phone in hot or cold places such as a car will reduce the
capacity and life of the battery. A phone with a hot or cold battery may
temporarily not work even when the battery is fully charged.
• Repeated changing of phone parameters. (i.e. Adding or deleting entries
to/from the phonebook feature) and usage of phone features viz. Phone
book, SMS, Mail, Alarm etc.
• “Back light” being ON consumes more power.
• Repeated closing and opening of the flip cover.
• Pressing and holding
to search the network
Page 20
UT618 User Manual Getting Started 1-3
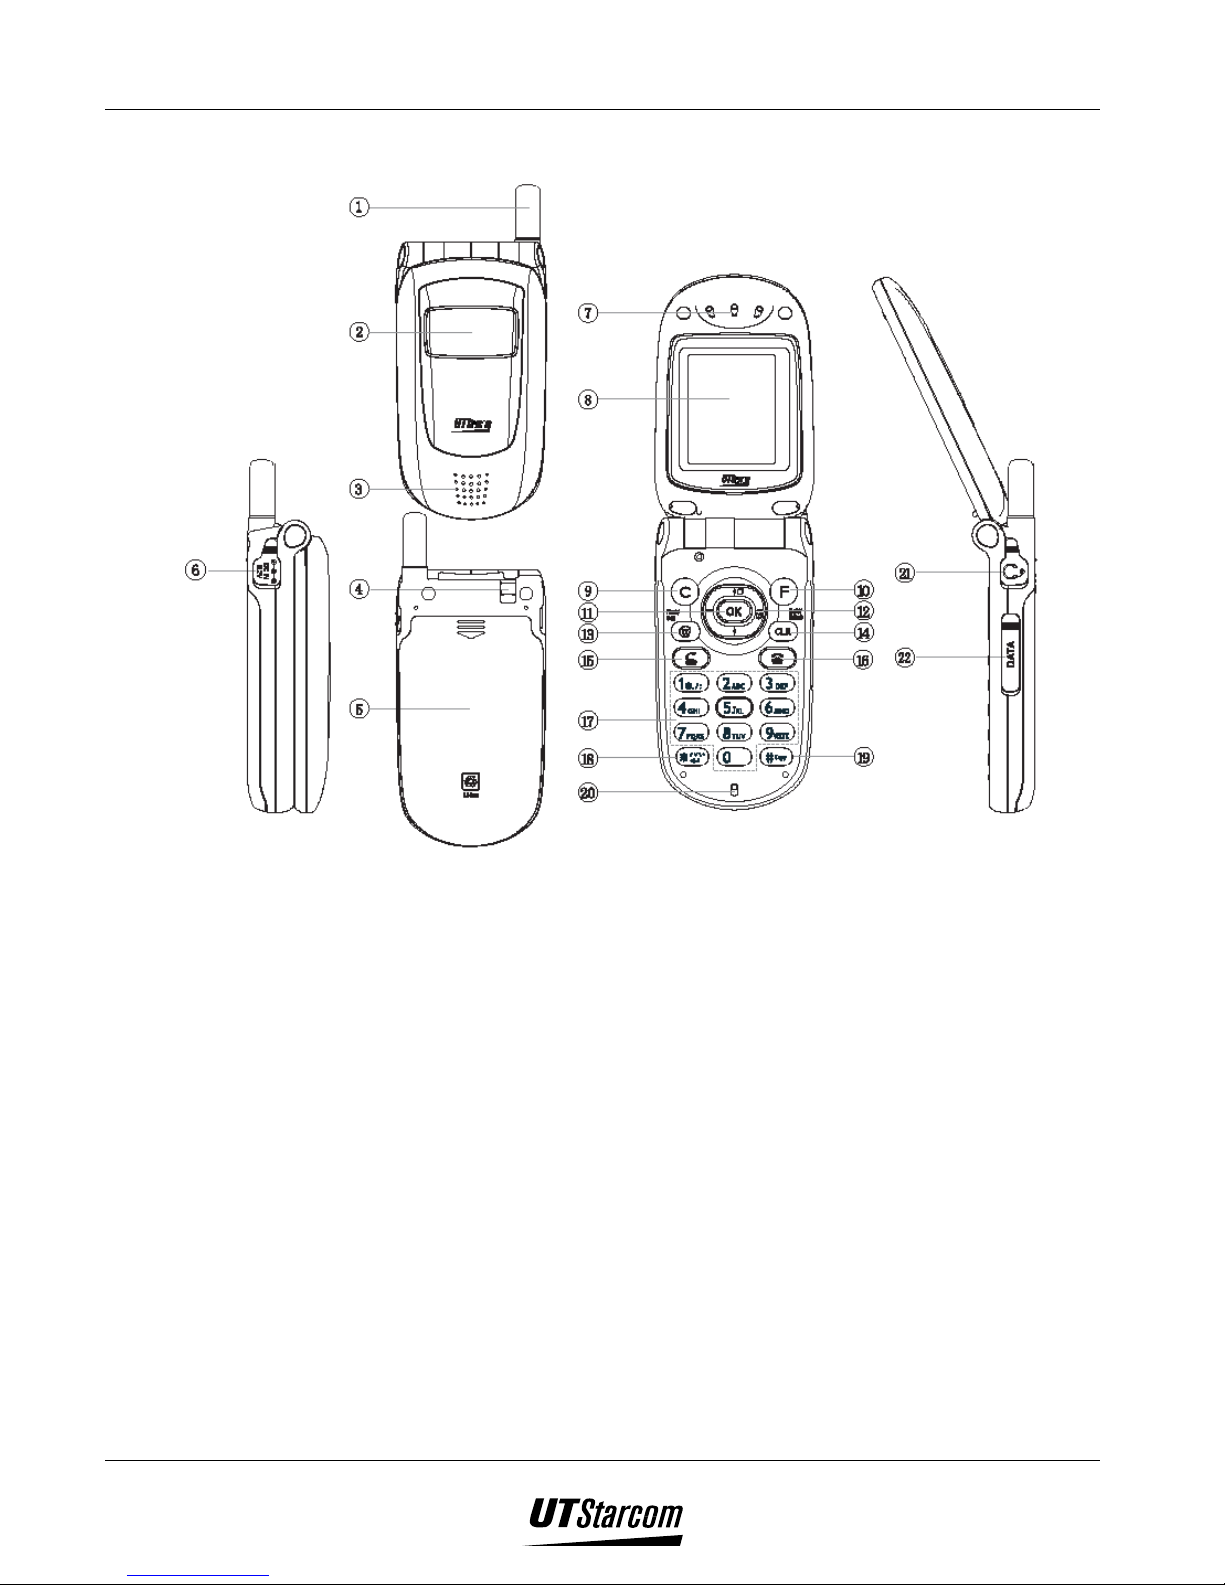
1.3 Handset Description
1. Fixed antenna:
The antenna cannot to be extended. Any attempt to pull out the antenna may
damage the handset and antenna.
2. Sub display:
The Sub display flashes when there is any incoming call, message, Email or
alarm. The Sub display supports three-color settings - red, green and orange.
The red light is turned on when the battery is being charged.
3. Speaker:
Plays back ringing, warning and keypad beeps.
4. Slot for the hand strap
5. Battery cover
6. Charging connector
7. Earpiece
8. Main display
Page 21
1-4 Getting Started UT618 User Manual
9.
10.
11.
12.
key:
This key is used to enter a Custom Function, search the network and to return
back to the previous screen.
key:
This key is used for accessing the Main menu, Manner Setting or Sub-LCD
Setting and save edited data or block incoming calls.
(Ok) key:
Along with the confirmation option (Okay) this key is used for entering the OK
menu, which caters to various functions
(Functional) key:
This key has multiple functions. On its own, the four sides of the key represent
various functions viz. browse and enter Dialed Record, Incoming Record,
Phone Book, Book Mark. It is also used for moving the cursor.
13.
14.
15.
16.
17.
(@/Flash/English/Chinese) key:
This key is used to enter the MiMi Express menu, which caters to enter Air Info
record, my Favorite etc.
(CLR/HOLD/group) key:
This key is used to delete phone number/text/data and hold a call.
key:
This is the off-hook key to dial and answer incoming calls.
(Power/End) key:
This key is used to power on and off, hang up, cancel an operation or return to
standby mode.
(Number/Text) key:
Used to enter telephone numbers, text or for selecting functions.
Page 22
UT618 User Manual Getting Started 1-5
18.
(*) key:
This key is used as a carriage return key and also for selecting tones when
inputting Chinese data.
19.
(#) key:
This key is used display the sub-menu when editing text.
20. Microphone
21. Earphone jack:
To connect the earphone
22. Data communication slot cover
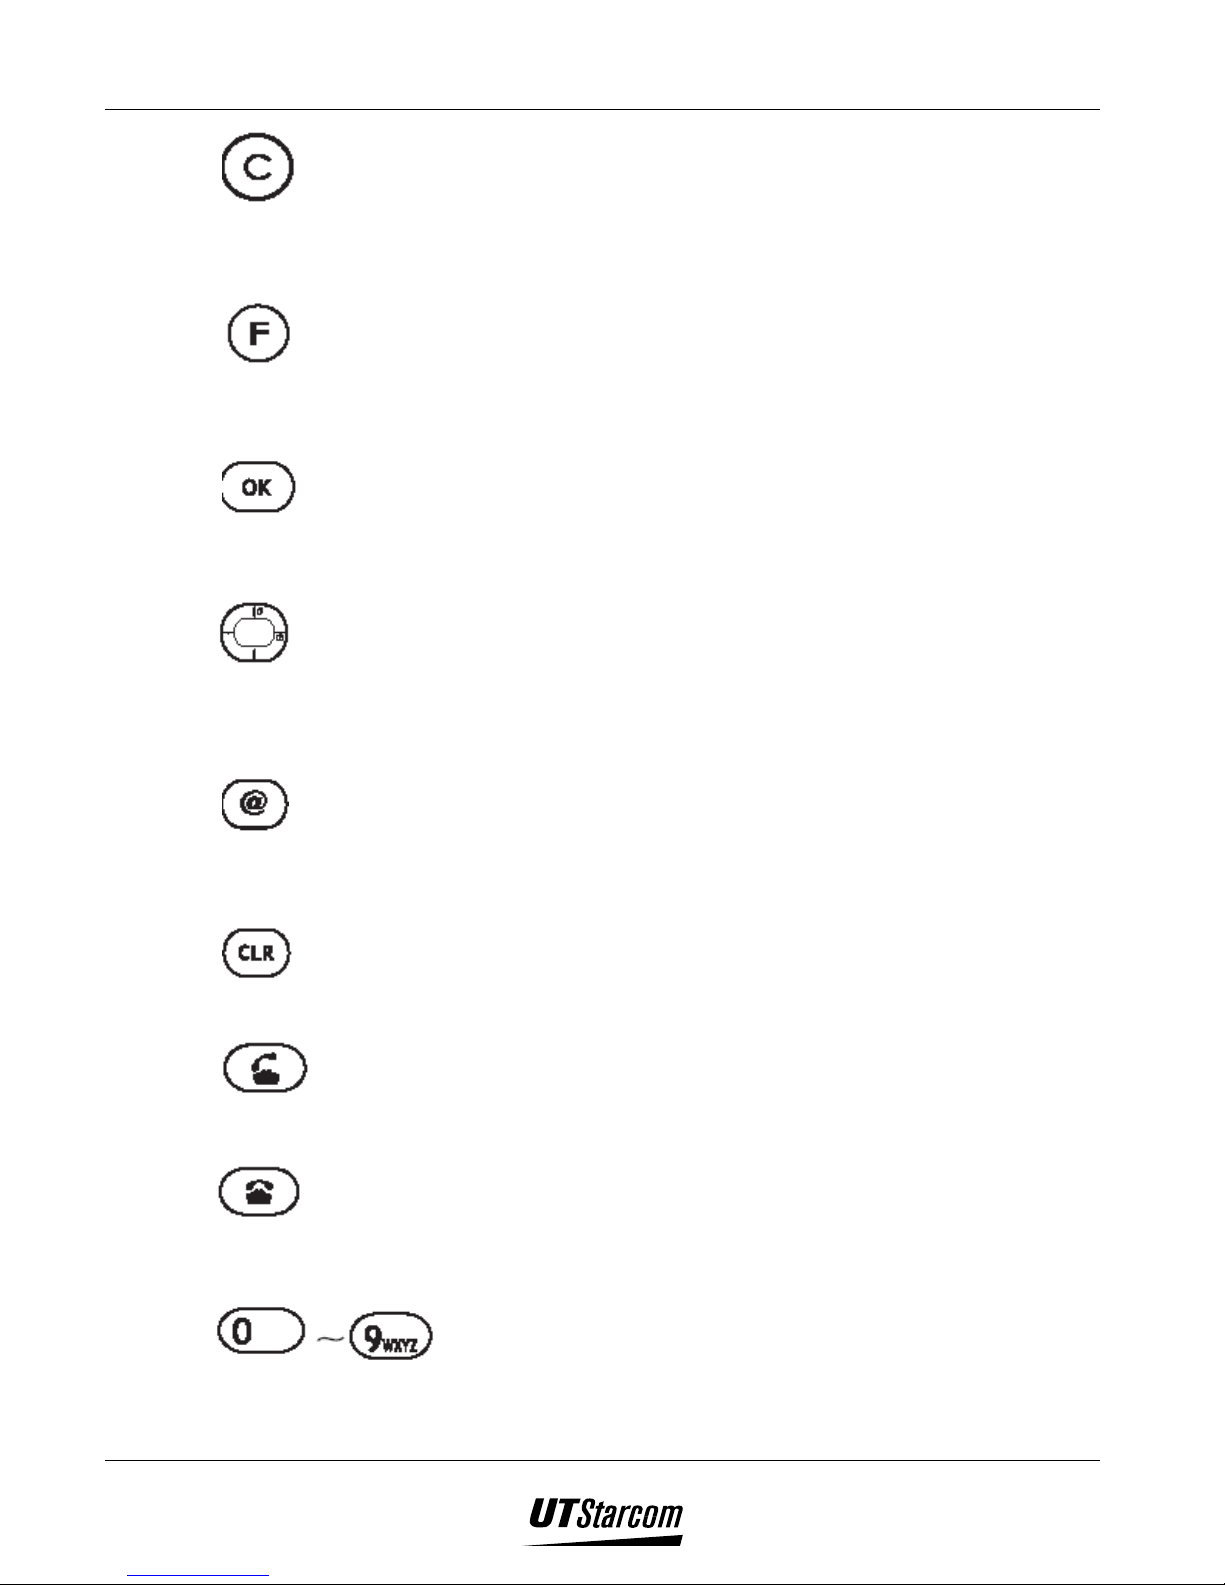
1.4 Soft Key Description
, , and are keys located on the upper half of
the keypad that can be used to select the functions on the last line of the display.
However, please be aware the keys and the corresponding functions on the
display are not aligned exactly.
E.g.
Out BOX
10/10 10:00
10/05 11:30
Re:GoodMor
10/03 23:20
Hello !
1/10
Appointmen t
Page 23
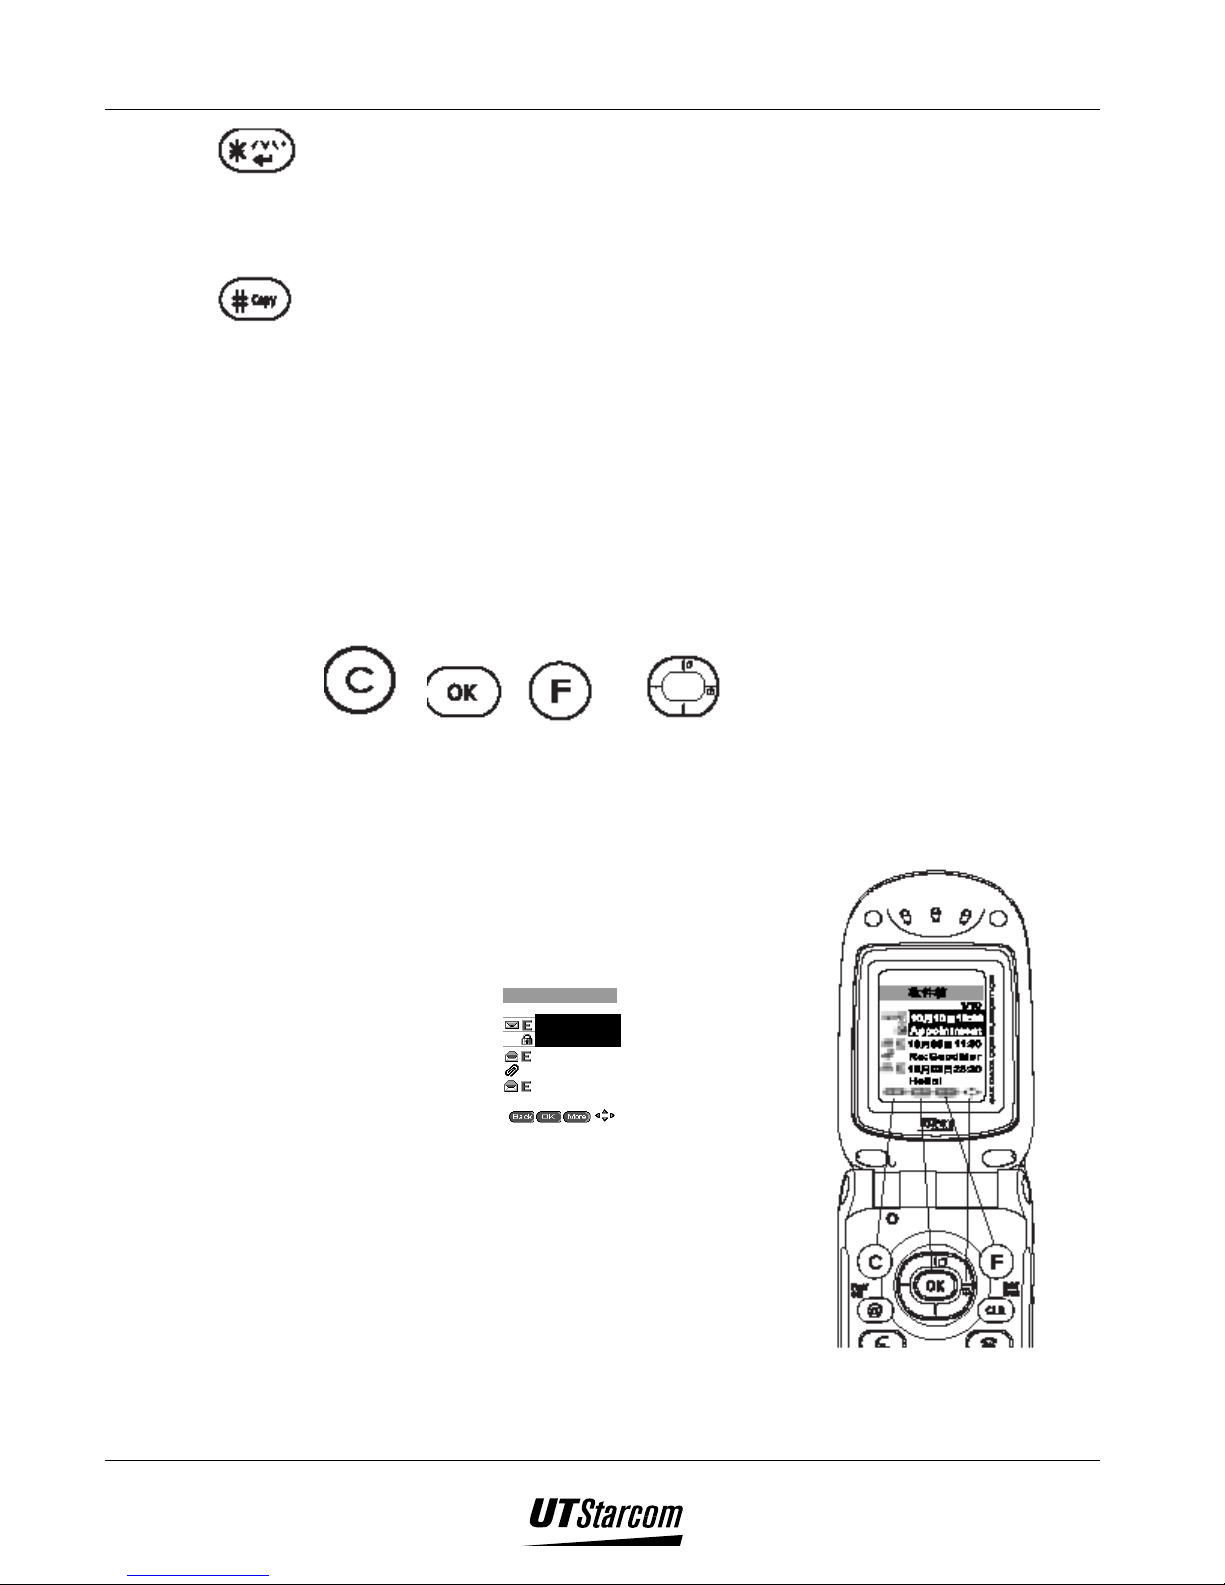
1-6 Getting Started UT618 User Manual
• If the first icon in the last line of the display indicates
you can press
, it means you can press to select the function; if the
third icon is (or , , , etc.,) it means
you can press
(or etc.,) it indicates you can press
1.5 Display Indicator
1.5.1 Main Display Indicator
, it means
to select the function; if the second icon is
to select the function; if the forth icon indicates
to select the function;
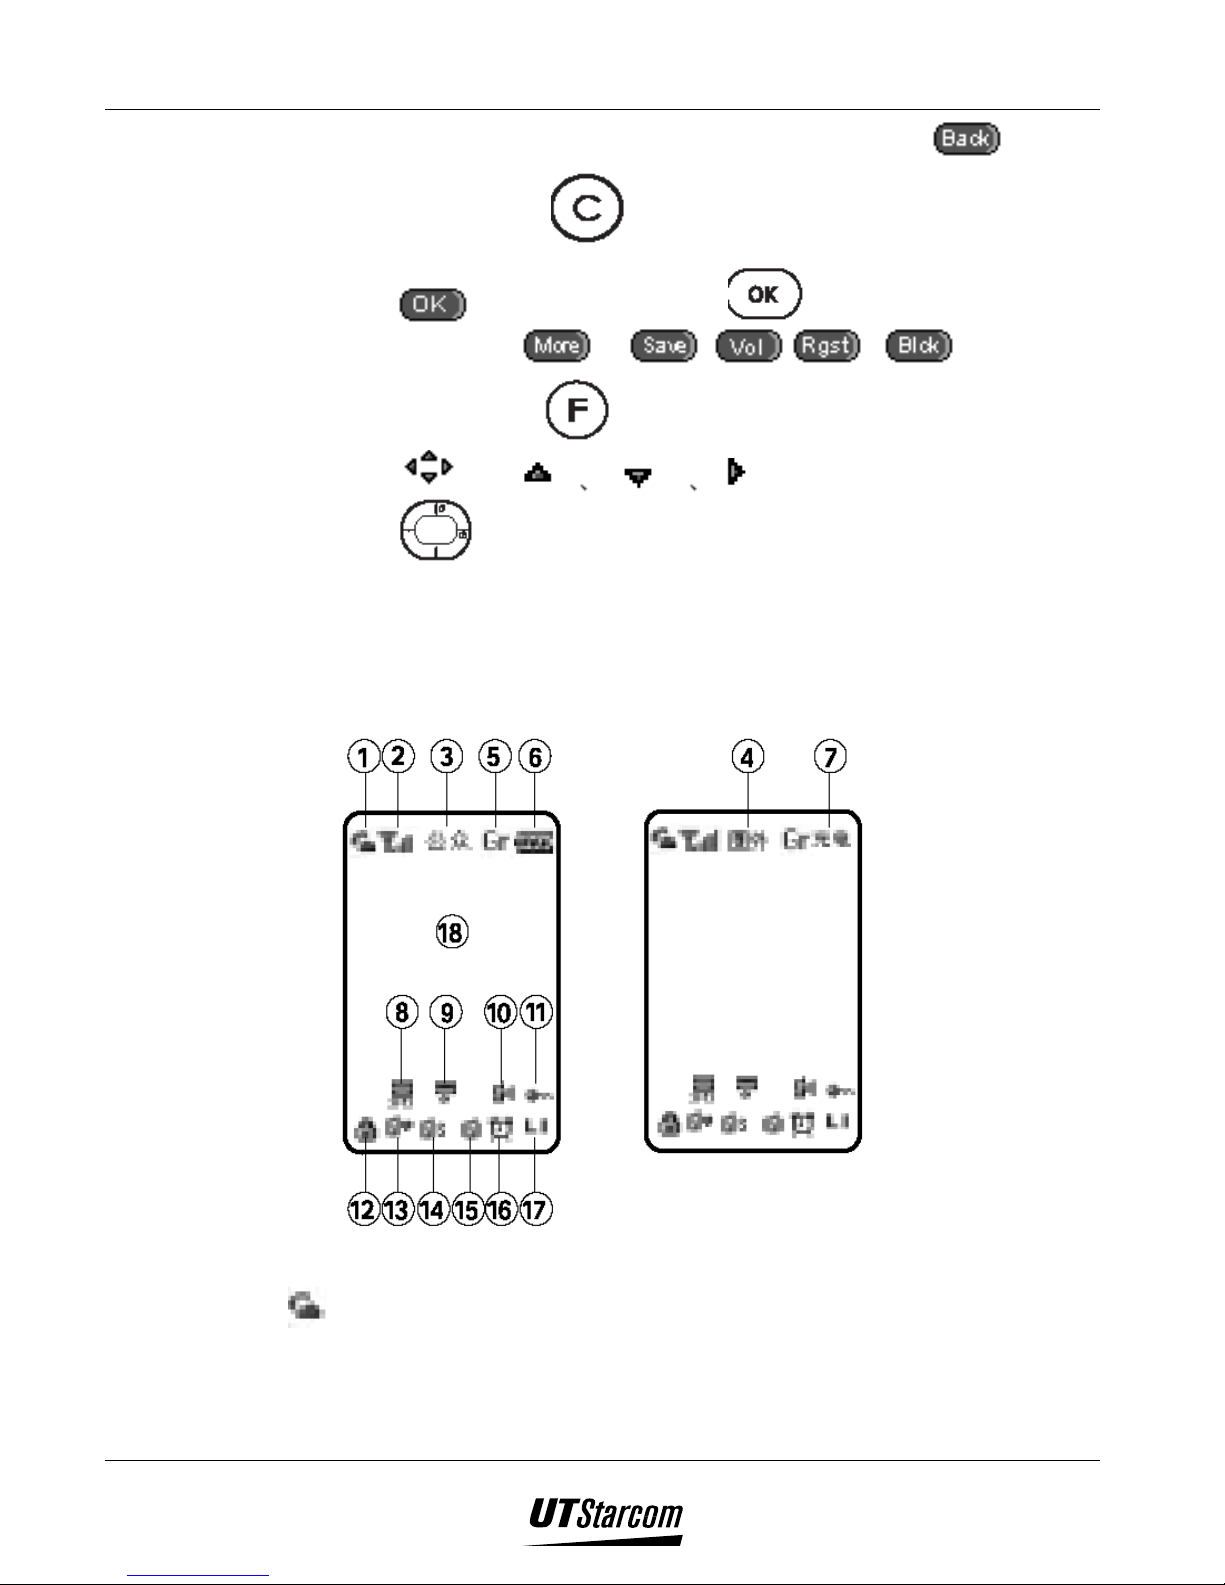
1.
Service Indicator:
When a call is in progress this icon is displayed to show the off-hook
status. The phone is in standby status when this icon is not displayed.
Page 24
UT618 User Manual Getting Started 1-7
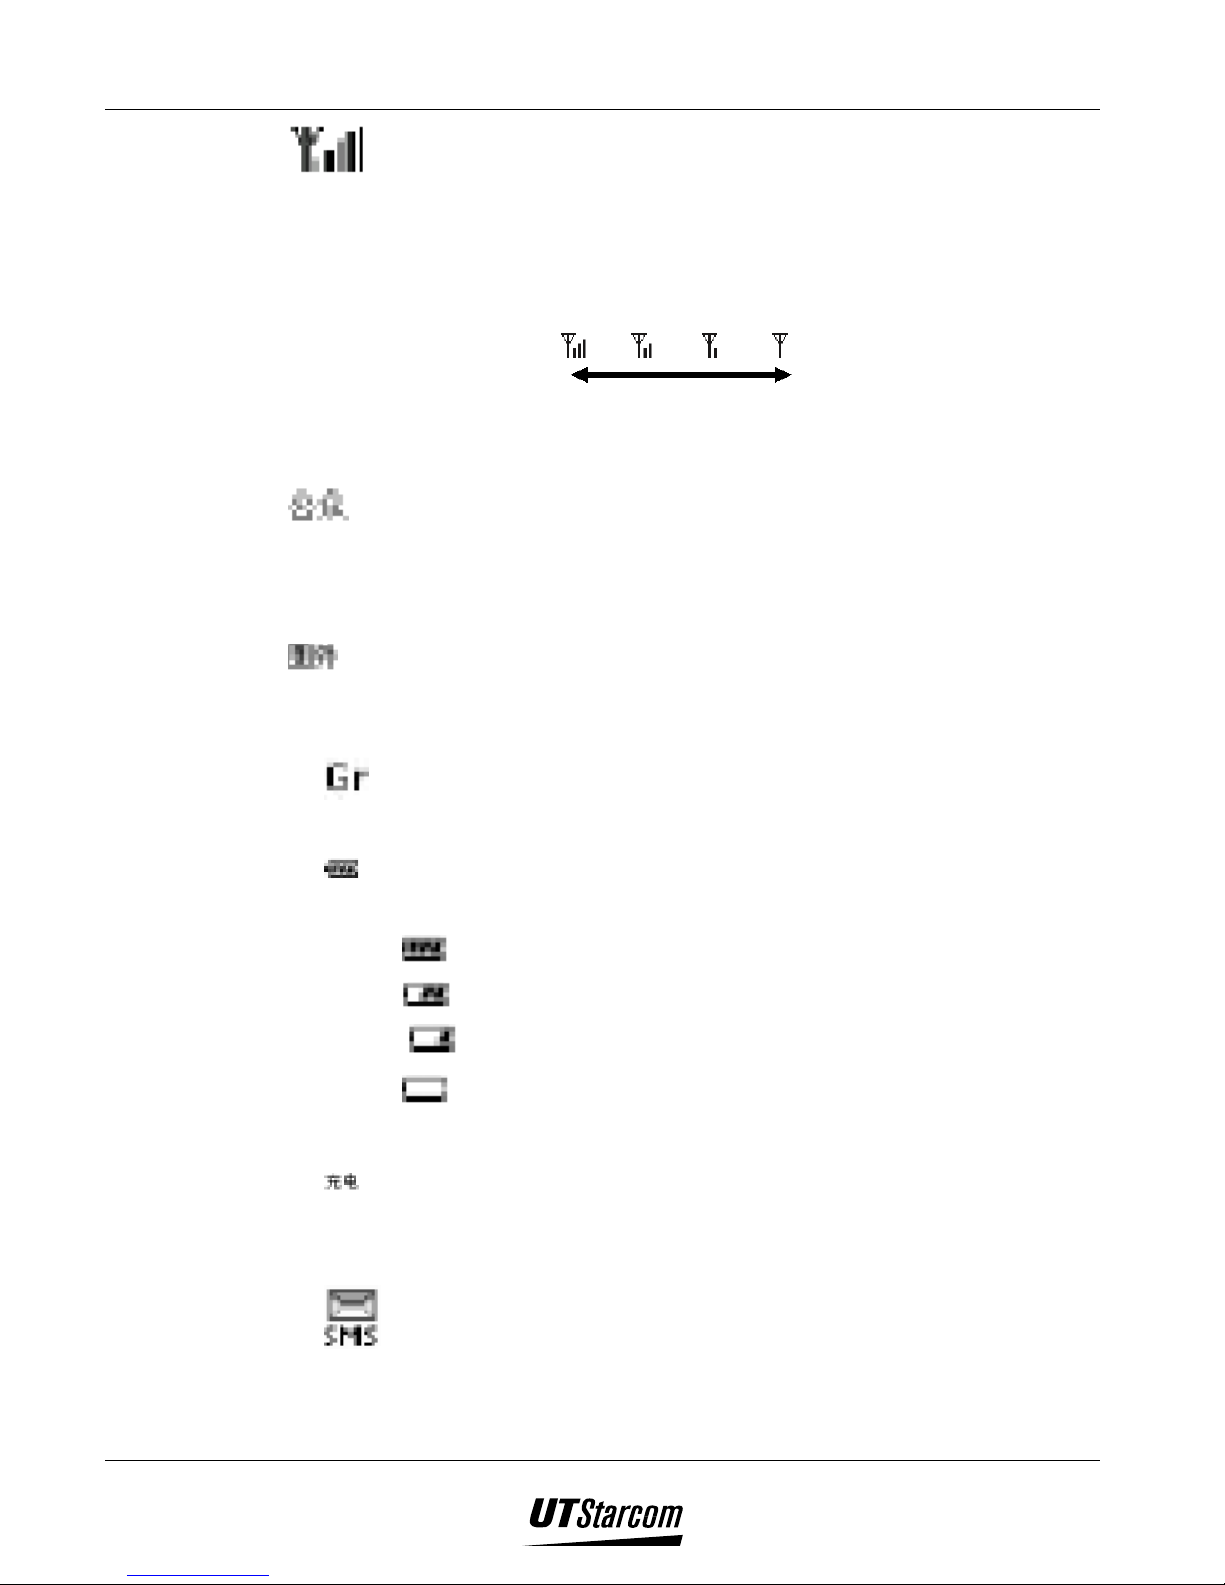
2.
3.
4.
Signal Strength:
Indicates the current signal strength. When the phone is in a service area
lines are displayed to signify signal strength. More lines mean better
signal strength. Signal strength is symbolized as follows and it also
indicates whether the phone is in public mode or public/group mode.
Strong Weak
Mode of operation :
This icon displays the public mode of operation and it indicates that the
phone is in service area. The indicator will flash when dialing under
public mode or when you have an incoming call.
Out of service area:
This icon indicates that the phone is out of service area and you cannot
dial out or answer a call.
5.
Group Mode:
Indicates that the user is in a public/group mode or transfer mode
6. Battery Power:
Indicates the remaining battery power level. There four levels:
- Full
- Medium
- Low
- Very low
7. Charging Status:
This symbol indicates the charging status.
8.
Message Indicator:
Page 25
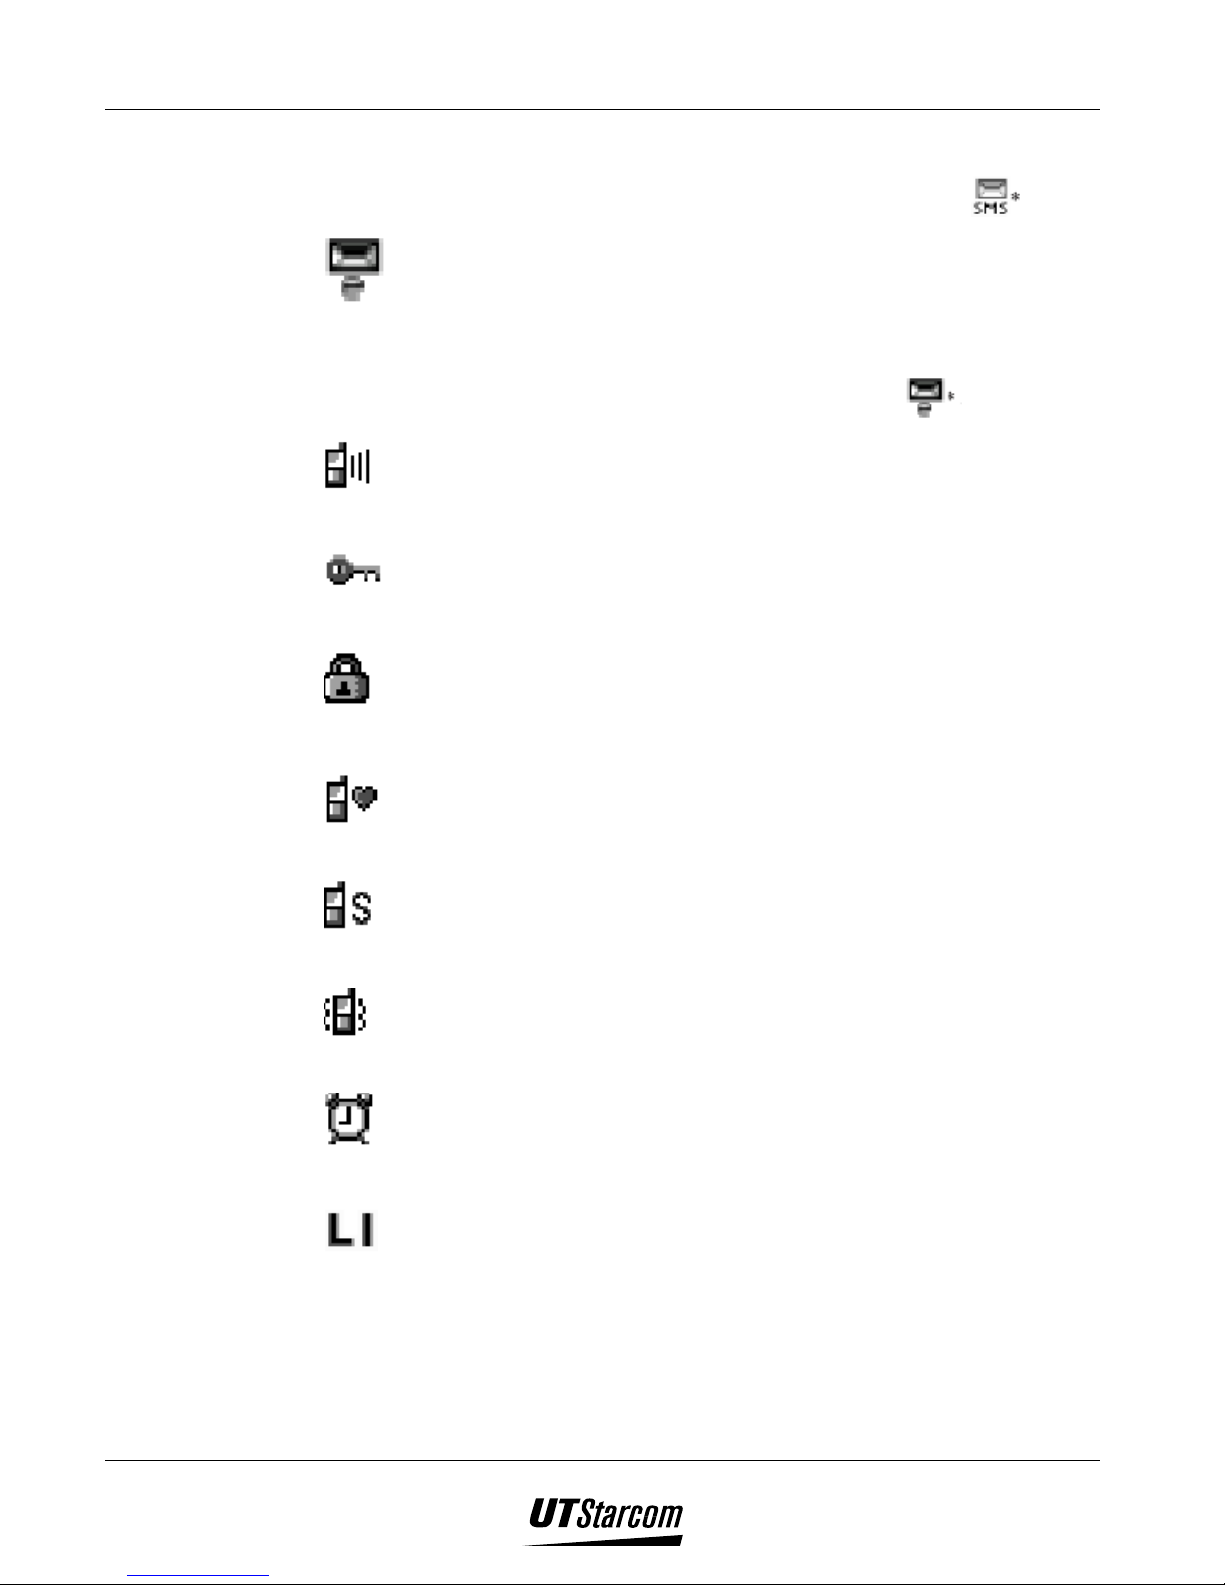
1-8 Getting Started UT618 User Manual
This symbol indicates a new short message. The right side indicates the
numbers of unread messages. When the messages are less than 9, it
9.
10.
11.
12.
displays a number; when they are over 10, it is displayed as
.
Email Indication:
This symbol indicates an unread email. The right side indicates the
number of unread emails. A number is displayed when the emails are
less than 9; when they are over 10, it is displayed as
.
Ringing
Indicates an unanswered incoming call.
Keypad Lock:
Indicates the keypad is locked.
Toll Lock:
Indicates Toll lock has been enabled.
13.
Manner Mode:
Indicates manner mode has been activated.
14.
Ringer Indication:
Indicates incoming call ringer is turned off
15.
Vibrator Indication:
Indicates incoming call vibrator is on
16.
Alarm:
Indicates the Alarm is activated.
17.
LDS /LTS:
Indicates LDS or LTS is activated.
18. Display area:
This is the area where all the operations and activities are displayed.
Page 26
UT618 User Manual Getting Started 1-9
)))) Note:
• Battery level is an indicator. The number of the bars may change under
different environmental conditions.
• If the standby screen displays “Please Charge”, it means that the
battery has run out of power and it needs to be recharged immediately.
Under such circumstance no keys work except .
1.5.2 Sub Display Indicator.
This phone comes with an additional sub display on the phone flip cover. Even
if you close the flip you can still know the standby mode, incoming call mode
and the caller. The various modes are illustrated as below:
1. Modes of standby mode:
Standby mode Low battery Unanswered Incoming call
10/10 Fri. 10:00
Please Charge
Missed Call
New SMS New mail Charging
You Got SMS
1
You Got E-Mail 1
Charging
2. Real Time Events:
• Incoming call (if the phone number is saved in phone book)
Call From:
Michael Yang
• Incoming call (if the phone number is not saved in phone book or is
saved in the secret phone book)
Call From:
07012345678
• Receive SMS
You Got SMS
Page 27
1-10 Getting Started UT618 User Manual
• Receive mail
You got E-mail
• Alarm
10/10 Fri.10:00
Alarm
• Schedule (the second line indicates the first 16 bytes of the information)
08/09 Fri. 19:00
[Max 16bytes]
• Group incoming call
Group 1
No.0001
• Data Communication
Data Comm.
1.6 How to Use the User’s Manual
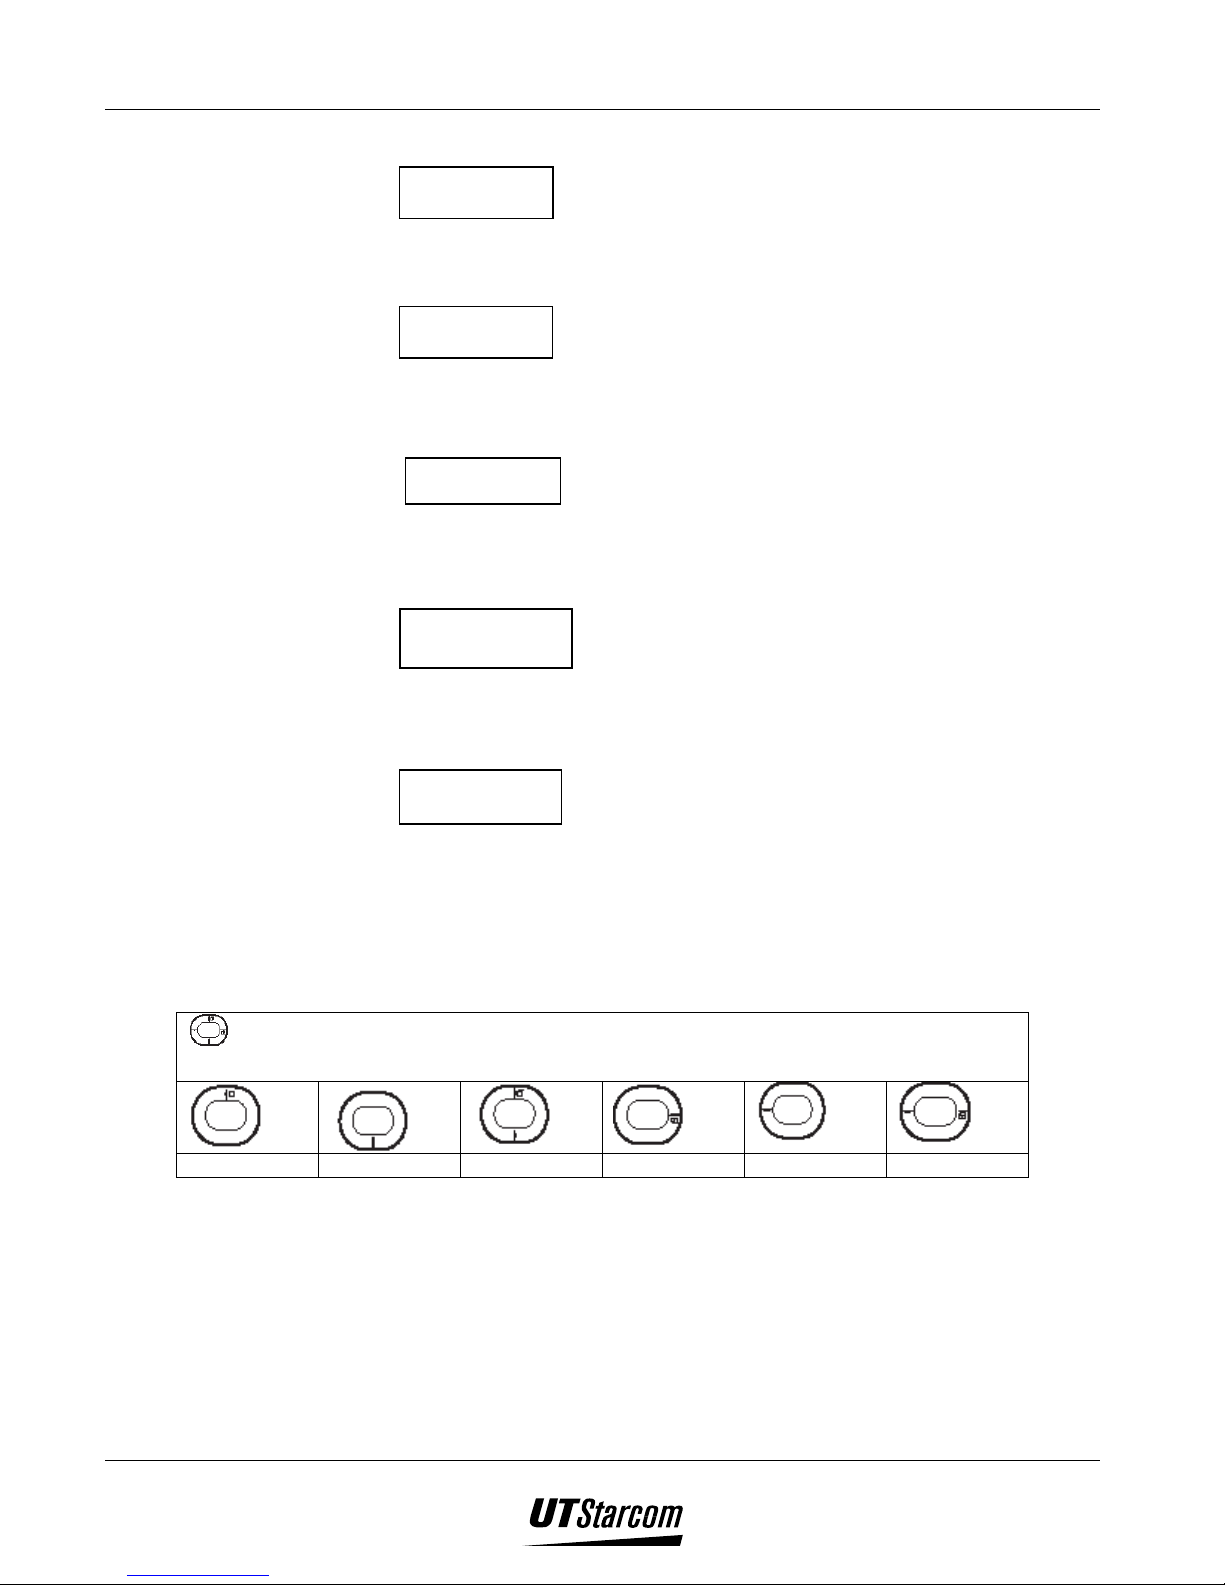
1.6.1 Functional Key Instructions
Press functional keys “Up”, “Down”, “Left”, “Right” to select “search, select,
adjust, setting” etc. The directions of the functional keys are as following:
Up Down Up or Down Right Left Right or Left
1.6.2 Conventions in the manual
In this manual, “Press * key” means pressing * key and releasing it
immediately. “Press and hold * key” or “hold * key” mean pressing * key for
more than 2 seconds before releasing it.
Page 28
UT618 User Manual Getting Started 1-11
1.6.3 Activity status on Opening / Closing the Flip Cover
Status Opening the flip Closing the flip
Incoming call If automatic answer is not set
then Press
answer a call.
Talking End call
Sending or receiving mails,
message, air info, online
registration etc.
Automatically receive mail, data
communication
Connection end
Will remain still connected
to
Incoming ring will be switched
off but the phone will still
remain in but the phone is still
in incoming call mode
1.6.4 Timeouts and their effect
‘Timeout’ means that if any key is not pressed within a certain time, the phone
will automatically return to either the standby mode wallpaper or connecting
screen.
Password screen will automatically return to wallpaper if there is a timeout.
Also, the phone will automatically return to standby mode wallpaper after a
while if alert information is displayed.
The timeout duration is about 60 seconds and then the display returns to
wallpaper or connecting screen.
)))) Note
When any operation is complete, please press to return to standby
mode screen. Constantly displaying an operational screen will consume more
battery power.
1.6.5 Returning to the Previous Screen
Press to return to the previous screen.
1.6.6 Returning to Standby Mode Screen
Press to return to standby mode screen.
Page 29
1-12 Getting Started UT618 User Manual
1.6.7 Quick Browse
In the main menu or list screen, you can browse features quickly by pressing
and holding
• Press and hold
Browse to bottom-right menu and the cursor will return to the upper-left
menu again.
Main Menu
• Press and hold
to any direction.
to the right.
to the left.
Browse to upper-left menu and the cursor will return to the bottom-right
menu again.
Main Menu
• Press and hold
on top.
Browse to upper-left menu and the cursor will return to the bottom-right
menu again.
Page 30
UT618 User Manual Getting Started 1-13
Main Menu
• Press and hold
downwards
Browse to bottom-right menu and the cursor will return to the upper-left
menu again.
Main Menu
• List screen
Melody List
4/29
The Christm
Can't help fa
Fly me to the
No Scrub
Boombustic
I try
Displays next six data.
Display previous six data.
Up
Down
Page 31

1-14 Getting Started UT618 User Manual
)))) Note
If the data is less than six,
does not work.
1.7 Scenarios where the phone can’t be used
03/15 Fri.
:
3
1
0
0
• Reason: (Public mode) the user is out of the service area.
• Solution: Please move to a service area or a place with stronger signal
reception.
Weak Signal!
00:00:02
• Reason: If the phone is under “public mode” and moves to a weak
signal area, the
icon flashes and “Weak Signal” warning information
is displayed.
• Solution: Please move to a place with stronger signal reception.
02/14 Fri.
10:00
• Reason: “Phone Lock” is on.
• Solution: Please unlock the “Phone Lock”.
Page 32

UT618 User Manual Getting Started 1-15
Please Charge
• Reason: If the battery is low under standby mode, the display indicates
“Please Charge” and sounds a warning beep.
• Solution: Please charge.
Please Charge
00:00:20
• Reason: Warning beep sounds when the phone is in use, which means
there is only
displayed on the main displayed.
• Solution: Please charge.
)))) Notice:
• When the phone is in receiving/sending mail and Air Info connecting
mode and if the signal is too weak or the battery is low,
flash, but it will not sound a warning beep.
• If the display indicates “Please Charge”, it is recommended to recharge
the phone for 5-10 minutes before using it.
1.8 Charging the battery
one minute talk time remaining. “Please Charge” will be
icon will
1.8.1 Charging Instructions
1. Plug the charger into an AC100-240V electrical outlet.
Page 33

1-16 Getting Started UT618 User Manual
t
100-240V AC Outle
2. Plug the charger into the charging connector of the phone.
• During charging, the red light will be illuminated.
• It takes 2.5-3.5 hours to charge. (Exact time may vary depending on
circumstances)
• If the phone is turned on during charging, you can still answer incoming calls,
but this will consume battery power thus extend the charging time.
• The battery can be recharged even if the phone is connected to the Internet or
the earphone is plugged in.
3. Switching off of the Sub-LCD light indicates that the charging is complete.
Sub-LCD light status during
charging
On
Flash - Abnormal
Off
1.8.2 Battery Life
Main Display Charging status
Charging icon light
(Power on) light on
It does not display when power
off
Charging
Indicates the charger is not
correctly plugged in the phone.
Please reinsert it. If the Sub
LCD light still flashes, it
indicates the battery or the
charger has problems.
Charge completed
• The actual battery life varies according to a number of factors. Some of
them are listed herewith.
• Continuous standby time is defined as the time during which the phone
does not make or receive any call or perform any operation. The
continuous standby time of the phone is around 48-200 hours.
• Actual battery life is determined by “standby time” and “talk time”. The
longer the talk time, the shorter is the standby time.
• If the phone is used in areas with weak signals, at low or high
temperature or out of service area, it may consume more battery power.
• Entering text over an extended period or time, for example: editing
phone book, editing mail, connecting to the Internet and Air Info will
consume more battery power.
Page 34

UT618 User Manual Getting Started 1-17
• If the flip is open, it consumes more battery power.
• At high or low temperature, battery power consumption will increase.
The battery life will decrease at low temperature however the
performance will increase once it is back to normal temperature.
)))) Note:
• During charging, the charger or the phone may become hot. This is
normal. There is no reason for concern.
• If it interferes with TV or radio reception during charging, please move
the charger to a different electrical outlet, and move the phone to a place
away from TV, radio and other electronic appliances with antenna.
• Please charge the battery for 2.5-3.5 hours before you use it for the first
time or if the phone has not been used for a long time.
• If the phone is connected to the charger again after it has been charged
fully, the sub LCD will be switched ON for a short period after which it
will go OFF.
• Please note the number of bars in display and recharge or replace the
battery as instructed.
• Charging and discharging the battery repeatedly will decrease battery
life. If usage time decreases by half or more, please replace the battery
with a new one.
• If the battery is fully charged and phone is not used or switched off for
extended period of time, battery life will decrease and the battery may
discharge fully.
1.8.3 Replacing the Battery
When the usage time decreases by half or more it’s time to replace the battery.
Except for replacing the battery or any kind of emergency please do not remove
the battery.
1. Press and hold to turn off the phone.
2. Remove the battery cover: Press the upper middle side of the cover with
your thumb and slide it downwards, then remove it.
Page 35

1-18 Getting Started UT618 User Manual
3. Pull out the battery, but make sure not to pull the connector lead directly.
After the battery is out pull the connecter gently. Please make sure you
remember the way in which the connecter was connected ( Polarity).
4. Install a new battery and route the battery cable between the battery and the
phone body.
)))) Note: Make sure the connector is connected with the right polarity and fitted
firmly. Please do not use excessive force.
5. Attach the battery cover firmly.
Page 36

UT618 User Manual Getting Started 1-19
)))) Note:
The red lead of the battery is the positive terminal (anode) and the black lead is
the negative terminal (cathode).
)))) Caution:
Before using the phone for the first time, please charge the battery for 2.5-3.5
hours.
After removing the battery, the following data will be lost:
1. Data in mailbox
2. Air Info data
3. Dialed number record, number memo, incoming call record
4. Copied and cut text
After removing the battery, the following data will be set back to its default
original settings:
1. Time setting
2. Display setting of mail
)))) Note: Please remember to backup important data.
1.9 Connecting the Phone Hand Strap
1. Pass the thin end of the hand strap through the hand strap slot. Pull it out at
the other end.
Page 37

1-20 Getting Started UT618 User Manual
2. Pass the other end of the hand strap through the thin thread and push the thin
thread to the bottom.
1.10 Service Issues
• This PAS phone cannot be used out of the service area. When the phone
is in the service area, it displays
indicator.
• When the call cannot be connected or the signal drops within the service
area, please move to an area where signal level is stronger.
• When the phone is used in the shadow of a building or near a metal door
or electronic appliances, the signal may decrease, and may hinder the
clarity of the communication.
• If you press any key but none of them work, please remove the battery
and put it back a minute later (refer to Page 1-18 for battery installation)
and redo the prior operation. Please note that when the battery is
removed, some data may be lost and settings reset to default values.
Please refer to the “Caution” on Page 1-19.
Page 38
Learning to use your phone
2. Learning to Use Your Phone
2.1 Power On / Power Off
When you use the phone for the first time or if the phone has not been used for
an extended period of time, make sure the phone is charged for 2.5-3.5 hours
before using it.
The phone can be turned on or off by pressing and holding the key.
When the phone is turned on, it will beep and the display and backlit keys will
be turned on. During the process of power on / power off, the display will show
animated graphics.
2
2.2 Introduction to Standby Mode
• This phone comes with four standby modes. "Public" standby mode works
within the service area of the system and does not require special settings.
Refer to "Setting Standby Mode" for details on how to set other standby
modes. If the standby mode is "Public" but you are outside the service area
of the system, the phone will display “
not be available.
1. Public Mode: you can use all PAS services within the service area.
02/14 Fri.
:
3
1
0
0
2. Group Mode: When the phone's group functions are activated, the
phone can be used as an intercom phone.
” image and PAS services will
Page 39

2-2 Learning to use your phone UT618 User Manual
Group
02/14 Fri.
:
3
1
0
0
3. Public/Group Mode: You can use all functions available in Public
Mode and Group Mode.
Group
02/14 Fri.
:
3
1
0
0
4. Transfer Mode: Phone book entries and bookmarks can be
transferred among the phones with Group Mode set.
Transfer
02/14 Fri.
:
3
1
0
0
2.3 Feature Selection Methods
• This phone provides two methods of selecting phone features:
1. Move the cursor to the desired feature in the main menu and press
2. Directly enter the function number
)))) Note:
This manual illustrates the second method, but the user can use the first
method as well.
Page 40
UT618 User Manual Learning to use your phone 2-3
2.3.1 Selecting a Feature by Moving the Cursor
• Press to enter the "Main Menu".
• To enter "OK menu”, press
• Press
key to select the desired feature.
at standby display.
• The size of the image of the selected feature will change and the description
of the feature and an outside frame appears.
• Press
• Press
to enter the selected feature's sub-menu.
key to show the next group of features; press key to show
the previous group of features.
• Press
to select a function and then press to show the selected
feature screen.
)))) Note:
Press and hold
key to gain quick access to the main menu.
2.3.2 Directly Entering the Feature Number
1. Press key to enter "Main Menu".
2. To enter "OK Menu", press
at standby screen.
3. Use numeric keys to enter the feature number. The picture of the selected
feature is displayed.
2.3.3 Table of Feature Numbers
2.3.3.1 Main Menu (directly entering feature numbers)
Features Operations
Own Number
Call/Vibrator
Earpiece volume
Whisper
Key beep
Manner setting
Vibrator
Earphone pickup
Page 41

2-4 Learning to use your phone UT618 User Manual
Features Operations
Melody setting
Melody select
Melody compose
Voice memo
Time manager
Time Date
Alarm
Schedule
Calendar
Anniversary
Sub LCD
Screen/LCD
Wallpaper
LCD contrast
Backlight
Talking time
Standby mode
Group mode
Group setting
Delete Group
Transfer
Special
Calculator
LDS
LTS
Canned MSG
Language
Security
Caller ID
No ID Block
Phone lock
Password
Voice mail
Change own number
Reset
Toll lock
Page 42
UT618 User Manual Learning to use your phone 2-5
Features Operations
All reset
2.3.3.2 Ok Menu
Features Operations
Air Info
SMS
New
Retrieve
Editing Data
SMS BOX
Receive Email
Send Email
New
Retrieve
Send All
Editing Data
Mail Box
MiMi Setup
Online Sign Up
Center Number
Email Setting
Sign
Quote
Sent Beep
Air Info Text
2.4 Making a Call
1. Standby mode must be set to Public Mode or Public/Group Mode before
making a call.
Page 43

2-6 Learning to use your phone UT618 User Manual
2. Refer to "Set Up Standby Mode" for details on how to set up standby
mode.
3. Calls can be established successfully only when there is sufficient signal
strength.
4. Key in the phone number of the party you want to call, the number will be
displayed on the screen.
5. You can also press key to enter the phone book to search the number
then dial the number.
6. If you make an error, press
key to erase the last number. Press and hold
key to clear all digits then return to standby screen.
7. You can press
key to store the phone number into the phone book. Refer
to "Creating New Phone Book" for details.
Two-Stage Dialing:
8. Key in the phone number press key ("P" will be displayed after the
phone number)
9. Press
again
the phone will dial the number after "P"
key in the extension number.
key the phone will dial the number before "P" press
)))) Note:
When you want to dial an extension in an office, you can use this method to
speed up dialing. But this function depends on the other end's PBX type. For
certain type of PBXs, this function may not work.
10. Press
11. When you are connected, the screen displays "In Use". If "Talking Time"
is turned on, length of the call is displayed. When the call is in progress the
following functions can be accessed by the help of the navigation key as
shown below:
- Adjust the earpiece volume
- Number memo
- Search phone book
12. Press
terminated.
key to dial.
to terminate the call. "End Call" is displayed when the call is
Page 44
UT618 User Manual Learning to use your phone 2-7
)))) Note:
• You can also press
first, then dial. But this will cause a few
seconds delay between end of dialing and sending out the signal.
• In step 4 if you type in 32 numbers, you will not be able to press
to search the phone book.
• You cannot dial when you are not in the service area.
• If the phone's "Toll Lock" is turned on, and you attempt to dial a
long distance number the screen will display "Toll Lock”.
2.5 Dialed Number Record
• Phone numbers that are already dialed previously, short messages,
number memo, and automatically received emails will be recorded in
"Dialed Record", with a maximum total of 20 records. (There can be
only 1 automatically received email; new email will replace the
previously saved one). If there are more than 20 records, the old ones
will be replaced by the new ones.
2.5.1 Redialing a number / resending a short message
2. Press to show the latest dialed number.
• If there is no dialed number, it will show "No Record"
3. Press to select the phone number to call or to send short message.
: Display dialed number with the oldest date
: Display dialed number with the recent date
• If the oldest dialed number is displayed, pressing will return to
the most recent dialed number.
3. Press to dial the selected number
• If you select a number that was used for sending a short message,
redialing the number will send the same message.
4. Press to terminate the call.
• It is not necessary to press
when resending short messages.
)))) Note:
• Numbers saved as Number Memo are saved as Dialed Record. A
total of 20 numbers can be saved.
Page 45

2-8 Learning to use your phone UT618 User Manual
• Press to switch between Dialed Record and Detailed Record.
• Icon description:
phone call, short message,
auto received email.
• When email is set to auto receive, auto received email will be
recorded but cannot be redialed.
• If a dialed number is a number in the secret phone book, only the
phone number will be shown.
• Press
to show the sub menu
1. Dial: Will dial the number
2. New SMS: Will create a new message
3. Check SMS: Read the message but cannot be edited. If a non-
message number is selected, this menu item will be grayed out
and cannot be selected.
4. Each phone record can hold three phone numbers. If a dialed
number's record in the phone book has additional numbers, those
numbers can also been shown. Using the numeric key to select it
will automatically dial the number. If the dialed number is not in
the phone book or the record in the phone book contains no
additional phone numbers, it will display "No number" (grayed
out and cannot be selected).
• To call a number that was used for message, press
sub menu will be displayed. Press to dial.
2.5.2 Composing A New Message
1. Select a number from the Dialed Record to create a new message
2. Press
3. Press
to show the sub menu
to select "New SMS" to enter "SMS" input screen.
4. Follow operations after Step 2 in "Composing a New Message" in
Chapter 6.
2.5.3 Reading A Message
1. Select the message to be viewed from the Dialed Record
2. Press
to show the sub menu
, and the
Page 46

UT618 User Manual Learning to use your phone 2-9
• If the number selected is not a message, "Check SMS" is grayed
out and cannot be selected.
3. Press
)))) Note:
• If the message in Out Box has been deleted, then it cannot be displayed in
the dialed record. However, the number itself is still saved.
• Messages can only be read but not edited from Dialed Record.
to select " Check SMS ". The content of the message is displayed.
2.5.4 Changing a Number
1. Select the number to be changed from Dialed record.
2. Press
3. Press
4. Press to dial the revised number.
to show the sub menu
to select "Change No."
• Press
enter the new phone number.
to delete digits one by one then using the numeric keys
2.5.5 Deleting Dialed Record Individually
1. Select the number to be deleted from the dialed record list.
2. Press
3. Press
will be displayed.
to show the sub menu.
to select "Delete One", when the number is deleted "Deleted"
2.5.6 Deleting All Dialed Records
1. Display dialed record
2. Press
3. Press to select "Delete All", "Delete All?" is displayed.
4. Select "Yes"
displayed.
to show the sub menu
Press , when all the numbers are deleted "Deleted " is
2.6 Answering an Incoming Call
1. When a call is received, the screen will flash "Call From:" information.
Page 47

2-10 Learning to use your phone UT618 User Manual
• When a call is received, the phone will ring, and the Sub LCD
will flash (if the phone flip is already open, the Sub LCD will not
flash.)
• To stop ringing / vibration, press
. If a call is received
when the flip is open, ringing / vibrator can be stopped by
closing the flip. The call is not disconnected.
• The phone will also show caller’s number if the caller ID service
is subscribed.
• If the number has been entered in the phone book, then the
caller’s name will also be displayed. If the number is in the
secret phone book, only the phone number will be shown.
• Pressing
2. Press
to answer the call. "In Use" will be displayed and if
will reject the call.
"Talking Time" function is activated, it will also show the length of the
call. While in conversation the navigation key can be used to accomplish
the following functions
: adjust Earpiece volume
: Number memo
: Search phone book
3. Press
to terminate the call. When the call is terminated "End Call
" will be displayed.
)))) Note:
• When the flip is opened, the ringer volume of incoming call will
gradually increase to the set level. But if the incoming call ringer is set
to off or Manner mode is set to on and its volume is turned off, incoming
call volume is turned off.
• Upto 15 digits can be displayed for an incoming call.
• If you open the flip when there is an incoming call, the Sub LCD will
stop flashing and the backlight will be turned on. If you close the flip,
the Sub LCD will flash again but ringing/vibration will stop.
2.7 Incoming Call Record
• Record the phone number, date, and time of incoming calls and short
messages.
Page 48

UT618 User Manual Learning to use your phone 2-11
2.7.1 Calling Back
1. Press to show the most recent incoming call record.
• Incoming call record will show date, time, and whether the call has been
answered.
Indicates the call has been answered, including received short messages.
Indicates the call has not been answered.
2. Use
to select the phone number
: Switch between ‘list view’ of all incoming calls and ‘detail view’ of
calls
: Show incoming calls with oldest date
: Show incoming calls with most recent date
• If the oldest incoming call is being displayed, pressing
will return to
the most recent incoming call record.
3. Press to dial the selected number.
)))) Note:
• If you do not subscribe to caller ID service, the phone number in incoming
call will be displayed as "---"
• If the date and the time in the phone have been set, incoming call will show
date and time of the call. Refer to section on “ Setting the time” on how to
set date and time.
• If the number of the call is already in the phone book, it will also display the
caller's name. However, if the number is saved in the secret phone book,
only the number will be displayed.
• When incoming call records exceed 20, new records will replace old ones.
• If there are unanswered calls, standby screen will show "Missed Call" and
• Pressing
1. Dial: Will dial the number
2. New SMS: Create a new message
3. Each phone record can hold three (3) phone numbers. If the incoming
call number's record in the phone book has additional numbers, those
numbers can also been shown. Using the numeric key to select it, will
automatically dial the number. If the incoming call number is not in the
phone book or the record in the phone book contains no additional
phone numbers, it will display "No Number" (grayed out and cannot be
selected).
will display the sub menu
Page 49

2-12 Learning to use your phone UT618 User Manual
2.7.2 Composing a New Message
1. Select a number from incoming call records to create a new short message.
2. Press
3. Press
4. Refer to operations after Step 2 in "Composing a New Message" in Chapter
6.
to display the sub menu.
to select " New SMS" and enter "SMS" editing screen.
2.7.3 Deleting Incoming Call Record Individually
1. Select the record to be deleted.
2. Press
3. Press
is displayed.
to display the sub menu.
to select "Delete One". Deletion is completed when "Deleted"
2.7.4 Deleting All Incoming Record
1. Display incoming call records
2. Press
to display sub menu
3. Press to select "Delete All", "Delete All?" is displayed.
4. Select "Yes"
appear.
2.8 Number Memo
1. Press during a call. "Number Memo" screen is displayed.
2. Enter numbers
• You may use all numeric keys,
• Pressing
digits.
3. Press
)))) Note:
• In Group mode, you cannot save a number during a call.
• Maximum number of digits that can be saved is 32.
press . When all the records are deleted “Deleted” will
, , and .
will delete one digit; pressing and holding will delete all
, when the number has been saved "Registered" will be displayed.
• When the call is completed, the number will be saved in the Dialed Record.
Page 50

UT618 User Manual Learning to use your phone 2-13
• There can be a maximum of 20 dialed number and saved numbers. When
the numbers of record exceed 20, the new record will replace the old ones.
The oldest one will be replaced first.
• While entering the numbers, pressing
number memo will still be saved into Dialed Record.
• To display number memo, follow operations of Dialed Record.
2.9 Adjusting Earpiece Volume
• There are five levels of volume to choose from. The default setting is 2.
• The volume setting will not change when the phone is powered off.
1. Press
appears with the current volume setting.
2. Press
3. Press
to display the "Earpiece Volume" screen
to adjust Earpiece volume.
• Pressing
• Pressing
once, the volume will increase to the next level
once, the volume will decrease to the next level
. When "Earpiece Volume" has been set, "Set" is displayed.
will terminate the call, but the
)))) Note:
• If you want to adjust volume during a call, you can press . The Earpiece
volume will be set to the new value.
2.10 Whisper Mode
• The whisper mode allows the other party to hear you clearly even if you
speak in low voice in a noisy environment or in a meeting.
• The default setting for whisper mode is OFF.
1. Press
2. Press
)))) Note:
• To turn off "Whisper" function, repeat Steps 1-2 and turn "Whisper" from
"ON" to "OFF"
• After Step 1, you can move the cursor to " Whisper" menu item and press
. "Call/Vibrator" menu appears.
to switch "Whisper" from "OFF" to "ON".
to switch “Whisper” "ON"/"OFF".
Page 51

2-14 Learning to use your phone UT618 User Manual
• During a call, you can press
Whisper" mode is not turned on, and press
Whisper" mode if " Whisper" mode is turned on. When the call is
completed, it will return to its original setting.
2.11 Holding a Call
• This phone comes with the call holding function. The other party will hear
the call hold sound.
1. Press during the conversation. The other party will hear the call hold
sound and "On Hold" will be displayed on the screen.
2. To return to the conversation, please press again.
You can also press
)))) Note:
• You will still be charged when the call is being held.
• Call holding sound is only available when the phone is set to Public Mode
to enter " Whisper" mode if "
to turn off "
to return to conversation.
2.12 Three Party Calling (Needs network support)
• You need to subscribe to this service from your service provider in order to
use Call Waiting and three party calling. Specific operation details depend
on your service provider's network. If you need help, please contact your
service provider.
2.12.1 Call Waiting
• This feature is used to hold the current call and answer another call.
1. While you are on a call and have another incoming call.
2. Press
)))) Note:
• If you want to terminate the current call when the next call come in, press
to hold the current conversation and answer the other call. Press
to switch between the callers.
.
• If you do not want to answer the other call, press . This will reject
the call.
Page 52

UT618 User Manual Learning to use your phone 2-15
2.12.2 Three Party Calling
• This feature allows you to call another person while you are in a call to
initiate a three party conversation.
• Example: A and B are having a conversation and they need C to join them.
Assume A as the initiator.
1. Press
while in the call, A will hear continuing beeping that indicates he
can now enter the phone number of C.
2. Enter the phone number and phone will dial the number automatically.
3. Press
to start three party conversation.
)))) Note:
• To return to normal two party conversation, A needs to press
A presses
he will toggle between the two calling parties.
• To terminate both conversations, A needs to press
• During a three party call, B and C both will have call waiting function, but
for A as both lines are busy, there will not be any call waiting.
2.13 Displaying Caller ID (Needs network support)
• The caller can choose whether to have his phone number identified by the
other party.
, each time
.
• This feature needs network support.
1. Press
to display the "Caller ID" menu
2. Press to turn it ON
3. Press
• Once the system's voice response is complete, press
to dial the system
to terminate the
call and return to standby screen.
)))) Note:
• To turn off Caller ID function, select "OFF" in step 2. Press
to call the
system to turn off this function.
• Using Air Info or short message cannot turn off this function. The system
will send out the phone's number instead.
• Turning on/off this function requires you to call the system. If you cannot
connect to the system and hear the system's voice message after you
attempted to turn on/off this function, it indicates the operation was not
successful.
Page 53

2-16 Learning to use your phone UT618 User Manual
2.14 Rejecting Unidentified Call
• If you subscribe to caller ID service, you can turn on this function to reject
unidentified calls. If you don't subscribe to caller ID, please turn off this
function. Otherwise, it will reject all calls. The default setting is "OFF".
1. Press
2. Press to turn " No ID Block " from "OFF" to "ON"
)))) Note:
• Unidentified short messages cannot be rejected.
• Call Block is only available in Public Mode.
• When a caller uses unidentified number calling function to call a phone with
" No ID Block" function turned on, the call will be rejected directly. The
phone will not ring or vibrate. " No ID Block MSG, Playing" will be
displayed on the screen.
. "Security" menu appears.
2.15 Showing Talking Time
• If the Talking Time function is activated, call length will be displayed
during the call. The default setting is "ON".
1. Press to display "Screen LCD" .
2. Press . "Talking Time" changes from "OFF" to "ON".
)))) Note:
• After Step 1, you may move the cursor to "Talking Time" then press
to toggle between ON/OFF.
• Talking Time is only for reference and cannot be used as evidence of
service charges.
2.16 Power Searching
• You can search for high power if the signal is weak while in a call or in
standby mode. You can also do this when you are outside of the service
area.
1. Press and hold
The phone starts to search for network signals.
• "Power Search OK" will be displayed on locating the strongest signal.
at standby screen until "Power Search" screen appears.
Page 54

UT618 User Manual Learning to use your phone 2-17
)))) Note:
• You can press other keys when the phone is searching for network signals,
however this will stop network searching.
• You can also search for network signals during a call, but it is limited to
three.
• Searching for network signals may not always find network signals.
• This feature is only available in public mode.
Page 55

2-18 Learning to use your phone UT618 User Manual
BLANK PAGE
Page 56

Setting Up Your Phone
3. Setting Up Your Phone (Main Menu)
3.1 Key Beep
• You can either keep the beep on or off. The default setting is “ON”.
3
1. Press
2. Press
))))Note:
• If key beep is “OFF” then you will not hear any completion tones or
warning tones.
• To set “key beep” please repeat steps 1 and 2. When the icon switches
from “OFF” to “ON”, it indicates the “key beep” has been set.
• After step 1, you may move the cursor to “key beep”
toggle between “ON/OFF”
3.2 Manner Setting
3.2.1 Manner Setting
• This menu helps to set the ringer volume, key beep or vibrator.
• This feature allows you to instantly change the ringer volume.
• There are three options in manner setting:
, to display “Call/vibrator” menu.
“key beep” toggles from “ON” to “OFF”
press to
1. Key beep on/off: Turns on/off the key beep.
2. Vibrator on/off: Turns on/off the vibrator
3. Volume off/adjust: This option helps in turning off and adjusting the
volume for Incoming call, alarm, schedule and mail/SMS.
• In the default setting, “Vibrator” is “ON”; “Key Beep” and
“Volume” are “OFF”.
Page 57

3-2 Setting Up Your Phone UT618 User Manual
1. Press
2. Press
3. Press
to select the item.
for “ON/OFF”.
, to display the “Manner Setting” screen.
4. While setting the volume, press
• There are five levels of volume to choose from (1-5). Use the scroll up,
scroll down key to raise or lower the volume.
• Please press
5. Press
, to display “set”, which means the manner setting, is done.
to set volume press .
3.2.2 Setting/Canceling Manner Mode
1. Press and hold , to display “Set”, selection of which will display
“manner mode”, which means the manner setting has been set.
• If the manner setting is set to on, “ ” icon is displayed on the main
display.
, to display “Volume”.
)))) Note:
• While in standby mode if the “Manner Setting” is ON, and if you press and
hold
has been cancelled.
• When the manner setting is set to ON, there is no confirmation beep,
however if the vibrator is set to “ON”, the phone vibrates one time.
• When the manner setting is cancelled; there is no confirmation beep and
vibration.
3.3 Setting Vibrator
• On setting the vibrator the phone will vibrate to indicate the Incoming call,
alarm, and scheduled activity time or new message/email,
• There are three options to choose from. The default vibrator setting is
“OFF”.
• While the battery is being recharged, irrespective of whether the vibrator is
turned ON or OFF, it will not vibrate.
, “Cancelled” will be displayed to indicate that the manner setting
1. Press
settings.
2. Press to select the items you want to set press to display the
vibrator setting screen.
, to display the “Vibrator” menu with the current
Page 58

UT618 User Manual Setting Up Your Phone 3-3
3. Press to select vibrator type press
• When you set vibrator type, the phone will vibrate with the set style for
reference
4. Press
, to display “Set” which means the vibrator has been turned on.
)))) Note:
• When “call” vibrator is set to “ON”, ‘ ” icon is displayed on the main
display.
• When SMS/Mail vibrator is set to on, the phone vibrates three times
when you receive a new message or email.
3.4 Setting Earphone Pickup
• If this feature is activated, the phone will answer incoming calls
automatically if the earphone is plugged in.
• The default setting of earphone pickup is “OFF”.
1. Press
2. Press to toggle “Earphone pickup” between “OFF” and “ON”.
• When there is an incoming call, the phone will answer the call
automatically after 5 seconds of ringing. The ring can be heard from
the earphone.
, to display “Call/ Vibrator” menu.
)))) Note:
• To cancel “Earphone pickup”, please repeat steps 1 and 2. The icon will
switch from “ON” to “OFF”, which means the earphone pickup is
cancelled.
• This feature is only available under “Public” mode.
• This does not have effect on the short messages and emails, and behaves the
same way as it would without the earphone.
3.5 Melody Setting
• This feature allows you to change the melody and the volume for call,
alarm, schedules and SMS/Mail.
• There are three ringing categories:
1. Harmony (10 built-in four chord melodies)
2. Monody (6 built-in melodies and 10 composed and downloaded melodies)
3. Analog (6 composed melodies and 1 voice memo)
Page 59

3-4 Setting Up Your Phone UT618 User Manual
3.5.1 Melody Select
1. Press , to display “Melody Select” menu.
• The current melody setting is indicated in the next line. The volume
indicator is on the right side.
2. Press
3. Press
• Built-in melodies are listed as Harmony
to select the desired item press , to display “Melody List”.
to select melody.
Monody Analog.
• They are illustrated as follows:
Melody Symbol Description
Harmony (built-in)
Harmony(downloaded)
Monody (built-in)
Monody (composed)
Analog (built-in)
Voice memo
Copy Guard
Volume
• Please press
• Press
to display the melody sub-menu. Press to show the details of
to play melody.
the selected melody.
1. When selected, press
2. Press
to display “Volume” screen.
• There are five levels of volume to select from, which can be selected by
the scroll up and scroll down button.
• Please use
to set volume press .
• Volume is ranked from low to high.
• Please press
3. Press
, to display “Set”, which means the selected melody and the
to play melody
volume have been set.
)))) Note:
• The phone rings only for 5 seconds for emails.
• When “Manner Setting” is activated, the ringing will be set to mute.
• Ringing style cannot be changed under group mode.
Page 60

UT618 User Manual Setting Up Your Phone 3-5
3.5.2 Searching Melody by Category
1. Press , to display “Melody Select” menu.
2. Press
to select the item you want to search press , to display the
“Melody List”.
3. Press to display the melody sub-menu. The sub menu options are:
1. Harmony 2. Monody 3. Analog 4. Detail: detailed information of the
melody
4. Press or or to select the melody category.
5. Select the melody and press
.
3.5.3 Deleting Composed Melodies Individually- method 1
1. Press , to display “Melody Select” menu.
2. Press
“Melody List”.
3. Press
• You can also press
melody you want to delete. Please refer to section “Searching Melody
by Category” Step 3-5.
to select the item you want to search press , to display the
to select the item you want to delete.
to enter “Melody List” sub-menu to select the
4. Press
5. Press
deleted.
)))) Note:
• Built-in melodies cannot be deleted.
• To delete voice memo, please refer to section “Deleting the Voice
Memo”.
• If the deleted melody has been set as the melody for a feature, the
feature will be reverted back to the default ring tone.
3.5.4 Deleting all Composed Melodies-method 1
1. Press , to display “Melody Select” menu.
to display the melody sub-menu
, to display “Deleted”, which means the selected melody has been
Page 61
3-6 Setting Up Your Phone UT618 User Manual
2. Press
to select the item you want to search press , to display
“Melody List”.
3. Press
4. Press
to select a melody composed by you.
to display the melody sub-menu
5. Press to select “Delete All”, “Delete All Registered Songs?” will be
displayed.
6. Press “YES”
press , to display “Deleted” which means all composed
melodies have been deleted.
3.6 Composing a Melody
3.6.1 Composing a New Melody
• Composed melody can be used as ring for calls, alarms, schedules and
SMS/Mail.
• Composed melody is monody. It can have a maximum of 255 notes for each
melody and you can compose up to 10 songs.
• There are 13 notes and 8 rhythms to edit.
• The following illustrates the 13 notes in the phone:
Semiquaver
Quaver
Dotted crotchet
Crotchet
Dotted quaver
Minim
Dotted minim
• The following illustrates the key range for composition:
1. Press
2. Press
semibreve
Semiquaver rest
Quaver rest
Crotchet rest
Minim rest
Rest
to display the “Melody Compose” screen.
to select a number that does not have saved data Press to
enter new melody composing screen.
3. Using numeric key
• Rest cannot be used at the beginning of the song.
enter notes and rests.
Page 62

UT618 User Manual Setting Up Your Phone 3-7
• To change the scale of a note, please refer to the following method:
Keys Press once Press
twice
1 1
2 2
#
#
3 3
4 4
5 5
6 6
3
▼
#
#
5
#
7 7
7
▼
rest
4. Use
• Press
• To edit the length of a note please refer to the following methods.
Key Default
setting
Crotchet Quaver Semiquaver Semibreve Minim
Crotchet Minim Semibreve Semiquaver Quaver
No dot Dot
Press once Press twice Press three
Press three
times
1▲
2▼
▲
4▼
▼
6▼
▲
Press four
times
1
2
4
5
6
Press five
times
Press six
times
▲
2
▲
4
▲
5
▲
6
2
4
5
6
, , to change the length of a note:
to select the note you want to change and then using ,
and change the length of the note.
times
Press four
times
5. Press
to play the melody while composing.
• You can adjust the pace and volume of the melody during playback.
There are 8 playing pace to select from:
: Increase the tempo : Decrease the tempo
: Decrease the volume : Increase the volume
• The “tmp” on the upper-right side of the display indicates the
tempo.
• Press again to end playing.
6. When completed
press to display “Title” screen.
• You can enter up to 20 alphabets or 40 alphanumeric characters.
Page 63
3-8 Setting Up Your Phone UT618 User Manual
7. Enter the title press , to display “Registered”, which means your selfcomposed melody has been saved.
)))) Note:
• To set the self-composed melody as ring for a call or alarm, please
refer to section “Melody Select”.
• If the battery is removed while the melody is being composed the
melody recorded will be lost.
• If there is an incoming call or you press during composition of
a melody, the composed content will be saved temporarily. The
phone can only save one temporary data. To resume the
composition, please refer to section “Resuming Melody
Composing”.
3.6.2 Modifying a Melody
• You can modify the self-composed melody that is saved in the phone.
1. Press to display “Melody Compose” screen.
2. Press
to select the melody you want to edit Press to enter
melody composing screen, which allows you to edit the melody.
3. To modify the melody, please refer to section “Composing a new melody”
Steps 3-5.
4. When completed
5. Press
to select a data number for saving the melody press .
press .
• If you select an unused data number, the “Title” screen will be
displayed. Enter the title. The maximum number of characters allowed
is 20 alphabets or 40 alphanumeric characters.
• If you select a used data number, “Replace?” is displayed. Select
“YES”
press to replace the melody.
• When the replaced melody has been set as the ring for calls, alarms,
schedules, SMS/Mail, favorite calls and group calls, “Change as a
Ringer?” is displayed.
6. Enter the title
press , to display “Registered”, which means the edited
melody has been saved.
Page 64

UT618 User Manual Setting Up Your Phone 3-9
3.6.3 Resuming Melody Composition
• During composition, if there is an incoming call or if you press , the
composed data will be saved temporarily.
1. Press
2. Select “No”
• To delete the melody you are composing, please select “YES”, to
display “Deleted”, which means the melody has been deleted.
3. To resume the composition, please refer to “Composing a New Melody”
Steps 3-7.
press to enter the “Melody Composing” screen.
, “Delete Composing Data, YES/NO” is displayed.
3.6.4 Deleting Composed Melody Individually- method 2
1. Press to display “Melody Compose” screen.
2. Press
3. Press
4. Press
means the selected melody has been deleted.
)))) Note:
to select the composed melody you want to delete.
to display the sub-menu
to select “Delete One”, “Deleted” will be displayed, which
• If the deleted melody has been set as the melody for a feature, the
feature will be reverted back to the original default ring tone.
3.6.5 Deleting All Composed Melodies- method 2
1. Press to display “Melody Compose” screen.
2. Press
3. Press to select “Delete All”, “Delete All?” is displayed.
4. Press “YES”
composed melodies have been deleted.
to display the sub-menu
press , to display “Deleted”, which means all self-
3.7 Voice Memo
3.7.1 Recording a Voice Memo
• You can record a 15-second record as a call ring. To set call ringing, please
refer to “Melody Select”.
Page 65

3-10 Setting Up Your Phone UT618 User Manual
1. Press
2. Press
the record begins.
3. If you press
record is said to have ended. Then “Subject” screen is displayed.
4. Enter the subject.
5. Press
)))) Note:
• If there is an existing voice memo; “Replace?” will be displayed at step
2. Select “YES”
memo has been set as the ring for calls, alarms, schedules or SMS/Mail,
then the setting will be cancelled. You need to reset it.
• If you press
which means the recording has been stopped.
, to display “Voice Memo” menu.
to select “2 Record”, to display “Recording” which means that
or when the “End Recording” screen is displayed, the
, to display “Registered”.
press to replace the old data. If the old voice
during recording, “Stop Recording” will be displayed,
3.7.2 Playing the Voice Memo
1. Press , for the “Voice Memo” to be displayed.
2. Press to select “1 Play”, “Playing” and the subject of the voice memo
will be displayed, which means the phone is playing the voice memo.
• If the phone does not have voice memo record, then “Play” will be
grayed out and cannot be selected.
3. If you press or when the playing ends, “End Playing” will be
displayed.
3.7.3 Deleting the Voice Memo
1. Press , to display “Voice Memo” menu.
2. Press
• If the phone does not have voice memo record, then “Delete” item will
be grayed out and cannot be selected.
to select “3 Delete”, to display “Delete?”.
3. Select “YES”
memo has been deleted.
press , to display “Deleted” which means the voice
Page 66

UT618 User Manual Setting Up Your Phone 3-11
3.8 Setting the Time
• When the time is set, the items such as alarm in “ Time Manager” can be
used. Incoming/Dialed Record will have the corresponding time and date
stamp.
• The time can be set from January 1 2000 to December 31 2099.
• Its default setting is 00:00 01/01/2002 (January 1, 2002).
1. Press , to display “Time/Date” screen.
2. Press
to select “Main Display” ON/OFF.
• Select “ON” to show the time and date on the main display; select
“OFF” to hide the time and date.
• The selected text will flash.
• When selected, the cursor will automatically move to the next item
“Date”.
3. Use numeric keys to enter month, day and year.
• Please enter date as “month/day/year”.
• When completed, the cursor will automatically move to the next
item “Time”.
• If there is an error in the time and date you entered, please re-enter it
on hearing the warning beep.
4. Use numeric keys to enter the time.
• Please enter the time as “hour: minute” in 24-hour mode.
5. Press
, to display “Set” which means the time is set.
3.9 Setting an Alarm
• When the alarm is set, the phone will ring the alarm at the set time of the
day or the date.
• To use alarm function, you must set date and time first. Please refer to
section “Setting the Time”.
• Please refer to “Melody Select” on how to select an alarm ring tone.
• Its default settings are as follows:
Setting: “OFF”
Day: Appointed Day
Once: “01/01”
Appointed day: “Sun, Mon, Tue, Wed, the, Fri, Sat” are all “ON”.
Page 67

3-12 Setting Up Your Phone UT618 User Manual
Alarm Time: 15sec.
Snooze: “OFF”
Once: The alarm will ring at the preset time on the appointed date.
Appointed day: The alarm will ring at the preset time on the assigned
day every week.
Snooze: When this function is activated, if you stop the alarm, it will
snooze after every 5 minutes for 5 times.
3.9.1 Setting an Appointed Date
• The alarm will ring at the preset time on an appointed date.
1. Press
, for the “Alarm” screen to appear.
• The text at the cursor flashes.
2. Press
to select “ON” press .
• When completed, the cursor will automatically jump to the next item
“Alarm”.
3. Press
select “1.Day” press .
4. Enter the alarm date.
• If there is an error in the time and date you entered, please re-enter it
after you hear warning beep.
5. Press , the cursor automatically moves to the next item “Time”.
6. Enter the time. (24-hour mode)
• If there is an error in the time and date you entered, please re-enter it
after you hear warning beep.
• When completed, the cursor will move to the next item “Alarming
Time”.
7. Enter the length of the alarm time. (5-30 seconds)
• When completed, the cursor will automatically move to the next item
“Snooze”.
8. Press
every 5 minutes and it will play 5 times).
: Snooze off.
9. Press
to select ON/OFF.
: Snooze ON (after the alarm ringing stops, the phone will play alarm
, to display “Set”, which means the alarm, is set.
Page 68

UT618 User Manual Setting Up Your Phone 3-13
• The
icon is displayed on the main display.
3.9.2 Setting an Appoint Day
• The alarm will ring at the preset time on the same day of every week.
1. Press
2. Press
• When completed, the cursor will automatically jump to the next
parameter “Alarm”.
3. Press to select “2 Appoint Day”.
4. Press to display “Alarm” ON/OFF screen.
5. Press
6. Please refer to section “Setting an Appointed Date” Steps 5-9 to
complete the setting.
, to display “Alarm” screen.
to select “ON” press .
to select the day press to select ON/OFF.
3.9.3 Stopping the Alarm Ring
1. When the alarm rings, “Alarm” is displayed on the main display.
2. Press
to stop the ring.
• Press
)))) Note:
• If you are talking on the phone, the alarm will not sound until you hang
up the phone.
• When the phone’s alarm rings, you can close the flip to stop the ringing.
Opening and closing the flip again will clear the alarm animation.
• If an alarm and a schedule are set for the same time, the phone plays the
alarm ring first and then the schedule ring.
3.10 Schedule
• At the preset time, the phone will play the schedule ring. The main
display indicates the scheduled activity.
again to clear the alarm animated graphics.
• To set the melody of the schedule, please refer to “Melody Select”.
• You can set up to 40 schedules for a 12-month cycle.
Page 69

3-14 Setting Up Your Phone UT618 User Manual
• If you have not set date and time, “Schedule” is grayed out and cannot
be selected. To set the date and the time, please refer to section “Setting
the Time”.
• You cannot set schedules for past dates.
3.10.1 Setting a Schedule
1. Press , to display “Schedule” menu.
2. Press
to select “1 New”, to display the current month calendar.
• If the phone has 40 saved schedules, “1 New” will be grayed out and
cannot be selected. The cursor will move to “2 Edit”
• If a date has been set a scheduled activity, it will be displayed with a
gray circle. If it is also set as an anniversary day, the date will have a
gray background with a frame outside.
• Press
to display the next month calendar; press to display the
previous month calendar.
3. Press
to select the date press .
• If the selected date already has other schedule set, the schedule list will
be displayed
press to enter editing screen.
• After the phone automatically enters the preset date, the cursor will
move to “Time”.
• To edit date, please press
to move to “Date” and edit it.
4. Enter the time (24-hour mode).
• When completed, the cursor will automatically move to “Message”.
5. Press to display “Message” screen.
• Please refer to section “Entering Text” on how to input text.
• You can enter with a maximum of 18 alphabets or 36 alphanumeric
characters.
6. When completed
next item “Icon”
• The default setting of “Icon” is “Other”.
7. Press
8. Press
• The icons are illustrated as follows:
press , the cursor will automatically move to the
, to display classified “Icon” picture.
to select the icon and then press .
Page 70
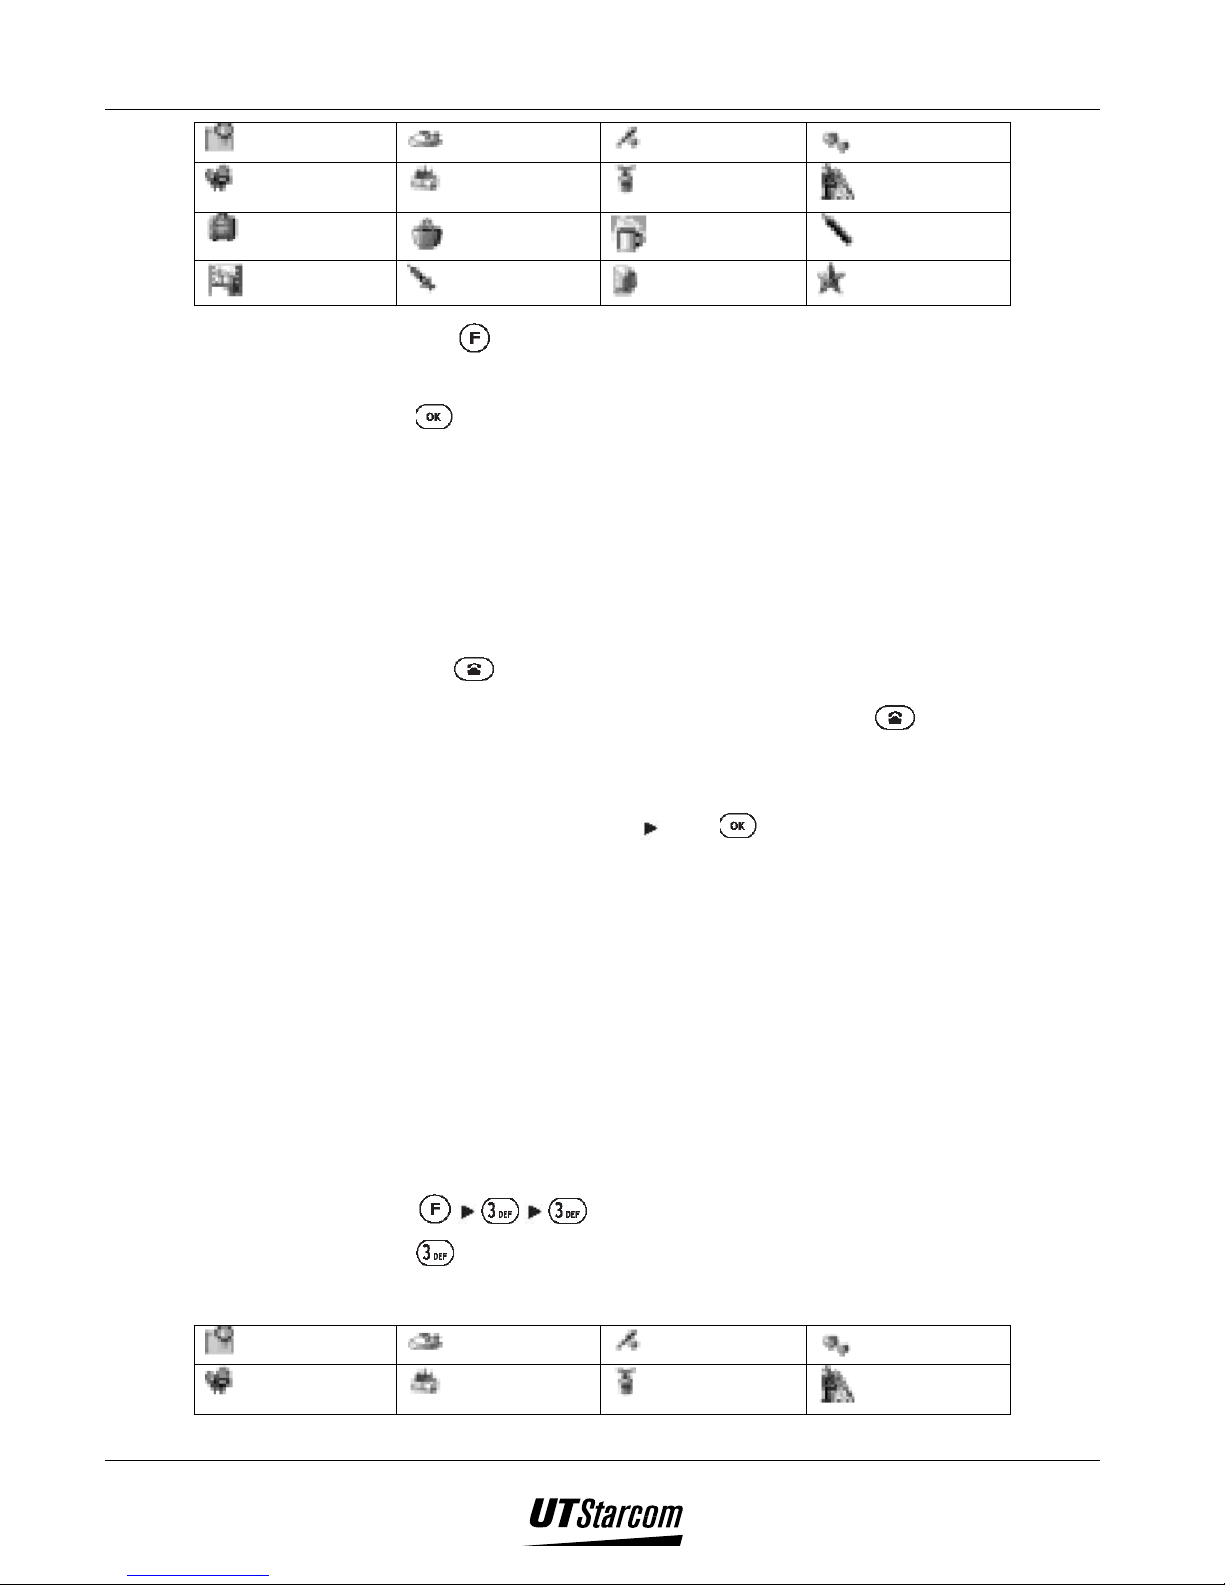
UT618 User Manual Setting Up Your Phone 3-15
Plan
Movie
Travel
Meeting
9. Press
)))) Note:
Eat
Birthday
Shopping
Hospital
Sports
Anniversary
Holiday
Party
Date
Wedding
Test
Other
• Press to preview the image on the main display for the scheduled
time.
, to display “Registered”, which means the schedule, has been set.
• The phone will play the schedule ring for about 30 seconds at the
scheduled time. The schedule icon will be displayed on the main display
for about 90 seconds.
• If you are talking on the phone, the phone will not play the ring until you
hang up.
• Press
• To clear the schedule icon display, please press
to stop the schedule ringing.
after you stop the
schedule ring.
• If there is a scheduled activity set at the same time, “Replace?” will be
displayed. Select “YES”
• If an alarm and a schedule are set at the same time, the phone plays the
alarm first and then it plays the schedule ring.
3.10.2 Searching a Schedule by Icon
• You can search a schedule based on schedule icons.
• The schedule will show all the activities of the selected icon according to
the icon category.
• If you have not set any schedule, “Icon” is grayed out and cannot be
selected.
1. Press , to display “Schedule” menu.
2. Press
• The icons are illustrated as follows:
Plan
to select “Icon”, the “Icon” is displayed.
Eat
press to replace the old schedule.
Sports
Date
Movie
Birthday
Anniversary
Wedding
Page 71

3-16 Setting Up Your Phone UT618 User Manual
Travel
Meeting
Shopping
Hospital
3. Press to select the icon you want to search press to display all
the activities in the selected category.
4. After you press to select the icon press to display the contents of
the schedule.
• Press
to enter the editing screen to change the scheduled activities.
3.10.3 Modifying a Schedule
• You can modify your scheduled activities.
• If you have not set any schedule, “Edit” item is grayed out and cannot be
selected.
• Press to display the next month calendar; press to display the
previous month calendar.
Holiday
Party
Test
Other
• If the other months have no scheduled activities,
selected.
1. Press , to display “Schedule”.
2. Press to select “Edit”, to display the current month calendar.
• If a date already has a scheduled activity; the date will have a gray
circle. If it also has an anniversary day, the date will have a gray
background with a frame outside.
3. Press to select the date you want to edit press , all the activities
for this date will be displayed.
4. Press
to select the activity press to view the content of the
scheduled activity.
5. Press
to select the item you want to edit. Please refer to section
“Setting a Schedule” Step 3-9 on how to edit and save it.
3.10.4 Deleting Schedule Individually
cannot be
1. Press , to display “Schedule” menu.
2. Press
to select “Edit”, to display the current month calendar.
Page 72

UT618 User Manual Setting Up Your Phone 3-17
• Press
to display the next month calendar; press to display the
previous month calendar.
• If the other months have no scheduled activities,
used.
3. Press
to select the date you want to delete press , all the activities
for this date will be displayed.
4. Press to select the activity you want to delete press to display
the sub menu.
5. Press
to select “Delete One”, “Deleted” is displayed, which means the
selected activity has been deleted.
3.10.5 Deleting the Current Day Schedule
• You can delete all activities for the current day in the schedule.
1. Press
2. Press
, to display “Schedule” menu.
to select “Edit”, to display current month calendar.
cannot be
• Press
to display the next month calendar; press to display the
previous month calendar.
• If the other months have no scheduled activities,
selected.
3. Press
to select the date you want to delete press , all the activities
for this date will be displayed.
4. Press to display the sub menu
5. Press to select “Delete All”, “Delete All?” is displayed.
6. Select “YES”
press , to display “Deleted”, which means the current
day schedule has been deleted.
3.10.6 Deleting All Past Schedules
• You can delete all past schedules.
• If there is no past schedule, “Del. Past Data” item is grayed out and cannot
be selected.
cannot be
1. Press
2. Press
, to display “Schedule”.
select “4 Del. Past Data”, “Delete All?” is displayed.
Page 73

3-18 Setting Up Your Phone UT618 User Manual
3. Select “YES” press , to display “Deleted”, which means all past
schedules have been deleted.
3.10.7 Deleting All Schedules
• You can delete all scheduled activities.
• If there is no schedule saved in the phone, “Delete All” item is grayed out
and cannot be selected.
3.11 Calendar
1. Press
2. Press
3. Select “YES”
, to display “Schedule” menu.
to select “Delete All”, to display “Delete All?”
press , to display “Deleted” which means all schedules
have been deleted.
• The phone can display calendar from January 1900 to December 2099.
• If there is a scheduled activity, you can view the detail from the calendar.
However, it does not work for anniversary.
• If you have not set the date and the time, “Calendar” is grayed out and
cannot be selected. Please refer to section “Setting the Time” on how to set
the time and the date.
1. Press
, to display the current month calendar.
• The following keys are used for navigational purpose:
: Displays the next month’s calendar
: Displays the previous month’s calendar
• The various parameters in the calendar are represented as:
• When an anniversary and a schedule fall on the same day, it is
represented with gray background and a frame outside
• Press in a calendar that has scheduled activities, the scheduled
activities will be displayed. However the content of the anniversary
cannot be displayed.
: Displays the same month’s calendar for the next year
: Displays the same month’s calendar for the previous year
General day: Black character
Current day: Black character flashes
Anniversary: Black character, gray diamond
Schedule: Black character, gray circle
Page 74
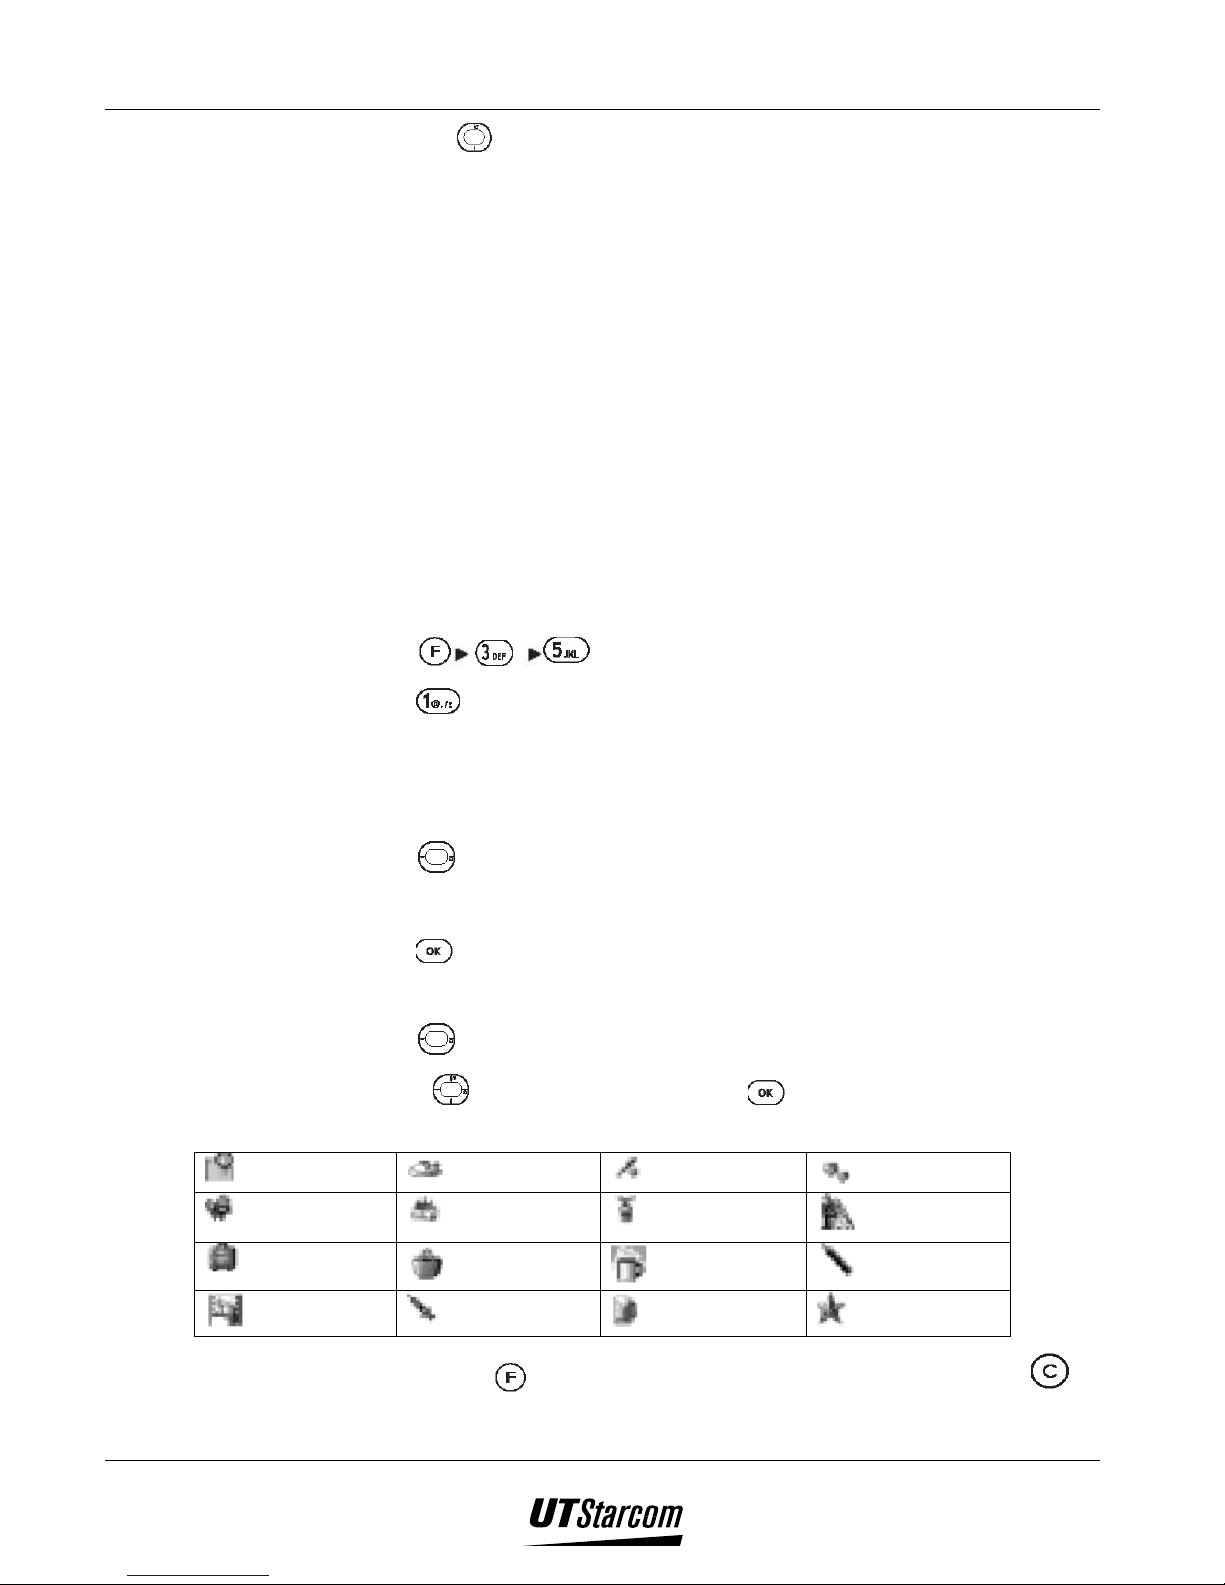
UT618 User Manual Setting Up Your Phone 3-19
• Press
to select another schedule.
3.12 Anniversary
• If you have set an anniversary day, the anniversary icon and information
will be displayed on the main display on that day.
• You can enter a maximum of 8 alphabets or 16 alphanumeric characters.
• You can save up to 10 anniversary data.
• If the date and time are not set, “Anniversary” is grayed out and cannot be
selected. Please refer to section “Setting the Time” on how to set the date
and the time.
• An anniversary cannot be set or changed on the day of the anniversary.
3.12.1 Setting a New Anniversary
1. Press , to display the “Anniversary” screen.
2. Press to select “1 New”, to display the anniversary editing screen.
3. Set the date and the time.
4. Press
5. Press , to move the cursor to the next parameter “Icon”.
6. Press
7. Press
descriptions are shown below:
Plan
Movie
Travel
Meeting
• Use numeric keys to enter the date, when completed, the cursor will
automatically move to the next parameter “ Subject”.
to display “Subject”.
• Please refer to section “Entering Text” on how to input text.
• The default setting for icon is “Other”.
to display the “Icon” category.
to select the icon, press . The various icons with their
Eat
Birthday
Shopping
Hospital
Sports
Anniversary
Holiday
Party
Date
Wedding
Test
Other
• Press to preview the image on the main display. Press to
return.
Page 75

3-20 Setting Up Your Phone UT618 User Manual
8. Press , to display “Registered”, which means the anniversary day has
been set.
)))) Note:
• The anniversary icon and information will be displayed on the main display
on the anniversary day.
• To turn off the anniversary display; please refer to section “Setting an
Anniversary Display”.
• The anniversary display will have a priority over the wallpaper display.
• If the anniversary day exits only in a leap year, it will be displayed every
four years.
3.12.2 Changing an Anniversary
• If you have not set any anniversary, “Edit” is grayed out and cannot be
selected.
1. Press , to display “Anniversary” screen.
2. Press
3. Press
to select “Edit” to display the anniversary list sorted by date.
to select the anniversary you want to edit press , to display
the content of the anniversary.
4. Press
to select the item you want to edit. Please refer to section
“Setting a New Anniversary” Steps 3-8 on how to edit and save.
3.12.3 Setting an Anniversary Display
1. The anniversary icon and information will be displayed on the main screen
on the anniversary day in the standby mode.
2. Press to display “Display Anniversary? ON/OFF”.
3. Select “OFF”
phone returns to the standby mode wallpaper.
• If “Display Anniversary” is turned off, pressing will not work.
)))) Note:
press to turn off “Display Anniversary” and the
• If you turn off “Display Anniversary” on the anniversary day, and then
turn on/off the phone, reset the date and the time or set/edit/delete the
anniversary, the anniversary icon and information will be displayed again.
Page 76

UT618 User Manual Setting Up Your Phone 3-21
3.12.4 Deleting Anniversary Individually
1. Press , to display “Anniversary” screen.
2. Press
3. Press
to select “Edit” to display the anniversary list sorted by date.
to select the anniversary you want to edit press to display
the sub menu.
4. Press
to select “Delete One”, “Deleted” is displayed, which means the
selected anniversary has been deleted.
3.12.5 Deleting All Anniversaries
1. Press , to display “Anniversary” screen.
2. Press
3. Press
4. Press to select “Delete All”, “Delete All?” is displayed.
5. Select “YES”
anniversaries have been deleted.
)))) Note:
to select “Edit” to display the anniversary list sorted by date.
to display the sub menu
press , to display “Deleted”, which means all
• Pressing
3.13 Setting the Sub LCD
• You can select the color of display for the sub LCD, from among the three
colors available, viz. red, orange and green.
• The sub LCD color can be set for the following features: “Call’, “Alarm”,
“Schedule” and “SMS/Mail’. The default settings are “Green”, “Red”,
“Orange” and “Orange”.
1. Press
2. Press
setting screen.
3. Press
• If you press
4. Press
to select the item you want to set press to enter color
to select the color you want to set press .
flash. Press
, to display “Set”, which means, the Sub LCD has been set.
to select “Delete All” in Step 2 can delete all anniversaries.
, to display “Sub LCD” menu.
when you select the color, the sub LCD light will
again or wait for 3 seconds for the light to go off.
Page 77

3-22 Setting Up Your Phone UT618 User Manual
)))) Note:
• The following are the details of the Sub LCD, the backlight and the ringing
under various situations:
When the phone flip is
closed
Call (Favorite
Call, Group, Data
Comm)
Alarm The Sub LCD flashes; the
Schedule The Sub LCD flashes; the
SMS/Mail The Sub LCD flashes; the
The Sub LCD flashes; the
backlight goes off; the call
rings
backlight goes off; alarm
rings
backlight goes off; the
schedule rings
backlight goes off; the
SMS/Mail rings
3.14 Setting Wallpaper
3.14.1 Selecting Wallpaper
When the phone flip
is open
The Sub LCD does not
flash; the backlight
goes on; the call
continues to ring
The Sub LCD does not
flash; the backlight
goes on; alarm
continues to ring
Sub LCD does not
flash; the backlight
goes on; the schedule
information is
displayed; the schedule
ring stops
The Sub LCD does not
flash; the backlight
goes on; the SMS/Mail
ringing stops
When the phone flip
is closed again
The Sub LCD flashes;
the backlight goes off;
the call ring is muted
The Sub LCD does not
flash; the alarm ringing
stops; “Alarm” is still
displayed;
Sub LCD does not
flash; the schedule
information is
displayed
The Sub display
displays “You got EMail”; with no
• You can select your favorite picture as the phone’s wallpaper.
• The picture from Air Info can also be set as wallpaper.
1. Press
2. Press
press
, to display “Wall Paper” menu.
to select the picture category you want to set as the wallpaper
.
• The following are the categories of the pictures:
(1) Fixed picture: The phone has default pictures for you to select.
(2) Picture: Pictures saved from Air Info or picture attachments. You can
save up to 10 pictures.
(3) No Wall Paper: Do not set wallpaper.
• If you do not save any pictures, “2 Picture” item is grayed out and
cannot be selected.
3. Press
to select the picture you want to set.
• If you press “2 Picture”, the picture list will be displayed. Select the
picture you want to set press to view the picture.
Page 78

UT618 User Manual Setting Up Your Phone 3-23
• After you select the picture, press
4. Press
, to display “Set”, which means the wallpaper, has been set.
3.14.2 Deleting Pictures
• You can delete pictures you saved in the phone.
• You can only delete the pictures saved by you and not delete the fixed
pictures.
1. Please refer to section “Setting Wallpaper” Steps 1-3. Select the picture
you want to delete.
2. Press , to display the sub menu.
3. Press
selected picture has been deleted.
)))) Note:
• To delete all pictures, please select “2 Delete All” in Step 3. “Delete All?”
will be displayed, select “YES” press . “Deleted” is displayed, which
means all pictures have been deleted.
to select “Delete One”, to display “Deleted”, which means the
to preview the wallpaper.
• If the deleted picture is set as current wallpaper, it will be still be retained as
wallpaper. But when you reset the wallpaper, this picture will be deleted.
3.15 Setting LCD Contrast
• You can use this function to set the contrast for the main display and the sub
display.
• There are 10 levels to select from.
• The default settings for the two displays are all 6.
3.15.1 Setting the Main Display Contrast
1. Press , to display “LCD Contrast” menu.
2. Press
3. Press
• During the adjustment, your selected contrast scale will be displayed on
the main display for your reference.
to select “1 Main Display”.
to adjust the level of the main display contrast.
4. Press
, to display “Set”, which means the main display contrast, has
been set.
Page 79

3-24 Setting Up Your Phone UT618 User Manual
3.15.2 Setting the sub Display Contrast
1. Press , to display “LCD Contrast” menu.
2. Press
3. Press
• During adjustment, “Contrast Setting” will be indicated on the sub
4. Press
set.
to select “2 Sub Display”.
to adjust the level of the main display contrast.
display.
, to display “Set” which means the sub display contrast has been
3.16 Setting the Backlight
• If you press any key on the phone, the backlight will go on.
• If you do not press any key within a particular time limit, it will go off.
• You can set the backlight flashing time (5-99 seconds).
• The default setting for “Back Light” is “ON”. The default setting for
“Flashing Time” is “30sec”.
1. Press
2. Press
, to display “Back Light” menu.
to select “ON”.
• When selected, the cursor will automatically move to the next parameter
“Flashing Time”.
3. Use numeric keys to enter flashing time
which means the backlight has been set.
)))) Note:
• To turn off backlight, please press and select “OFF” in Step 2 and press
to turn off the backlight.
• When Air Info is in use, if the preset flashing time is under 20 seconds, the
backlight will still flash for 20 seconds; if the preset flashing time is over 20
seconds, it will flash for the actual preset time.
• Turning on backlight will consume more battery power.
3.17 Setting a Standby Mode
1. Press , to display “Standby Mode” menu.
press , “Set” is displayed
Page 80

UT618 User Manual Setting Up Your Phone 3-25
2. Press
3. Press
)))) Note:
• If the phone has not been set “Group”, “Group”, “Public/Group” and
• You can also set it by pressing under standby mode.
• For more detailed information please refer to section on “Introduction to
3.18 Calculator
• The phone can carry out addition, subtraction, multiplication and division
to select the standby mode.
, to display “Set”, which means the selected standby mode, has
been set.
• The text information of the selected standby mode will be displayed
after “Set” is displayed, which means the selected standby mode has
been set.
“Transfer” are grayed out and cannot be selected. Please refer to section on
how to set group mode.
Standby Mode”.
within 10 digits.
1. Press
, to display “Calculator” screen.
2. Calculate.
• The calculator is illustrated as follows:
• Press numeric keys to enter numbers.
: Enter dot (you can also press )
: “+” : “-“
: “×” : “÷”
: “=” : Delete the last number
: Delete entered numbers Press and hold : Start new
calculation
• e.g. Calculate “100 ÷ 2”
• Press
• Press
• Pressing
, which means “100” is entered.
, to enter “÷”.
, to enter “2”
• Pressing
, to enter “=” and at the same time, calculating result.
Page 81

3-26 Setting Up Your Phone UT618 User Manual
3. If you want to end calculation, press
• ·Press
to go back to “Special” menu.
)))) Note:
• You can use this result to do the next calculation.
• If the calculation is over 10 digitals or it is against algorithm, the phone will
sound warning beep and “ERROR” will be displayed.
• When you calculate, if there is an incoming call and you answer it then the
calculation data will be lost.
3.19 LDS (needs network support)
• If you set LDS on and use “Air Info”, the location of the phone will be
recorded in MiMi center. Therefore, you can get your current surrounding
information.
• This function can be used under Public/Group mode. When any three digits
of a telephone number are dialed, the location information will be sent to
MiMi center.
to go back to standby mode.
• Its default setting is “OFF”.
1. Press , to display “LDS” ON/OFF icon.
2. Press to switch on/off.
• If LDS is turned on,
3.20 LTS (needs network support)
• Setting LTS “ON” allows you to trace the phone.
• In order to protect the user’s privacy, it required password validation for
using “LTS”. This password is an independent password, which is different
from the phone password.
• For more detailed information, please contact your local service provider.
• Its default setting is “OFF”
• The default password for LTS is “9999”.
icon will be displayed on the main display.
3.20.1 Setting LTS
1. Press , to display “LTS” menu.
2. Press to select “1 LTS Setting” enter the password.
Page 82

UT618 User Manual Setting Up Your Phone 3-27
• The password you entered will be displayed as “****”. If the password is
incorrect, “Invalid Password” will be displayed and the screen will go back
to the standby mode.
3. Press to select “1 ON” press .
• You can also press
4. Press to select the item you want to set. For example, select “LTS
Alarm On”.
5. Press , to display “Set”, which means the selected LTS function, is
turned on.
• Icon is displayed on standby mode wallpaper.
)))) Note:
• To turn off “LTS”, please press “2 OFF” in Step 3, “LTS OFF Saved”
will be displayed, which means LTS has been turned off.
• When MiMi center begins to trace the phone, “LTS Activating” will be
displayed. If the LTS alarm is turned on, the phone will ring and vibrate to
notify the user.
• If the LTS alarm is turned off, the phone will only vibrate to notify the user.
3.20.2 Changing the LTS Password
1. Press , to display “LTS” menu.
to select “1 ON”.
2. Press to select “2 Change pwd” enter the password.
3. Enter the new password.
• Enter a 4-digit number as a new password.
4. Re-enter the new password to confirm it.
• If the password is correct, “Set” is displayed, which means the password
has been changed.
• If the password is incorrect, “Invalid Password” is displayed. Please re-
enter the new password.
)))) Note:
• Please record your password incase you forget it.
• If you forget the password, please send the phone to your local service
provider’s service center to reset it.
Page 83

3-28 Setting Up Your Phone UT618 User Manual
3.21 Selecting the Language
• The phone supports to languages “ENGLISH” and “CHINESE”.
• The default setting for the language is “CHINESE”. The menu is in Chinese.
1. Press
2. Press to select the language you want to use press , to display
“Set”, which means the language, has been set.
, to display “Language” menu.
3.22 Phone Lock
• When the phone lock is turned on, only the pickup key and the number keys
will work.
• Turning on phone lock can prevent others from using your phone.
• The phone is not set with the phone lock when you buy it.
3.22.1 Setting Phone Lock
1. Press , to display “Phone Lock” screen appears.
2. Enter the password.
• The password you entered will be displayed as “****”.
• If the password is correct, “Set” is displayed, which means the phone
lock has been activated. If the password is incorrect, “Invalid
Password” will be displayed then go back to the standby mode screen.
• The
)))) Note:
• Please refer to section “Changing the Phone Lock Password” on how to
set password.
• You can still answer a call under “Phone Lock” mode. When there is an
incoming call, “In Use”, “Mute” and “Block Call” can still be used
normally.
• When you are talking under “Phone Lock” mode, features like earpiece
volume adjustment, call hold, displaying your own number, whisper, call
waiting and 3-party call can still be used normally. The following functions
do not work, searching the phone book and number memo.
icon will be indicated on the main display.
3.22.2 Canceling Phone Lock
• You can use numeric keys to enter the password under standby mode.
Page 84

UT618 User Manual Setting Up Your Phone 3-29
• The password you entered will be displayed as “****”.
• If the password is correct, “Cancelled” will be displayed, which means
“Phone Lock” has been cancelled. The
icon on the main display will
disappear. If the password is incorrect, it will display “Invalid Password”
and go back to the standby mode screen.
3.23 Changing the Phone Password
• Some functions in this phone need password in order to protect the user’s
privacy.
• Please choose a 4-digit number as your phone password.
• The default setting for the password is “0000”.
• If you forget your password, please send the phone to your local service
provider’s service center to reset it.
1. Press
2. Enter the password.
3. Enter the new password.
4. Re-enter the new password.
)))) Note:
• The password of “Group Setting” or “LTS” is different from this
• Please refer to section “Setting a Group” on how to set group setting
, to display “Change Password” screen.
• The password you entered will be displayed as “****”.
• If the password is correct, “New Password” screen is displayed. If the
password is incorrect, “Invalid Password” will be displayed and it will
go back to the standby mode wallpaper.
• After you enter the new password, “Re-enter New Password” screen is
displayed.
• If the password is correct, completion ring is played and “Set” is
displayed, which means the password has been changed.
password.
password.
• Please refer to section “Changing the LTS Password” on how to set LTS
password.
3.24 Voice Mail (needs network support)
• This feature needs network support for use.
Page 85

3-30 Setting Up Your Phone UT618 User Manual
• When your phone is turned off, out of the service area or you cannot answer
calls under some specific situations, the incoming call information will be
recorded in the voice mail. The system will answer the calls and ask the
callers to leave messages.
3.24.1 Accessing Voice Mail
1. Press , to display “Voice Mail” menu.
2. Press
system’s voice mail center. Please follow the voice response to operate.
to select “1 Play”, the phone will automatically connect to the
3.24.2 Turning On/Off Voice Mail
1. Press , to display “Voice Mail” menu.
2. Press
system’s voice mail center. Please follow the voice response for operations.
)))) Note:
• To turn off voice mail service, please press
2.
• All the functions of the voice mail need to connect to the system for use.
Please follow the prompts to operate and complete the settings. Voice mail
cannot be set when the phone is out of the service area or at a place where
the signal is weak.
to select “2 ON”, the phone will automatically connect to the
3.24.3 Checking the Voice Mail setting
to select “3 OFF” in Step
1. Press , to display “Voice Mail” menu.
2. Press to select “4 Setting Check”, the phone will automatically
connect to the system’s voice mail center. Please follow the prompts for
operation.
3.24.4 New Voice Mail Reminder
• When you get a new voice mail in the system’s voice mail center, it will
send short message to notify you and “You Got SMS” will be displayed on
the screen.
Page 86

UT618 User Manual Setting Up Your Phone 3-31
3.25 Your Own Number
• You can use this feature to set the phone number in the phone and press
to display “Own number” to check it.
• The number can be the actual phone number or a virtual number (e.g. for
security reason).
3.25.1 Setting Own Number
1. Press , to display “Change Own Number” screen.
2. Enter the phone password.
• The password you entered will be displayed as “****”.
• If the password is correct, “New Password” screen is displayed. If the
password is incorrect, “Invalid Password” will be displayed and it will
go back to the standby mode screen.
3. Enter the phone number.
4. Press
saved.
)))) Note:
• If the phone has set an own number; your own number will be displayed in
Step 2 after you enter the password. Please enter the new number in Step 3.
, to display “Registered”, which means the own number, has been
3.25.2 Displaying Own Number
1. Press to display “Own Number”. If you have not set “Own
Number”, it will be displayed as “---“.
• The displayed number is the number you saved in “Change Own
Number”.
• You can check your own number even you are talking on the phone. When
the checking is completed and the result is displayed, the screen will go
back to the in use display after 60 seconds.
3.26 Toll Lock
• You can set long distance call lock. When the toll lock is turned on, long
distance calls cannot be dialed out.
• The default setting for Toll Lock is “OFF”.
• Toll lock cannot lock long distance call made by IP, or phone cards.
Page 87

3-32 Setting Up Your Phone UT618 User Manual
3.26.1 Turning On Toll Lock
1. Press , to display “Toll Lock” menu.
2. Select “1 ON”, to display “Set”, which means the toll lock is turned on.
• If the toll lock is set on, will be displayed on the main display.
• If you dial a long distance call number and press
will be displayed and the call cannot be dialed out.
3.26.2 Turning Off Toll Lock
1. Press , display “Toll Lock” menu.
2. Select “2 OFF”, to display “Password” screen.
3. Enter the password.
• The password you entered will be displayed as “****”.
• If the password is correct, “Cancelled” will be displayed, which means
toll lock has been turned off; if the password is incorrect, “Invalid
Password” will be displayed and it will go back to the standby mode
screen.
3.27 Reset
• You can reset some of the default settings.
, “Toll Locked”
1. Press
, to display “Password” screen.
2. Enter the phone password.
• The password you entered will be displayed as “****”.
• If the password is correct, “Reset? Yes No” appears; if the password is
incorrect, the phone will play a warning beep and “Invalid Password”
will be displayed then the screen will go back to the standby mode
wallpaper.
3. Select “YES” press , to display “Resetting”, which means the phone
is retrieving some of the default settings.
• When “Completed” is displayed it indicates that some of the default
settings have been retrieved.
• The items for which the default settings can be retrieved are:
Functional Items Default settings
Earpiece Volume Volume 2
Whisper OFF
Page 88

UT618 User Manual Setting Up Your Phone 3-33
Functional Items Default settings
Key Beep ON
Manner Setting (Key Beep) OFF
Manner Setting (Vibrator) ON
Manner Setting (Volume) OFF
Manner Mode OFF
Vibrator (Call) OFF
Vibrator (Alarm) OFF
Vibrator (Schedule) OFF
Vibrator (SMS/Mail) OFF
Earphone Pickup OFF
Melody Select (Call) Tone 1
Melody Select (Alarm) Tone 2
Melody Select (Schedule) Tone 3
Melody Select (SMS/Mail) Tone 4
Melody Select (Volume) Volume 3
Alarm OFF
Anniversary Display ON
Voice Mail OFF
LCD Contrast 6
Sub LCD Setting (Call) Green
Sub LCD Setting (Alarm) Red
Sub LCD Setting (Schedule) Orange
Sub LCD Setting (SMS/Mail) Orange
Back Light ON
Back Light Flashing Time 30 Seconds
Talking Time ON
LDS OFF
LTS (LTS Alarm) OFF
No ID Block OFF
Custom function Deleted
SMS in editing Deleted
Mail in editing Deleted
Sent Beep ON
Phone book in editing Deleted
Bookmark in editing Deleted
3.28 All Reset
• You can use this function to retrieve all default settings.
1. Press
2. Enter the phone password.
• The password you entered will be displayed as “****”.
• If the password is correct, “Reset? Yes No” is displayed; if the
password is incorrect, the phone will play the warning beep and
“Invalid Password” will be displayed and the screen will go back to the
standby mode wallpaper.
3. Select “YES”
, to display “Password” screen.
press .
Page 89

3-34 Setting Up Your Phone UT618 User Manual
• “Resetting” is displayed, which means the phone is retrieving some
of the default settings.
• When “Completed” is displayed, it indicates all the settings have
been reset to their default values.
)))) Note:
• “All Reset” function deletes all the data in the phone. All features
will go back to the default settings. Therefore, if you have saved
important information in the phone, do not use “All Reset” function.
• The items for which the default settings can be retrieved are:
Function Items Default settings
Earpiece Volume Volume 2
Whisper OFF
Key Beep ON
Manner Setting (Key Beep) OFF
Manner Setting (Vibrator) ON
Manner Setting (Volume) OFF
Manner Mode OFF
Vibrator (Call) OFF
Vibrator (Alarm) OFF
Vibrator (Schedule) OFF
Vibrator (SMS/Mail) OFF
Earphone Pickup OFF
Melody Select (Call) Tone 1
Melody Select (Alarm) Tone 2
Melody Select (Schedule) Tone 3
Melody Select (SMS/Mail) Tone 4
Melody Select (Volume) Volume 3
Melody Compose Deleted
Alarm (ON/OFF) OFF
Alarm (Alarm) Appoint Day
Alarm (Once) 01/01
Alarm (Appoint Day) All ON
Alarm (Time) 00:00
Alarming Time (length of time) 15sec.
Snooze OFF
Voice Memo None
Voice Mail OFF
LCD Contrast 6
Picture Deleted
Sub LCD Setting (Call) Green
Sub LCD Setting (Alarm) Red
Sub LCD Setting (Schedule) Orange
Sub LCD Setting (SMS/Mail) Orange
Back Light ON
Back Light Flashing Time 30 Seconds
Talking Time ON
LDS OFF
LTS OFF
LTS (LTS alarm) OFF
No ID Block OFF
Custom function Deleted
Page 90

UT618 User Manual Setting Up Your Phone 3-35
Function Items Default settings
SMS in editing Deleted
Free Box (Rename) Free Box 1-3
Mail in editing Deleted
Schedule None
Anniversary None
Sent Beep ON
Sign OFF
Air Info Text Omit
Center Number (Online Sign Up) Preset
Center Number (Mail) Preset
Center Number (Air Info) Preset
Center Number (Auto E-Mail) Preset
E-Mail Setting (Send) Send
E-Mail Setting (Receive) All
Dialed Record None
Incoming Record None
3.29 Custom Function
• You can set your frequently used items from “Main Menu” and “OK
Menu” to “Custom Menu”. When it is set, you can press
custom function menu under standby mode.
• You can set up to 9 functions in the menu.
3.29.1 Setting Custom Function
1. Press , to display “Custom Function” menu.
2. Press
to select an unoccupied frame press .
3. Select the menu that has the function you want to include in the custom
function menu
4. Press
5. Press
to select the function item.
, to display “Registered”, which means the function, has been set
press .
into custom function menu.
3.29.2 How to Use Custom Function
to enter the
1. Press , to display “Custom Function” menu.
2. Press
• Press
to select the function.
to enter the operational screen.
Page 91

3-36 Setting Up Your Phone UT618 User Manual
• You can also press corresponding numbers to enter the operational
screen.
3.29.3 Deleting Custom Function Individually
1. Press , “Custom Function” menu appears.
2. Press
3. Press
4. Press
to select the function you want to delete.
to display the sub menu.
to select “1 Delete One”, to display “Deleted”, which means the
function, has been deleted from the custom function menu.
3.29.4 Deleting All Custom Functions
1. Press , to display “Custom Function” menu.
2. Select a function, press
3. Press
4. Select “YES”
to select “2 Delete All”, “Delete All? YES/NO” is displayed.
press , to display “Deleted”, which means all the
functions have been deleted from the custom function menu.
to display the sub menu.
Page 92

Text Edition
4. Text Edition
4.1 Entering Text
4.1.1 Text Input Area
• The Text input area can be categorized into sections for better
understanding.
4
Text
1. Input Method Area
• This is indicated on the right margin of the title area. The user can select
from the three options available, viz. Pinyin , English and
numericals
2. Text Display Area (16*16 dot)
• This area will display the English text being entered.
3. Input Area
• This area will display the Pinyin text being entered.
.
1
2
4
5
3
shou
寿受授瘦售兽狩
Text
ˋ
4. Word Selection area / Relevant Words Area
• When you enter the first Chinese character in the input area, it will
display words relevant to what you are entering.
5. Functional Key Indicator
Page 93
4-2 Text Edition UT618 User Manual
• This is the last line of the screen, which indicates the functions of the
keys.
• When the input area and the word selection area/relevant words area are
blank:
• Press
• Press
to display the sub menu.
to return to the previous step.
• Press to go to the next step.
• When there is text in the input area and the word selection area / relevant
words area:
• Press to return to the previous step.
• Press
to select a character and it will jump to the text area.
• Press
4.1.2 Switching Input Method
• The steps for entering text are as follows: Select “Input Method” Enter
characters
• In the text entering area, you can toggle between input methods by pressing
once.
Confirm characters.
or to erase the related words.
Pinyin
English number
• The input method selected is displayed at the upper-right corner of the main
display.
Page 94

UT618 User Manual Text Edition 4-3
4.1.3 Features Using Text Input
Input methods
Features
Schedule/Anniversary/(entering
title), Phone Book (entering
name and searching name),
Melody Compose (entering
title), SMS (entering text), Mail
(entering text and subject), Air
Info (entering text and subject),
Sign, Free Box (Rename), Air
Info, Online Sign Up
Entering phone number,
Number Memo, Time Date,
Password, Group No.
Entering E-Mail Address, Book
Mark
• When you enter phone number, number memo, time setting, password and
group number, the image “
• Keys for entering/editing text:
Keys Functions
Pinyin
9 9 9
English
9 9
” will not be displayed.
number
9
Press
: Move the cursor to the right side :Move the cursor to the left side
Press
and
hold
Confirm a character.
●When you enter English and numeric characters, they will be displayed directly on the
display area.
Carriage return (only can be used in Mail, Air Info and SMS)
Chinese Tones.
Delete a character
Delete the character at the cursor or
to the left of the cursor
Deletes all characters entered
Delete a character between characters
After deleting a character, the remaining
text will automatically shift to the left
4.1.4 Entering numbers, characters and symbols
Keys Input Methods Input Characters
Pinyin
English
number
Pinyin
English
number
Pinyin
Space @ . / : ;~ _ * # $ % ^ & \ | ‘ ,” “
1
abc
abc ABC
2
def
Page 95

4-4 Text Edition UT618 User Manual
Keys Input Methods Input Characters
English
number
Pinyin
English
number
Pinyin
English
number
Pinyin
English
number
Pinyin
English
number
Pinyin
English
number
Pinyin
English
number
Pinyin
English
number
Pinyin
English
number
Pinyin
English
number
def DEF
3
ghi
Abc ABC
4
jkl
jkl JKL
5
mno
mno MNO
6
pqrs
pqrs PQRS
7
tu
tuv TUV
8
wxyz
wxyz WXYZ
9
+ - = ? ! < > ( ) { } [ ]
0
/ v \ · next line
pqrs PQRS
7
Edit (copy, cut, paste)
Edit (copy, cut, paste)
Edit (copy, cut, paste)
4.1.5 Input Method
• When you press the keys the display will depend based on the input method
selected.
• Please refer to section “ Entering numbers, characters and symbols”.
Example: Pressing
modes selected.
multiple number of times with different input
Page 96

UT618 User Manual Text Edition 4-5
12 3
)))) Note:
• If you want to enter a character that is as the same as the previous one, or is
on the same key as the previous one, please use
to move the cursor then
enter the second character.
• After you enter the first character, press
the second character.
• While entering text in English, if you want to know the various possible
characters, numbers that the key supports, press and hold the key. All the
characters will be displayed in turns. This feature is available only for
English characters.
4.1.6 Entering Chinese Character
1. Switch to Pinyin method in text entering display, the cursor will be
displayed in the input area.
2. Press
input area and the relevant words will be displayed in the word selection
area.
• You can delete incorrectly typed Pinyin symbols by pressing
• After you press ~ to input Pinyin, if the word you want to
enter is not the first tone, you can press
find the word.
~ and , the related Pinyin symbol will be displayed in
to move the cursor then enter
.
to select the tone in order to
3. Press
selection area. Press
you select will have a black background.
4. Press
area.
)))) Note:
or to move the cursor between the input area and the word
to move the cursor to select the word. The word
to enter the word; the word you select will be displayed in test
Page 97

4-6 Text Edition UT618 User Manual
• When you enter the first character in the input area, the relevant words of
what you are entering will be displayed. Select a relevant word and press
. If you enter other characters directly, these relevant words will be
erased. You can also press
• Pinyin method needs to follow its syllable rule; else the keys won’t work.
For example, pressing
or to erase these words.
after entering “W” will not work.
4.1.7 Entering English characters and Numbers
1. Press under text entering mode to switch between English and number
input method. The cursor is displayed in the text area whereas the input area
and the word selection area are blank.
2. Enter characters or numbers to be displayed in the text area.
4.1.8 Deleting Words and Sentences while Editing
• Delete all words (SMS and Mail)
1. Press and hold
2. Select “YES”
, to display “Delete All?”.
press to delete all the words that are being edited.
4.2 Functions for Editing
• The functions supported for editing are copy, cut and paste.
• The maximum number of characters that can be copied and cut is 60
alphabets or 120 alphanumeric characters.
4.2.1 Copying Text
1. Display the screen that has the text you want to copy.
• You cannot edit text from your SMS box.
2. Press
3. Press
4. Press
• After you select the first letter, “Select the last letter” appears.
5. Press
background.
to display the sub menu.
to select “Copy”, “Select the first letter” is displayed.
to select the first letter press .
to select the last letter. The letters you select will have a black
Page 98

UT618 User Manual Text Edition 4-7
6. Press to complete.
)))) Note:
• To paste the text, please refer to section “Pasting Text”.
• The most recent copy or cut text will be available even if the phone
is turned off.
4.2.2 Cutting Text
1. Display the screen that has the text you want to cut.
• “Cut” function can only be used while editing text.
2. Press
3. Press to select “Cut”, “Select the first letter” will be displayed.
4. Press
5. Press to select the last letter. The letters you selected will have a black
6. Press
)))) Note:
• To paste the text, please refer to section “Pasting Text”.
• The most recent copy or cut text will be available even if the phone is turned
4.2.3 Pasting Text
1. Display the screen that has the text you want to paste.
to display the sub menu.
to select the first letter press , to display “Select the last
letter”.
background.
to cut it.
off
• “Paste” function can only be used while editing text.
2. Press
3. Press
4. Press
you copied or cut has been pasted.
)))) Note:
• The most recent copy or cut text will be available even if the phone is turned
off. The paste function can be used unlimited number of time.
to display the sub menu.
to select “Paste”, “Select the Pasting Area” is displayed.
to select the beginning of the pasting area press . The text
Page 99

4-8 Text Edition UT618 User Manual
4.3 Marks
4.3.1 Entering marks
1. Press under text entering mode, to display the sub menu.
• The items in the sub menu may be different due to different text.
2. Press , to display “Mark” list. Please refer to section “Mark List” for
details.
3. Press to select a mark press for the selected symbol to move to
the text area.
4.3.2 Mark List
Page 100

UT618 User Manual Text Edition 4-9
))))Note:
• If you send “Marks” to a computer or a different model phone, some of
them may not be displayed correctly.
• Please refer to the phone display for the exact symbols.
4.4 Emoji
4.4.1 Entering Emoji
1. Press under text entering mode to display the sub menu.
• The items in the sub menu may different due to different text.
2. Press
4. Press
area.
, to display “Emoji” list. Please refer to section “Emoji List”.
to select an “Emoji” press to move the “Emoji” to the text
 Loading...