

Page 1
TM
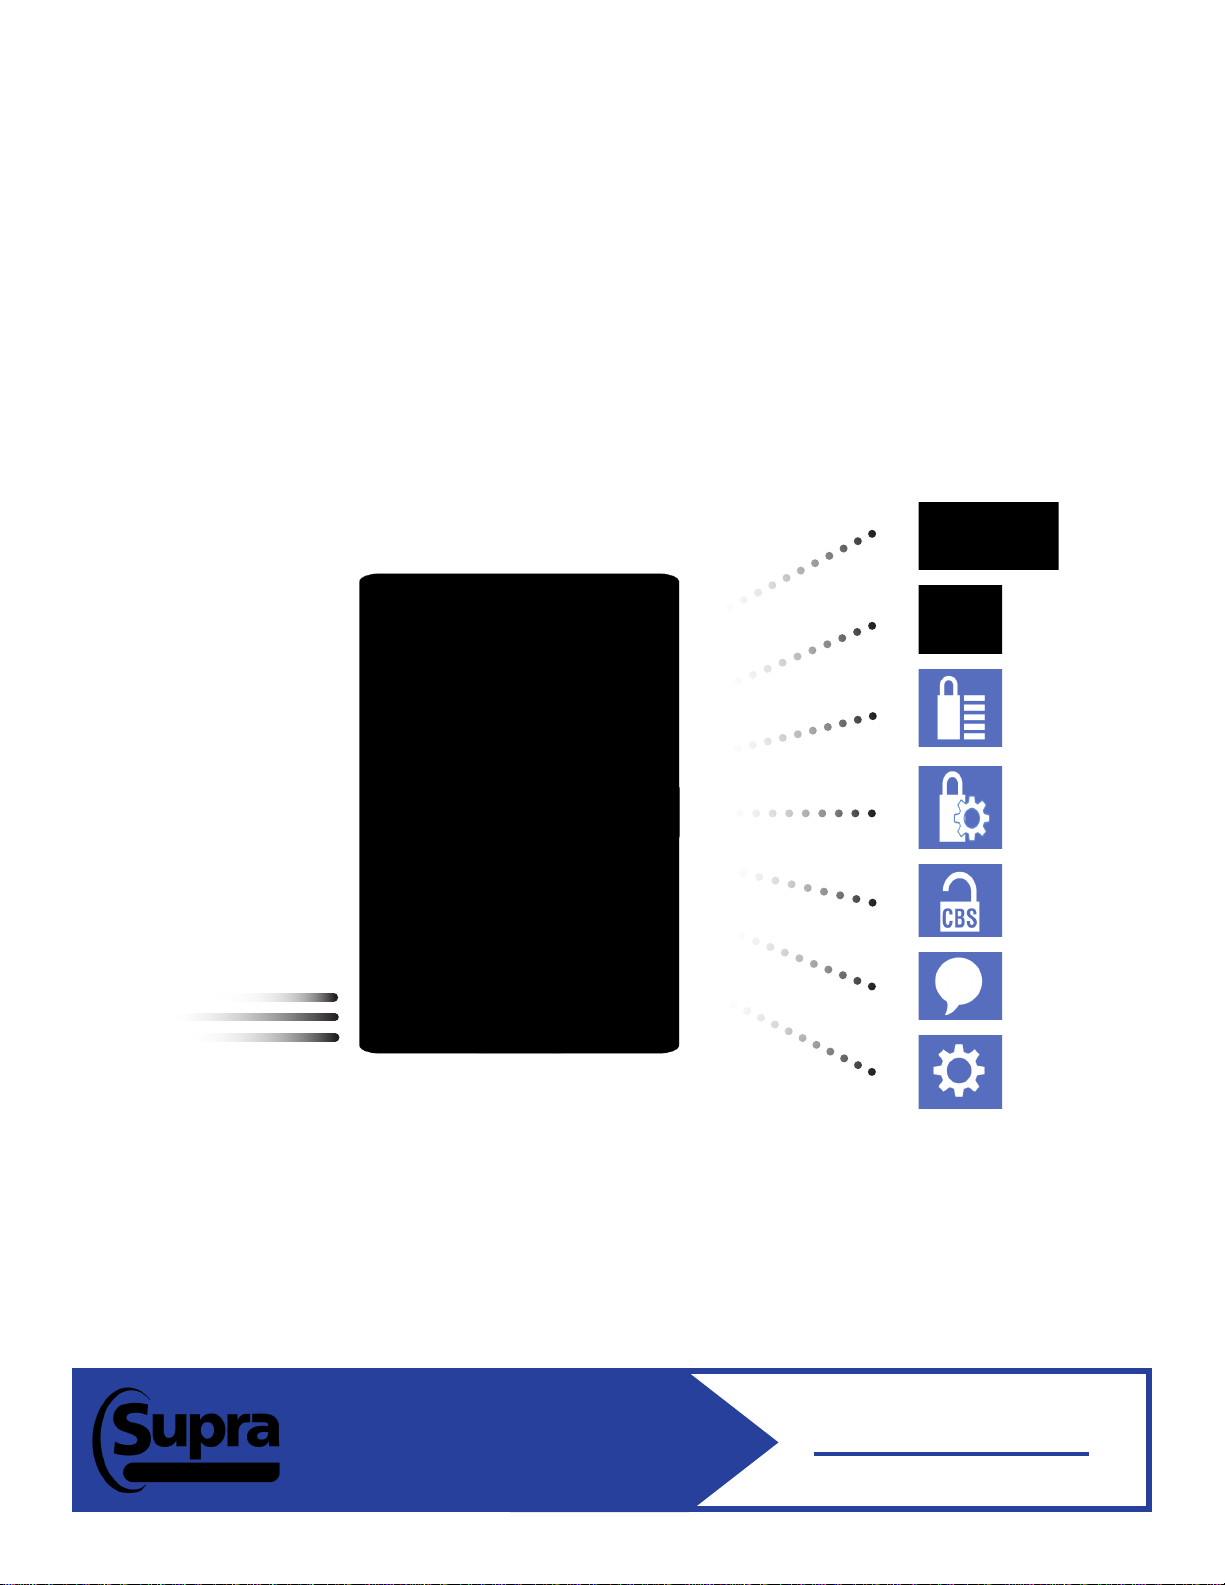
Supra® XpressKEY
User Manual
www.supraekey.com
Page 2

Copyright © 2015 United Technologies Corporation. All rights reserved.
10103747P1, EN
Disclaimer The information in this document is subject to change without notice. UTC Fire & Security Americas
Corporation (“UTC”) assumes no responsibility for inaccuracies or omissions and specically
disclaims any liabilities, losses, or risks, personal or otherwise, incurred as a consequence,
directly or indirectly, of the use or application of any of the contents of this document. For the latest
documentation, contact Supra or visit us online at www.supraekey.com.
This publication may contain examples of screen captures and reports used in daily operations.
Examples may include ctitious names of individuals and companies. Any similarity to names and
address of actual businesses or persons is entirely coincidental.
Trademarks and
patents
Intended use Use this product only for the purpose it was designed for. For the latest product information, contact
Supra and XpressKEY are registered trademarks of United Technologies Corporation. Other trade
names used in this document may be trademarks or registered trademarks of the manufacturers or
vendors of the respective products.
Supra or visit us online at www.supraekey.com.
Rules and
regulations relating
to the use of the
service
Key Possession. Each keyholder (“Keyholder”) is responsible for the key (“Key”) issued to him or
her.
Current Update. The Key must be updated in order to access keyboxes (“Keyboxes”). The Key
cannot be updated unless the Keyholder is in good standing with the organization (“Organization”)
and UTC Fire & Security Americas Corporation (“UTC”), is authorized to use the Service, and is in
compliance with the obligations for the use of the Service including, without limitation, these rules
and regulations.
Equipment Security. It is necessary to maintain the security and the personal identication number
(“PIN”) of the Key to prevent the use of the Key and the Service by unauthorized persons. Each
person in possession of a Key, whether such Key is being actively used or not, shall abide by the
following terms and conditions:
To keep the Key in authorized Keyholder’s possession or in a safe place at all times;
Not to allow the PIN for the Key to be displayed on or attached to the Key for any purpose
whatsoever or to be disclosed to any third party;
Not to lend or otherwise transfer the Key to any other person or entity, or permit any other person
or entity to use the Key for any purpose whatsoever, whether or not such other person or entity is
authorized to use the Key;
Not to duplicate the Key or allow any other person to do so;
Not to assign, transfer or pledge the Key;
Not to (i) destroy, alter, reproduce, modify, adapt, translate, reverse engineer, de-compile,
disassemble or tamper with the Key or knowingly or unknowingly allow anyone else to do so; or (ii)
provide or otherwise make available the software or any part or copies thereof to any third party;
To notify your Organization or UTC within forty-eight (48) hours if the Key is lost or stolen;
To follow all additional security procedures as specied by your Organization; and
To safeguard the code for each Keybox from all other individuals and entities, whether or not they
are authorized users of the service.
Keybox Authorization. Before a Keybox is installed or used on any piece of real property, the prior
written authorization to install or use a Keybox must be obtained from the property owner, as well as
from any tenant(s) in possession of the property, if applicable. Extreme care shall be used to ensure
that all doors to the listed property and the Keybox are locked. All owners and/or tenant(s) of real
property shall be informed that the Keybox is not designed to be, or intended as, a security device.
ii
Page 3

Table of Contents
Introduction .........................................................................................................1
Get Started .........................................................................................................6
XpressKEY Operations ......................................................................................10
Additional Features ...........................................................................................16
Manage XpressKEY in SupraWEB ...................................................................25
Preface ................................................................................................................................v
Safety Terms and Symbols ...............................................................................................v
Supra XpressKEY Overview .............................................................................................2
System Components .........................................................................................................2
XpressKEY Basics .............................................................................................................2
Menu Icons ...................................................................................................................3
Battery ..........................................................................................................................4
Power Up ............................................................................................................................7
Agent Identication ...........................................................................................................7
Automatic Update ..............................................................................................................7
Manual Update and Sync
Obtain an Update Code
Enter an Update Code .................................................................................................8
Keyboxes ..........................................................................................................................11
Key Container .............................................................................................................11
Keybox Showing Hours ..............................................................................................12
Keybox Battery Warnings ...........................................................................................12
Call Before Showing ........................................................................................................12
Cooperating in Neighboring Areas ................................................................................12
Obtain Key ........................................................................................................................13
Open/Release Shackle.....................................................................................................14
Keybox Assistant .............................................................................................................14
Flashlight ..........................................................................................................................15
Manage Keyboxes ............................................................................................................17
Read a Keybox ...........................................................................................................17
View Keybox Showings ..............................................................................................18
Keybox Settings ..........................................................................................................18
Clear Keybox ..............................................................................................................19
Preferences ......................................................................................................................19
Vibrate Mode ..............................................................................................................19
Display PIN or Shackle Code Mode ...........................................................................20
Change PIN Code.......................................................................................................20
Languages ..................................................................................................................21
Messages ..........................................................................................................................21
CBS ...................................................................................................................................22
Input Update .....................................................................................................................23
About .................................................................................................................................23
View XpressKEY Details .............................................................................................23
View Error List ............................................................................................................24
SupraWEB Functions ......................................................................................................26
SupraWEB Login ..............................................................................................................26
Identify a Keyholder by Serial Number ..........................................................................27
..................................................................................................7
................................................................................................8
iii
Page 4

Manage Keybox Inventory
Notication Setup
End of Showing Notication
Set Up Notications for All Inventoried Keyboxes.......................................................29
Set Up Notications for Individual Keyboxes ..............................................................29
Reports .............................................................................................................................30
Showing Feedback ..........................................................................................................30
Leave Feedback on a Showing
Locate XpressKEY
XpressKEY Alerts .............................................................................................................31
Setup Alert ..................................................................................................................31
Unsubscribe
Use Alert
............................................................................................................27
...........................................................................................................30
................................................................................................................32
.....................................................................................................................32
..............................................................................................27
........................................................................................28
.......................................................................................30
Support .......................................................................................................33
XpressKEY Resources ....................................................................................................34
Contact Us ........................................................................................................................34
Regulatory Compliance
...................................................................................................34
iv
Page 5
Preface
The Supra XpressKEY User Manual includes instructions explaining:
• how to use the XpressKEY
• how to access a keybox
• how to view showing activity
There is information describing how to contact technical support.
For additional information on using the XpressKEY, visit www.supraekey.com and click on the Customer
Support link.
The following conventions are used in this document:
Bold Menu items and buttons.
Italic Emphasis of an instruction or point; special terms.
File names, path names, windows, panes, tabs, elds, variables, and other GUI elements.
Titles of books and various documents.
Blue italic (Electronic version.) Hyperlinks to cross-references, related topics, and URL addresses.
Monospace
Programming or coding sequences.
Safety Terms and Symbols
These terms may appear in this manual:
WARNING: Warnings identify conditions or practices that may result in personal injury.
CAUTION: Cautions identify conditions or practices that may result in damage to the equipment or other
property.
v
Page 6

THIS PAGE WAS INTENTIONALLY LEFT BLANK.
vi
Page 7

Introduction
Supra XpressKEY Overview ................................................................... 2
System Components
XpressKEY Basics
Menu Icons
Battery
1
............................................................................... 2
.................................................................................. 2
.......................................................................................... 3
................................................................................................. 4
INTRODUCTION
Chapter 1 Introduction
1
Page 8
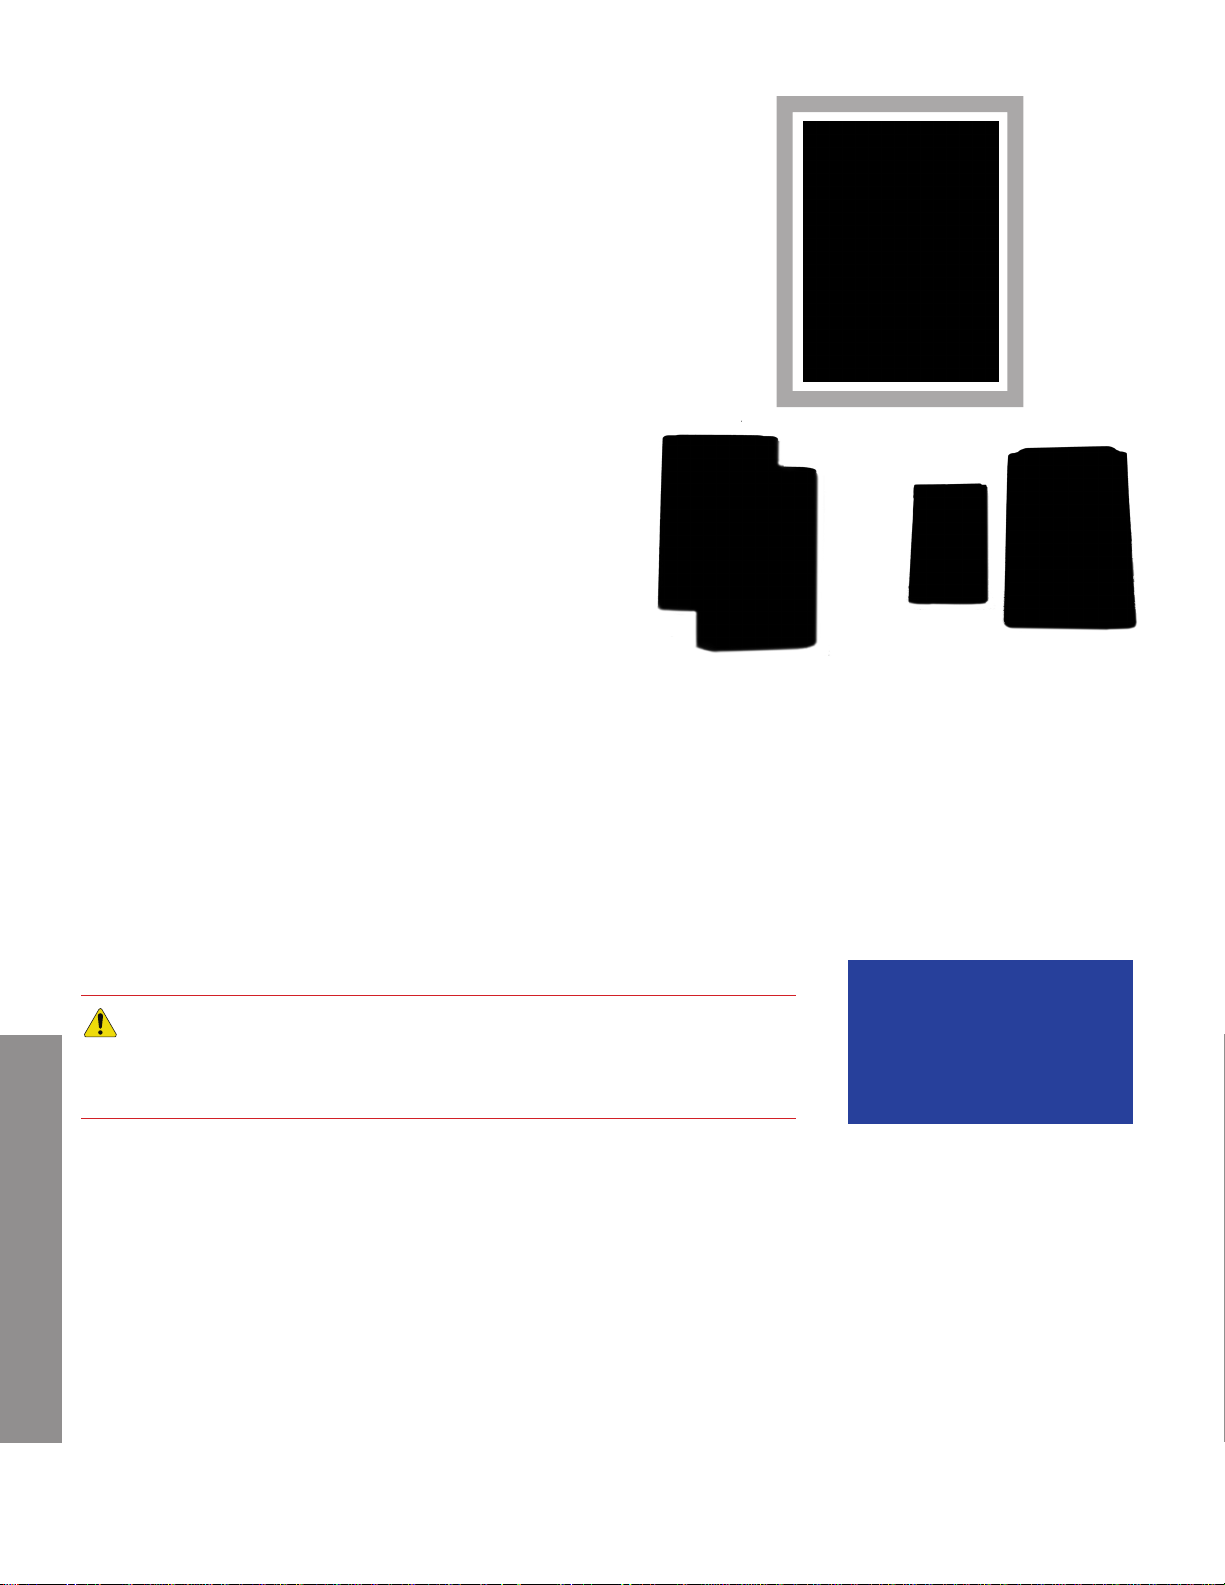
Supra XpressKEY Overview
The XpressKEYTM is used to open Supra® keyboxes.
Supra keyboxes are placed on property listings by the
listing agents and hold the property keys. Real estate
professionals can use the XpressKEY to unlock the
keybox and remove or replace the property keys.
The XpressKEY communicates with Supra keyboxes
using infrared technology. Keyboxes record detailed
information about who accessed it and when, and the
XpressKEY displays that information.
Document Website LInk
Reference Guides/Training Videos
www.supraekey.com/CustomerSupport/Pages/XpressKEY-Resources.aspx
1
SupraWEB Guide for Agents
Real Estate Order Form
SupraWEB Single Sign-On (SSO)
www.supraekey.com/Documents/SupraWEB_Guide.pdf
www.supraekey.com/Documents/REorderform.pdf
www.supraekey.com/Documents/SSO-Instructions.pdf
System Components
Component Description
Keybox Supra keyboxes hold property keys to the listed properties. To show a listing, access the
keys inside the property’s keybox.
XpressKEY The XpressKEY provides access to Supra keyboxes and keeps track of its opened keyboxes.
Supra Network The Supra network maintains all key and keybox data.
SupraWEB
KIMvoice Keybox Information Manager (KIM) is the Supra network that maintains the key and keybox
XpressKEY Basics
The XpressKEY:
SupraWEB, available at www.supraekey.com, is the agent’s website to view and manage
information, get update codes, create reports, and more.
data. Automated voice access to KIM is available by calling 1-888-968-4032.
Infrared
Touch
screen
• Automatically renews keybox system privileges
using a cellular radio
• Has an easy-to-use durable touchscreen display
• Fits easily in your hand or pocket
• Has a long battery life and the battery is removable
and replaceable
• Battery charges with a universal micro-USB
• Uses infrared to communicate with keyboxes
• Helps to assign your keybox with a GPS receiver
INTRODUCTION
The XpressKEY uses Global Positioning System (GPS)
coordinates to assist with showing notications, keybox
Note: The key serial number
and bar code are located on
the back of the key.
Chapter 1 Introduction
ON/OFF
Power
2
Page 9
assignment, and XpressKEY location assistance. GPS location is collected on the Obtain Key and Open
Shackle functions. Note: GPS can take 10 to 40 seconds to obtain a x, depending on line-of-sight to satellites.
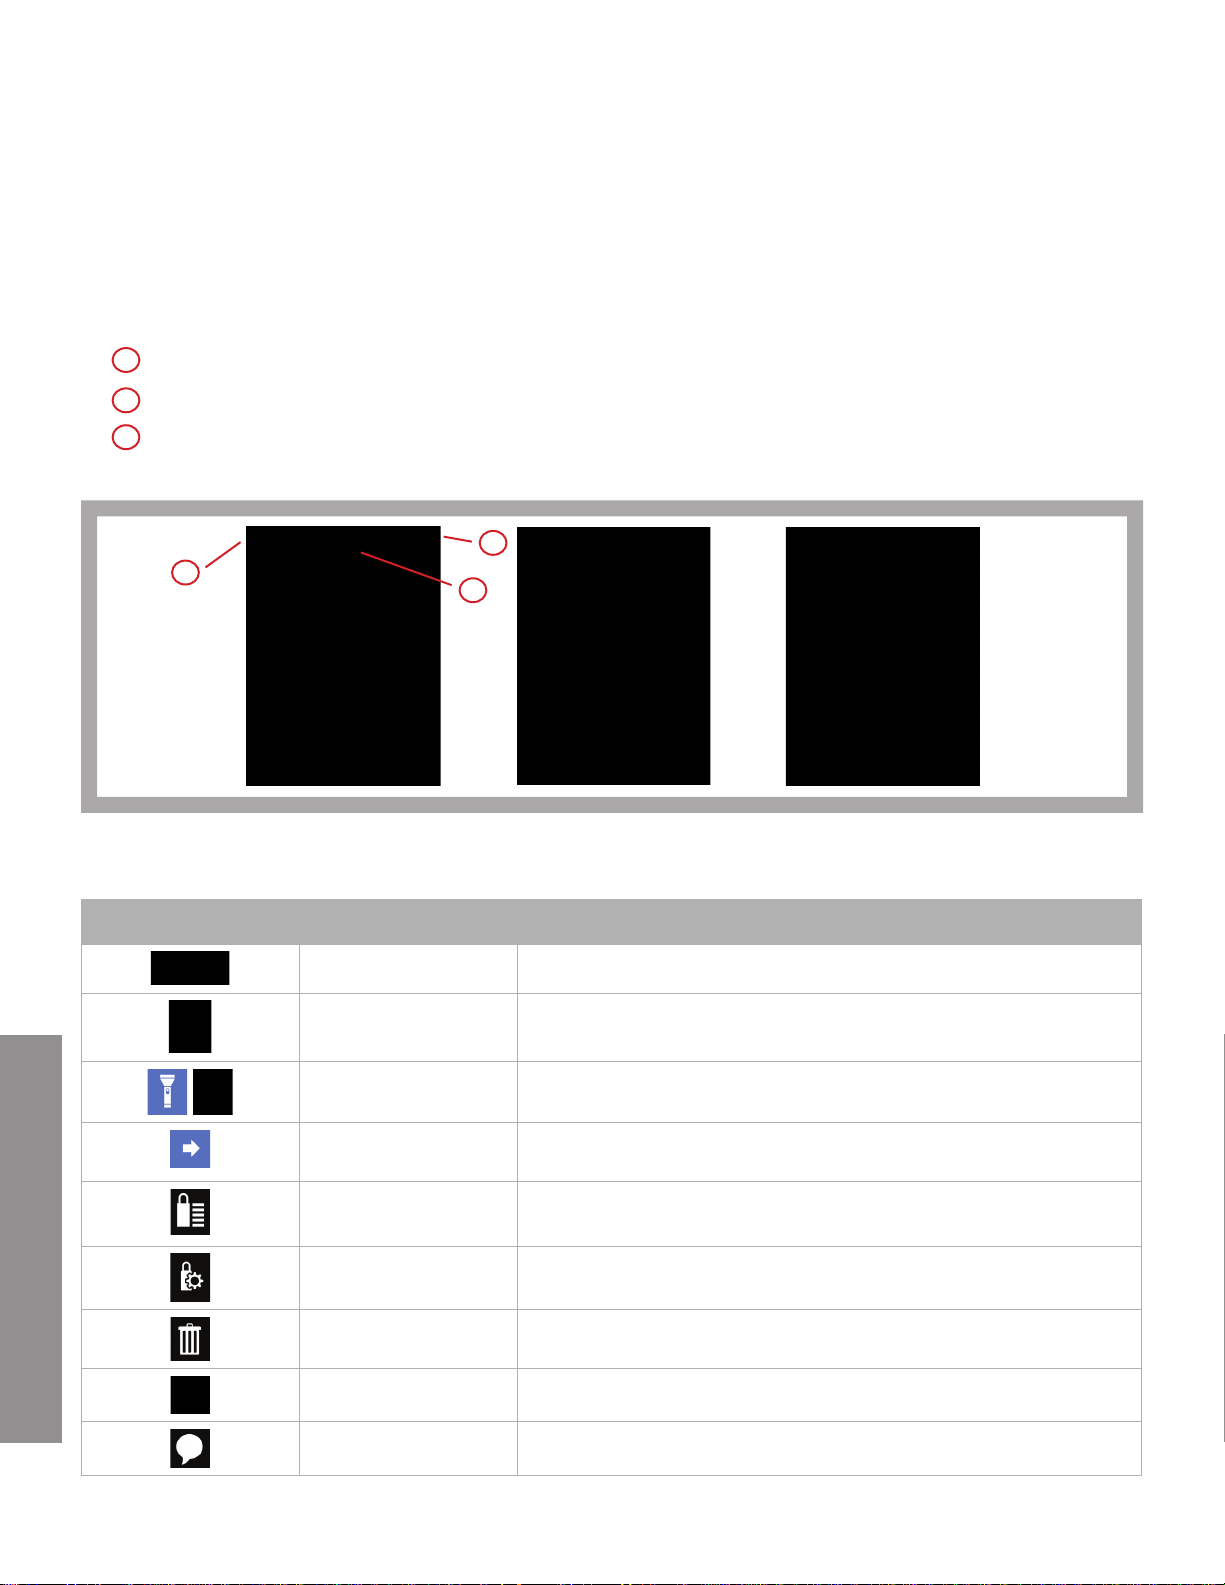
When you power on the key, the home screen appears with the most commonly used functions:
• Obtain a key
• Release a shackle
• Press the arrow button for additional features
The top bar displays:
1
New message indicator
2
Current time
3
Battery status
Main Menu Screens
3
1
2
Menu Icons
Icon Function This means
Key Obtain a key from a keybox key container.
Shackle Open/Release the shackle to add or remove a keybox at a listing.
Flashlight
More Options
Read Keybox Read the keybox to see showings and details.
Keybox Settings Change the time the keybox can be opened or set a CBS code.
Clear Keybox Clear all previous data from the keybox.
Preferences Change the way the XpressKEY performs.
Brighten the surrounding area with a Light-Emitting Diode
(LED) ashlight.
Find more options: Get messages, view showings, read a
keybox, set up your preferences for the XpressKEY.
INTRODUCTION
Messages Get messages from your association or organization.
Chapter 1 Introduction
3
Page 10

Call Before
Showing (CBS)
Input Update Enter the code to update the XpressKEY.
About View details about the XpressKEY and update the key.
Vibrate Toggle the vibration on or off.
Control access by requiring the buyer’s agent to call the listing
agent to obtain a CBS code.
Display PIN/
Shackle
Change PIN Customize your Personal Identication Number.
Languages Change the language to French, Spanish, or English.
Current Time View the current time from the top status bar.
Battery Status
Display the PIN or Shackle code on or off.
View from the top status bar how much battery is left in the key,
when it is charging, if the battery is too hot and when to replace
the battery, respectively.
Battery
The XpressKEY has a rechargeable, replaceable battery that was specically designed for XpressKEY. The
battery should last several years (with average use) before it is replaced. When replacing the battery , only use
the approved Supra XpressKEY battery. You can order the battery online through SupraWEB.
WARNING: Do not leave the XpressKEY or battery exposed to high (over 131°F/55°C). Lithium Ion
batteries have a risk of re, explosion, and burns. Do not short-circuit, crush, incinerate, or disassemble
the battery. Burning these batteries will generate toxic fumes. Cool the exterior of the batteries to
help prevent rupturing. In case of re, use dry chemical, alcohol resistant foam, or carbon dioxide
re extinguishers. For specic information, see the battery manufacturer’s warnings and cautions at
www.na.industrial.panasonic.com.
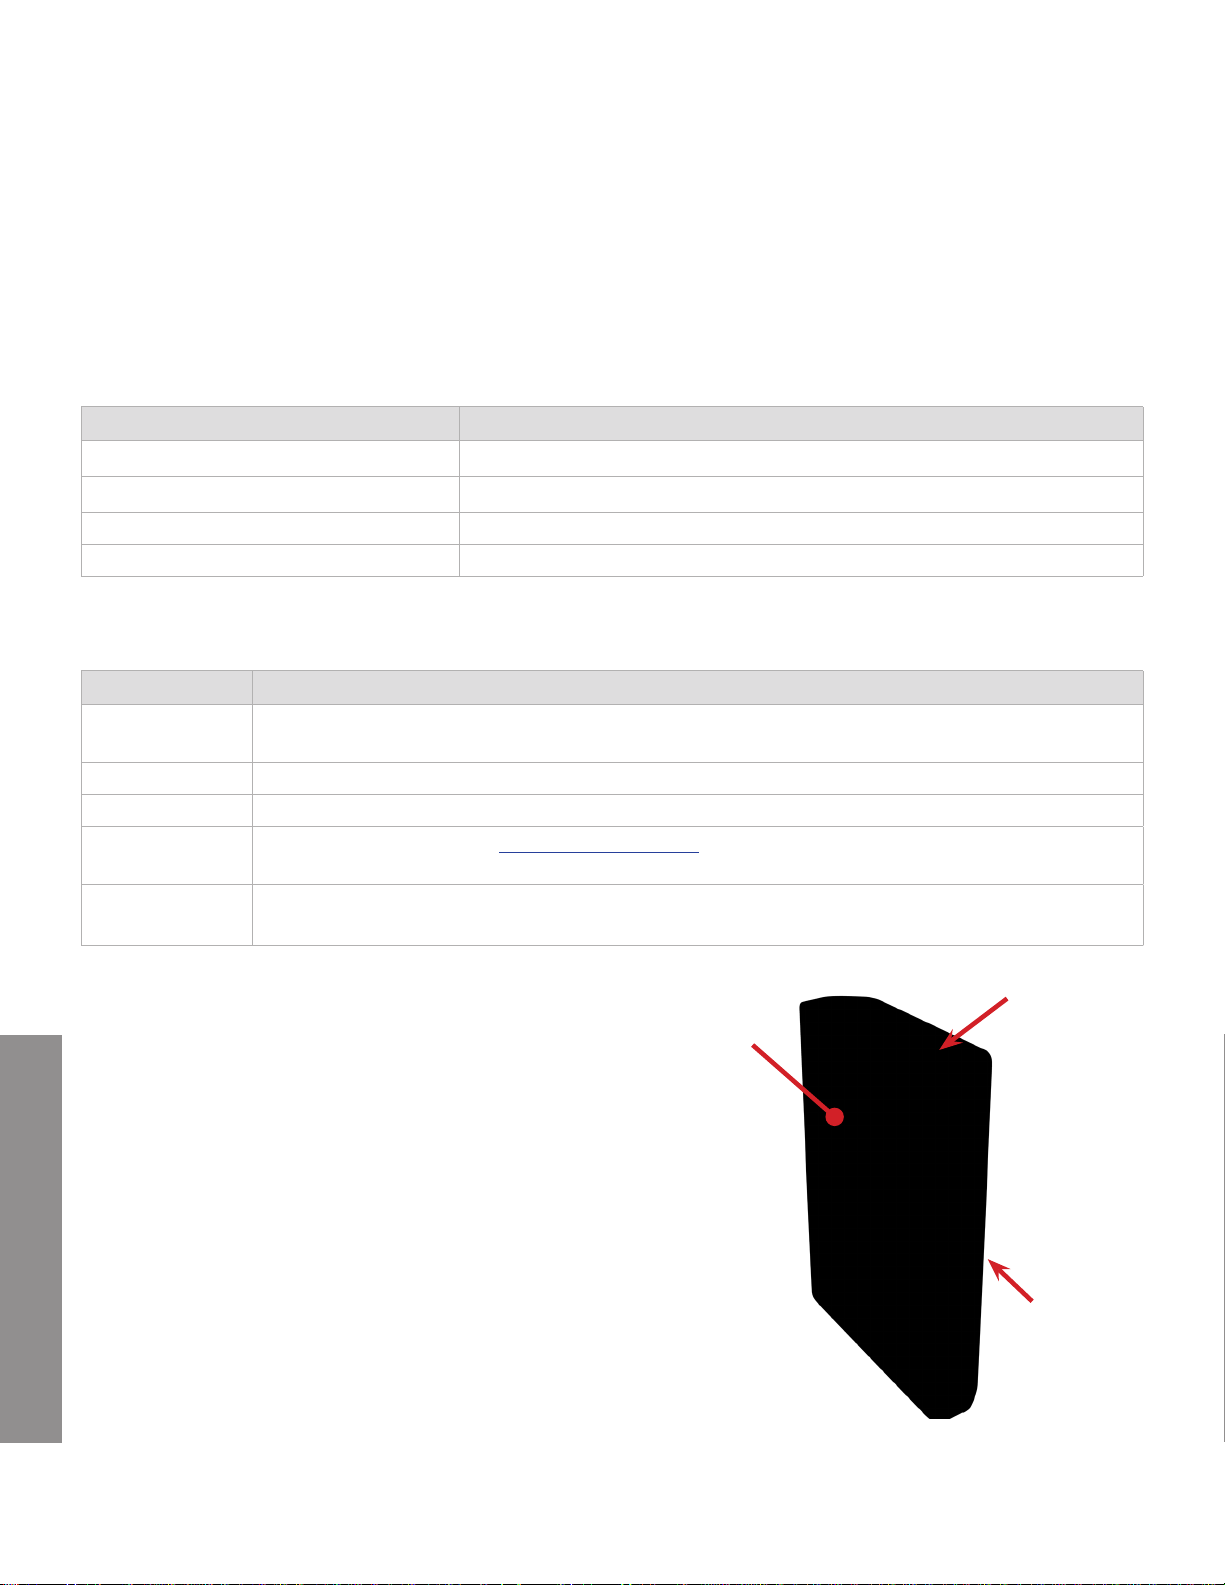
Charging
Use the included micro-USB, off-the-shelf micro-USB,
or car charger to charge the XpressKEY battery. When
the battery is fully charged, the battery icon shows full.
It takes about three (3) hours to fully charge.
A warning displays on the XpressKEY when it has 25%
battery life remaining. A second warning displays when
there is 15% battery charge remaining. The XpressKEY
will automatically shut down when the battery charge
is at 5% and must be charged before the next use.
To preserve battery power, the XpressKEY goes into
Standby mode after 60 seconds of inactivity.
If the Charge NOW warning displays, you will be able
INTRODUCTION
to open a keybox after a minimum 10 min of charging,
then a full charge to the XpressKEY is required.
Charging
Port
Chapter 1 Introduction
4
Page 11
Temperature Warning
The XpressKEY is designed to operate in temperatures
between -4° and 131°F (-20° to 55°C). Low or high
temperature conditions may shorten battery life or
cause the XpressKEY to malfunction. If the XpressKEY
reaches a temperature over 131°F (55°C) the key
automatically goes into safe mode. DO NOT leave
an XpressKEY in an environment that can exceed this
range, such as automobiles. If you see the message
“Warning! Key is TOO HOT!...” displayed on the
XpressKEY, the key has reached a high temperature.
Do not use it until it cools down.
Replacement
1. Remove the back cover.
2. Remove the old battery.
3. Fit the new battery into the battery area.
4. Replace the back cover and snap to close.
Disposal
Panasonic states “All Panasonic Lithium Ion batteries are classied by the federal government as non-
hazardous waste and are safe for disposal in the normal municipal waste stream. These batteries contain
recyclable materials and are accepted for recycling by the Rechargeable Battery Recycling Corporation’s
(RBRC) Battery Recycling Program. For more information on how to recycle your used Lithium Ion battery call
1-800-8-BATTERY for go to the RBRC website at www.rbrc.org for additional information.”
Touchscreen
The XpressKEY has a Liquid Crystal Display (LCD) touchscreen. The protective plastic cover can be removed.
You can use the protective cover as a template to shape a generic screen protector if needed.
Cleaning
CAUTION: Do not use acid/vinegar based or abrasive products to
clean the touchscreen. Do not use pre-moistened cleaner wipes that
are not specically designed for LCD screens. These can damage
the touchscreen and void the warranty.
Use non-abrasive glass cleaner with a clean soft cloth or pre-moisten LCD display cleaner wipes to clean the
screen.
1. Spray the glass cleaner on the clean soft cloth.
2. Using the soft cloth or cleaner wipes, clean the screen.
3. Wipe until dry.
Touchscreen Warranty
INTRODUCTION
The XpressKEY has a limited warranty. Check the warranty page for more details.
Tip: You can use the
protective cover as a
template to cut a generic
screen protector to the
touchscreen size for the
XpressKEY.
Chapter 1 Introduction
5
Page 12

Get Started
Power Up .................................................................................................. 7
Agent Identication
Automatic Update
Manual Update and Sync
................................................................................. 7
.................................................................................... 7
Obtain an Update Code
Enter an Update Code
2
........................................................................ 7
....................................................................... 8
......................................................................... 8
GET STARTED
6Chapter 2 Get Started
Page 13

Power Up
There are three (3) power states; ON, OFF, and Standby.
• ON. Press the power button on the left side to turn it on.
• OFF. Use this feature when the key will not be operated for an
extended period of time. While in the OFF state the key will not
be able to check into the network. Push and hold the power
button (about 3-5 seconds) and tap Power Off to turn it off.
• Standby. Press the power button momentarily to place it in
‘standby’ (sleep-type) mode. Some background operations
such as GPS and cellular may still occur. Press the power
button momentarily to awaken the key.
Agent Identication
The Agent ID is a keyholder identication feature. If your board or
association enables this feature, they can use SupraNET to establish
this information when the agent signs up and it generally does not
change.
Each time the XpressKEY is turned on, the keyholder’s identication
information (name, ID number, and association) is displayed on the
Agent ID screen. Tap anywhere on the screen to dismiss the Agent ID
screen and return to the home screen. The Agent ID will display again
when you turn off the power and then back on again.
2
The barcode scanner used to read the Agent ID must use LED (as
opposed to laser) to penetrate the glass touch screen.
Automatic Update
The XpressKEY contains a cellular radio that communicates with the Supra network. The XpressKEY is
programmed to automatically sync twice a day to update the key, send and receive showing notications, and
receive messages. For the key to update it must be powered on and within cellular range for 10 continuous
minutes during any 24-hour period to update.
As long as the XpressKEY is updated, it does not need to be within cellular range to open keyboxes. However ,
it does need to be in cellular range to send and receive showing notications.
In order for an automatic update to occur the XpressKEY must be:
• Must be in Powered ON mode and have a charged battery
• In cellular range
GET STARTED
• In good standing with your association or organization and Supra
Manual Update and Sync
If the XpressKEY was not able to update or requires an update, a Key Expired! Enter Update Code alert
displays and you can manually update the XpressKEY by following the applicable instructions below.
A Warning Cellular Coverage Required pop-up box will appear if you are out of cellular range when you try to
perform a function that requires cell connection. If you see the warning, move into cellular coverage.
7Chapter 2 Get Started
Page 14

Obtain an Update Code
If the XpressKEY is outside the cellular range for more
than 24 hours, there are three (3) ways to update your
key:
Tip: If you get the Key Expired! warning,
While in cell coverage, power the XpressKEY
off, then power it back on to reconnect it to
the system.
Option 1: Get an Update Code with SupraWEB
1. Go to:
www.supraekey.com.
2. Select Agents-Log
on to SupraWEB and
Login.
3. Select the Update
Code link under Quick
Links.
4. Type the displayed
update code into the
XpressKEY.
Option 2: Get an Update Code from your Administrator
Option 3: Get an Update Code with KIMVoice
1. Call 1-888-968-4032. 2. Follow the automated prompts to
get an update code.
3. Follow the above below From the Main
Screen.
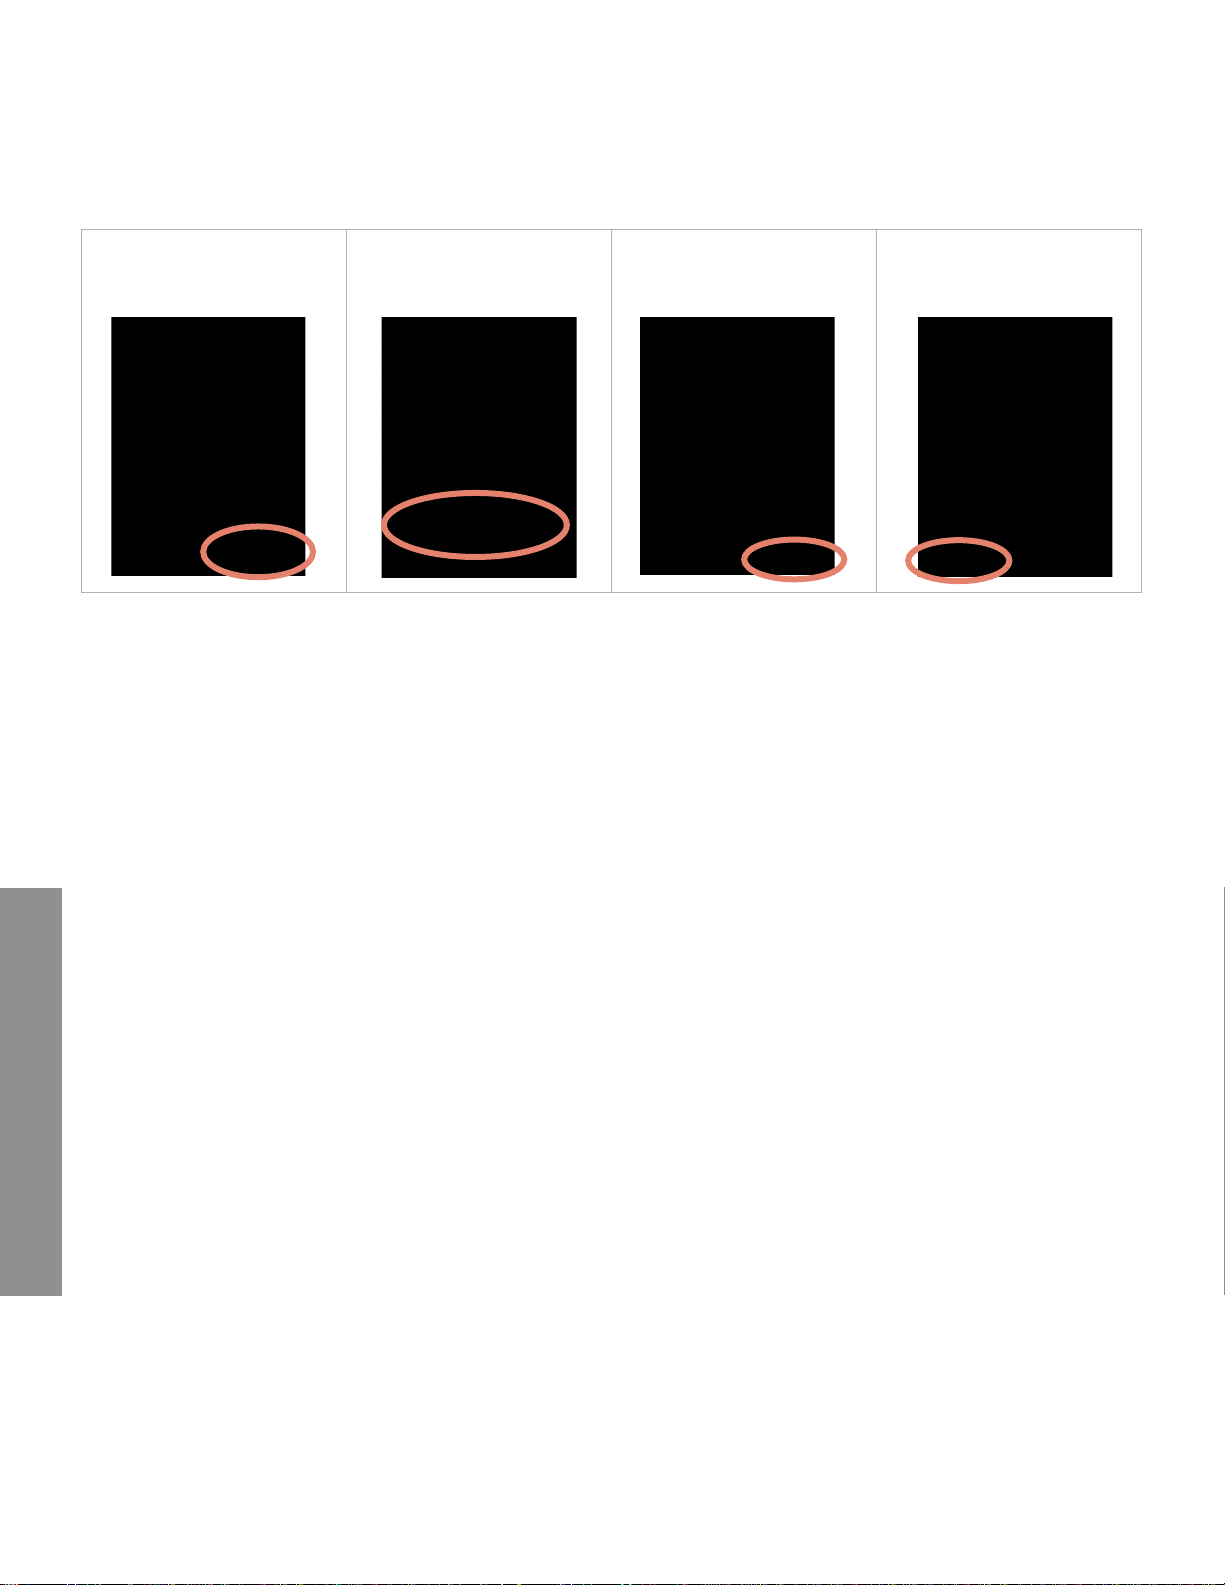
Enter an Update Code
If you see the Key Expired! screen, the key may be out of cellular range. When you move the XpressKEY
into cellular range, it will connect to the system. If you are out of cellular coverage, get an update code (from
SupraWEB, your administrator, or KIMVoice) then follow the directions below to update your key.
From the Key Expired! Screen
1. Tap Enter Update
Code.
2. Type in the update
From the Main Screen
1. Tap on the arrow and
then Next.
2. Tap on Input Update. 3. Type in the code and
GET STARTED
3. Tap Done to exit.
code and tap Enter.
4. Tap Done to exit.
tap Enter.
8Chapter 2 Get Started
Page 15
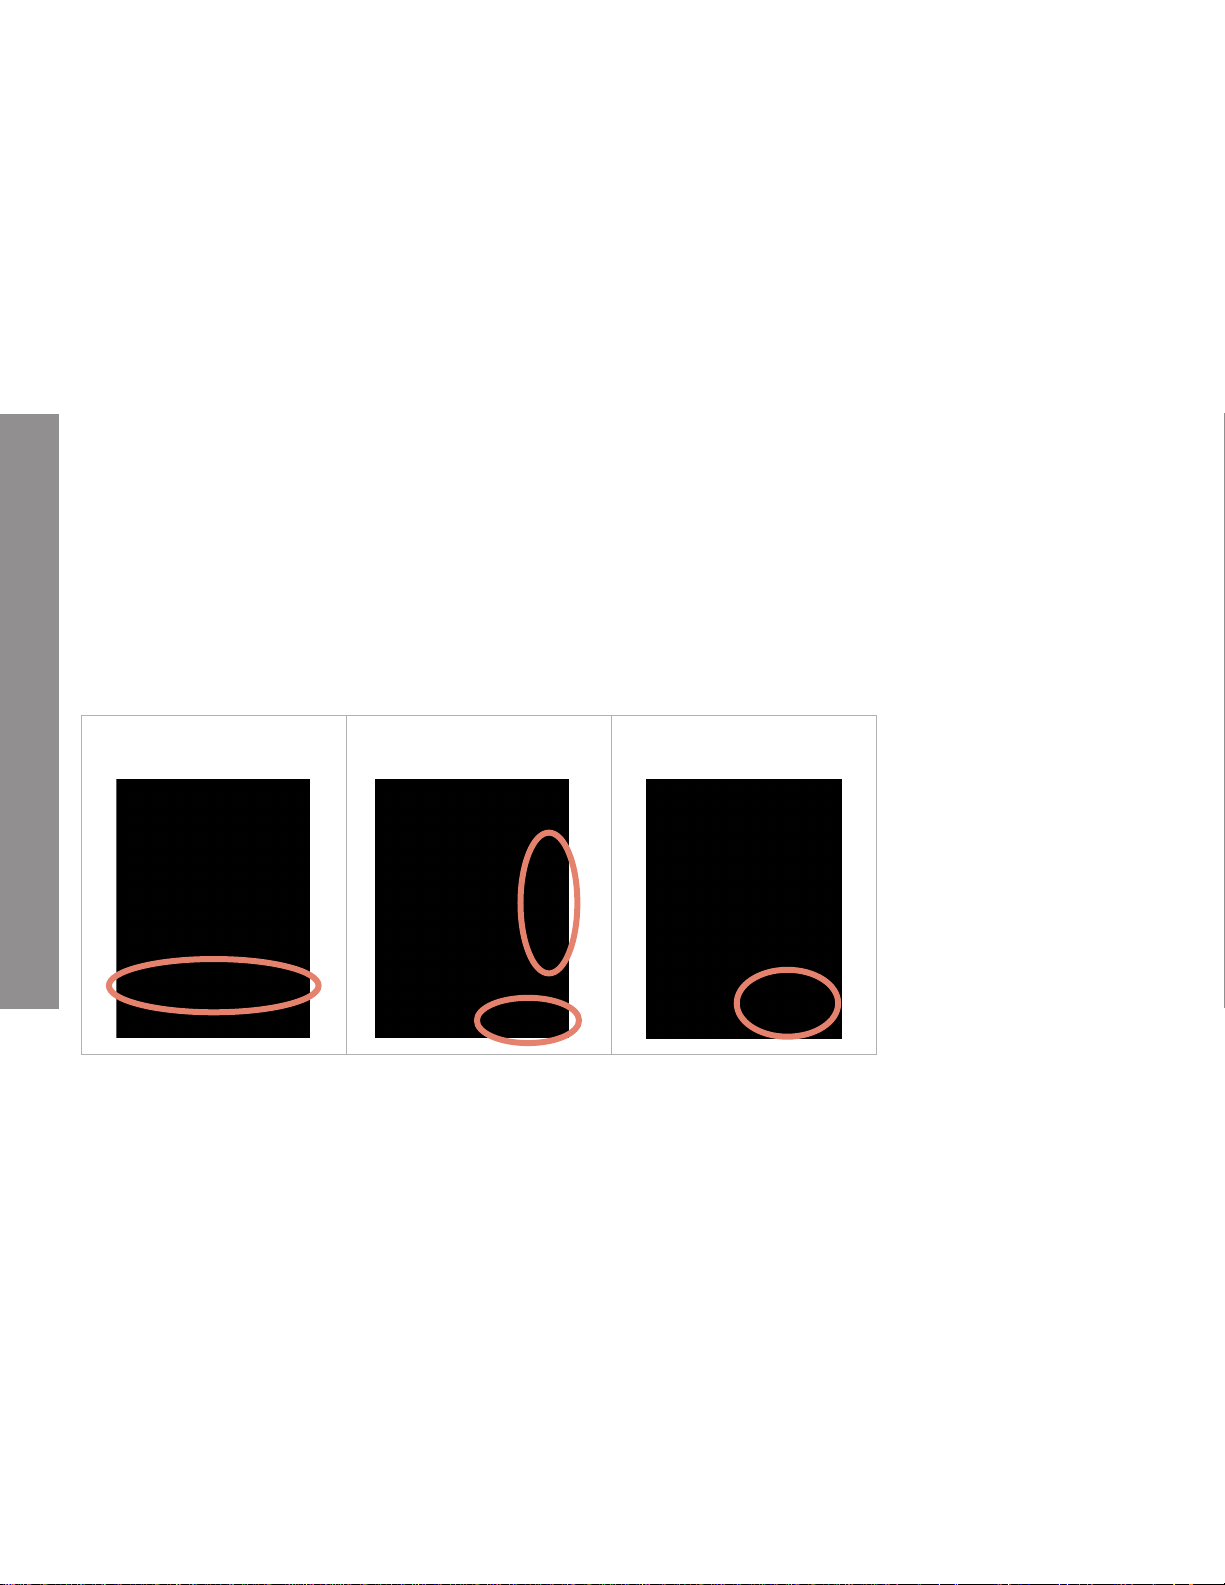
You can power the XpressKEY off and back on to initiate an update or if you want to keep the key powered
on, perform the following steps. After step 3 below, the radio turns on and the key checks for new information.
If the key receives new information the Update Key Communicating... screen pops up and then the key is
updated.
1. On the main screen
tap the arrow then
Next.
2. Tap About. 3. Tap More. 4. Tap Done to exit.
GET STARTED
9Chapter 2 Get Started
Page 16

OPERATIONS
XpressKEY Operations
Keyboxes ................................................................................................11
Key Container
Keybox Showing Hours
Keybox Battery Warnings
Cooperating in Neighboring Areas
Call Before Showing
Obtain Key
Open/Release Shackle
Keybox Assistant
Flashlight
............................................................................................... 15
.....................................................................................11
..................................................................... 12
............................................................................. 12
............................................................................................. 13
.......................................................................... 14
.................................................................................. 14
3
.................................................................. 12
...................................................... 12
10Chapter 3 XpressKEY Operations
Page 17

Keyboxes
The XpressKEY uses an infrared signal and can communicate with
any of the Supra iBox keyboxes.
The XpressKEY electronic key allows access to the keyboxes to:
• Release the key container
• Release the shackle
• Change the keybox settings
• Read the showing history stored in a keybox
There are three (3) different versions of keyboxes that may be placed on your listings and depends upon your
association or organization. The iBox BT LE and iBox BT read infrared and Bluetooth® signals. In addition, the
iBox BT LE uses a low energy battery. The classic iBox (the original Supra iBox) reads only an infrared signal.
Note: Direct sunlight can interfere with the infrared communication and shading the area between the
XpressKEY and the keybox may be required.
Shackle
3
Shackle
Bluetooth signal
iBox BT LE
OPERATIONS
Key Container
The iBox BT LE and iBox BT key containers hold up to ve (5) listing keys or
two (2) gate cards and two (2) keys. The classic iBox key container holds up
to three (3) listing keys.
CAUTION: Do not place ID tags, key rings, or loose objects in the key
container. It can jam the container.
iBox BT
Infrared lens
iBox
Before closing the key container, verify that all items are well inside and the front is
not bowing or bulging out. If you are a listing agent, always make sure you have a
spare set of keys before closing the key container.
T o close the key container , turn it so the compartment holding the keys is facing you.
Insert the key container into the bottom of the keybox and push up until it closes.
11Chapter 3 XpressKEY Operations
Page 18

Keybox Showing Hours
Keybox access hours, established by your association or organization, are programmed into each keybox. You
can change your keybox to allow access for specic hours. To determine the timed access hours preset for
keyboxes in the area, contact the local organization.
Showing hours are in Standard time zone. If the local area observes daylight-saving time, the actual access
hours are one (1) hour later than the hours set in the keybox during daylight-saving time. For example, if a
keybox is set for access from 8 a.m. to 9 p.m. Standard time, during daylight-saving time, the actual showing
hours are 9 a.m. to 10 p.m.
Customize the keyboxes in your inventory to allow 24-hour access or to limit access to during the timed access
hours, see “View Keybox Showings” on page 18 for more information.
Keybox Battery Warnings
The XpressKEY displays a warning if the keybox battery
is low. When low battery warnings are displayed, return
the keybox to your organization.
Call Before Showing
Every Supra keybox contains a Call Before Showing
(CBS) code that your association or organization can
activate. The CBS code allows the listing agent to
control access to the keybox. The showing agent must
contact the listing agent to determine if a CBS code is
required and get the CBS code to open the keybox.
When the keybox requires a CBS code, a prompt to
enter the code into the XpressKEY pops up before the
key container is released. Enter the CBS code and select Continue each time an Obtain Key function is
performed. See “CBS” on page 22 for more information on how to enter the CBS code into the XpressKEY.
Cooperating in Neighboring Areas
To access a keybox in a neighboring association or organization, the cooperating association or organization
must give you permission to update the XpressKEY for their area. Check with your organization to determine
if there is a cooperating agreement in place. The XpressKEY supports up to 50 cooperating codes.
OPERATIONS
Step 1 Get permission from your organization to access cooperating areas.
Step 2 Once the programming is added to the XpressKEY, contact the cooperating organization to
receive permission to update your XpressKEY for their system.
Step 3 After both steps are completed, perform an Update Key function or wait until the next time the
XpressKEY updates (it will update the primary system and the cooperating system).
12Chapter 3 XpressKEY Operations
Page 19

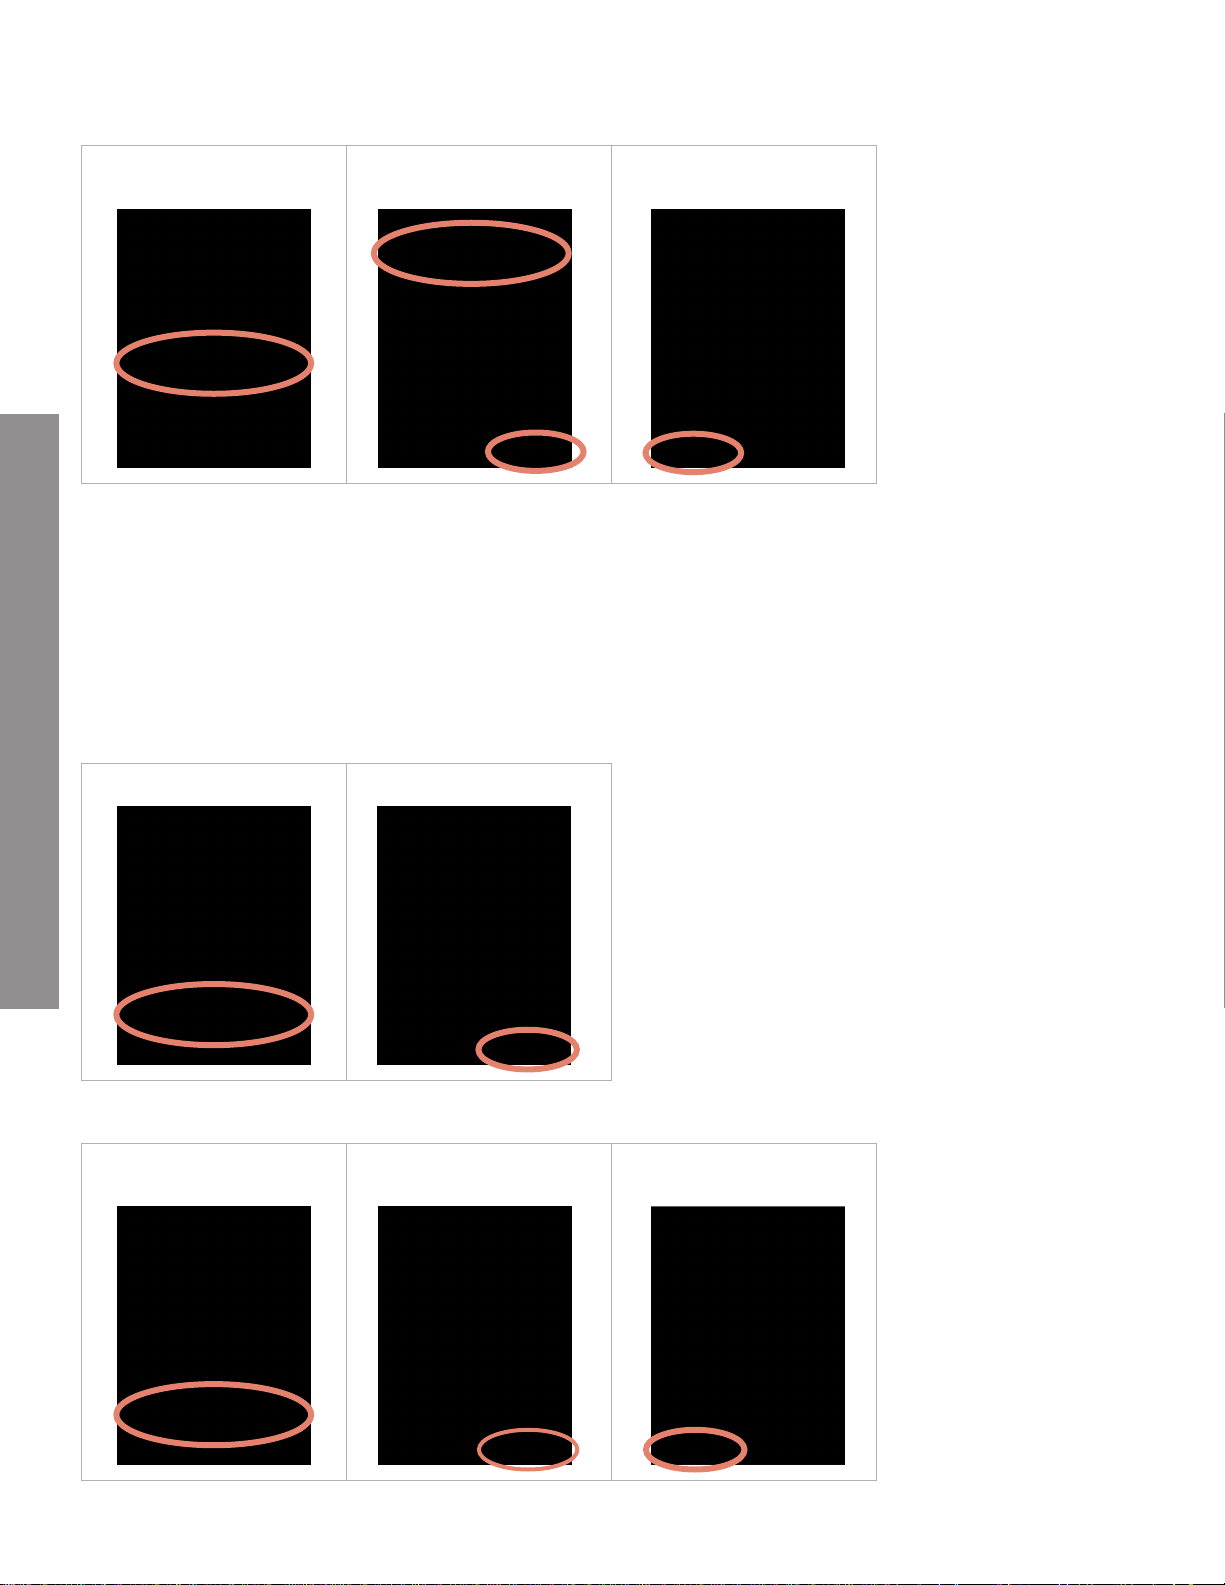
Obtain Key
To get a key from a keybox a Personal Identication Number (PIN) must be entered to perform the Obtain Key
function. The XpressKEY gives an opportunity to to aim the XpressKEY at the keybox up to ve (5) minute after
starting the operation. This allows you to enter the PIN in the car and then walk up to the keybox.
Note: The distance between the XpressKEY and the infrared lens on the keybox should be less than a foot.
Direct sunlight can interfere with the infrared communication and shading the area between the XpressKEY
and the keybox may be required.
After performing an Obtain Key function, the XpressKEY automatically sends the activity to the servers when in
cellular range. When it is not in cell range then it will save the activity and send it to the servers when it is back
in range.
1. On the main screen tap
the Key icon.
5. Press up on the
key container at the
bottom of the keybox.
2. T ype in the PIN number
and tap Enter.
6. Press Done on the
XpressKEY to exit.
3. If prompted type in the
CBS code and tap Enter.
Tip: If you mistype the PIN
code, tap the to clear the
last number entered.
4. Point the key at the
keybox.
OPERATIONS
13Chapter 3 XpressKEY Operations
Page 20

Open/Release Shackle
Each keybox has a four-digit shackle code. Release the shackle to place it on, or remove it from, a listing. After
the shackle code is entered, a prompt appears asking for a reason for the shackle release. The reason choices
are:
• Put on a listing
• Remove from a listing
• Relocate on same listing
• None of the above
Note: For an iBox BT LE and iBox BT keybox, press down on the shackle then pull up on the shackle to
remove it completely. For a classic iBox keybox, the shackle pops open and swings on one side. To fully
remove the iBox shackle perform the remove shackle operation twice.
1. On the main screen tap
the Shackle icon.
5. Push down on the
shackle.
OPERATIONS
PRESS
FIRMLY
2. Type in the shackle
code and tap Enter.
6. Then pull up to
remove the shackle.
PULL UP
TO RELEASE
3. Select a reason, press
Enter, and follow the
prompts.
7. Tap Done to exit.
4. Point the key at the
keybox.
Keybox Assistant
Boards and associations must rst opt-in to this feature for it to be active. The Keybox Assistant uses Global
Positioning System (GPS) to help you assign your keybox. It helps increase the number of keyboxes that have
a listing ID or addresses assigned to them. When more keyboxes are associated with a listing ID or address,
reports are more informative and are easier to distinguish which of your listings have activity.
If Put on a listing is selected, a prompt to enter a house address displays. When the property or house number
(or partial number) is entered, the Supra system looks at new MLS listings entered by you and attempts to
14Chapter 3 XpressKEY Operations
Page 21

nd the corresponding MLS number. If there are several
possibilities, an email is sent to you asking you to select
the link of the correct address for the listing. If a match is
made, you will receive an email telling you the assignment
has been made. If no match is found, the keybox remains
unassigned.
Tip: Assign a listing ID or address
to the keybox when you place it on
property to make sure your reports and
email notices are more complete.
1. On the main screen tap
the Shackle icon.
5. Point the key at the
keybox.
2. Type in the shackle
code and tap Enter.
6. Push down on the
shackle.
PRESS
FIRMLY
3. Select a reason, press
Enter, and follow the
prompts.
7. Then pull up to
remove the shackle.
PULL UP
TO RELEASE
4. Add the property
address and tap
Enter.
8. Tap Done to exit.
Flashlight
Tap the Flashlight button to activate the LED ashlight. Tap it again to turn it off.
OPERATIONS
1. Tap the Flashlight icon
to turn it ON.
2. Tap the Flashlight icon
to turn it OFF.
15Chapter 3 XpressKEY Operations
Page 22

Additional Features
ADDITIONAL FEATURES
4
Manage Keyboxes ................................................................................. 17
Read a Keybox
View Keybox Showings
Keybox Settings................................................................................. 18
Clear Keybox
Preferences
Vibrate Mode
Display PIN or Shackle Code Mode
Change PIN Code
Languages
Messages
CBS
......................................................................................................... 22
Input Update
About
...................................................................................................... 23
View XpressKEY Details
View Error List
............................................................................................ 19
............................................................................................... 21
.................................................................................. 17
..................................................................... 18
..................................................................................... 19
..................................................................................... 19
.................................................. 20
............................................................................. 20
......................................................................................... 21
.......................................................................................... 23
................................................................... 23
................................................................................... 24
16Chapter 4 Additional Features
Page 23

Manage Keyboxes
Each time a Supra key releases the key container in a keybox, the
showing is recorded in the key and the keybox. The showing event is
also sent to the Supra database. As a listing agent, there are several
ways to see your listing activities. You can also get a report of how
many properties you’ve accessed.
4
There are three (3) ways to view showing activity:
• Read the keybox to transmit and view the showing information
to the XpressKEY
• View showing reports and key activity reports on SupraWEB
• Set up SupraWEB to send you an email when you’ve had a
showing
Read a Keybox
Keyboxes store showing information for the most recent 100 showings and the XpressKEY displays the most
recent 10 showings. Up and down scrool arrows allow for easy movement to see more information on the
listing and the detail views. Also, you can visit the property listing and use your XpressKEY to determine
who has recently accessed your keybox. View the agent’s name, phone number, the date, and time that the
property was shown. Reading a keybox will clear all previous data on the keybox.
1. Tap Read Keybox. 2. Tap Read. 3. Tap OK to the warning. 4. Type in the shackle
code then tap Enter.
ADDITIONAL FEATURES
5. Point the key at the
keybox.
6. Tap Done to exit.
17Chapter 4 Additional Features
Page 24

View Keybox Showings
You can only view showing activity on the XpressKEY after you perform a keybox read.
1. On the main screen tap
the arrow.
2. Tap Read Keybox. 3. Tap on a showing to
view in detail.
4. Tap Back then Done
to exit.
Keybox Settings
On a keybox in your inventory, you can set the time when access is permitted while the agent’s permissions
determine if they have access to the keybox. The XpressKEY sends the request directly to the Supra system
in real time.
• 24-Hour Access. This setting allows the keybox to be opened at any time of the day or night.
• Timed Access. Adjust the time of day or night in which the keybox can be opened.
Note: A keybox shackle code is required to change the keybox options.
1. On the main screen tap
the arrow and Next.
ADDITIONAL FEATURES
5. Point the key at the
keybox.
2. Tap Keybox Settings. 3. Tap on an option and
then Enter.
6. Tap Done to exit.
4. Type in the shackle
code and tap Enter.
18Chapter 4 Additional Features
Page 25

Clear Keybox
The keybox stores a showing record each time the key container is released. It records the date and time
the property was shown, the buyer’s agent’s name, key serial number, and phone number. The Clear Keybox
function will clear the keybox yer, business card, and notes stored in your keybox. The Clear Keybox function
does not clear the information from SupraWEB or the showing information.
1. Tap Clear Keybox. 2. Tap OK to proceed. 3. Type in the shackle
code and tap Enter.
5. Tap Done to exit.
4. Point the key at the
keybox.
Preferences
ADDITIONAL FEATURES
You can disable or enable the vibration feedback, show or hide your codes, and change your PIN or language.
Vibrate Mode
The XpressKEY uses vibration (haptic feedback) along with messages on the screen to communicate with the user .
Vibrations are used to communicate when buttons are pushed, the key nishes a task successfully, and errors.
1. Tap Preferences. 2. Tap Vibrate to toggle
ON or OFF.
3. Tap Done to exit.
19Chapter 4 Additional Features
Page 26

Display PIN or Shackle Code Mode
When the Display PIN/Shackle mode is enabled, the XpressKEY will display your four-digit Personal Identication
Number (PIN) or the keybox shackle code as it is entered into the XpressKEY. Follow the steps below to turn this
feature ON or OFF.
1. Tap Preferences. 2. Tap Display PIN/Shackle
to toggle ON or OFF.
3. Tap Done to exit.
Change PIN Code
A Personal Identication Number (PIN) is used to help prevent unauthorized use of the key. An easy way to
change your PIN is directly on the XpressKEY. After you change the PIN, the XpressKEY sends the change
to the Supra system. The PIN will not take effect until the servers conrm the change, then a Success!
conrmation is sent to the XpressKEY. You can also change your PIN code at the SupraWEB agent website
or through your association or organization.
Customize the PIN in the XpressKEY
1. Tap Preferences. 2. Tap Change PIN. 3. Tap Next to proceed. 4. Type in the current
PIN code, tap Enter.
ADDITIONAL FEATURES
5. Type in the new PIN
code and tap Enter.
6. Conrm the new PIN
co d e and tap Enter.
7. Tap Done to exit.
20Chapter 4 Additional Features
Page 27
Customize the PIN in SupraWEB
1. Using a computer, navigate to www.supraekey.com.
2. Select SupraWEB Login for Real Estate Agents.
3. Enter the user ID, password, and select Login.
Note:
T o register for a single sign on (SSO) user ID and password, click the Register button.
4. Select Change PIN.
5. Enter the current PIN code.
6. Enter the new PIN code and re-enter to conrm.
7. Select Save.
8. Verify cell/data coverage.
9. On the XpressKEY open the About feature.
10. Tap on More to update the XpressKEY.
The radio turns on and a message displays that the PIN had changed and new information will be downloaded
to the key.
Languages
The XpressKEY operates in three (3) different languages, English, French, and Spanish. Follow the steps
below to change the language.
1. In Preferences tap
Languages.
2. Tap a language and
Enter.
3. Tap OK to proceed.
ADDITIONAL FEATURES
Messages
The XpressKEY can receive messages from Supra, your organization, or ofce broker. The new message icon in
the top menu bar alerts you when there are new messages and disappears after the last unread messages is
read. The white text represents an unread message. The XpressKEY can store up to three (3) 140 character
text messages. Tap the arrows at the bottom of the screen to maneuver through the message. If three (3)
non-expired messages are stored, the next message received will replace the oldest message (even if it is
unread).
21Chapter 4 Additional Features
Page 28

1. Tap Messages. 2. Tap a message to
view in more detail.
NOTE: The message
icon disappears.
3. Tap Back. 4. Tap Done to exit.
CBS
If the CBS code is required in a keybox, you must enter the CBS code into the XpressKEY before accessing
the keybox. If an invalid CBS code is entered three (3) times in a row, the operation will fail. Then you must
contact Customer Support.
1. Tap CBS. 2. Type in the CBS code
ADDITIONAL FEATURES
Once the CBS code for a keybox is entered into the XpressKEY, follow the standard procedure for releasing
the key container. Keybox access is permitted until the listing agent changes the keybox or another CBS code
is entered for a different keybox.
and tap Enter.
3. Tap Done to exit.
22Chapter 4 Additional Features
Page 29
Input Update
1. Tap Input Update. 2. Type in the update
code and tap Enter.
3. Tap Done to exit.
About
The About feature gives you access to useful information about your XpressKEY.
• XpressKEY owner, owner’s contact number, and key serial number
• If the key is registered on the cellular network, its carrier, signal, SIM information, and the rmware version
• View XpressKEY errors
At the second screen in the About function the communication radio turns on and the key checks for messages.
If the key receives new information the “Communicating...” and “Success! Key updated.” screens appear.
1. Tap About. 2. Tap More.
ADDITIONAL FEATURES
View XpressKEY Details
1. Tap About. 2. Tap More. 3. Tap Back and then
Done to exit.
23Chapter 4 Additional Features
Page 30
View Error List
XpressKEY has the ability to view the previous ve (5) error codes and their descriptions. To see more
information, use the UP and DOWN arrows to scroll through the individual error codes.
1. Tap About then More. 2. Tap View Errors. 3. Tap an error for more
details.
4. Tap Back and then
Done to exit.
ADDITIONAL FEATURES
24Chapter 4 Additional Features
Page 31

Manage XpressKEY
SUPRAWEB
in SupraWEB
SupraWEB Functions ............................................................................ 26
SupraWEB Login
Identify a Keyholder
Manage Keybox Inventory
Notication Setup
End of Showing Notication............................................................... 28
Set Up Notications for All Inventoried Keyboxes
Set Up Notications for Indiviual Keyboxes
Reports
Showing Feedback
Leave Feedback on a Showing
Locate XpressKEY
XpressKEY Alerts
Setup Alert
Unsubscribe....................................................................................... 32
Use Alert
5
................................................................................... 26
.............................................................................. 27
.................................................................... 27
.................................................................................. 27
............................. 29
....................................... 29
................................................................................................... 30
................................................................................ 30
............................................................ 30
................................................................................ 30
.................................................................................. 31
........................................................................................ 31
............................................................................................ 32
Chapter 5 Manage XpressKEY in SupraWEB
25
Page 32

SupraWEB Functions
SupraWEB is the agent website, available at www.supraekey.com.
With SupraWEB you can perform several functions from your computer.
• Obtain an update code for the XpressKEY
• Identify keyholder names by key serial number
• Manage keybox inventory and listing information
• Set up notications
• View, email, and schedule activity reports
• View and send showing feedback
• Manage alerts, billing, and change the PIN code
5
SupraWEB Login
To set up a user ID and password, follow the SupraWEB Single Sign-On (SSO) Instructions at http://www.
supraekey.com/Documents/SSO-Instructions.pdf:
1. On a computer,
navigate to
www.supraekey.com.
2. Click SupraWEB
Login for Real Estate
Agents.
3. Click the Register
button.
4. Fill out the User
Registration
Application screen.
SUPRAWEB
5. Type in the security characters and click Submit. 6. Click the Continue to complete your
registration link.
7. Type in your new ID and password and click
Login.
Note: The rst time you login, your key serial number, PIN,
and association or organization (select from a dropdown list)
are required.
In the future, to login into SupraWEB only the user ID
and password are required.
Chapter 5 Manage XpressKEY in SupraWEB
26
Page 33

Identify a Keyholder by Serial Number
1. Click Identify
Keyholder.
2. Enter the key serial
number.
Manage Keybox Inventory
1. Click LISTINGS. 2. Click the Keyboxes
link.
SUPRAWEB
3. Click Find.
3. Click a keybox
Manage the keybox
information.
To add a keybox, click
the Add Keybox link,
enter the keybox serial
number, shackle code,
and MLS number where
the box is located.
To assign a listing to a
keybox already in your
inventory, select the
Assign Listing dropdown,
choose the keybox, and
enter the MLS number
where the keybox is
located and click Assign.
Notication Setup
As a listing agent you have several options for sending showing notications. Your board or association must
contact Supra to “opt-in” to showing notications for this feature to be available to you. Using SupraWEB,
you can add multiple people (i.e. the listing agent, ofce staff, and the home owner) to receive notications.
Notications are sent to email addresses and cell phone numbers (as text) but not to the XpressKEY.
Listing agent - To receive notications, make sure your email is correct in the Email Address eld and
check the Send me showing notications... box in General Email Settings.
Partner or team member - Add partners to receive all showing notications by entering their email in
the Also send a copy to: (CC) eld.
Client - To have your client receive notications, go to the specic keybox in your inventory, check the
box and enter their clients email.
The Showing Notication feature alerts the listing agent when a keybox key container is opened to start a
showing. This information can be display on all activity reports.
Showing information includes keybox serial number, associated listing address/information, date of showing,
the beginning and the end of the showing time (if enabled), and displays on all activity reports in SupraWEB.
Chapter 5 Manage XpressKEY in SupraWEB
27
Page 34

End of Showing Notication
The XpressKEY uses GPS to determine when a showing is complete by moving away from the approximate
keybox area. End of showing information includes the keybox serial number, the property address, date and
time of the end of the showing. End of Showing (EoS) notication allows the listing agent and designated
recipients to see when the showing begins and ends for a property.
If the EoS notication is not enabled by the association, the box in the Showing Notications (for all
keyboxes):
Send me showing notications for all keyboxes in my inventory
If the EoS notication is enabled by the association, the box in the Showing Notications (for all keyboxes)
will say:
Send me beginning and estimated end of showing notications for all keyboxes in my inventory
SUPRAWEB
Below is an example of an EoS notication message that is transmitted to the designated recipients:
From: ShowingValue [mailto:ShowingValue.UnmonitoredMailbox@fs.utc.com]
Sent: Monday, August 10, 2015 4:12 PM
To: Jones, Bria
Subject: End of Showing Notication Email from Mark Johnson
This message is to inform you that the Supra system detected the showing has ended for Listing 4001
Fairview Industrial Drive, Salem, OR 97302 at 4:06PM on 08/10/2015 4:06PM
Please note that this notication does not guarantee that the showing agent is no longer at the listing.
Chapter 5 Manage XpressKEY in SupraWEB
28
Page 35

Set Up Notications for All Inventoried Keyboxes
You can set up notications to all the keyboxes in your inventory at once.
1. Click the SETTINGS
tab.
5. Click Save.
2. Click the General
Email link.
Note: The recipients will get an email from the
Supra system indicating that their email ID is
subscribed to receive showing notications.
3. Check the box Send me
showing notications...
4. Add recipients to the box
Also send a copy ...
SUPRAWEB
Set Up Notications for Individual Keyboxes
You can set up showing notications to the individual keyboxes in your inventory.
1. Click the LISTINGS
tab.
5. Add recipients to the box
Also send a copy ...
2. Click Keyboxes in
QUICK LINKS.
6. Click Save.
3. Click the keybox serial
number.
Note: The recipients will get an email from the
Supra system indicating that their email ID is
subscribed to receive showing notications.
4. Click the Listing
Details tab.
Chapter 5 Manage XpressKEY in SupraWEB
29
Page 36

Reports
1. Click the REPORTS
tab.
2. Click Create Showing
Report link.
3. Select the settings for
the report.
4. Click Create Report.
Showing Feedback
1. Click the Showing Feedback icon. The feedback information displays.
SUPRAWEB
Leave Feedback on a Showing
1. Click Feedback
Reminders.
2. Click Leave Feedback
icon.
3. Use the drop-down
menu and Notes eld
to provide feedback.
4. Click Submit
Feedback.
Locate XpressKEY
If you misplaced the XpressKEY and the battery still has a charge, you can nd its approximate location
using GPS. The next time the XpressKEY checks in, it sends the network a SMS message containing the
current GPS coordinates if the key can obtain a GPS signal. Supra will send an email to notify you when the
XpressKEY has reported into the Supra system with its GPS location. Click on the link and Google
be open in other tab of the browser and show the last known location of the XpressKEY.
®
Maps® will
Note: It may take 6-10 hours before you receive an email with the location coordinates.
Chapter 5 Manage XpressKEY in SupraWEB
30
Page 37

1. Click the SETTINGS
tab.
2. Click Locate
XpressKEY.
3. Select the settings for
the report.
4. Check your email, click
the Google
®
Maps® link.
XpressKEY Alerts
XpressKEY has an Alert Email feature that boards and associations must rst opt-in to this feature for it to be
active. The Alert Email feature allows authorized XpressKEY keyholders to send a pre-dened email message
from an XpressKEY to a maximum of three (3) selected contacts.
Note: This should not be used as a replacement for emergency services.
Setup Alert
Use SupraWEB to enable, disable, and congure your XpressKEY Alerts.
1. Click XpressKEY
Alerts.
2. Accept to the End User
License Agreement.
3. Customize the alert
information.
4. Click Save.
SUPRAWEB
The recipients will get an email from the Supra system indicating that their email ID is subscribed to receive
XpressKEY alerts emails from you.
Email Subject: XpressKEY Alert Email from: Bria Jones
Email Body:
Hi, this is Bria Jones. It is important that you call me at 555-555-1234 right away.
This alert originated from a Supra XpressKEY. Click here to view a map of the estimated location of the
XpressKEY at the time this alert was sent.
Unsubscribe
Chapter 5 Manage XpressKEY in SupraWEB
31
Page 38

Unsubscribe
1. On the XpressKEY Alert email, click the Unsubscribe link.
2. After you are directed to the XpressKEY Alert Information page, click the Unsubscribe from XpressKEY
Alerts link at the bottom of the page.
Email Subject: XpressKEY Alert Email from: Bria Jones
Email Body:
Hi, this is Bria Jones. It is important that you call me at 555-555-1234 right away.
This alert originated from a Supra XpressKEY. Click here to view a map of the estimated location of the
XpressKEY at the time this alert was sent.
Unsubscribe
Use Alert
Press and hold the ashlight on the home screen for 3-5 seconds. The XpressKEY sends the alert message
to the Supra server then the message is sent to the saved recipients that are set up in SupraWEB.
1. Press/hold the Flashlight
icon for 3 seconds.
SUPRAWEB
2. Tap OK to send the
alert email.
Chapter 5 Manage XpressKEY in SupraWEB
32
Page 39

Support
SUPPORT
6
XpressKEY Resources .......................................................................... 34
Contact Us
Regulatory Compliance
............................................................................................. 34
........................................................................ 34
Chapter 6 Support
33
Page 40

XpressKEY Resources
Another great resource for assistance with your XpressKEY is our online XpressKEY
Resources page, available to all agents.
Access the library:
1. Go to www.supraekey.com.
2. In the top navigation pane, highlight Customer Support and select
XpressKEY Resources.
Document and video training available here is periodically updated and we encourage you to bookmark this
page for future reference.
6
Contact Us
Need assistance troubleshooting the XpressKEY? Customer Support is available from 5 a.m. to 7 p.m. Pacic
Time, seven (7) days a week.
Website http://www.supraekey.com Telephone 877.699.6787
Email suprasupport@fs.utc.com Fax 503.589.8677
SUPPORT
Regulatory Compliance
United States (FCC)
This device complies with part 15 of the FCC rules. Operation is subject to the following conditions:
1. This device may not cause harmful interference.
2. This device must accept any interference received, including interference that may cause undesired operation.
Changes or modications not expressly approved by the party responsible for compliance could void the user’s
authority to operate the equipment.
Note acc. FCC part 15.105: This equipment has been tested and found to comply with the limits for a Class
B digital device, pursuant to part 15 of the FCC Rules. These limits are designed to provide reasonable
protection against harmful interference in a residential installation. This equipment generates, uses and can
radiate radio frequency energy and, if not installed and used in accordance with the instructions, may cause
harmful interference to radio communications. However, there is no guarantee that interference will not occur
in a particular installation. If this equipment does cause harmful interference to radio or television reception,
which can be determined by turning the equipment off and on, the user is encouraged to try to correct the
interference by one or more of the following measures:
—Reorient or relocate the receiving antenna.
—Increase the separation between the equipment and receiver.
—Connect the equipment into an outlet on a circuit different from that to which the receiver is connected.
—Consult the dealer or an experienced radio/TV technician for help.
RoHS
COMPLIANT
Chapter 6 Support
34
Page 41

Canada (IC)
This device complies with Industry Canada’s license-exempt RSSs. Operation is subject to the following two
conditions:
(1) This device may not cause interference; and
(2) This device must accept any interference, including interference that may cause undesired operation of the
device.
Cet équipement est conforme à la (aux) norme(s) canadienne(s) d’exemption de licence RSS Industry
Canada. Son opération est sujette aux deux conditions suivantes : (1) cet équipement ne provoquera aucune
interférence et (2) cet équipement doit tolérer toute interférence pouvant provoquer une opération indésirable
de l’équipement.
FCC and IC Radiofrequency radiation exposure Information:
This device has been tested and meets FCC and IC RF exposure guidelines for use at zero distance towards
the body, based on a conservatively estimated average transmission rate.
If you want to operate the device together with a carrying accessory please make sure, however, that this
accessory does not contain any metal parts (like springs etc.) since this may cause RF exposure beyond the
limits specied in FCC and IC RF exposure guidelines.
SUPPORT
Chapter 6 Support
35
 Loading...