

Page 1
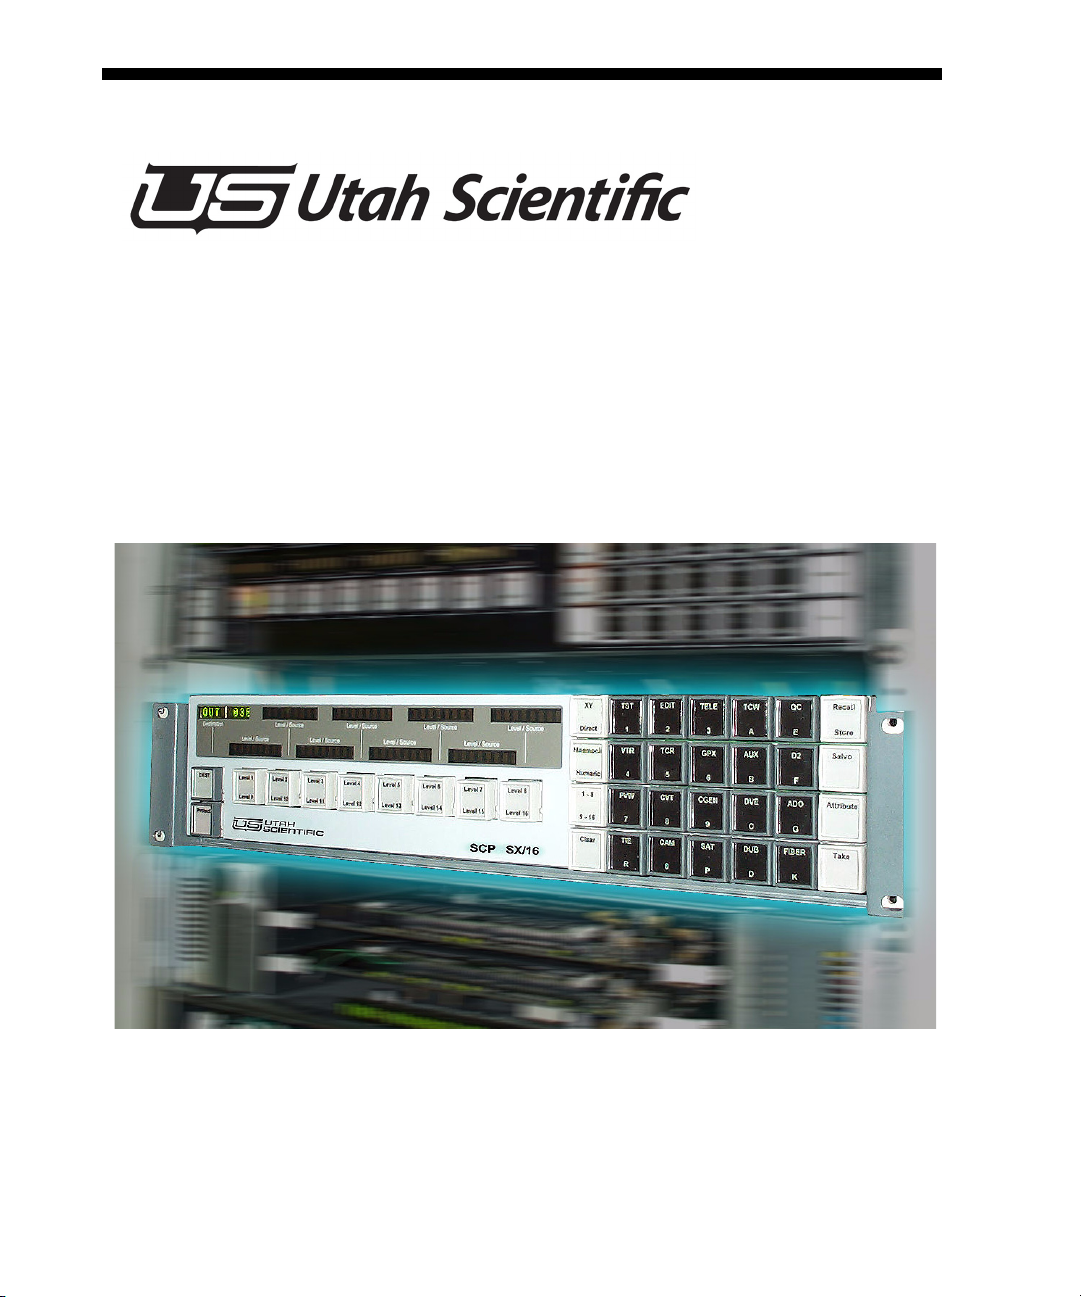
SCP Series
Routing Switcher Control Panels
User’s Guide
Page 2

SCP Series • Routing Switcher Control Panels • User's Guide
• Document Number: 82101-0055
• Document Version: 2.3
• Date: October - 2004
• Printed in U.S.A.
Copyrights and Trademarks
© 2004 Utah Scientific, Inc. All rights reserved. Any use or reproduction of this guide's
contents without the prior written consent of Utah Scientific, Inc. is strictly prohibited.
• UTAH-200 and UTAH-300 are trademarks of Utah Scientific, Inc.
• Windows, Windows 95, and Windows NT are registered trademarks of Microsoft
Corporation.
• All other product names and any registered and unregistered trademarks mentioned in this
guide are used for identification purposes only and remain the exclusive property of their
respective owners.
Notice
Information contained in this user’s guide is subject to change without notice or obligation.
While every effort has been made to ensure that the information is accurate as of the
publication date, Utah Scientific, Inc. assumes no liability for errors or omissions. In addition,
Utah Scientific, Inc. assumes no responsibility for damages resulting from the use of this
guide.
Page 3
FCC Compliance (USA) and Digital Equipment Compliance
(Canada)
This equipment has been tested and found to comply with the limits for a Class A, digital
device, pursuant to Part 15, Subpart B of the FCC Rules and the Canadian EMC Requirement
(ICES-003). These limits are designed to provide reasonable protection against harmful
interference when the equipment is operated in a commercial environment. This equipment
generates, uses, and can radiate radio frequency energy and, if not installed and used in
accordance with the instruction manual, may cause harmful interference to radio
communications. Operation of this equipment in a residential area is likely to cause harmful
interference, in which case, the user will be required to correct the interference at their own
expense. Shielded cables must be used to ensure compliance with the FCC Class A limits.
Declaration of Conformity
Utah Scientific
4750 Wiley Post Way
Salt Lake City, Utah 84116-2878 USA
declare our sole responsibility that the SCP Series Routing Switcher Control Panels are in
conformity with the following standards:
• EN50081-1 Generic Emission Standard
• EN50082-1 Generic Immunity Standard
• IEC-950 Product Safety
• C-UL 1950 Product Safety
• UL 1950 Product Safety
Following the provisions of the Directive(s) of the Council of the European Union:
• EMC Directive 89/336/EED
• Low Volta ge Electrical Directive 72/23/EEC
Utah Scientific, Inc. hereby declares that the product specified above conforms to the above
Directive(s) and Standard(s).
Page 4
Important Safeguards and Notices
This section provides important safety guidelines for both the Operator and Service Personnel.
Specific warnings and cautions are found throughout the guide where they apply, but may not
appear here. Please read and follow the important safety information, noting especially those
instructions related to risk of fire, electric shock or injury to persons.
Safety Symbols
Please note the following important safety symbols:
• Hazardous Voltage symbol.
• Caution symbol: The product is marked with this symbol when it is necessary to refer
to the manual to prevent damage to the product.
Warnings
Please observe the following important warnings:
• Any instructions in this guide that require opening the chassis, changing a power supply,
or removing a board should be performed by qualified service personnel only. To reduce
the risk of electric shock, do not perform any servicing unless you are qualified to do so.
• Heed all warnings on the unit and in the operating instructions.
• Do not use this product in or near water. Disconnect AC power before installing any
options or servicing the unit unless instructed to do so by this manual.
• This product is grounded through the power cord grounding conductor. To avoid electric
shock, plug the power cord into a properly wired receptacle before connecting the product
inputs or outputs.
• Route power cords and other cables so that they are not likely to be damaged. Disconnect
power before cleaning. Do not use liquid or aerosol cleaners; use only a damp cloth.
Page 5
• Dangerous voltages exist at several points in this product. To avoid personal injury, do not
touch exposed connections and components while power is on. Do not insert anything into
either of the system's two power supply cavities with power connected.
• Do not wear hand jewelry or watches when troubleshooting high current circuits, such as
the power supplies. During installation, do not use the door handles or front panels to lift
the equipment as they may open abruptly and injure you.
• To avoid fire hazard, use only the specified correct type, voltage and current rating as
referenced in the appropriate parts list for this product. Always refer fuse replacement to
qualified service personnel.
• Have qualified personnel perform safety checks after any service.
Cautions
Please observe the following important cautions:
• When installing this equipment, do not attach the power cord to building surfaces. To
prevent damage when replacing fuses, locate and correct the trouble that caused the fuse to
blow before applying power.
• Use only specified replacement parts. Follow static precautions at all times when handling
this equipment.
• Slots and openings in the control panel enclosures are provided for ventilation. Do not
block them. Leave the back of the units clear to allow room for cabling — a minimum of 6
inches (15.25 cm) of clearance is recommended.
Page 6

Notices
Please observe the following important notes:
• When the following symbol is indicated on the chassis, please refer to the manual for
additional information.
• For the SCP panels, refer to the “Connecting and Disconnecting Power” section on page
2-11 for important information regarding the power connector.
Company Information
Utah Scientific, Inc.
4750 Wiley Post Way, Suite 150
Salt Lake City, Utah 84116-2878 USA
• Telephone: +1 (801) 575-8801
• Fax: +1 (801) 537-3098
• Customer Support (Voice): +1 (800) 447-7204
• Customer Support (Fax): +1 (801) 537-3069
• After hours emergency: +1 (800) 447-7204
follow menu instructions for emergency service
Page 7

Warranty Policies
Hardware Warranty
Utah Scientific, Inc. warrants to the original purchaser that the Utah Scientific hardware is free
from defects in materials and workmanship and will perform substantially in accordance with
the accompanying written materials under normal use and service for a period of ten (10)
years from the date of shipment. Any implied warranties on hardware are limited to ten (10)
years. Some states/jurisdictions do not allow limitations on duration of an implied warranty, so
the above limitation may not apply to certain specific purchasers.
Software Warranty
Utah Scientific warrants that the software will perform substantially in accordance with the
accompanying written materials for a period of one (1) year from the date of shipment.
Customer Remedies
For the first one (1) year after purchase of the software and the first ten (10) years after the date
of purchase of the hardware, Utah Scientific’s and its suppliers’ entire liability and purchaser’s
exclusive remedy shall be, at Utah Scientific’s option, either:
• Return of the price paid, or
• Repair or replacement of the software or hardware that does not meet the above warranties
and is returned to Utah Scientific under the returned materials authorization (RMA)
process with freight and forwarding charges paid.
After the initial warranty periods, purchaser’s exclusive remedy is the repair or replacement of
the hardware upon payment of a fixed fee to cover handling and service costs based on Utah
Scientific’s then-current price schedule. The above warranties are void if failure of the
software or hardware has resulted from an accident, abuse, or misapplication. Any replacement
software or hardware will be warranted for the remainder of the original warranty period or
thirty (30) days, whichever is longer.
No other warranties. To the maximum extent permitted by applicable law, Utah Scientific and
its suppliers disclaim all other warranties, either express or implied, including, but not limited
to implied warranties of merchantability and fitness for a particular purpose, with regard to the
software, the accompanying written materials, and any accompanying hardware. This limited
warranty gives the purchaser specific legal rights. These rights may vary in certain states/
jurisdictions.
Page 8

No liability for consequential damages. To the maximum extent permitted by applicable law,
in no event shall Utah Scientific or its suppliers be liable for any damages whatsoever
(including without limitation, damages for loss of business profits, business interruption, loss
of business information, or any other pecuniary loss) arising out of the use of or inability to use
Utah Scientific products, even if Utah Scientific has been advised of the possibility of such
damages. Because some states/jurisdictions do not allow the exclusion or limitation of liability
for consequential or incidental damages, the above limitation may not apply in those
circumstances.
circumstances.
Page 9

Contents
1 Introduction
In This Guide ............................................................................................................ 1-1
How To Use This Guide ...........................................................................................1-2
Conventions ............................................................................................................. 1-2
Abbreviations ........................................................................................................... 1-3
Terms .......................................................................................................................1-3
Routing Switcher Basics .......................................................................................... 1-5
Switching Matrix ................................................................................................1-5
Router Levels ....................................................................................................1-6
Introducing the SCP Series Panels ............................................................................. 1-7
SCP 2/8 .......................................................................................................................1-7
SCP 32/8 ...........................................................................................................1-8
SCP 64/8 ...........................................................................................................1-8
SCP XY/16 ........................................................................................................1-9
SCP SX/16 ........................................................................................................1-10
SCP MX/16 ........................................................................................................ 1-11
2 Installation
In This Chapter ............................................................................................................2-1
Rear Panel Layout ....................................................................................................... 2-2
Panel Installation (U-Net) ............................................................................................ 2-3
Unpacking and Inspection ..................................................................................2-3
Installing the Panel .............................................................................................2-3
Connecting U-Net ........................................................................................................ 2-4
Setting the Panel Address ...........................................................................................2-6
Panel Installation (Ethernet) ........................................................................................2-7
Connecting the E-Net Panels .............................................................................2-8
SCP Ethernet Panel Configuration ....................................................................2-8
Connecting the panel to the terminal ................................................................. 2-8
Using the pcon utility .........................................................................................2-9
USI Panel Config Commands: ...........................................................................2-9
Connecting the panel to the network ................................................................. 2-10
Connecting and Disconnecting Power ........................................................................2-11
i
Page 10

3 SCP 2/8 Operations
In This Chapter ..................................................................................................... 3-1
About the SCP 2/8 ................................................................................................ 3-2
Displaying Level Status ........................................................................................ 3-5
Defaulting the Level Select Buttons .....................................................................3-6
Performing an All-follow Take .............................................................................. 3-6
All-follow with the Direct Source Select Buttons ................................................ 3-6
All-follow with the Group Select Buttons ............................................................3-7
Cancelling an All-follow Take ............................................................................. 3-8
Performing a Breakaway Take ............................................................................. 3-8
Breaking Away One Level From One Source ............................................. 3-8
Breaking Away Multiple Levels From One Source ..................................... 3-10
Breakaway with the Direct Source Select Buttons ...................................... 3-11
Breaking Away Multiple Levels from Different Sources .............................. 3-12
Cancelling a Breakaway Take .................................................................... 3-13
Using the Protect Mode ........................................................................................ 3-14
Setting a Protect ......................................................................................... 3-15
Setting a Lock ............................................................................................. 3-16
Clearing a Lock or Protect .......................................................................... 3-17
Using the Direct Protect Mode .................................................................... 3-18
Cancelling a Protect Mode Selection .......................................................... 3-19
Protect Mode Notes .................................................................................... 3-19
Changing Attributes .............................................................................................. 3-19
Using the Chop Mode ...........................................................................................3-21
Setting the Chop Mode Rate ....................................................................... 3-21
Performing an All-follow or Breakaway Chop ............................................. 3-22
Chop Mode Notes ....................................................................................... 3-22
Monitor Matrix Mode ............................................................................................. 3-23
Miscellaneous Panel Modes ................................................................................. 3-25
Changing Panel LED Intensity .................................................................... 3-25
Verifying the Software Version ...................................................................3-26
Verifying the Panel Node ............................................................................ 3-26
Verifying the Panel ID ................................................................................. 3-26
General Panel Notes ............................................................................................ 3-27
4 SCP 32/8 Operations
In This Chapter .....................................................................................................4-1
About the SCP 32/8 .............................................................................................. 4-2
Displaying Level Status ........................................................................................ 4-3
Defaulting the Level Select Buttons ...................................................................... 4-4
ii Table of Contents
Page 11

Performing an All-follow Take ............................................................................... 4-4
Performing a Breakaway Take ............................................................................. 4-5
Breaking Away One Level From One Source .............................................4-5
Breaking Away Multiple Levels From One Source ......................................4-6
Breaking Away Multiple Levels From Different Sources .............................4-7
Canceling a Breakaway Take ..................................................................... 4-7
Monitor Matrix Mode ................................................................................................... 4-8
Changing Panel LED Intensity ....................................................................................4-10
Panel Lock .................................................................................................................. 4-10
General Panel Notes ...................................................................................................4-11
5 SCP 64/8 Operations
In This Chapter ...........................................................................................................5-1
About the SCP 64/8 ....................................................................................................5-2
Displaying Level Status ...............................................................................................5-5
Defaulting the Level Select Buttons ............................................................................5-5
Performing an All-follow Take .....................................................................................5-6
Performing a Breakaway Take .................................................................................... 5-6
Breaking Away One Level From One Source ....................................................5-6
Breaking Away Multiple Levels From One Source .............................................5-7
Breaking Away Multiple Levels From Different Sources ....................................5-8
Cancelling a Breakaway Take ...........................................................................5-9
Monitor Matrix Mode .................................................................................................... 5-9
Changing Panel LED Intensity .................................................................................... 5-11
About the Protect LED ................................................................................................. 5-12
Panel Lock ...................................................................................................................5-12
General Panel Notes ................................................................................................... 5-13
6 SCP XY/16 Operations
In This Chapter ............................................................................................................6-1
About the SCP XY/16 ..................................................................................................6-2
Displaying Level Status ...............................................................................................6-8
Selecting a Destination ................................................................................................ 6-9
Using the Direct Destination Select Buttons ......................................................6-9
Selecting a Destination in Mnemonic Mode ......................................................6-9
Selecting a Destination in Numeric Mode ..........................................................6-11
Cancelling a Destination Selection .................................................................... 6-11
Performing an All-follow Take ..................................................................................... 6-12
All-follow with the Direct Source Select Buttons ................................................6-12
iii
Page 12

Performing an All-follow Take in Mnemonic Mode ............................................ 6-13
Performing an All-follow Take in Numeric Mode ............................................... 6-14
Cancelling an All-follow Take ............................................................................ 6-14
Performing a Breakaway Take ............................................................................. 6-15
Breaking Away One Level From One Source .................................................... 6-15
Breaking Away Multiple Levels From One Source ............................................ 6-16
Breakaway with the Direct Source Select Buttons ............................................6-17
Breaking Away Multiple Levels From Different Sources .................................... 6-18
Breakaway Take (Starting in All-Follow Mode) .................................................. 6-19
Cancelling a Breakaway Take ........................................................................... 6-20
Using the Protect Mode ........................................................................................ 6-20
Setting a Protect ................................................................................................ 6-21
Setting a Lock .................................................................................................... 6-22
Clearing a Lock or Protect ................................................................................. 6-24
Using the Direct Protect Mode .......................................................................... 6-25
Cancelling a Protect Mode Selection ................................................................ 6-26
Protect Mode Notes ........................................................................................... 6-26
Performing a Salvo Take ....................................................................................... 6-26
Changing Attributes ...............................................................................................6-27
Using the Chop Mode ........................................................................................... 6-29
Setting the Chop Mode Rate ...................................................................... 6-29
Performing an All-follow or Breakaway Chop .............................................. 6-30
Chop Mode Notes .......................................................................................6-30
Monitor Matrix Mode ..............................................................................................6-31
Miscellaneous Panel Modes ................................................................................. 6-33
Changing Panel LED Intensity .................................................................... 6-33
Verifying the Panel Node ............................................................................ 6-34
Verifying the Panel ID ................................................................................. 6-34
Verifying the Software Version ...................................................................6-35
General Panel Notes ............................................................................................ 6-35
7 SCP SX/16 Operations
In This Chapter .....................................................................................................7-1
About the SCP SX/16 ........................................................................................... 7-2
Displaying Level Status ........................................................................................ 7-8
Selecting a Destination ......................................................................................... 7-9
Selecting a Destination in Mnemonic Mode ................................................ 7-9
Selecting a Destination in Numeric Mode ................................................... 7-10
Destination Selection Notes ........................................................................7-11
Performing an All-follow Take ............................................................................... 7-11
iv Table of Contents
Page 13

Performing an All-follow Take in Mnemonic Mode ................................................7-12
Performing an All-follow Take in Numeric Mode ......................................... 7-13
Cancelling an All-Follow Take .....................................................................7-13
Performing a Breakaway Take .................................................................................... 7-14
Breaking Away One Level From One Source .............................................7-14
Breaking Away Multiple Levels From One Source ......................................7-15
Breaking Away Multiple Levels From Different Sources .............................7-16
Breakaway Take (Starting in All-Follow Mode) ...........................................7-17
Cancelling a Breakaway Take .................................................................... 7-18
Using the Protect Mode ...............................................................................................7-18
Setting a Protect ..........................................................................................7-19
Setting a Lock .............................................................................................7-21
Clearing a Lock or Protect ..........................................................................7-22
Cancelling a Protect Mode Selection ..........................................................7-23
Protect Mode Notes ....................................................................................7-23
Performing a Salvo Take ............................................................................................7-23
Changing Attributes ....................................................................................................7-24
Using the Chop Mode ................................................................................................. 7-26
Setting the Chop Mode Rate .............................................................................7-26
Performing an All-follow or Breakaway Chop ....................................................7-27
Chop Mode Notes ..............................................................................................7-27
Monitor Matrix Mode..................................................................................................... 7-27
Using Direct Selection ................................................................................................. 7-30
Working with Direct Sources .............................................................................7-30
Working with Direct Destinations .......................................................................7-35
Working with Direct Protects and Attributes ...................................................... 7-37
Miscellaneous Panel Modes ........................................................................................7-41
Changing Panel LED Intensity ...........................................................................7-42
Verifying the Panel Node....................................................................................7-42
Verifying the Panel ID ........................................................................................7-42
Verifying the Software Version ..........................................................................7-43
Using E or L ....................................................................................................... 7-43
Using F or R ......................................................................................................7-43
Use One or Two Destinations ............................................................................7-44
Custom All-follow Mode .....................................................................................7-45
Enable/Disable Protect Mode ............................................................................7-46
Status at a Glance .............................................................................................7-47
General Panel Notes ................................................................................................... 7-48
v
Page 14

8 SCP MX/16 Operations
In This Chapter .....................................................................................................8-1
About the SCP MX/16 ........................................................................................... 8-2
Displaying Level Status ........................................................................................ 8-11
Level Status in Single Mode .............................................................................. 8-11
Level Status in Multi Mode ................................................................................ 8-12
A Word About Custom Status Labels ................................................................ 8-12
Selecting, Storing and Clearing Destinations ........................................................ 8-13
Selecting a Destination in Mnemonic Mode ....................................................... 8-13
Selecting a Destination in Numeric Mode ......................................................... 8-14
Selecting and Storing Destinations in Single Destination Mode ........................ 8-15
Selecting and Storing Destinations in Multi-destination Mode ........................... 8-16
Clearing a Destination Register ......................................................................... 8-17
Destination Selection Notes .............................................................................. 8-17
Performing an All-follow Take ............................................................................... 8-18
Performing an All-follow Take in Mnemonic Mode ............................................ 8-18
Performing an All-follow Take in Numeric Mode ............................................... 8-19
Performing an All-follow in Multi-destination Mode ............................................ 8-20
Cancelling an All-Follow Take ........................................................................... 8-21
Performing a Breakaway Take ............................................................................. 8-21
Breaking Away One Level From One Source ............................................ 8-21
Breaking Away Multiple Levels From One Source ..................................... 8-22
Breaking Away Multiple Levels From Different Sources ............................. 8-23
Breakaway Take (Starting in All-Follow Mode) ........................................... 8-24
Cancelling a Breakaway Take .................................................................... 8-25
Using the Protect Mode ........................................................................................ 8-26
Setting a Protect ......................................................................................... 8-27
Setting a Lock .............................................................................................8-28
Clearing a Lock or Protect .......................................................................... 8-29
Cancelling a Protect Mode Selection ......................................................... 8-30
Protect Mode Notes ....................................................................................8-31
Performing a Salvo Take ...................................................................................... 8-31
Changing Attributes .............................................................................................. 8-32
Using the Chop Mode ...........................................................................................8-34
Setting the Chop Mode Rate ...................................................................... 8-34
Performing an All-follow Chop in Single Destination Mode ........................ 8-35
Performing a Breakaway Chop in Single Destination Mode ....................... 8-35
Chop Mode Notes .......................................................................................8-36
Monitor Matrix Mode .............................................................................................8-36
Miscellaneous Panel Modes .................................................................................8-39
vi Table of Contents
Page 15

Changing Panel LED Intensity ....................................................................8-40
Verifying the Panel Node ............................................................................8-40
Verifying the Panel ID .................................................................................8-40
Verifying the Software Version .................................................................... 8-41
Using E or L ................................................................................................ 8-41
Using F or R ................................................................................................8-42
Custom All-follow Mode ..............................................................................8-43
Enable/Disable Protect Mode ..................................................................... 8-44
Status at a Glance ......................................................................................8-45
General Panel Notes ................................................................................................... 8-46
Specifications
In This Appendix ......................................................................................................A-1
SCP 2/8 Specifications ............................................................................................A-2
SCP 32/8 Specifications .......................................................................................... A-2
SCP 64/8 Specifications .......................................................................................... A-3
SCP XY/16 Specifications .......................................................................................A-3
SCP SX/16 Specifications .......................................................................................A-4
SCP MX/16 Specifications .......................................................................................A-4
Maintenance Functions
In This Appendix .......................................................................................................... B-1
Changing Button Legends ...........................................................................................B-2
Using the Template ...........................................................................................B-2
Inserting Legends in Buttons .............................................................................B-4
Changing the Panel PROM .........................................................................................B-5
Button Parts List ..........................................................................................................B-6
Ordering Parts .............................................................................................................B-6
vii
Page 16

viii Table of Contents
Page 17

In This Guide
In This Guide
This guide provides instructions for installing, configuring and operating the SCP Series of Routing
Switcher Control Panels. The following chapters and appendices are included:
• Chapter 1, “Introduction” summarizes the guide, provides important terms, conventions, and
background information on the SCP panels.
1
Chapter 1
Introduction
• Chapter 2, “Installation” provides installation instructions for all panels in the SCP series.
• Chapter 3, “SCP 2/8 Operations” provides setup and operating instructions for the SCP 2/8, an
eight level, full source, dual destination panel.
• Chapter 4, “SCP 32/8 Operations” provides setup and operating instructions for the SCP 32/8, an
eight level, single destination, 32 source panel.
• Chapter 5, “SCP 64/8 Operations” provides setup and operating instructions for the SCP 64/8, an
eight level, single destination 64 source or dual destination 32 source panel.
• Chapter 6, “SCP XY/16 Operations” provides setup and operating instructions for the SCP XY/16,
a 16 level full XY panel (all sources and all destinations).
• Chapter 7, “SCP SX/16 Operations” provides operating instructions for the SCP SX/16, an
advanced 16 level full XY panel (all sources and all destinations).
• Chapter 8, “SCP MX/16 Operations” provides operating instructions for the SCP MX/16, a 16
level XY panel that operates in both single and multi-destination modes.
• Appendix A, “Specifications” lists control, physical, power and environmental specifications for all
SCP panels.
• Appendix B, “Maintenance Functions” provides a detailed procedure for changing button legends
and opening the panel to change the PROM.
SCP Series • User’s Guide 1-1
Page 18
Introduction
Take
Destination
DST 001
How To Use This Guide
The chapters in this guide follow a logical sequence, from introduction through operations:
• Read this chapter (Chapter 1, “Introduction”) to familiarize yourself with the full line of
SCP routing switcher panels.
• Follow the instructions in Chapter 2, “Installation” to install your SCP panel(s).
• Use chapters 3 through 8 to learn about setup and operations for your specific SCP routing
switcher panel(s).
• Use the appendices for reference, when you need additional information about hardware
and keycaps.
• Once you’re familiar with the panels, start with the Index when you need additional
assistance on a specific subject.
Conventions
The following conventions are used throughout this guide:
• Buttons, knobs and connectors on the SCP panels are indicated in bold-faced upper and
lower case text, using a sans-serif font. For example:
~Press TAKE to perform...
• On the SCP Panel LED displays, labels and commands are indicated in bold-faced upper
and lower case text, using a sans-serif font. For example:
~ The label DST indicates...
1-2 SCP Series • User’s Guide
Page 19
Abbreviations
Abbreviations
The following abbreviations are used throughout this guide:
Table 1-1. Abbreviations
Term s
Abbreviation Description
ATR Audio Tape Recorder
CPU Central Processing Unit
DIP Dual Inline Package
DTR Digital Tape Recorder
I/O Input/Output
IP Internet Protocol
MX Bus UTAH router control communications bus
RMS Router Management System
RU Rack Unit
U-Net UTAH control panel communications network
UTP Unshielded Twisted Pair
VTR Video Tape Recorder
The following documentation terms are used throughout this guide:
Chapter 1
•“Operator” and “User” refer to the person using or operating the SCP panels.
•“System” refers to the interconnected routing switcher system (such as a UTAH-300) that
is controlled by the SCP panels.
•“Router” is short for routing switcher.
•“Chassis” refers to the metal enclosure that houses an SCP panel.
•“Input” refers to an audio or video signal that is connected to a routing switcher.
~ One video input represents a single output from an analog or digital video source.
SCP Series • User’s Guide 1-3
Page 20

Introduction
•“Source” refers to an audio/video device whose output signals are connected to one or
•“Output” refers to an audio or video signal that is connected from a routing switcher to a
•“Destination” refers to an audio/video device that receives one or more signals from a
•“Router Level” refers to the specific type of audio/video element that a routing switcher
~ One analog audio input represents a single monophonic track from an analog audio
source.
~ One digital audio input represents two tracks (left and right) from a digital audio
source.
more routing switcher inputs. Examples of audio/video sources are the output signals
originating from ATRs, VTRs, DTRs, cameras, video production switchers, audio mixers,
graphics systems, and satellite feeds.
destination device.
routing switcher. Examples of audio/video destinations are the inputs of ATRs, VTRs,
DTRs, video production switchers, additional routing switchers, audio mixers, graphics
systems, and satellite feeds.
is capable of routing. For example, the UTAH-200 system can switch up to eight router
levels, which can be any combination of Digital Video, Digital Audio, Analog Video
(Composite or Component) or Analog Audio (Left and Right).
•“Control Panel” refers to current (and future) physical human interfaces (such as the SCP
panels) that are used for system input/output routing assignments.
•“Display” refers to the many integral LED indicators on a control panel.
•“All-follow Take” refers to the most basic of routing switcher functions. You select a
source, select a destination, and then press Take to instantly route the source to the input
of the selected destination device. An “all-follow take” simply means that all assigned
router levels switch simultaneously, and no router levels are broken away.
•“Breakaway Take” is a special Take in which a subset of all installed router levels are
sent to a destination, or router levels from more than one source are sent to the destination.
Each panel supports the ability to program “breakaway takes.”
•“Lock” refers to a special condition whereby a source-to-destination routing cannot be
changed by any user. However, a Lock can be cleared by any panel.
•“Protect” refers to a special condition whereby a source-to-destination routing can only
be changed by the user at the originating panel (the panel on which the Protect was
entered). A Protect can be cleared from the panel that originally set the Protect (or by the
RMS).
1-4 SCP Series • User’s Guide
Page 21
Routing Switcher Basics
0 123456789
0
1
2
3
4
5
6
7
8
9
Inputs
Outputs
VTR 2
VTR 6
VTR 2
Out
VTR 6
Out
VTR 2
In
VTR 6
In
Routing Switcher Basics
A routing switcher is a specialized form of broadcast switcher that allows you to connect large
numbers of source and destination devices together electronically — without patching, without
running cables across the floor, and without losing signal quality.
In any type of facility, whether it’s broadcast, industrial, or consumer, a routing switcher solves
problems and reduces connectivity errors. Instead of running audio and video cables
inefficiently throughout your facility (and re-running them each time a routing requirement
changes), you simply connect all the “ins” and “outs” from each device to the routing switcher.
From that point forward, all equipment interconnections are performed electronically — at the
routing switcher's control panel — rather than at each device’s rear panel. Please note:
• Routing switchers can switch many router levels simultaneously (typically eight or 16).
For example, a simple route connects one router level from one source device (such as a
VTR) to one destination device (such as a video monitor). A complex route connects
multiple router levels from one source device (such as a satellite feed) to multiple
destinations (such as a group of VTRs and monitors).
• Audio and video router levels can be switched individually or in groups. Any input can be
switched to any output (or group of outputs).
• You can switch in an “all-follow” mode (where audio and video switch together), or in a
“breakaway” mode (where audio is taken from one source and video from another).
• Routing switchers can be switched manually from control panels (such as the SCP series),
or automatically via computer control.
Switching Matrix
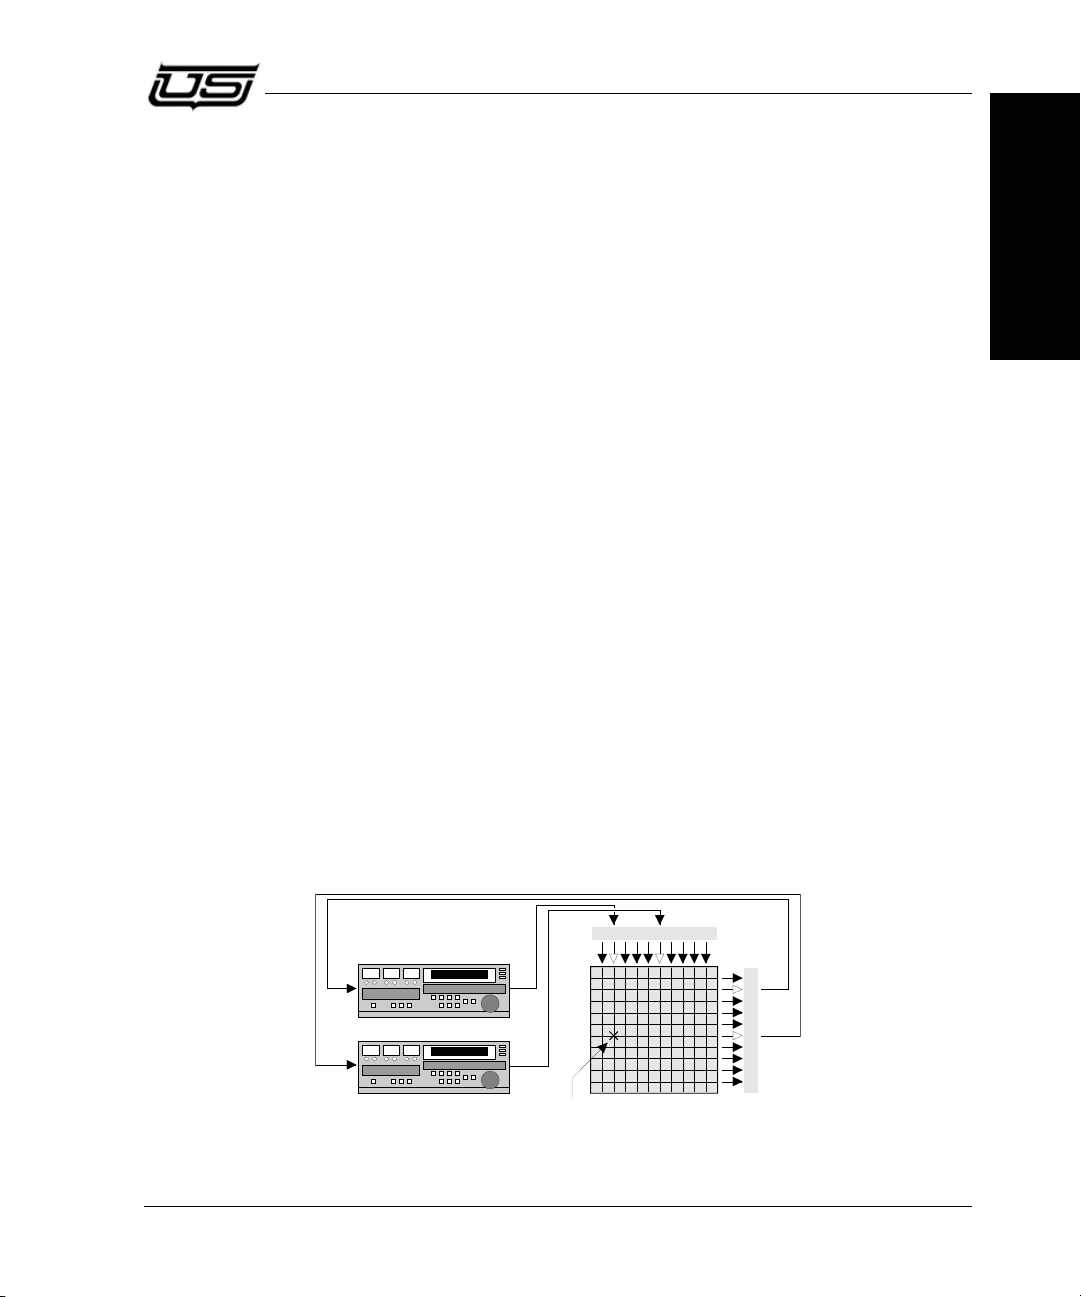
A switching matrix is the internal array of inputs, outputs and crosspoints that allows a routing
switcher to perform the task of moving signals from sources to destinations. The figure below
illustrates a simple 10x10 switching matrix — with 10 inputs and 10 outputs.
Chapter 1
Figure 1-1. Simple 10x10 Switching Matrix
SCP Series • User’s Guide 1-5
Crosspoint
Routing Switcher Matrix
Page 22
Introduction
Analog Audio R
Digital Video
Digital Audio 1/2
Digital Audio 3/4
Digital Audio 5/6
Digital Audio 7/8
Analog Video
Analog Audio L
One
Signal
Level
Note the following points regarding the illustration:
• Each VTR is fully-connected to the matrix — all audio/video inputs and all audio/video
• A crosspoint (represented by an X) is the internal intersection of an input and an output,
• When an entire audio/video array is connected in this manner, from all devices in your
• Even though the matrix size shown above is 10x10, in the UTAH-200 and UTAH-300
Router Levels
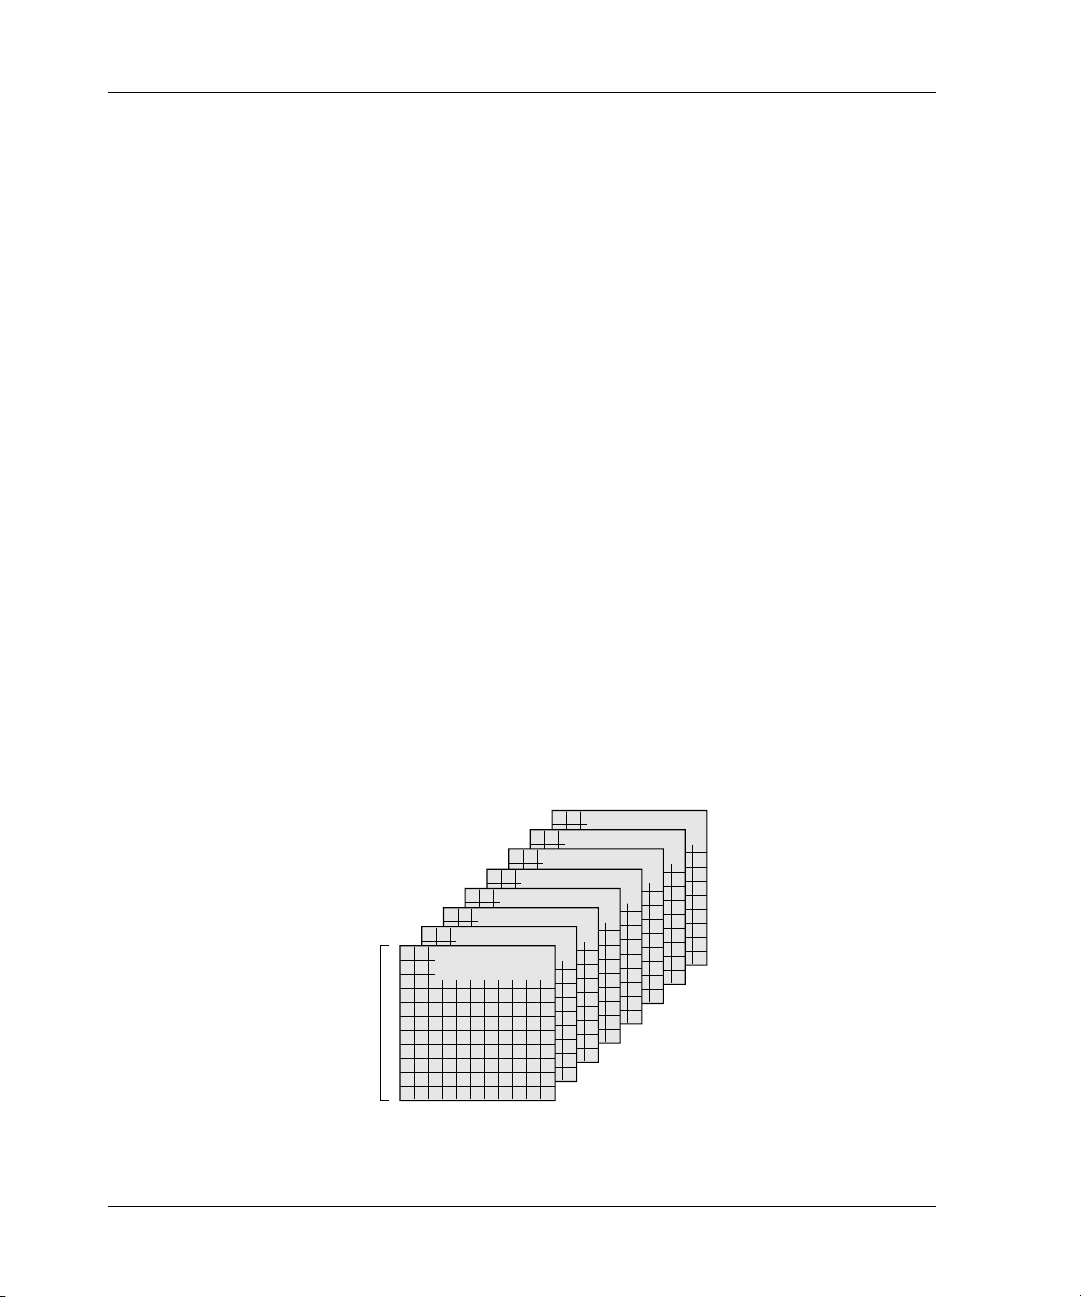
A “router level” represents one of many specific types of audio or video elements that a
routing switcher is capable of handling. The UTAH-300, for example, can switch up to eight or
16 router levels, which can be any combination of Digital Video, Digital Audio, Analog Video
or Analog Audio (Left and Right). Some systems can be configured with one router level,
while others can be configured with multiple router levels.
outputs.
either audio or video. When a crosspoint is turned on, a connection is made between a
selected source and one (or more) destinations. The act of turning a crosspoint on or off is
known as a Tak e.
facility, you have full routing flexibility. Without re-patching or running new cables, a
device can play back one moment (as a source), and record the next moment (as a
destination).
routers, for example, you can configure much larger matrices.
While the diagram in the previous section shows only one router level, a multi-router level
system is capable of routing any combination of the eight levels, each with its own matrix and
crosspoints. The figure below illustrates a multi-router level 10x10 system.
1-6 SCP Series • User’s Guide
Figure 1-2. Multi-router Level 10x10 Routing Switcher System
Page 23
Introducing the SCP Series Panels
SCP - 2 / 8
Source
SRC 001
Attribute
Protect
Source1Source2Source3Source
4
Level 1
Level 5
Level 2
Level 7
Level 3
Level 6
Level 4
Level 8
Take
SrcGrp 11SrcGrp 22SrcGrp 3
3
SrcGrp 6
A
SrcGrp10SrcGrp 44SrcGrp5
5
SrcGrp11
6
SrcGrp 7
B
SrcGrp 20SrcGrp127SrcGrp138SrcGrp14
9
SrcGrp 8CSrcGrp 9
SrcGrp 18
F
SrcGrp 15
0
SrcGrp17
E
SrcGrp 16
D
SrcGrp19
Dest 1
Dest 2
Shift 1
-
4
Shift
5-
8
The size of the various router level matrices need not be consistent throughout the routing
switcher. For example:
• A symmetrical matrix might have 32x32 digital video and digital audio.
• A non-symmetrical matrix might have 32x32 digital video, but only 16x16 analog audio.
Although the concept of a full multi-router level system (with its thousands of crosspoints)
may seem complicated, the beauty of a routing switcher system is its operational simplicity. As
a user, you need only think about sources and destinations. You can perform all operations
using the SCP panels, with ease and convenience, without ever thinking about the underlying
concepts, matrices, and electronics.
Introducing the SCP Series Panels
The SCP Series control panels from Utah Scientific are designed for easy and straightforward
operation, using a minimum number of keystrokes for each switch or status operation. The
panels connect to an SC-3 controller over high-speed U-Net communication lines (using
standard RJ-45 connectors). All SCP panels are designed to switch either 8 or 16 levels
(depending on the model), and each panel can be re-programmed over U-Net lines without the
need to interrupt system operations, or remove the panel from service. Refer to the SC-3
Operations Guide for instructions on re-programming SCP panels.
Each rack-mountable panel houses a matrix of buttons and displays, and each includes an
external (universal) power supply. Following are brief descriptions of each panel.
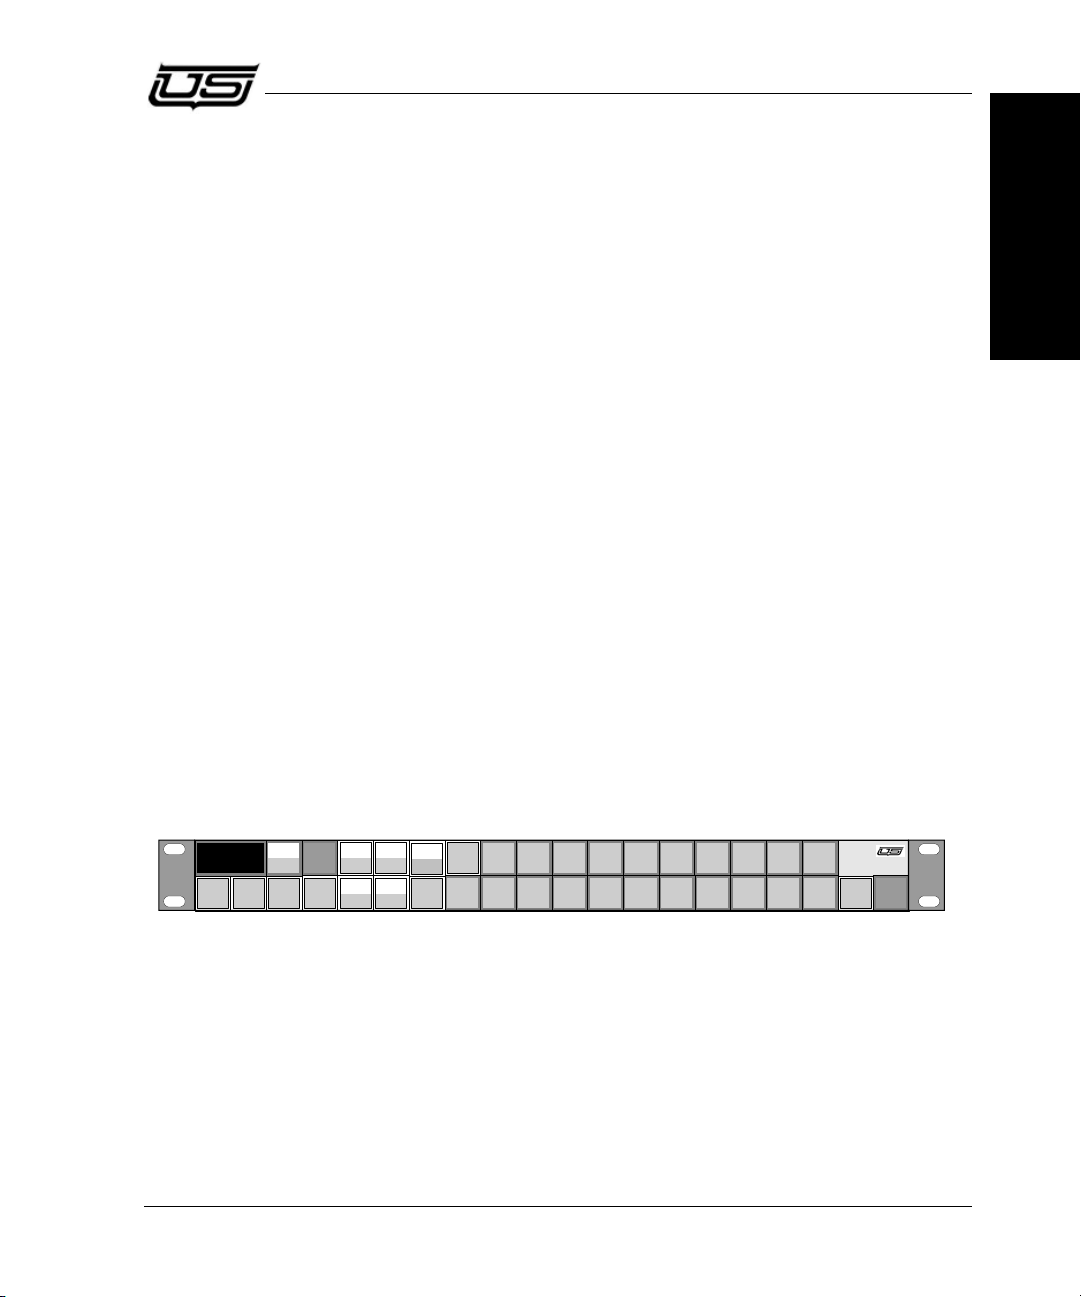
SCP 2/8
The SCP 2/8 is a 16 level, full source panel that is designed to operate as a single or dual bus
control panel. Full access is provided to all sources and up to two user-defined destinations.
Chapter 1
SCP Series • User’s Guide 1-7
Figure 1-3. SCP 2/8 Panel
The panel includes the following key features:
• Eight Character LED display for clear indication of selected source names and status.
• 16-level switching and eight-level breakaway capability that includes control within a
mixed analog/digital environment. “Attribute” switching is standard.
• Four “Direct Access” buttons for rapid switching of the most commonly used sources.
Page 24
Introduction
Level 1
Level 5
Level 2
Level 6
Level 3
Level 7
Level 4
Level 8
SCP - 32 / 8
312 4 756 8 11910 12 1513 14
3230 312927 282624 252321 222018 191716
Shift 1
-
4
Shift
5-
8
Level 1
Level 5
Level 2
Level 6
Level 3
Level 7
Level 4
Level 8
SCP - 64 / 8
PROTECT
Dest 1
Dest 2
112
2
17
17
16
16
44556677889
9
15
15
14
14
13
13
12
12
11
11
10
10
18181919202021212222232324242525262627272828292930
30
32
32
31
31
3
3
Shift 1-4
Shift
5-
8
• “Group Name” capability, for mnemonic flexibility and easy sorting when large numbers
• Output “Protect” and “Lock” modes that prevent unauthorized switching of a destination
Refer to Chapter 3 for complete setup and operating instructions.
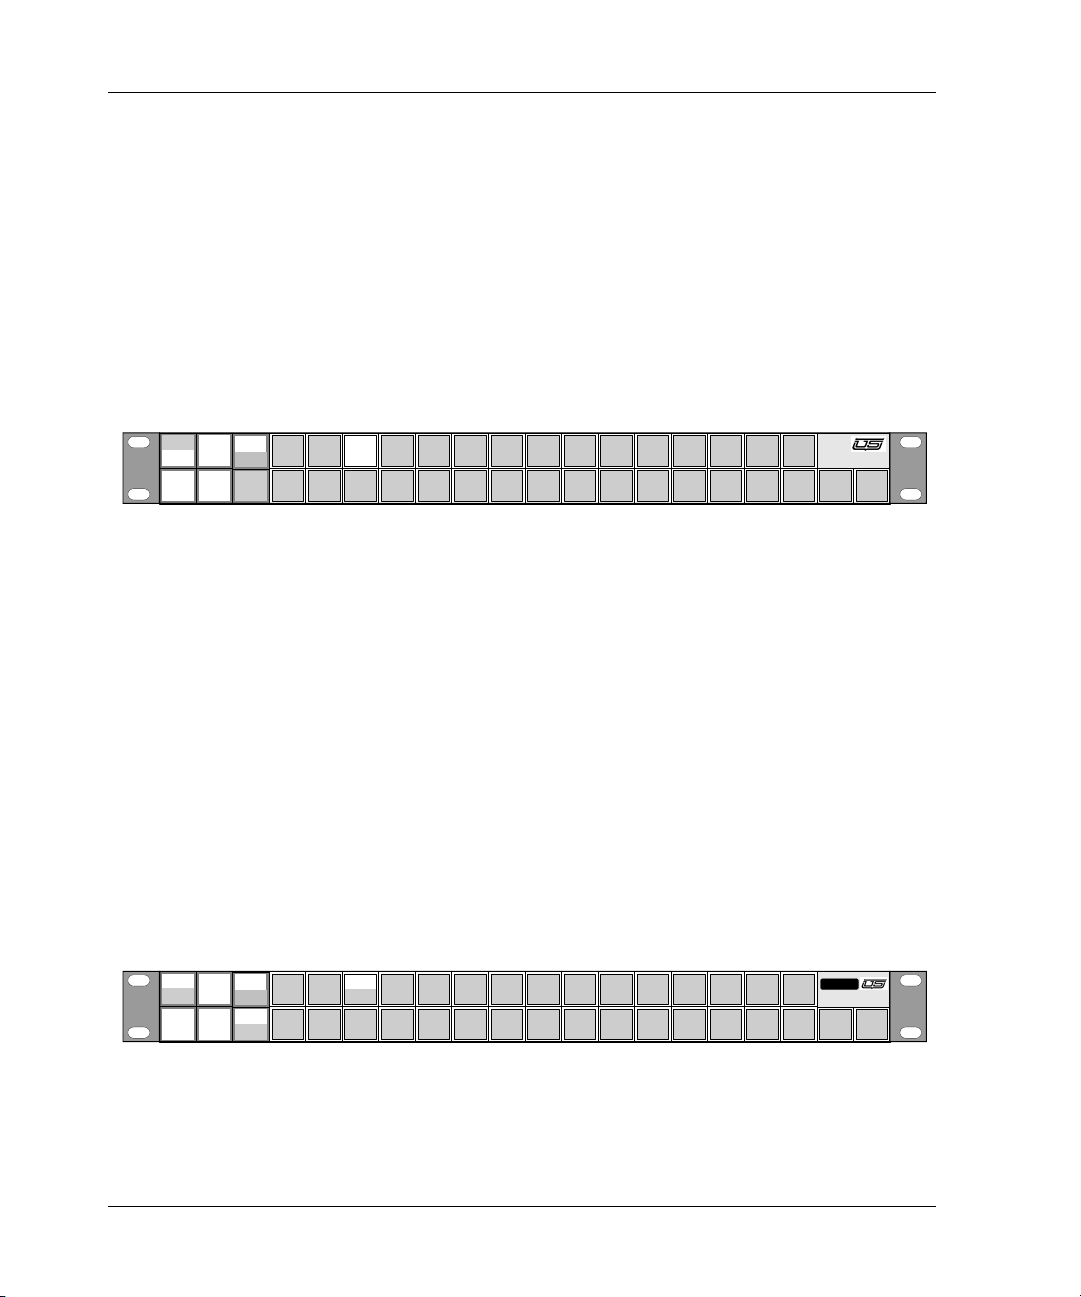
SCP 32/8
The SCP 32/8 is an eight level, single destination, 32 source panel that is designed for fast
access to a limited number of sources. All programming is performed with the SC-3.
The panel includes the following key features:
• 16-level switching and eight-level breakaway capability that includes control within a
of sources are available.
by other control panels.
Figure 1-4. SCP 32/8 Panel
mixed analog/digital environment.
• Large pushbuttons provide simple source switching capability, and all button labels have
removable inserts for custom labels as required.
• All buttons are backlit for superb legibility, under all light conditions. The backlight
intensity is user adjustable.
Refer to Chapter 4 for complete setup and operating instructions.
SCP 64/8
The SCP 64/8 is a 16-level panel with eight level breakaway capability. The panel provides the
same basic functionality as the SCP 32/8 — plus several additional features.
Figure 1-5. SCP 64/8 Panel
1-8 SCP Series • User’s Guide
Page 25
Introducing the SCP Series Panels
SCP - XY / 16
Salvo
Scroll
Up
Source
SRC 001
Destination
DST 001
Source
SRC 001
Source
SRC 001
Source
SRC 001
Source
SRC 001
Source
SRC 001
Source
Source
Attribute
Scroll
Down
Select
Dest
Protect
Dest1Dest2Dest3Dest
4
Source1Source2Source3Source
4
Source5Source6Source7Source
8
Level 1
Level 9
Level 2
Level 10
Level 3
Level 11
Level 4
Level 12
Level 5
Level 13
Level 6
Level 14
Level 7
Level 15
Level 8
Level 16
Take
Mnemonic
Numeric
SrcGrp1
1
DstGrp 1
SrcGrp 2
2
DstGrp 2
SrcGrp 3
3
DstGrp 3
SrcGrp 4
A
DstGrp 4
SrcGrp 5
DstGrp 5
SrcGrp6
4
DstGrp 6
SrcGrp 7
5
DstGrp 7
SrcGrp 8
6
DstGrp 8
SrcGrp 9
B
DstGrp 9
SrcGrp10
DstGrp10
SrcGrp 11
7
DstGrp11
SrcGrp12
8
DstGrp 12
SrcGrp13
9
DstGrp13
SrcGrp14
C
DstGrp14
SrcGrp15
DstGrp 15
SrcGrp 16
F
DstGrp16
SrcGrp17
0
DstGrp 17
SrcGrp18
E
DstGrp18
SrcGrp19
D
DstGrp19
SrcGrp20
DstGrp 20
Clear
Shift 1
-
8
Shift 9-16
In addition to the basic SCP 32/8 feature set, the SCP 64/8 can function either as a single
destination 64 source panel or as a dual destination 32 source panel. A bright status LED is
provided for alerting the user to any “Lock” or “Protect” conditions.
Refer to Chapter 5 for complete setup and operating instructions.
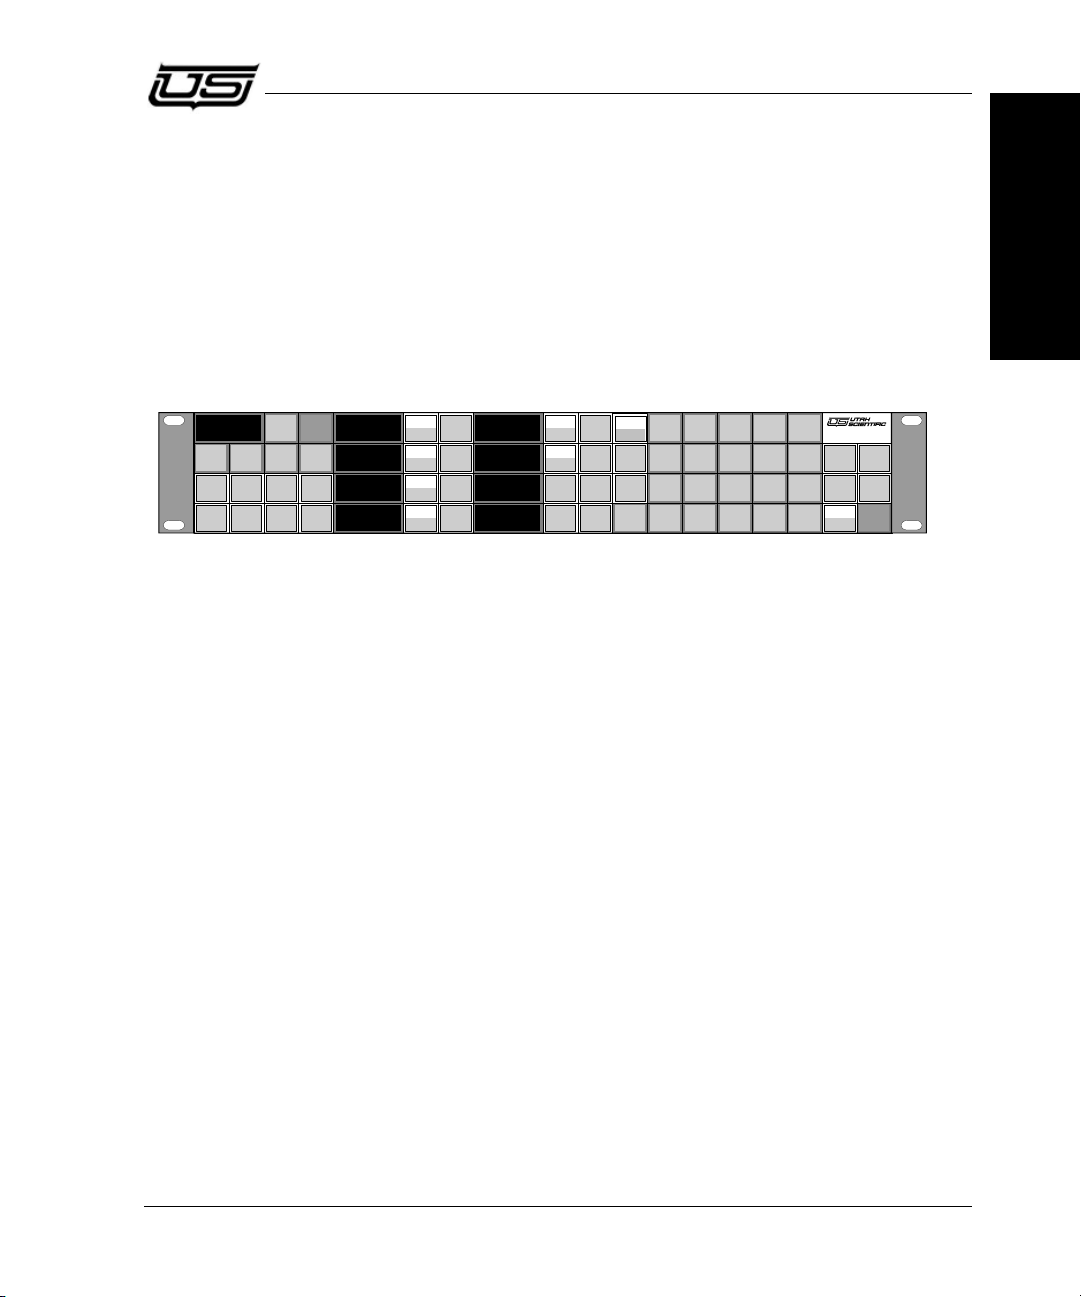
SCP XY/16
The SCP XY/16 is a 16 level XY panel that provides full access to all sources and all
destinations connected to your routing switcher, including the monitor bus.
Figure 1-6. SCP XY/16 Panel
The panel includes the following key features:
• Individual group name capability for both sources and destinations. Monitor output
switching is standard.
• Eight LED displays are provided for sources, plus one display for the destination. LED
intensity is fully adjustable.
• Full 16-level switching capability that includes control within a mixed analog/digital
environment.
• “Direct Access” buttons for eight sources and four destinations. Full output protection
modes are provided.
Chapter 1
SCP Series • User’s Guide 1-9
Refer to Chapter 6 for complete setup and operating instructions.
Page 26
Introduction
Sal
SrcGrp 1
1
DstGrp 1
SrcGrp 2
2
DstGrp 2
SrcGrp 3
3
DstGrp 3
SrcGrp 4
A
DstGrp 4
SrcGrp 5
DstGrp 5
SrcGrp 6
4
DstGrp 6
SrcGrp 7
5
DstGrp 7
SrcGrp 8
6
DstGrp 8
SrcGrp 9
B
DstGrp 9
SrcGrp 10
DstGrp 10
SrcGrp 11
7
DstGrp 11
SrcGrp 12
8
DstGrp 12
SrcGrp13
9
DstGrp 13
SrcGrp 14
C
DstGrp 14
SrcGrp15
DstGrp 15
SrcGrp 16
F
DstGrp 16
SrcGrp 17
0
DstGrp 17
SrcGrp18
E
DstGrp 18
SrcGrp 19
D
DstGrp 19
SrcGrp20
DstGrp 20
Clear
Level 8
Level 16
SRC 001
Level 6
Level 14
SRC 001
Level 4
Level 12
SRC 001
Level 2
Level 10
SRC 001DST 001
SRC 001
Level 7
Level 15
SRC 001
Level 5
Level 13
SRC 001
Level 3
Level 11
SRC 001
Level 1
Level 9
Destination Level / Source Level / Source Level / S ource Level / Source
Level / SourceLevel / SourceLevel / SourceLevel / Source
Select
Dest
Protect
SCP - SX / 16
XY
Direct
Mnemonic
Numeric
Rec
Sto
Attrib
Ta
Shif t 1
-
8
Shift 9-16
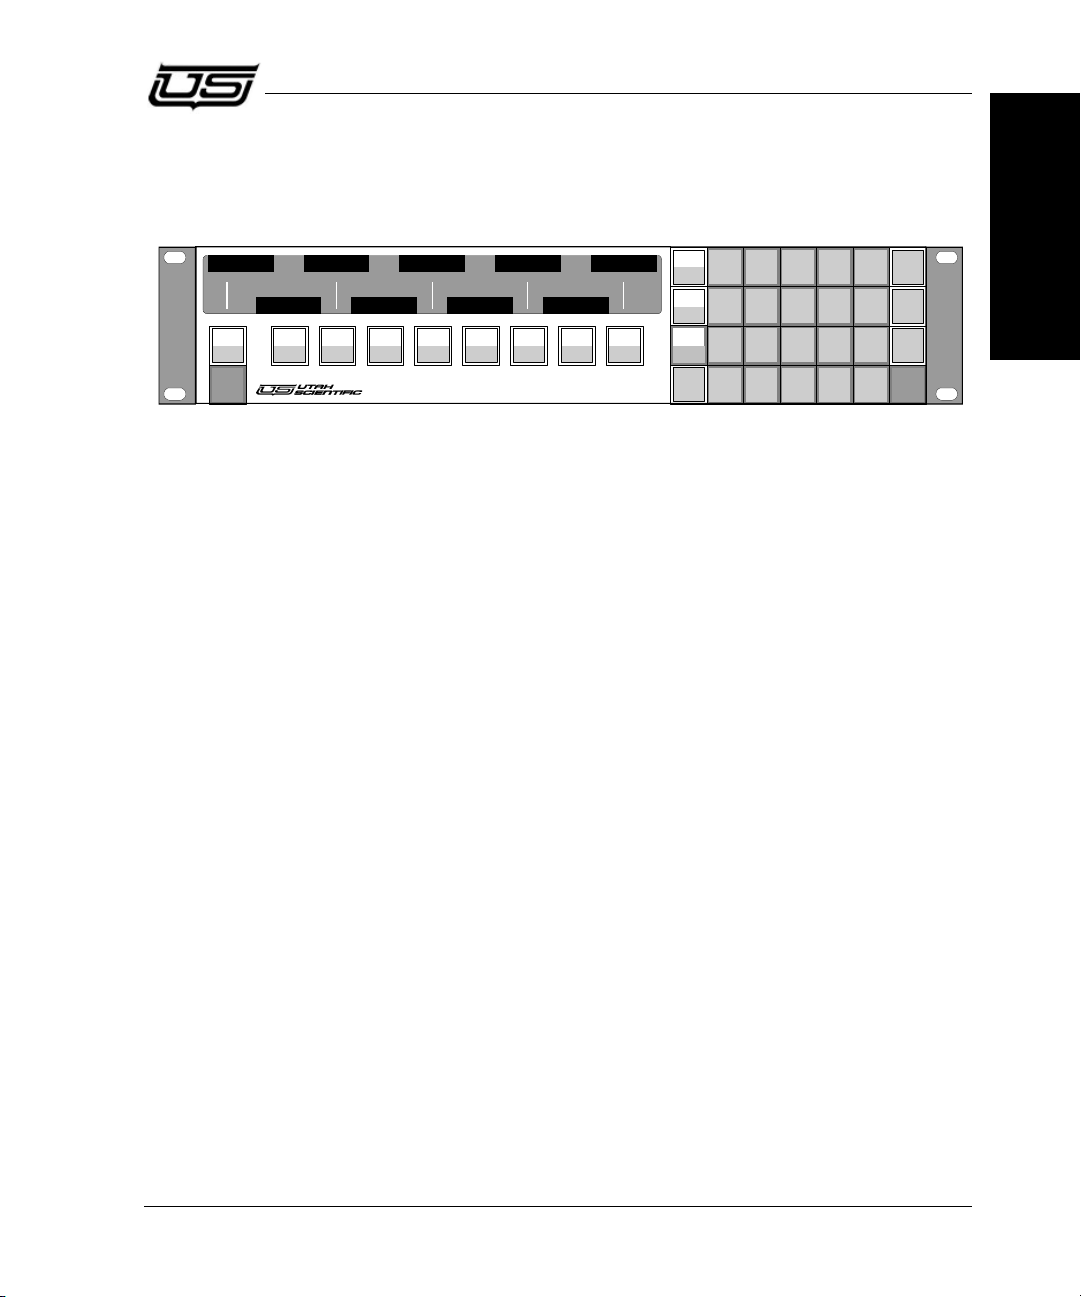
SCP SX/16
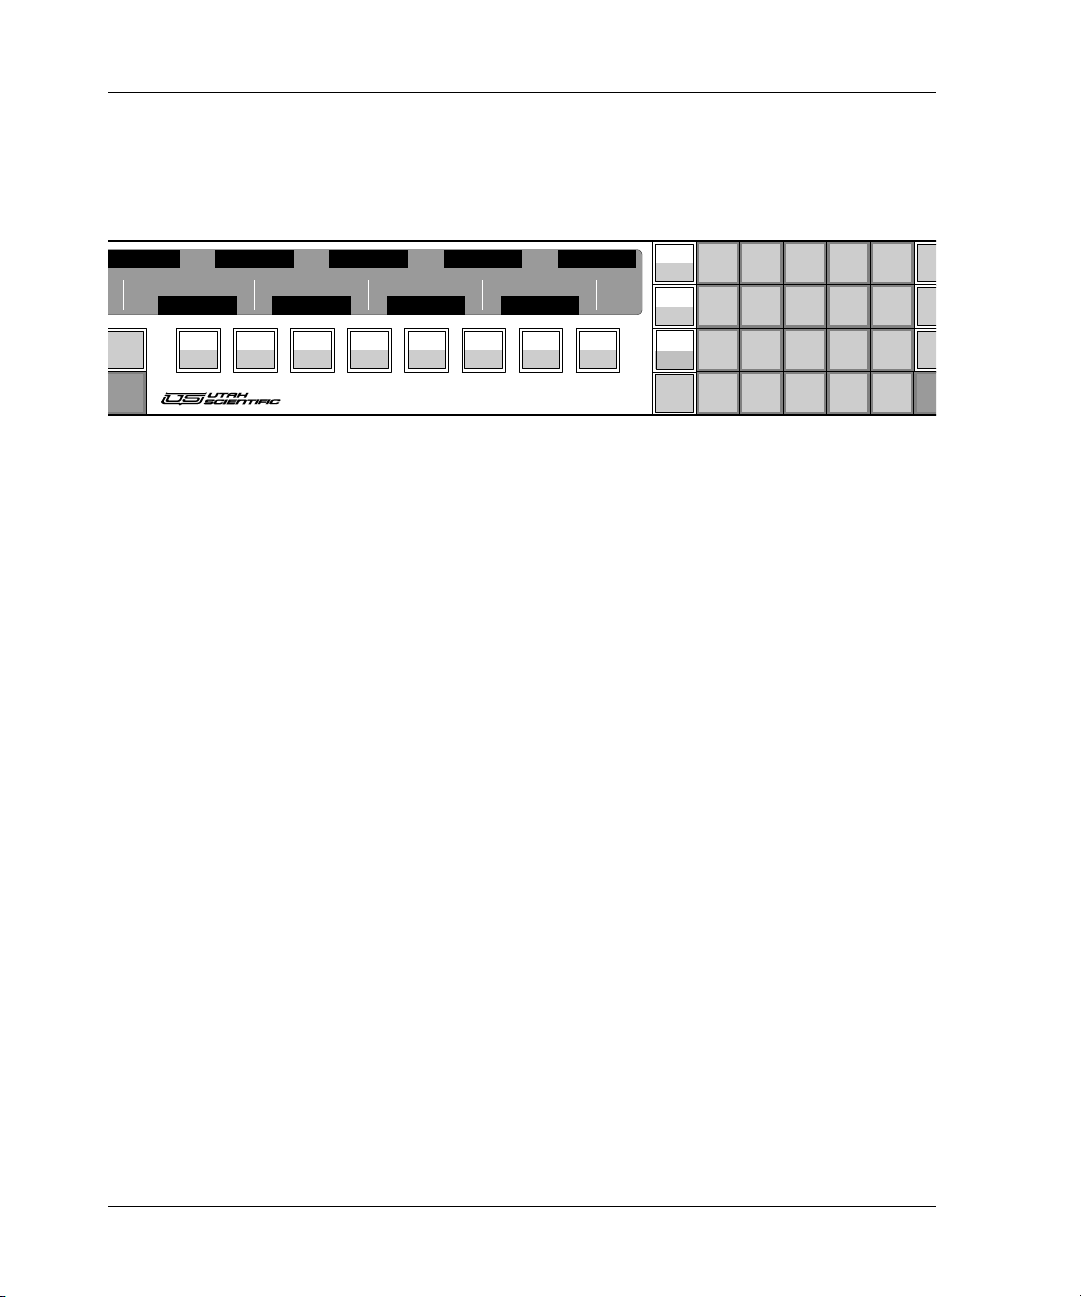
The SCP SX/16 is an advanced 16 level XY panel that includes the core features of the SCP
XY/16, plus many additional features.
The panel includes the following key features:
• Switchable operations between “XY” mode and “Direct Source” mode.
• A special “All-follow Take Level Exclusion” mode allows the user to exclude certain
• Individual source/destination color coding.
• Audio/video attribute switching is standard, without requiring an extra level.
Figure 1-7. SCP SX/16 Panel
levels from an All-follow Take function.
• Salvos (essentially multiple source/destination functions grouped under one key) can be
performed from the panel.
Refer to Chapter 7 for complete setup and operating instructions.
1-10 SCP Series • User’s Guide
Page 27
Introducing the SCP Series Panels
Salvo
SrcGrp1
1
DstGrp 1
SrcGrp 2
2
DstGrp 2
SrcGrp 3
3
DstGrp 3
SrcGrp 4
A
DstGrp 4
SrcGrp 5
DstGrp 5
SrcGrp6
4
DstGrp 6
SrcGrp 7
5
DstGrp 7
SrcGrp 8
6
DstGrp 8
SrcGrp 9
B
DstGrp 9
SrcGrp 10
DstGrp 10
SrcGrp 11
7
DstGrp 11
SrcGrp 12
8
DstGrp 12
SrcGrp13
9
DstGrp13
SrcGrp14
C
DstGrp 14
SrcGrp15
DstGrp15
SrcGrp 16
F
DstGrp 16
SrcGrp 17
0
DstGrp 17
SrcGrp18
E
DstGrp18
SrcGrp19
D
DstGrp 19
SrcGrp20
DstGrp20
Clear
Lv/Ds t 8
Lv/Dst 16
SRC 001
Lv/Dst 6
Lv/Dst 14
SRC 001
Lv/Ds t 4
Lv/Dst 12
SRC 001
Lv/Dst 2
Lv/Dst 10
SRC 001DST 001
SRC 001
Lv/Dst 7
Lv/Dst 15
SRC 001
Lv/Dst 5
Lv/Dst 13
SRC 001
Lv/Dst 3
Lv/Dst 11
SRC 001
Desti natio n / Le vel
Source Source Source Source
SourceSourceSourceSource
Protect
SCP - MX / 16
Multi
Single
Mnemonic
Numeric
View
Dest
Store
Attribute
Take
Level
Dest
Lv/Dst 1
Lv/Dst 9
Shift 1-8
Shift 9-16
SCP MX/16
The SCP MX/16 is a 16 level XY panel that includes the core features and button layout of the
SCP SX/16, plus the ability to operate in single or multi-destination modes.
Figure 1-8. SCP MX/16 Panel
The panel includes the following key features:
• Switchable operations between single and multi-destination modes (with the ability to use
up to 16 pre-assigned destinations). Up to eight destinations can be displayed at once.
• Destinations can be selected without using the RMS.
• Breakaway operations up to 16 levels.
• Single or multi-destination takes.
Chapter 1
• Audio/video attribute switching, plus numeric or mnemonic operations.
• Salvo operations.
Refer to Chapter 8 for complete setup and operating instructions.
SCP Series • User’s Guide 1-11
Page 28

Introduction
1-12 SCP Series • User’s Guide
Page 29

In This Chapter
This chapter provides installation instructions for all panels in the SCP series. The following
topics are discussed:
• Rear Panel Layout . . . . . . . . . . . . . . . . . . . . . . . . . . . . . . . . . . . . . . . . . . 2-2
• Panel Installation . . . . . . . . . . . . . . . . . . . . . . . . . . . . . . . . . . . . . . . . . . . 2-3
• Unpacking and Inspection . . . . . . . . . . . . . . . . . . . . . . . . . . . . . . . . . . . . 2-3
• Installing the Panel . . . . . . . . . . . . . . . . . . . . . . . . . . . . . . . . . . . . . . . . . . 2-3
• Connecting U-Net. . . . . . . . . . . . . . . . . . . . . . . . . . . . . . . . . . . . . . . . . . . 2-4
• Setting the Panel Address. . . . . . . . . . . . . . . . . . . . . . . . . . . . . . . . . . . . . 2-6
• Panel Installation (Ethernet) . . . . . . . . . . . . . . . . . . . . . . . . . . . . . . . . . . . .2-7
• Connecting the E-Net Panels . . . . . . . . . . . . . . . . . . . . . . . . . . . . . . . . . . . 2-8
• SCP Ethernet Panel Configuration . . . . . . . . . . . . . . . . . . . . . . . . . . . . . . .2-8
• Connecting the panel to the terminal . . . . . . . . . . . . . . . . . . . . . . . . . . . . .2-8
• Using the pcon utility . . . . . . . . . . . . . . . . . . . . . . . . . . . . . . . . . . . . . . . . . 2-9
• USI Panel Config Commands . . . . . . . . . . . . . . . . . . . . . . . . . . . . . . . . . . 2-9
• Connecting the panel to the network . . . . . . . . . . . . . . . . . . . . . . . . . . . . 2-10
• Connecting and Disconnecting Power . . . . . . . . . . . . . . . . . . . . . . . . . . 2-11
In This Chapter
2
Chapter 2
Installation
Refer to Appendix A for connector pinout diagrams, and details on individual SCP panel
power supplies.
SCP Series • User’s Guide 2-1
Page 30
Installation
1
0
U-NET
D
A
T
A
T
S
E
N
STATION
NUMBER
EXPANSION
POWER
GND
+5VDC
1 2 3 4 5
1
0
U-NET
D
A
T
A
T
S
E
N
STATION
NUMBER
EXPANSION
POWER
GND
+5VDC
1 2 3 4 5
Rear Panel Layout
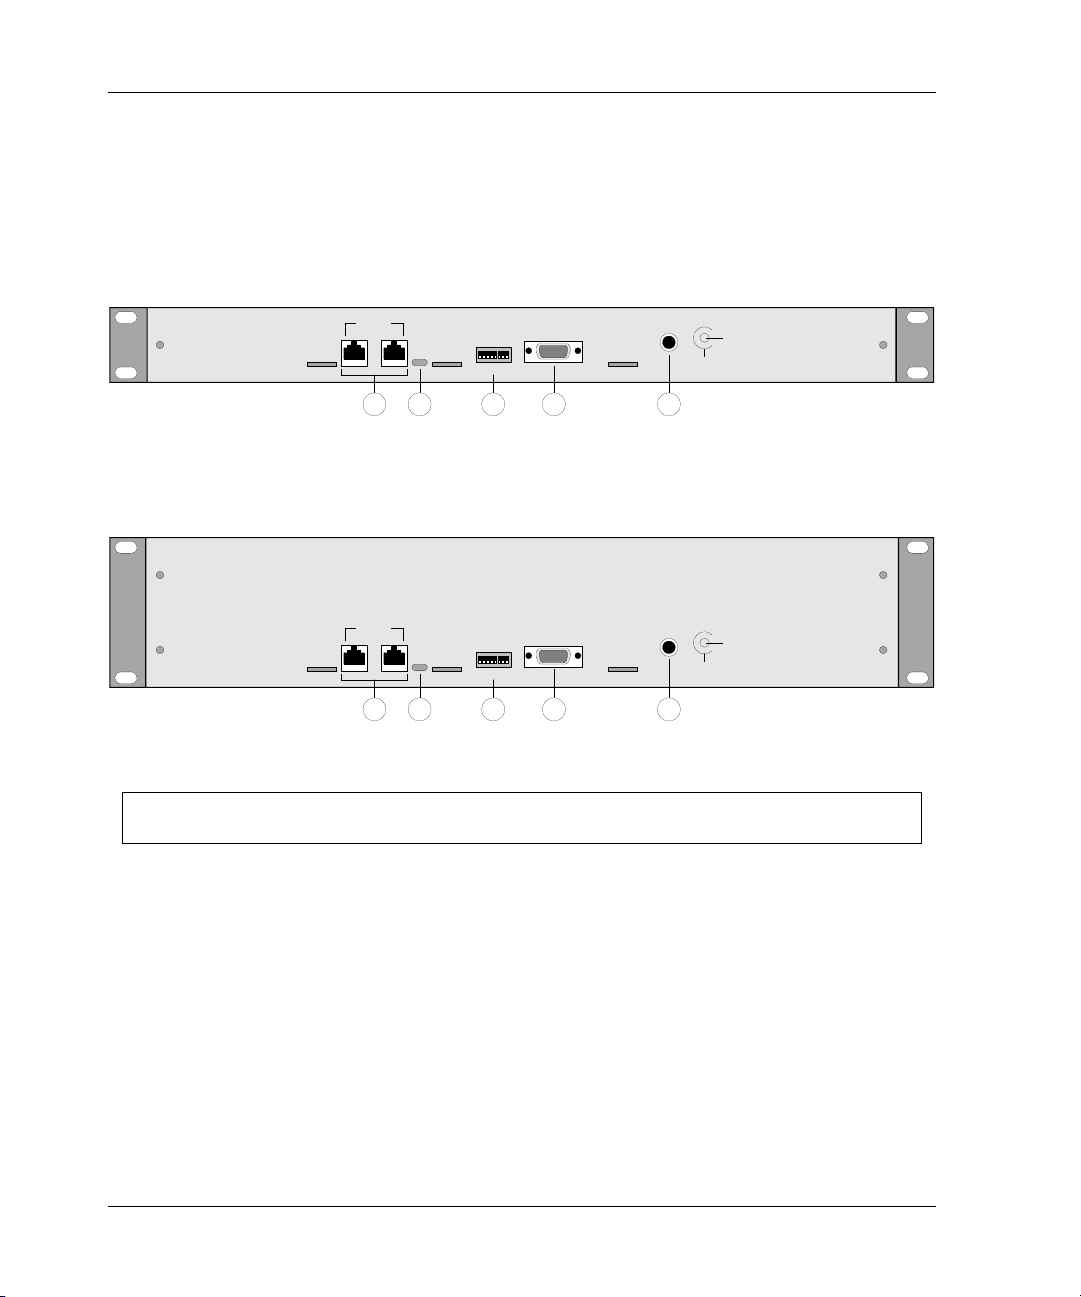
This section describes the rear panel layouts of all SCP panels. Even though panel height
differs between units, the connector arrangement is identical on all panels.
The figure below illustrates the rear panel layout of the SCP 2/8, SCP 32/8, and SCP 64/8
routing switcher control panels.
Figure 0-1. Rear Panel Layout, SCP 2/8, SCP 32/8, and SCP 64/8
The figure below shows the rear panel layout of the SCP XY/16, SCP SX/16 and SCP MX/16
panels.
Figure 0-2. Rear Panel Layout, SCP XY/16, SCP SX/16 and SCP MX/16
1) U-Net Connectors 3) Panel ID DIP Switch 5) Power Connector
2) Status LEDs 4) Expansion Port
1) U-Net Connectors
The two RJ-45 U-Net connectors are used for inter-system panel communications. U-Net
uses category five, 10Base-T cable running on four twisted pairs. Up to 32 control panels
can be connected and synchronized to your routing switcher’s main frame via U-Net.
~ One of the two U-Net ports (either one can be used) connects via U-Net cable to the
main frame’s U-Net port, or to the previous SCP panel in your system.
~ The remaining U-Net port connects to the next standalone control panel, or it is
terminated with a special U-Net Terminator plug (if it is the last panel in the chain).
Refer to the “Connecting U-Net” section on page 2-4 for instructions.
2-2 SCP Series • User’s Guide
Page 31

2) Status LEDs
The two Status LEDs are designed for factory use only.
3) Panel ID DIP Switch
The 8-position Panel ID DIP Switch is used to set a control panel’s unique ID number or
“address.” This number allows the routing switcher to address panels individually, for
control purposes and also for mapping special source and destination configurations to
each panel. Refer to the “Setting the Panel Address” section on page 2-6 for instructions.
4) Expansion Port
The 9-pin “D” RS-422 Expansion Port is designed for factory use only.
5) Power Connector
The Power Connector is used to connect the external Universal Power Supply. Refer to
the “Connecting and Disconnecting Power” section on page 2-11 for instructions.
Panel Installation (U-Net)
This section provides instructions for installing control panels in your facility.
Panel Installation (U-Net)
Chapter 2
Caution
To avoid damage to the system, do not connect the power supply until the
hardware is fully installed.
Unpacking and Inspection
When you receive your SCP control panel(s), inspect each shipping carton for signs of
damage. Contact your dealer and the shipper immediately if you suspect any damage has
occurred during shipping. Check the contents of each box to be sure that all parts are included.
If any items are missing, contact your dealer immediately. After unpacking, please save the
packing materials for future shipping convenience.
Installing the Panel
Control panels are typically located in edit suite consoles, at various locations in the machine
room or transmission room, in studio control rooms, in screening rooms or conference rooms
— any place where you are required to route or monitor audio and video signals
Use the following steps to install each control panel:
1. Determine the location for each SCP control panel in your facility.
SCP Series • User’s Guide 2-3
Page 32
Installation
Level 1
Level 5
Level 2
Level 6
Level 3
Level 7
Level 4
Level 8
SCP - 32 / 8
312 4 756 8 11910 12 1513 14
3230 312927 282624 252321 222018 191716
Mounting Holes
Shift 1-4
Shift
5-
8
• Ensure that each location is within five feet of an AC outlet. This distance is the
length of the DC power cord.
• Select a location that allows for easy cabling and minimum interconnecting U-Net
cable lengths.
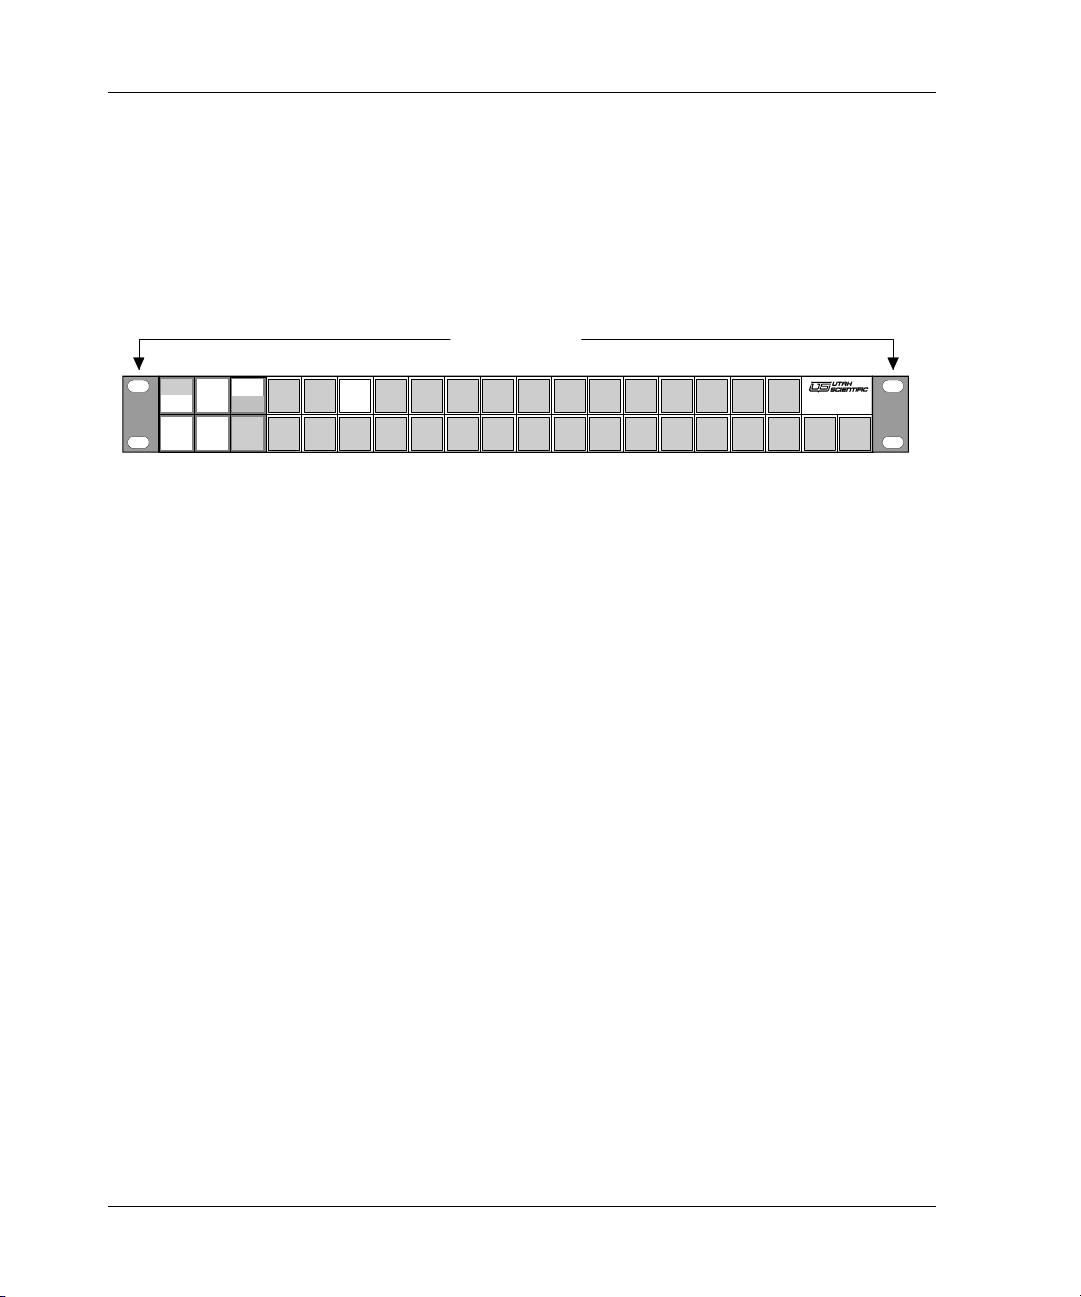
2. Install each control panel in the destination equipment rack or console. Note that the left
and right mounting holes at the front of each panel support the entire weight of the unit.
Figure 0-3. SCP Panel Mounting Holes
Because of this front support method, ensure that all screws are tightened securely as you
install each panel.
Note: Provide sufficient space behind each panel for running your cables and for
performing maintenance if required.
3. Repeat steps 1 and 2 for each panel that you want to install.
This completes the installation of each SCP control panel. Please continue with the procedure
for connecting U-net.
Connecting U-Net
In this procedure, you will interconnect each SCP control panel to the main frame (in
“daisy-chain” fashion) using the rear chassis U-Net connectors. U-Net uses category five,
4-pair UTP (unshielded twisted pair) cable with RJ-45 connectors. Up to 32 control panels can
be connected to the main frame via U-Net.
Note: When control panels are daisy-chained together, the total length of the entire
cable run can not exceed 1000 feet.
• U-Net Cables are not supplied. You can purchase Ethernet cables, or you can construct a
custom cable. See Appendix A, “Specifications” for cable specifications and pinouts.
• One U-Net Terminator plug is supplied per SCP panel.
2-4 SCP Series • User’s Guide
Page 33
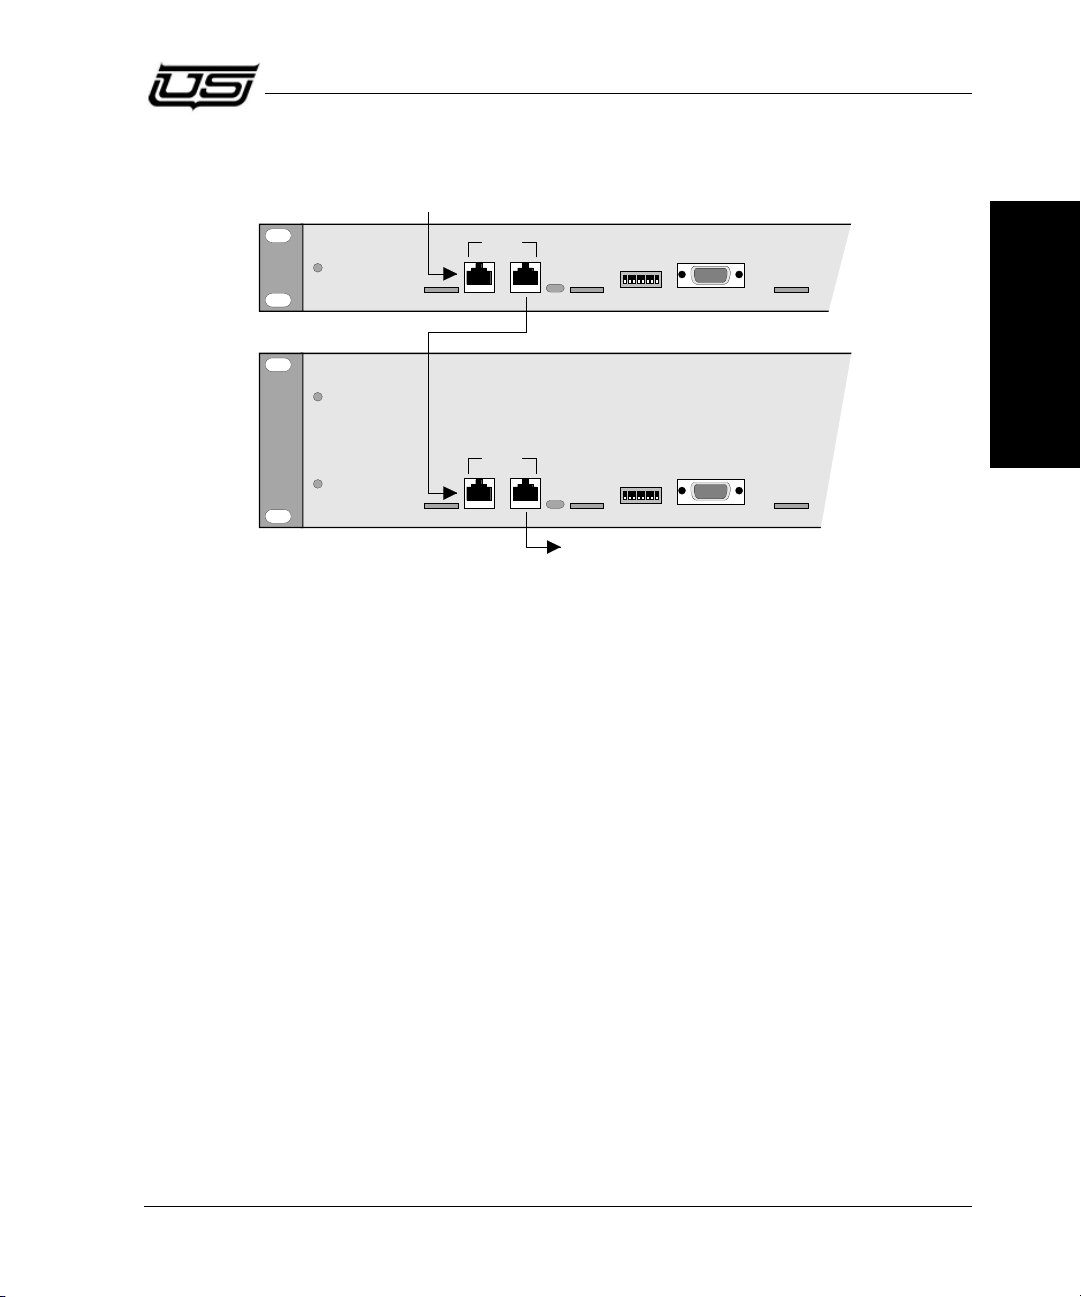
Use the following diagram for reference throughout the procedure.
To additional Control Panels,
)
Control Panel 2
Control Panel 1
1
0
U-NET
D
A
T
A
T
S
E
N
STATION
NUMBER
EXPANSION
1
0
U-NET
D
A
T
A
T
S
E
N
STATION
NUMBER
EXPANSION
From Routing Switcher Main Frame
or the last Control Panel in the current chain
or Terminate (if the last panel in the chain
Figure 0-4. U-Net Interconnection Diagram
Use the following steps to interconnect control panels:
Connecting U-Net
Chapter 2
1. Locate the U-Net connector on your switcher main frame, or alternately, locate the last
control panel in the current daisy chain (of control panels).
2. If you are going to connect to the last control panel in the current chain, remove the U-Net
Terminator plug from one of the panel’s two U-Net connectors.
3. Using a customer-supplied U-Net Cable, connect either U-Net connector on your new
SCP control panel to the Main Frame’s U-Net connector — or to the open U-Net
connector on the last panel in the current chain.
4. Using another U-Net Cable, connect the new control panel’s open U-Net connector to
either U-Net connector on your next SCP control panel.
5. Repeat step 4 for each additional SCP control panel.
6. On the last control panel in the chain, connect the U-Net Terminator plug to the open
U-Net connector.
This completes the interconnection of each control panel.
SCP Series • User’s Guide 2-5
Page 34
Installation
ON
1
234
5
678
Station Number Dipswitch as it appears
on the back of the SCP panel
1
128
0
1
Panel Address = 5
Switch Number
12
3
45 678
Setting the Panel Address
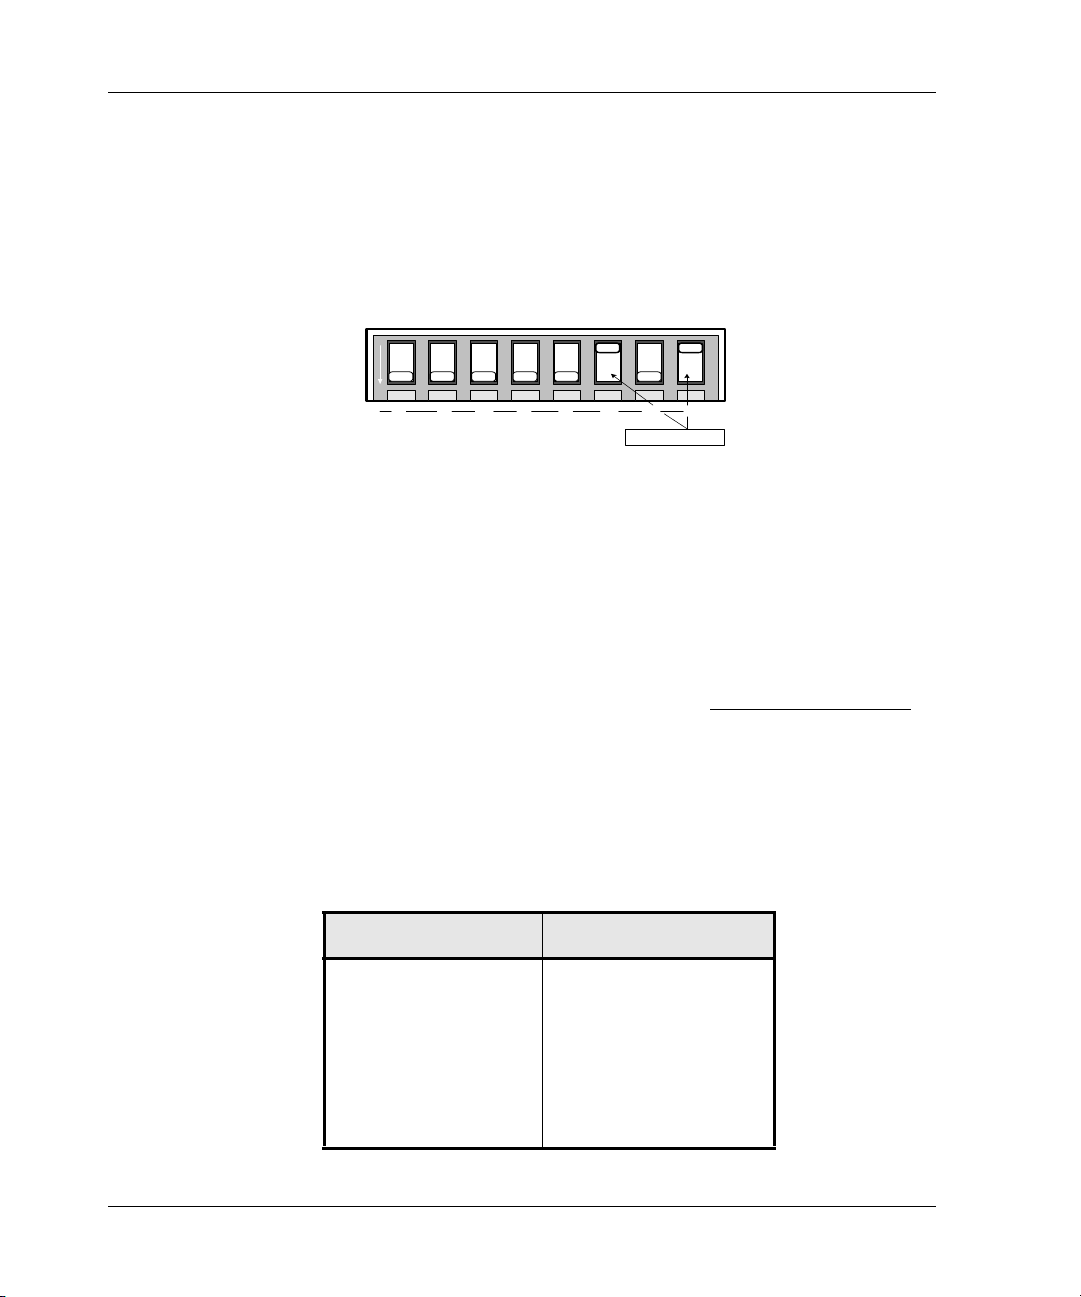
One 8-position Panel ID DIP Switch is provided on the rear panel of each control panel for
setting the panel’s ID number. The figure below illustrates the DIP switch, and shows the value
of each switch (in binary notation).
Figure 0-5. Panel ID DIP Switch Values
The following rules apply:
• Every control panel must have a unique ID number. This number allows it to be properly
identified by both the routing switcher.
• ID numbers between 1 and 250 can be selected.
• ID numbers 0 and 251 through 255 are reserved.
• The numbers printed above the switch represent the range of the switch bank. The “Binary
Va lu e s ” from Left to Right are 128, 64, 32, 16, 8, 4, 2 and 1. To “build” an ID number
~ To include the printed value, slide the switch up, towards the printed label.
~ To exclude the printed value, slide the switch down, away from the printed label.
~ Add the values of all the “up” switches together to obtain the desired ID.
The table below provides several examples.
Table 0-1. ID Number Examples
ID Switch Positions
1 8 up, 1-7 down
2 7 up, 1-6, 8 down
12 5-6 up, 1-4, 7, 8 down
14 5-7 up, 1-4, 8 down
24 4-5 up, 1-3, 6-8 down
2-6 SCP Series • User’s Guide
:
Page 35

Set the ID for each panel according to its position in the chain, or according to the panel
numbering conventions used at your facility. Once you have set the ID, you may wish to make
a label that includes the ID, and place it on the rear panel surface.
Repeat the procedure for each control panel in your system.
Panel Installation (Ethernet)
Control panels are typically located in edit suite consoles, at various locations in the machine
room or transmission room, in studio control rooms, in screening rooms or conference rooms
— any place where you are required to route or monitor audio and video signals
Use the following steps to install each control panel:
1. Determine the location for each SCP control panel in your facility.
Installation
• Ensure that each location is within five feet of an AC outlet. This distance is the length of
the DC power cord.
• Select a location that allows for easy cabling and minimum interconnecting U-Net cable
lengths.
Panel Installation (Ethernet)
Chapter 2
2. Install each control panel in the destination equipment rack or console. Note that the left
and right mounting holes at the front of each panel support the entire weight of the unit.
Because of this front support method, ensure that all screws are tightened securely as you
install each panel.
Note: Provide sufficient space behind each panel for running your cables and for
performing maintenance if required.
3. Repeat steps 1 and 2 for each panel that you want to install.
This completes the installation of each SCP control panel. Please continue with the procedure
for connecting the Ethernet panel.
SCP Series • User’s Guide 2-7
Page 36

Installation
Connecting the E-Net Panels
Each panel contains only one E-Net port, and must be attached to the control system using a
hub on which the SC3/SC4 is located. There is only one E-Net port on the rear of the panel,
and therefore needs to be run directly from its location directly to the hub.
E-Net cables and E-NET hubs/switches are not supplied. The cable is a standard off the shelf
(straight through) E-Net cable.
Each panel contains a unique IP address and node number. The IP address must be set to the
same subnet as the SC3/SC4 controller, otherwise a gateway address is required.
192.168.221.xxx
SCP Ethernet Panel Configuration
In order to configure the Ethernet panels for your intranet, follow the steps below:
1. Connect a terminal or terminal emulator to the panel serial port.
2. Run the pcon utility to configure the panel network connection.
3. Reset the panel.
4. Connect the panel Ethernet port to the network.
5. Repeat steps 1-4 for all SCP Ethernet panels in the system.
Connecting the panel to the terminal
In order to run the pcon utility you must successfully connect the panel serial port to a terminal
or terminal emulator program on a PC. The physical connection is made by using a regular
9-pin-D serial cable. Connect the male connector of the cable to the SCP Ethernet panel and
the female connector to the terminal or PC. Set the terminal serial connection for 19200 baud,
with 8 data bits, no parity and one stop bit.
2-8 SCP Series • User’s Guide
Page 37

Panel Installation (Ethernet)
Using the pcon utility
At the terminal prompt, type in the pcon command as shown.
/> pcon
You will see the pcon commands listed as below and a new prompt.
USI Panel Config Commands:
IP <IP address> - set panel IP address
GATE <gateway address> - set gateway IP address*
MASK <IP net mask> - set IP net mask 255.255.255.0
HIP1 <host 1 IP address> - set controller 1 IP address**
HIP2 <host 2 IP address> - set controller 2 IP address (for redundancy)
ID <UNet node ID> - set unique panel node ID
NET <Net Address> - set network address XX.XXX.XXX.0
RESET - Reset the panel and apply the new settings
SHOW - display current settings
HELP - display this message
EXIT - exit program
Chapter 2
*Gateway is set up with the LAN gateway. If no LAN gateway exists, it should then be set to
the default of the IP address subnet and address 1.
ie: 192.168.221.1
The NET address generally contains the same subnet numbers as the panel IP, with the last
number set to zero.
**The Host address is the IP address of the SC3/SC4.
Note: SC3 control systems with redundant cards have two addresses and will need (2)
Host addresses.
SC4 chassis with redundant cards only contain (1) IP address.
When the SC4 is in control, the second host address should be set to 0.0.0.0.
Node address is the address that is used to re-program the panel from the Configurator
software, and must be unique with no other panels having the same number.
SCP Series • User’s Guide 2-9
Page 38

Installation
Note: Enter IP addresses and mask in the format nnn.nnn.nnn.nnn
Commands are not case sensitive.
cmd>
You must set the IP, GATE, MASK, HIP1, HIP2 and ID parameters correctly in order to use
the panel in the system. The IP, GATE and MASK values must be set for the panel to work on
your intranet. These values can be obtained from your network administrator. The IP address
must be a unique address for each device on the network.
Set the HIP1 and HIP2 parameters to the IP addresses of the SC-3 boards. If you are not using
a redundant controller then set the HIP2 value to 0.0.0.0.
The U-Net node ID must be set to a unique number between 1 and 254 inclusive. This number
must be different from all other Ethernet and U-Net panels.
As you set each parameter the settings will be saved and the current settings will be displayed.
When you are satisfied that all are correct, type in the RESET command. This will reboot the
panel and make the current settings active. After a reset you must run pcon again to edit the
network parameters.
Connecting the panel to the network
After resetting the panel, as the panel is booting up, the Ethernet cable can be connected. The
LINK light on the back of the panel will light up if the connection is good. Within a few
seconds the panel should be active. It can then be reprogrammed via RMS and used to control
the router as configured on the SC-3. Refer to the SC-3 user documentation for further
information on configuring the controller for U-Net functionality.
If the panel does not seem to work properly, make sure the LINK light is illuminated, run the
pcon utility and use the SHOW command to verify the network parameters. Verify that the
controller is configured to work with SCP panels. You can also use the ping command to verify
that the network connection to the controller is good. At the terminal prompt enter the ping
command and the IP address of the controller as shown below. When entering the command,
replace the IP address below with the IP address of your controller.
/> ping 192.168.4.221
If the panel cannot “ping” the controller successfully, it will not be able to work in the system.
Contact your network administrator to troubles.
2-10 SCP Series • User’s Guide
Page 39
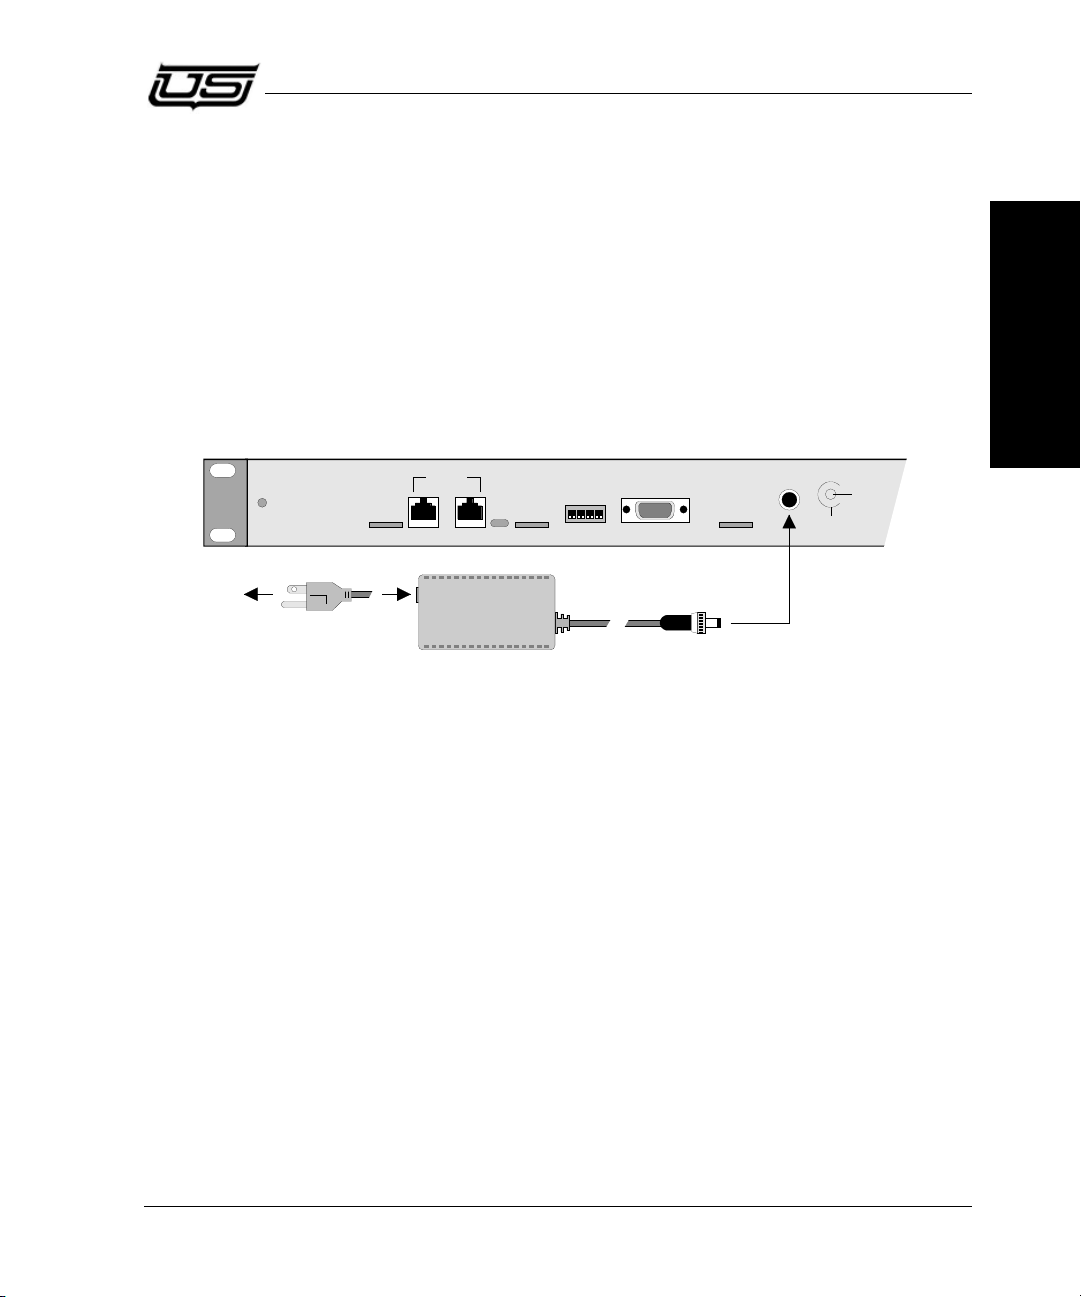
Connecting and Disconnecting Power
1
0
U-NET
D
A
T
A
T
S
E
N
STATION
NUMBER
EXPANSION
POWER
GND
+5VDC
AC Line Cord
Locking Ring
Connector
Universal
Power Supply
AC
Source
Each SCP control panel requires a wall-mounted Universal Power Supply that connects to the
panel with a DC power cord and locking connector. One Universal Power Supply is provided
with each control panel. The length of the DC cord is 5 feet
Note: The Universal Power Supply and the associated DC Power Cord is typically the
only method by which you can connect and disconnect SCP control panel
power. The control panel does not have a power switch, and it is intended to be
left on indefinitely. If the Universal Power Supply includes a switch, it can be
used to connect and disconnect power only if required.
Use the following diagram for reference throughout the procedure:
Connecting and Disconnecting Power
Chapter 2
Figure 0-6. Universal Power Supply Connection
Use the following steps to connect control panel power:
1. Connect the female end of the supplied AC Power Cord to the Universal Power Supply.
Note: Universal Power Supplies may differ depending upon the model of SCP panel in
use. Some supplies may have the AC cord permanently connected. Be sure to
check how your specific model is configured.
2. Connect the male end of the AC Power Cord to a stable power source.
3. On the rear of each control panel, locate the Power connector.
4. Connect the supply’s DC cable to the SCP panel’s DC Power connector, and secure the
locking ring finger tight. If the AC source’s breaker is on, the panel should immediately
power up.
Note: Depending upon the model, some Universal Power Supplies may include a
small Power Switch. Be sure to check how your specific model is configured. If
this is the case, toggle the switch to the ON position to enable panel power.
SCP Series • User’s Guide 2-11
Page 40

Installation
Repeat this procedure for each control panel in your system.
Use the following steps to disconnect control panel power (only if required):
1. On the rear of each control panel, locate the Power connector.
2. If the panel’s Universal Power Supply does not have a switch, unscrew the locking ring,
and carefully disconnect the supply’s DC cable.
3. If the panel’s Universal Power Supply does include a switch, simply toggle the switch to
the OFF position.
Repeat this procedure for each control panel in your system.
Refer to Appendix A for connector pinout diagrams, and details on individual SCP panel
power supplies. Refer to Appendix B for instructions on opening a panel to change the PROM,
if required.
2-12 SCP Series • User’s Guide
Page 41

In This Chapter
This chapter provides setup and operating instructions for the SCP 2/8, an eight level, full
source, dual destination XY panel. The following topics are discussed:
• About the SCP 2/8 . . . . . . . . . . . . . . . . . . . . . . . . . . . . . . . . . . . . . . page 3-2
In This Chapter
3
SCP 2/8 Operations
Chapter 3
• Displaying Level Status . . . . . . . . . . . . . . . . . . . . . . . . . . . . . . . . . . page 3-5
• Defaulting the Level Select Buttons. . . . . . . . . . . . . . . . . . . . . . . . . page 3-6
• Performing an All-follow Take . . . . . . . . . . . . . . . . . . . . . . . . . . . . page 3-6
• Performing a Breakaway Take . . . . . . . . . . . . . . . . . . . . . . . . . . . . . page 3-8
• Using the Protect Mode . . . . . . . . . . . . . . . . . . . . . . . . . . . . . . . . . page 3-14
• Changing Attributes . . . . . . . . . . . . . . . . . . . . . . . . . . . . . . . . . . . . page 3-19
• Using the Chop Mode. . . . . . . . . . . . . . . . . . . . . . . . . . . . . . . . . . . page 3-21
• Monitor Matrix Mode. . . . . . . . . . . . . . . . . . . . . . . . . . . . . . . . . . . page 3-23
• Miscellaneous Panel Modes . . . . . . . . . . . . . . . . . . . . . . . . . . . . . . page 3-25
• General Panel Notes . . . . . . . . . . . . . . . . . . . . . . . . . . . . . . . . . . . . page 3-27
SCP Series • User’s Guide 3-1
Page 42
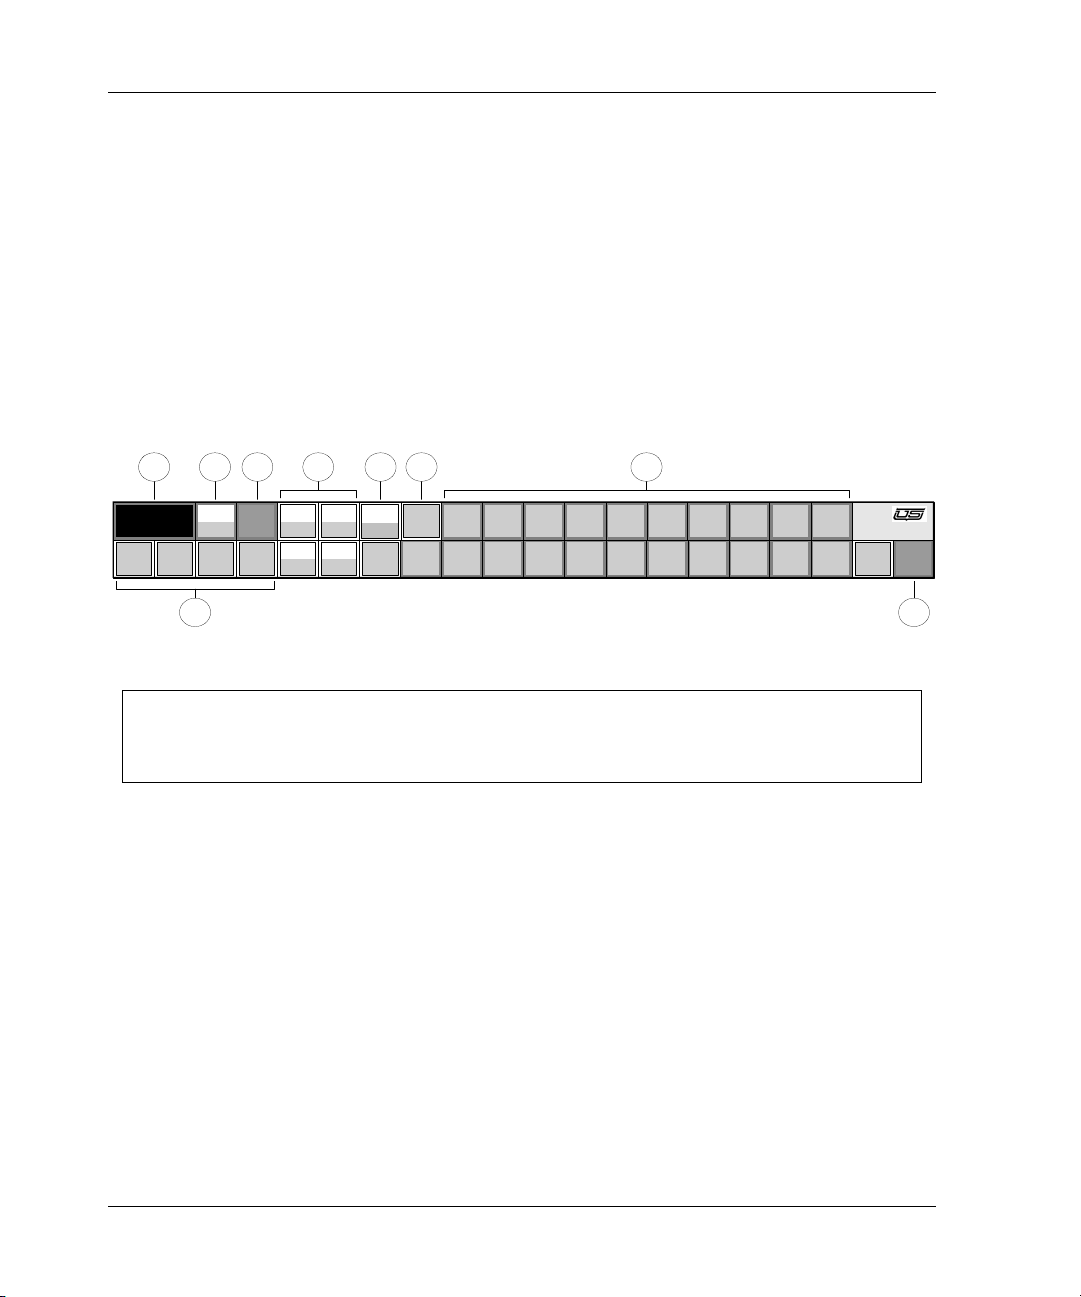
SCP 2/8 Operations
SCP - 2 / 8
Source
SRC 001
Attribute
Protect
Source1Source2Source3Source
4
Level 1
Level 5
Level 2
Level 7
Level 3
Level 6
Level 4
Level 8
Take
SrcGrp 11SrcGrp 22SrcGrp 3
3
SrcGrp 6
A
SrcGrp 10SrcGrp44SrcGrp 5
5
SrcGrp 11
6
SrcGrp 7
B
SrcGrp20SrcGrp 127SrcGrp138SrcGrp 14
9
SrcGrp 8CSrcGrp 9
SrcGrp 18
F
SrcGrp15
0
SrcGrp 17
E
SrcGrp 16
D
SrcGrp 19
Dest 1
Dest 2
1 2 3
4
5 7 8
9
6
Shif t 1-4
Shift
5-8
About the SCP 2/8
The SCP 2/8 is a 16 level XY panel that is designed to operate as a single or dual bus control
panel. Only eight of the 16 levels can be broken away. Full access is provided to all sources
and up to two user-defined destinations. Refer to the “SCP 2/8” section on page 1-7 for a brief
description of the panel’s main features.
The figure below illustrates the main buttons and sections of the SCP 2/8 panel.
Note: For simplicity, numeric labels are shown on the level, source, destination and
group buttons below. Your labels will differ depending upon the level, source,
destination and group assignments in your facility. As shown below, buttons
without labels have no functions assigned.
Figure 0-1. SCP 2/8 Panel
3-2 SCP Series • User’s Guide
1) Source Display 4) Direct Source Select Section 7) Attribute Button
2) Destination Select Button 5) Level Select Section 8) Group Select Section
3) Protect Button 6) Level Shift Button 9) Take Button
1) Source Display
The panel’s multi-function Source Display is an eight-segment LED readout that shows
the current source associated with a selected level. The buttons in the Level Select Section
(plus the Level Shift button) determine which specific level is shown. The display is also
used for all-follow and breakaway assignments, attribute selection, protect mode
selection, and chop mode rate selection.
2) Destination Select Button
The Destination Select button switches between the two assigned destinations. Each
destination is programmed (assigned) from the routing switcher’s RMS tool (Router
Management System). The lit half of the button indicates the selected destination.
Note: When you press the Destination Select button, the selected source (and the
associated level) may change accordingly.
Page 43
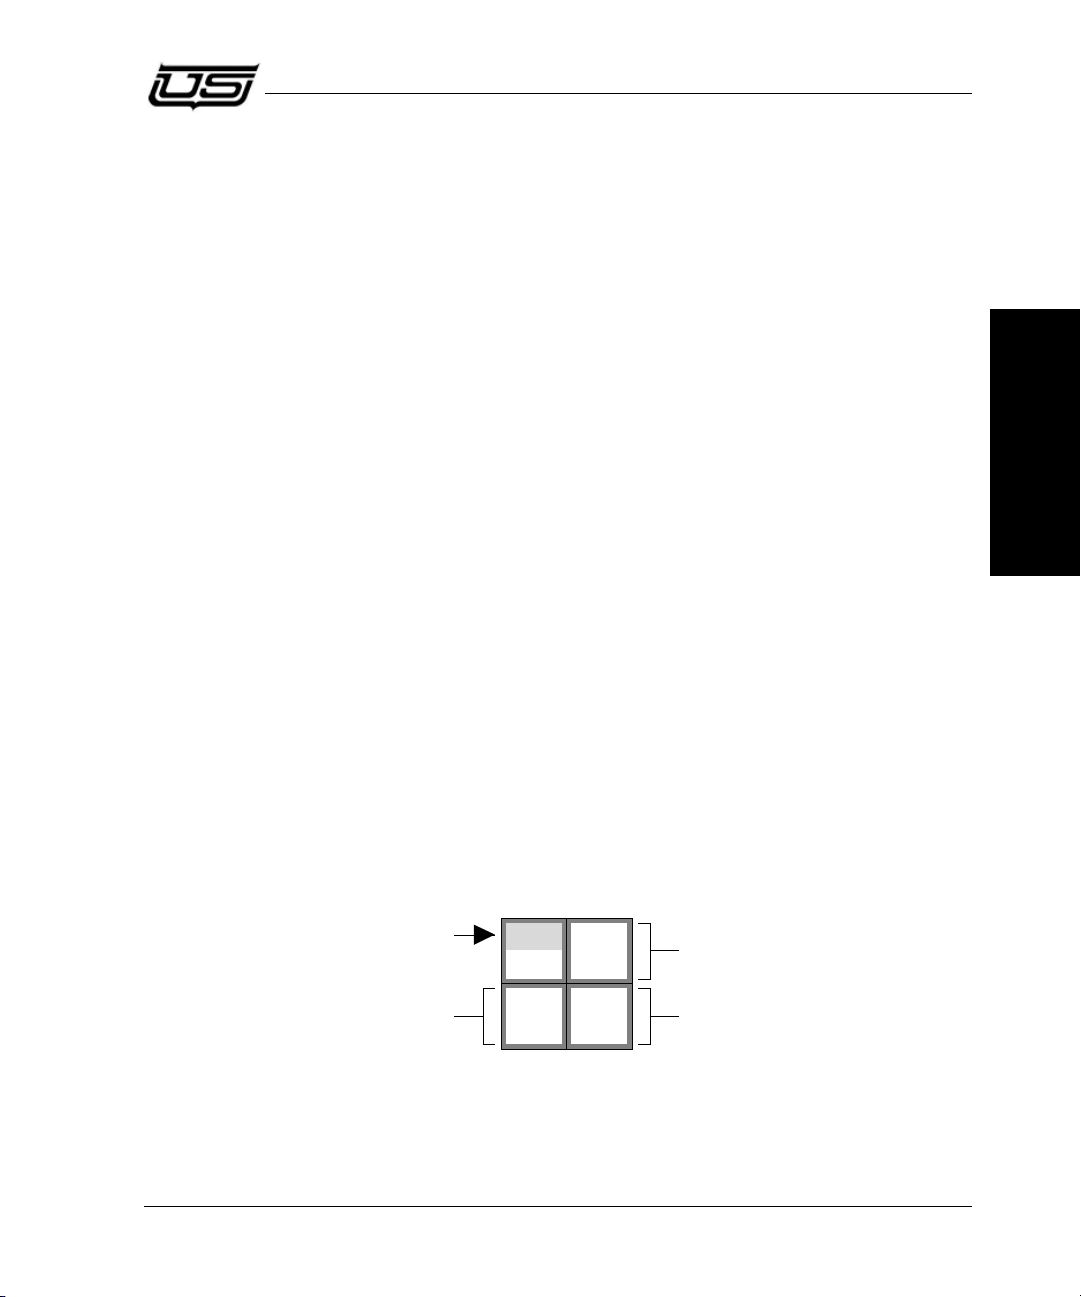
About the SCP 2/8
Level 1
Level 5
Level 2
Level 6
Level 3
Level 7
Level 4
Level 8
Blinking
Lit
Lit
Lit
3) Protect Button
The Protect button, when lit Red, indicates that either a Lock or a Protect has been
enabled for the selected destination.
•In the “Protect” mode, all other panels are prevented from routing sources to a
destination — or to a selected level of a destination.
•In the “Lock” mode, all panels (including the current panel) are prevented from
routing sources to a destination — or to a selected level of a particular destination.
When you press Protect, the button blinks and allows you to modify the current mode.
Refer to the “Displaying Level Status” section on page 3-5 for operating instructions.
4) Direct Source Select Section
Each of the four buttons in the Direct Source Select Section can be pre-programmed with
a favorite (or frequently used) source. By pressing a Direct Source button, the source is
“taken” and immediately routed to the selected destination, level information (for the
selected level) appears in the Source Display, and the button lights to indicate that a
direct source is in use.
Note: The button will light only if all valid levels match the selected source in an
all-follow take situation. If a Direct Source button is used in a breakaway
take, the button will not light after Take is pressed, because all valid levels are
now different.
Chapter 3
On the SCP 2/8 panel, each of the four buttons is dedicated to its assigned source, but any
of the available sources on the entire routing switcher can be assigned. Each Direct
Source button is programmed from the routing switcher’s RMS tool.
5) Level Select Section
Each of the four buttons in the Level Select Section is divided in half, and each half can
be lit independently. Only one of the eight half-button segments can be blinking, but any
number of segments can be lit steadily.
Figure 0-2. Typical Level Select Section Display
SCP Series • User’s Guide 3-3
Page 44

SCP 2/8 Operations
The top half of a button displays its level 1-4 assignment, while the bottom half displays
the button’s level 5-8 assignment (for example, Video, Audio1, Audio2, Timecode, etc.).
The Level Shift button switches between the two groups of levels (1-4 and 5-8).
The buttons in the Level Select Section perform two functions:
• Status Display
• Breakaway Selection
6) Level Shift Button
The Level Shift button switches the buttons in the Level Select Section between the two
groups of levels (1-4 and 5-8). The lit portion of the Level Shift button indicates the
levels that can currently be selected — for either checking status or including a level in a
pending breakaway take.
In the “all-follow” and “breakaway” modes, the blinking button is associated with the
source shown in the Source Display. This association tells you that the indicated
level from the indicated source is currently connected to the selected destination. See
the “Displaying Level Status” section on page 3-5 for details.
In the “breakaway” mode, the buttons allow you to select the level(s) that you want to
include in a pending breakaway take. A half-button segment that is lit steadily is
already included in the pending breakaway take selection. The blinking button
segment indicates the most recently selected level. Refer to the “Performing a
Breakaway Take” section on page 3-8 for more information.
7) Attribute Button
The Attribute button allows you to change various audio and video attributes of the
routing switcher’s output signal, and route those changes to the desired destination. For
example, by entering the Attribute Mode, you could mute analog audio on a particular
level, or change the digital video data rate. All attribute parameters must be pre-mapped
on the RMS. Refer to the “Changing Attributes” section on page 3-19 for instructions.
8) Group Select Section
The buttons in the Group Select Section allow you to select source “group” names and
extensions. A “group” represents a category of devices, and up to 20 source groups can be
programmed from the routing switcher’s RMS tool and used on the SCP 2/8 panel. Each
group can contain up to 1000 sources, providing you with a convenient and simple way to
address large numbers of devices.
For example, if your facility has 100 VTRs, you could select VTR 98 with two easy steps:
• Select the group name (VTR).
• Select the desired extension (98).
3-4 SCP Series • User’s Guide
Page 45
Displaying Level Status
SrcGrp 11SrcGrp 22SrcGrp 3
3
SrcGrp 6
A
SrcGrp 10SrcGr p 44SrcGrp 5
5
SrcGrp 11
6
SrcGrp 7
B
SrcGrp 20SrcGrp 127SrcGrp 138SrcGrp 14
9
SrcGrp 8CSrcGrp 9
SrcGrp 18
F
SrcGrp 15
0
SrcGrp 17
E
SrcGrp 16
D
SrcGrp 19
Keypad
Take
The Group Select Section itself includes a keypad for entering extensions (up to three
digits) in the mnemonic mode, and for entering complete source and destination
identifications in the numeric mode).
Figure 0-3. Keypad Location
Note: The buttons marked A through F are also used for entering valid “letter”
extensions (if programmed as such from the RMS) such as VTR-23A.
9) Take B u tt o n
Press the Take button to conclude a pending procedure on the panel, such as an All-follow
take, a Breakaway take, an Attribute selection or a Protect take.
Figure 0-4. Take Button
The button blinks to indicate that a procedure is pending.
Displaying Level Status
Whether your panel is in “breakaway” or “all-follow” mode, the four buttons in the Level
Select Section provide an easy way to check which levels from which sources are currently
being routed to the selected destination.
Use the following steps to display level status:
1. Press Level Shift to select the group of levels that you wish to “status” (either 1-4 or 5-8).
The lit portion of the button indicates the selected group.
2. In the Level Select Section, press the desired level button. In the Source Display, the
source currently associated with that level appears. This level-to-source “pairing”
indicates that the selected level from the displayed source is currently routed to the
selected destination.
Chapter 3
3. Press another Level Select button to check its status, or repeat the procedure from step 1
to select a level in the opposite group. Only one level can display status at a time.
SCP Series • User’s Guide 3-5
Page 46

SCP 2/8 Operations
Please note:
• The level mapping of each panel can differ, depending upon how each panel is configured
from the RMS. For example, if levels 7 and 8 are invalid on the particular destination
device, those levels may be rendered inactive on your panel, and thus would not light.
• After an all-follow take is performed, the status of all levels will be identical. After a
breakaway take is performed, the status of each level may differ.
Defaulting the Level Select Buttons
In preparation for an all-follow or a breakaway take, the Level Select Section buttons should
be returned to the default “all-follow” mode. This can be performed with two simple checks:
• Press the blinking Level Select button. If all Level Select buttons turn off and the
button segment that you pressed blinks, your panel was already in the all-follow mode. To
return to the mode, press the blinking Level Select button again.
• Press the blinking Level Select button. If the button segment turns off and another
button segment begins to blink, you have just cancelled one breakaway level. Continue
pressing the blinking Level Select button segment, and if necessary, press Level Shift
to switch level groups. When all button segments light (and the button that you pressed
continues to blink), the default “all-follow” mode has been restored.
Performing an All-follow Take
An “all-follow take” is one in which all assigned signal levels switch simultaneously, and no
signal levels are broken away. There are two ways to perform an all-follow take on the panel:
• All-follow with the Direct Source Select buttons
• All-follow with the Group Select buttons
Each selection method is described below.
All-follow with the Direct Source Select Buttons
Use the following steps to perform an all-follow take using the Direct Source Select
buttons.
1. Ensure that the desired “direct” sources are pre-programmed from the RMS, and that all
Direct Source Select buttons are properly labeled.
2. Ensure that the buttons in the Level Select Section are in the default “all-follow” mode.
Refer to the “Defaulting the Level Select Buttons” section on page 3-6 for instructions.
3-6 SCP Series • User’s Guide
Page 47
Performing an All-follow Take
Source1Source2Source3Source
4
VTR-- ?
Source
3. Press the Destination Select button to choose the desired destination.
4. Press the desired Direct Source Select button.
Figure 0-5. Direct Source Select Section
The button lights, the source is automatically selected, and its name appears in the
Source Display. There is no need to press Take.
Once the all-follow take has been performed, all buttons in the Level Select Section will status
the source that was just chosen.
All-follow with the Group Select Buttons
Use the following steps to perform an all-follow take using the Group Select buttons.
1. Ensure that the desired source “groups” are programmed from the RMS, and that all panel
group buttons are properly labeled.
2. Ensure that the buttons in the Level Select Section are in the default “all-follow” mode.
Refer to the “Defaulting the Level Select Buttons” section on page 3-6 for instructions.
3. Press the Destination Select button to choose the desired destination.
4. In the Group Select Section, press the button for the desired group of devices (for
example, EDIT, VTR, MON, CAM, etc.). In the Source Display, the “question mark”
readout appears, with the selected group name showing as the prefix.
Figure 0-6. Source “Question Mark” Display, Awaiting Extension
5. Using the keypad buttons (within the Group Select Section), enter the extension of the
desired device. One, two, or three digits can be selected, and leading zeros do not need to
be entered. Once the first digit of the extension is entered, the Take button blinks to let
you know that a “take” is pending.
Note: The first press of a Group Select button chooses the group. After the first press,
the keypad buttons activate, allowing you to choose the extension with the
second, third and fourth presses. If you press a keypad button a fifth time, the
cycle repeats and a group name is selected again (as if it was the first press).
Chapter 3
SCP Series • User’s Guide 3-7
Page 48

SCP 2/8 Operations
6. With a valid extension entered, press Take to conclude the procedure. The Take button
stops blinking and the new source assignment appears in the Source Display on all
valid levels.
Refer to the “Cancelling an All-follow Take” section on page 3-8 for additional important
information.
Cancelling an All-follow Take
To cancel the all-follow take procedure, press any unused or invalid button (such as the blank
button below Attribute) at any time prior to pressing Take. This safely cancels the data entry
procedure and returns the Source Display back to its previous assignment.
Note: If you press Take but the source ID is invalid, the Take button stops blinking
and all levels revert to their previous assignments — without taking the new
source.
Performing a Breakaway Take
A “breakaway take” is a special Take in which a subset of all available signal levels are sent to
a destination. The following topics are discussed in this section:
• Breaking away one level from one source
• Breaking away multiple levels from one source
• Breakaway with the Direct Source Select Buttons
• Breaking away multiple levels from different sources
• Breakaway take, starting in all-follow mode
Breaking Away One Level From One Source
Use the following steps to break away one level from one source.
1. Ensure that the desired source “groups” are programmed from the RMS, and that all panel
group buttons are properly labeled.
2. Ensure that the buttons in the Level Select Section are in the default “all-follow” mode.
Refer to the “Defaulting the Level Select Buttons” section on page 3-6 for instructions.
3. Press the Destination Select button to choose the desired destination.
3-8 SCP Series • User’s Guide
Page 49
Performing a Breakaway Take
Source
4. Press the Level Shift button to choose the group (1-4 or 5-8) that contains the level that
you want to break away. When breaking away just one level, its easier to choose the group
prior to entering the breakaway mode.
5. In the Level Select Section, press the blinking button. All Level Select buttons turn off
and the button that you pressed blinks. In the Source Display, the “dots” display appears
— indicating that the level is now awaiting data.
Figure 0-7. Source “Dots” Display, Awaiting Data Entry
The Level Select Section is now in the breakaway mode.
~ If the blinking button is the level that you want to break away, no further action is
necessary in the Level Select Section. Please continue with step 6 below.
~ If the blinking button is not the level that you want to break away, press the Level
Select button for the desired level. The button blinks and the previously blinking
button lights steadily. Press the steadily lit button to toggle it off, leaving only the
desired level button blinking.
6. In the Group Select Section, press the button for the desired group of devices (for
example, EDIT, VTR, MON, CAM, etc.). In the Source Display, the “question mark”
readout appears with the selected group name written as the prefix.
Chapter 3
7. Using the keypad buttons (within the Group Select Section), enter the extension of the
desired source device — up to three digits. Once the first digit of the extension is entered,
the Take button blinks to let you know that a “take” is pending.
Note: Remember that the first press of a Group Select button chooses the group, and
the next three keypad presses select the extension. The cycle repeats if you
press a keypad button again.
8. With a valid extension entered, press Take to conclude the procedure. The Take button
stops blinking, the buttons in the Level Select Section return to the default “all-follow”
mode, the single source level is routed to the destination, and new status is shown in the
Source Display for the selected level.
Refer to the “Cancelling a Breakaway Take” section on page 3-13 for additional important
information.
SCP Series • User’s Guide 3-9
Page 50
SCP 2/8 Operations
Lit
Off
Level 1 Level 3
Level 5
Level 7
Level 2
Level 6
Level 4
Level 8
Blinking
Off
Breaking Away Multiple Levels From One Source
Use the following steps to break away multiple levels from one source.
1. Ensure that the desired source “groups” are programmed from the RMS, and that all panel
group buttons are properly labeled.
2. Ensure that the buttons in the Level Select Section are in the default “all-follow” mode.
Refer to the “Defaulting the Level Select Buttons” section on page 3-6 for instructions.
3. Press the Destination Select button to choose the desired destination.
4. Press the Level Shift button to choose the group (1-4 or 5-8) that contains the first level
that you want to break away.
5. In the Level Select Section, press the blinking button. All Level Select buttons turn off
and the button that you pressed blinks. In the Source Display, the “dots” display appears
— indicating that the level is now awaiting data. The section is now in the breakaway
mode.
~ If the blinking button is one of the levels that you want to break away, please continue
~ If the blinking button is not one of the multiple levels that you want to break away,
with step 6.
press the Level Select button for the desired level. The button blinks and the
previously blinking button lights steadily. Press the steadily lit button to toggle it off,
leaving only the desired level button blinking.
6. To add additional levels, press each desired Level Select button to add it to the
breakaway group. Each new button that you press blinks, and the previously blinking
button lights steadily. As required, use the Level Shift button to change groups.
In the sample breakaway selection below, levels 1 and 3 are pending for a breakaway take,
and level 3 was the last button pressed (because it is blinking).
Figure 0-8. Sample Breakaway Mode Display
Note: You can remove levels from the breakaway group simply by toggling Level
Select buttons. Pressing a steadily lit button toggles it off. Pressing the blinking
button toggles it off, and causes the last-selected button to blink.
3-10 SCP Series • User’s Guide
Page 51

Performing a Breakaway Take
7. In the Group Select Section, press the button for the desired group of devices (for
example, EDIT, VTR, MON, CAM, etc.). In the Source Display, the “question mark”
readout appears with the selected group name written as the prefix.
8. Using the keypad buttons, enter the extension of the desired source device — up to three
digits. Once the first digit of the extension is entered, the Take button blinks to let you
know that a “take” is pending.
Note: Remember that the first press of a Group Select button chooses the group, and
the next three keypad presses select the extension. The cycle repeats if you
press a keypad button again.
9. With a valid extension entered, press Take to conclude the procedure. The Take button
stops blinking, the buttons in the Level Select Section return to the “all-follow” mode, all
selected source levels are routed to the destination, and new status is available in the
Source Display for each selected level.
Refer to the “Cancelling a Breakaway Take” section on page 3-13 for more information.
Breakaway with the Direct Source Select Buttons
The four Direct Source Select buttons can be used to simplify the breakaway take
procedure as follows.
Chapter 3
1. Ensure that the desired “direct” sources are pre-programmed from the RMS, and that all
Direct Source Select buttons are properly labeled.
2. Ensure that the buttons in the Level Select Section are in the default “all-follow” mode.
Refer to the “Defaulting the Level Select Buttons” section on page 3-6 for instructions.
3. Press the Destination Select button to choose the desired destination.
4. Using the Level Shift button in conjunction with the buttons in the Level Select Section,
choose the levels that you want to break away. Refer to the “Breaking Away Multiple
Levels From One Source” section on page 3-10 for more detailed instructions.
Note: You can select and deselect levels as needed — you can even toggle off a
previously “enabled” level. However, if you toggle off the last remaining level,
you will exit the breakaway selection mode and return to previous status.
5. Press the desired Direct Source Select button. The source is automatically routed to
the enabled levels, and new status is available in the Source Display for each selected
level. There is no need to press Take .
Refer to the “Cancelling a Breakaway Take” section on page 3-13 for additional information.
SCP Series • User’s Guide 3-11
Page 52

SCP 2/8 Operations
Breaking Away Multiple Levels from Different Sources
Use the following steps to break away two or more levels from different sources.
1. Ensure that the desired source “groups” are programmed from the RMS, and that all panel
group buttons are properly labeled.
2. Ensure that the buttons in the Level Select Section are in the default “all-follow” mode.
Refer to the “Defaulting the Level Select Buttons” section on page 3-6 for instructions.
3. Press the Destination Select button to choose the desired destination.
4. Using the Level Shift button in conjunction with the buttons in the Level Select Section,
choose the levels that you want to break away from the current source. Refer to the
“Breaking Away Multiple Levels From One Source” section on page 3-10 for more
detailed instructions on selecting levels.
Note: You can select and deselect levels as needed — you can even toggle off a
5. In the Group Select Section, press the button for the desired group of devices (for
example, EDIT, VTR, MON, CAM, etc.). In the Source Display, the “question mark”
readout appears with the selected group name written as the prefix.
previously “enabled” level. However, if you toggle off the last remaining level,
you will exit the breakaway selection mode and return to previous status.
6. Using the keypad buttons, enter the extension of the desired source — up to three digits.
7. Once the first source has been entered for the first set of levels, repeat steps 4 through 6 (as
often as required) for each additional set of levels and sources that you want to add to the
multiple breakaway. You can breakaway up to 8 levels from 8 different sources.
Note: If you change your mind, pressing a blinking Level Select button (for the first
time) returns that level to the “dots” display, allowing you to re-enter a source.
Pressing the button while the “dots” display is active toggles the level off.
8. With all valid sources entered, press Take to conclude the procedure. The Ta k e button
stops blinking, the buttons in the Level Select Section return to the “all-follow” mode, all
selected source/level combinations are routed to the destination, and new status is
available in the Source Display for each selected level.
Refer to the “Cancelling a Breakaway Take” section on page 3-13 for more information.
3-12 SCP Series • User’s Guide
Page 53

Performing a Breakaway Take
Breakaway Take (Starting in All-Follow Mode)
Use the following steps to start a breakaway take in the “all-follow” mode, and then select your
desired breakaway sources as required.
1. Ensure that the desired source “groups” are programmed from the RMS, and that all panel
group buttons are properly labeled.
2. Ensure that the buttons in the Level Select Section are in the default “all-follow” mode.
Refer to the “Defaulting the Level Select Buttons” section on page 3-6 for instructions.
3. Press the Destination Select button to choose the desired destination.
4. In the Group Select Section, select the all-follow source. Press the button for the desired
group of devices (for example, EDIT, VTR, MON, CAM, etc.). In the Source Display,
the “question mark” readout appears, with the selected group name showing as the prefix.
5. Using the keypad buttons, enter the extension of the desired device. One, two, or three
digits can be selected, and leading zeros do not need to be entered.
6. Using the Level Shift button in conjunction with the Level Select Section buttons,
choose the levels that you want to break away. See the “Breaking Away Multiple Levels
From One Source” section on page 3-10 for detailed instructions on selecting levels.
7. In the Group Select Section, select the breakaway source by pressing the button for the
desired group of devices. In the Source Display, the “question mark” readout appears
with the selected group name written as the prefix.
8. Using the keypad buttons, enter the extension of the desired breakaway source device.
9. With a valid extension entered, press Take to conclude the procedure.
Refer to the “Cancelling a Breakaway Take” section on page 3-13 for additional information.
Note: You can also break away multiple levels and sources. See the “Breaking Away
Multiple Levels from Different Sources” section on page 3-12 for details.
Cancelling a Breakaway Take
To cancel the breakaway take procedure, two methods are available:
• Press any unused or invalid button (such as the blank button below Attribute) at any
time prior to pressing Take, or prior to pressing a Direct Source Select button.
Chapter 3
• Toggle all blinking Level Select buttons off.
Both methods safely cancel the data entry procedure.
SCP Series • User’s Guide 3-13
Page 54

SCP 2/8 Operations
LOCKOTHR
Source
LOCKALL
Source
CLRLOCK
Source
Using the Protect Mode
Pressing the red Protect button activates the “Protect Mode” and causes the button to blink
— indicating that the mode is active. In this mode, you can set a Lock or a Protect, or you can
clear either of the two modes (if appropriate for the current panel).
Note: Because the Protect button by itself does not differentiate between a Protect or
a Lock, you can enter the mode to verify what type of protect is enabled, and on
what levels.
In the Protect Mode, you can perform one of three functions to the selected destination:
• Setting a “Protect” prevents all other panels from routing sources to a destination — or to
a selected level. Only the current panel (that is, the one that originally set the Protect) can
perform takes, and only the current panel (and the RMS) can clear the Protect.
The Protect mode is indicated by the “LOCKOTHR” label in the Source Display.
Figure 0-9. Protect Mode Source Display Label
• Setting a “Lock” prevents all panels (including the current panel) from routing sources to
a destination — or to a selected level of a particular destination. Any panel (including the
RMS) can clear the Lock.
The Lock mode is indicated by the “LOCKALL” label in the Source Display.
Figure 0-10. Lock Mode Source Display Label
• Setting a “Clear” removes either the enabled Lock or Protect. When you set the Clear
mode, it is indicated by the “CLRLOCK” label in the Source Display.
Figure 0-11. Clear Mode Source Display Label
Each procedure is discussed in detail in the following sections.
3-14 SCP Series • User’s Guide
Page 55
Using the Protect Mode
Keypad
Buttons
Source
Set Protect
SrcGrp 11SrcGrp 22SrcGrp 33SrcGr p 44SrcGrp 5
5
SrcGrp 116SrcGrp 127SrcGrp 138SrcGrp 149SrcGrp 15
0
Setting a Protect
Use the following steps to set a Protect for a destination. This mode prevents all other panels
from routing sources to a destination or to a selected level.
1. Ensure that the buttons in the Level Select Section are in the default “all-follow” mode.
Refer to the “Defaulting the Level Select Buttons” section on page 3-6 for instructions.
2. Press the Destination Select button to choose the destination on which you want to set
or change the Protect.
3. Press the red Protect button. The button blinks to indicate that the Protect Mode is
active. In the Source Display, one of two labels will appear:
• If there are no Protects or Locks currently set, the display will be blank.
•If a Protect or a Lock is currently set, the appropriate label will appear.
4. If you want to set a Protect for all levels, please continue with step 5.
If you want to set a Protect on selected levels, use the Level Shift button in conjunction
with the buttons in the Level Select Section to choose the levels that you want to select.
Refer to the “Breaking Away Multiple Levels From One Source” section on page 3-10
for more detailed instructions on selecting levels. The “dots” display appears.
Chapter 3
5. Press Keypad Button 1 to set the Protect mode for all levels, or for the selected levels.
Figure 0-12. Keypad “Set Protect” Button Location
In the Source Display, the “LOCKOTHR” label appears.
6. Press Take to send the new Protect mode to the selected destination.
7. To exit the Protect Mode, press the blinking Protect button. The button will remain lit if
the current destination has a Protect or a Lock enabled.
With the Protect mode set, please note:
• All other panels are prevented from routing sources to the destination.
• Only the current panel (the one that originally set the Protect) can perform takes.
SCP Series • User’s Guide 3-15
Page 56
SCP 2/8 Operations
Keypad
Buttons
Source
Set Lock
SrcGrp 11SrcGrp 22SrcGrp 33SrcGr p 44SrcGrp 5
5
SrcGrp 116SrcGrp 127SrcGrp 138SrcGrp 149SrcGrp 15
0
• Only the current panel (and the RMS) can clear the Protect.
Refer to the “Cancelling a Protect Mode Selection” section on page 3-19 for additional
important information.
Setting a Lock
Use the following steps to set a Lock for a particular destination. This mode prevents all
panels (including the current panel) from routing sources to a destination.
1. Ensure that the buttons in the Level Select Section are in the default “all-follow” mode.
Refer to the “Defaulting the Level Select Buttons” section on page 3-6 for instructions.
2. Press the Destination Select button to choose the destination on which you want to set
or change the Lock.
3. Press the red Protect button. The button blinks to indicate that the Protect Mode is
active. In the Source Display, one of two labels will appear:
• If there are no Protects or Locks currently set, the display will be blank.
•If a Protect or a Lock is currently set, the appropriate label will appear.
4. If you want to set a Lock for all levels, please continue with step 5.
If you want to set a Lock on selected levels, use the Level Shift button in conjunction
with the buttons in the Level Select Section to choose the desired levels. The “dots”
display appears.
5. Press Keypad Button 2 to set the Lock mode for all levels, or for the selected levels.
Figure 0-13. Keypad “Set Lock” Button Location
In the Source Display, the “LOCKALL” label appears.
6. Press Take to send the new Lock mode to the selected destination.
7. To exit the Protect Mode, press the blinking Protect button. The button will remain lit if
the current destination has a Protect or a Lock enabled.
3-16 SCP Series • User’s Guide
Page 57
Using the Protect Mode
Keypad
Buttons
Source
Clear
SrcGrp 11SrcGrp 22SrcGrp 33SrcGr p 44SrcGrp 5
5
SrcGrp 116SrcGrp 127SrcGrp 138SrcGrp 149SrcGrp 15
0
With the Lock mode set, please note:
• All panels (including the current one) are prevented from routing sources to the
destination.
• All panels (and the RMS) can clear the Lock.
Refer to the “Cancelling a Protect Mode Selection” section on page 3-19 for additional
important information.
Clearing a Lock or Protect
The Lock and Protect modes can each be cleared (removed) entirely, or selected levels can be
cleared individually. Note that if the selected destination has a Protect enabled, only the
current panel (the one that originally set the Protect) can clear it. If the selected destination has
a Lock enabled, any panel can clear it.
Use the following steps to clear a Lock or a Protect:
1. Ensure that the buttons in the Level Select Section are in the default “all-follow” mode.
Refer to the “Defaulting the Level Select Buttons” section on page 3-6 for instructions.
2. Press the Destination Select button to choose the destination on which you want to
clear the Lock or Protect. Remember that you must be working from the panel that
originally set the Protect in order to clear it.
Chapter 3
3. Press the red Protect button. The button blinks to indicate that the Protect Mode is
active. In the Source Display, the appropriate Lock or Protect label appears.
4. To clear all levels, please continue with step 5.
To clear selected levels, use the Level Shift button in conjunction with the buttons in the
Level Select Section to choose the levels that you want to clear.
5. Press Keypad Button 3 to set the Clear mode for all levels, or for the selected levels.
Figure 0-14. Keypad “Clear Lock” Button Location
In the Source Display, the “CLRLOCK” label appears.
6. Press Take to send the Clear mode to the selected destination.
SCP Series • User’s Guide 3-17
Page 58
SCP 2/8 Operations
Source1Source2Source3Source
4
Direct Source
Select Buttons
Source
Clear
Set Lock
Set Protect
7. To exit the Protect Mode, press the blinking Protect button. The button will remain lit if
the current destination has a Protect or a Lock enabled.
Refer to the “Cancelling a Protect Mode Selection” section on page 3-19 for additional
important information.
Using the Direct Protect Mode
As an easy shortcut, you can use several buttons in the Direct Source Select Section to set any
of the three Protect modes.
1. Ensure that the buttons in the Level Select Section are in the default “all-follow” mode.
Refer to the “Defaulting the Level Select Buttons” section on page 3-6 for instructions.
2. Press the Destination Select button to choose the desired destination.
3. Press the red Protect button. The button blinks to indicate that the Protect Mode is
active. In the Source Display, one of two labels will appear:
• If there are no Protects or Locks currently set, the display will be blank.
•If a Protect or a Lock is currently set, the appropriate label appears.
4. In the Direct Source Select Section (with Protect Mode enabled), the functions of the
first three buttons are changed as follows:
•Press Direct Source Select Button 1 to set a Protect.
•Press Direct Source Select Button 2 to set a Lock.
•Press Direct Source Select Button 3 to set a Clear.
The figure below illustrates the button functions.
Figure 0-15. Direct Source Select Button Functions in Protect Mode
5. To exit the Protect Mode, press the blinking Protect button. There is no need to press
Take using the “direct” method.
Refer to the “Cancelling a Protect Mode Selection” section on page 3-19 for additional
important information.
3-18 SCP Series • User’s Guide
Page 59

Cancelling a Protect Mode Selection
If you need to cancel a Protect Mode procedure, two methods are available:
• If any “breakaway” Protect Mode selections are pending, press any unused or invalid
button (such as the blank button below Attribute) at any time prior to pressing Take.
Then press the blinking Protect button to exit the mode.
• If there are no “breakaway” Protect Mode selections pending, press the blinking
Protect button to exit the mode.
Protect Mode Notes
Please note the following important point regarding the Protect Mode in general.
•When the Protect Mode is enabled and you are selecting between the three modes (prior
to pressing Tak e ), you can not switch directly between Lock and Protect. You must first
clear the Lock or Protect by sending a Clear take, and then choose the alternate mode.
Changing Attributes
The Attribute Mode allows you to change various audio and video attributes of the routing
switcher’s output signals, and route those changes to the desired destination with a Ta k e.
Attribute changes are performed in “breakaway” fashion to the target signal levels only. For
example, changes in audio attributes would only be performed on selected audio levels, while
changes to the video data rate would only be performed to the digital video level.
Changing Attributes
Chapter 3
Note: Audio attributes always apply to analog stereo pairs, as pre-defined in the RMS.
For example, if Level 1 is defined as Channel 1 Left and Level 2 is defined as
Channel 2 Right in the RMS (and both are defined as a stereo pair), when an
attribute change is made to either Level 1 or 2, the change may affect one or
both portions of the stereo pair. In addition, status will be displayed the same for
both levels, even if the attribute change was performed to one half of the stereo
pair only.
Use the following steps to change audio and video attributes.
1. Ensure that all stereo pairs are properly defined in the RMS.
2. Ensure that the buttons in the Level Select Section are in the default “all-follow” mode.
Refer to the “Defaulting the Level Select Buttons” section on page 3-6 for instructions.
3. Press the Destination Select button to choose the desired destination.
4. Press the Attribute button. The button blinks to show that the Attribute Mode is active.
SCP Series • User’s Guide 3-19
Page 60
SCP 2/8 Operations
5. Use the Level Shift button in conjunction with the buttons in the Level Select Section to
choose the levels on which you want to change attributes. The “dots” display appears.
6. Using keypad buttons 0 through 9 and buttons A through D, select the desired attributes
that you wish to change. The table below lists each selection. Note that the Attribute
Name column lists how each attribute appears in the Source Display.
Table 0-1. Attribute Selections
Keypad Button Attribute Name Description
0
1 SWAP Swaps audio left and right signals.
2 MIX Mixes left and right signals together, and
3 MONOLEFT Sends the left channel out both the left
4 MONORGHT Sends the right channel out both the left
5 INVTLEFT Inverts the phase of the left channel.
6 INVTRGHT Inverts the phase of the right channel.
7 MUTELEFT Mutes the left channel, and sends
8 MUTERGHT Mutes the right channel, and sends
9 MUTEALL Mutes both the left and right channels.
A DV143 Reclocks video data rate to 143 Mhz.
B DV177 Reclocks video data rate to 177 Mhz.
C DV270 Reclocks video data rate to 270 Mhz.
D DV360 Reclocks video data rate to 360 Mhz.
NORMAL
Resets the selected level to normal.
Removes any attribute changes.
sends a “mixed” signal out each port.
and right ports.
and right ports.
“normal” on the right channel.
“normal” on the left channel.
7. Press Take to complete the procedure. The Attribute button stops blinking, and the new
attributes are routed to the selected levels of the destination.
Note: Video data rate changes are specific to the UTAH-300 routing switcher, in which
the data rate must be “set” for the output modules. Refer to the UTAH-300
User’s Guide for additional information.
3-20 SCP Series • User’s Guide
Page 61
Using the Chop Mode
CHOP .25
Source
The Chop Mode allows you to toggle between two Takes. When you initiate the mode, the
panel alternates between the two sources continuously, at a predetermined rate. The “chop”
continues until you cancel it, or until another user on another panel cancels it. The mode is
typically used for color-matching cameras, phasing sources, or matching video levels. The
Chop Mode can be used in both “all-follow” and “breakaway” conditions.
Setting the Chop Mode Rate
Use the following steps to set the Chop Mode rate (that is, the rate at which the system toggles
between the two selected sources).
1. Press and hold the Tak e button.
Using the Chop Mode
2. Using keypad buttons 0 through 9, select the number for the desired chop rate. The table
below lists each selection.
Table 0-2. Chop Rate Selections
Keypad Button Chop Rate (seconds)
0Off
1 .25
2.50
3.75
41.0
51.5
62.0
72.5
83.0
95.0
When you select a number, the current chop rate appears in the Source Display.
Figure 0-16. Chop Mode Display
Chapter 3
3. Release the Take button to complete the procedure. The panel is now set to chop between
two selected sources at the chosen rate.
SCP Series • User’s Guide 3-21
Page 62

SCP 2/8 Operations
Performing an All-follow or Breakaway Chop
Use the following steps to activate the Chop Mode between two All-follow Take or
Breakaway Take sources:
1. Program the first All-follow Take or Breakaway Take in the normal manner. Refer to the
“Performing an All-follow Take” section on page 3-6 or the “Performing a Breakaway
Tak e” section on page 3-8 for instructions.
2. Program the second All-follow or Breakaway Take in the normal manner — to the same
destination as the first Take. Instead of pressing Tak e to conclude the procedure, press
and hold the Take button for two seconds.
This action places the panel in the Chop Mode, and the system switches between both
sources on all selected levels continuously (at the current toggle rate). The label in the
Source Display now alternates between the two selected sources. These alternating
labels are your only indications that the system is in Chop Mode.
3. To cancel the Chop Mode, press any button on the panel.
Note: The mode is also automatically cancelled when any other panel sends a normal
Tak e (or a breakaway Ta ke ) to the destination that is currently chopping.
Chop Mode Notes
Note the following important points regarding the Chop Mode:
• Locks and Protects apply in the normal manner. Refer to the “Using the Protect Mode”
section on page 3-14 for full details.
• If the Chop Mode is active in “breakaway” condition on a specific signal level, you can
perform another breakaway Take to a signal level that is not chopping — without affecting
the levels that are chopping. This action can be performed on any other panel except the
one that initiated the Chop Mode.
3-22 SCP Series • User’s Guide
Page 63

Monitor Matrix Mode
The Monitor Matrix mode allows you to conveniently monitor each signal level’s outputs —
without affecting the router’s actual destinations. Each level has a separate Monitor Matrix
output that is typically routed to physical audio and video monitors in the control room (or
machine room). When the SCP 2/8 panel is in Monitor Matrix mode, and when a particular
destination device is chosen, you can monitor that destination visually and aurally. You have
the ability to see and hear the source that is routed to the destination, but you can not
determine what the actual source is from the SCP 2/8 panel itself.
Because the SCP 2/8 is a dual-destination panel, one of the two destinations can be assigned to
the Monitor Matrix function from the RMS. This is accomplished by typing the keyword
“MMTRX” into one of the panel’s two available destination entry boxes on the RMS itself.
Once the panel is programmed in this manner, when you switch to the Monitor Matrix
destination, the entire SCP 2/8 panel functions in the special Monitor Matrix mode — allowing
you to monitor any of the router’s 20 groups of available destinations.
Note: The following important rules apply when the Monitor Matrix mode is selected
on the SCP 2/8 panel:
• The buttons in the Group Select Section (which are normally source selection buttons),
become destination selection buttons.
Monitor Matrix Mode
Chapter 3
• The normal procedure for taking a source becomes the process for taking a destination.
• The Source Display becomes a Destination Display.
• The buttons in the Level Select Section function in the normal way, allowing you to view
the Monitor Matrix output on all levels — or on selected levels. Typically, a Monitor
Matrix “take” is an all-follow take, but you can split the monitor as required. This would
allow you, for example, to see the video routed to destination one (e.g., VTR--021), but
hear the audio routed to destination two (e.g., SATELITE).
• The Protect and Attribute modes are not valid during the Monitor Matrix mode.
• The buttons in the Direct Source Select Section are not valid.
Use the following steps to enable and utilize the Monitor Matrix mode:
1. Ensure that the Monitor Matrix mode is properly enabled from the RMS for your specific
panel, with the keyword “MMTRX” entered. The feature will not operate otherwise.
2. On the panel, ensure that the correct portion of the Destination Select button is clearly
labeled (for example, MMTRX or Mon Mtrx).
3. Ensure that the desired destination “groups” are programmed from the RMS.
SCP Series • User’s Guide 3-23
Page 64

SCP 2/8 Operations
4. Ensure that the buttons in the Level Select Section are in the default “all-follow” mode.
Refer to the “Defaulting the Level Select Buttons” section on page 3-6 for instructions.
5. Press the Destination Select button to choose the Monitor Matrix destination.
6. In the Group Select Section (which now applies to destinations rather than sources) press
the button for the desired group of destination devices (for example, EDIT, VTR, MON,
CAM, etc.). In the Source Display (which is now a destination display), the “question
mark” readout appears, with the selected group name showing as the prefix.
7. Using the keypad buttons, enter the extension of the desired destination device. One, two,
or three digits can be selected, and leading zeros do not need to be entered.
8. If you want to break away a level (for purposes of monitoring split destinations), perform
the following steps:
•Use the Level Shift button in conjunction with the Level Select Section buttons to
•In the Group Select Section, select the breakaway destination by pressing the button
choose the levels that you want to break away. See the “Breaking Away Multiple
Levels From One Source” section on page 3-10 for instructions on selecting levels.
for the desired group of devices. In the Source Display, the “question mark”
readout appears with the selected group name written as the prefix.
• Using the keypad buttons, enter the extension of the desired breakaway destination.
9. With a valid extension entered, press Tak e to conclude the procedure.
The selected destination is now routed to the Monitor Matrix output, allowing you to monitor
the audio and video signals that are routed to the destination’s input. Repeat the procedure
from step 6 to monitor additional destinations as required.
3-24 SCP Series • User’s Guide
Page 65
Miscellaneous Panel Modes
te
Adjust
LED Intensity
Verify
Software Version
Verify
Panel ID
+
Hold
Leve l
Shift
SrcGrp 11SrcGr p 22SrcGrp 3
3
SrcGrp 6
A
SrcGrp 44SrcGrp 5
5
SrcGrp 116SrcGrp 127SrcGrp 138SrcGrp 149SrcGrp 150SrcGrp 16
D
Verify
SrcGrp
B
Src
Source
SRC 001
Prot ect
Sourc e1Source2Source3Source
4
Level
Lev
Le
Dest 1
Dest 2
This section provides instructions for the following miscellaneous panel modes:
• Changing Panel LED Intensity
• Verifying the Software Version
• Verifying the Panel Node
• Verifying the Panel ID
Use the following figure for reference during the procedures listed above. Note that the keypad
buttons are highlighted in white for clarity only.
Miscellaneous Panel Modes
Chapter 3
Panel Node
Figure 0-17. Keypad Buttons used for Miscellaneous Panel Modes
Changing Panel LED Intensity
Use the following steps to change the intensity of the panel LEDs.
1. Press and hold the Level Shift button.
2. While holding, press one of the first seven keypad buttons, as shown in Figure 0-17.
Button 1 is the brightest setting; button 7 is the dimmest setting.
Note: Even on the dimmest setting the LEDs are never completely off.
3. Release the Level Shift button to complete the procedure.
SCP Series • User’s Guide 3-25
Page 66

SCP 2/8 Operations
VER 2.00
Source
NODE# 21
Source
Verifying the Software Version
Use the following steps to verify the panel’s current software version.
1. Press and hold the Level Shift button.
2. While holding, press Direct Source Select Button 2 as shown in Figure 0-17. In the
Source Display, the panel’s software version appears.
3. Release the Level Shift button to complete the procedure.
Verifying the Panel Node
Use the following steps to verify the panel node address, as assigned on the SCP 2/8’s rear
panel DIP switch.
1. Press and hold the Level Shift button.
2. While holding, press Direct Source Select Button 3 as shown in Figure 0-17. In the
Source Display, the panel’s node address appears.
Figure 0-18. Panel Software Version Display
Figure 0-19. Panel Node Address Display
3. Release the Level Shift button to complete the procedure.
Verifying the Panel ID
Using the RMS, you can enter a panel ID (or “name”), up to 32 characters in length.
Note: Since the Source Display is only eight characters long, it is recommended that
you truncate Panel IDs for the SCP 2/8.
Use the following steps to verify the panel ID.
1. Press and hold the Level Shift button.
3-26 SCP Series • User’s Guide
Page 67
2. While holding, press Direct Source Select Button 4 as shown in Figure 0-17. In the
Source
Panel #9
Source Display, the panel’s ID appears.
Figure 0-20. Panel ID Display
3. Release the Level Shift button to complete the procedure.
General Panel Notes
Note the following important points regarding the SCP 2/8 panel in general:
• When the SCP 2/8 panel is being re-programmed from the RMS, the label
“REPROGRM” appears in the Source Display. The panel is inactive during the
reprogramming mode.
• If the panel’s U-Net connection is lost, the Source Display will show all dashes, and all
blinking will stop in the Level Select Section.
• With the SCP 2/8 (and with other SCP panels), multiple panels may be able to address the
same destination. In this case, changes made to a destination from another remote panel
will track on the SCP 2/8, even though the changes were not made on the local panel itself.
Changes made on your panel will also track on a remote panel (that is assigned to the same
destination). Each panel will display the same status information in regards to levels and
sources.
General Panel Notes
Chapter 3
SCP Series • User’s Guide 3-27
Page 68

SCP 2/8 Operations
3-28 SCP Series • User’s Guide
Page 69

In This Chapter
In This Chapter
This chapter provides setup and operating instructions for the SCP 32/8, an eight level, single
destination, 32 source panel. The following topics are discussed:
• About the SCP 32/8 . . . . . . . . . . . . . . . . . . . . . . . . . . . . . . . . . . . . . page 4-2
4
SCP 32/8 Operations
Chapter 4
• Displaying Level Status . . . . . . . . . . . . . . . . . . . . . . . . . . . . . . . . . . page 4-3
• Defaulting the Level Select Buttons. . . . . . . . . . . . . . . . . . . . . . . . . page 4-4
• Performing an All-follow Take . . . . . . . . . . . . . . . . . . . . . . . . . . . . page 4-4
• Performing a Breakaway Take . . . . . . . . . . . . . . . . . . . . . . . . . . . . . page 4-5
• Monitor Matrix Mode. . . . . . . . . . . . . . . . . . . . . . . . . . . . . . . . . . . . page 4-8
• Changing Panel LED Intensity. . . . . . . . . . . . . . . . . . . . . . . . . . . . page 4-10
• Panel Lock . . . . . . . . . . . . . . . . . . . . . . . . . . . . . . . . . . . . . . . . . . . Page 4-10
• General Panel Notes . . . . . . . . . . . . . . . . . . . . . . . . . . . . . . . . . . . . page 4-11
SCP Series • User’s Guide 4-1
Page 70
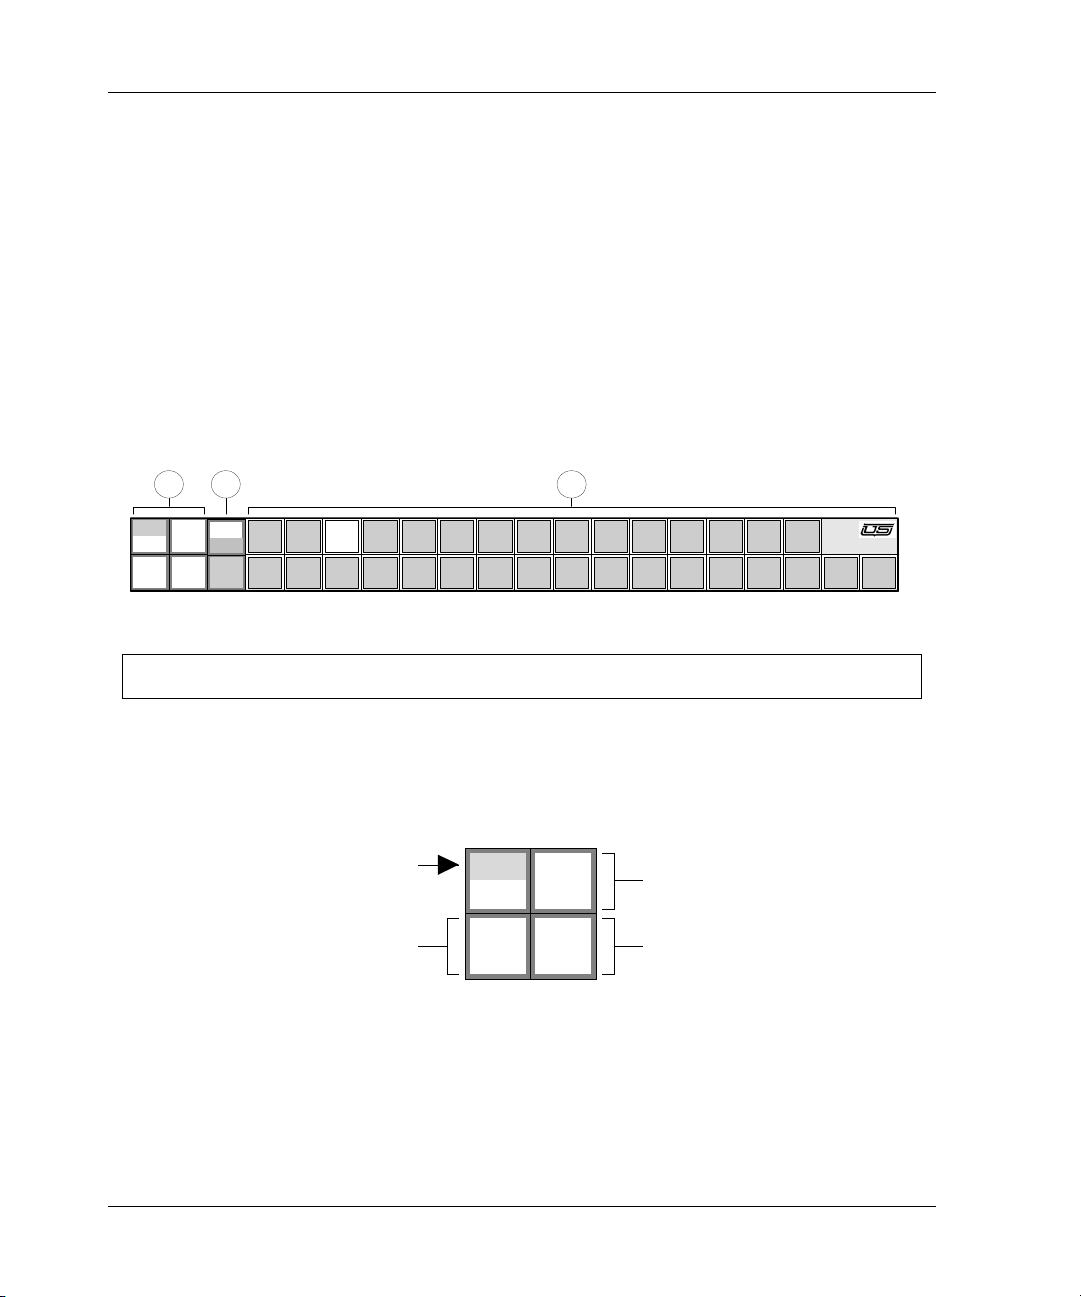
SCP 32/8 Operations
Level 1
Level 5
Level 2
Level 6
Level 3
Level 7
Level 4
Level 8
SCP - 32 / 8
312 4 756 8 11910 12 1513 14
3230 312927 282624 252321 222018 191716
1 2 3
Shift 1-4
Shift
5-8
Level 1
Level 5
Level 2
Level 6
Level 3
Level 7
Level 4
Level 8
Blinking
Lit
Lit
Lit
About the SCP 32/8
The SCP 32/8 is an eight level, single destination, 32 source panel that is designed for fast
access to a limited number of sources. Because the panel is dedicated to a single destination
(and typically located near the destination itself), the destination is not electronically displayed
on the panel. It is the user’s responsibility to make a note of the destination. Refer to the “SCP
32/8” section on page 1-8 for more information on the panel’s main features.
The figure below illustrates the main buttons and sections of the SCP 32/8 panel.
Note: For simplicity, numeric labels are shown on the level and source buttons below.
Your labels will differ depending upon the level and source assignments in your
facility. Note also that buttons without labels have no functions assigned.
Figure 0-1. SCP 32/8 Panel
1) Level Select Section 2) Level Shift Button 3) Source Section
1) Level Select Section
Each of the four buttons in the Level Select Section is divided in half, and each half can
be lit independently. Only one of the eight half-button segments can be blinking, but any
number of segments can be lit steadily.
Figure 0-2. Typical Level Select Section Display
The top half of a button displays its level 1-4 assignment, while the bottom half displays
the button’s level 5-8 assignment (for example, Video, Audio1, Audio2, Timecode, etc.).
The Level Shift button switches between the two groups of levels (1-4 and 5-8).
4-2 SCP Series • User’s Guide
Page 71

Displaying Level Status
The buttons in the Level Select Section perform two functions:
• Status Display
In the “all-follow” and “breakaway” modes, the blinking button is associated with a
lit source button (in the Source Section). This association tells you that the indicated
level from the indicated source is currently connected to the destination. See the
“Displaying Level Status” section on page 4-3 for details.
• Breakaway Selection
In the “breakaway” mode, the buttons allow you to select the level(s) that you want to
include in a pending breakaway take. A half-button segment that is lit steadily is
already included in the pending breakaway take selection. The blinking button
segment indicates the most recently selected level. Refer to the “Performing a
Breakaway Take” section on page 4-5 for more information.
2) Level Shift Button
The Level Shift button switches the buttons in the Level Select Section between the two
groups of levels (1-4 and 5-8). The lit portion of the Level Shift button indicates the
levels that can currently be selected — for either checking status or including a level in a
pending breakaway take.
3) Source Section
The Source Section provides 32 buttons, each of which represents a single source. All 32
sources are programmed (assigned) from the routing switcher’s RMS tool (Router
Management System). When a source button is pressed, either the “all-follow take” or the
“breakaway take” is sent to the dedicated destination. There is no TAK E button required.
Chapter 4
Note: An “all-follow” take can include up to 16-levels, depending upon how your
specific panel is mapped.
Displaying Level Status
Whether your panel is in “breakaway” or “all-follow” mode, the four buttons in the Level
Select Section provide an easy way to check which levels from which sources are currently
being routed to the destination.
Use the following steps to display level status:
1. Press Level Shift to select the group of levels that you wish to “status” (either 1-4 or 5-8).
The lit portion of the button indicates the selected group.
2. In the Level Select Section, press the desired level button. The source button currently
associated with that level lights in the Source Section.
SCP Series • User’s Guide 4-3
Page 72

SCP 32/8 Operations
This level-to-source “pairing” indicates that the selected level from the associated source
is currently routed to the destination.
3. Press another Level Select button to check its status, or repeat the procedure from step 1
to select a level in the opposite group. Only one level can display status at a time.
Please note:
• The level mapping of each panel can differ, depending upon how each panel is configured
from the RMS. For example, if levels 7 and 8 are invalid on the particular destination
device, those levels may be rendered inactive on your panel, and thus would not light.
• After an all-follow take is performed, the status of all levels will be identical. After a
breakaway take is performed, the status of each level may differ.
Defaulting the Level Select Buttons
In preparation for an all-follow or a breakaway take, the buttons in the Level Select Section
should be returned to the default “all-follow” mode. This can be performed with two simple
checks as follows:
• Press the blinking Level Select button. If all Level Select buttons turn off and the
button segment that you pressed blinks, your panel was already in the all-follow mode. To
return to the mode, press the blinking Level Select button again.
• Press the blinking Level Select button. If the button segment turns off and another
button segment begins to blink, you have just cancelled one breakaway level. Continue
pressing the blinking Level Select button segment, and if necessary, press Level Shift
to switch level groups. When all button segments light (and the button that you pressed
continues to blink), the default “all-follow” mode has been restored.
Performing an All-follow Take
An “all-follow take” is one in which all assigned signal levels switch simultaneously, and no
signal levels are broken away.
Use the following steps to perform an all-follow take on the SCP 32/8:
1. Ensure that the buttons in the Level Select Section are in the default “all-follow” mode.
Refer to the “Defaulting the Level Select Buttons” section on page 4-4 for instructions.
2. Press the desired button in the Source Section. All assigned levels from the selected
source are routed to the destination.
Once the all-follow take has been performed, all buttons in the Level Select Section will status
the source that was just chosen.
4-4 SCP Series • User’s Guide
Page 73

Performing a Breakaway Take
Performing a Breakaway Take
A “breakaway take” is a special Take in which a subset of all available signal levels are sent to
a destination. The following topics are discussed in this section:
• Breaking away one level from one source
• Breaking away multiple levels from one source
• Breaking away multiple levels from different sources
• Canceling a breakaway take
Breaking Away One Level From One Source
Use the following steps to break away one level from a source and route it to the destination:
1. Ensure that the buttons in the Level Select Section are in the default “all-follow” mode.
This is the preferred starting point for a breakaway take. Refer to the “Defaulting the
Level Select Buttons” section on page 4-4 for instructions.
2. Press the Level Shift button to choose the group (1-4 or 5-8) that contains the level that
you want to break away. When breaking away just one level, its easier to choose the group
prior to entering the breakaway mode.
3. In the Level Select Section, press the blinking button. All Level Select buttons turn off
and the button that you pressed blinks. The section is now in the breakaway mode.
~ If the blinking button is the level that you want to break away, no further action is
necessary in the Level Select Section. Please continue with step 4 below.
~ If the blinking button is not the level that you want to break away, press the Level
Select button for the desired level. The button blinks and the previously blinking
button lights steadily. Press the steadily lit button to toggle it off, leaving only the
desired level button blinking.
4. In the Source Section, press the desired button to complete the procedure. Only the
selected level from the source (that you just pressed) is routed to the destination.
Once the breakaway take has been performed, the buttons in the Level Select Section return to
the default “all-follow” mode.
Chapter 4
SCP Series • User’s Guide 4-5
Page 74
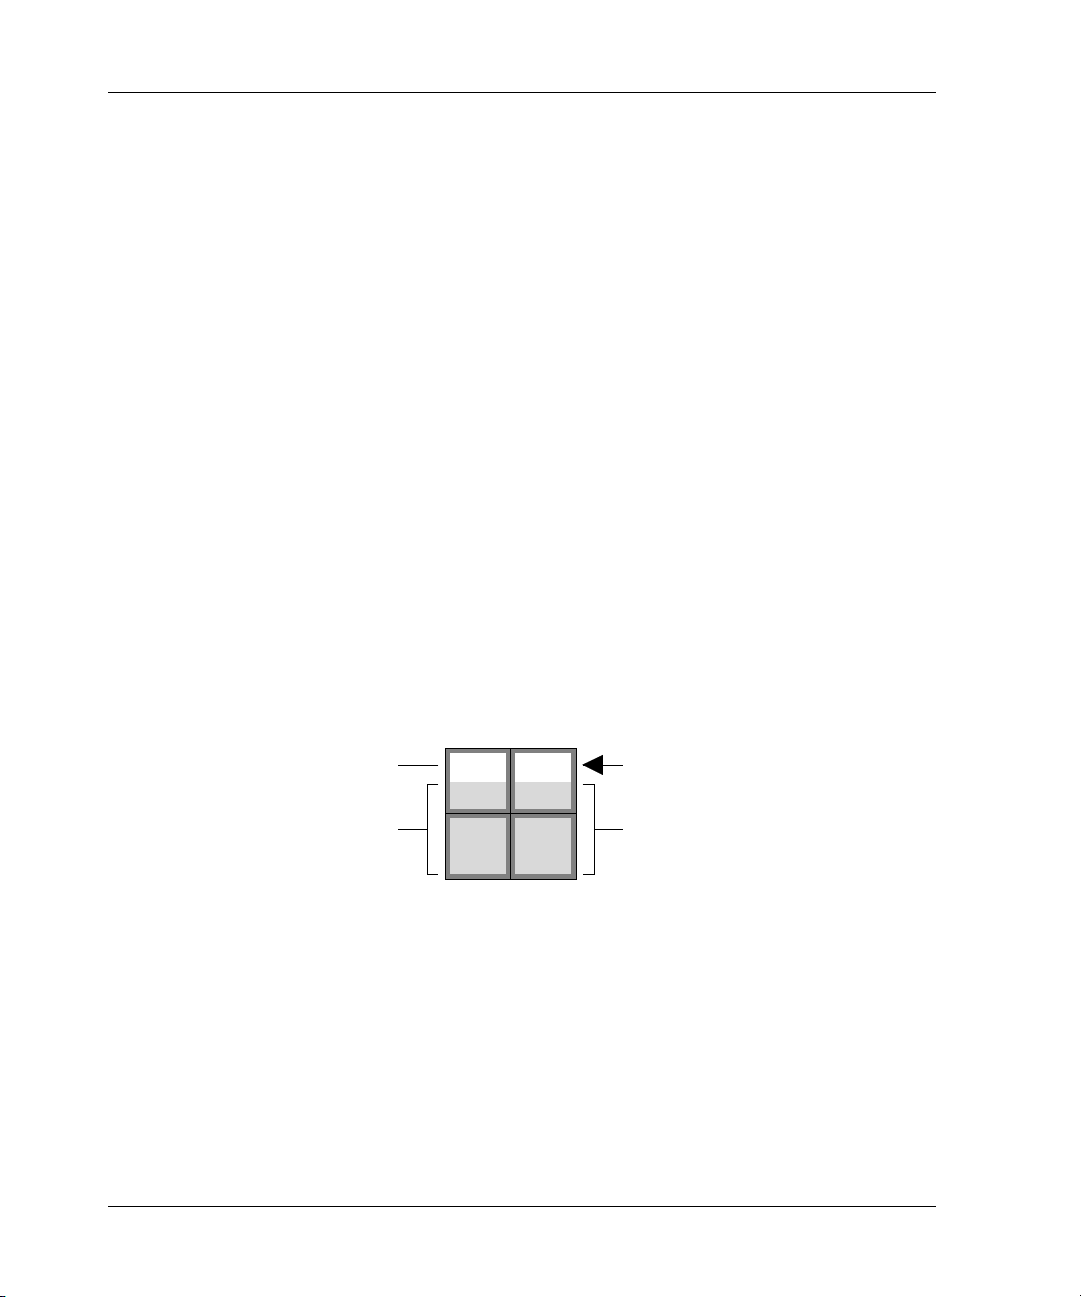
SCP 32/8 Operations
Level 1
Level 5
Level 2
Level 6
Level 4
Level 8
Lit
Off
Off
Level 3
Level 7
Blinking
Breaking Away Multiple Levels From One Source
Use the following steps to break away two or more levels from a source:
1. Ensure that the buttons in the Level Select Section are in the default “all-follow” mode.
This is the preferred starting point for a breakaway take. Refer to the “Defaulting the
Level Select Buttons” section on page 4-4 for instructions.
2. Press the Level Shift button to choose the group (1-4 or 5-8) that contains the first level
that you want to break away.
3. In the Level Select Section, press the blinking button. All Level Select buttons turn off
and the button that you pressed blinks. The section is now in the breakaway mode.
~ If the blinking button is one of the levels that you want to break away, please continue
~ If the blinking button is not one of the multiple levels that you want to break away,
4. To add additional levels, press each desired Level Select button to add it to the
breakaway group. Each new button that you press blinks, and the previously blinking
button lights steadily. As required, use the Level Shift button to change groups.
In the sample breakaway selection below, levels 1 and 3 are pending for a breakaway take,
and level 3 was the last button pressed (because it is blinking).
with step 4.
press the Level Select button for the desired level. The button blinks and the
previously blinking button lights steadily. Press the steadily lit button to toggle it off,
leaving only the desired level button blinking.
Figure 0-3. Sample Breakaway Mode Display
Note: You can remove levels from the breakaway group simply by toggling Level
Select buttons. Pressing a steadily lit button toggles it off. Pressing the blinking
button toggles it off, and causes the last-selected button to blink.
5. In the Source Section, press the desired button to complete the procedure. All selected
levels from the source (that you just pressed) are routed to the destination.
Once the breakaway take has been performed, the buttons in the Level Select Section return to
the default “all-follow” mode.
4-6 SCP Series • User’s Guide
Page 75

Performing a Breakaway Take
Breaking Away Multiple Levels From Different Sources
The SCP 32/8 does not allow you to break away multiple levels from different sources in one
single operation. However, this function can easily be accomplished in two or more passes, by
selecting a different level and a different source with each breakaway pass.
Use the following steps to break away two or more levels from two or more sources:
1. Follow the procedure for breaking away one level from one source, as outlined in the
“Breaking Away One Level From One Source” section on page 4-5.
2. Repeat step 1 as many times as required, each time selecting a different level and a
different source to route to the assigned destination.
Canceling a Breakaway Take
If you are in the midst of the Breakaway Mode and need to cancel it for any reason (in order to
return to the default “all-follow” mode), use the following steps:
1. If only one Level Select button is blinking, press it to cancel the breakaway mode and
return to the all-follow mode. Use the Level Shift button as necessary to change groups.
2. If more than one Level Select button is lit, press each steadily lit button to toggle it off,
then press the remaining blinking button to return to the all-follow mode. Use the Level
Shift button as necessary to change groups.
Chapter 4
SCP Series • User’s Guide 4-7
Page 76

SCP 32/8 Operations
Monitor Matrix Mode
The Monitor Matrix mode allows you to conveniently monitor each signal level’s outputs —
without affecting the router’s actual destinations. Each level has a separate Monitor Matrix
output that is typically routed to physical audio and video monitors in the control room (or
machine room). When the SCP 32/8 is assigned as a Monitor Matrix panel, and when a
particular destination device is chosen, you can monitor that destination visually and aurally.
You have the ability to see and hear the source that is routed to the destination, but you can not
determine what the actual source is from the SCP 32/8 panel itself.
Because the SCP 32/8 is a single-destination panel, if you want to use the Monitor Matrix
feature, the panel must be dedicated to that function from the RMS. This is accomplished by
typing the keyword “MMTRX” into the panel’s destination entry box on the RMS itself. Once
the panel is programmed in this manner, the entire SCP 32/8 panel functions in the special
Monitor Matrix mode — allowing you to monitor any of the assigned destinations.
Note: The following important rules apply when the Monitor Matrix mode is
dedicated to the SCP 32/8 panel:
• The buttons in the Source Section (which are normally source selection buttons), become
destination selection buttons.
• The normal procedure for taking a source becomes the process for taking a destination.
• The buttons in the Level Select Section function in the normal way, allowing you to view
the Monitor Matrix output on all levels — or on selected levels. Typically, a Monitor
Matrix “take” is an all-follow take, but you can split the monitor as required. This would
allow you, for example, to see the video routed to destination one (e.g., VTR--021), but
hear the audio routed to destination two (e.g., SATELITE).
Use the following steps to enable and utilize the Monitor Matrix mode:
1. Ensure that the Monitor Matrix mode is properly enabled from the RMS for your specific
panel, with the keyword “MMTRX” entered. The feature will not operate otherwise.
2. Ensure that the panel is clearly labeled as a Monitor Matrix panel.
3. Ensure that the desired destinations are programmed from the RMS (into the Source
Section buttons).
4. Ensure that the buttons in the Level Select Section are in the default “all-follow” mode.
Refer to the “Defaulting the Level Select Buttons” section on page 4-4 for instructions.
5. To perform an all-follow Monitor Matrix take, press the desired button in the Source
Section. Remember that the buttons now apply to destinations rather than sources.
4-8 SCP Series • User’s Guide
Page 77

Monitor Matrix Mode
6. If you want to break away a level (for purposes of monitoring split destinations), perform
the following steps:
• Press the Level Shift button to choose the group (1-4 or 5-8) that contains the level
that you want to break away.
•In the Level Select Section, press the blinking button. All Level Select buttons turn
off and the button that you pressed blinks. The section is now in the breakaway mode
• If the blinking button is the level that you want, no further action is necessary in the
Level Select Section. If the blinking button is not the level that you want, press the
desired Level Select button and toggle the previous button off. Continue to add (or
remove) levels as desired.
•In the Source Section, press the desired “destination” button to perform the
“breakaway” Monitor Matrix take.
For both all-follow and breakaway procedures, the selected destination is now routed to the
Monitor Matrix output, allowing you to monitor the audio and video signals that are routed to
the destination’s input. Repeat the procedure from step 4 to monitor additional destinations as
required.
Chapter 4
SCP Series • User’s Guide 4-9
Page 78
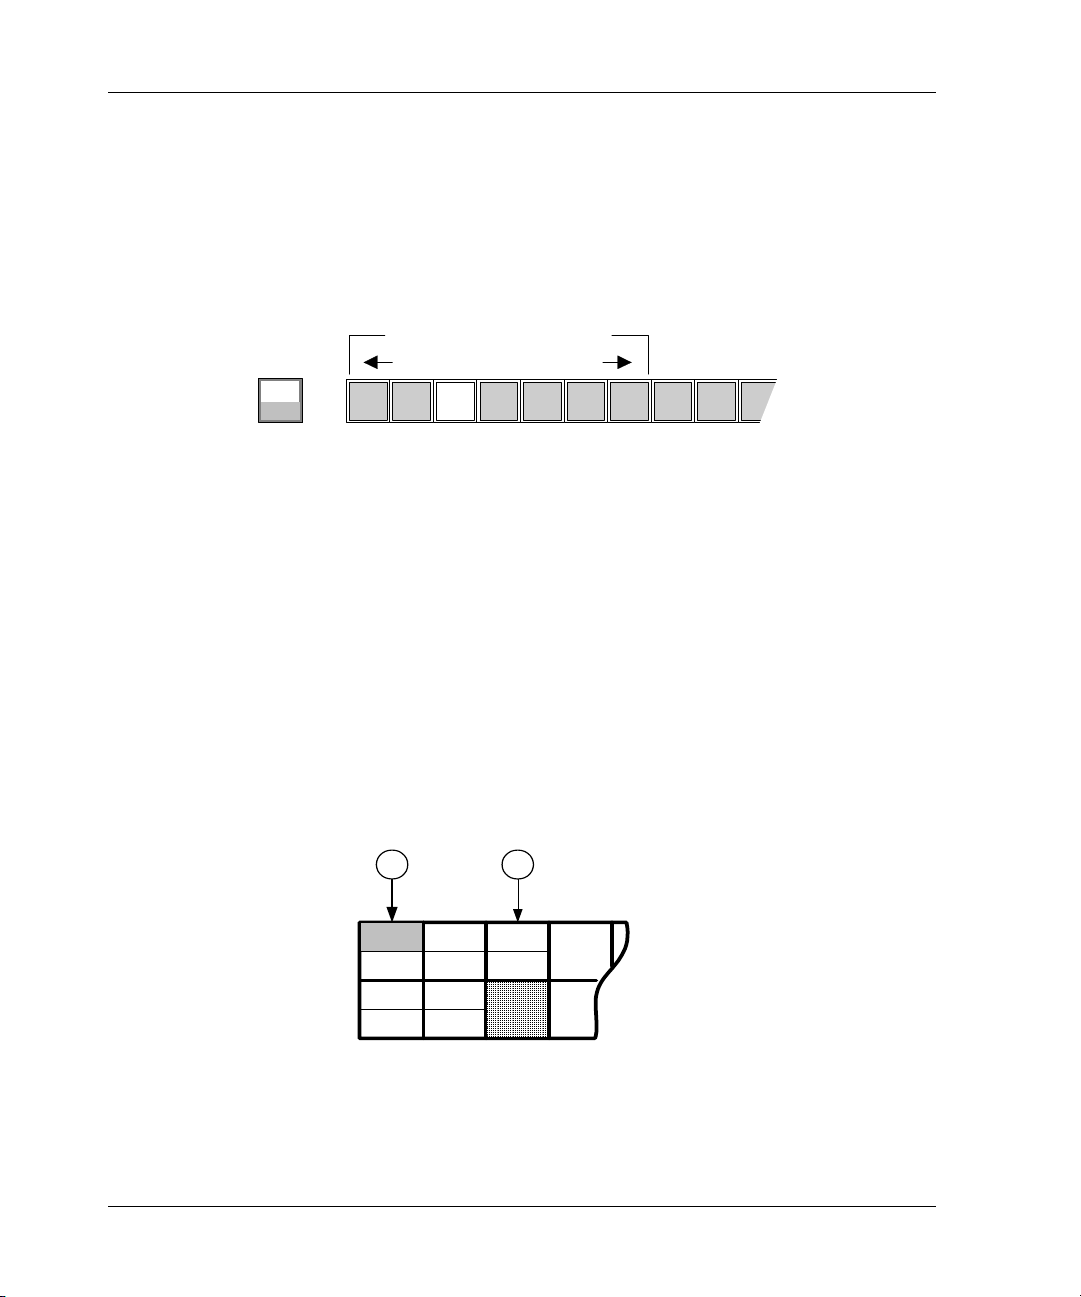
SCP 32/8 Operations
312 4 756 8910
Panel Brightness Buttons
Brighter Dimmer
+
Hold
Shif t 1-4
Shift
5-
8
Shift 1-4
1
16
Level 1 Level 3
Level 5 Level 7
Level 2 Level 4
Level 6
Level 8
Shift 5-8
12
Press and Hold
Press
Changing Panel LED Intensity
The SCP 32/8 includes a simple mode that allows you to change the intensity of the panel
LEDs. Use the following steps to change LED intensity:
1. Press and hold the Level Shift button.
2. While holding, press one of the first seven source buttons, as shown below.
Figure 0-4. Panel Brightness Adjustment
The first button is the brightest setting; the seventh button is the dimmest setting.
Note: Even on the dimmest setting the LEDs are never completely off.
3. Release the Level Shift button to complete the procedure.
Panel Lock
Software Release 2.06 allows the user to lock the panel so no takes can be made. The panel
will still status changes made from other sources.
• The user Locks the panel (Reference Figure 4-5) by pressing and holding the Level Shift
Button and then pressing the Level 1 Button in sequence.
•To Unlock the panel repeat the sequence above.
Figure 0-5. Panel Lock Sequence
4-10 SCP Series • User’s Guide
Page 79

General Panel Notes
General Panel Notes
Note the following important points regarding the SCP 32/8 panel in general:
• If the panel’s U-Net connection is lost, all blinking will stop in the Level Select Section.
• With the SCP 32/8 panel (and with other SCP panels), multiple panels may be assigned to
the same destination. In this case, changes made to a destination from another remote
panel will track on the SCP 32/8, even though the changes were not made on the local
panel itself. Changes made on your panel will also track on a remote panel (that is
assigned to the same destination). Each panel will display the same status information in
regards to levels and sources.
Chapter 4
SCP Series • User’s Guide 4-11
Page 80

SCP 32/8 Operations
4-12 SCP Series • User’s Guide
Page 81

In This Chapter
In This Chapter
This chapter provides setup and operating instructions for the SCP 64/8. The following topics
are discussed:
• About the SCP 64/8 . . . . . . . . . . . . . . . . . . . . . . . . . . . . . . . . . . . . . page 5-2
5
SCP 64/8 Operations
• Displaying Level Status . . . . . . . . . . . . . . . . . . . . . . . . . . . . . . . . . . page 5-5
• Defaulting the Level Select Buttons. . . . . . . . . . . . . . . . . . . . . . . . . page 5-5
• Performing an All-follow Take . . . . . . . . . . . . . . . . . . . . . . . . . . . . page 5-6
• Performing a Breakaway Take . . . . . . . . . . . . . . . . . . . . . . . . . . . . . page 5-6
• Monitor Matrix Mode. . . . . . . . . . . . . . . . . . . . . . . . . . . . . . . . . . . . page 5-9
• Changing Panel LED Intensity. . . . . . . . . . . . . . . . . . . . . . . . . . . . page 5-11
• About the Protect LED . . . . . . . . . . . . . . . . . . . . . . . . . . . . . . . . . . page 5-12
• Panel Lock . . . . . . . . . . . . . . . . . . . . . . . . . . . . . . . . . . . . . . . . . . . .page 5-12
• General Panel Notes . . . . . . . . . . . . . . . . . . . . . . . . . . . . . . . . . . . . .page 5-13
SCP Series • User’s Guide 5-1
Chapter 5
Page 82
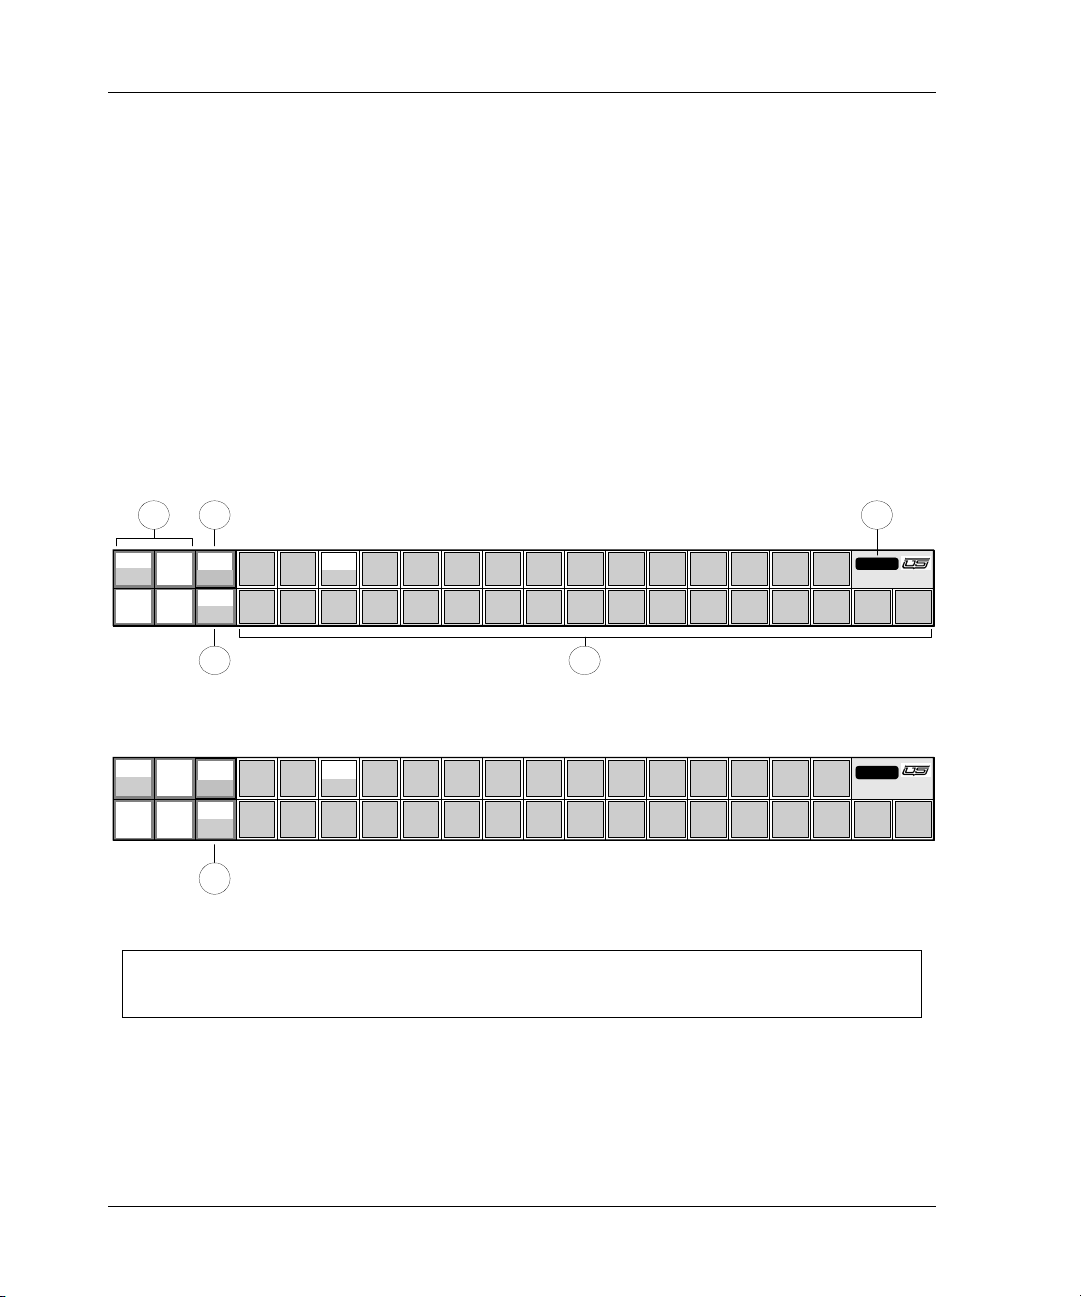
SCP 64/8 Operations
Level 1
Level 5
Level 2
Level 6
Level 3
Level 7
Level 4
Level 8
SCP - 64 / 8
PROTECT
Dest 1
Dest 2
112
2
17
17
16
16
44556677889
9
15
15
14
14
13
13
12
12
11
11
10
10
18181919202021212222232324242525262627272828292930
30
32
32
31
31
3
3
1 2
3 4
5
Shift 1
-
4
Shift
5-
8
Level 1
Level 5
Level 2
Level 6
Level 3
Level 7
Level 4
Level 8
SCP - 64 / 8
PROTECT
Src 1-32
Src 33-64
1332
34
17
49
16
48
4365376387398409
41
15
47
14
46
13
45
12
44
11
43
10
42
18501951205221532254235524562557265827592860296130
62
32
64
31
63
3
35
6
Shif t 1-4
Shift 5-
8
About the SCP 64/8
The SCP 64/8 is a 16-level panel with eight level breakaway capability. Using the RMS, the
panel can be configured in one of two modes — either a single-destination, 64 source panel or
a dual-destination, 32 source panel. If you send either one or two destinations to the panel from
the RMS, the panel runs in either the single or dual destination mode, respectively. Refer to the
“SCP 64/8” section on page 1-8 for a description of the panel’s main features.
The two figures below illustrate the main buttons and sections of the SCP 64/8 panel. Both
configurations are shown. All buttons and sections are identical on both configurations except
where noted.
Note: For simplicity, numeric labels are shown on the level, source and destination
buttons below. Your labels will differ depending upon the level, source and
destination assignments in your facility.
Figure 0-1. SCP 64/8 Panel, Dual Destination Configuration
Figure 0-2. SCP 64/8 Panel, Dual Source Configuration
1) Level Select Section 3) Destination Select Button 5) Protect LED
2) Level Shift Button 4) Source Section 6) Source Select Button
1) Level Select Section
Each of the four buttons in the Level Select Section is divided in half, and each half can
be lit independently. Only one of the eight half-button segments can be blinking, but any
number of segments can be lit steadily.
5-2 SCP Series • User’s Guide
Page 83
About the SCP 64/8
Level 1
Level 5
Level 2
Level 6
Level 3
Level 7
Level 4
Level 8
Blinking
Lit
Lit
Lit
The figure below illustrates a typical Level Select Section.
Figure 0-3. Typical Level Select Section Display
The top half of a button displays its level 1-4 assignment, while the bottom half displays
the button’s level 5-8 assignment (for example, Video, Audio1, Audio2, Timecode, etc.).
The Level Shift button switches between the two groups of levels (1-4 and 5-8).
The buttons in the Level Select Section perform two functions:
• Status Display
In the “all-follow” and “breakaway” modes, the blinking button is associated with a
lit source button (in the Source Section). This association tells you that the indicated
level from the indicated source is currently connected to the destination. See the
“Displaying Level Status” section on page 5-5 for more details.
• Breakaway Selection
In the “breakaway” mode, the buttons allow you to select the level(s) that you want to
include in a pending breakaway take. A half-button segment that is steadily lit is
already included in the pending breakaway take selection. The blinking button
segment indicates the most recently selected level. Refer to the “Performing a
Breakaway Take” section on page 5-6 for more information on breakaway takes.
Chapter 5
2) Level Shift Button
The Level Shift button switches the buttons in the Level Select Section between the two
groups of levels (1-4 and 5-8). The lit portion of the Level Shift button indicates the
levels that can currently be selected — for either checking status or for including a level in
a pending breakaway take.
3) Destination Select Button
The Destination Select button (Dual Destination panels only) switches between the
two assigned destinations. Each destination is programmed (assigned) from the routing
switcher’s RMS tool (Router Management System). The lit half of the button indicates the
selected destination.
Note: When you press the Destination Select button, the selected source (and the
associated level) may change accordingly.
SCP Series • User’s Guide 5-3
Page 84
SCP 64/8 Operations
Src 1-32
Src 33-64
16
48
Source Labels 1-32
Source Labels 33-64
Dest 1
Dest 2
16
16
Destination 1 Source Labels
Destination 2 Source Labels
4) Source Section
The Source Section provides 32 buttons, each of which represents a single source. All 64
sources are programmed (assigned) from the routing switcher’s RMS tool (Router
Management System). When a source button is pressed, either the “all-follow take” or the
“breakaway take” is sent to the destination. There is no TAK E button required.
Note: An “all-follow” take can include up to 16-levels, depending upon how your
Please note:
• For single-destination, 64 source panels, the labels for sources 1-32 are located on the
• For dual-destination, 32 source panels, the labels for destination 1’s sources (1-32) are
specific panel is mapped.
top half of each button, while labels for sources 33-64 are located on the bottom half.
The appropriate half segment lights when selected.
Figure 0-4. Source Label Scheme, Single Destination Panel
located on the top half of each button, while labels for destination 2’s sources (1-32)
are located on the bottom half of each source button. The appropriate half segment
lights when selected.
Figure 0-5. Source Label Scheme, Dual Destination Panel
5) Protect LED
The Protect LED, when lit, indicates that a “Protect” or a “Lock” has been set for the
selected destination — from another location. Protects and Locks can not be initiated on
the SCP 64/8, but if one has been set elsewhere, its status can be displayed. Refer to the
“About the Protect LED” section on page 5-12 for more information.
6) Source Select Button
The Source Select button (Single Destination panels only) switches the source buttons
between sources 1-32 and 33-64. All sources are programmed (assigned) from the routing
switcher’s RMS tool (Router Management System). The lit half of the button indicates the
active group of sources.
5-4 SCP Series • User’s Guide
Page 85

Displaying Level Status
Displaying Level Status
Whether your panel is in “breakaway” or “all-follow” mode, the four buttons in the Level
Select Section provide an easy way to check which levels from which sources are currently
being routed to the destination.
Use the following steps to display level status. The instructions apply to both single and
dual-destination panels, except where noted.
1. For dual-destination panels only, press the Destination Select button to select the
destination for which you want to check status.
2. Press Level Shift to select the group of levels that you wish to “status” (either 1-4 or 5-8).
The lit portion of the button indicates the selected group.
3. In the Level Select Section, press the desired level button. The source button currently
associated with that level lights in the Source Section. This level-to-source “pairing”
indicates that the selected level from the associated source is currently routed to the
(selected) destination.
4. Press another Level Select button to check its status, or repeat the procedure from step 2
to select a level in the opposite group. Only one level can display status at a time.
Please note:
• The level mapping of each panel can differ, depending upon how each panel is configured
from the RMS. For example, if levels 7 and 8 are invalid on the particular destination
device, those levels may be rendered inactive on your panel, and thus would not light.
• After an all-follow take is performed, the status of all levels will be identical. After a
breakaway take is performed, the status of each level may differ.
Defaulting the Level Select Buttons
In preparation for an all-follow or a breakaway take, the buttons in the Level Select Section
should be returned to the default “all-follow” mode. This can be performed as follows:
• Press the blinking Level Select button. If all Level Select buttons turn off and the
button segment that you pressed blinks, your panel was already in the all-follow mode. To
return to the mode, press the blinking Level Select button again.
• Press the blinking Level Select button. If the button segment turns off and another
button segment begins to blink, you have just cancelled one breakaway level. Continue
pressing the blinking Level Select button segment, and if necessary, press Level Shift
to switch level groups. When all button segments light (and the button that you pressed
continues to blink), the default “all-follow” mode has been restored.
SCP Series • User’s Guide 5-5
Chapter 5
Page 86

SCP 64/8 Operations
Performing an All-follow Take
An “all-follow take” is one in which all assigned signal levels switch simultaneously, and no
signal levels are broken away.
Use the following steps to perform an all-follow take on the SCP 64/8. The instructions apply
to both single and dual-destination panels, except where noted.
1. Ensure that the buttons in the Level Select Section are in the default “all-follow” mode.
Refer to the “Defaulting the Level Select Buttons” section on page 5-5 for instructions.
2. For dual-destination panels only, press the Destination Select button to choose the
desired destination.
3. For single-destination panels only, press the Source Select button to choose the desired
group of sources (1-32 or 33-64).
4. Choose the desired source in the Source Section. All assigned levels from the selected
source are routed to the destination.
Once the all-follow take has been performed, all buttons in the Level Select Section will status
the source that was just chosen.
Performing a Breakaway Take
A “breakaway take” is a special Take in which a subset of all available signal levels are sent to
a destination. The following topics are discussed in this section:
• Breaking away one level from one source
• Breaking away multiple levels from one source
• Breaking away multiple levels from different sources
• Cancelling a breakaway take
Breaking Away One Level From One Source
Use the following steps to break away one level from a source and route it to the (selected)
destination. The instructions apply to both single and dual-destination SCP 64/8 panels, except
where noted.
1. Ensure that the buttons in the Level Select Section are in the default “all-follow” mode.
This is the preferred starting point for a breakaway take. Refer to the “Defaulting the
Level Select Buttons” section on page 5-5 for instructions.
5-6 SCP Series • User’s Guide
Page 87

Performing a Breakaway Take
2. For dual-destination panels only, press the Destination Select button to choose the
desired destination.
3. Press the Level Shift button to choose the group (1-4 or 5-8) that contains the level that
you want to break away. When breaking away just one level, its easier to choose the group
prior to entering the breakaway mode.
4. In the Level Select Section, press the blinking button. All Level Select buttons turn off
and the button that you pressed blinks. The section is now in the breakaway mode.
~ If the blinking button is the level that you want to break away, no further action is
necessary in the Level Select Section. Please continue with step 5 below.
~ If the blinking button is not the level that you want to break away, press the Level
Select button for the desired level. The button blinks and the previously blinking
button lights steadily. Press the steadily lit button to toggle it off, leaving only the
desired level button blinking.
5. For single-destination panels only, press the Source Select button to choose the desired
group of sources (1-32 or 33-64).
6. In the Source Section, press the desired button to complete the procedure. Only the
selected level from the source (that you just pressed) is routed to the destination.
Once the breakaway take has been performed, the buttons in the Level Select Section return to
the default “all-follow” mode.
Breaking Away Multiple Levels From One Source
Use the following steps to break away two or more levels from a source. The instructions apply
to both single and dual-destination SCP 64/8 panels, except where noted.
1. Ensure that the buttons in the Level Select Section are in the default “all-follow” mode.
This is the preferred starting point for a breakaway take. Refer to the “Defaulting the
Level Select Buttons” section on page 5-5 for instructions.
2. For dual-destination panels only, press the Destination Select button to choose the
desired destination.
3. Press the Level Shift button to choose the group (1-4 or 5-8) that contains the first level
that you want to break away.
4. In the Level Select Section, press the blinking button. All Level Select buttons turn off
and the button that you pressed blinks. The section is now in the breakaway mode.
~ If the blinking button is one of the levels that you want to break away, please continue
with step 5.
SCP Series • User’s Guide 5-7
Chapter 5
Page 88
SCP 64/8 Operations
Level 1
Level 5
Level 2
Level 6
Level 4
Level 8
Lit
Off
Off
Level 3
Level 7
Blinking
~ If the blinking button is not one of the multiple levels that you want to break away,
5. To add additional levels, press each desired Level Select button to add it to the
breakaway group. Each new button that you press blinks, and the previously blinking
button lights steadily. As required, use the Level Shift button to change groups.
In the sample breakaway selection below, levels 1 and 3 are pending for a breakaway take,
and level 3 was the last button pressed (because it is blinking).
Note: You can remove levels from the breakaway group simply by toggling Level
press the Level Select button for the desired level. The button blinks and the
previously blinking button lights steadily. Press the steadily lit button to toggle it off,
leaving only the desired level button blinking.
Figure 0-6. Sample Breakaway Mode Display
Select buttons. Pressing a steadily lit button toggles it off. Pressing the blinking
button toggles it off, and causes the last-selected button to blink.
6. For single-destination panels only, press the Source Select button to choose the desired
group of sources (1-32 or 33-64).
7. In the Source Section, press the desired button to complete the procedure. All selected
levels from the source (that you just pressed) are routed to the destination.
Once the breakaway take has been performed, the buttons in the Level Select Section return to
the default “all-follow” mode.
Breaking Away Multiple Levels From Different Sources
The SCP 64/8 does not allow you to break away multiple levels from different sources in one
single operation. However, this function can easily be accomplished in two or more passes, by
selecting a different level and a different source with each breakaway pass.
Use the following steps to break away two or more levels from two or more sources. The
instructions apply to both single and dual-destination SCP 64/8 panels.
1. Follow the procedure for breaking away one level from one source, as outlined in the
“Breaking Away One Level From One Source” section on page 5-6.
5-8 SCP Series • User’s Guide
Page 89

Monitor Matrix Mode
2. Repeat step 1 as many times as required, each time selecting a different level and a
different source to route to the assigned destination.
Cancelling a Breakaway Take
If you are in the midst of the Breakaway Mode and need to cancel it for any reason (in order to
return to the default “all-follow” mode), use the following steps. The instructions apply to both
single and dual-destination SCP 64/8 panels.
1. If only one Level Select button is blinking, press it to cancel the breakaway mode and
return to the all-follow mode. Use the Level Shift button as necessary to change groups.
2. If more than one Level Select button is lit, press each steadily lit button to toggle it off,
then press the remaining blinking button to return to the all-follow mode. Use the Level
Shift button as necessary to change groups.
Monitor Matrix Mode
The Monitor Matrix mode allows you to conveniently monitor each signal level’s outputs —
without affecting the router’s actual destinations. Each level has a separate Monitor Matrix
output that is typically routed to physical audio and video monitors in the control room (or
machine room).
When the SCP 64/8 panel is in Monitor Matrix mode, and when a particular destination device
is chosen, you can monitor that destination visually and aurally. You have the ability to see and
hear the source that is routed to the destination, but you can not determine what the actual
source is from the SCP 64/8 panel itself.
Because the SCP 64/8 can be configured as a single or dual-destination panel, two Monitor
Matrix modes are possible:
• When configured as a single destination panel, if you want to use the Monitor Matrix
feature, the panel must be dedicated to that function exclusively, from the RMS.
• When configured as a dual destination panel, one of the two destinations can be assigned
to the Monitor Matrix function from the RMS.
In each case, the assignment of the Monitor Matrix function is performed on the RMS by
typing the keyword “MMTRX” into one of the panel’s available destination entry boxes. Once
the panel is programmed in this manner, the entire SCP 64/8 panel functions in the special
Monitor Matrix mode — allowing you to monitor any of the panel’s available destinations.
SCP Series • User’s Guide 5-9
Chapter 5
Page 90

SCP 64/8 Operations
Note: The following important rules apply when the Monitor Matrix mode is selected
• The buttons in the Source Section (which are normally source selection buttons), become
destination selection buttons.
• The normal procedure for taking a source becomes the process for taking a destination.
• The buttons in the Level Select Section function in the normal way, allowing you to view
the Monitor Matrix output on all levels — or on selected levels. Typically, a Monitor
Matrix “take” is an all-follow take, but you can split the monitor as required. This would
allow you, for example, to see the video routed to destination one (e.g., VTR--021), but
hear the audio routed to destination two (e.g., SATELITE).
• The Protect LED is not valid during the Monitor Matrix mode.
Use the following steps to enable and utilize the Monitor Matrix mode:
1. Regardless of the mode (single or dual-destination), ensure that the Monitor Matrix mode
is properly enabled from the RMS for your specific panel, with the keyword “MMTRX”
entered. The feature will not operate otherwise.
2. Ensure that the panel is properly labeled:
• For a dual-destination panel, ensure that the correct portion of the Destination
(or dedicated) on the SCP 64/8 panel:
Select button is clearly labeled (for example, MMTRX or Mon Mtrx).
• For a single destination panel, ensure that the panel is clearly labeled as a Monitor
Matrix panel.
3. Ensure that the desired destinations are programmed from the RMS (into the Source
Section buttons).
4. Ensure that the buttons in the Level Select Section are in the default “all-follow” mode.
Refer to the “Defaulting the Level Select Buttons” section on page 5-5 for instructions.
5. For a dual-destination panel only, press the Destination Select button to choose the
Monitor Matrix destination.
6. For single-destination panels only, press the Source Select button to choose the desired
group of destinations (1-32 or 33-64).
7. To perform an all-follow Monitor Matrix take, in the Source Section (which now applies
to destinations rather than sources) press the button for the desired destination device.
5-10 SCP Series • User’s Guide
Page 91
Changing Panel LED Intensity
1332
34
43653763873984094110
42
3
35
Panel Brightness Buttons
Brighter Dimmer
+
Hold
Shif t 1-4
Shift
5-
8
8. If you want to break away a level (for purposes of monitoring split destinations), perform
the following steps:
• Press the Level Shift button to choose the group (1-4 or 5-8) that contains the level
that you want to break away.
•In the Level Select Section, press the blinking button. All Level Select buttons turn
off and the button that you pressed blinks. The section is now in the breakaway mode
• If the blinking button is the level that you want, no further action is necessary in the
Level Select Section. If the blinking button is not the level that you want, press the
desired Level Select button and toggle the previous button off. Continue to add (or
remove) levels as desired.
•In the Source Section, press the desired “destination” button to perform the
“breakaway” Monitor Matrix take.
For both all-follow and breakaway procedures, the selected destination is now routed to the
Monitor Matrix output, allowing you to monitor the audio and video signals that are routed to
the destination’s input. Repeat the procedure from step 4 to monitor additional destinations as
required.
Changing Panel LED Intensity
The SCP 64/8 includes a simple mode that allows you to change the intensity of the panel
LEDs. Use the following steps to change LED intensity. The instructions apply to both single
and dual-destination SCP 64/8 panels.
Chapter 5
1. Press and hold the Level Shift button.
2. While holding, press one of the first seven source buttons, as shown below.
Figure 0-7. Panel Brightness Adjustment
The first button is the brightest setting; the seventh button is the dimmest setting.
Note: Even on the dimmest setting the LEDs are never completely off.
3. Release the Level Shift button to complete the procedure.
SCP Series • User’s Guide 5-11
Page 92
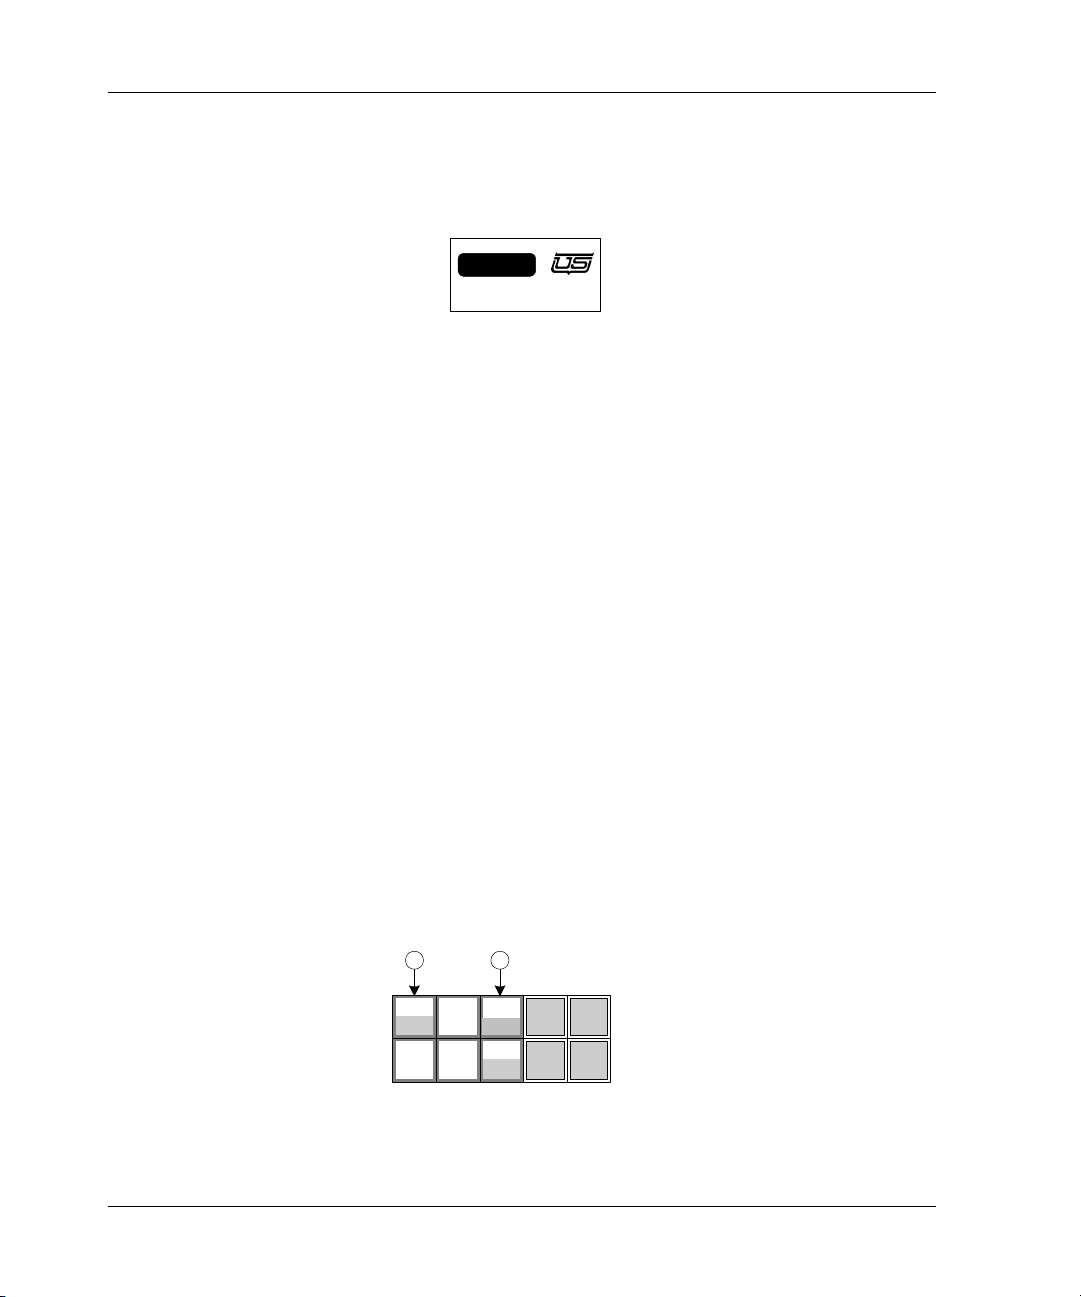
SCP 64/8 Operations
SCP - 64 / 8
PROTECT
Level 1
Level 5
Level 2
Level 6
Level 3
Level 7
Level 4
Level 8
Dest 1
Dest 2
1
1
16
16
Shif t 1
-
4
Shift
5-
8
2
Press
1
Press and Hold
About the Protect LED
When a “Protect” or a “Lock” has been set elsewhere for the selected destination, the Protect
LED lights.
Figure 0-8. Protect LED, Lit State
Protects and Locks can not be initiated or cleared from the SCP 64/8, but if one has been set
elsewhere, its status can be displayed. Refer to the “Terms” section on page 1-3 for basic
definitions of Lock and Protect.
When the Protect LED is lit, the selected source-to-destination routing can not be changed on
the SCP 64/8 panel. If you attempt to make a “take” on the panel, no action is taken. However,
on the initiating panel (the panel that programmed the Lock or Protect), the panel’s display
flashes with a PROTECT warning, indicating that another panel has attempted a “take.”
Note: On the SCP 64/8 Dual Destination version, one destination may be protected
while the other may not. The Protect LED would light accordingly in this case.
In a Protect or Lock situation, if you need to perform a take to the protected destination,
consult with your facility engineer to determine the “initiating” panel, and more important, to
determine if the destination is still in use.
Panel Lock
Software Release 2.06 allows the user to lock the panel so no takes can be made. The panel
will still status changes made from other sources.
• The user Locks the panel (Reference Figure 5-9) by pressing and holding the Level Shift
Button and then pressing the Level 1 Button in sequence.
•To Unlock the panel repeat the sequence above.
Figure 0-9. Panel Lock Sequence
5-12 SCP Series • User’s Guide
Page 93

General Panel Notes
Note the following important points regarding the SCP 64/8 panel in general:
• If the panel’s U-Net connection is lost, all blinking will stop in the Level Select Section.
• With the SCP 64/8 (and with other SCP panels), multiple panels may be assigned to the
same destination. In this case, changes made to a destination from another remote panel
will track on the SCP 64/8, even though the changes were not made on the local panel
itself. Changes made on your panel will also track on a remote panel (that is assigned to
the same destination). Each panel will display the same status information in regards to
levels and sources.
Chapter 5
SCP Series • User’s Guide 5-13
Page 94

SCP 64/8 Operations
5-14 SCP Series • User’s Guide
Page 95

In This Chapter
In This Chapter
This chapter provides setup and operating instructions for the SCP XY/16, a 16 level XY panel
(all sources and all destinations). The following topics are discussed:
• About the SCP XY/16 . . . . . . . . . . . . . . . . . . . . . . . . . . . . . . . . . . . page 6-2
6
SCP XY/16 Operations
• Displaying Level Status . . . . . . . . . . . . . . . . . . . . . . . . . . . . . . . . . . page 6-8
• Selecting a Destination. . . . . . . . . . . . . . . . . . . . . . . . . . . . . . . . . . . page 6-9
• Performing an All-follow Take . . . . . . . . . . . . . . . . . . . . . . . . . . . page 6-12
• Performing a Breakaway Take . . . . . . . . . . . . . . . . . . . . . . . . . . . . page 6-15
• Using the Protect Mode . . . . . . . . . . . . . . . . . . . . . . . . . . . . . . . . . page 6-20
• Performing a Salvo Take . . . . . . . . . . . . . . . . . . . . . . . . . . . . . . . . page 6-26
• Changing Attributes . . . . . . . . . . . . . . . . . . . . . . . . . . . . . . . . . . . . page 6-27
• Using the Chop Mode. . . . . . . . . . . . . . . . . . . . . . . . . . . . . . . . . . . page 6-29
• Monitor Matrix Mode. . . . . . . . . . . . . . . . . . . . . . . . . . . . . . . . . . . page 6-31
• Miscellaneous Panel Modes . . . . . . . . . . . . . . . . . . . . . . . . . . . . . . page 6-33
• General Panel Notes . . . . . . . . . . . . . . . . . . . . . . . . . . . . . . . . . . . . page 6-35
SCP Series • User’s Guide 6-1
Chapter 6
Page 96
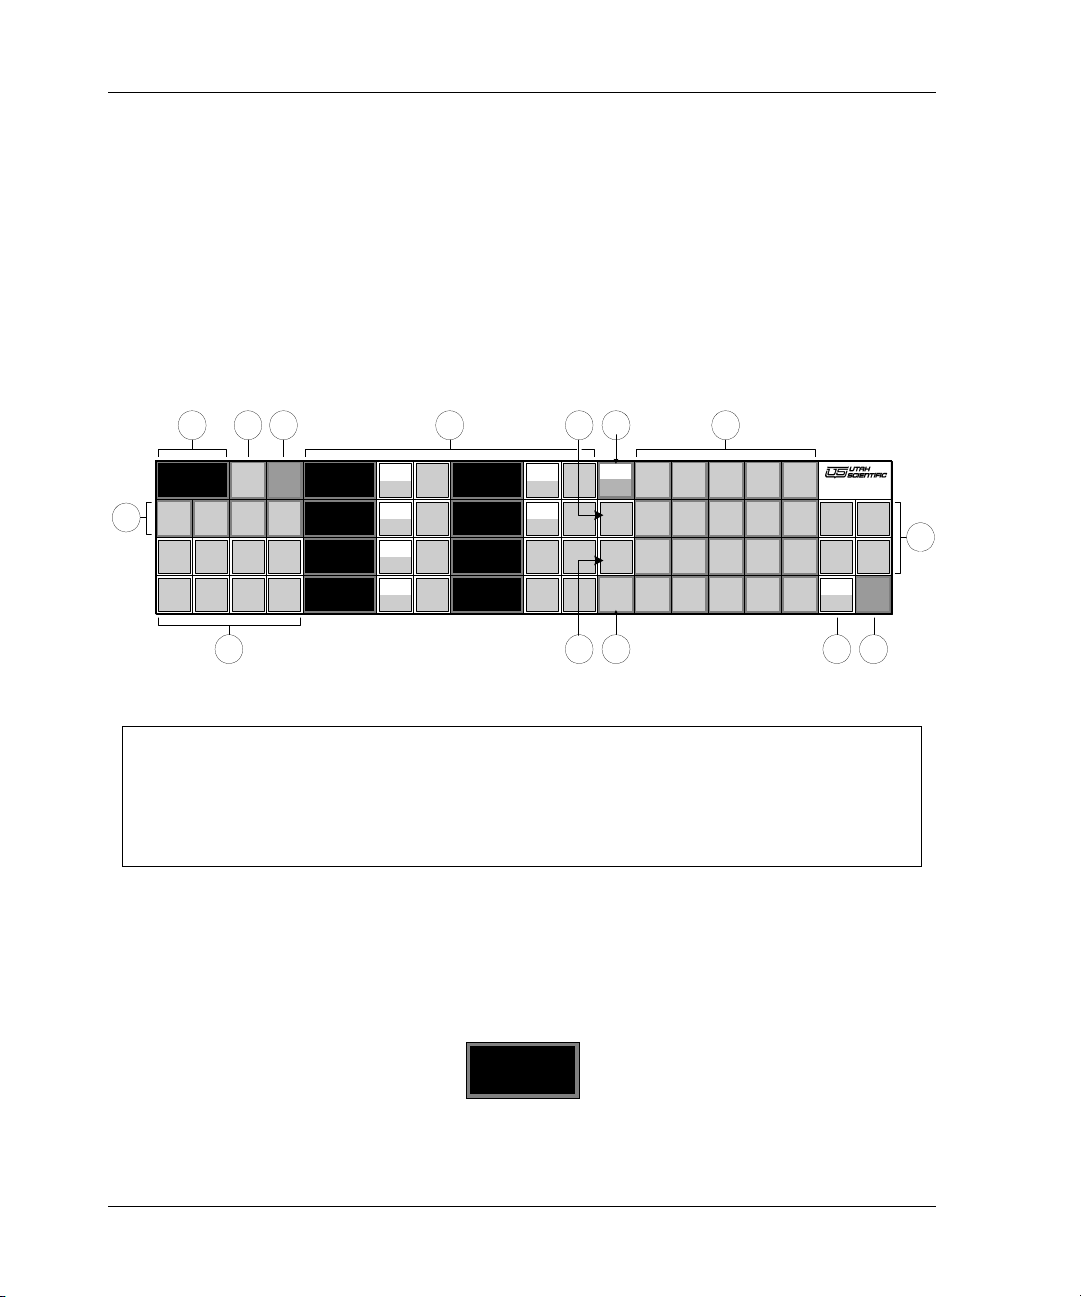
SCP XY/16 Operations
SCP - XY / 16
Salvo
Scroll
Up
Source
SRC 001
Destination
DST 001
Source
SRC 001
Source
SRC 001
Source
SRC 001
Source
SRC 001
Source
SRC 001
Source
Source
Attribute
Scroll
Down
Select
Dest
Protect
Dest1Dest2Dest3Dest
4
Source1Source2Source3Source
4
Source5Source6Source7Source
8
Level 1
Level 9
Level 2
Level 10
Level 3
Level 11
Level 4
Level 12
Level 5
Level 13
Level 6
Level 14
Level 7
Level 15
Level 8
Level 16
Take
Mnemonic
Numeric
SrcGrp 1
1
DstGrp 1
SrcGrp 2
2
DstGrp 2
SrcGrp 3
3
DstGrp 3
SrcGrp 4
A
DstGrp 4
SrcGrp 5
DstGrp 5
SrcGrp 6
4
DstGrp 6
SrcGrp 7
5
DstGrp 7
SrcGrp 8
6
DstGrp 8
SrcGrp 9
B
DstGrp 9
SrcGrp 10
DstGrp 10
SrcGrp11
7
DstGrp 11
SrcGrp12
8
DstGrp 12
SrcGrp13
9
DstGrp 13
SrcGrp 14
C
DstGrp 14
SrcGrp 15
DstGrp15
SrcGrp16
F
DstGrp 16
SrcGrp17
0
DstGrp 17
SrcGrp18
E
DstGrp 18
SrcGrp 19
D
DstGrp 19
SrcGrp 20
DstGrp20
Clear
1 4
3
6
5
10
87 11
12 13
14
2
9
Shift
1-8
Shift 9-16
Destinat ion
VTR--098
About the SCP XY/16
The SCP XY/16 is a 16 level XY panel that provides full access to all sources and destinations
connected to your routing switcher (including the monitor bus). Refer to the “SCP XY/16”
section on page 1-9 for a brief description of the panel’s main features.
The figure below illustrates the main buttons and sections of the SCP XY/16 panel.
Note: For simplicity, numeric labels are shown on the level, source, destination and
group buttons below. Your labels will differ depending upon the level, source,
destination and group assignments in your facility. As shown below, buttons
without labels have no functions assigned.
Figure 0-1. SCP XY/16 PanelSections
1) Destination Display 6) Direct Source Select Section 11) Group Select Section
2) Destination Select Button 7) Salvo Button 12) Display Type Button
3) Direct Destination Select 8) Level Shift Button 13) Take Button
4) Protect Button 9) Attribute Button 14) Scroll Buttons
5) Source Display Section 10) Clear Button
1) Destination Display
The Destination Display is an eight-segment LED readout that shows the currently
selected destination. The display can be switched between numeric and mnemonic
(alphanumeric) modes using the Display Type button.
The figure below illustrates a typical mnemonic destination display.
6-2 SCP Series • User’s Guide
Figure 0-2. Mnemonic Destination Display
Page 97
About the SCP XY/16
Destinat ion
456
Destination
Destination
VTR-- ?
In the mnemonic mode, the display typically shows up to five characters plus a three-digit
extension, signifying a group name plus a specific device within that group.
In the numeric mode, the display typically shows up to three digits, signifying a device’s
numeric identification (ID) as programmed with the RMS (Router Management System).
Figure 0-3. Numeric Destination Display
During the destination selection procedure, two other types of displays are used:
• A display consisting of all “dots” indicates the first step in the destination selection
procedure. At this point, the panel is waiting for data entry.
Figure 0-4. Destination “Dots” Display, Awaiting Data Entry
• A display in which a question mark appears indicates that a group name has been
selected, but an extension has not yet been entered.
Figure 0-5. Destination “Question Mark” Display, Awaiting Extension
Note: Each of the four examples illustrated above also apply to the eight Source Level
Status Dis plays — mnemonic, numeric, dots and question mark.
2) Destination Select Button
The Destination Select button begins, concludes or cancels the procedure for selecting
a destination manually (rather than via a direct selection). When pressed initially, the
button blinks to indicate that the panel is in the “destination select” mode. Please note:
•If the Destination Select button is pressed while an invalid destination is
displayed, the button stops blinking, the Destination Display returns to its default
state prior to pressing the button, and the current destination is retained.
•If the Destination Select button is pressed while a valid destination is displayed,
the button stops blinking, the new destination is accepted, and the display updates
with the new destination name.
SCP Series • User’s Guide 6-3
Chapter 6
Page 98
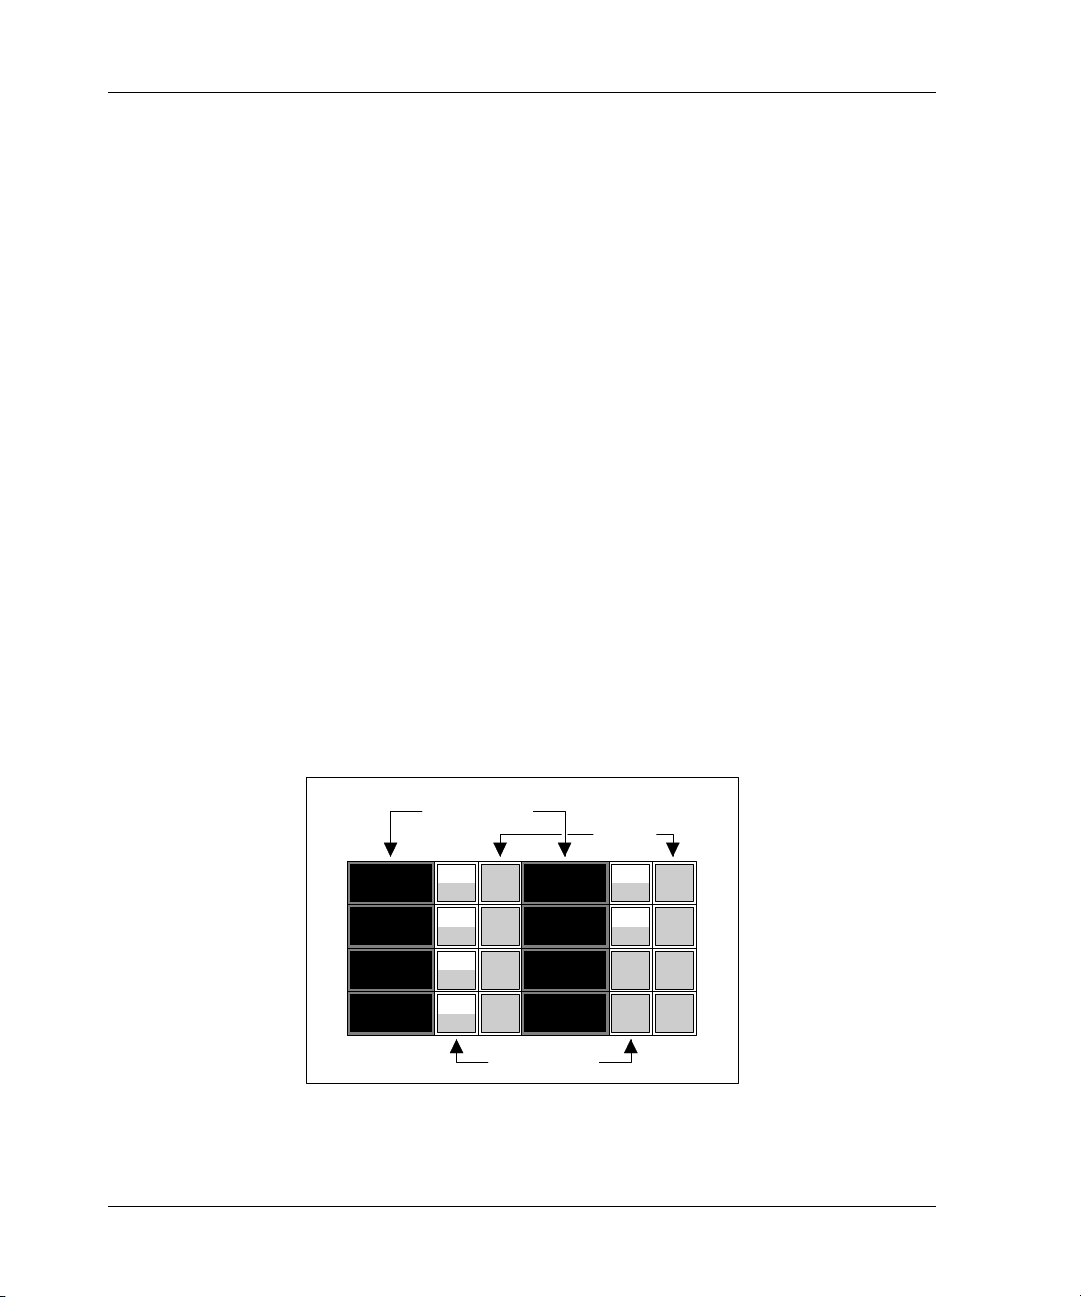
SCP XY/16 Operations
Source
SRC 001
Source
SRC 001
Source
SRC 001
Source
SRC 001
Source
SRC 001
Source
SRC 001
Source
Source
Level 1
Level 9
Level 2
Level 10
Level 3
Level 11
Level 4
Level 12
Level 5
Level 13
Level 6
Level 14
Level 7
Level 15
Level 8
Level 16
Source Level
Status Displays
Level Select
Buttons
Unused
Source
3) Direct Destination Select Section
Each of the four buttons in the Direct Destination Select Section can be pre-programmed
with a favorite (or frequently used) destination. By pressing a Direct Destination
button, the destination is automatically selected, its name appears in the Destination
Display, and the button lights to indicate that a direct destination is in use.
On the SCP XY/16 panel, each of the four buttons is dedicated to its assigned destination,
but any of the available destinations on the entire routing switcher can be assigned. Each
Direct Destination button is programmed from the routing switcher’s RMS tool.
4) Protect Button
The Protect button, when lit Red, indicates that either a Lock or a Protect has been
enabled for the selected destination.
•In the “Protect” mode, all other panels are prevented from routing sources to a
destination — or to a selected level of a destination.
•In the “Lock” mode, all panels (including the current panel) are prevented from
routing sources to a destination — or to a selected level of a particular destination.
When you press Protect, the button blinks and allows you modify the current mode.
Refer to the “Using the Protect Mode” section on page 6-20 for more information and
complete operating instructions.
6-4 SCP Series • User’s Guide
5) Source Display Section
The Source Display Section provides status for all 16 levels of a given destination. You
can easily view the sources assigned to each level, check each level’s validity, and select
various levels for a pending breakaway take.
Figure 0-6. Source Display Section
Page 99

About the SCP XY/16
• The eight Source Level Status Displays provide status for up to 16 levels. Each
display is an eight-segment LED readout that shows the current source associated
with that level, in either the numeric or mnemonic (alphanumeric) modes. The
Display Type button is used to change display modes. The Level Shift button
switches the eight displays between the two groups of levels (1-8 and 9-16).
• The eight Level Select buttons are divided in half, and each segment can be lit
independently. The top half displays the button’s level 1-8 assignment, while the
bottom half displays the button’s level 9-16 assignment (for example, Video, Audio1,
Audio2, Timecode, etc.).
• The buttons perform two functions.
~A lit segment always indicates a valid level — one that can be selected for a
breakaway take. If a segment is not lit, that level is not valid for the current
destination, and can not be included in a breakaway take. If all 16 levels were
valid, all buttons would be fully lit.
~ Pressing a valid Level Select button allows you to include that level in a
breakaway take, and assign a source to that level for routing to the destination.
• The eight unused buttons in the Source Display Section are reserved for future use.
6) Direct Source Select Section
Each of the eight buttons in the Direct Source Select Section can be pre-programmed
with a favorite (or frequently used) source. By pressing a Direct Source button, the
source is “taken” and immediately routed to the selected destination, all associated level
information appears in the Source Display Section, and the button lights to indicate that a
direct source is in use.
Note: The button will light only if all valid levels match the selected source in an
all-follow take situation. If a Direct Source button is used in a breakaway take
situation, the button will not light after Take is pressed, because all valid levels
are now different.
On the SCP XY/16 panel, each of the eight buttons is dedicated to its assigned source, but
any of the available sources on the entire routing switcher can be assigned. Each Direct
Source button is programmed from the routing switcher’s RMS tool.
7) Salvo Button
A Salvo is a group of “Ta ke s” or commands that are stored in the RMS and programmed
in the RMS. Salvos are similar to “macro” keys that you can program on a PC. For
example, a Salvo Take might be programmed to route bars and tone to 10 different VTRs
— at the touch of one button.
SCP Series • User’s Guide 6-5
Chapter 6
Page 100
SCP XY/16 Operations
SrcGrp 1
1
DstGrp 1
Source Group Name
Destination Group Name
Pressing the Salvo button on the SCP XY/16 panel allows you to run one of 32
pre-defined command lists. The panel simply chooses the Salvo number and issues the
“Take” command. Refer to the “Performing a Salvo Take” section on page 6-26 for
complete instructions.
8) Level Shift Button
The Level Shift button switches the displays in the Source Display Section between the
two groups of levels (1-8 and 9-16). The lit portion serves two functions:
• It indicates the levels that are currently shown on the eight Source Displays — for
status purposes.
• It indicates the group of levels that can be chosen with the Level Select buttons —
for including a level in a pending breakaway take.
9) Attribute Button
The Attribute button allows you to change various audio and video attributes of the
routing switcher’s output signal, and route those changes to the desired destination. For
example, by entering the Attribute Mode, you could mute analog audio on a particular
level, or change the digital video data rate. All attribute parameters must be pre-mapped
on the RMS. Refer to the “Changing Attributes” section on page 6-27 for instructions.
10) Clear Button
The Clear button, when pressed during a data entry mode (such as the source or
destination selection procedure), safely cancels the mode and returns the panel to a normal
“status” condition with no buttons blinking. If an entry was in progress, the Destination
Display or the array of eight Source Displays return to their previous assignment(s).
The Clear button effectively allows you to begin an entry procedure again.
6-6 SCP Series • User’s Guide
11) Group Select Section
The buttons in the Group Select Section allow you to select source and destination
“group” names (and extensions). The twenty buttons are divided in half. The top half
displays the button’s source group name, while the bottom half displays the button’s
destination group name.
Figure 0-7. Group Select Button Naming Scheme
A “group” represents a category of devices, and up to 20 source and 20 destination groups
can be programmed from the routing switcher’s RMS tool, and used on the SCP XY/16
panel. Each group can contain up to 1000 sources or destinations, providing you with a
convenient and simple way to address large numbers of devices.
 Loading...