

Page 1
Tel: 877-50-USSUN
www.ussunlight.com
Light Kit Installation
support@ussunlight.com
for Spectrum Skylight Tubes
Thank you for purchasing the Spectrum Skylight Tube Light Kit from U.S. Sunlight Corp. We
are committed to providing alternative energy products that can improve your everyday life
and our environment.
If there is a problem with your U.S. Sunlight product call us at 1-877-50-USSUN
Spare parts and installation advice are only a call away.
Before beginning the installation of your Light Kit, please read through the entire installation
instructions and call us if you have any questions.
We recommend using a 100 Watt equivalent Compact Flourescent Light Bulb (CFL)
USE 60 WATT MAXIMUM LIGHTBULB
(not included)
TOOLS REQUIRED
• Ladder
• Power drill
• ⅛“ and ½“ drill bits
• Measuring tape or ruler
• Pen or marker
• Phillips Drill Bit
2
½
”
g. 1 g. 3g. 2
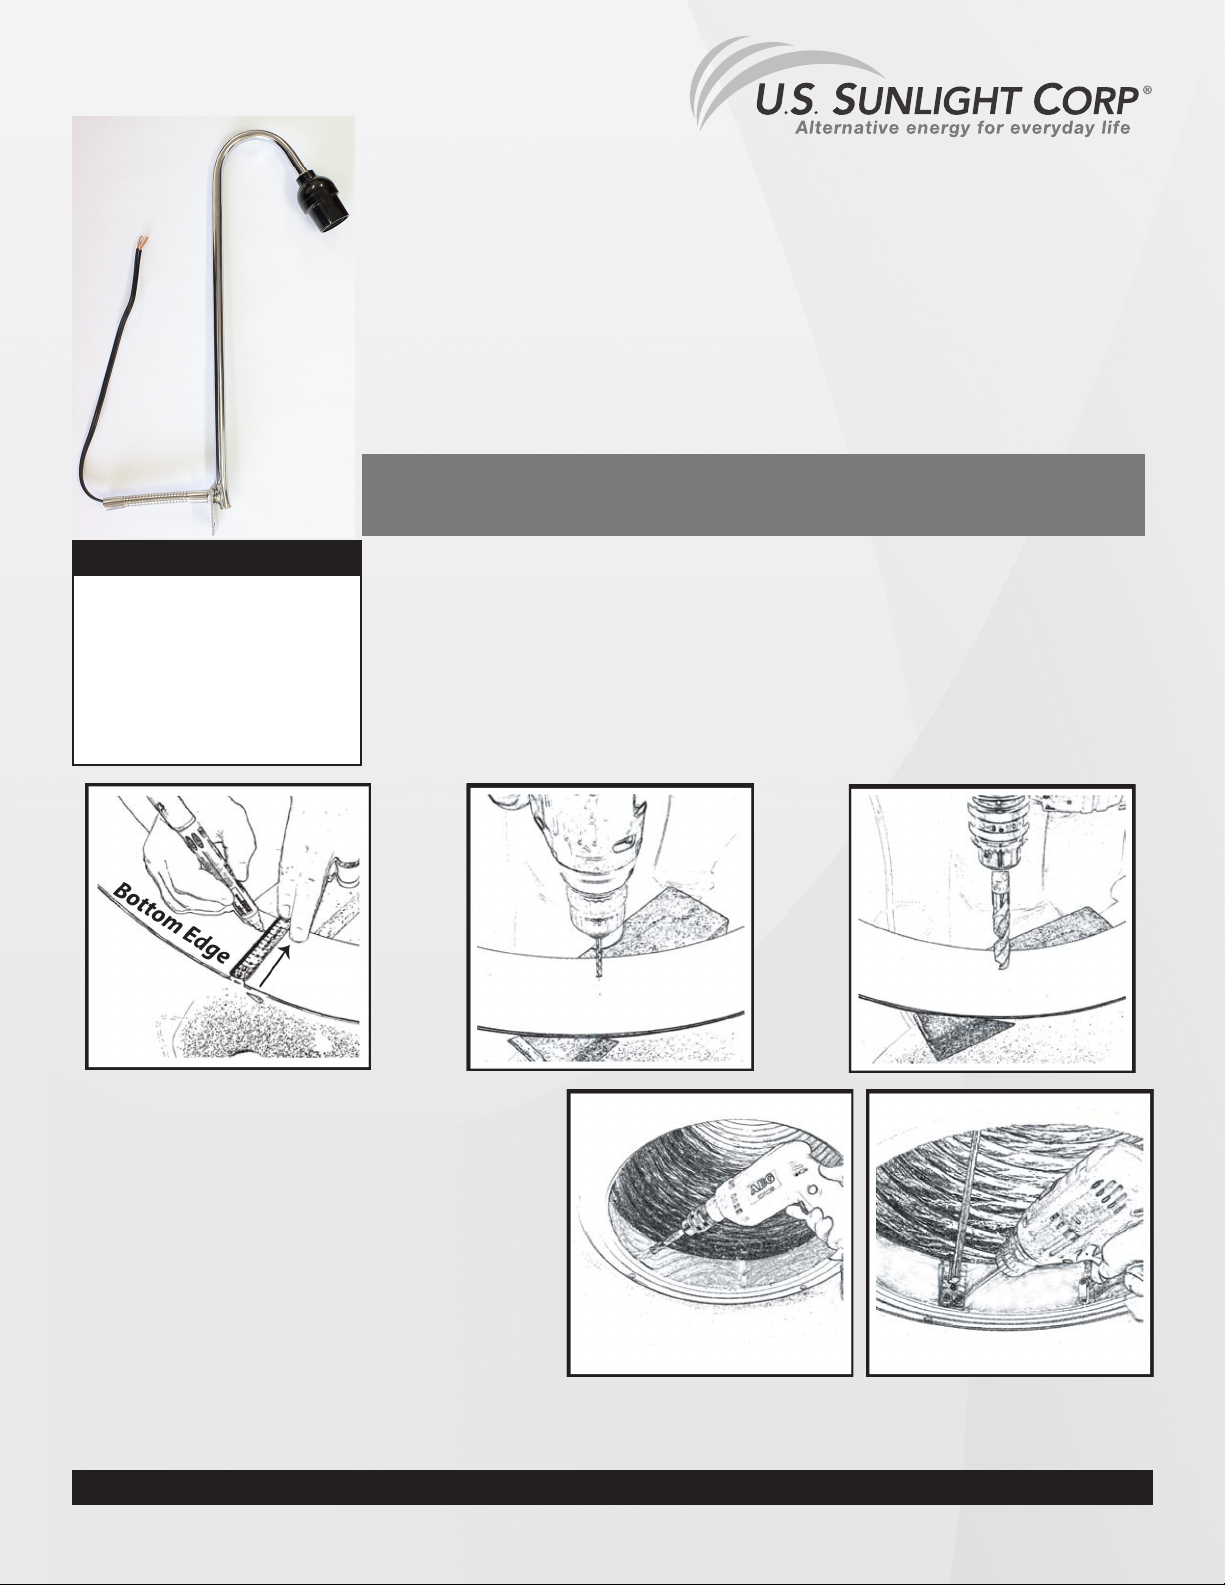
Step 1
Measure & mark a spot 2½” from the bottom edge on your Lower Stainless Steel Ring.
If your Spectrum Skylight Tube is already installed, start at Step 4. (g. 1)
Step 2
Drill a ⅛“ pilot hole on your “marked spot”. (g. 2)
Step 3
Drill a ½“ hole through your pilot hole. (g. 3)
Step 4
After having installed the Lower Ring in the Skylight
Tube as instructed in your separate “Spectrum Skylight
Tube Installation Instructions”, re-drill the ½“ hole, to
clear any obstruction of tubing or duct tape. (g. 4)
Step 5
Insert the exible metal tube of the Light Kit through the
hole you have drilled. Now, while holding the Light Kit in
position, use a power drill with a phillips head drill bit and
screw the three self-drilling screws through the guide
holes on the Light Kit and into the ceiling frame. (g. 5)
g. 4
g. 5
Step 6
Wiring from the light must be properly terminated inside a junction box and securely affixed to a structural member in
the attic per local building codes.
Consult a licensed electrician to complete the installation process, complying with all applicable building codes.
© Copyright 2013 US Sunlight Corp, Inc. Spectrum Light Kit C01 ver 1
 Loading...