

Page 1
5625-B Brisa Street | Livermore, CA 94550
Tel: 877 55 US SUN (877-558-7786)
www.ussunlight.com
Fascia Mounting Kit
support@ussunlight.com
Installation and Mounting Guide
Use with the All Purpose Ventilator, Add-A-Panel Kit, or with
remote mounted panels on the Solar Powered Attic Fan.
The Fascia Mounting Kit allows you to install the solar panel of the All Purpose Ventilator and Add-A-Panel Kit directly to
a fascia board. This gives you another option for mounting the panel instead of on the roof tiles or an exterior wall. Here
are the following steps to install.
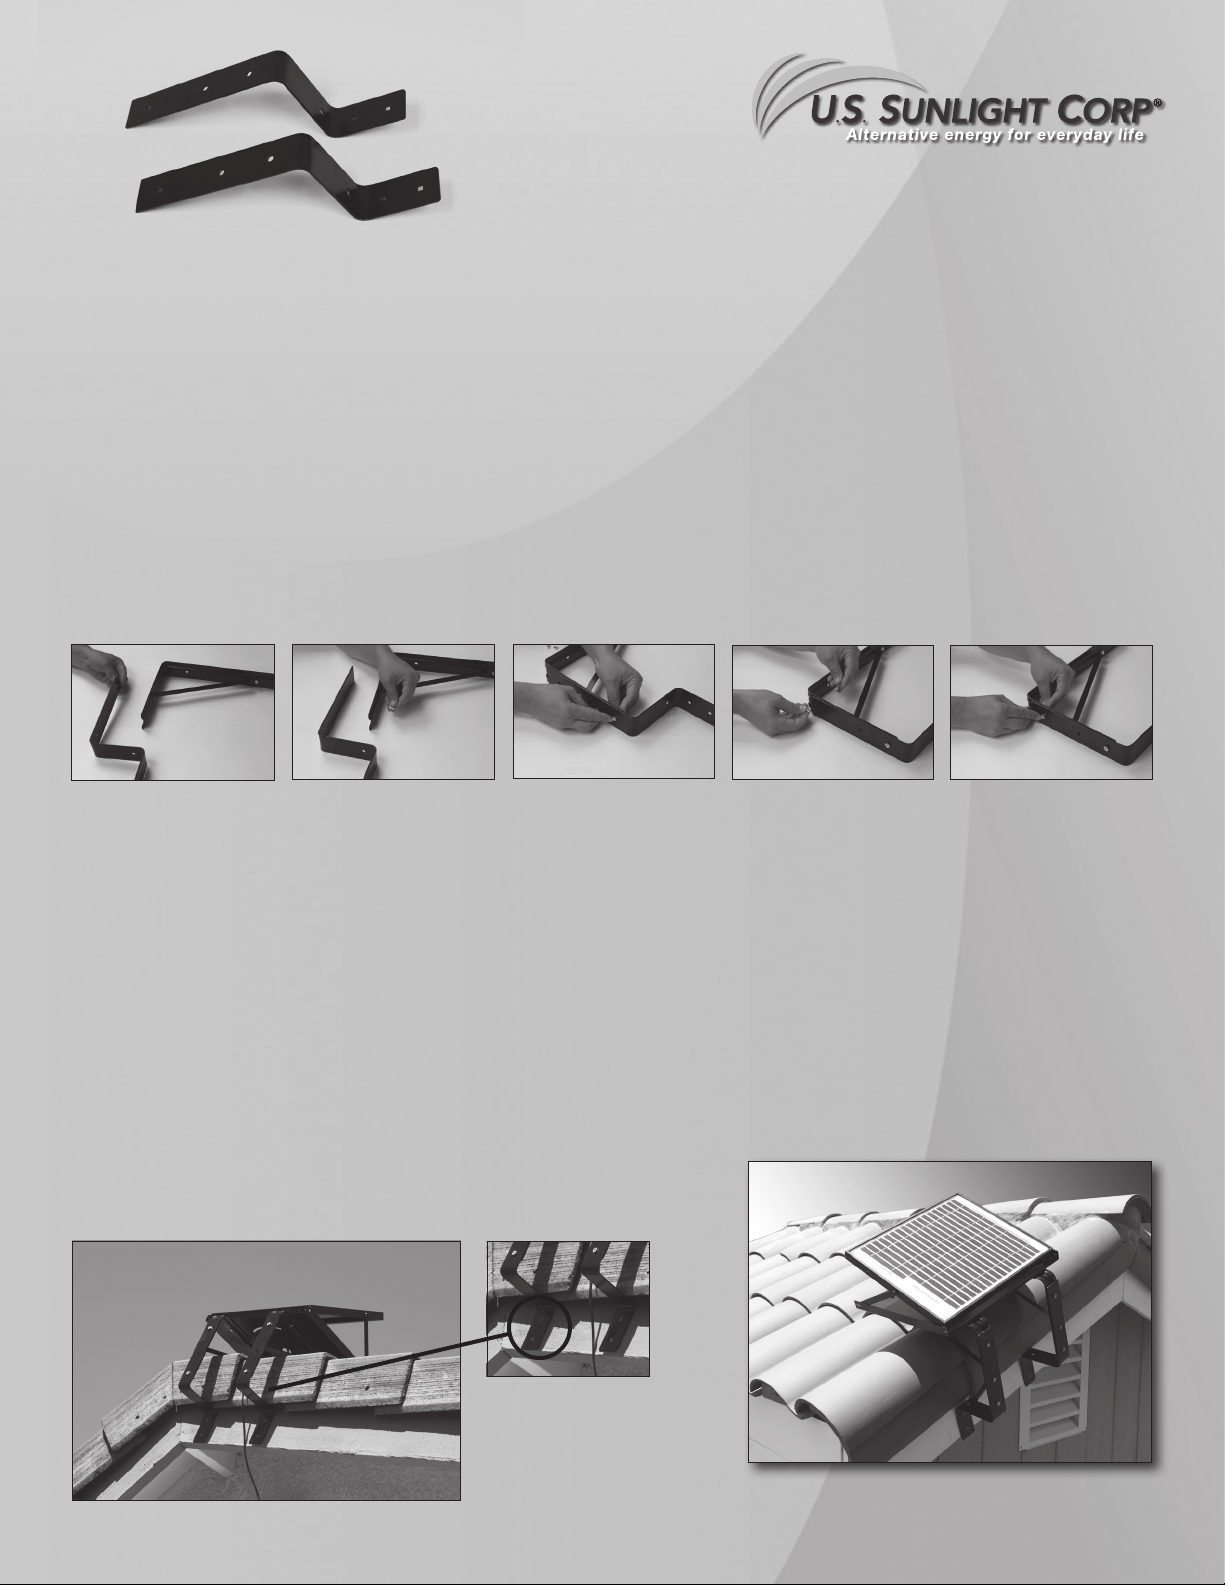
Attach the facia brackets to the fully assembled wall brackets
included with your All Purpose Ventilator
fig. 1 fig. 2 fig. 3 fig. 4 fig. 5
Step 1
On a flat surface, orient the two brackets as shown. (fig. 1)
You can also install on wall brackets that are already attached
to the panel - just make sure they are facing the same
direction.
Step 3
Repeat step 2 for the upper hole with another bolt and nut
(fig. 4 and 5) Once both nuts are secure, tighten completely with
an adjustable wrench.
Step 4
Step 2
Locate the lower hole on the wall bracket (fig. 2) and fit the
bolt through the 2 brackets and attach the nut. (fig. 3)
Repeat all the steps again for the second set of braces. Then
attach to the solar panel as described in your 9910APV
installation instructions.
Attach the complete assembly to your fascia board
Step 5
Find a desired location for the completed assembly and attach with four
1.5” gavanized screws (not included) or fasteners appropriate for your
fascia material. (fig. 6 and 7) Once secure, adjust the panel as desired.
fig. 6
fig. 7
8910FB_rev2 5/13/10
 Loading...