

Page 1
Page 1
6057-C Nitro Fuzer Welding Cart Quick Start Guide
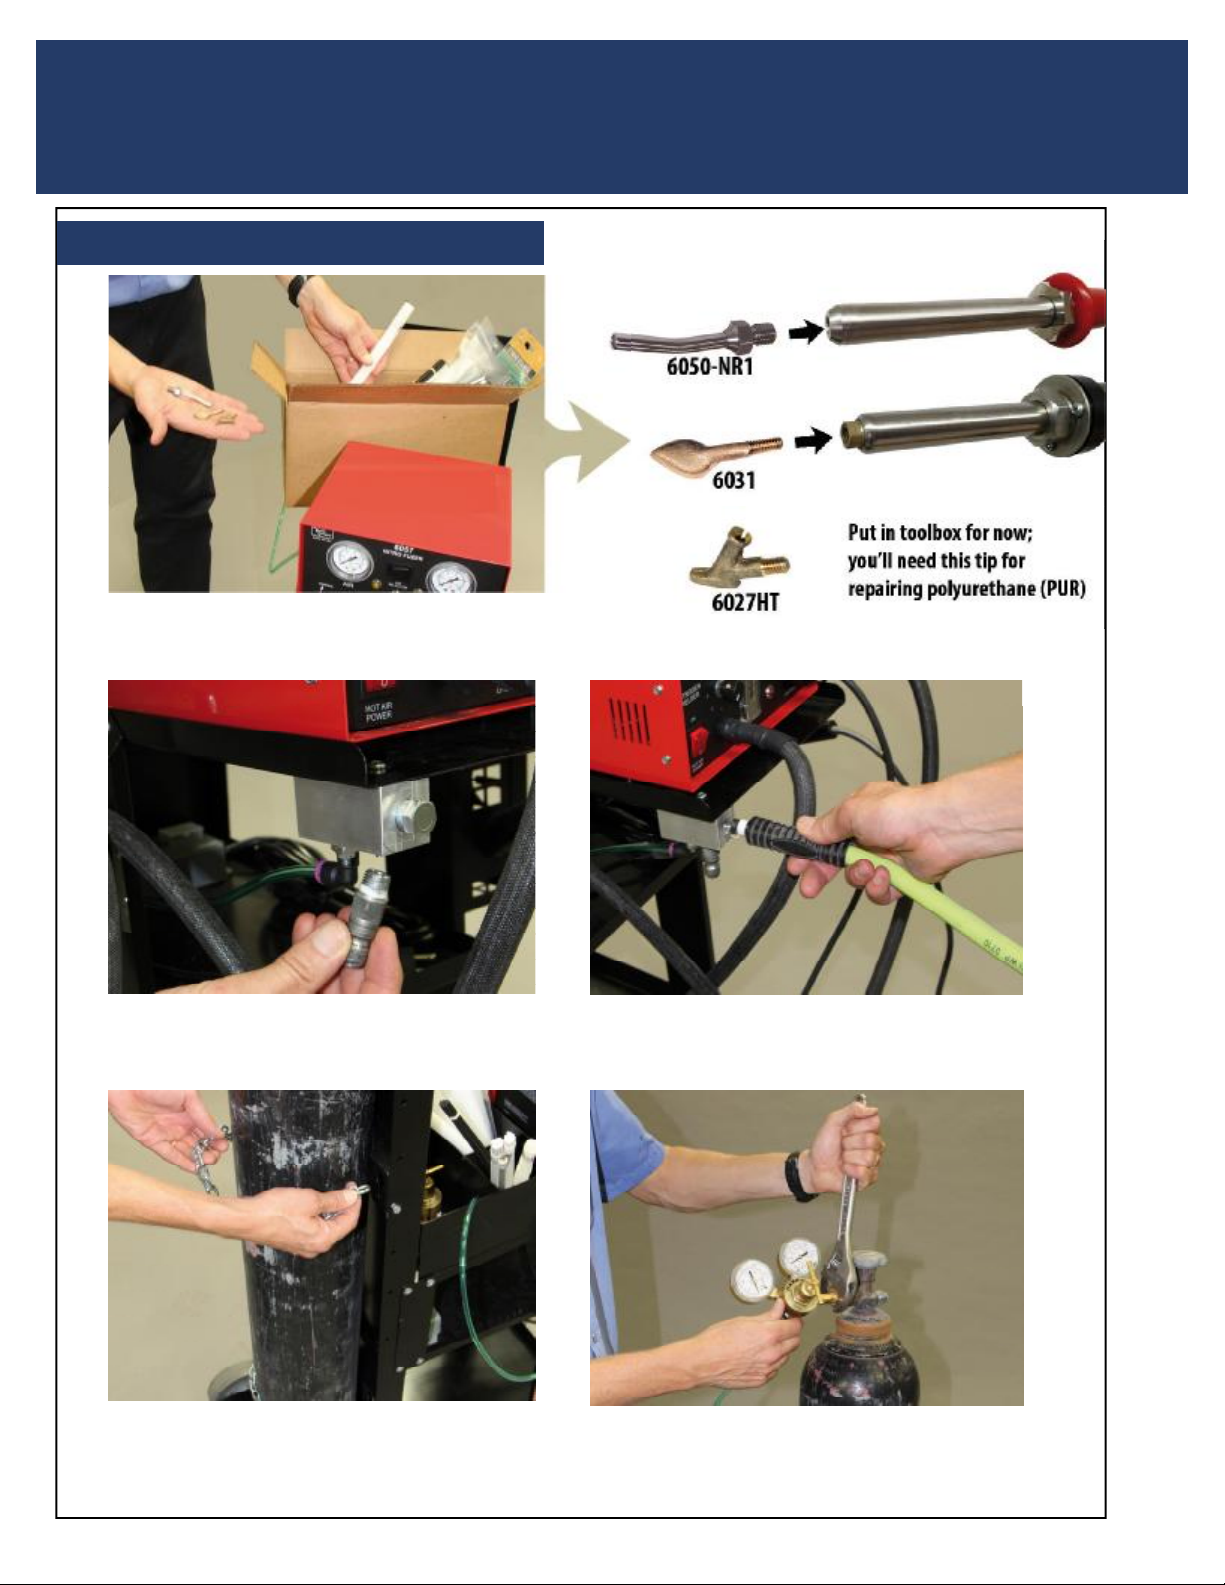
Initial Setup:
1. Unbox cart and remove accessories from box.
Find the hot air welder and airless welder ps
and screw them into to the hea! ng elements.
2. Install your shop’s quick disconnect plug into
the bo# om inlet port of the cart’s air mani-
fold.
4. Install nitrogen tank (argon or argon/CO2
may also be used). Install included safety
chains around tank. Adjust height of top tank
cradle if necessary.
3. A short whip hose may be a$ ached at the
front of the air manifold if desired to power
your die grinder and sander.
5. Screw the nitrogen regulator into the tank.
Do NOT use te" on tape. Tighten securely.
Page 2
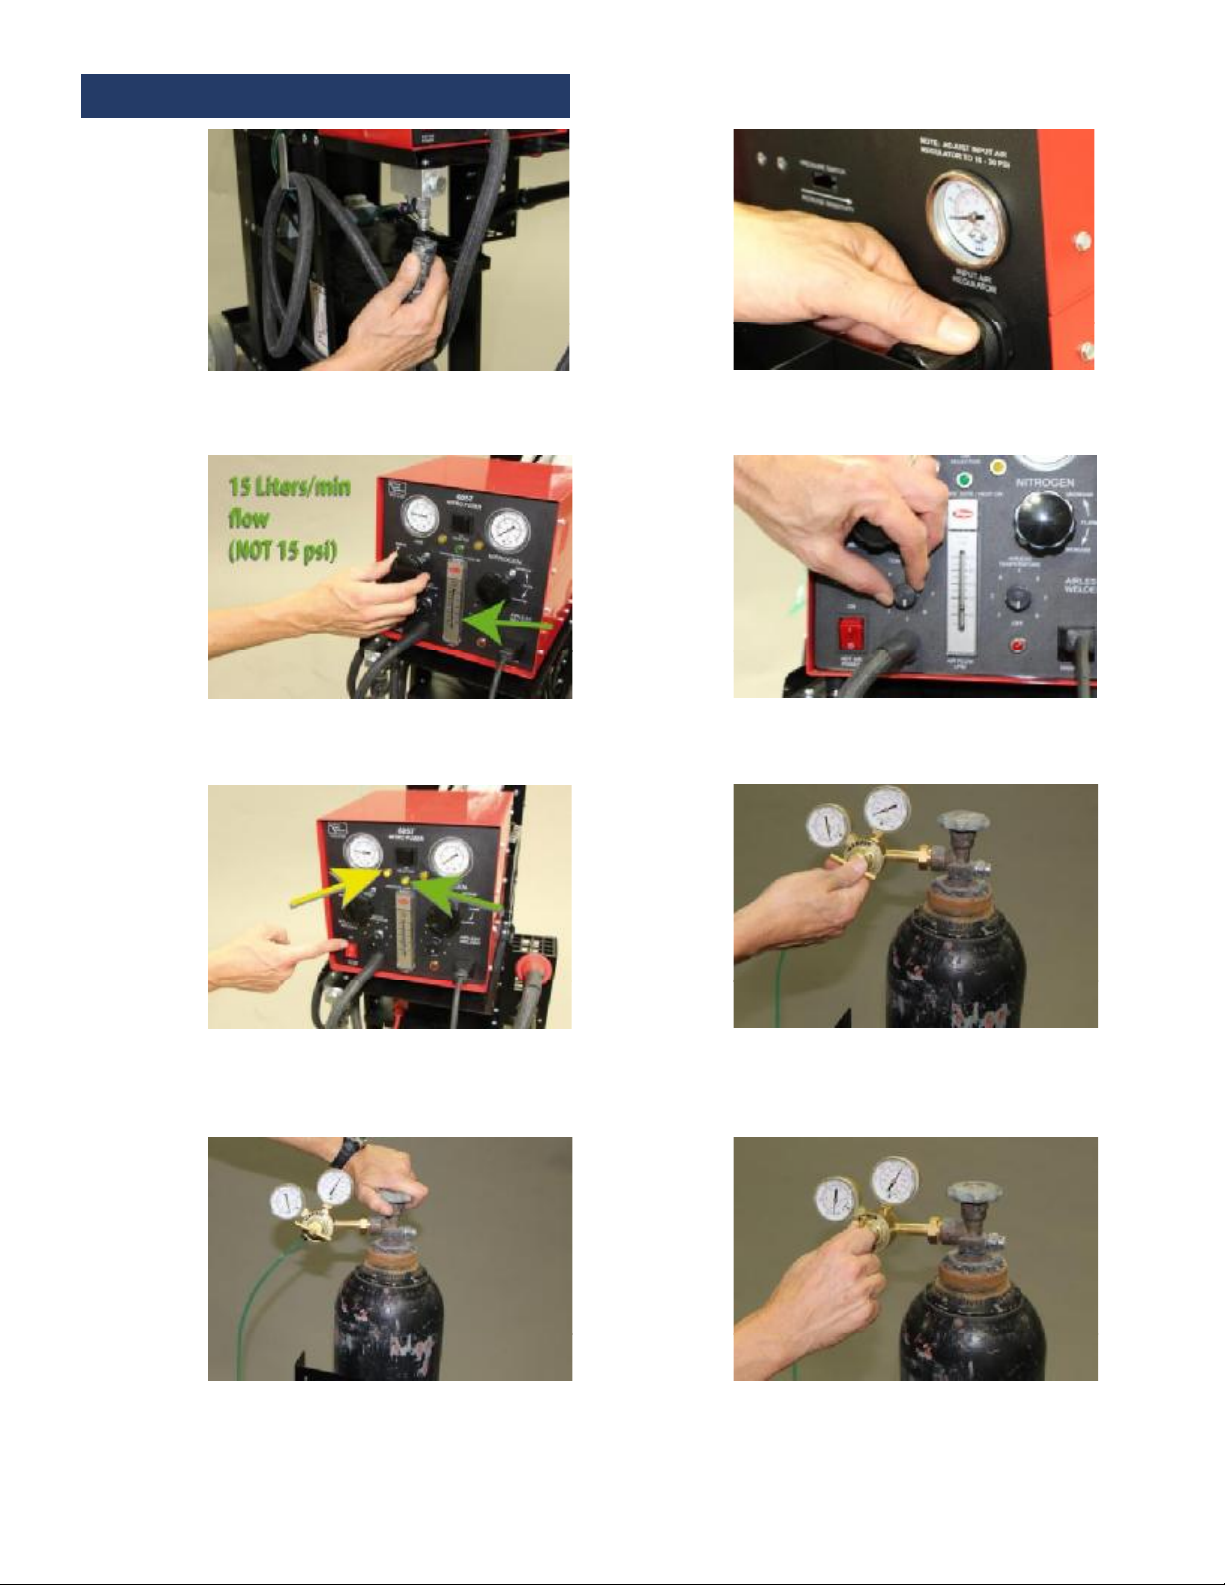
Start-Up Procedure:
1. Connect clean, dry, oil-free shop air to air
inlet. Supply pressure should be set between
60-120 psi.
3. Adjust % ne " ow control on the air (le& ) side
so the " ow meter reads 15 LPM. You should
feel air coming from the torch.
2. Set inlet pressure regulator on back of the
welder to 15 psi.
4. Adjust hot air temperature control to Level 1 to
prevent any current " ow to hea' ng element.
5. Plug in and turn on power strip. Turn hot air power
switch on. Verify that the yellow light on the “air”
side and the green “pressure safe” lights are glowing.
7. Open nitrogen tank valve slowly. Check that the
tank gauge needle shows some pressure in the
tank.
Page 2
6. To turn on the nitrogen, back out the pressure screw
on the nitrogen tank regulator to prevent possible
overpressure from damaging downstream components or the tank regulator.
8. Turn pressure screw clockwise un( l the outlet
side gauge shows 15 psi.
Page 3
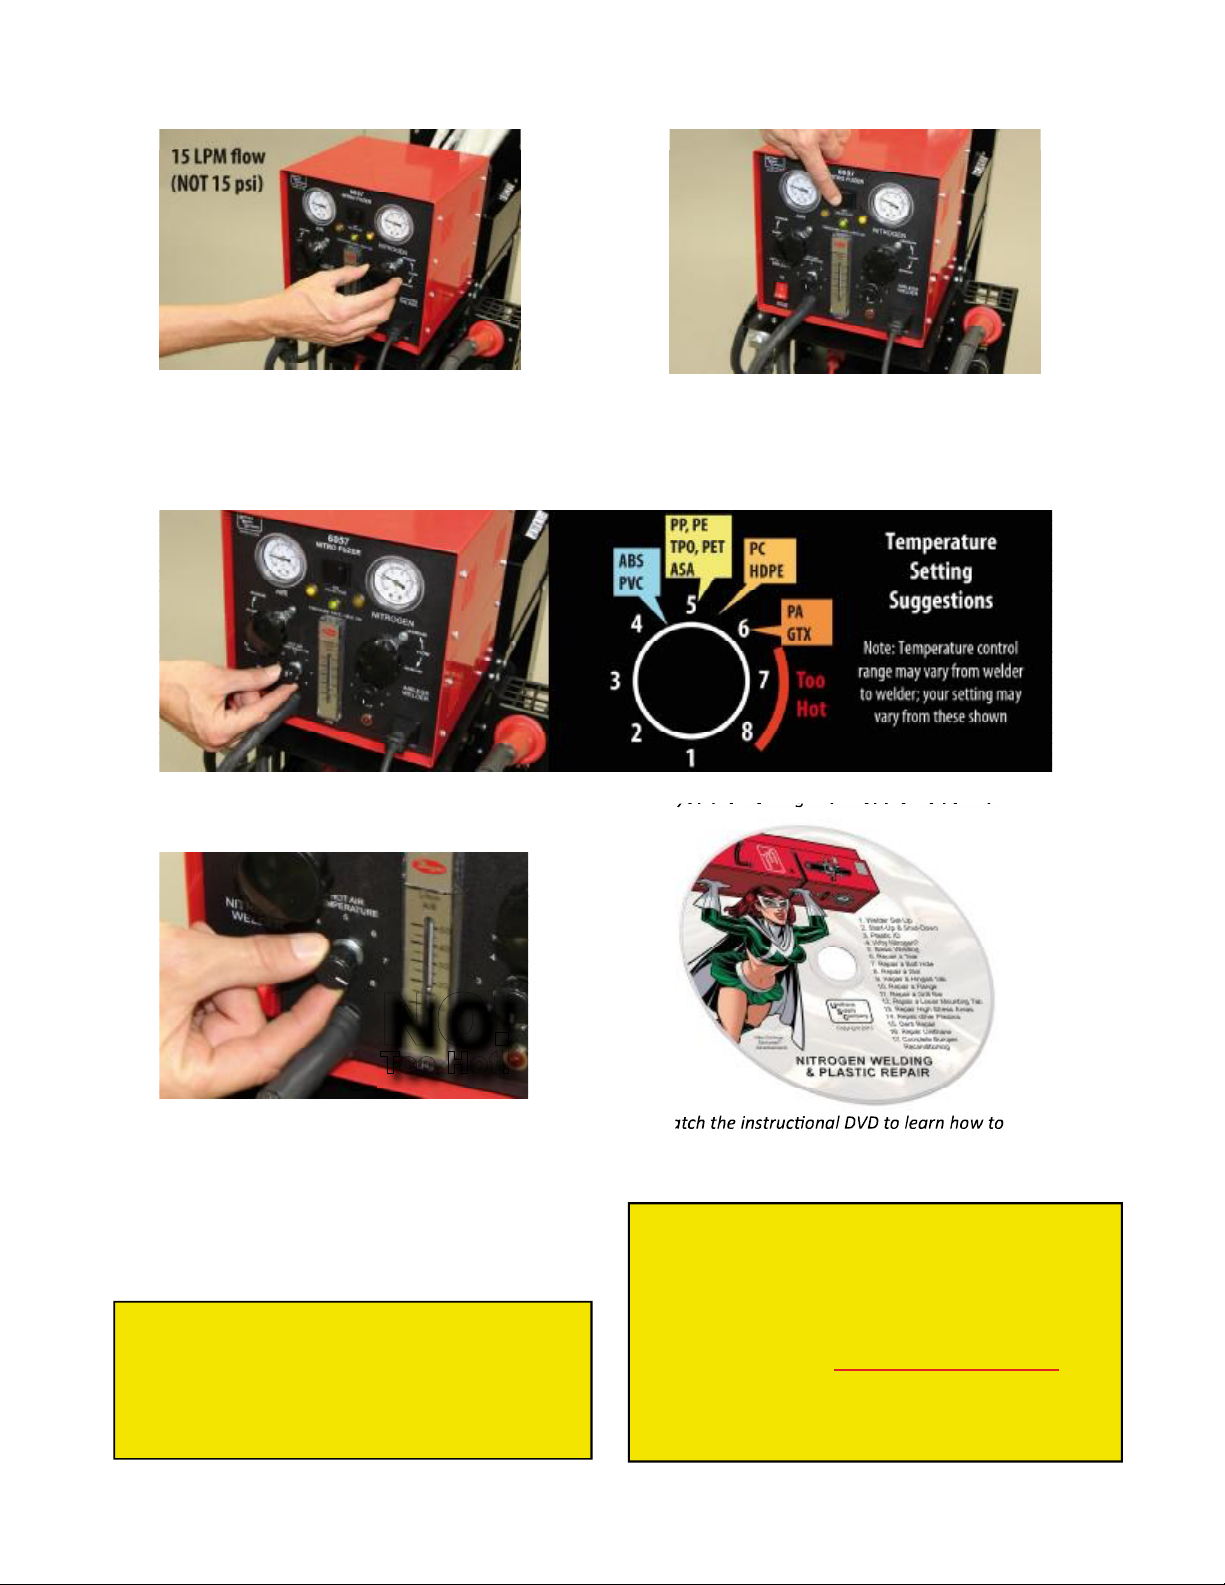
9. Adjust % ne " ow control on the nitrogen (right)
side so the " ow meter reads 15 LPM. You should
feel nitrogen gas coming from the torch.
11. Turn the temperature control dial to the proper level for the plas- c you are working with. Let the welder warm up for
% ve minutes before use.
10. Switch the air selector back and forth between air and nitrogen, making sure that the yellow lights indicate which side is
" owing, that the green pressure safe light is glowing on both
sides, and that you have " ow from the torch on both sides.
Leave on air at all ) mes except when you’re actually welding.
NO!
Too Hot!
12. Do NOT leave on heat level 7 or 8 for any length of
. me because you will overheat the element! These
se/ ngs are appropriate for higher air" ow se0 ngs
and thicker plas1 cs., NOT for thin plas2 cs like used
for most automo3 ve parts.
CAUTION - you must use CLEAN, DRY,
OIL-FREE air for the hot air welder. Water
and/or oil inside the hea# ng element will
dras$ cally shorten its life span.
13. Watch the instruc* onal DVD to learn how to use the
plas+ c welder. Prac, ce on a scrap bumper % rst before
you do any actual repairs.
CAUTION - you must ALWAYS maintain
air ow through the welder while it is hot
or the power is on. Failure to do so will
burn out your hea! ng element. Urethane
Supply Company DOES NOT WARRANT the
hea" ng element because its life is com-
pletely under YOUR control.
Page 3
Page 4
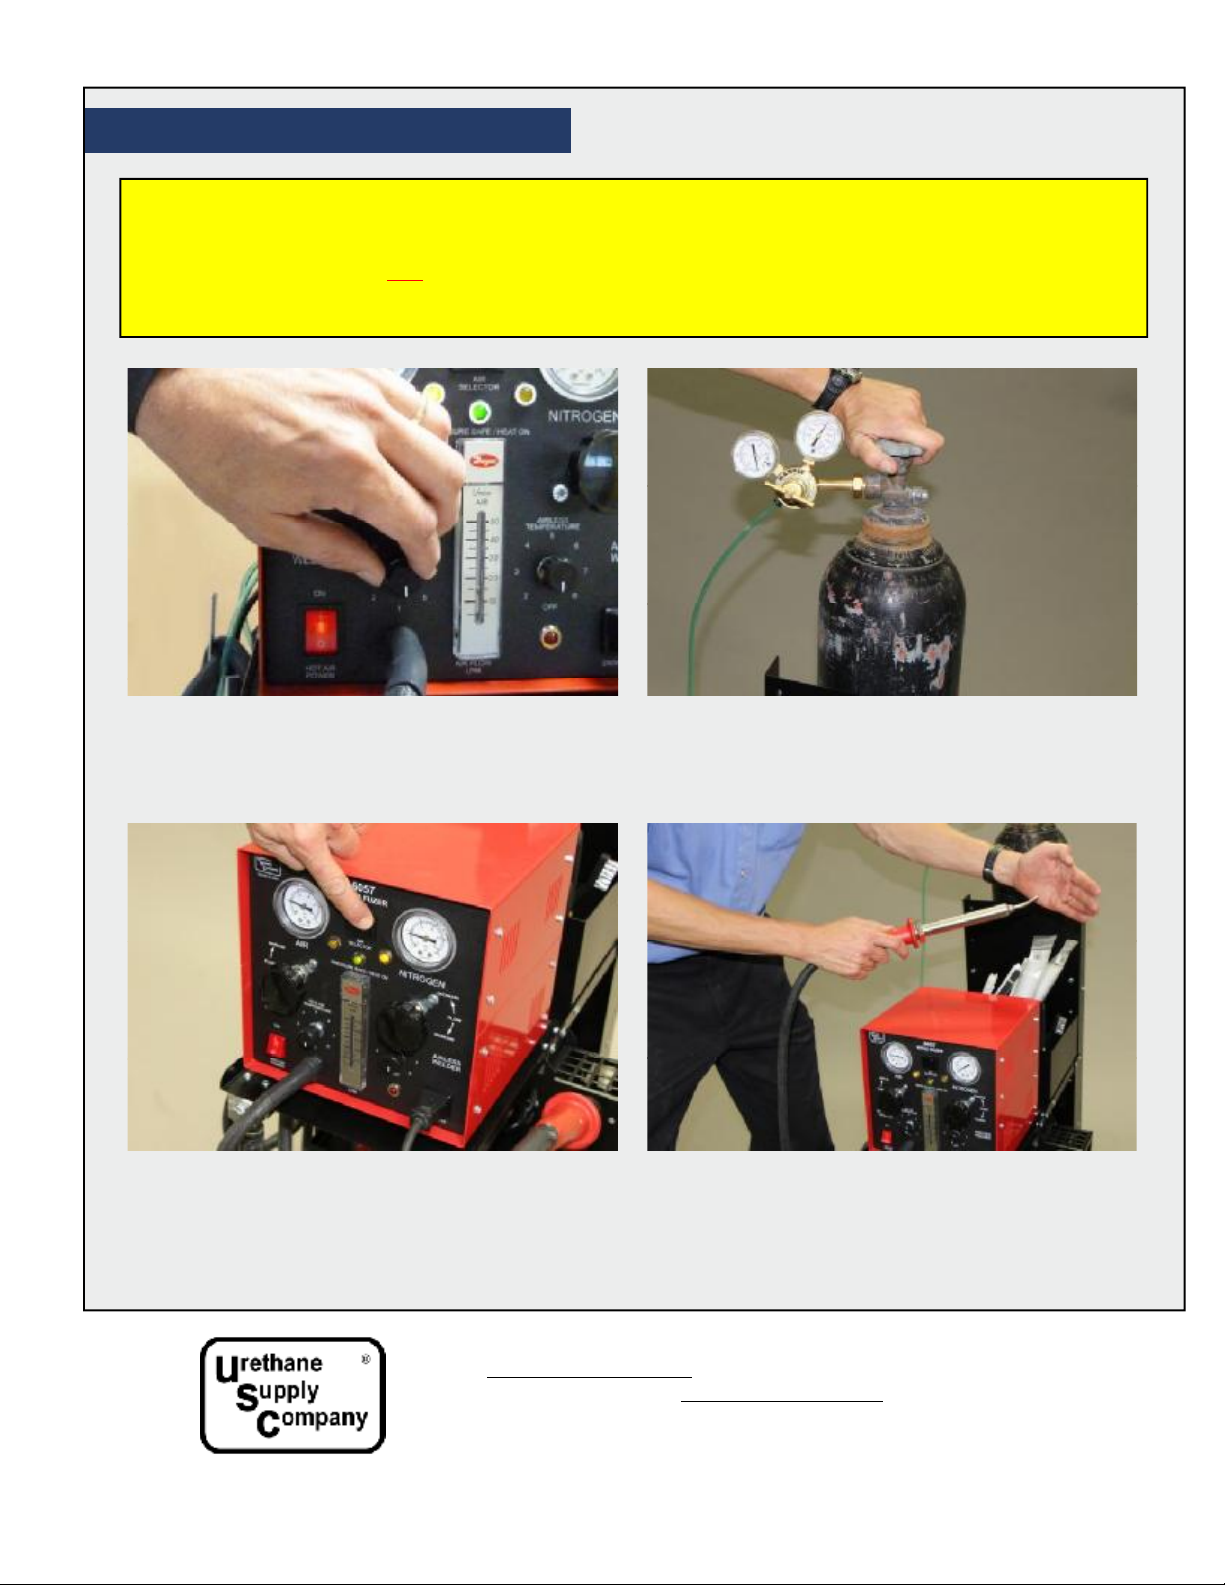
Shutdown Procedure:
The shutdown procedure is VERY IMPORTANT for maximizing the life of your hea ng element. You
MUST shut down power to the unit ! rst, then let clean, dry, oil-free air " ow un# l the hea$ ng ele-
ment is completely cool. You are in control of your hea% ng element’s life... Urethane Supply Com-
pany cannot warrant the hea& ng elements for this reason.
1. Turn the hot air temperature control to Level 1.
This will shut down current " ow to the hea4 ng
element. Allow the air to " ow and cool the ele-
ment.
3. Switch the air selector to the nitrogen side
brie" y to purge the nitrogen from the lines.
Immediately switch back to air to con6 nue
cooling the hea7 ng element.
2. Close the nitrogen tank valve. This will prevent
any downstream leaks from draining the tank
while the welder is o5 .
4. Let the air " ow for at least 10 minutes or un8 l the
air coming from the nozzle is completely cool to
the touch. Shut o5 the hot air power switch, turn
o5 the power strip, and unhook the shop air line.
Quick Start Guide.indd REV 2013-09-01
Contact [email protected] or call 800-633-3047 with any other technical ques ons. You may also visit www.urethanesupply.com or become a fan on
our Facebook or LinkedIn page to get the latest informa! on.
Page 4
 Loading...