

Page 1
SP210
User Guide
Page 2

2
FOR SAFE OPERATION. . . . . . . . . . . . . . . . . . . . . . . . . . . . . . . . . 6
INFORMATION FOR SAFE OPERATION . . . . . . . . . . . . . . . . . . . . . . 6
ABOUT
STORAGE AND MAINTENANCE . . . . . . . . . . . . . . . . . . . . . . 6
MENU . . . . . . . . . . . . . . . . . . . . . . . . . . . . . . . . . . . . . . . . . . . . . . . . . . 7
MEASUREMENT
OF RADIO FREQUENCY EXPOSED
(ABSORBED SPECIAL RATE INFORMATION SAR). . . . . . . . . . . . . . 8
COMMUNICATION NETWORK SERVICE. . . . . . . . . . . . . . . . . . . . . . 9
SAFETY
ON THE ROAD . . . . . . . . . . . . . . . . . . . . . . . . . . . . . . . . . . . 9
SAFETY
IN HOSPITAL. . . . . . . . . . . . . . . . . . . . . . . . . . . . . . . . . . . . 10
SAFETY
IN FLIGHT . . . . . . . . . . . . . . . . . . . . . . . . . . . . . . . . . . . . . . 10
SAFETY
IN PLACES WHERE EXPLOSION IS
PREDICTABLE . . . . . . . . . . . . . . . . . . . . . . . . . . . . . . . . . . . . . . . . . . 10
INFRARED EQUIPMENT AND SAFETY . . . . . . . . . . . . . . . . . . . . . . 11
ELECTRICAL
EQUIPMENT . . . . . . . . . . . . . . . . . . . . . . . . . . . . . . . . 11
BATTERY
AND PARTS. . . . . . . . . . . . . . . . . . . . . . . . . . . . . . . . . . . . 12
INSIDE THE PACKAGE . . . . . . . . . . . . . . . . . . . . . . . . . . . . . . . . 13
HANDSET DESCRIPTION . . . . . . . . . . . . . . . . . . . . . . . . . . . . . .
14
CELLULAR PHONE . . . . . . . . . . . . . . . . . . . . . . . . . . . . . . . . . . .
15
IN THE BEGINNING . . . . . . . . . . . . . . . . . . . . . . . . . . . . . . . . . . . . . . 15
INSTALIMENT
OF SIM CARD . . . . . . . . . . . . . . . . . . . . . . . . . . . . . 15
BATTERY
CHARGE. . . . . . . . . . . . . . . . . . . . . . . . . . . . . . . . . . . . . 17
PHONE ON/OFF
. . . . . . . . . . . . . . . . . . . . . . . . . . . . . . . . . . . . . . . . . 18
START . . . . . . . . . . . . . . . . . . . . . . . . . . . . . . . . . . . . . . . . . . . . . . .
18
STAND-BY SCREEN
. . . . . . . . . . . . . . . . . . . . . . . . . . . . . . . . . . . . 20
CALLS. . . . . . . . . . . . . . . . . . . . . . . . . . . . . . . . . . . . . . . . . . . . . . . . . 25
MAKING A CALL . . . . . . . . . . . . . . . . . . . . . . . . . . . . . . . . . . . . . . .
25
ANSWERING THE PHONE
. . . . . . . . . . . . . . . . . . . . . . . . . . . . . . . 25
WHOLE MENUS
. . . . . . . . . . . . . . . . . . . . . . . . . . . . . . . . . . . . . . . . . 26
COMMON SCREENS AND SYSTEM IN VARIOUS
MENUS . . . . . . . . . . . . . . . . . . . . . . . . . . . . . . . . . . . . . . . . . . . . . . . . 27
INPUT PHONE NUMBER . . . . . . . . . . . . . . . . . . . . . . . . . . . . . . . .
27
WRITER . . . . . . . . . . . . . . . . . . . . . . . . . . . . . . . . . . . . . . . . . . . . . . 27
WRITER OF PHONE NUMBER . . . . . . . . . . . . . . . . . . . . . . . . . . .
28
WRITER OF NUMBER . . . . . . . . . . . . . . . . . . . . . . . . . . . . . . . . . .
28
WRITER OF TEXT
. . . . . . . . . . . . . . . . . . . . . . . . . . . . . . . . . . . . . . 29
MULTI INPUT
. . . . . . . . . . . . . . . . . . . . . . . . . . . . . . . . . . . . . . . . . . 31
SMART INPUT
. . . . . . . . . . . . . . . . . . . . . . . . . . . . . . . . . . . . . . . . . 31
TEXT SELECTOR . . . . . . . . . . . . . . . . . . . . . . . . . . . . . . . . . . . . . .
32
Table Of Contents
Page 3

3
1.CALLS. . . . . . . . . . . . . . . . . . . . . . . . . . . . . . . . . . . . . . . . . . . . . 33
CALL LOGS . . . . . . . . . . . . . . . . . . . . . . . . . . . . . . . . . . . . . . . . . . . . 34
MISSED . . . . . . . . . . . . . . . . . . . . . . . . . . . . . . . . . . . . . . . . . . . . . . 34
RECEIVED. . . . . . . . . . . . . . . . . . . . . . . . . . . . . . . . . . . . . . . . . . . . 35
DIALED NUMBERS
. . . . . . . . . . . . . . . . . . . . . . . . . . . . . . . . . . . . . 36
VOICE MAIL . . . . . . . . . . . . . . . . . . . . . . . . . . . . . . . . . . . . . . . . . . . .
37
OPTIONS . . . . . . . . . . . . . . . . . . . . . . . . . . . . . . . . . . . . . . . . . . . . . . 38
CALL SETTINGS
. . . . . . . . . . . . . . . . . . . . . . . . . . . . . . . . . . . . . . . 39
CALL SERVICES
. . . . . . . . . . . . . . . . . . . . . . . . . . . . . . . . . . . . . . . 41
CLEAR CALL LOG
. . . . . . . . . . . . . . . . . . . . . . . . . . . . . . . . . . . . . . 45
AIR TIME . . . . . . . . . . . . . . . . . . . . . . . . . . . . . . . . . . . . . . . . . . . . .
46
CALL COSTS
. . . . . . . . . . . . . . . . . . . . . . . . . . . . . . . . . . . . . . . . . . 47
2. SPECIAL . . . . . . . . . . . . . . . . . . . . . . . . . . . . . . . . . . . . . . . . . . 48
3. EXTRAS
. . . . . . . . . . . . . . . . . . . . . . . . . . . . . . . . . . . . . . . . . . . 49
CALENDAR. . . . . . . . . . . . . . . . . . . . . . . . . . . . . . . . . . . . . . . . . . . . . 50
EVENTS. . . . . . . . . . . . . . . . . . . . . . . . . . . . . . . . . . . . . . . . . . . . . . 51
VIEW CALENDAR
. . . . . . . . . . . . . . . . . . . . . . . . . . . . . . . . . . . . . . 53
OTHER EVENT OPTIONS . . . . . . . . . . . . . . . . . . . . . . . . . . . . . . .
54
CALCULATOR
. . . . . . . . . . . . . . . . . . . . . . . . . . . . . . . . . . . . . . . . . . . 55
WORLD CLOCK
. . . . . . . . . . . . . . . . . . . . . . . . . . . . . . . . . . . . . . . . . 56
UNIT CONVERTER . . . . . . . . . . . . . . . . . . . . . . . . . . . . . . . . . . . . . .
57
STOP WATCH
. . . . . . . . . . . . . . . . . . . . . . . . . . . . . . . . . . . . . . . . . . . 58
4. CAMERA . . . . . . . . . . . . . . . . . . . . . . . . . . . . . . . . . . . . . . . . . . 59
CAMERA. . . . . . . . . . . . . . . . . . . . . . . . . . . . . . . . . . . . . . . . . . . . . . . 60
OTHER OPTIONS
. . . . . . . . . . . . . . . . . . . . . . . . . . . . . . . . . . . . . . 61
MY PICTURES . . . . . . . . . . . . . . . . . . . . . . . . . . . . . . . . . . . . . . . . . .
62
IMAGE MANAGEMENT
. . . . . . . . . . . . . . . . . . . . . . . . . . . . . . . . . . 62
MOTION ALBUM
. . . . . . . . . . . . . . . . . . . . . . . . . . . . . . . . . . . . . . . . . 63
SEND IMAGE . . . . . . . . . . . . . . . . . . . . . . . . . . . . . . . . . . . . . . . . . . .
64
5.PHONEBOOK. . . . . . . . . . . . . . . . . . . . . . . . . . . . . . . . . . . . . . . 65
MIXED PHONEBOOK. . . . . . . . . . . . . . . . . . . . . . . . . . . . . . . . . . . . . 67
HOW TO ENTER PHONEBOOK . . . . . . . . . . . . . . . . . . . . . . . . . . . .
68
VIEW CARD
. . . . . . . . . . . . . . . . . . . . . . . . . . . . . . . . . . . . . . . . . . . 69
CALL CONTACT . . . . . . . . . . . . . . . . . . . . . . . . . . . . . . . . . . . . . . .
70
NEW CONTACT
. . . . . . . . . . . . . . . . . . . . . . . . . . . . . . . . . . . . . . . . 71
SEND MESSAGE . . . . . . . . . . . . . . . . . . . . . . . . . . . . . . . . . . . . . .
72
DELETE CONTACT
. . . . . . . . . . . . . . . . . . . . . . . . . . . . . . . . . . . . . 77
DELETE ALL . . . . . . . . . . . . . . . . . . . . . . . . . . . . . . . . . . . . . . . . . .
78
Table Of Contents
Page 4

4
COPY CONTACT TO SIM . . . . . . . . . . . . . . . . . . . . . . . . . . . . . . . . 78
CHANGE PHONEBOOK . . . . . . . . . . . . . . . . . . . . . . . . . . . . . . . . .
79
NEW GROUP
. . . . . . . . . . . . . . . . . . . . . . . . . . . . . . . . . . . . . . . . . . 79
SEARCH . . . . . . . . . . . . . . . . . . . . . . . . . . . . . . . . . . . . . . . . . . . . . 81
RECEIVE CARD(S)
. . . . . . . . . . . . . . . . . . . . . . . . . . . . . . . . . . . . . 81
SERVICE NUMBER(S) . . . . . . . . . . . . . . . . . . . . . . . . . . . . . . . . . .
81
OWN NUMBER . . . . . . . . . . . . . . . . . . . . . . . . . . . . . . . . . . . . . . . .
82
MEMORY STATUS . . . . . . . . . . . . . . . . . . . . . . . . . . . . . . . . . . . . .
83
GROUP SETTING / GROUP WORK . . . . . . . . . . . . . . . . . . . . . . . . .
84
VIEW GROUP . . . . . . . . . . . . . . . . . . . . . . . . . . . . . . . . . . . . . . . . .
85
SEND MESSAGE TO GROUP . . . . . . . . . . . . . . . . . . . . . . . . . . . .
85
NEW GROUP
. . . . . . . . . . . . . . . . . . . . . . . . . . . . . . . . . . . . . . . . . . 86
RENAME GROUP . . . . . . . . . . . . . . . . . . . . . . . . . . . . . . . . . . . . . .
86
DELETE GROUP
. . . . . . . . . . . . . . . . . . . . . . . . . . . . . . . . . . . . . . . 86
NEW CONTACT
. . . . . . . . . . . . . . . . . . . . . . . . . . . . . . . . . . . . . . . . 86
RECEIVE CARD(S)
. . . . . . . . . . . . . . . . . . . . . . . . . . . . . . . . . . . . . 86
SERVICE NUMBER(S) . . . . . . . . . . . . . . . . . . . . . . . . . . . . . . . . . .
87
CHANGE PHONEBOOK . . . . . . . . . . . . . . . . . . . . . . . . . . . . . . . . .
87
MEMORY STATUS . . . . . . . . . . . . . . . . . . . . . . . . . . . . . . . . . . . . .
87
TERMINAL PHONEBOOK . . . . . . . . . . . . . . . . . . . . . . . . . . . . . . . . .
87
SIM PHONEBOOK . . . . . . . . . . . . . . . . . . . . . . . . . . . . . . . . . . . . . . .
89
6. MESSAGES . . . . . . . . . . . . . . . . . . . . . . . . . . . . . . . . . . . . . . . . 91
RECEIVE MESSAGE . . . . . . . . . . . . . . . . . . . . . . . . . . . . . . . . . . . . . 92
TEXT MESSAGE
. . . . . . . . . . . . . . . . . . . . . . . . . . . . . . . . . . . . . . . 92
MULTIMEDIA MESSAGE
. . . . . . . . . . . . . . . . . . . . . . . . . . . . . . . . . 93
SEND NEW MESSAGE . . . . . . . . . . . . . . . . . . . . . . . . . . . . . . . . . . .
93
SMS MESSAGE
. . . . . . . . . . . . . . . . . . . . . . . . . . . . . . . . . . . . . . . . 93
MULTIMEDIA MESSAGE
. . . . . . . . . . . . . . . . . . . . . . . . . . . . . . . . . 96
INBOX . . . . . . . . . . . . . . . . . . . . . . . . . . . . . . . . . . . . . . . . . . . . . . . 97
SENT . . . . . . . . . . . . . . . . . . . . . . . . . . . . . . . . . . . . . . . . . . . . . . . 100
UNSENT. . . . . . . . . . . . . . . . . . . . . . . . . . . . . . . . . . . . . . . . . . . . . 101
DRAFT MMS . . . . . . . . . . . . . . . . . . . . . . . . . . . . . . . . . . . . . . . . .
101
DELETE ALL SMS
. . . . . . . . . . . . . . . . . . . . . . . . . . . . . . . . . . . . . 101
DELETE ALL MMS
. . . . . . . . . . . . . . . . . . . . . . . . . . . . . . . . . . . . . 101
OPTIONS . . . . . . . . . . . . . . . . . . . . . . . . . . . . . . . . . . . . . . . . . . . . 101
CB MESSAGE . . . . . . . . . . . . . . . . . . . . . . . . . . . . . . . . . . . . . . . . .
105
7.LEISURE. . . . . . . . . . . . . . . . . . . . . . . . . . . . . . . . . . . . . . . . . . 107
GAMES . . . . . . . . . . . . . . . . . . . . . . . . . . . . . . . . . . . . . . . . . . . . . . . 107
Table Of Contents
Page 5

5
MELODIES . . . . . . . . . . . . . . . . . . . . . . . . . . . . . . . . . . . . . . . . . . . . 108
IMAGES . . . . . . . . . . . . . . . . . . . . . . . . . . . . . . . . . . . . . . . . . . . . . . 109
MEMORY . . . . . . . . . . . . . . . . . . . . . . . . . . . . . . . . . . . . . . . . . . . . .
110
8.WAP . . . . . . . . . . . . . . . . . . . . . . . . . . . . . . . . . . . . . . . . . . . . . 111
9. SETTINGS
. . . . . . . . . . . . . . . . . . . . . . . . . . . . . . . . . . . . . . . . 112
ALERT TYPE/VOL . . . . . . . . . . . . . . . . . . . . . . . . . . . . . . . . . . . . . . 113
TELEPHONE. . . . . . . . . . . . . . . . . . . . . . . . . . . . . . . . . . . . . . . . . . . 115
RINGINGTONES . . . . . . . . . . . . . . . . . . . . . . . . . . . . . . . . . . . . . . 115
WALLPAPERS
. . . . . . . . . . . . . . . . . . . . . . . . . . . . . . . . . . . . . . . . 116
TIME AND DATE . . . . . . . . . . . . . . . . . . . . . . . . . . . . . . . . . . . . . .
116
LANGUAGES. . . . . . . . . . . . . . . . . . . . . . . . . . . . . . . . . . . . . . . . . 118
BACKLIGHT. . . . . . . . . . . . . . . . . . . . . . . . . . . . . . . . . . . . . . . . . . 119
DICTIONARY
. . . . . . . . . . . . . . . . . . . . . . . . . . . . . . . . . . . . . . . . . 120
WELCOME MESSAGE . . . . . . . . . . . . . . . . . . . . . . . . . . . . . . . . .
121
RESET SETTING
. . . . . . . . . . . . . . . . . . . . . . . . . . . . . . . . . . . . . . 122
NETWORK . . . . . . . . . . . . . . . . . . . . . . . . . . . . . . . . . . . . . . . . . . . . 123
SELECT MODE
. . . . . . . . . . . . . . . . . . . . . . . . . . . . . . . . . . . . . . . 124
PREFERRED . . . . . . . . . . . . . . . . . . . . . . . . . . . . . . . . . . . . . . . . . 125
SELECT BAND . . . . . . . . . . . . . . . . . . . . . . . . . . . . . . . . . . . . . . .
126
SECURITY . . . . . . . . . . . . . . . . . . . . . . . . . . . . . . . . . . . . . . . . . . . . 127
HOW TO APPLY OR CANCEL PASSWORD . . . . . . . . . . . . . . . .
127
3 TIMES OF WRONG PASSWORD INPUT . . . . . . . . . . . . . . . . .
128
CHANGE PIN 1 & 2
. . . . . . . . . . . . . . . . . . . . . . . . . . . . . . . . . . . . 129
SETTING FDN ENVIRONMENT . . . . . . . . . . . . . . . . . . . . . . . . . .
130
SIM LOCK . . . . . . . . . . . . . . . . . . . . . . . . . . . . . . . . . . . . . . . . . . .
131
CONNECTIVITY . . . . . . . . . . . . . . . . . . . . . . . . . . . . . . . . . . . . . . . . 132
INFRARED. . . . . . . . . . . . . . . . . . . . . . . . . . . . . . . . . . . . . . . . . . . 132
DIRECTIVES OF EUROPEAN UNION . . . . . . . . . . . . . . . . . . . . 135
DECLARATION OF CONFORMITY . . . . . . . . . . . . . . . . . . . . . .
135
WARRANTY
. . . . . . . . . . . . . . . . . . . . . . . . . . . . . . . . . . . . . . . . . 135
Table Of Contents
Page 6

6
Information For Safe Operation
Please read the following user manual carefully to keep from injuries.
About Storage And Maintenance
Do not try to disassemble or repair the phone.
Avoid wet and damp places.
Do not use harmful detergent or harmful chemical materials to wash the
phone.
Instead, use soft cloth to rub its appearance.
Do not inflict strong shock on the appliance.
The appliance shall be situated near the electronic switch for hands to
reach easily when the battery is charged.Do not put the phone in high
temperature environment, which may cause defects on the phone. The
warranty on this phone will be invalid if it is repaired by an unauthorized
person. And its maker does not take responsibility for the breakdown
caused afterward.
Never extract the battery from the phone while turned on, which will cause
defects on the phone.
Contact the agency you joined if the phone or its parts (charger, battery,
and so on) malfunction.
For Safe Operation
Page 7

7
Menu
1. Calls
2. Special
3. Extras
4. Camera
5. Phonebook
6. Messages
7. Leisure
8. WAP
9. Settings
For Safe Operation
Page 8

8
Measurement Of Radio Frequency
Exposed (Absorbed Special Rate
Information SAR)
This phone is a communication appliance with low-output electric wave.
Complying with EU standard requirements related with radio wavelength
exposure, the phone has been designed and made not exceeding the
energy exposure limit of the radio frequency as recommended by European
Union board of directors. The limit specified above is a frequency allowable
in general as a world standard.
World standard value was developed, based on thorough and regular
scientific researches and estimation (examination) by an independence
research institution. The limit is a standard to search for safety of all,
regardless of age or present state of health.
Standard value of the phone exposure is displayed in unit of Specific
absorption index (SAR).
For Safe Operation
Page 9

9
Communication Network Service
Safety On The Road
GRUNDIG mobile conforms to the communication standard laws of
GSM900, GSM1800, GSM1900 and GPRS.
Read this user manual thoroughly to understand and learn the functions of
this appliance.
Customers should know that the trio function (900-1800-1900) is a feature
coming from the communication network.
Make sure that this feature is available via the RED exchange service
personnel.
Additional RED services are available for this phone.
For these services, however, customers are required to join the exchange
service.
For further information on How To Join, see below.
Please remember that using a mobile phone during driving is prohibited.
Follow the rules as applicable in each country.
Stop the car in a safe place if you need to answer or use the phone.
Please always remember the following before using the phone in
emergencies.
Focus on driving only.
Remember the most considerable thing is nothing but your safety.
If you want a Hands-Free device on vehicles, let it installed by an
authorized engineer.
For Safe Operation
Page 10

10
Safety In Flight
Remember the phone if used in the airplane can disturb functions of
electric wave equipment of the airplane.
Therefore, the use of the phone is illegal in the airplane.
Remember to turn the phone off always during flight.
Safety In Places Where Explosion Is
Predictable
In such places as gas stations or chemical factories where explosion is
predictable, the use of any electric wave equipment is illegal and prohibited.
Turn off the phone and avoid the use near any gas station.
Safety In Hospital
The mobile phone since designed to transmit electric waves can disturb
functions of electric or medical appliances.
Remember to turn the phone off always in hospital.
For Safe Operation
Page 11

11
This phone includes infrared transmission equipment.
Do not let infrared rays come in contact with eyes of others nor use
together with other infrared equipment.
Infrared Equipment And Safety
Most electric appliances are secured and protected against the effect of the
phone radio frequency.
Nevertheless, there are some products that are not protected against.
A person who works in a manufacturing company of those products,
wearing heart pulsimeter is desired to keep at least 15cm away from the
phone to avoid the electric wave.
If applicable problems still occur as before to the person with heart
pulsimeter, then the phone shall be turned off.
The phone can disturb functions of some kind of microphones.
In this case, please contact the manufacturing factory of such microphones
for further information.
Since the radio frequency signal generated from this phone may have an
influence on electric equipment of a car (air bag, brake, and so on), please
be well informed thereof via its maker.
Electrical Equipment
For Safe Operation
Page 12

12
For Safe Operation
Battery And Parts
This phone uses a rechargeable battery of Li-ion Technology.
The battery if completely recharged is usable to call for a duration of 230
minutes and available for standing-by for a duration of 180 minutes.
Do not use any charger or battery if damaged or worn out.
Do not touch any circuit of the battery. It will cause damage thereon.
If the battery is kept in hot temperature, its function and duration may be
deteriorated.
Keep temperature always as similar as possible.
The phone if kept in too high or too low temperature may not operate from
time to time even if the battery completely recharged.
Time required to recharge the battery may be different according to several
factors such as capacity left, type of battery and charger, and so on. For the
better performance of recharge, keep suitable temperature.
The battery although completely recharged can be discharged of itself as
the time elapses.
Unplug the switch of the charger if not used.
For effective operation of the phone, please stand the phone always
lengthwise.
Do not throw the battery in a ditch or a fire.
The battery shall be recycled according to its related laws.
Use only the battery, charger and parts attached to the phone just as
provided from the factory.
Parts shall be compatible to be used.
If not, its warranty will be invalid.
If some parts need replacement, contact the agency you joined to order.
Fill up the battery to the maximum prior to its first operation.
For pluggable equipment, the socket-outlet shall be installed near the
equipment and shall be easily accessible.
Page 13
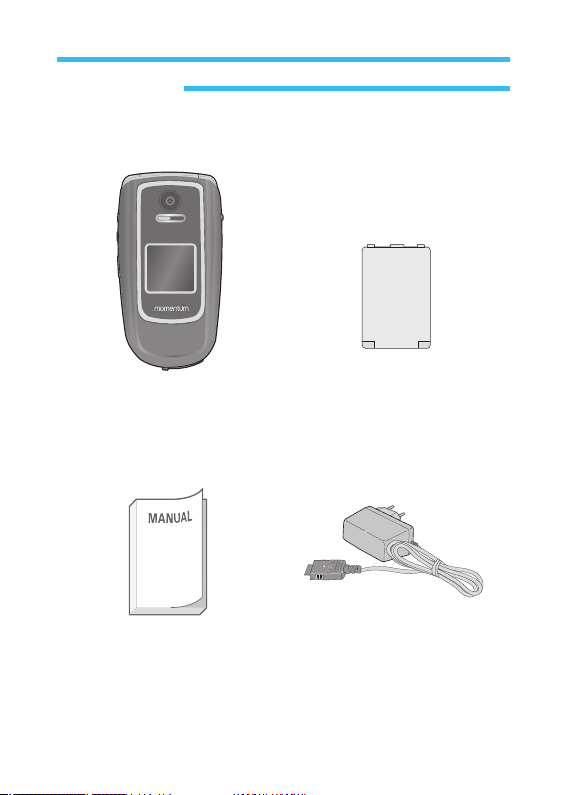
13
Handset Battery
User Manual Charger
Inside The Package
Page 14
14
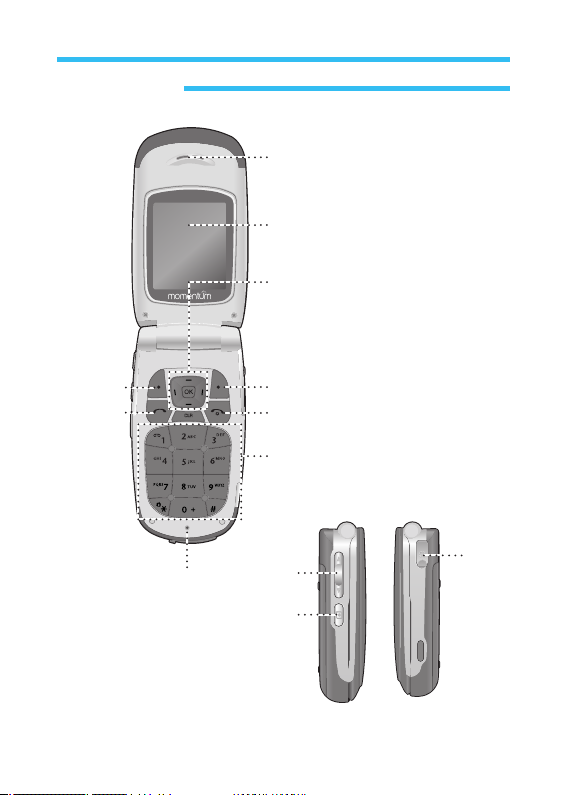
Handset Description
SIde Key
Earpiece
LCD Screen
Navigation &
WAP Key
Right Selection Key
END / Power Key
Alphabet / Number Key
Send Key
MIC
Left Selection Key
Camera Key
Earjack
Page 15
15
Cellular Phone
In The Beginning
Instaliment Of SIM Card
To answer the phone or to call, GRUNDIG mobile needs a available SIM
card, which the communication company may have installed already.
Note If GRUNDIG mobile is used, installation state of the SIM card will be
displayed. If the SIM card is not installed, a confirmation paragraph will be
displayed.
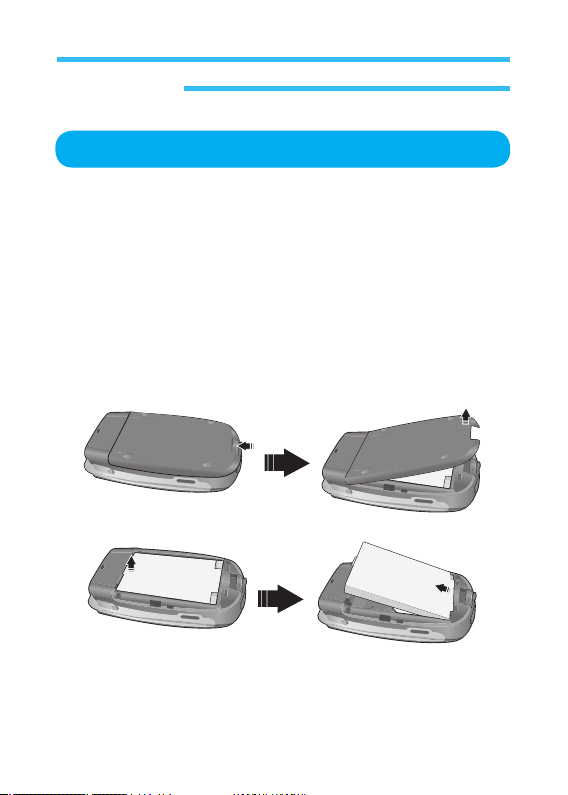
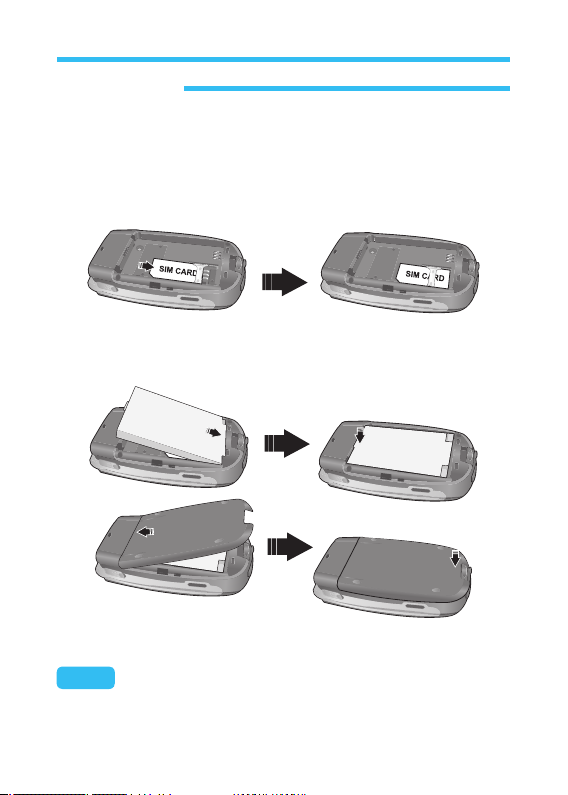
1. Remove the battery after pulling the hook outward with GRUNDIG mobile
turned off. The battery since adhered to the cover will come out as one
component.
Page 16
16
Note: Follow these procedures or some defects may occur on the support
parts of the entrance, which will not be guaranteed.
2. After the battery is removed, insert the SIM card to the hole. At this
moment, make sure the corner of card fits well on the rim of the hole
so to insert the card, checking the remaining aspect. Insert SIM card as
shown in the following figure.
3. As for the two holes, make sure the cover on the rear fits well to insert
the battery. Finally, keep pressing the lower of the cover till it sounds Tic.
4. Pull the hook and insert the cover and the battery.
Cellular Phone
Page 17
17
Cellular Phone
Battery Charge
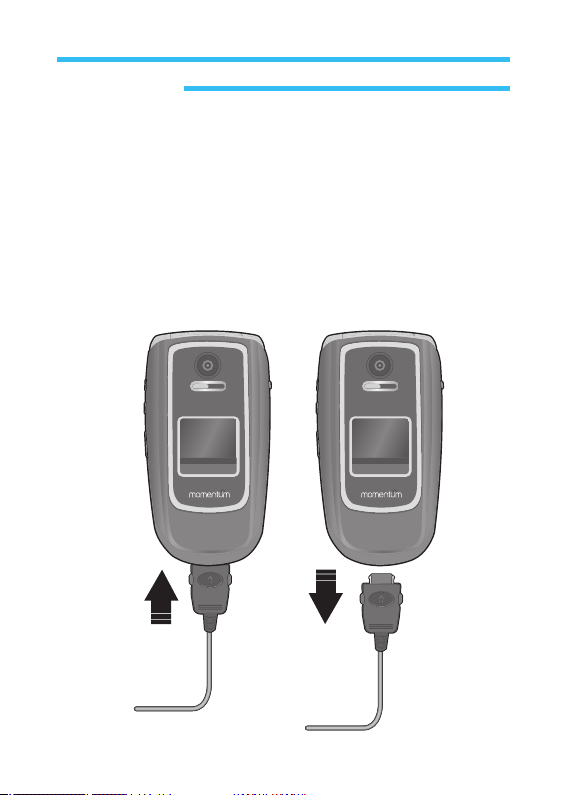
1. Insert the charger as shown in the figure. The screen will display the
Battery is being charged while the phone is turned on for several
seconds before returning to the previous step. (your phone is available
even during the battery is charged). If the phone is turned off, display of
Battery is being charged will be continuously displayed.
2. If the charge is completed, the screen will be as shown in the figure. To
remove the charger hold and press the both ends to extract.
Page 18
18
Cellular Phone
Phone ON/OFF
Keep on pressing the End Key for 5 seconds to turn on the phone.
This function is designed to avoid unintentional ON or OFF of the phone
when kept in a pocket or luggage.
Start
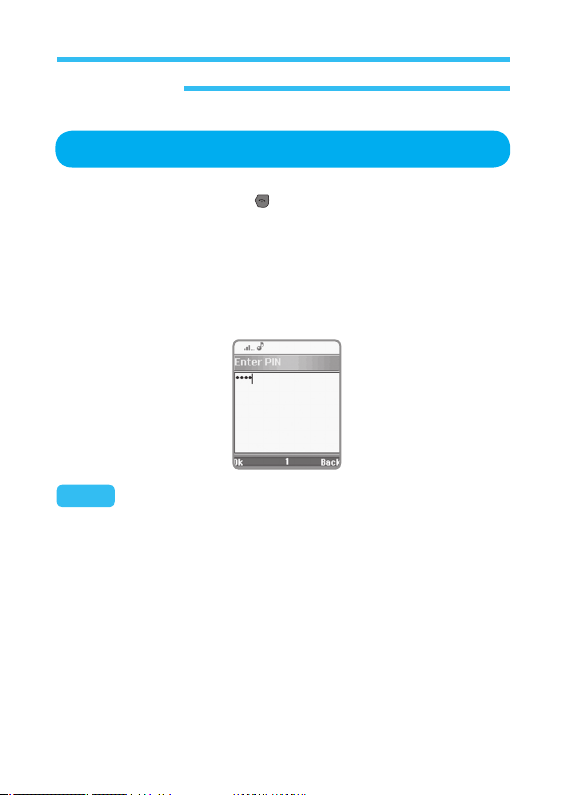
If PIN enable setting on after the phone is turned on, you will be required to
input 4-digit password. Input correct password and press Select Key.
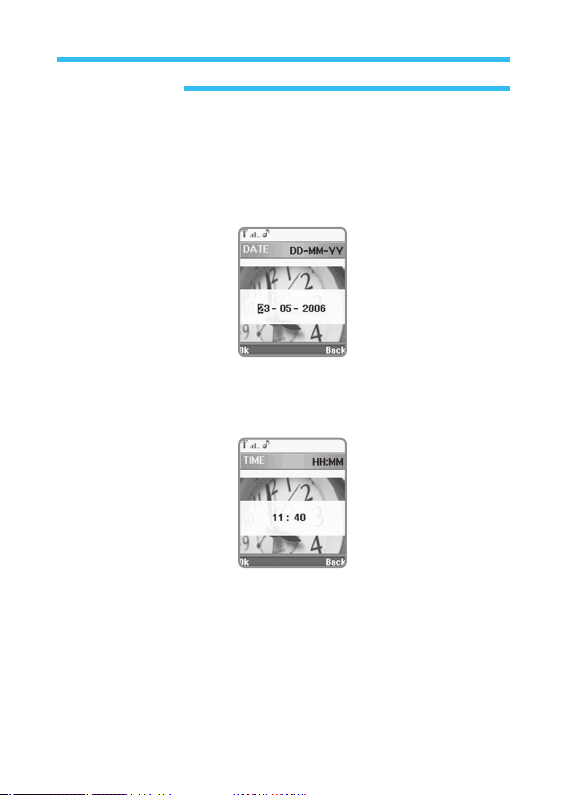
In case the phone has been off for long, you may be asked to make sure if
date and time are correct.
Note: If password is not input, only emergency call will be available with
SOS Key.
Page 19
19
Cellular Phone
If they are not correct, press edit Key.
If the date is correct, press Select Key.
If the date is not correct, input new date using the number on the Key pad
and then press Select Key.
If the time is correct, press Select Key.
If the time is not correct, input new time and then press Select Key.
Page 20
20
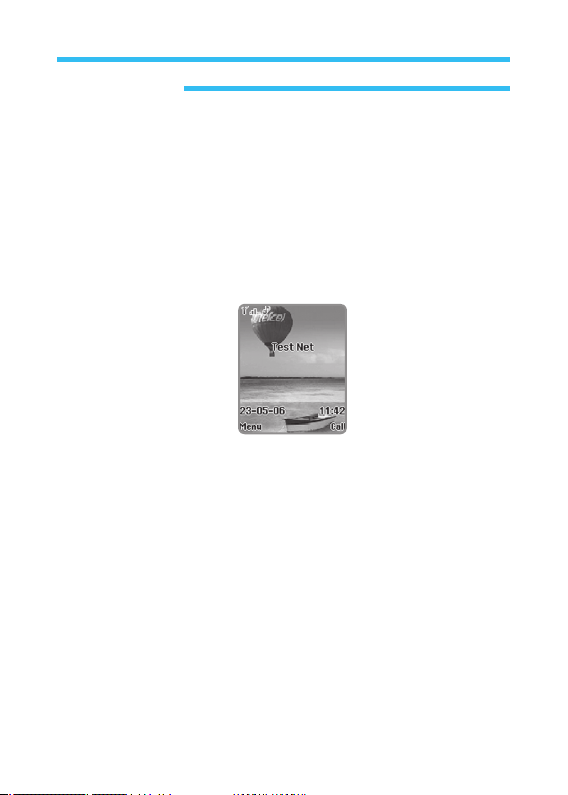
Stand-by Screen
Note For about 1 minute and 30 seconds after the phone is on, it’s image
and menu may be displayed a little slower than usual. This delayed
time is for environmental setting of the menu. And the menu will not be
displayed during this duration. After this duration, the speed will be back to
normal.Stand-by screen is displayed when the phone is available to answer
or use to call.
• Central
Part: If the phone is not available yet for services, bumpy
paper type of background is displayed, where main
menus are displayed here too.
• Lower
Part: On the top, day, month, year and present time will be
displayed. On the bottom, optional menu Key will be
displayed as a selection Key. If services are not ready for
the phone, the option is displayed with Menu, WAP and
Sandglass typed icon in the center. If service are ready,
the center of this selection menu, a room-shaped icon will
be displayed.
Cellular Phone
Page 21
21
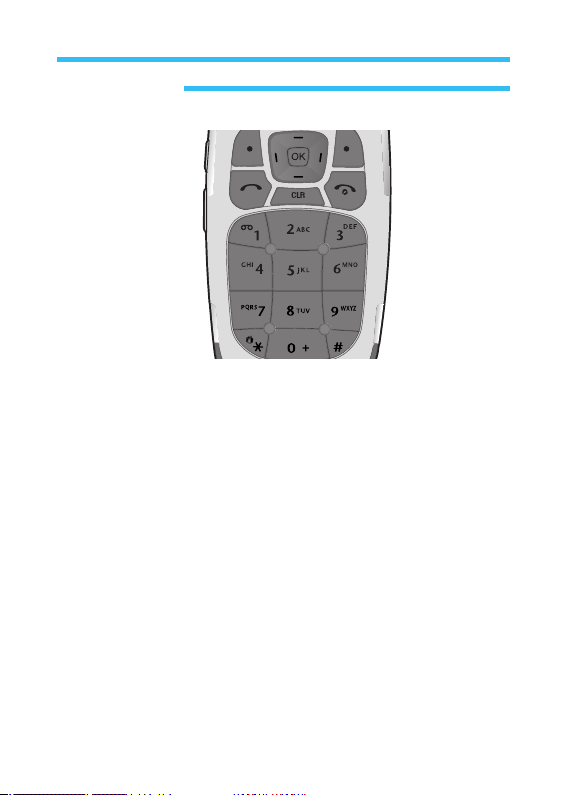
• Press the left selection Key located below the menu in stand-by screen
stat so to display the main menu.
• Press the right selection Key located below the Call Logs menu in
stand-by screen state so to display the Call menu.
• Press the upper of the direction Key in stand-by screen state so to
display the Messages menu.
• Press the lower of the direction Key in stand-by screen state so to
display the Special menu.
• Press the left of the direction Key in stand-by screen state so to display
the Phonebook menu.
• Press the right of the direction Key in stand-by screen state so to
display the Multimedia menu.
• Press the OK Key in stand-by screen state so to display the WAP
menu.
Cellular Phone
Page 22

22
The direction Key will be used mainly to appropriate functions of the
phone.
• Keep on pressing End Key in stand-by screen state to turn off the
phone.
• When the screen is in a normal state, press Send Key to display the
call record.
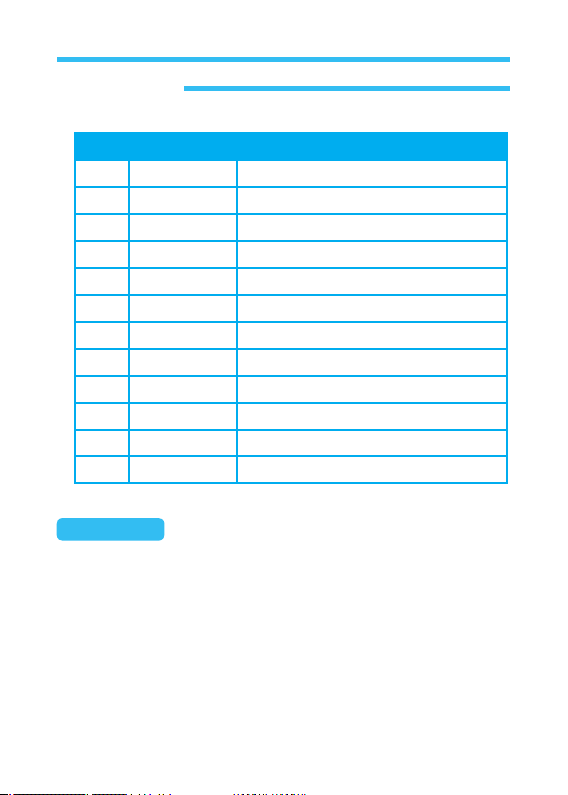
• In order to make a call, press number first in stand-by screen state and the
call Key next. Keep on pressing one number among 2 and 9 and a call to
the number as input will be made. In the following table, various functions
are described as applicable when number keys are pressed for short or
long in stand-by screen state.
They are company mode and individual mode, where a relevant SIM card
mode will appear if any password is input in stand-by screen state.
Company mode and individual mode have their own numbering system
respectively.
Cellular Phone
Page 23
23
Short Long
1 No.1 Call connected to voicemail box
2 No.2 Speed Dial
3 No.3 Speed Dial
4 No.4 Speed Dial
5 No.5 Speed Dial
6 No.6 Speed Dial
7 No.7 Speed Dial
8 No.8 Speed Dial
9 No.9 Speed Dial
0 No.1 Symbol +
* Symbol* Manner Mode
# Symbol# Lock Keypad
Dual SIM card: Dual SIM card has 2 passwords and 2 relevant modes
respectively.
Cellular Phone
Page 24
24
Cellular Phone
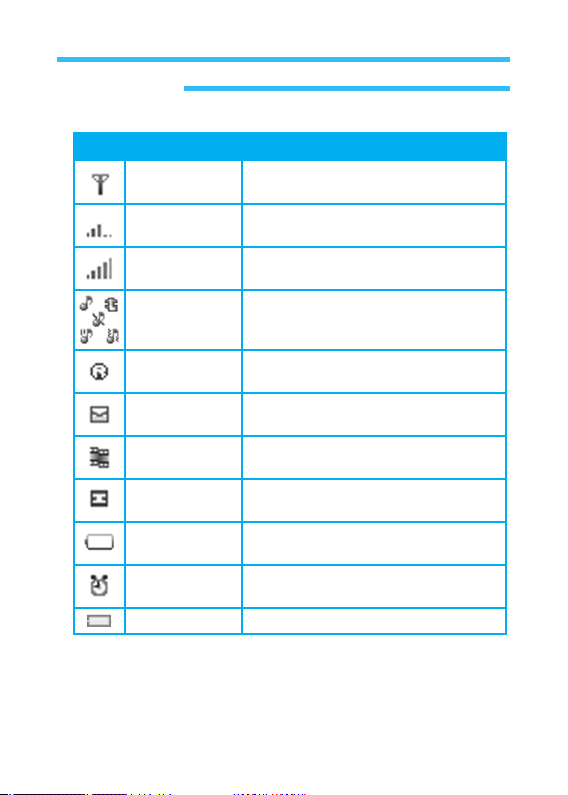
Icon Name Description
Antenna Always displayed to show service area
if reached.
Service
available level
Always displayed to show service
available level (0 to 5) in a bar graph.
Service
available level A
The greatest service available level with
the maximum bars.
Bell mode There are 5 modes available (sound
only, vibrate only, sound after vibrate,
sound with vibrate, silence).
Roaming state Displayed while user is in other
service area or receiving a call abroad.
New Message This will be displayed when a new
message is received.
New Multimedia
Message
Displayed when a multimedia message
received.
New voice
message
Displayed when a new voice message
is received.
Battery Battery charging level - the more
blocks, the stronger the charge.
Alarm Displayed if alarm is set via the
calendar.
Battery charging
Page 25
25
Cellular Phone
Calls
Making A Call
To make a call, press desired phone number in stand-by screen state and
then Call Key .
If you input wrong number, Clear Key
to delete the last number input.
In order to delete a specific number, move the cursor right behind the
number to delete (press the left of OK Key) and then press End Key.
Press End Key
to finish the call.
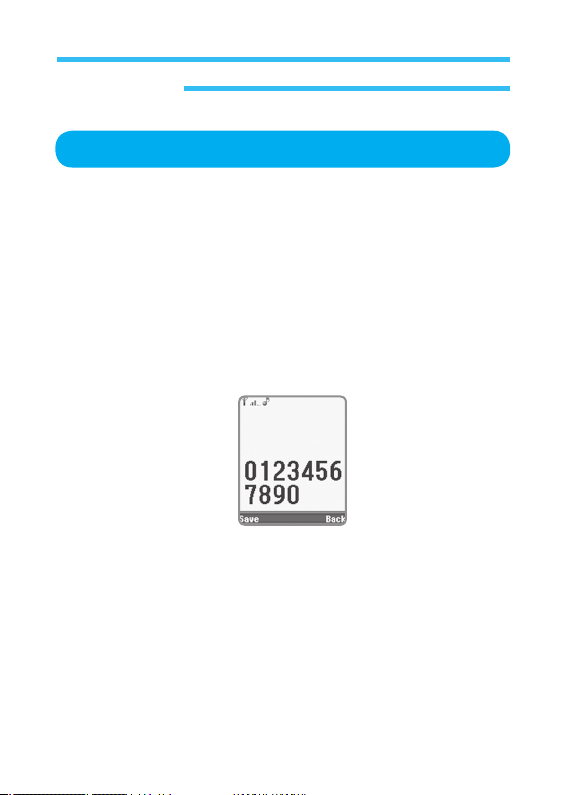
In the stand-by state of the phone, input number to display the following
screen.
If the inputted phone number is displayed, just press Save Key and specify
a save folder.
If SIM card or the memory of the phone is displayed automatically, specify
a related type of the phone too. (Refer to the user manual for more detailed
procedures)
Answering The Phone
Press Call (receive) Key to answer the phone call.
Press End Key
not to answer the phone call.
Page 26
26
Cellular Phone
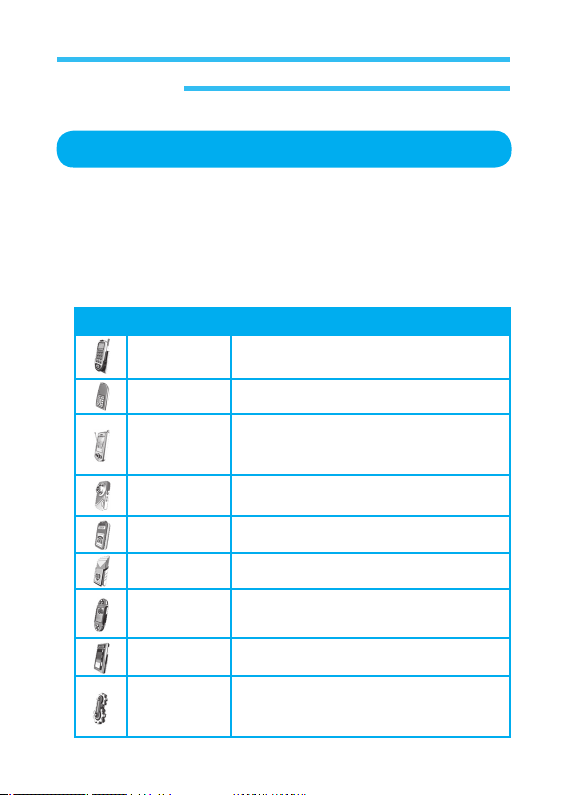
In the stand-by state, press the menu Key to go back to standard menu.
Press the direction Key (up/down/left/right) to get into menu desired.
While pressing the menu Key, press relevant number to get into the
category applicable. Figures of the icons, names of the categories, brief
description of each menu and short-cut keys are as in the following table;
Icon Menu Description
Calls To look through call record and voice
messages sent and received.
Special To use the Function in the SIM card.
Extras To use calendar, calculator, downloading
program, information on various events
meeting, birthday), etc.
Camera To deal with camera and image album.
Phonebook To save phone numbers.
Messages To read and write text messages.
Leisure To download and select new video
games and melody images.
Wap To move to WAP service menu.
Settings To specify volume, calling melody,
background image and other environment
of the phone.
Whole Menus
Page 27
27
Cellular Phone
Common Screens And System In Various
Menus
Input Phone Number
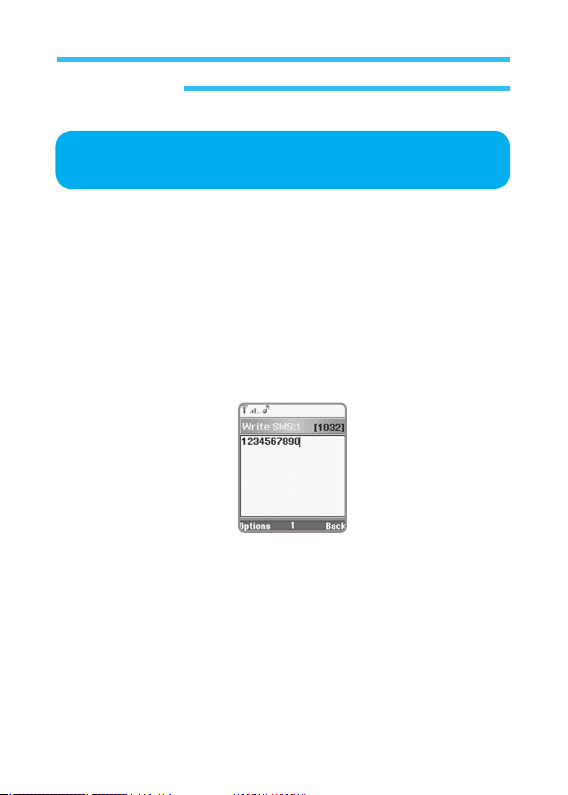
When you start inputting number in stand-by state, the number will be
displayed, moving from right to left as it is inputted. If the number input
reaches the end of the right, the number will move to the upper line to
prepare a space for the next numbers to input.
During inputting number, the screen will be as shown below.
In order to insert a number between numbers just entered, use the direction
Key (up/down/left/right) to move the cursor.
Press End Key to delete the number on the left of the cursor.
Writer
Writer is used to input phone number, text or number.
All kinds of writers (phone number, number, text) have their own functions
respectively.
Page 28

28
Cellular Phone
Writer Of Phone Number
It is used to input phone number from the phonebook. Above all, press
number in stand-by screen state to get into the screen of writer function.
0 ~ 9 are available to enter, which has the following features.
• Keep pressing 0 to display + character.
• Press <
*
> and <#> to input characters of <*> and <#> respectively.
• Press CLR Key to delete the last number input. Keep on pressing End
Key to delete the whole number input (whole number) and to return to
stand-by screen state.
• Press OK/Save/Enter Key (menu displayed on the left of the screen) to
go to next step. Press Previous Key to go back to the previous step of
the screen.
• Press direction Key (up/down/left/right) to move the cursor to the
direction as designated.
Writer Of Number
It is used to input password 1, password 2 and call-restricted password.
Press the following keys to make use of its functions specified.
• Use the keys 0 to 9 to press such number 0 to 9 as applicable.
• <
*
> Key has no function.
• # Key is used to display the decimal point, excepting in the screen of
password 1 and 2.
• Press CLR Key to delete the last number input. Keep on pressing END
Key to delete the whole number input.
• Press
select Key to go to next screen. Press Previous Key (CLR) to go
back to the previous screen.
• Press the direction Key left or right to make the cursor move to the
direction as indicated.
Page 29
29
Cellular Phone
Writer Of Text
It is used to input text of names or messages. There are 4 input methods
for text writer.
• Capital letter input: displays all the input text in capital letters. This can
be used together with Multi Input and Smart Input which will be later
described.
• Small letter input: displays all the input text in small letters. This can be
used together with Multi Input and Smart Input.
• Capital & Small letter input: In case with Multi Input accompanied, this
will change the text if once input by user, to small letters automatically.
In case with Smart Input accompanied, this will make the first letter be
a capital letter, and the rest be small letters automatically.
In case with Number Input (1), number input is available fast. (Press
number 0 to 9 to display 0 to 9 as applicable, and press # Key to
display the decimal point.)
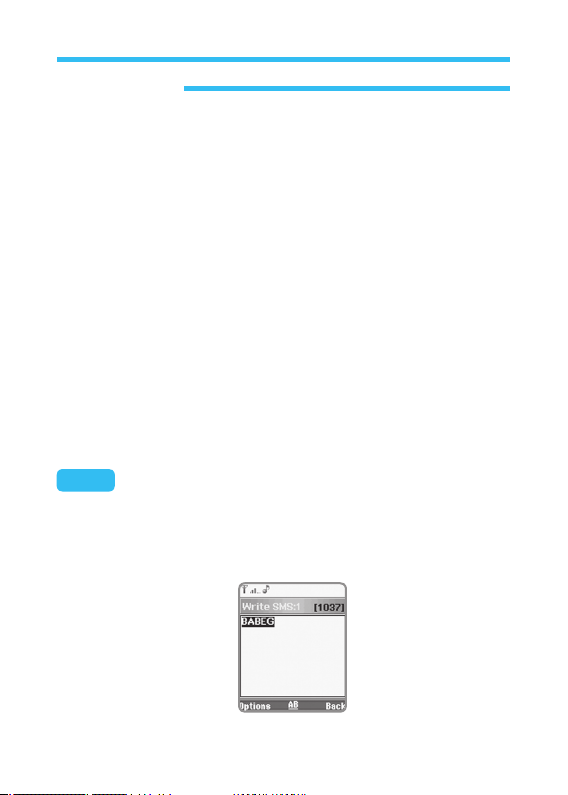
Note: Press <*> shortly to change input sequence as follows;
AB, ab, Ab, 1.
Input method is displayed between the two menus in the center of
the bottom line of the screen.
(See below):
Page 30

30
As described above, there are two input methods.
• Multi Input (Multiple Input)
• Expected Input (Smart Input)
In the Expected Input method, the method is underlined.
In case with the two accompanied, it will be displayed as below.
Note: Keep on pressing <*> Key in text writer to change to other input
method. (Multi Input - Expected Input and Numeric mode)`
Note: Keep on pressing <#> Key in text writer to change to symbol input
mode.
Cellular Phone
Page 31
31
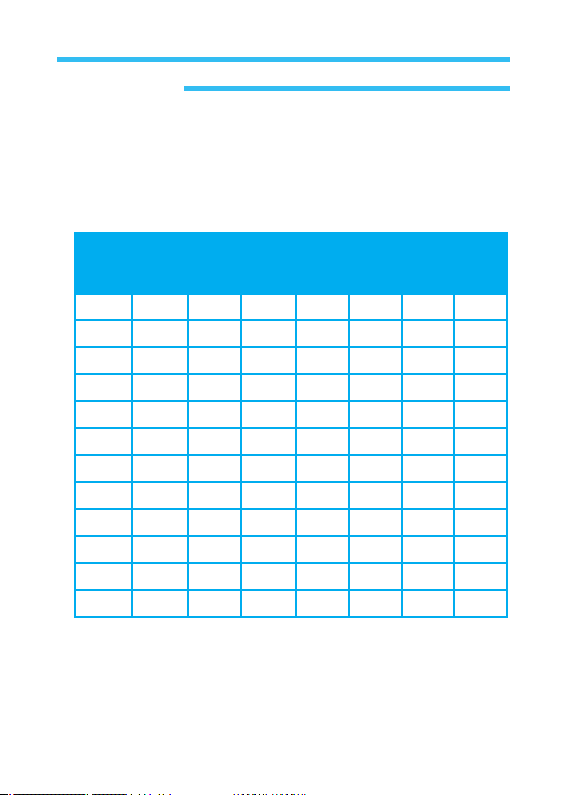
Multi Input
This method operates differently according to the language specified.
If Spanish has been specified, following text will be displayed when you
press one numeric Key repeatedly.
Key
Press1aPress2aPress3aPress4aPress5aPress6aPress7aPress
1 Space . , @ / 1
2 A/a B/b C/c 2 Á/á À/à Ç/ç
3 D/d E/e F/f 3 É/é È/è
4 G/g H/h I/i 4 Í/í Ì/ì
5 J/j K/k L/l 5
6 M/m N/n O/o 6 Ñ/ñ Ó/ó Ò/ò
7 P/p Q/q R/r S/s 7
8 T/t U/u V/v 8 Ú/ú Ü/ü
9 W/w X/x Y/y Z/z 9
0 0
*
#
Smart Input
This makes fast text input available. With the improved technology of (Press
and Expect), a function to expect is realized, making use of the dictionary
prepared in the language specified. In this way the writer provides the serial
expected characters of text when the user presses the Key once.
Cellular Phone
Page 32
32
Cellular Phone
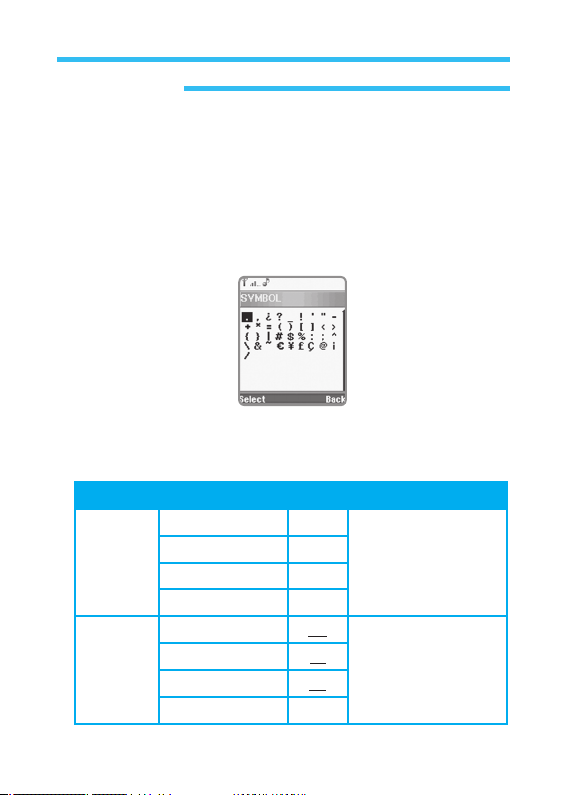
Text Selector
Press # Key shortly in the screen of text mode to display text selector
which can display special characters which are not available in general text
mode. Move the direction Key (up/down/left/right) on the text desired to
select those special characters.
If you select the special character.
Press select Key to input applicable
character. Characters available are as follows;
All the input methods and all the languages available in GRUNDIG Mobile
have been summarized in the following table.
Input type Input method Mark Language
Multi Input Capital AB
English
&
Spanish
Small ab
Capital & Small Ab
Number 1
Smart
Input
Capital AB
English
&
Spanish
Small ab
Capital & Small Ab
Number 1
Page 33
33
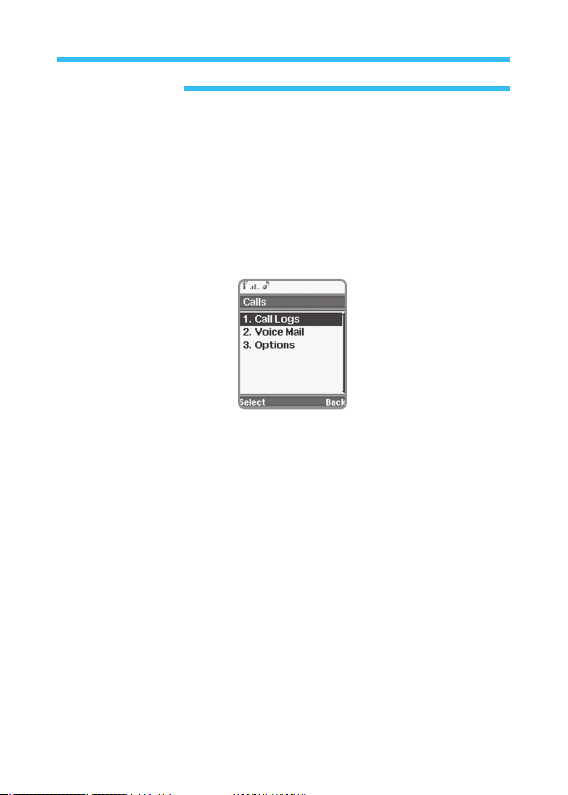
1.Calls
Through this Calls menu, you can move to call Logs, voice mail and mainly
used number list.
1. Press menu when the phone is in stand-by state to display options on
main menu.
2. Use the direction Key to select a Calls icon.
3. Press select Key. The Calls option in principal menu will be displayed.
• Call Logs
• Voice Mail
• Options
Page 34
34
1.Calls
Call Logs
1. In stand-by state, press menu Key to display main menu option.
2. Use the direction Key to select calls menu then press Select.
3. On calls screen, Select Call Logs and press select to display the
following information.
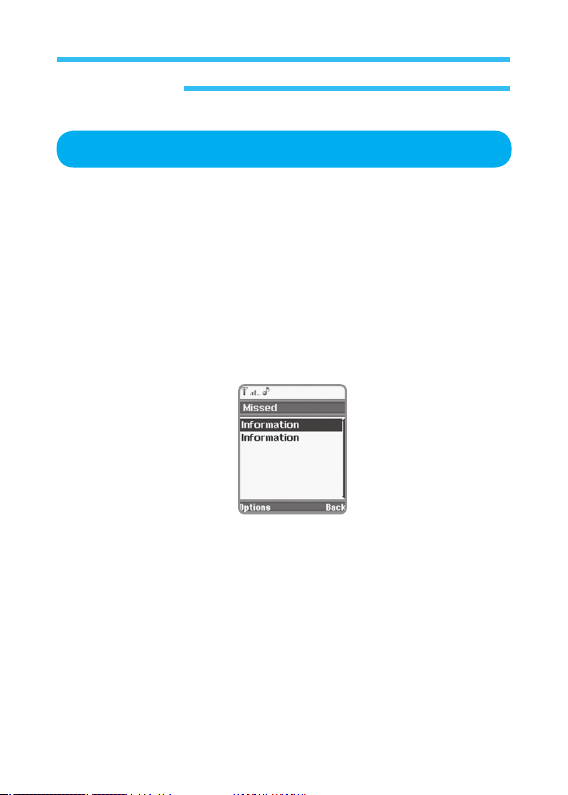
Missed
Select In Missed option on call logs and press Select Key to show record of
calls received but not answered. Select the call not answered and press
option Key to see the following menu.
Select a call desired and press option Key to display new menu with the
following options;
• Call:
Tries a call to the phone previously selected.
• Send Message:
Sends a message (Short or multimedia) to selected
number.
• Details:
Displays information of selected call on screen.
• Save: Allows you to add new contact to address book conveniently. You
should specify where to save information and details of contact
name, phone type, etc., as described previously in address book
options.
Page 35
35
1.Calls
• Delete: Deletes selected number from call list, which needs your
confirmation. Press Yes Key to confirm Delete Call.
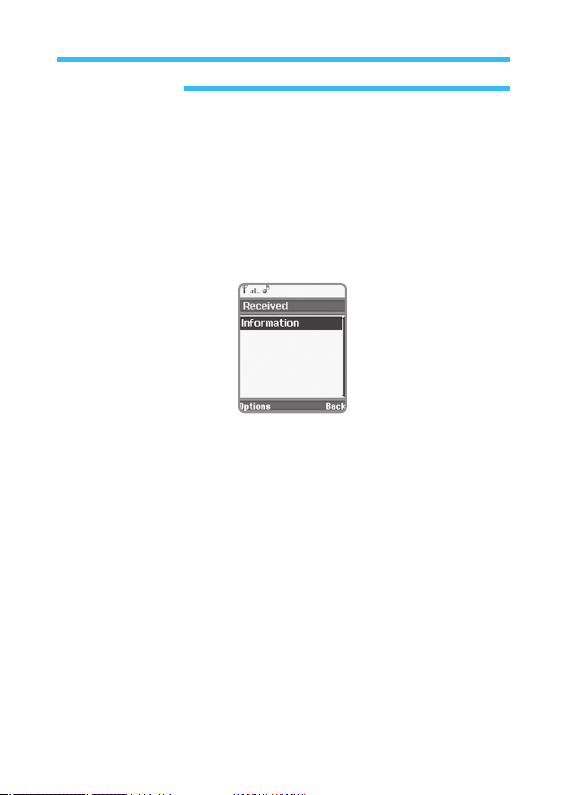
Received
On the Call logs, select Received option and press Select Key to display
the last list of calls answered. Select a call received and press option Key to
display option menu as before (Missed).
Select a call desired and press option Key to display new menu with the
following options;
• Call:
Tries a call to the phone previously selected.
• Send Message:
Sends a message (Short or multimedia) to selected
number.
• Details:
Displays information of selected call on screen.
• Save: Allows you to add new contact to address book conveniently. You
should specify where to save information and details of contact
name, phone type, etc., as described previously in address book
options.
• Delete: Deletes selected number from call list, which needs your
confirmation. Press Yes Key to confirm Delete Call.
Page 36
36
1.Calls
Dialed Numbers
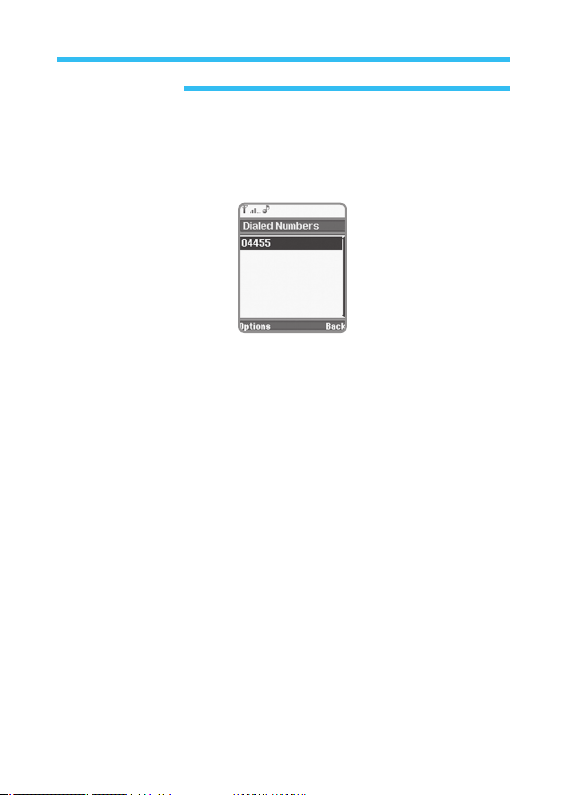
On the Call logs, select Dialed Numbers option and press Select Key to
display the list of calls dialed.
Select a call desired and press option Key to display new menu with the
following options;
• Call:
Tries a call to the phone previously selected.
• Send Message: Sends a message (Short or multimedia) to selected
number.
• Details: Displays information of selected call on screen.
• Save: Allows you to add new contact to address book conveniently. You
should specify where to save information and details of contact
name, phone type, etc., as described previously in address book
options.
• Delete: Deletes selected number from call list, which needs your
confirmation. Press Yes Key to confirm Delete Call.
Page 37
37
1.Calls
It is an automatic answering machine (run by communication company)
saying Please, leave your message for me to call back when the call can
not be answered or the phone is out of service area or turned off. Follow
the procedures below to enter the voice box.
1. In stand-by state, press menu Key to display main menu option.
2. Use the direction Key to select calls menu then press Select.
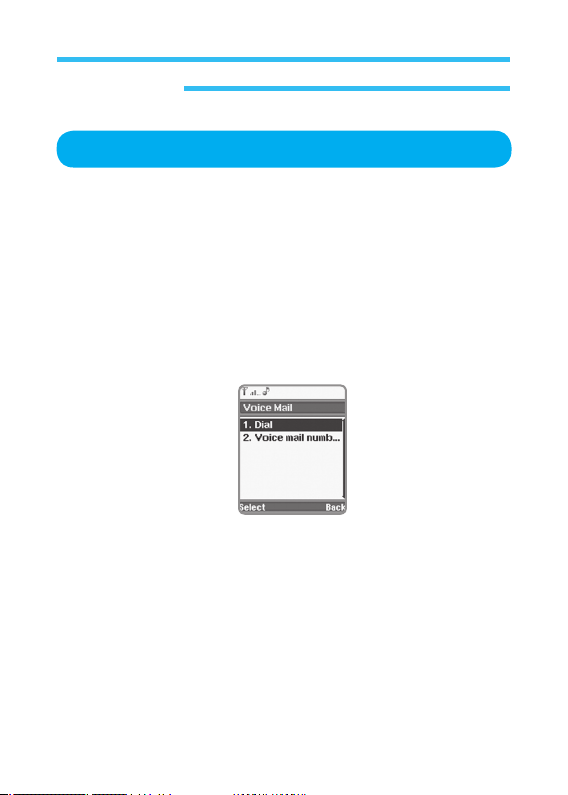
3. On calls screen, Select Voice Mail and press select to display the
following information.
The options are as follow;
Whatever option is selected (Dial, Voice mail number), you may hear
instructions if connected to the number you joined. And if any of those is
unavailable, an error message will be displayed on screen of the phone.
In case a call is made to voice mailbox, you will see the following display;
Voice Mail
Page 38
38
1.Calls
Call logs, Voice mail and Useful number has the identical options as shown
below. You may get to its options menu through the following operation;
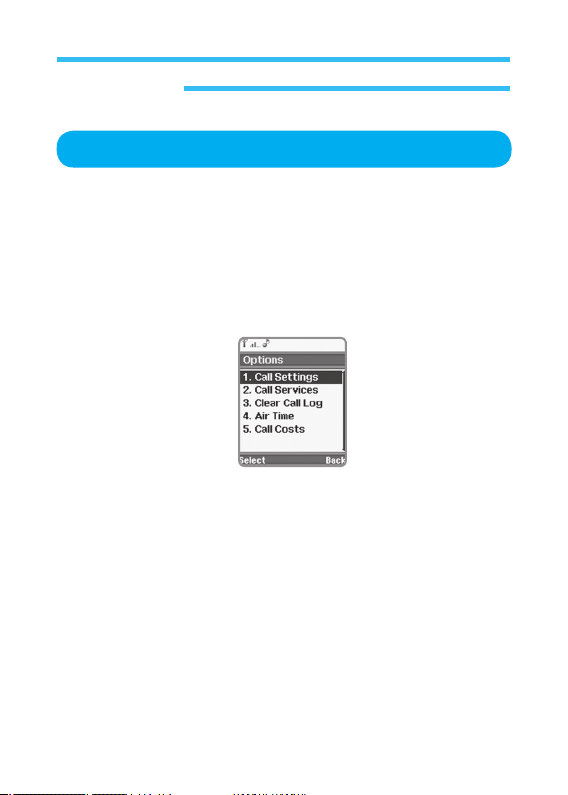
1. In stand-by state, press menu Key to display main menu option.
2. Use the direction Key to select calls menu then press Select.
3. On calls screen, Select Options and press select to display the following
information.
The following is to describe the option.
Options
Page 39
39
1.Calls
Call Settings
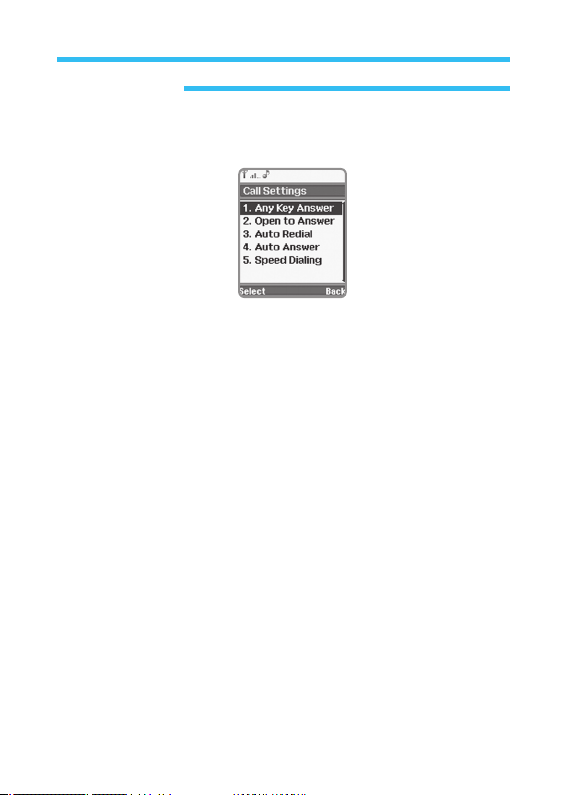
This option allows you to specify environmental setting through several
special options related with call.
• Any Key Answer: Starts connection if active to any call when any Key
on the pad is pressed. This option can be made on
or off (Press OK Key to have access to this option).
• Open To Answer: Starts connection if active to any call when GRUN-
DIG mobile folder is opened. This option is initially
kept off.
• Auto Redial: If this function of GRUNDIG mobile is selected, dialing will
be repeated to any number if the connection is failed since
in absence or not answered. In 5 seconds, the phone will
try to make a call to the number again automatically. If
you don t want to use this function, press Previous Key,
or press OK Key to use. The call if the connection is failed
again will be retried in 60 seconds. This function can be
made on or off, however, kept inactive initially.
Page 40

40
• Auto Answer: If this is selected, the call received will be automatically
answered, which has 4 options (Press OK Key to display
those): off, 3 seconds, 5 seconds and 10 seconds. It is
the duration just before the phone answers the received
call automatically.
• Speed Dialing: If this option is applied, you can make a fast call. Select
number and then press it to make a fast call thereto in
stand-by state. How to make it available is as follows;
Setting Fast Dial Number
In GRUNDIG mobile, individual phone number can be set to each number
Key of 2 to 9. For example, if you want to set Key No.7 for certain
fast dial number, the procedures below shall be followed.
1. In stand-by state, press menu Key to display main menu option.
2. Use the direction Key to select Calls icon and then press Enter.
3. On Calls screen, select Options and press OK to display option creen.
4. Select Calls settings and press OK.
5. Select Speed Dialing option and press OK Key to go into speed dial
setup window.
6. Select option 7 and press set to display phone number list saved in
address book.
7. Select any contact number you want to connect with Key No.7 and
press OK.
8. Press option Key and select Set or Delete if you want to Edit or Delete
the fast call connection.
9. Keep on pressing back Key till you reach the screen in stand-by state.
If the fast dial number is presently active, keep pressing Key No.7 till
the call is connected.
1.Calls
Page 41
41
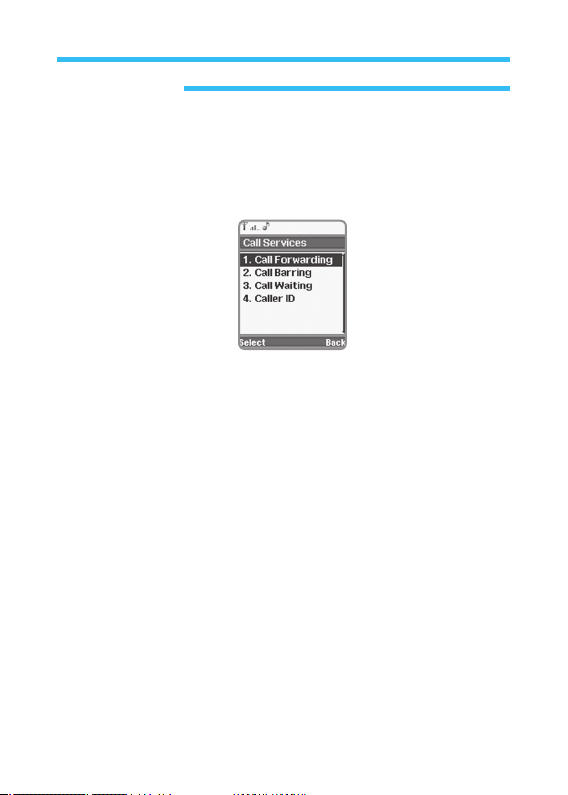
Call Services
The call service includes such functions stand-by call, environmental setting
and restricted display of sender.
The service is available as follows;
The options of this menu have the following functions related.
Call Forwarding
It allows you to make received Call to go to other phone number. Select
this option and press OK Key to use this function, which has 4 sub-menus
as follows;
• Voice:
Specifies received voice call.
• Data: Specifies received data.
• Fax: Specifies received fax.
• All: Specifies all received calls.
You can specify the time when you want to set the option for all the
received calls (For this operation, select an option of voice, data, fax or all
and press OK Key). All calls of data, fax or voice: receives all types of calls
selected.
1.Calls
Page 42

42
1.Calls
• Unconditional: Cancels all the previous options If all the type of calls
received is specified.
• Busy: Receives all calls selected even during you are connected with
other phone.
• No Answer: The service provider shall specify the number of bells to
make In-absence mode active if call is not answered.
• Unreachable: Receives all calls sent even if out of service area.
Once after the type and the number of calls received are specified, you
should execute the applicable option.
First,
1. On the voice menu, select one of the present options (Unconditional,
Busy, No answer, Unreachable) and press OK.
2. Select Activate to perform Received Call on the displayed menu. In
addition, select Activate to specify calls received, select Cancel to cancel
and select State to know the state of call received. And then press OK.
3. Select Activate and press Enter to display the following options;
• To Voicemail: If this option selected, calls will be sent to the voice box
number as specified in your phone.
• To Phonebook:
If this option selected, calls will be sent to the single
phone saved in address book. Select this option and
press Enter to display details of address book.
• To Other Number: If this option selected, calls will be sent to
designated number (number writer will be displayed
where up to 21 digits are available).
Page 43

43
1.Calls
Call Barring
This makes calls be sent and received only under the specified conditions.
Select this option on menu to make use of this service.
Select Barring Call service and press OK to display its options as follows;
• All outgoing: Restricts All outgoing calls, which is controlled by
password.
• Int’l Outgoing: Restricts All outgoing calls to abroad, which is
controlled by password.
• Int’l Expect Home
• All Incoming: Restricts All incoming calls which is controlled by
password.
• Inc
When Roam
• Cancel All: Cancel All the pre-setted restricts at a fine, which is
controlled by password.
• Change Password: In order to change password for call barring,
select change password option and press OK.
then input the correct existing password first and
then new password twice(it is to confirm that the
new password is correct).
Page 44

44
1.Calls
Call Waiting
This service is used to make other call stand by while a precedent call is
connected, which can be applied or cancelled as necessary. In order to
apply this function, select Stand-by call option on call service menu (see the
first of the manual if you are not familiar with the route to this screen) and
press Enter to display the following options;
• Activate:
Activate Call Waiting call option.
• Cancel: Cancels Call Waiting call option.
• Status: Displays the status of Call Waiting call.
Select state option and press Enter to show the state of stand-by call.
Caller ID
This will let you know the number and the name from which call is sent. In
order to apply this function, select Confirm sender option on call service
menu and press OK to display the following options;
• Show Caller:
Shows senders phone number
• Hide Own: Hides my phone number for its receiver not to see.
• Show Connected: Displays senders number for me conveniently to
check the number if dialed wrongly or correctly.
• Hide Own When Forward: Hides my number from its receivers phone
dialed wrongly. Select applicable option to
use and press OK.
Page 45
45
1.Calls
Clear Call Log
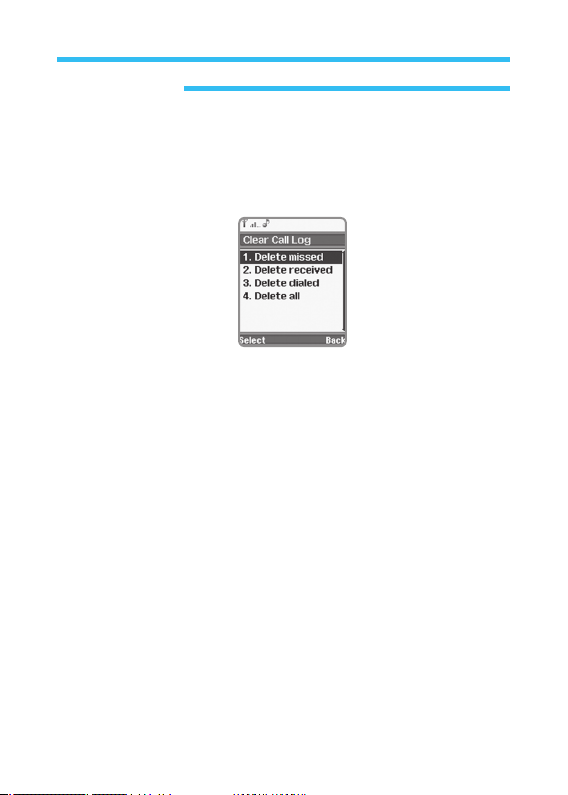
This option is used for you to erase all the call lists through call option menu.
(Missed, Received, Dialed, All).
It will erase all the record of calls with ease.
• Delete Missed:
Deletes all calls in absence saved.
• Delete Received:
Deletes all received calls saved.
• Delete Dialed: Deletes all sent calls saved.
• Delete All: Deletes all the lists of calls saved.
The procedures for each case above are identical as follows;
Select desired option and press OK to display a confirming screen.
Press Yes to erase or press No to cancel.
Page 46
46
1.Calls
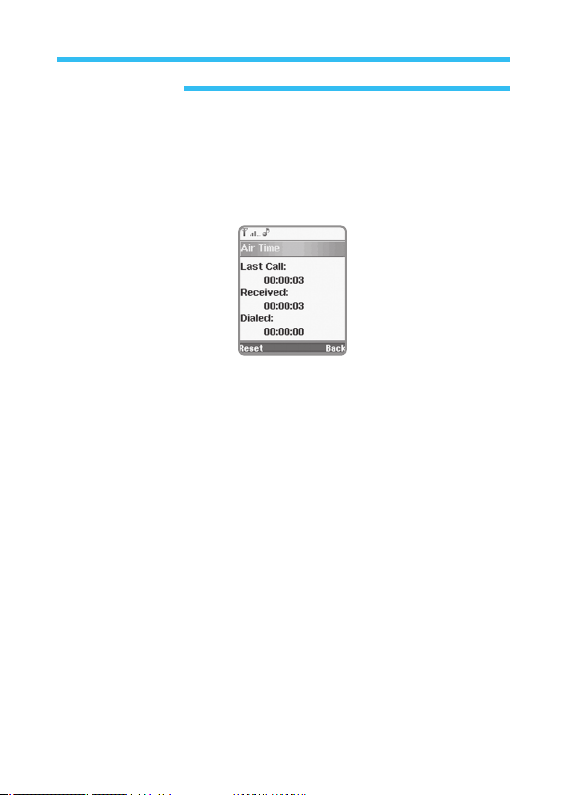
Air Time
This provides information on calling time used in total (time used for calls
dialed and received including the last one). Follow the procedures below to
use this option.
2. Press Back Key to go out of this screen.
3. Press Reset Key and select desired option on the menu below to set the
counter to 0 (Zero)
• All:
Erases all the accumulated time used for calls received and sent.
• Dialed: Erases the accumulated time used for calls sent.
• Received: Erases the accumulated time used for calls received.
• Last Dialed: Erases the time used for the last call.
4. Every option if selected will ask you to confirm.
Page 47
47
Call Costs
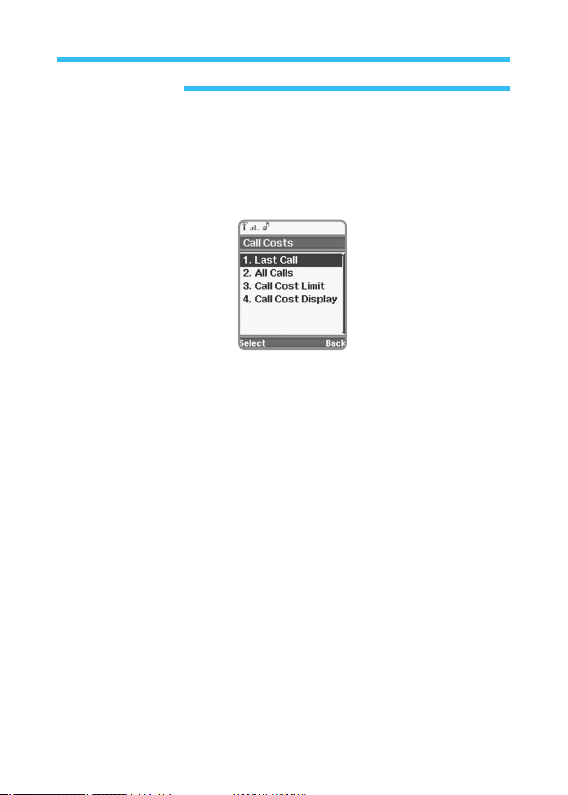
This informs you of the amount of total cost of all calls and the last call
including the maximum amount/cost of calls. The cost may be expressed in
some unit or currency. Follow the procedures below to go to this option.
• Last
Call: Displays the cost of the last call, which can be expressed in
specific unit or currency through Display calling cost option
(described later).
• All
Calls: Displays the cost of all calls. Press Reset Key to delete the
cost displayed. The terminal will ask you to input PIN 2. The
password shall be input correctly. If not, the cost of all calls
will not be deleted. If so, a message The cost of calls is set
to 0(zero) will be displayed.
• Call Cost Limit:
Limits the maximum cost of calls available. Select this
option to display on or off option screen. Then, select
on and input PIN 2 correctly to display the screen to
write the desired maximum cost of calls on. In order to
cancel this option, select off and input PIN 2 correctly.
• Call Cost Display:
Where display type of calling cost is specified with
two options of specific unit or currency. If you want
to change options, input PIN 2 correctly.
1.Calls
Page 48

48
2. Special
1. In stand-by state, press menu Key to display main menu option.
2. Use the direction Key to select Special menu then press select.
Note: It displays the menu that the SIM card could supports.
Page 49
49
3. Extras
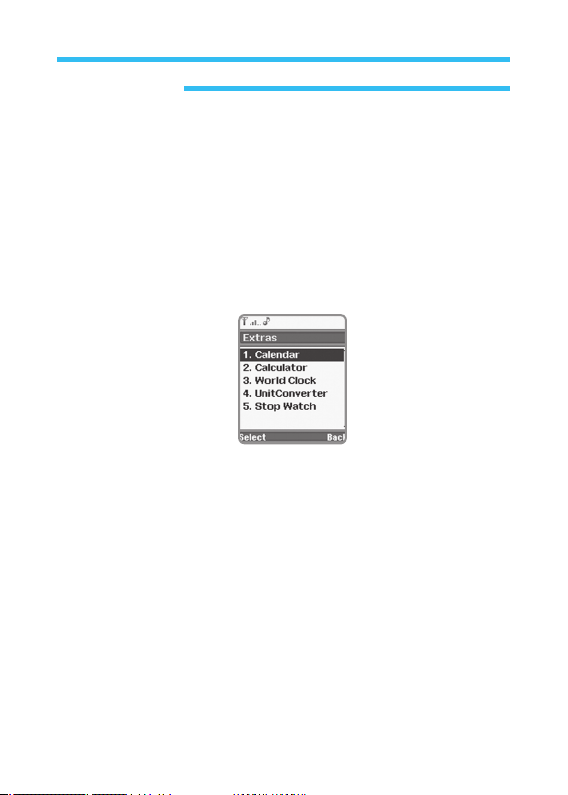
The options on Extras menus allow you to connect to other functions of the
phone and SIM card (My services, Calendar ). Follow the procedures below
to enter Extras menus.
1. Press menu when the phone is in stand-by state to display options on
main menu.
2. Use the direction Key to select a Extras icon.
Option list related with Extras menus will be displayed as shown below;
How to operate each tool will be described later.
Page 50
50
3. Extras
Calendar
On Other menus, select Calendar and press OK to go to its related option
list, where you can set an alarm for a specific event.
1. In stand-by state, press menu Key to display main menu option.
2. Use the direction Key to select Extras menu then press Select.
3. On Extras screen, Select Calendar and press select to display the
following information.
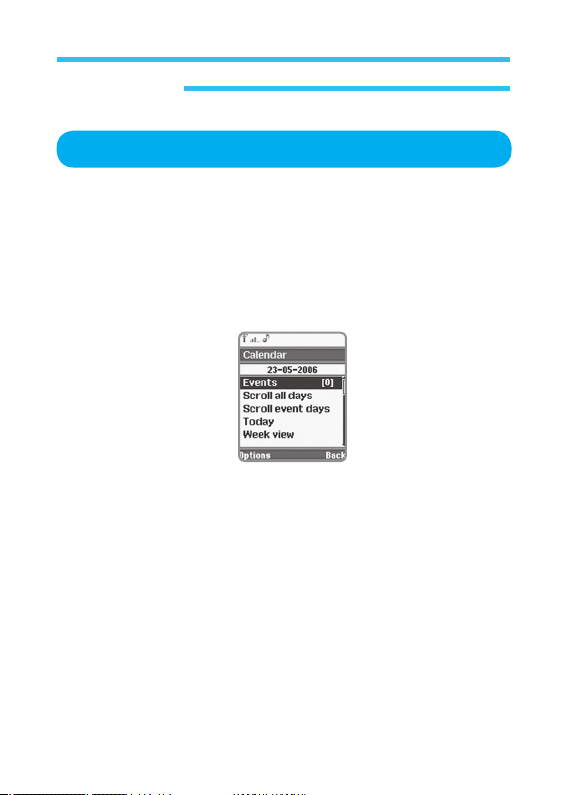
Main options related with Calendar will be displayed as shown below;
The title of the calendar screen is the date specified as seen (24-05-2005 on
the previous screen). On the other hand, the number of events specified is
displayed on the right side of the option line (The number of events is 0 on
the previous screen).
Page 51

51
Events
On Calendar screen, select Events option and press OK to display the
screen, where you can add, delete or execute an event.
Follow the procedures below to apply this function;
1. On option screen, select Add event and press OK.
2. Go to the screen where you can select the type of event to specify.
• Alarm Clock:
Sets an alarm for time Alert.
• Meeting: Sets an alarm for meeting.
• Birthday: Sets an alarm for birthday.
• Memo: Sets an alarm for other types of events.
3. Select an event type among three and press Enter (Up to 20 events can
be added. And date and time of the phone are always used when a new
event is added).
4. The following describes how to add text for event being specified. A text
writing screen will be displayed for you to input 64 characters. After text is
written, press OK Key.
5. The next procedure is how to input event date (Default is the present date
of the phone). Use Up/Down direction keys or input numbers directly on
the Key pad so to specify the date.
3. Extras
Note: Definition of each alarm differs a little according to each case as
follows;
Note: Setting of starting time only will be enough for an event type of
birthdays.
Page 52
52
3. Extras
6. Now, Start and End time (when the phone operates the alarm) of desired
event shall be set. Use the phone Key directly or Up/Down Key to input.
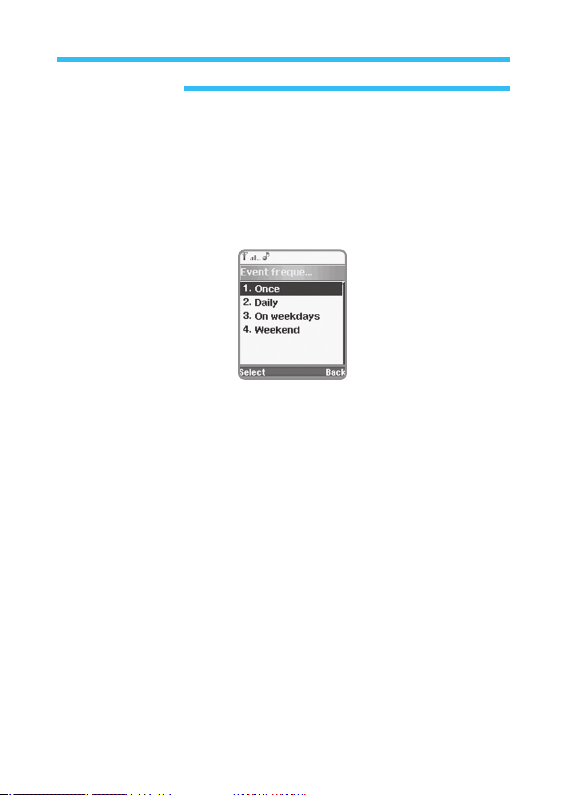
7. Now, how many times the event will be repeated shall be specified, where
the following options are available. Select a desired option and press
Enter.
You don t need to set the period in case of birthday event.
8. Set alarming time to inform you that an applicable event will be open.
(Alarming time screen); None, 1 day prior, 30 minutes prior and 15
minutes prior are available, where you can select an exact time option you
want. After a time option is selected, press OK.
You dont need to specify details as in alarm types or birthday event.
9. Finally, specify the type of alarm to inform you that an applicable event will
be open. There are 2 types of alarm available.
a. Visual: Uses blinking light to operate the alarm.
b. Ring Of Visual: Uses sound and light to operate the alarm.
Page 53

53
Select a desired alarm type and press OK to finish all the procedures.
The following icons will be displayed on the icon bar of the upper screen
when you specify the alarm. The screen of event alarm is as shown below;
View Calendar
Any event once after specified can be checked everyday through the
following options displayed on calendar screen;
• Events: Creates or changes events, which is previously described.
• Scroll All Days:
Checks events displayed on calendar everyday. If this
option is selected, the option Key will have names of
Next and Previous. Press Next Key to go to next day
on calendar, where the day s specified events will be
displayed. Press Previous to go to previous day on
calendar.
• Scroll Event Days:
Shows the event specified date only on calendar.
Next and Previous option keys will be displayed.
• Today:
Leads you directly to present event. With this option specified,
select Option and press OK.
• Week View:
Shows the week of the present date. Any day if with any
event will be displayed in x mark (See the figure below).
• Month View:
Shows the month of the present date.
3. Extras
Note: The sound of the time alarm is different from that of the event alarm.
When a call is received while an alarm operates, the alarm will stop
till the call is finished. In the beginning the alarming bell will go on
for 1 minute, and then for 5 minutes if not stopped by user. After the
third bell, the alarm will stop then.
Page 54

54
Other Event Options
You can execute other operation on calendar menu. Select Event option on
the displayed screen and press OK. Then, choose Select and press OK to
display the event list arranged, based on specified date and its operation
time (See the figure below).
• Details: Shows details of the event selected (type, date, operation
time, related expression and alarming time)
• Edit:
Edits specific details related with event (Description, Date, start
time, end time, frequency, etc.)
• Delete:
Deletes selected event. You will be asked to press Yes to
confirm).
• Alarm:
Description, time and date.
• Meeting:
Description, date, start time, end time, frequency, alarm type,
alarm time.
• Birthday:
Description, date, time and alarm type.
Return to calendar menu, select Event option and press Option Key to
display the list familiar to you, where event options are available, however,
some are not mentioned yet.
• Select: You can select the reserved events.
• Add Event: You can add a event.
• Go To:
Goes to the date designated on calendar in order to see the
event set on the date described.
• Delete Past Events:
Deletes all the events which happened before
today.
3. Extras
Note: Factors to be written for event are different according to its type.
That is to say, all kinds of events do not have the same factors. See
below;
Page 55
55
3. Extras
Select this option and press OK. Then you will be asked to confirm.
• Delete All Events:
Deletes all the events specified, which will ask you
to confirm.
Press Back Key to return to previous menu (It is the fastest route to get
out of the calendar menu).
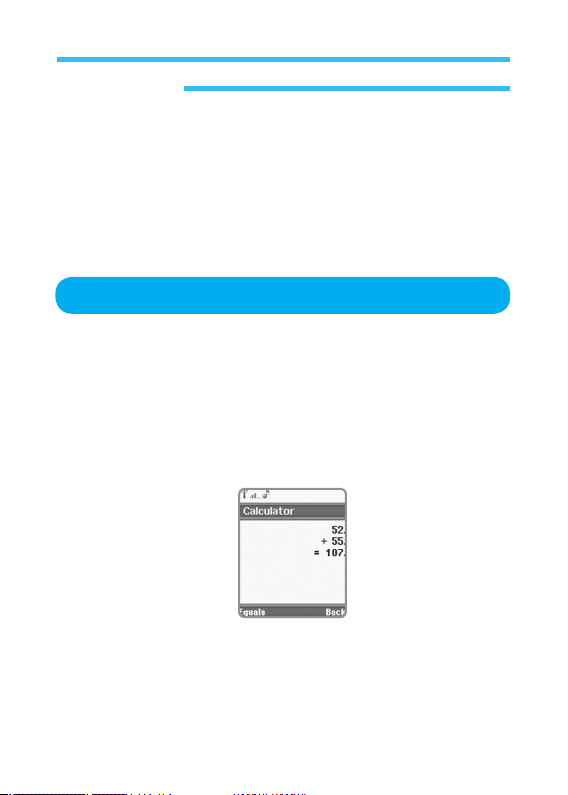
GRUNDIG mobile calculator helps you to perform basic calculation work.
Follow the procedures below to use the calculator.
1. In stand-by state, press menu Key to display main menu option.
2. Use the direction Key to select Extras menu then press Select.
3. On Extras screen, Select Calculator and press select to display the
following information.
- Use number keys to input numbers desired.
- Use # Key to display a decimal point.
- Use * Key to make a negative number.
- After desired number is input, press Navigation Key to input the signs
of +, -, x and /.
Calculator
Page 56
56
3. Extras
- Input the first number and then the second number to calculate.
- Te get the result of the calculation, press Equals Key (See the figure
below).
- You can use the acquired result to apply to other calculation with Down
Navigation Key keys. This calculator does not support simultaneous
multi-calculation. You should divide the object into several in such
a case and then perform each calculation in due consideration of
calculation priority.
Press Back Key to return to previous screen.
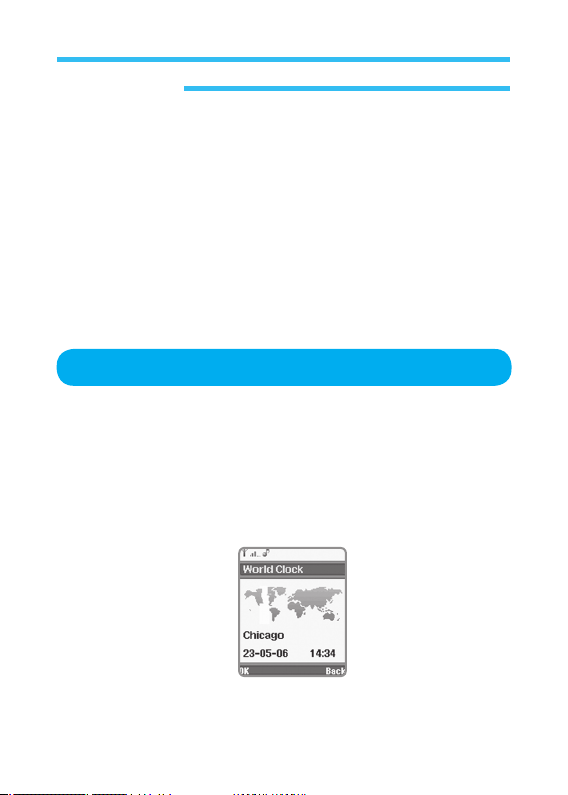
The World Clock can be uesd to check the Time of the Capitals in the world.
1. In stand-by state, press menu Key to display main menu option.
2. Use the direction Key to select Extras menu then press Select.
3. On Extras screen, Select World Clock and press select to display the
following information.
World Clock
Page 57
57
1. In stand-by state, press menu Key to display main menu option.
2. Use the direction Key to select Extras menu then press Select.
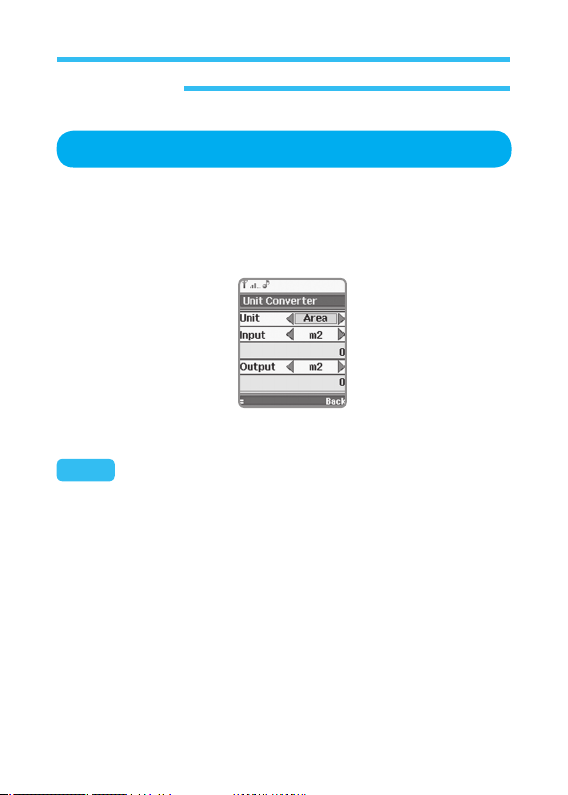
3. On Extras screen, Select Unit Converter and press select to display the
following information.
4. Select the desired type of measurement
5. To change the unit type (for example: m, cm), use the direction Key and
then use the keypad to input the number to conver
t
Unit Converter
3. Extras
Note: Length/ Weight/ Volume/ Area/ Temperature.
Page 58
58
3. Extras
Stop Watch
1. In stand-by state, press menu Key to display main menu option.
2. Use the direction Key to select Extras menu then press Select.
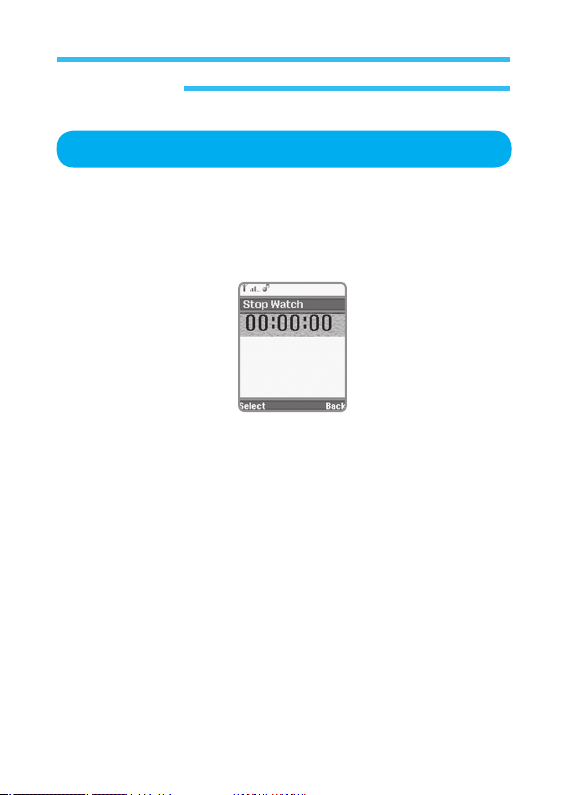
3. On Extras screen, Select Stop Watch and press select to display the
following information.
- To
start, press OK Key. [Select]
- To stop a time period and continue measuring another one, press left
selection Key. [Lap Time]
- To reset it
, press left selection Key. [Reset]
- To
back, press right selection Key. [Back]
- To stop, press OK Key.
Page 59
59
4. Camera
The Camera menu has a function related with taking pictures with digital
camera built-in GRUNDIG mobile.
Follow the procedures below to go to the Camera menu.
1. In stand-by state, press menu Key to display main menu option.
2. Use the direction Key to select Camera menu then press Select.
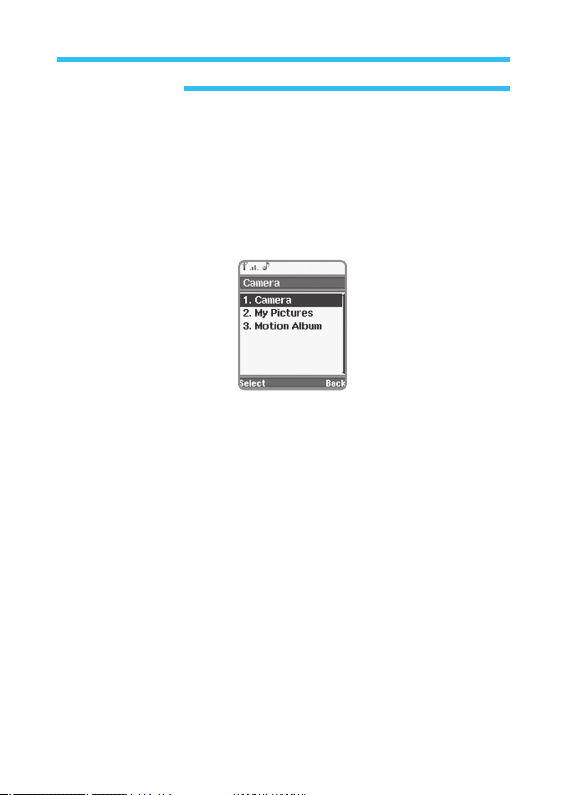
A list for multimedia menu will be displayed, whose options are as follows;
• Camera:
Operates image camera.
• My Pictures:
Displays list of images taken by the built-in camera.
• Motion Album:
Displays list of video files saved.
Page 60

60
4. Camera
There are Two methods to take a picture with GRUNDIG mobile.
1. In stand-by state, press menu Key to display main menu option.
2. Use the direction Key to select Camera menu then press select.
3. Select Camera on Camera menu and press select Key.
• Enter Via Main Menu: On the menu screen, select camera . Press
Enter again. If the camera operates anyway, let
the phone stand lengthwise with its number pad
downward, then catch hold of an object to take
a picture of using the direction Key (ensure that
camera controller is located at the rear central
upper of the phone) and press OK in the center
to take a picture.
• Hot Key: In stand-by screen, press camera Key on the center of the
direction Key to initializ camera mode.
Camera
Note: - Wait a few seconds for the digital sensor to adjust to digital tone of
color when starting camera operation, which will make the quality
of images excellent.
- Sound similar to the shutter of a camera will be heard for you
to feel the same as with the actual camera when the moment a
picture is taken. If you want to delete the picture just taken, press
Cancel and return to camera mode. On the contrary, if you want to
save the picture, press Save in the album with a name you want.
After then, the camera mode will be ready again. The automatically
created names of the pictures taken and saved are of numeric date
containing Year (2 digits), Month (2 digits) and Day (2 digits) with
Page 61

61
the sequence number of the pictures. Ex.) 050212-007 means
image number 007 taken on Feb. 12, 2005)
• Mode:
Sets camera mode as necessary. (3 modes available)
- Nomal Mode: Take a normal picture.
- Multishot Mode: Take 9 pictures continuously.
- Motion Mode: Change the mode to Camcorder.
• Resolution: Sets the resolution of images (3 levels available):
(VGA(640*480), QVGA(320*240). Normal(128*160)).
• Quality: Sets image related quality. (3 levels available: high, medium
and low)
Other Options
The camera built-in GRUNDIG mobile includes functions of digital zooming
and glossy adjustment. If the camera starts to operate, the following icon
will be displayed on the option below the screen. (see Take a picture)
• You may enter camera setting option described above.
• If you want to enlarge or reduce image size, select the upper Key
(Enlarge image). You can enlarge the image 5 times gradually.
Pressing the upper again at the maximum zooming will lead to the
minimum zooming function. The maximum zooming is available based
on the size-related environment specified. (5 times of zooming will be
available as described)
• Brightness can be adjusted higher or lower. If you want to apply this
function, select left selection Key.
• Effectiveness can be adjusted to each mode(eg. Normal, Black and
White, Sepia, etc). If you want to apply this function, select right
selection Key.
• If you press right selection Key and select the icon, the camera mode
will be cancelled and multimedia menu will be displayed again.
4. Camera
Page 62

62
4. Camera
1. In stand-by state, press menu Key to display main menu option.
2. Use the direction Key to select Camera menu then press select.
3. Select My pictures on Camera menu and press select Key.
It easily allows you not only to see, save or delete images taken but also to
change their names as follows;
Image management
These images will be arranged in date/time sequence. On the list, select
any image you want to work on and press Option to display the following
menu;
• Open: Opens images on the phone screen.
• Send: Sends images via infrared rays to user of text messages.
• Rename Photo: Writes or edits names of images with name writer.
• Delete: Deletes selected images.
• Delete All: Deletes all images.
The procedures described above will ask you to confirm.
My Pictures
Note: You can select internal or external memory what you want to use.
Page 63

63
4. Camera
On multimedia menu, select camcorder option and press OK. In several
seconds, the list of videos will be displayed just like downloaded or received
videos. These videos will be also arranged in date/time sequence. On the
list, select any video you want to work on and press Option to display the
following menu;
1. In stand-by state, press menu Key to display main menu option.
2. Use the direction Key to select Camera menu then press select.
3. Select My pictures on Motion Album menu and press select Key.
• Open:
Opens images on the phone screen.
• Rename Motion:
Writes or edits names of videos with name writer.
• Delete:
Deletes Selected videos.
• Delete All:
Deletes all videos.
The procedures described above will ask you to confirm.
Motion Album
Note: You can select internal or external memory what you want to use.
Use the converter tool to convert a AVI file, and use memory card to
play in the Phone. (Only use the converter tool which has given from
Operator, otherwise it will occur some problem)
Page 64

64
Send image
You can send image or video saved in album using multimedia message via
infrared rays. Follow the procedures below to apply this option.
1. In stand-by state, press menu Key to display main menu option.
2. Use the direction Key to select Camera menu then press select.
3. Select My pictures on Camera menu and press select Key.
4. Select an image to send and press Option Key.
5. Select Send and press Enter to display the menu with two options as
follows;
a. MMS: Where you can send image to selected receiver using
multimedia message. Press Enter to display the screen to write
multimedia message on. Follow the procedures as described in
Multimedia Message.
b. Infrared: Where you can send image to other device or equipment
using infrared port. (only if there is no reserved right to the
image).
Note: Video file can t be sent while attached to multimedia message or
infrared port.
4. Camera
Page 65

65
5.Phonebook
In address book, phone number, name and other information are saved and
displayed.
There are three points of contact in address book.
1. SIM: Information related with contact is saved in SIM memory only.
2. Only The Phone: Information is saved in phone memory only.
3. Double (copy): Name and phone number of these contacts are saved in
SIM memory and phone memory.
Besides, there are two address books.
1. Phone Memory: Shows all contacts saved in SIM memory and phone
memory.
2. SIM Memory: Shows double-saved contacts in both sides and
information saved in SIM memory only.
A special icon represents each contact.
In this way, duplicate contact uses visit card-shaped icon , and SIM
contact uses SIM card-shaped icon , and the next icon is used
for phone contact.
The followings are several rules used in address book.
• As specified, address book displays whole address book on the screen
to show all contacts.
Page 66

66
Group will be represented by a special icon.
• Information in the phone book is displayed in alphabet order. Phone
number correspondent to each name is marked on the right of the line
under the screen.
• Up to 14-character and 20-digit input can be saved in the phone book.
(If the first text input is some symbol to represent international call, up
to 21 is available)
• Up to 4 phone numbers are available for a name.
• Up to 250 addresses can be saved in SIM memory. (The number of
addresses available differs from each other according to card capacity)
• Up to 500 entries can be saved in phone memory.
• If all the information of a name can not be displayed at a time on screen,
press the direction Key to move the information vertically so to display
and read the rest on screen (being accordingly changed) to the end.
“......” if displayed in the end of the screen means that there is more
information to come.
5.Phonebook
Page 67
67
5.Phonebook
Mixed Phonebook
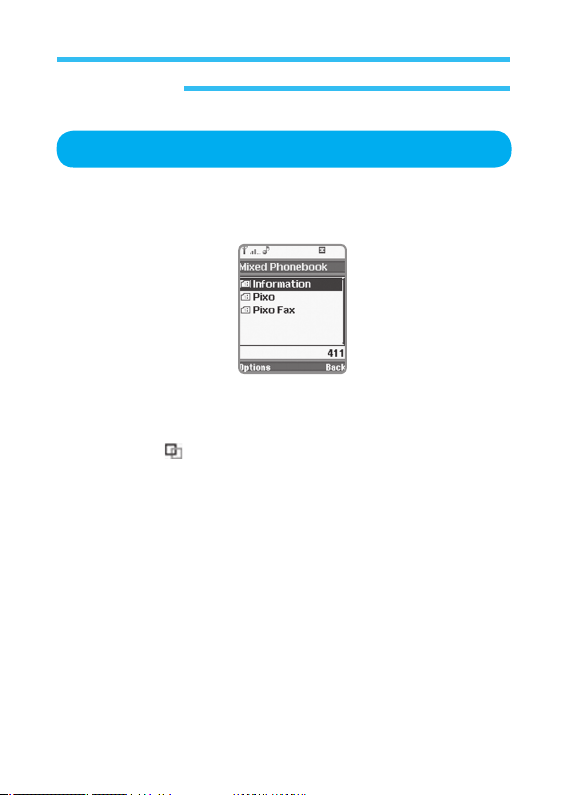
This address book shows all the contacts saved in phone memory and SIM
card memory. The following figure shows the appearance of this screen.
Below this screen (just above the option and the previous keys) expected
contact number is displayed.
Remember the icon will appear from this line if the contact is a group.
Up to 750 contacts can be shown via the whole address book. (Phone
memory plus SIM card memory in total)
Page 68
68
5.Phonebook
How To Enter Phonebook
There are two methods to get into whole address book.
1. Press the left selection Key in background screen.
2. In the basic menu screen, press select Key while Phonebook icon is
selected.
To make a call, select the one desired and press Call Key .
Or find the entry to call directly on the list. Press only the first letter of the
contact desired to call to display in alphabetic order all the names which
have the letter in front.
Press option Key up/down (any Key if selected and kept on pressing,
the selected one keeps on going up or down) to show option list which can
be selected.
The options are as follow;
• View Card
• Call Contact
• New Contact
• Send Message
• Delete Contact
• Delete All
Page 69
69
5.Phonebook
• Copy Contact To Phone
• Change Phonebook
• New Group
• Search
• Receive Card(S)
• Service Number(S)
• Own Number
• Memory Status
The function of each option is as follows;
In order to select one of them, select direction Key first and then press
Select Key.
View Card
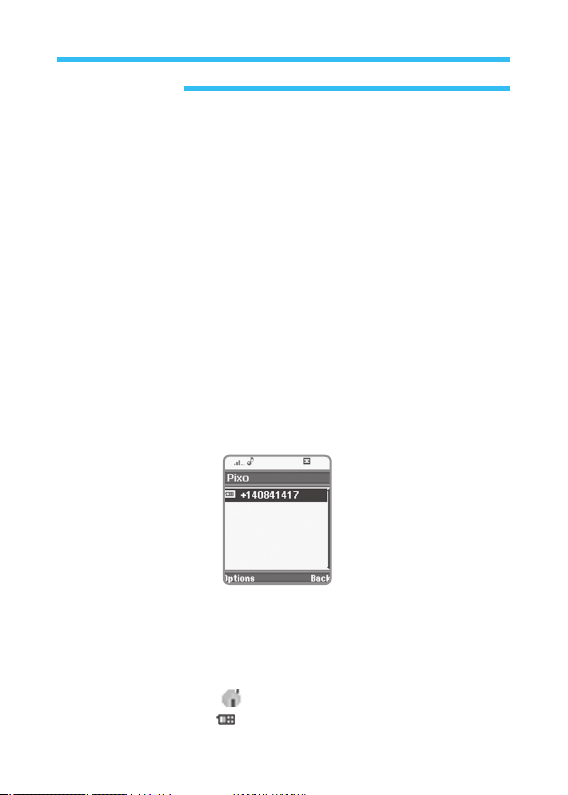
This option shows details on contact being selected.
(See the figure below)
• Name of contact is used as a title of View Card.
• It shows phone number of contact selected.
• Information correspondent to contact is displayed in the following order.
- Name of contact (it appears on the upper of the screen)
- Home phone number
- Cell phone number
Page 70
70
5.Phonebook
- Company number
- Fax
- E-mail address
- User s configuration (memo)
- Attached image
- Attached sound
- Group joined
Call Contact
Make A Call
It makes a call to the name (person) selected.
Send A Message
It sends a message to the name selected.
Change
This option if selected can change the information of the name selected.
Select information to change and press Left softkey to display various
options related with.
These options are different from each other according to the location where
the name is (SIM address book, phone address book).
For example, the following options will be displayed if Left softkey is
pressed with the number selected.(See the figure below)
Note: Use SIM card to display the phone number of the name selected
only. Press Previous Key to go back to the previous screen. Press
option Key to display options which can be applied to the name
selected.
Page 71
71
5.Phonebook
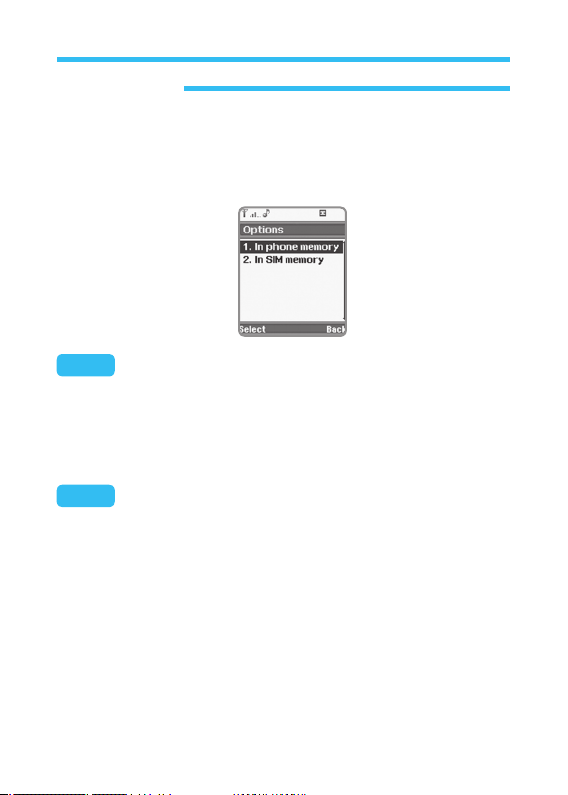
New Contact
This option adds new contact to address book. Select this option to display
the following screen.
Input number with numeric keys and then press OK Key to save this
number in memory and to display option screen of type. From here select
the type of the phone number (home, mobile, work, fax) and press Enter
Key. Press Previous Key to return to address book screen again and the
name just input will be displayed.
Note: New contact can not be made directly to whole address book.For
this operation, you should make it first in SIM or phone address
book and then copy the contact to address book next. Select In
phone memory to make contact in address book. Select In SIM
memory to save contact in card. Select option as desired and press
Select Key.
Note: Press * (asterisk) to specify phone using capital or small letters or
shortcut Key. (Ab - change capital to small; 1 - number, AB - all capi
tal, ab - all small) Press Previous Key to display option screen again.
Use numeric keys to write name and then press OK Key to save it.
Press this Key to display address book screen.
Page 72
72
5.Phonebook
Send Message
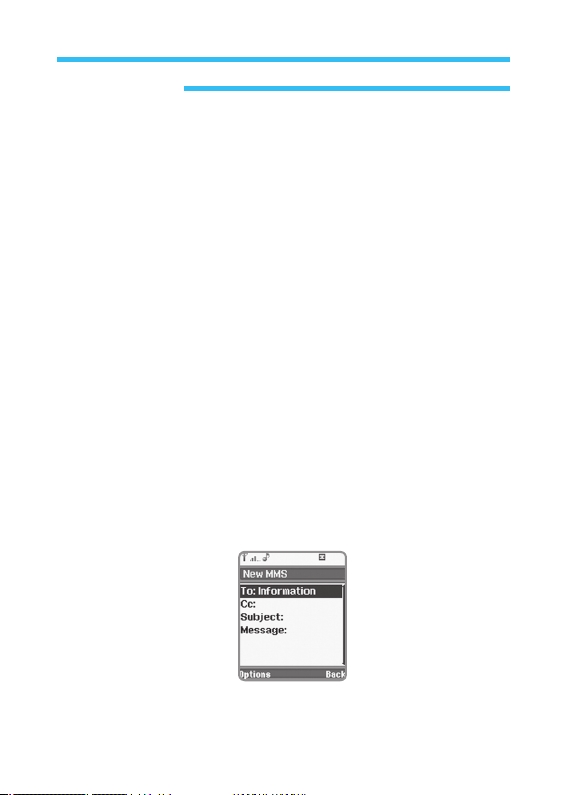
This option is used to send SMS (Short message) or MMS (multimedia
message) to previously selected contact. Details on these two messages
are as follow;
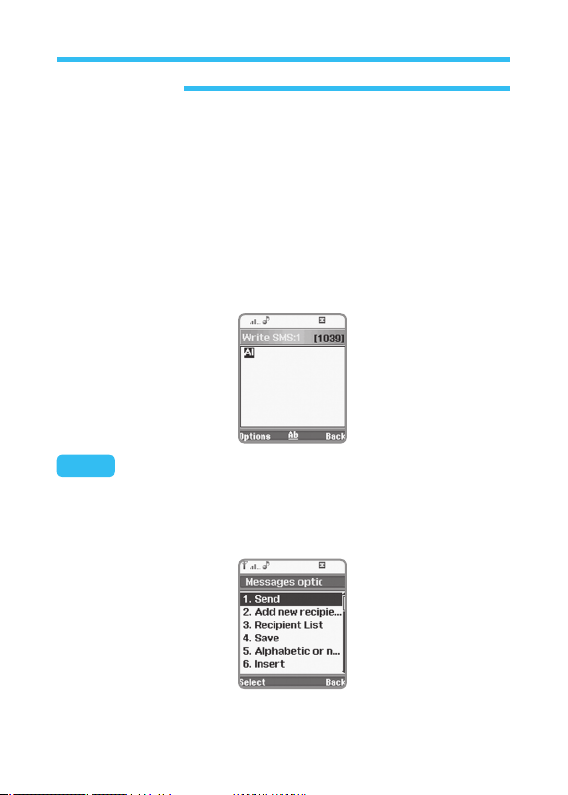
Short Message
Select short message on option screen and press Select Key to display
number list applicable to the selected contact. If just one number is found
available in the selected contact, start writing text message right there.
Note: If a message needs to be sent to several persons, you should select
add their numbers in Add new recipient options before writing the
message. After a message is written (up to 1042 letters available
for a message), press option Key to display the various message
functions as follows;
Page 73
73
5.Phonebook
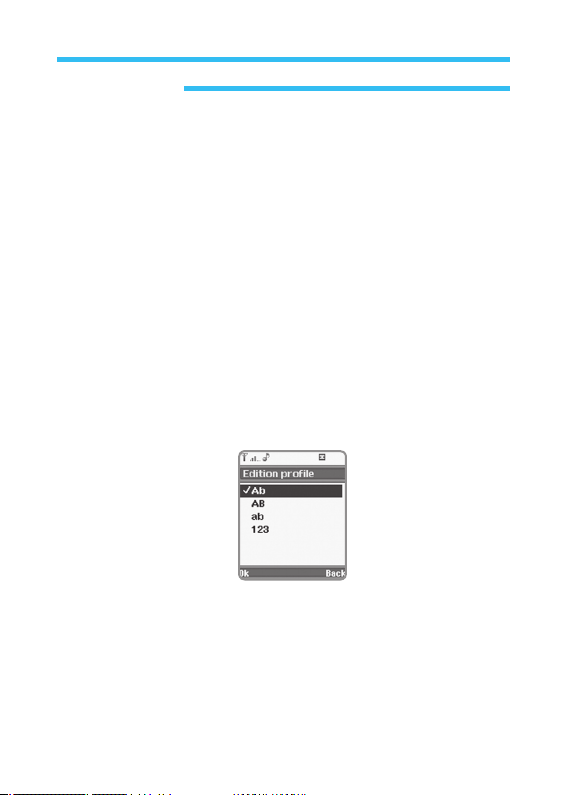
• Send: Sends a text message to a receiver with this option designated
(Press Enter Key).
• Add
New Recipient: Selects other SMS message receivers. To enter
receiver setting screen, press Enter Key to
display the screen, and there write receivers
name desired or press the name to enter address
book to select receivers.
• Recipient
List: If this option is selected, previously selected list
of receivers of text messages will be displayed. If
you want to change the list, press option Key again
to display the screen, where you may add recipient,
Delete or Delete all as desired.
• Save:
Saves the just written message in memory.
• Alphabetic or numeric mode: This option is used to select a function
to write messages (characters, capital
letter, small letter and numbers).
• Insert:
Inserts selected Picture, animation, melody, sound, symbol and
Template to a message to send. For example, you may select
sound from the list as desired to insert. (When you selected,
melody will sounds for a little while). The selected sound or
melody will be heard when its receiver confirms the message.
In this manner, choose Template option to select text prepared
before on the list (e.g. Urgent! Please call! Where are you? etc.)
Page 74
74
5.Phonebook
• Dictionary: This option is used to correct or cancel spelling of the
written message. Select On to start correcting spelling.
• Sending Option: On this screen, you may select the valid period of
written message (1 hour, 6 hours, etc.) and ensure
the message is received.
Valid period of a message means time duration during the message stays
in the communication network if not sent to its receiver. After this time, the
message will be erased automatically even if not sent to its receiver.
This option sends multimedia message to previously selected contact.
How to send multimedia message is as follows;
Multimedia Message
• Select Messages on option screen and press Enter.
• If the screen with several options appears, select multimedia message
and press Enter again.
• If there are several phone numbers in previously selected contact, you
should select a number to send the message first.
• New multimedia message screen will be displayed with the following
options.
Page 75

75
- To Nr: Where message receivers contact will be displayed.
- Cc:
Where other receivers contact will be displayed.
- Subject:
Where title of message to send will be displayed.
- Message:
Where text message to send will be input.
• Press option to add a new receiver. First, press option Key, select Add
recipient option and then press Select to get into number input window.
And then, write receivers number or press name Key to select in a
address book list. Press OK Key to return to new multimedia message
screen. If the number of the multimedia message receivers are 2 or
more, there will be all the numbers available to receive on the upper
blank.
• Select Cc on new multimedia message screen to send the multimedia
message copy to other receivers, and follow the procedures as
specified above.
• Select Subject option to add title to a message to send and press Select
Key. On the screen displayed, write title and press OK Key to finish.
• To add a message select Message option and press Select Key. If the
option Key is pressed, the following options are displayed.
- Send Message: If this option is selected, you may send the just
written message to previously selected receiver(s).
- Add/Edit Text: It is used to Add/Edit text. (You may change text
using Write Text or Delete Text function in the option
menu of previously written text.)
- Remove Text: It is used to remove the pre-inputted text.
- Add Picture: It is used to attach picture or image already saved in
the phone.
- Add Sound: It is used to add desired sound to multimedia
message. (You may select the sound saved in the
phone or the sound being recorded to the phone using
the microphone)
5.Phonebook
Page 76

76
- Add Page: It is used to add up to 5 slides to a message to send. Each
message is made up of one or more slides. Text, image and
sound can be saved in each slide. Use the following options
in option menu to add a new slide and its details. If a new
slide is added, there will be 2 new options in the menu.
They are Remove current page (used to delete attached file
applied) and Go to page. (used to apply another attached
file among attached files saved)
- Save As Draft: Saves the written multimedia message in Draft MMS
folder. Alphabetic or numeric mode: You may select a
mode to input messages. (Capital letters, small letters,
etc.)
- Alphabetic Or Numeric Mode: This option is used to select a function
to write messages (characters, capital
letter, small letter and numbers).
- Dictionary: You may correct spelling of the message written.
- Page Preview: Displays the appearance of the present messages
page.
- MMS Preview: Displays all details of the completed multimedia
message.
- Page Timing: Displays the play time in second during the attached file
is played. (Up to 99 seconds available)
- MMS Priority: Displays priority of multimedia messages sent. (High,
Medium, Low)
- MMS Information: Displays various details included in message. (It is
a brief list.) Sender’s name, receiver’s name, title,
specified priority, date sent, message capacity, etc.
5.Phonebook
Page 77
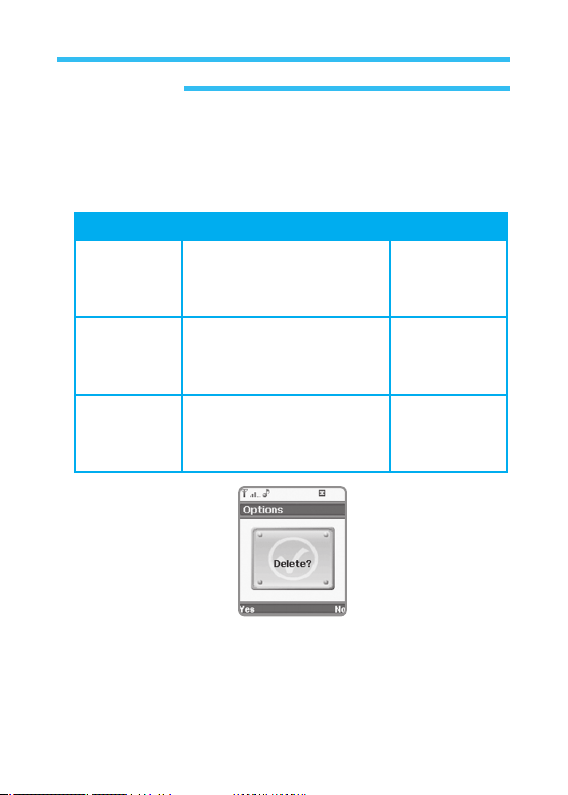
77
Delete Contact
Deletes selected contact from address book. How to delete from whole
address book is as follows;
Contact type Execute Result
Mixed
Phonebook
If Delete Contact option is
selected, screen will be
displayed to confirm.(Are you
sure to delete?)
The contact is
left only in SIM
address book
Terminal
Phonebook
If Delete Contact option is
selected, screen will be
displayed to confirm.(Are you
sure to delete?)
The contact
from Terminal
Phonebook will
be deleted
SIM
Phonebook
If Delete Contact option is
selected, screen will be
displayed to confirm.(Are you
sure to delete?)
Delete contact
from whole
address book
Press No/Cancel to cancel the execution. Press Yes to delete contact, a
message Operation complete! will appear.
After that, address book list will be displayed again. (You can see the
deleted details.).
5.Phonebook
Page 78
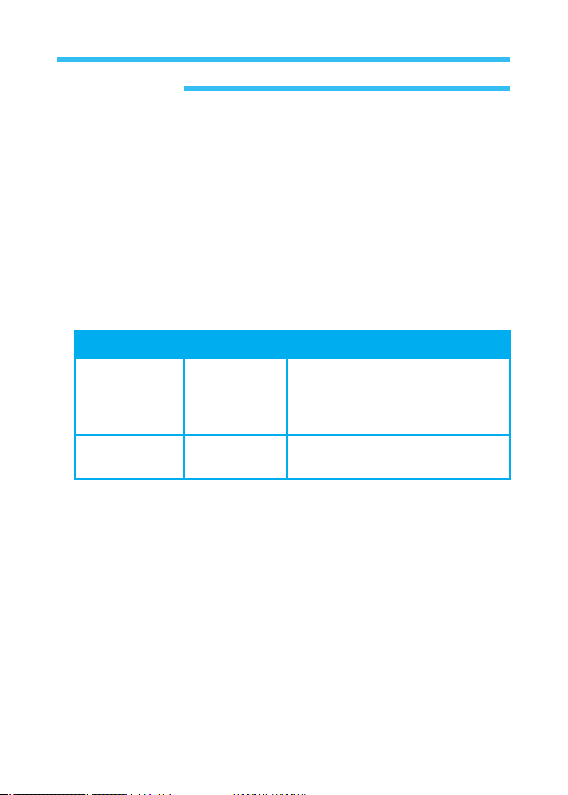
78
5.Phonebook
Delete All
Deletes all contacts saved in selected address book (SIM, cell phone or
whole address book).
Copy Contact To SIM
Used to copy selected contact. You should copy only the name and number
of contact as expected. This option can be executed to cell phone memory
from SIM memory or to the contrary according to the following rules. (it is
different according to the type of contact or copy.)
Contact Type Execute Result
Copy Copy Contact Since the contact is previously
saved in both memories, copy of
the contact to SIM memory is not
available.
Only From
Cell Phone
If you want to copy contact saved in SIM or cell phone memory, or if the
contact with the same name exists, you should newly make the contact with
the same name in both memories. (Including all the phone numbers which
belong thereto) (However, the phone number will not be changed)
During copying contact, In progress screen will be displayed.
Completed or Error in progress screen will be displayed to inform you of the
state. If memory is full, progress will not be successful but a message will be
displayed to let you know insufficient capacity of the memory.
Page 79

79
5.Phonebook
Change Phonebook
Opens other address book. If this option is selected, the following options
of menu will be displayed.
Mixed Phonebook
Means both address books saved in SIM and Terminal.
SIM Phonebook
Means address book saved in SIM card.
Terminal Phonebook
Means address book saved in cell phone memory.
Select address book to open, and then press OK. The name of this option is
Mixed phonebook where contact information is available after confirmed.
New Group
specifies group of contacts. The group of contacts means a meeting for
user to send call and message to at once. For example, if one group is
classified into family, friends, co-workers, etc., you may use this option
conveniently to send the same message to all the members of a specific
group as classified.
Specify groups as applicable to receive group messages.
Up to 5 groups available.
Follow the procedures below to specify a group with new contact.
1. Select New Group on option screen. (From address book menu)
2. Press select Key to display Group Name screen.
3. Write desired name using alphabet buttons. (Up to 14 characters
available for a name)
Page 80
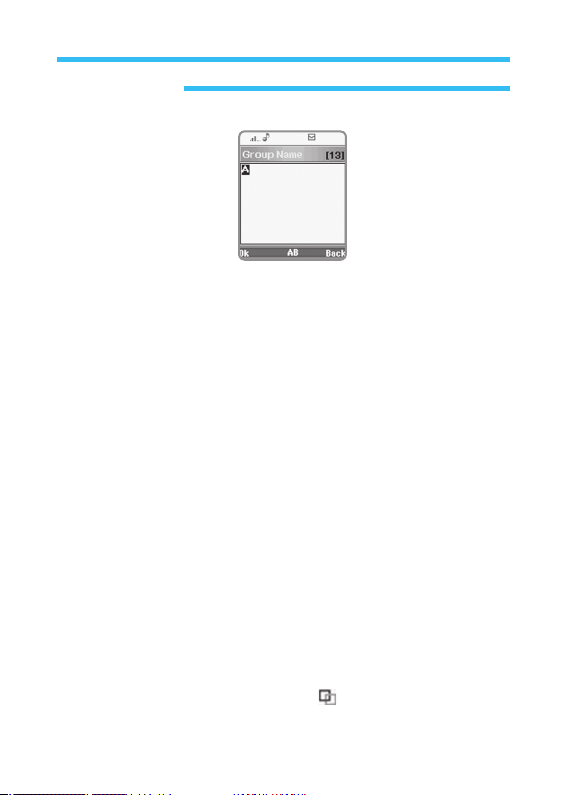
80
Press OK Key to finish. And you can see that the new group name is
displayed on the next screen as specified.
4. It is empty at first since the group is newly specified (Empty list). Press
Add Key to add another contact to this group.
5. The following options will be displayed.
a. New Member: It is used to appoint the contact on the established
contact list to be a new member.
b. Create Member: In order to make a new member in a group, contact,
its phone number and other procedures than
described above for Make New Contact shall be
fulfilled.
c. Rename Group: Displays the screen to change previously specified
group name to another name.
6. If new contact is made or added to group, Call member, Add member
(with contact selected from established address book), Create member
(starting from 0), Remove member, Set Group melody (any call to the
group members will make specific melody sound) and Set group Photo
are available.
If new group is made, press Previous Key to display its name on the
list.
5.Phonebook
Page 81

81
Search
This option is used to search for other contacts on the contact list.
Select Search option to display Search by name screen.
On the screen write more than 1 characters of the contact name to find.
If written, the applicable name with the same characters is displayed.
Now you may search up and down to find the name on the list.
For example, press No.2 Key to fast reach names with the first
character of C.
If there is no name with such a character, the Key will show names with
the next character (in alphabetical order).
Receive Card(s)
It receives a phonebook data from PC through an infrared port.
If this option is selected, receive card screen appears, where Via infrared
rays option is available.
Press Enter Key to start to receive messages via an infrared device.
If transmission is normal, new card will be added to address book.
Service Number(s)
Setting service numbers. Select service numbers then press Call Key.
5.Phonebook
Page 82
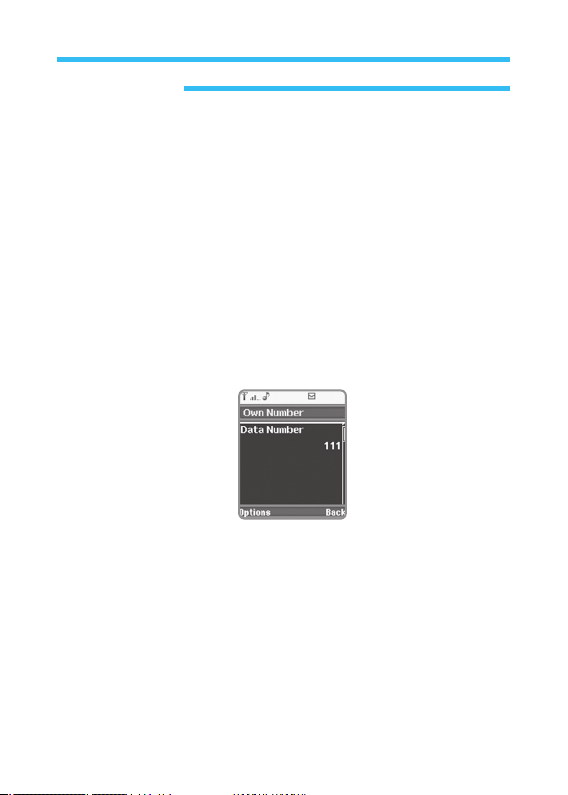
82
Own Number
My phone number(s) is saved in special address book inside SIM card.
Select My Number option on the phone call service menu and press Enter
to have access to this function. (If not informed of this route, please ask
from the first).
All the lists of phone numbers belonging to Own Number will be displayed
(For example, cell phone number, fax number, etc.).
How to add or cancel number is as follow;
1. Select specific number, press Add/ Delete, and then Select.
2. On the next screen all numbers belonging to the specific number are
displayed. : Data, fax...ƒ (see next figure)
Press Select
a. Add:
Adds new phone number onto list.
b. Edit: Writes or changes name added to the specific number or other
number.
c. Delete: Deletes selected phone number. Press Enter to finish.
5.Phonebook
Page 83
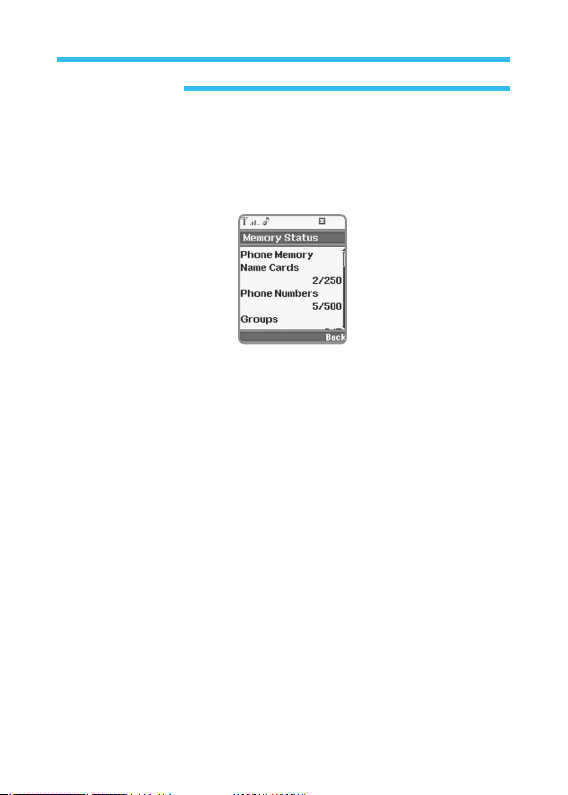
83
Memory Status
This option is used to confirm the capacity and the condition of SIM card or
phone memory.
On the state window, the following information is provided.
• Names saved in cell phone memory (up to 250 available)
• Phone numbers saved in cell phone memory (up to 500 available)
• The number of groups saved in cell phone memory (up to 5 available)
• The number of names saved in SIM card memory (up to 40 available)
5.Phonebook
Page 84
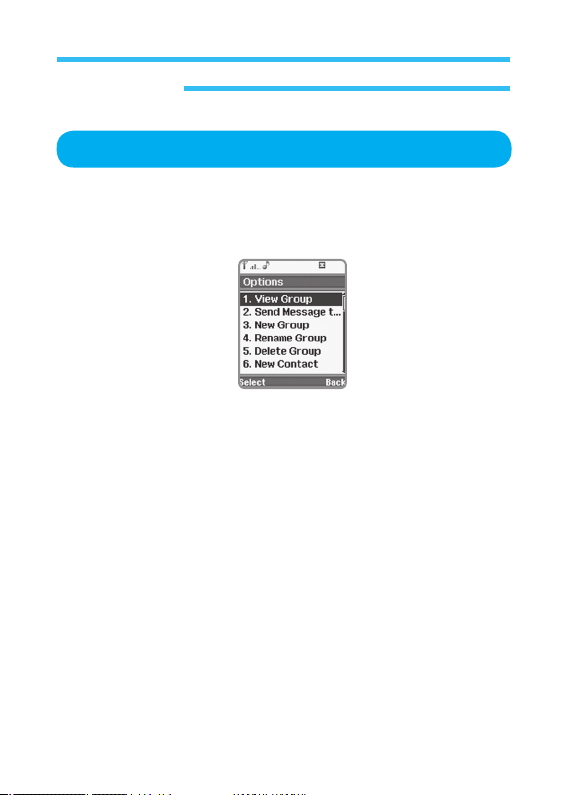
84
5.Phonebook
Group Setting / Group Work
If a user group is made, select address book option on the main menu and
then desired group on the contact group list to perform group work.
Click /Option Key to display the following lists;
• View
Group
• Send
Message To Group
• New
Group
• Rename
Group
• Delete
Group
• New
Contact
• Receive
Card(s)
• Service Number(s)
• Change
Phonebook
• Memory
Status
Functions of these options are as follow;
Page 85

85
5.Phonebook
View Group
It is used to view all the members belonging to selected group. On the list
select a member and press/Option Key to apply the followings:
Make a call to members, Delete, Add new member to group, Group melody
or image setting.
Send Message To Group
It is used to send SMS text message or MMS multimedia message to
selected group members.
• In the first case (Shot message), SMS message screen will be
displayed to write message. Use the function with alphabet / number
Key or press option Key to display message option. (Refer to Send
Message described above). If SMS message has been written with
its receiver specified, press Send option to send the message to the
designated number of the selected contact.
• In the second case (MMS message), this option sends MMS
multimedia message to selected members. First, select multimedia
message on Select screen and press OK to display new MMS screen.
How to use this screen and its options has been described above (see
Send Message). If MMS message is written (including text, image,
sound, etc.) with its receiver designated, you may send the message in
the following procedures;
1. Select message on new MMS screen.
2. Press Select Key to display message screen.
3. Press Select/Option Key and select Send Message on the list displayed.
(first option of the list)
4. Press OK Key to send the message.
Page 86

86
5.Phonebook
New Group
This option is used to add new group to address book. Select new group on
Select/screen and press OK Key to display Group Name screen. How to
use this screen and its options has been described above (see New Group).
Rename Group
It is used to change selected group name. Select Rename group on Select
screen and press OK to display Write Rename group screen. Use
alphabet/number buttons to change to new name. Press OK Key to finish.
Delete Group
It is used to delete selected group. Select Delete Group on Select screen
and press OK to display the following message screen to confirm “Delete?”
Press Yes Key to delete the selected group and its all information, which
will never be recovered. Now contact list in address book will be displayed.
Press No Key to cancel Delete and return to address book screen.
New Contact
It is used to add new contact to address book. Select New Contact on
option screen and press OK to display option screen. How to use this
screen and its options has been described above. (see New Contact)
Receive Card(s)
It is used to receive card through infrared port. If this option is selected,
Receive card screen appears, where Via infrared rays option is available.
Press OK Key to start to receive messages via infrared rays.
If transmission is succeed, new card will be added to address book.
Page 87

87
5.Phonebook
Service Number(s)
Setting service numbers
Change Phonebook
As described in Change Phonebook above.
Memory Status
As described in Memory Status above.
It displays the contacts saved in phone memory and the contacts saved in
both (cell phone and SIM card) only, thus to show details of whole address
book always.
Follow the procedures below to set and apply phone address book.
1. Press menu Key on background screen to display main menu with phone
options.
2. Select phonebook and press OK to display phonebook screen.
3. Press option Key to display option screen.
4. Select Change Phonebook and press OK to display Change Phonebook
screen.
5. Select the last option on this screen and press OK Key to set and apply
Terminal phonebook.
Terminal Phonebook
Note: From now on, the Terminal phonebook will operate till other type of
phonebook is selected (even if GRUNDIG mobile is turned off).
Page 88

88
5.Phonebook
All the options related with phonebook are as specified in Mixed phonebook
(excepting the following).
• New
Contact (name): Newly input contacts are saved all in the phone
memory (they become the contacts only for
the cell phone). Thus, right after this option is
selected, Name screen will be displayed, where
you should write new contact name and select
a location to save this information (similar to
whole address book).
• Erase/Delete
Contact: If this option is selected, only the contacts
saved in phone memory will be deleted. In
other words, if the same contact is saved in
both, copy of the contact in SIM card is kept
(still displayed in whole address book or SIM
address book).
• Copy
Name To SIM: If this option is selected, copy of contact to SIM
card memory is available. If the contact exists
already in SIM card, a message will appear to let
you know. Contact name and selected number
only will be copied.
Page 89

89
5.Phonebook
SIM phonebook
SIM phonebook shows only the information saved in SIM card memory and
the information saved in both, thus displaying whole address book always.
Follow the procedures below to set and apply SIM address book.
1. Press menu Key on background screen to display main menu with phone
options.
2. Phonebook and press OK to display address book screen.
3. Press option Key to display option screen.
4. Select Change Phonebook and press OK to display Change phonebook
screen.
5. Select the second option on the screen and press OK Key to set and
apply SIM phonebook.
• View
Card: With this option selected, SIM address book shows the
following information only: Phone number included in
contact, group the contact joined (if any).
• New Contact: Newly input contacts are saved all in the SIM card
memory. Thus, right after this option is selected, Name
screen will be displayed, where you should write new
contact name but you don t need to select a location to
save this information (similar to whole address book)
Note: From now on, the SIM phonebook will operate till other type of
phonebook is selected (even if the terminal is turned off). All the
options related with SIM phonebook are as specified in Mixed
phonebook (excepting the following).
Page 90

90
• Delete Contact: If this option is selected, only the contacts saved in
SIM memory will be deleted. In other words, if the
same contact is saved in both, copy of the contact in
phone memory is kept.
• Copy N
ame To Phone: If this option is selected, copy of contact to
phone memory is available. Contact name and
selected number only will be copied.
The menu option named Message allows settings of text message,
multimedia message, chatting, and environmental services for messages.
5.Phonebook
Page 91
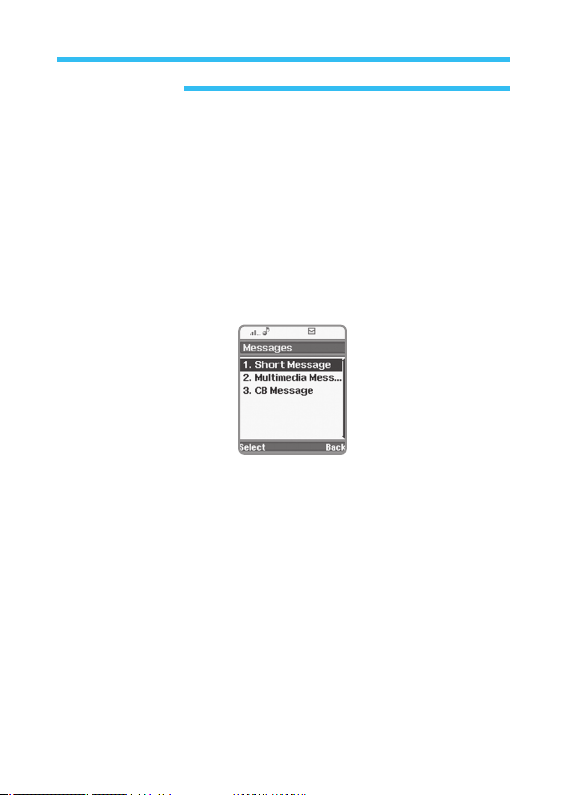
91
The menu defined as message allows text message, multimedia message,
chatting, cell phone mailing, and connection to environmental services for
messages.
Follow the procedures below to connect to message menu.
1. Press the left selection Key in background screen.
2. In the basic menu screen, press select Key while Messages icon is
selected.
The options on this menu are as follow;
• Short Message
• Multimedia Message
• CB Message
The following is about text messages, multimedia messages and options
related with environmental settings.
6. Messages
Page 92
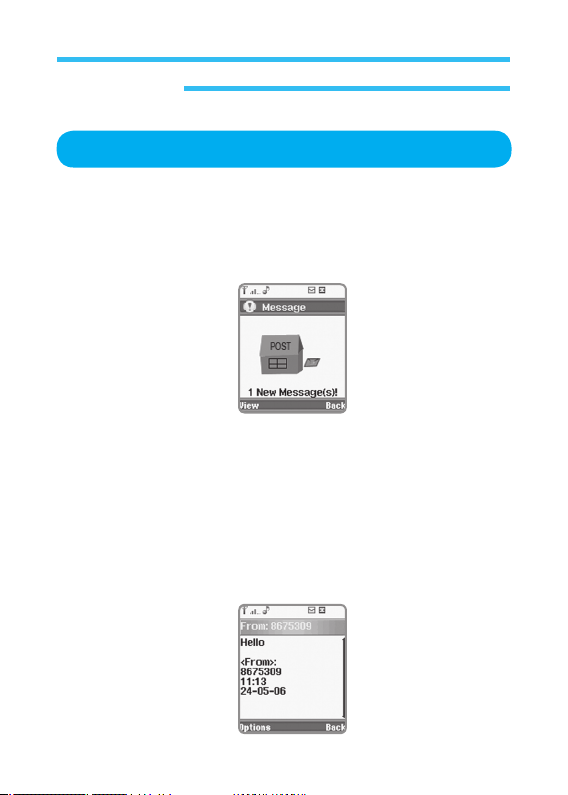
92
6. Messages
Receive Message
Text Message
If receiving a new text message, the phone (SMS and EMS) will sound
(sound can be cancelled if requested). And a screen appears to display the
number of messages received.
Press View Key to confirm the new text message, and press Back
Key to return to the previous screen.
• Open: Opens the text message for you to read its details.
• Delete: Deletes received messages from the list.
Select Open to display the received message including senders phone
number, received date and time, and its details. (See the figure below)
Page 93
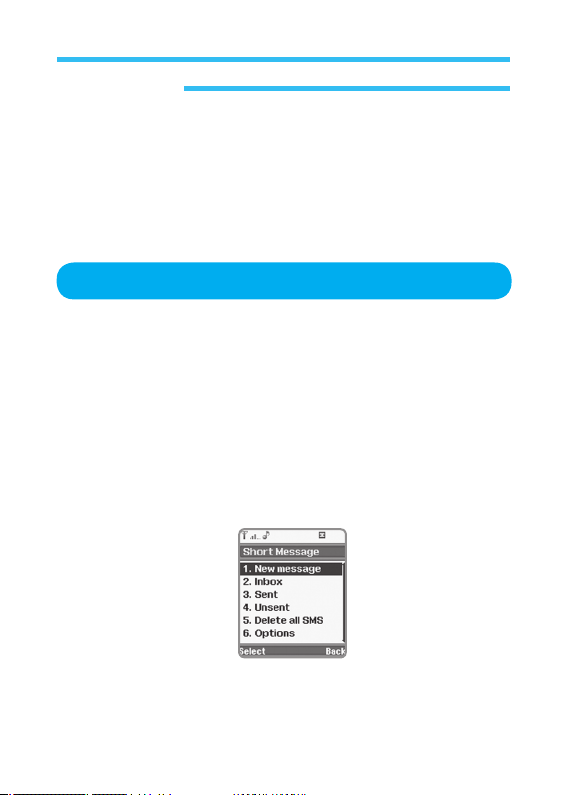
93
6. Messages
Multimedia Message
Reaction of the phone which received MMS message (multimedia
message) is different based on the specified display option.
Recovery display can be defined as specified in the described procedures
in <multimedia message>.
As previously described, two different types of messages can be sent.
• One is short message (SMS) composed of text only and the other is
multimedia message (MMS) composed of text, image and music. How
to use these is as follows;
SMS Message
1. In stand-by state, press menu Key to display main menu option.
2. Use the direction Key to select message menu then press select.
3. Select shot messages on message menu and press select Key.
4. Select new messages on shot message menu and press select Key.
Send New Message
Page 94
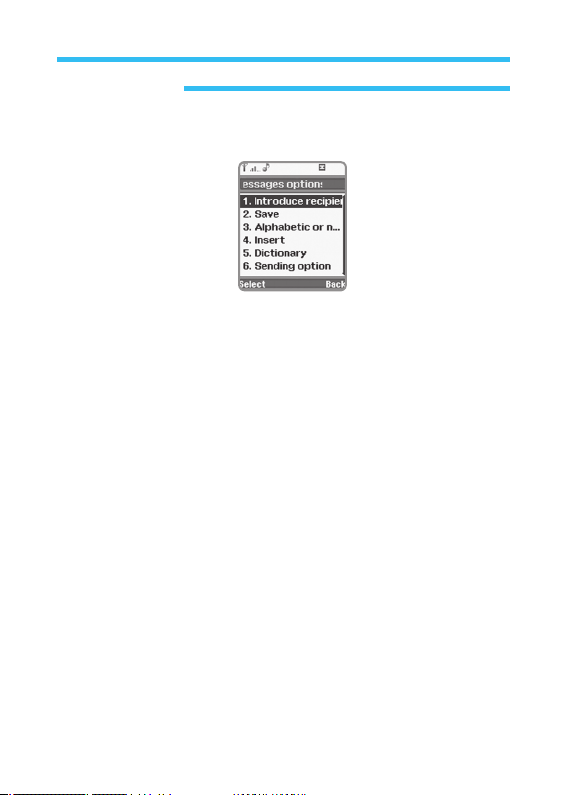
94
6. Messages
5. Press option Key.
• Introduce Recipient: Displays receivers of message. You may select
receiver s name using phonebook or directly
input phone number. You can select Add new
recipient to send the same text to all receivers
added at a time.
• Save: Saves text which is not yet sent in phone memory. The text will
be saved in unsent box in outbox folder.
• Alphabetic Or Numeric Mode: Shows how to input capital letters,
small letters, capital and small letters,
or numbers. Press <*> Key shortly to
step to other various modes (Ab, AB,
ab, 123).
• Insert : Allows user to insert some object in a message. For example,
picture (simple static picture), animation (small moving picture),
melody (music), sound (simple bell), symbols (press <#> Key
to display text writer to select symbol as desired thereon), or
Template are available. Insert one of 4 objects in a message to
display a series of icons on the message (simple musical note,
square).
• Dictionary: Makes spelling dictionary on or off.
Page 95
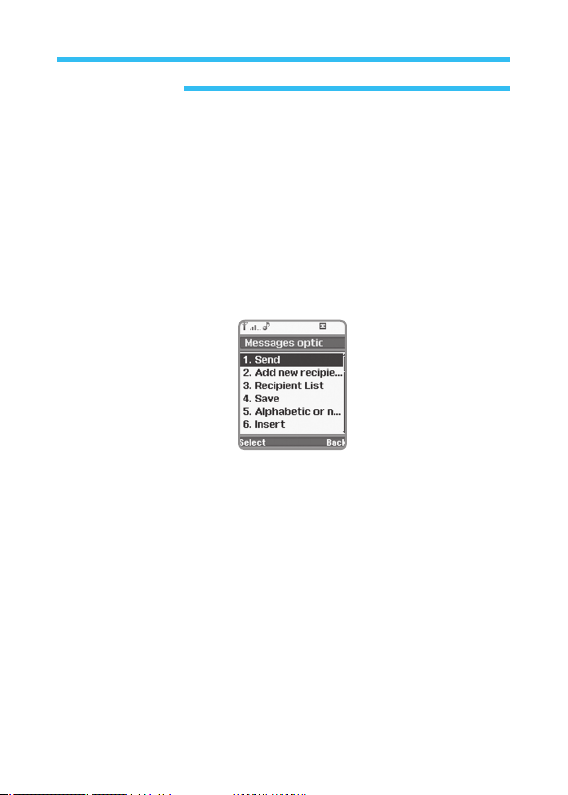
95
6. Messages
• Sending Option: Makes active or inactive the information menu on
valid period of message (1 hour, 6 hours, 12 hours,
24 hours, 72 hours, 1 week, maximum) or select
report options On or Off.
The message whose valid period is over will not be sent but deleted.
Confirmation of message allows you to ensure that the message is received.
If once details of message are specified, the receiver will display menu list
related with the message. (see the figure below)
• Send: Sends a message to a specific receiver only. The number of text
letters will be displayed on the screen as follows. Press OK Key
to send the message.
• Add
New Recipient: Adds a new receiver of message.
• Recipient List: Shows the list of receivers of message. Press option
Key to input a new receiver or to delete the existing
receiver.
• Other Options: (Save, Alphabetic/Numeric mode, Insert, Dictionary,
Sending option) are previously described.
Page 96
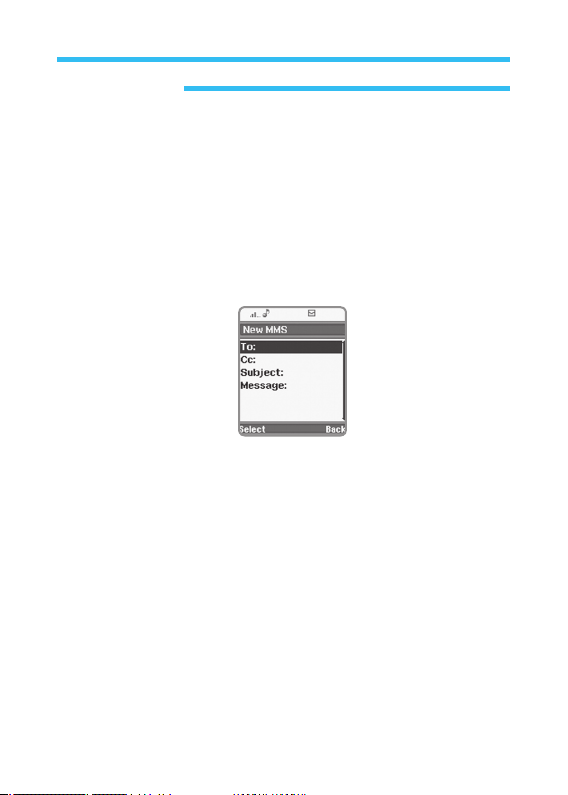
96
Multimedia Message
Follow the procedures below to send a multimedia message.
1. In stand-by state, press menu Key to display main menu option.
2. Use the direction Key to select message menu then press select.
3. Select multimedia messages on message menu and press select Key.
4. Select new messages on multimedia message menu and press select
Key.
- To Nr:
Where main receiver’s phone number will be surely specified. Up to
1024 characters are available for receiver and up to 20 numbers for
the phone number. Press names menu to set receivers.
- Cc: Where other receiver s contact will be displayed to receive copy of
message. How to select receivers is as described previously. You may
input several phone numbers or E-mail addresses to send a message
to many receivers at a time through address book screen.
- Subject:
Where title of message will be displayed. Select this option and
press Select Key to go to Subject screen described previously to
input up to 100 characters.
- Message:
Where details of message are written. This option is applied as
described in “Send Message” and “Multimedia Message”. Press
option Key on Send Message to send the message written. On
the next screen the capacity of the message will be displayed.
6. Messages
Page 97
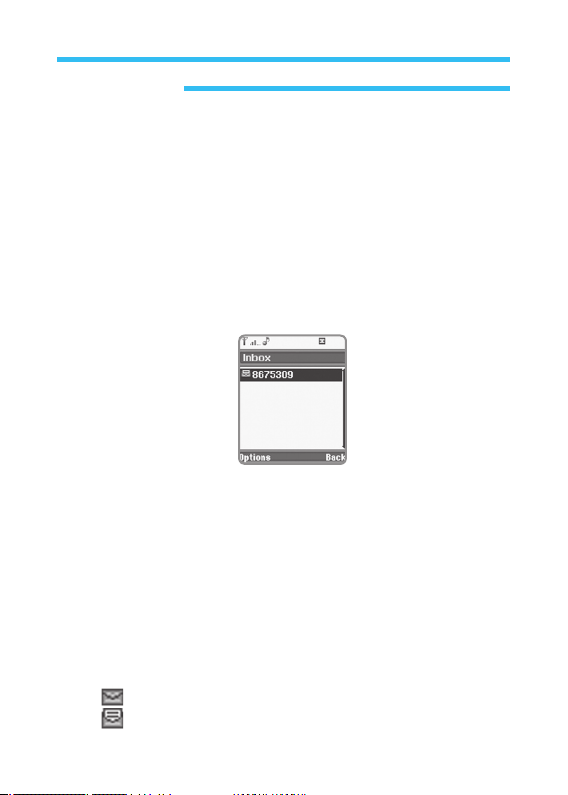
97
Press OK Key to send the message. If you want to save the message before sending, select Save as Draft Key on the menu and
press Execute Key.
Inbox
It is a space to save all the messages received including SMS, MMS and
other messages to send. The received box includes all the lists of the
messages received.
If a message is received, separately specified sound of bell will operate.
And as shown below, an image will be displayed on the screen.
View
Saved Message Not Read Yet
Follow the procedures below to read new message saved.
1. Select Inbox on message menu and press option Key.
2. Following options are available on the Inbox menu.
a. Read
Text Message: Select text message option to display text mes-
sage list, received. Each message has an icon
and senders number. There are two kinds of
icons;
• This icon means that the message in the Inbox is not read yet.
• This icon means that the message in the Inbox is read already.
6. Messages
Page 98
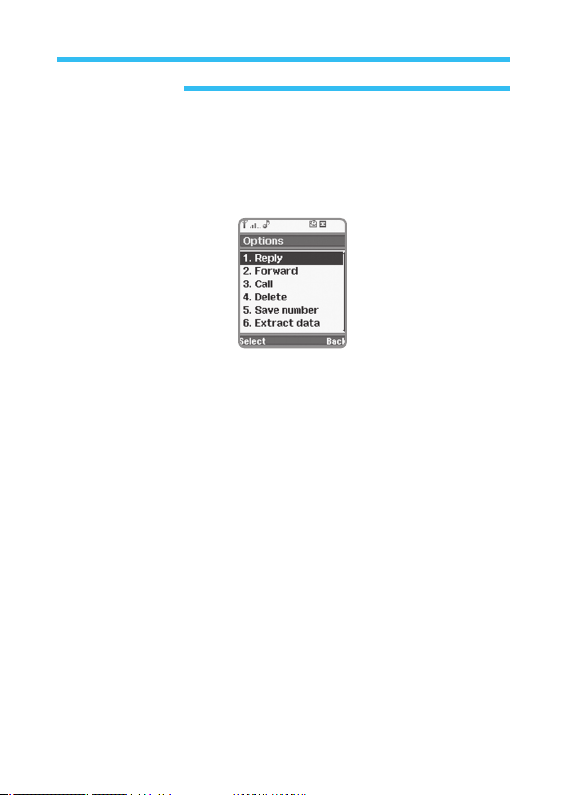
98
6. Messages
Select a text message to read now and press option Key. Select Open
(press Delete Key if you want to delete it) and press OK Key to display
the following screen showing such information as text message, senders
phone number, date and time when the message was sent.
• Reply: Displays Write Text Screen to replay to the message received.
Write message as desired. If you want to know how to write and
send text message (SMS), refer to <New Message>.
• Forward: Delivers the received message to others. Input the phone
number directly thereon or select a receiver on address book.
Then press OK Key.
• Call: Makes a call to message senders number. Press option Key to
display the menu where Save address book, Make a call, Send
number using MMS or SMS, and Send SMS & MMS message are
available.
• Delete: This option allows you to erase text message that you read or
get vid of all message.
• Save Number: Saves the phone number of text senders in phone
memory or SIM card (name of the phone user, type of
the phone and number of home, company, cell phone,
fax, etc.)
• Extract Data: Allows you to make use of the phone number, E-mail
address or URL address saved in the text message
received.
Page 99

99
6. Messages
b. Read Multimedia Message (MMS): Select multimedia message option
to display the list of multimedia
messages received and saved.
Select message to read and press
option Key to display various option
menus.
• Save Object: Saves melody and image attached.
• Previous Page: Shows the previous slide.
• Next Page: Shows the following slide.
• Reply: Replies to message received.
• Reply To All: Replies to all senders.
• Forward
• MMS Information: Displays additional information on the received MMS
message.
• Delete: Deletes selected MMS.
• Delete All: Deletes all MMS.
• Call Sender: Makes a call to MMS sender.
• Extract Data: Allow you to make use of the phone number, Email address
or URL address saved in the text message received.
Page 100
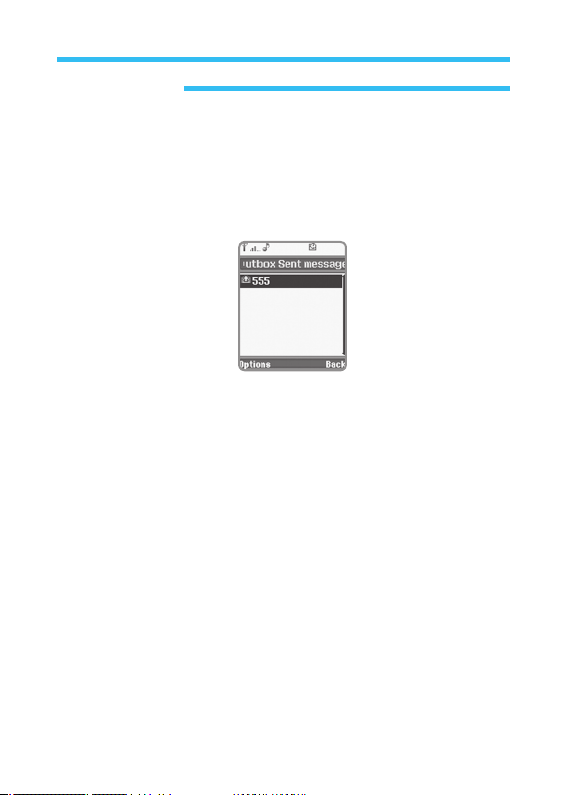
100
6. Messages
Sent
It is the place all sent messages are saved (messages sent or saved after
written). The sent box saves two types of messages, which are SMS (text
message) and MMS (multimedia message). Follow the procedures below to
go to the sent messages box.
If a message is opened, the details of the message will be displayed on
screen. The options related with Open Text Message are as follow;
SMS Message
• Forward: Forward text message
• Call: Makes a call to receiver of text message.
• Delete: Deletes text message.
• Save Number: Saves receiver s phone number in SIM card or phone
memory. The options related with multimedia message
displayed on screen are as follow;
Multimedia Message
• Write: Edits all information related with To, Cc, details or message.
• Resend: Resends text message.
• MMS Information: Displays brief information related with multimedia
message.
• Delete: Deletes multimedia message.
• Delete All: Deletes all multimedia messages saved in Sent Box.
 Loading...