

Page 1

Z-Wave Integration
v1.0
Page 2

Page 1
The Z-Wave Subsystem
The Z-Wave subsystem must be set-up and programmed independently. The following will be
used to integrate Z-Wave with MX HomePro in this example:
1. URC TRF-ZW2 Z-Wave Bridge
2. UI7 online editor
3. MXHP-H500 hub
4. URC Home App
5. MXHP-R500 Remote (optional)
You must have a Z-Wave dealer account prior to setup. See the MX HomePro Quick Start Guide for
information on setting up an account.
Setting Up the Hardware
This section covers the basic steps of setting up the TRF-ZW2 Z-Wave bridge:
1. Plug the bridge directly to your Internet connected router using an Ethernet cable and
then plug it into the wall using the AC adaptor.
2. The Z-Wave gateway automatically checks for the latest version of firmware and updates
when it is necessary.
a. The power LED flashes if updating and turns solid green once the process is complete.
3. Once updated, connect your programming computer to the same network and login to the
URC Dealer Portal found here.
a. Use the dealer information you received when you created the account to login.
Page 3

Page 2
4. Once logged in, enter the new user email address and name. This information is the
CUSTOMER’S information, not yours.
5. Locate the connected Z-Wave device on the right of the screen and click Use Values to
populate the Mac Address and Serial Number.
6. Click Register and the device will show up in Your Accounts.
7. The user receives an email with their password and a request to update their account
information.
Accessing the Gateway via UI7
Now that the Z-Wave gateway is associate with your dealer account it can be set up for the
installation location:
1. Click Go to local UI for your gateway from the dealer portal.
Page 4

Page 3
2. You are forwarded to the main UI7 editor for the gateway. Click on Settings and then Net
& Wi-Fi to set up our network preferences.
3. Choose how you want the gateway to connect:
a. Automatically configure using DHCP.
b. Manually configure enables you to assign a Static IP address.
c. Through Wi-Fi access point for wireless operation.
The Z-Wave subsystem is now configured and can now be programmed using UI7.
Page 5

Page 4
Accessing Z-Wave via the App
The URC Home app I required to control Z-Wave devices and to view/control connected cameras.
It is available for both iOS and Android devices. Find this app in the App Store or Google Play.
It is recommended to embed the URC Home app into the MX HomePro app using the in-app
launched to create a a seamless user experience.
Accessing Z-Wave via the Remote
To control the Z-Wave subsystem from the MXHP-R500 remote, it must be added to the system
using these basic steps:
1. Make sure the Z-Wave gateway is connected to the same network as the MX HomePro
hub (MXHP-H500).
2. Using the MX HomePro Editor, log in to the system and select Add advanced devices to
the system from the Programming Menu (view button below).
Page 6
Page 5
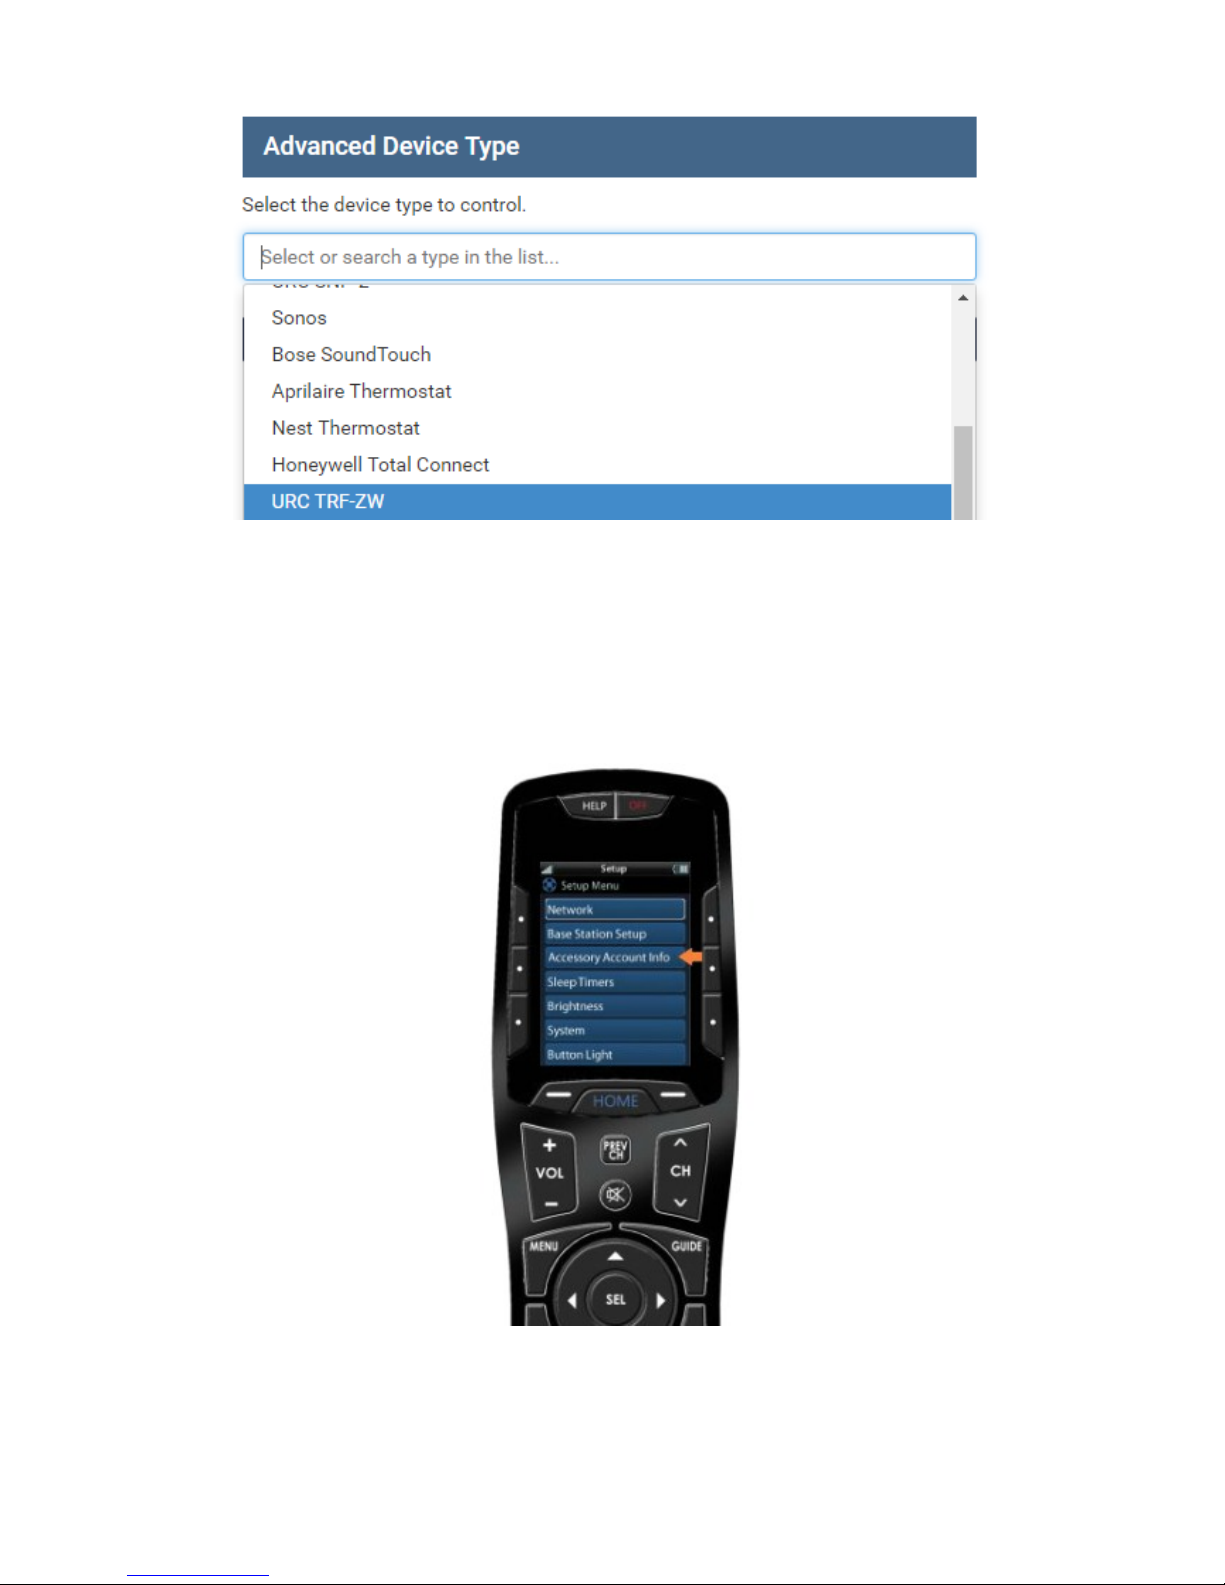
3. Select URC TRF-ZW from the drop down list and click Next.
4. Follow the prompts to connect the gateway to the system and download the updated
configuration to the hub.
5. After the download is complete, locate the MXHP-R500 remote and press the HOME and
ENT buttons simultaneously for five (5) seconds to enter the Setup Menu.
6. Use the arrows and SEL button to select Accessory Account Info.
7. Then select Enter Account Credentials.
Page 7

Page 6
8. Enter the username and password associated with the Z-Wave account and select Save.
9. You are prompted to select the room that the TRF-ZW gateway is to be used in, click
Home to exit the Setup Menu.
 Loading...