

Page 1
[RECEIVE]
RATE:
ELEV:
THRO:
VOLT:
LATI:
LONG:
ALT:
00cm/s
00cm/s
51%
16.8v
0º 00.00
0º 00.00
000.0cm
10
NULL
定点
0º
0º
0º
000.0m
GPS:
RSSI:
MODE:
YAW:
ROLL:
PITC:
DIST:
12.6V
00:00.0
SWB2
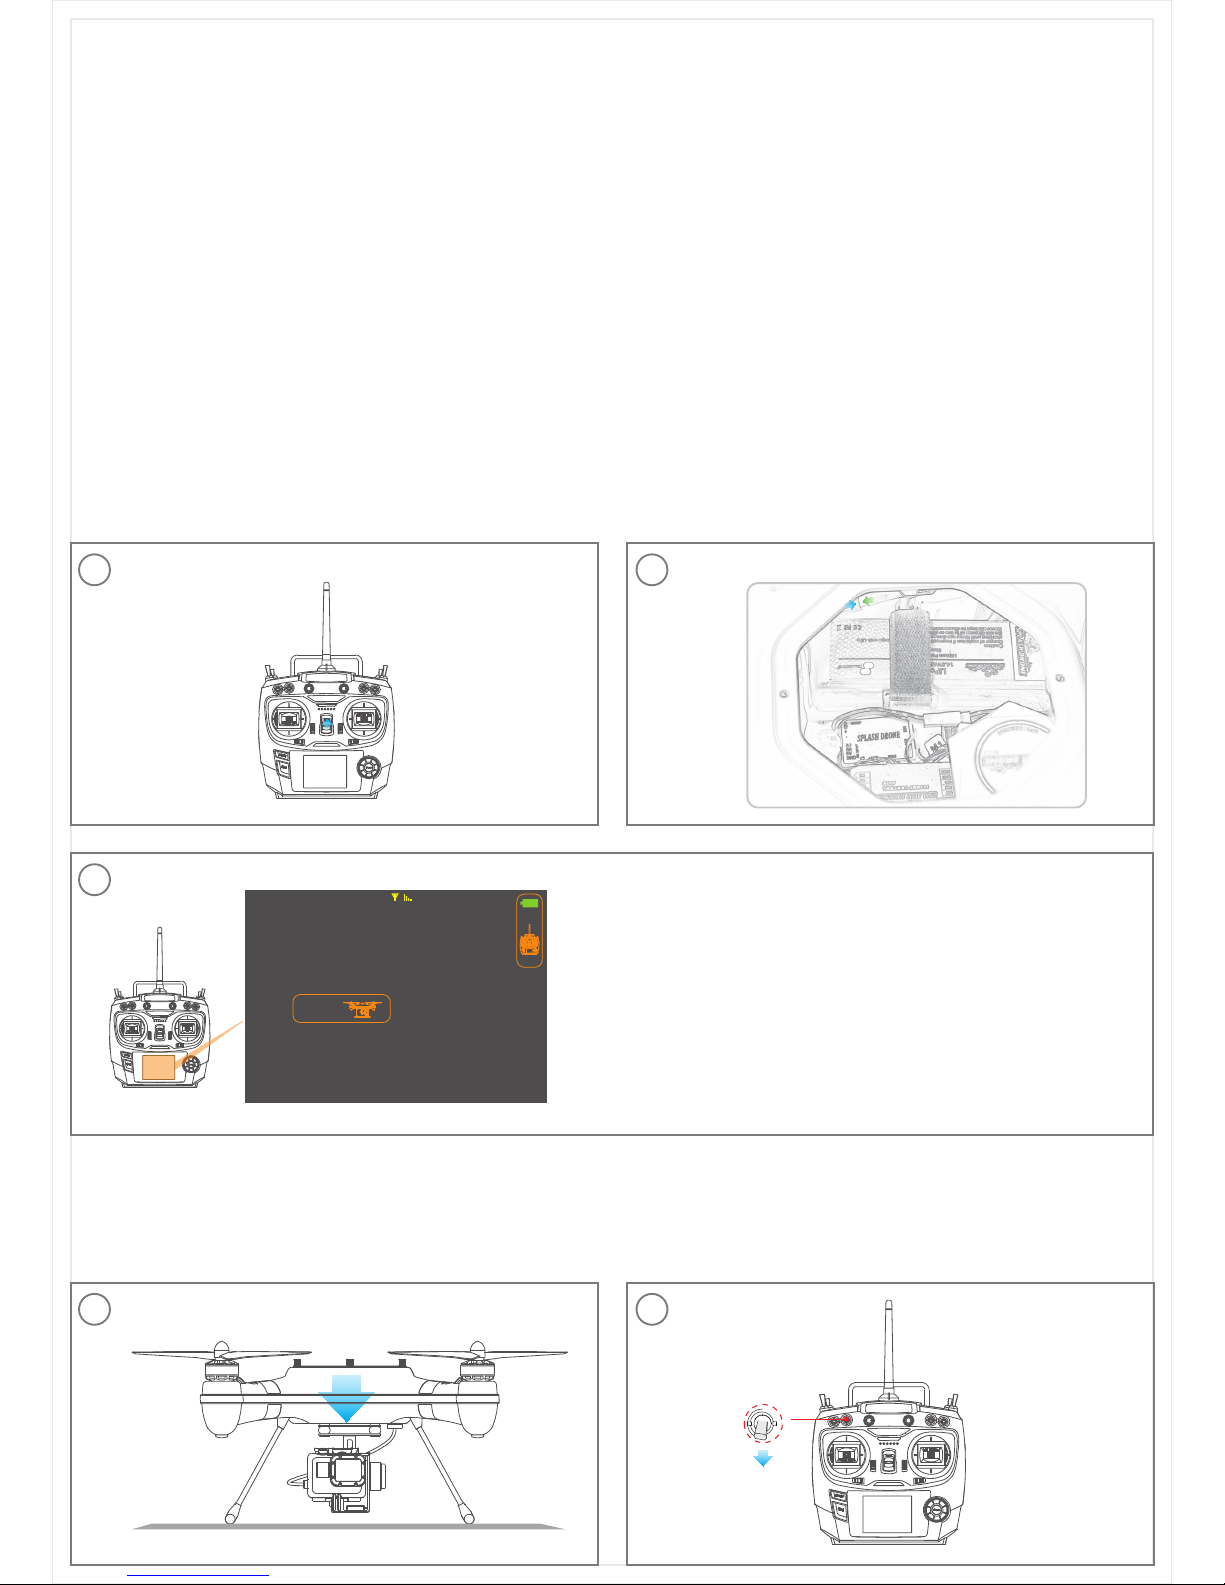
1、Take out the radio controller & drone body , then put the batteries into
corresponding hatch compartment and get them powering on.
2、Calibration
a、Accelerometer Calibration
Horizontal plane
Please check the VOLT value by long-pressing the ‘End’ button. Premise
for next steps is to ensure the current VOLT no less than 15.5V. Otherwise,
please charge the battery to be full balance.
Attention: The low-battery alarm will be activated when the 4S battery is
approaching to 14.2V and the 2S one is 7.2V. Meanwhile, the radio
controller will keep vibrating to remind pilot to land off the drone ASAP.
After returning back, please ensure all batteries are) in good status, and
get then fully-charged before next flight.
1
3
2
1 2
Turning on the radio controller
Powering on drone
SPLASH DRONE
Quick Start Tips
Page 2
SWB2
a b c
d e f
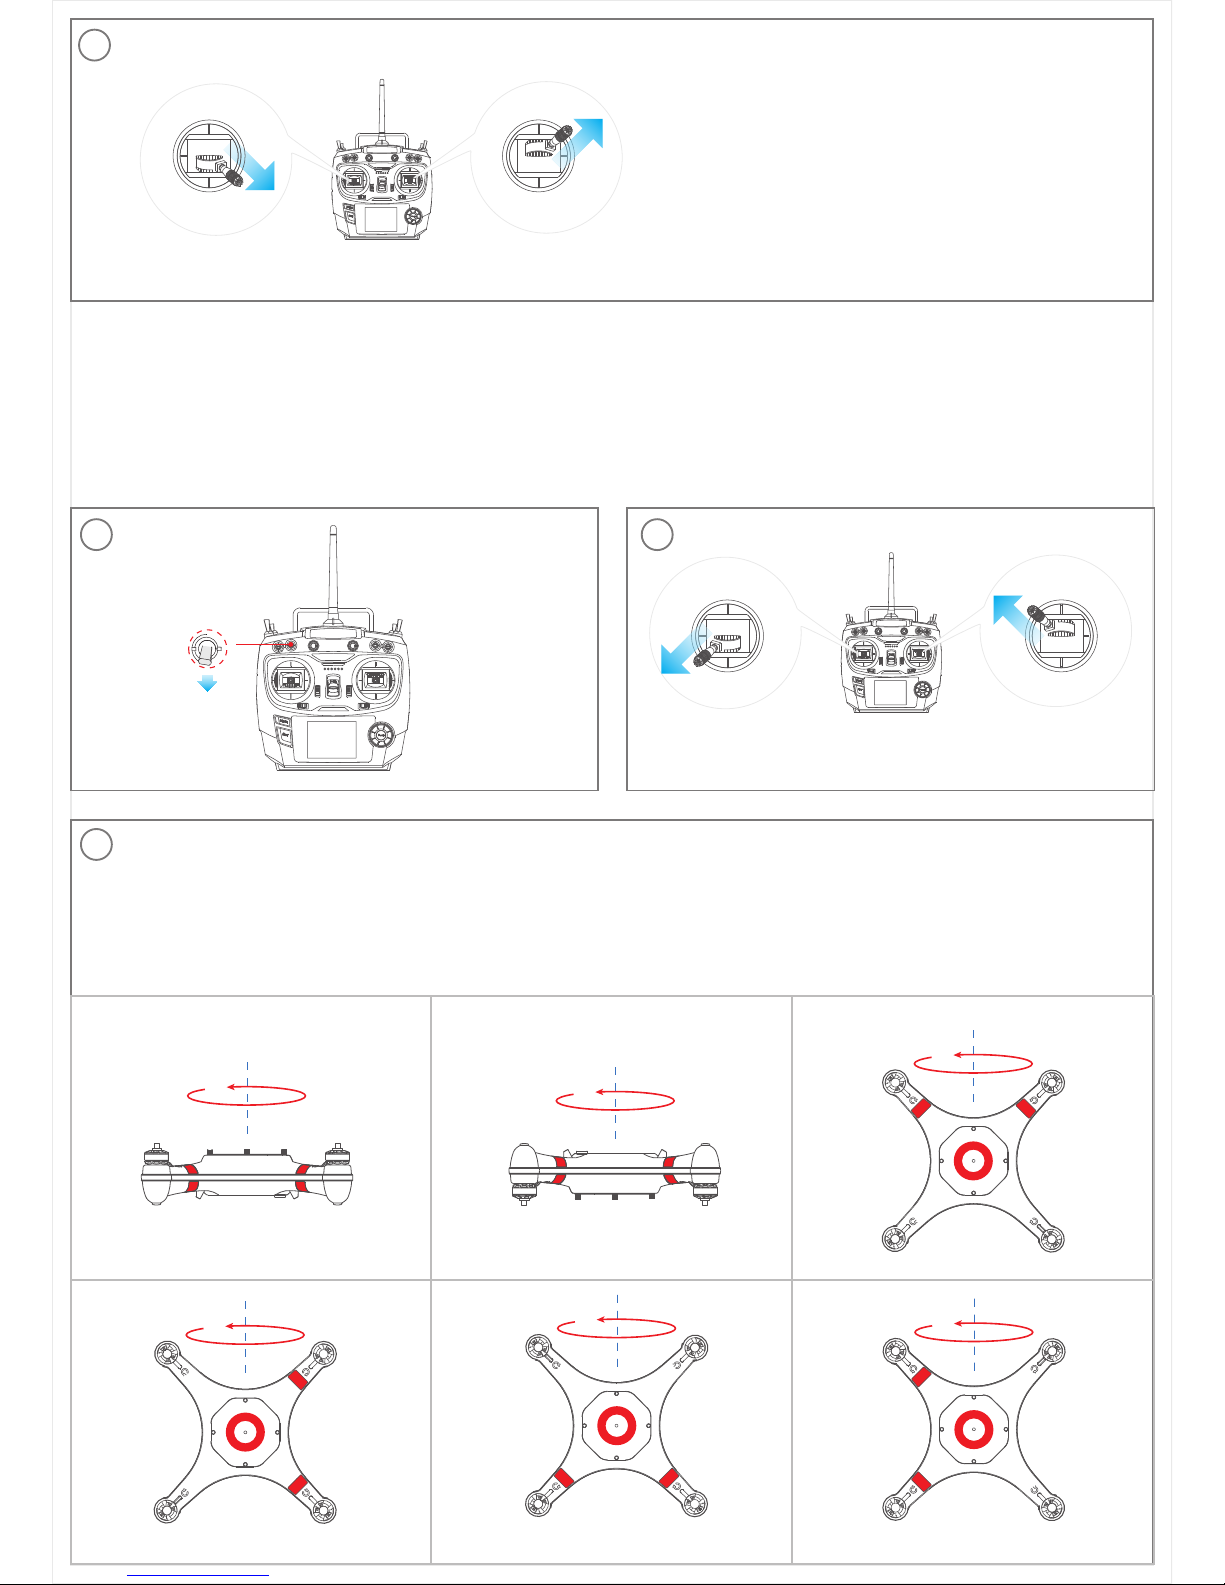
b、Compass Calibration
3
1
3
2
Keep left gesture for 2s till Indicator flashes RED,
the drone enter into calibration process. Wait
until the Indicator quit flashing RED, then release
joysticks, the Accelerometer calibration is
finished.
Wait 2s till SOLID RED indicator shows up, drone
is ready for compass calibration.
Horizontally Pick up drone to execute full counter-clockwise rotation in 6 cubic planes respectively,
1 circle is enough for each plane, and make sure all the rotation should be based on the same
vertical axis, details please refer to below Images. After completing above process, put drone on the
flat ground, keep still and Wait 2mins to finish compass data collection. When the solid red
indicator change into blinking slowly, the Compass calibration is done successfully.
Page 3
[RECEIVE]
RATE:
ELEV:
THRO:
VOLT:
LATI:
LONG:
ALT:
00cm/s
00cm/s
51%
16.8v
0º 00.00
0º 00.00
000.0cm
10
NULL
定点
0º
0º
0º
000.0m
GPS:
RSSI:
MODE:
YAW:
ROLL:
PITC:
DIST:
12.6V
00:00.0
SWC1
SWB1
3、Landing
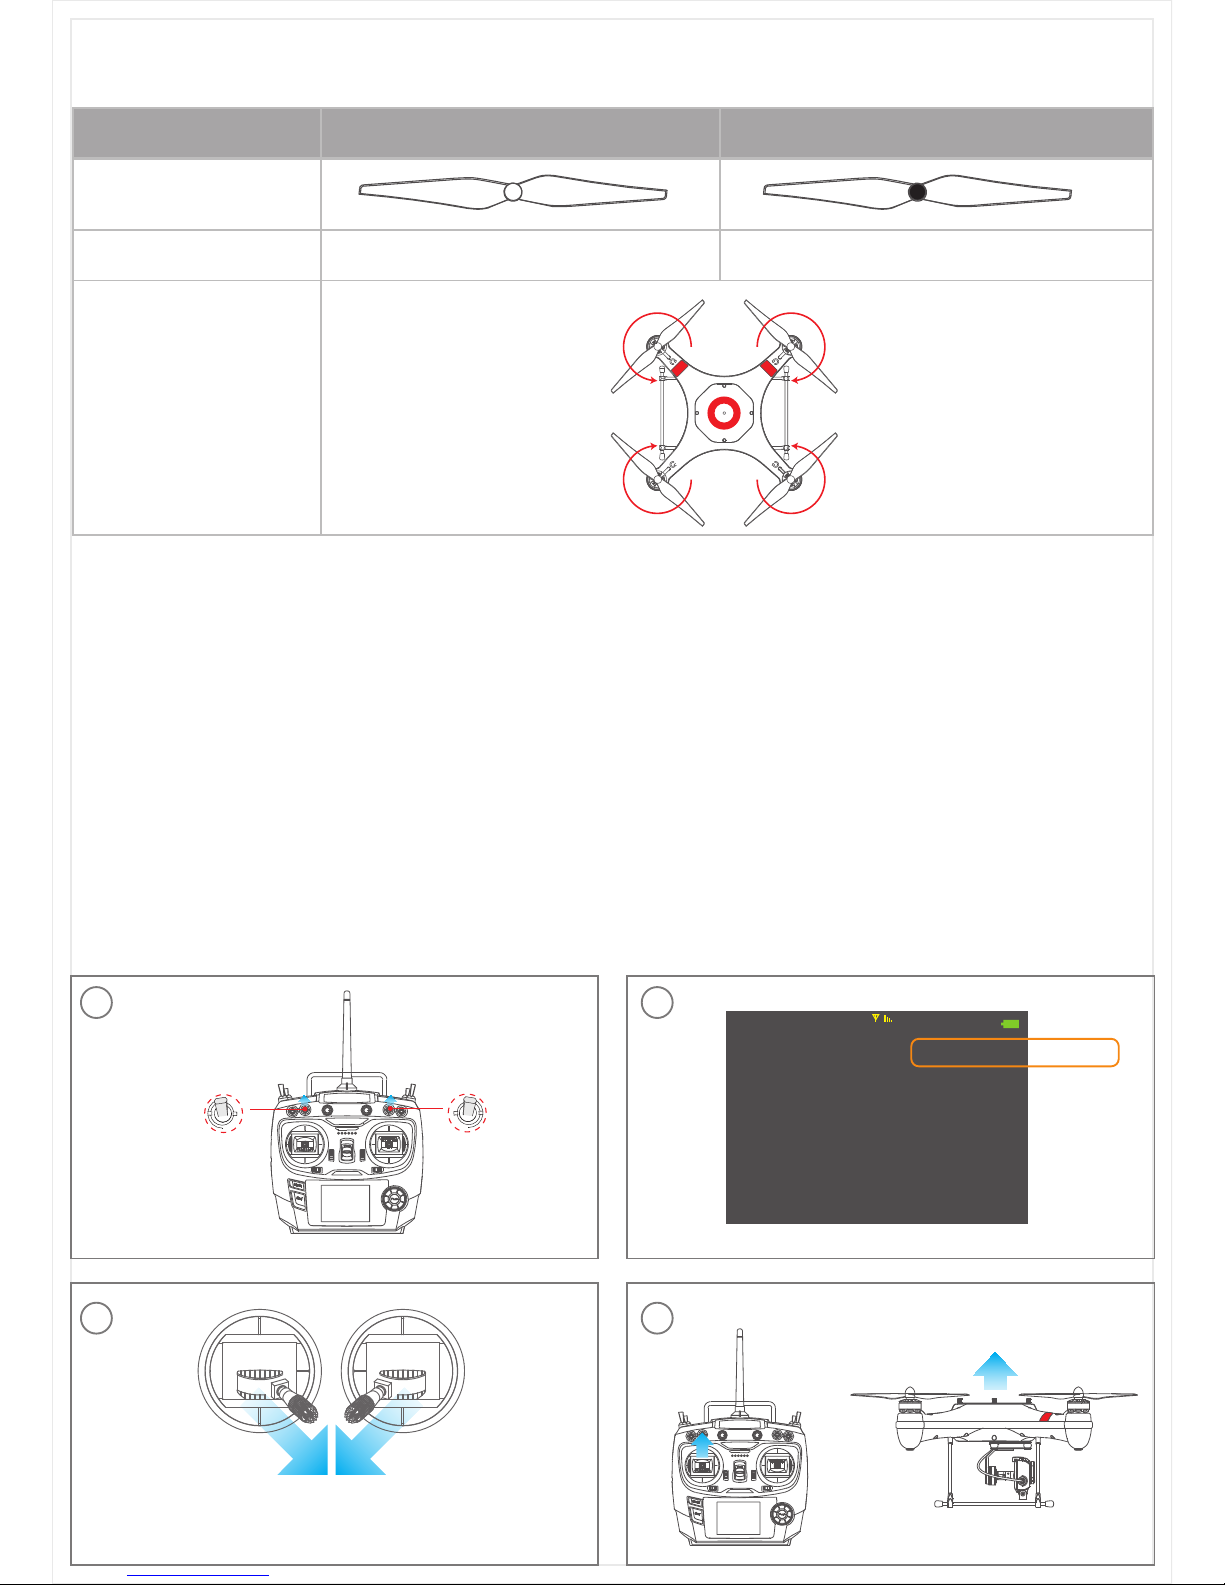
a、Propeller
1
3 4
2
>9
Propeller Propeller with silver spinner Propeller with black spinner
Graphic
Installation Graphic
Assembly Location Motor with silkprinting ‘CCW’ Motor with silkprinting ‘CW’
unlock motors
b、Install Zero or GOPRO3/4 Camera
1、
Open the waterproof case, insert the AV USB cable into the camera, place the cable to proper location, then
insert the camera inside the waterproof case, close it.
2、Please preset and start the expected photography mode before taking off with Gopro Camera. While using
the Zero camera, just need to power on camera, video-recording and picture-taking are available & switchable
during flight.
c、 Taking-off
Page 4
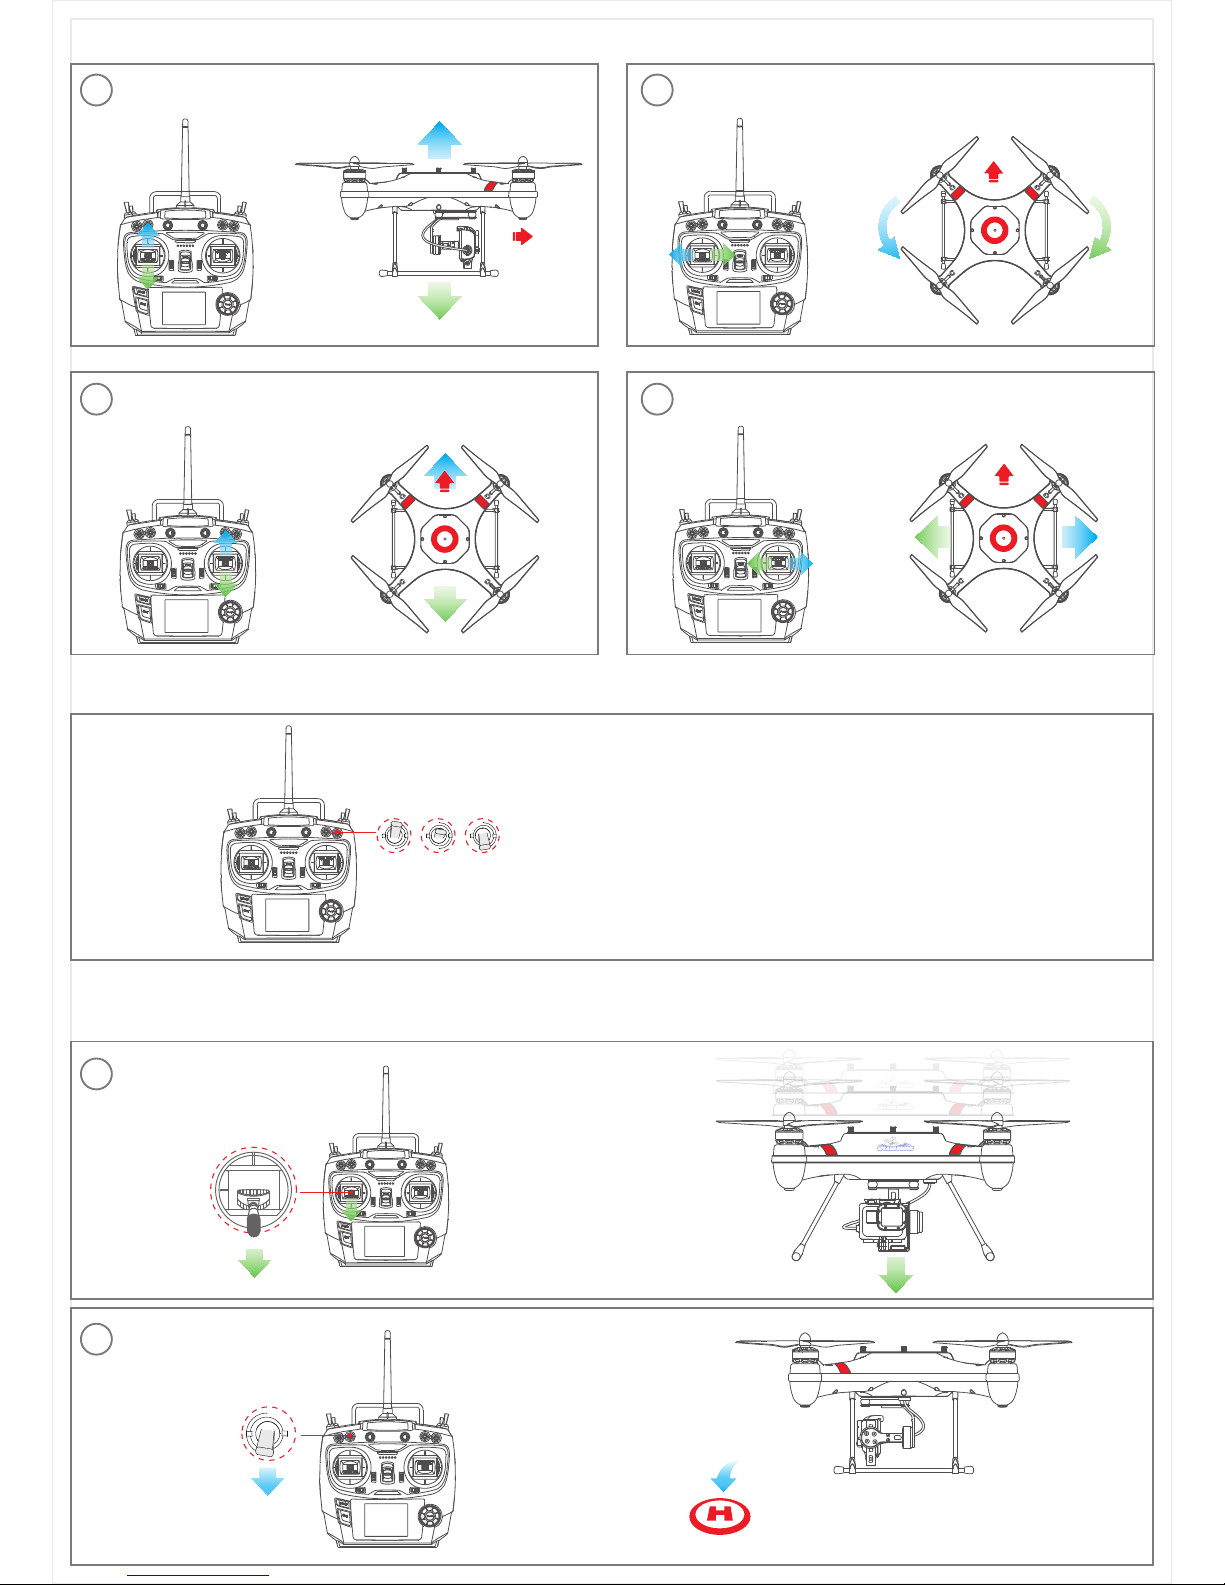
controls the Yaw direction
controls forward & backward in the horizontal plane
Method 1:Land-off the
Splash Drone
Method 2:Auto Return-
To-Home
controls left & right flight in the horizontal plane
SWB2
4、Land-off the Splash Drone
d、Controls the drone
e、Controls the ZERO camera
1
3
1
2
4
2
SWD1
SWD1 Photo
SWD2 Preview
SWD3 Video
SWD2 SWD3
controls the flying height
 Loading...