

Installation Guide
Bi-Directional Doors Assembly Instructions
Covers Part Number:
10163
The shipping carton contains the complete AisleLok®
Bi-Directional Doors assembly, minimum additional
assembly may be required. Carton contains:
(1) LH Door Assemblies
(1) RH Door Assemblies
(2) Door Hanger Assemblies
Handle Doors With Care:
The AisleLok® Bi-Directional Doors are constructed using a strong polycarbonate clear plastic panel, but the door panels tend
to be very flexible when in the flat position. Avoid picking up the doors from the ends, as this can cause bowing, which could
damage the doors. Although quite large, try to carry the doors with the long edge up (like a suitcase).
SAFETY REQUIREMENTS
The AisleLok® Bi-Directional Doors attach to the side of IT Server cabinets using rare earth magnets. Use extreme caution
when handling the powerful magnets. Make sure to keep fingers clear of the contact area between the case magnets and the
metal mounting surface.
The AisleLok® Bi-Directional Doors magnets must make direct contact with the side of the cabinet sheetmetal for maximum
holding force. Make sure the magnet attachment is not inhibited by any cables, cable openings, hardware, aluminum, etc.
The holding force is relational to the sheet metal thickness (gauge) and flatness and flexibility of the side panel. Thin and/or
flexible sheetmetal side panels may reduce the holding force of the magnets and compromise the attachment of the doors.
Installation Instructions:
AisleLok® Bi-Directional Doors
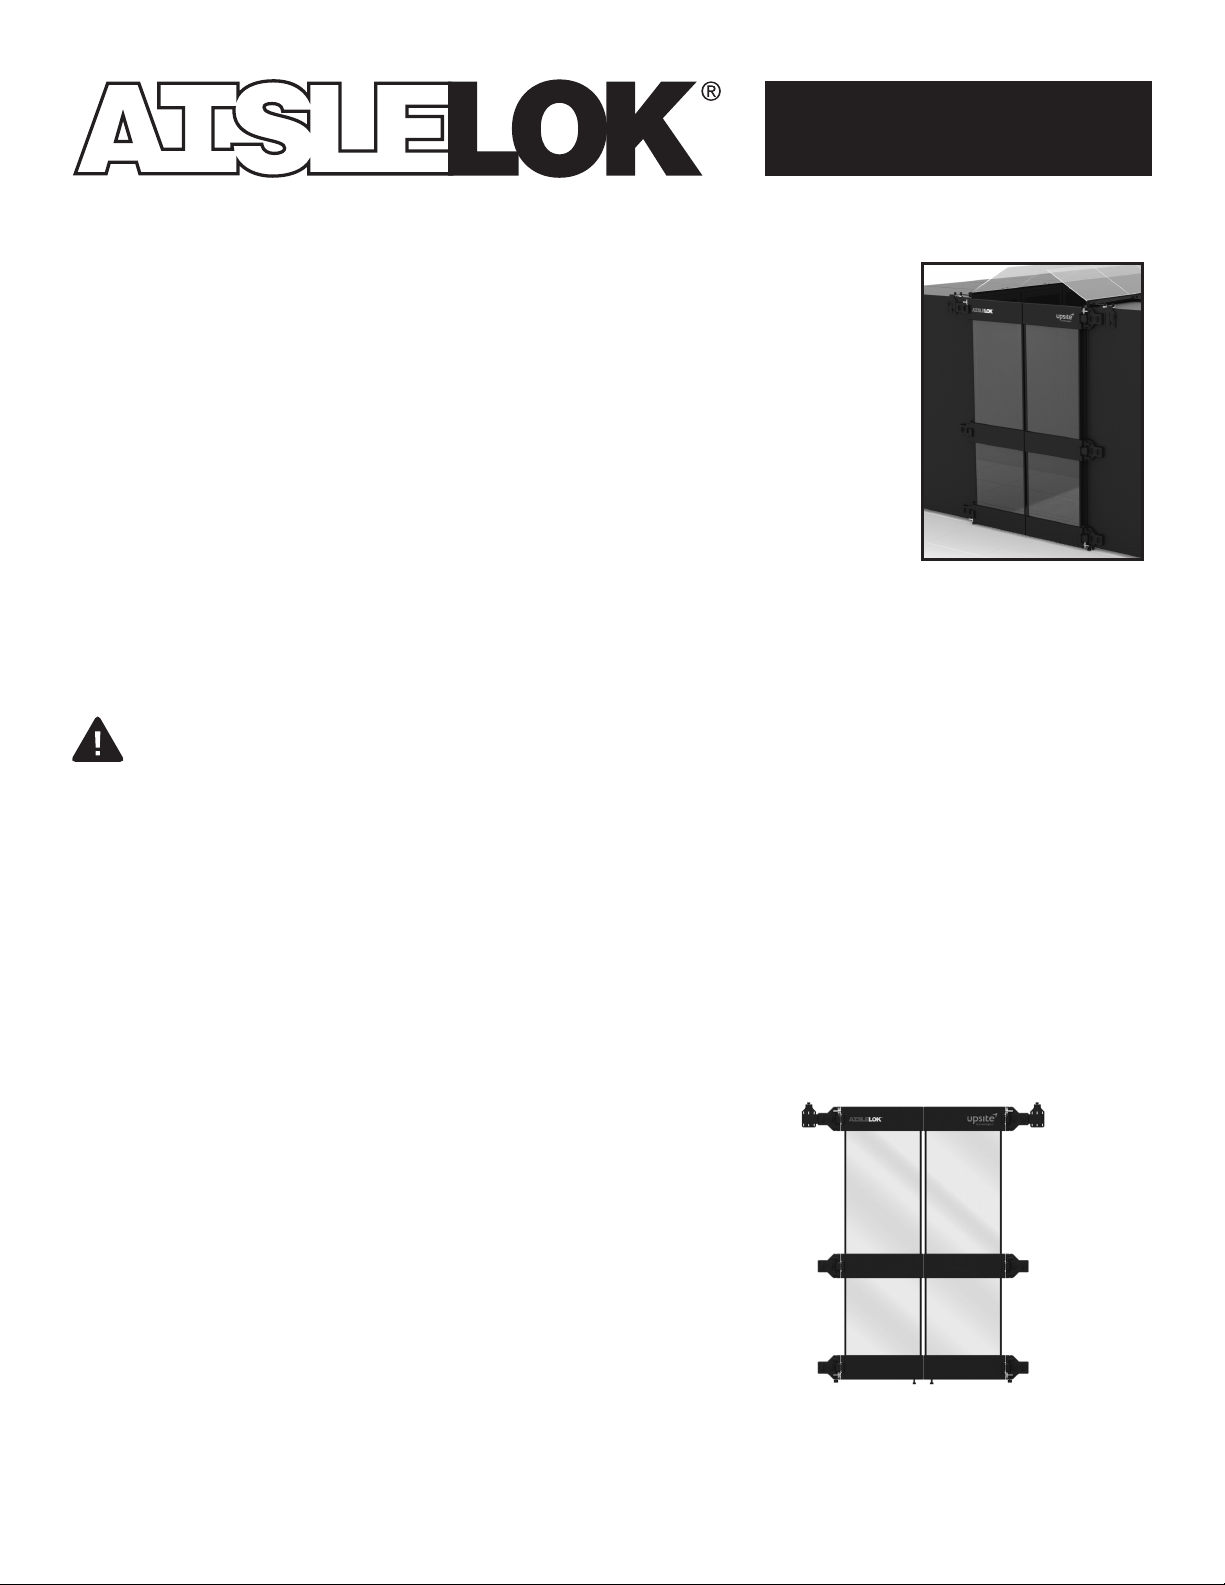
1. Preparation
The AisleLok
of the box without the need of tools. The AisleLok® Bi-Directional Door
Assembly consists of a left hand (LH) door and a right hand (RH) door.
The LH door identified by the AisleLok® logo on the top cross panel and
will have the hinge assembly on the left side. Use care when handling
the doors, refer to the door handling precautions above.
®
Bi-Directional Doors are designed to be installed right out
LH RH
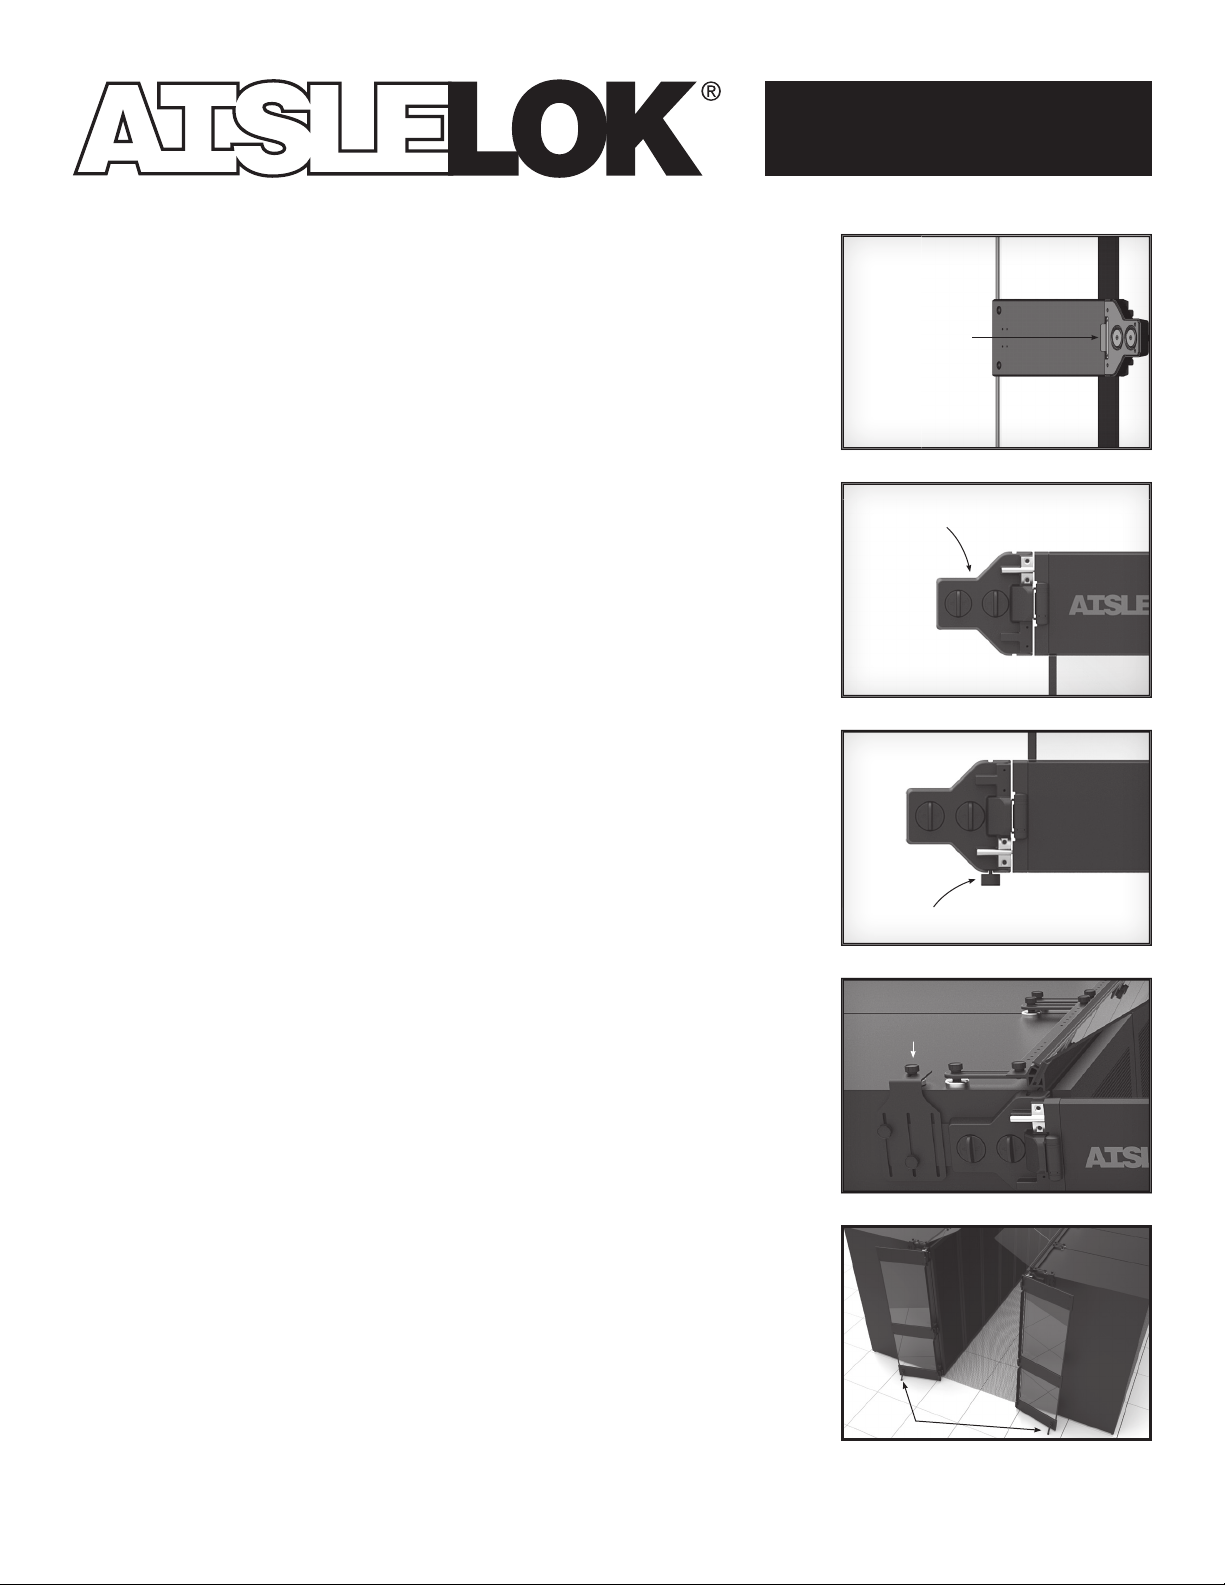
2. Attach the AisleLok® Bi-Directional Doors to the cabinets
a. Stand the LH AisleLok® Bi-Directional Doors up vertically.
b. Note the (3) metal registration tabs located behind each of the hinge points.
c. Position the door against the cabinet side panel so that the metal tabs on
the back side of each hinge fit into the seam between the door and the front
edge of the cabinet frame. All (3) registration tabs should fit flush, contacting
the front edge of the cabinet frame.
d. While holding the door in position, starting with the middle hinge position,
turn each of the magnet twists counterclockwise until you encounter the
physical stop point; this will fully engage the magnet against the cabinet
side panel. Once both the middle magnets are fully engaged, the door will
support itself.
e. Before completing the engagement of the other (4) magnets, turn down the
bottom leveling foot making sure the door is positioned with a minimal gap
between the door and the floor (<1").
f. With the door properly positioned, turn the remaining top and then bottom
magnet twists counterclockwise until fully engaged. Confirm each of the
magnets are making full contact.
g. Repeat the same process for the RH door.
Installation Guide
Registration
Tab
Magnet Twists
3. Position the Hanger Assembly on top of the cabinet
Attach the LH hanger assembly to so the magnet contacts the top of the
cabinet. This feature provides additional holding power to the door. Repeat for
the RH hanger assembly.
a. The magnet position on the hanger is adjustable. Out-of-the-box magnet
position should allow the hanger assembly to contact the top of the cabinet
sheet metal surface once installed.
b. Install the Hanger Assembly over the studs in the top hinge assembly.
c. Slide the assembly down until the magnet contacts the top of the cabinet.
d. Attach the LH hanger assembly using the supplied thumbscrews. If the magnet
does not make full contact, remove the hanger assembly and readjust.
e. Repeat for the RH hanger assembly.
Note: To Remove the AisleLok® Bi-Directional Doors simply
reverse Steps 1 – 3
To prop open the doors
Open the door against the side panel and then drop down the door stop foot.
Instructions for Cleaning
a. To clean clear plastic panels, mix warm water with a small amount of liquid
household detergent.
b. Using a micro fiber towel, lightly apply mixture to the clear plastic. It is not
recommended to use abrasive cleaning items (i.e. scratch pads), as these
items have the potential to damage the product.
c. Wipe dry with a clean microfiber towel.
Leveling Foot (Bottom Hinge)
Hanger Assembly

Installation Guide
Limited Warranty
Upsite Technologies, Inc. (the Company) warrants to the original purchaser that products delivered hereunder will be free of defects
in materials and workmanship for a period of twelve (12) months from the date of purchase (the “Warranty Period”).
The Company shall, at its option, within the Warranty Period, either repair or replace free of charge, any product or part thereof
found, upon the Company’s inspection, to be defective in materials and workmanship, and will return the repaired or replaced
product to the purchaser at Company’s expense.
For warranty service and shipping instructions, contact the Company at the telephone number shown below. If the product is
under warranty and the defect appears to be covered by this Limited Warranty, the Company will issue to the purchaser a Notice of
Authorization For Warranty Return. Products returned to the Company for warranty service must be accompanied by a statement of
defect, the Notice of Authorization for Warranty Return provided by the Company, and proof of purchase.
This Limited Warranty is conditioned on the following:
1. The Company must be notified within 12 months of purchase and have been given the opportunity of inspection by return of any
alleged defective product free and clear of all liens and encumbrances to the Company or its manufacturer; and
2. The product must not have been abused, misused, or improperly maintained, and/or non-Upsite authorized repair performed
during such period; and
3. Such defect has not been caused by corrosion or exposure to other than ordinary wear and tear; and
4. The installation and use of the product has been in accordance with the manufacturer’s instructions and not been modified or
customized to include but not limited to cut, resized, burned, glued, bent, re-shaped, disassembled, attachments added to,
improperly installed or used in a manner other than intended.
The company makes no other express or implied warranty or representation of any kind whatsoever including any warranty of
merchantability or fitness for a particular purpose and all such other warranties are hereby included.
The Company’s maximum liability hereunder is limited to the purchase price of the product. In no event shall the Company be liable
for any consequential, indirect, incidental, or special damages of any nature arising from the sale or use of the product, whether
based in contract, tort, strict liability, or otherwise.
Note: Some jurisdictions do not allow limitations on incidental or consequential damages or how long an implied warranty lasts, so
that the above limitations may not fully apply. This warranty gives specific legal rights and you may also have other rights which may
vary from jurisdiction to jurisdiction.
For complete warranty and repair information Call (888) 982-7800 or visit upsite.com
U.S. and International Patents Pending
Designer and Manufacturer
888.982.7800
www.upsite.com
84020A ©2014
 Loading...