

Uovision UV785 Instruction Manual

Superb Full HD Trail Camera
Uovision UV785 12MP Instruction Manual
UV785 Model
Content Page
1 General Description 1
2 Camera button info diagram 1
3 Installing the batteries 2
4 Inserting SD card 2
5 Customizing camera settings 2
5.1 CAM TAB 2
5.1.1 Camera Scene 3
5.1.2 Video Mode 4
5.2 PIR TAB 4
5.3 Work Time 6
5.4 SYS TAB 6
6 Sensing Angle and Distance Test 7
7 Mounting camera 7
8 File format 7
9 Trouble Shooting 8
Appendix Ⅰ: Technical Specifications 9
Appendix Ⅱ: Parts List 10
© Copyright 2017
Page 1
1 General Description
Congratulations on your purchase of UV785 scouting camera. UV785 is a powerful and reliable performance Trail Camera.
Features:
12MP invisible IR camera
1080P Full HD H.264 video with audio
0.6s trigger speed
Support 1-10 burst photos
No glow black LEDs with 15m range
Rich camera scene settings, including moving object
Improved time lapse accuracy, in seconds
4 work time settings
Camera rename
SD card overwrite (cycle use)
Weather resistant (IP54)
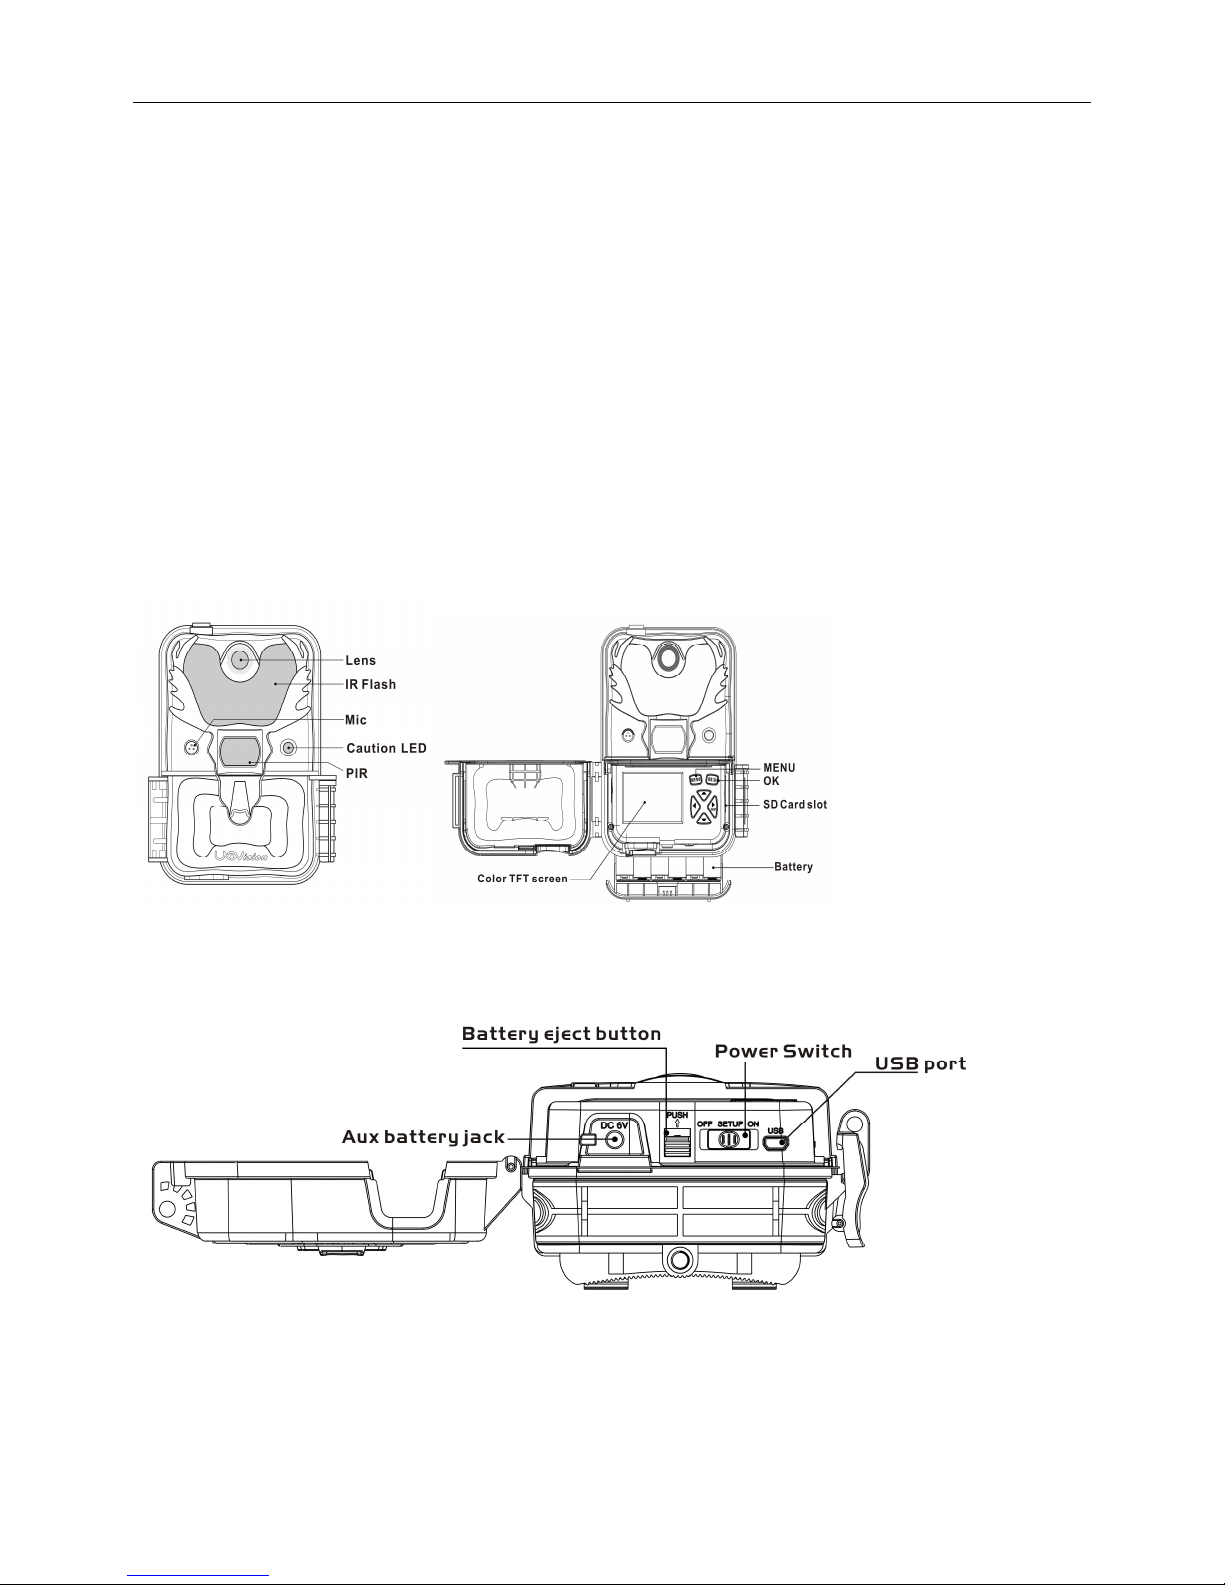
2 Camera button info diagram
Fig 1 Front View Fig 2 :Operation Interface
Fig 3 :Bottom View
Page 2
Operation Panel:
MENU: To enter the menu, the power switch should be on SETUP.
▲▼◄►: Navigation arrows. (“▲”is the shortcut to choose “Video”, while “▼”for the “Photo”.)
OK: Save parameter settings/Exchange between playback and preview.
► : To capture a photo or record a video manually. (Click ► again to stop the video.).
Power Switch: OFF: turn off the power; SETUP: change camera settings; ON: enter working mode.
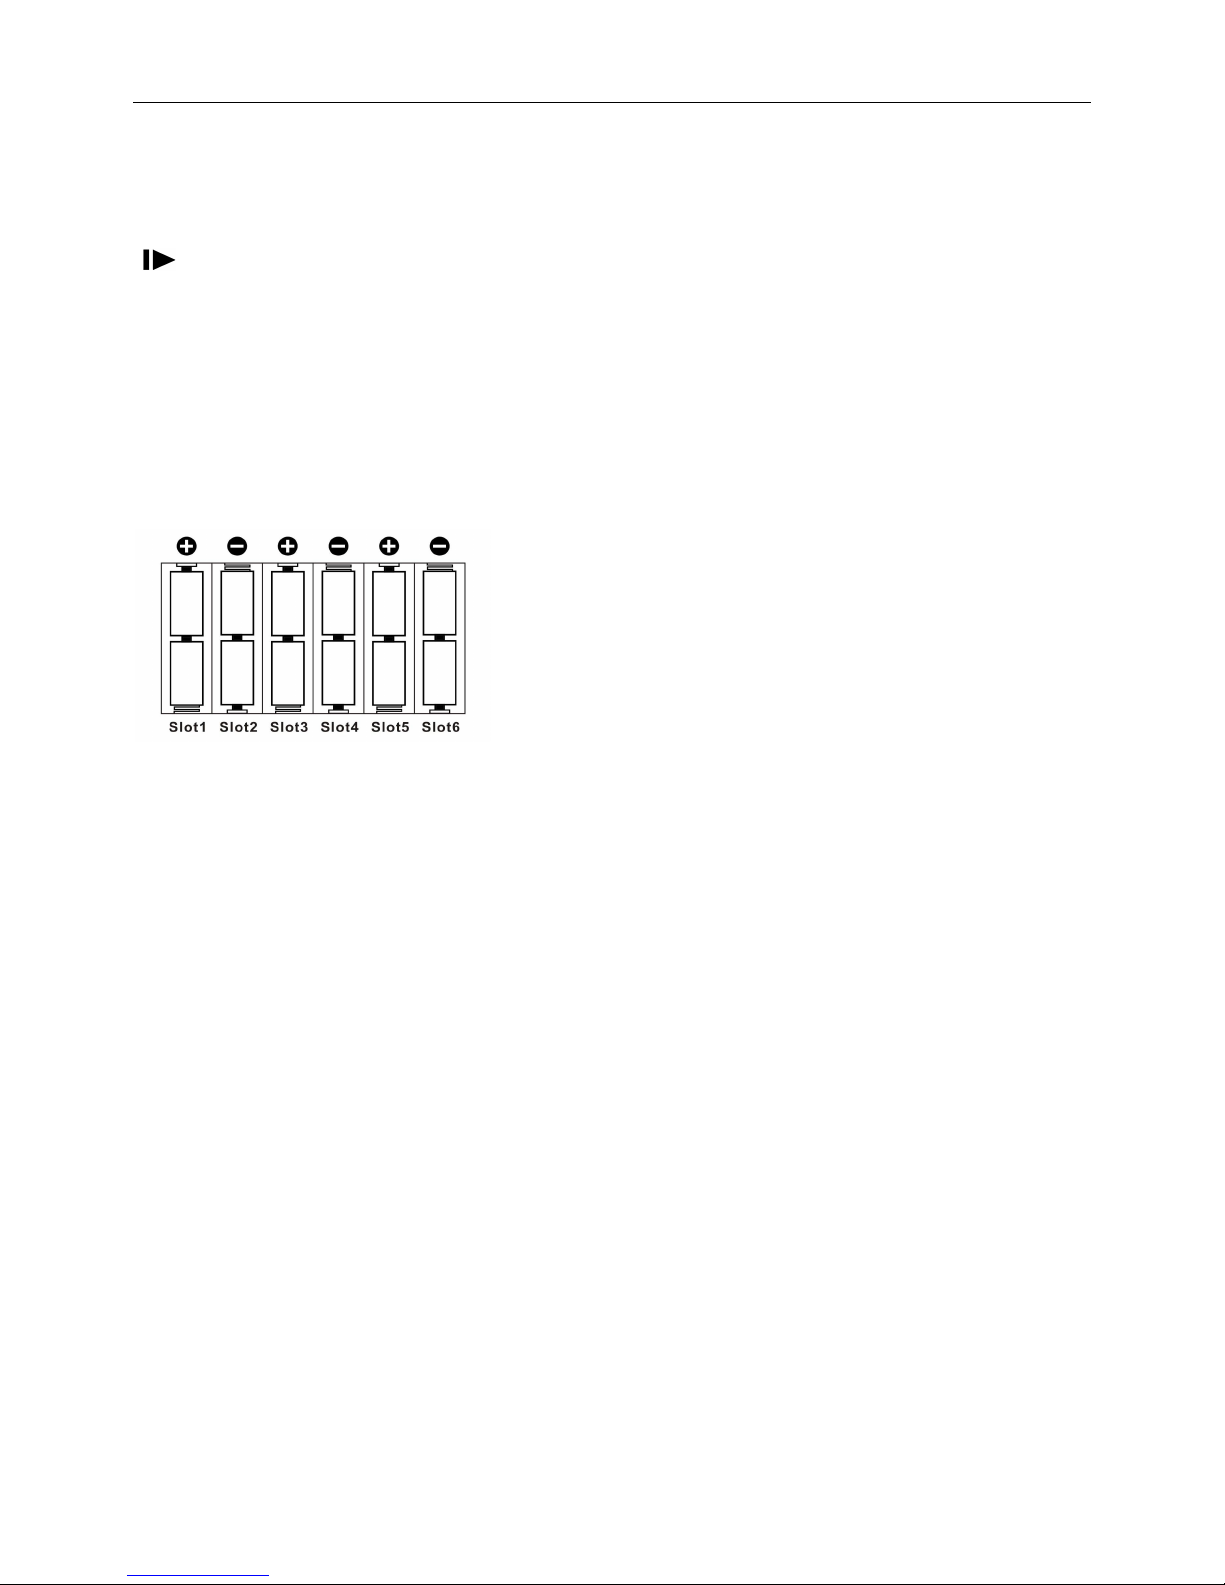
3 Installing the batteries
To supply power for the camera, 12 size AA good quality alkaline batteries are needed.
Confirm that the power switch is in the OFF position; load fully charged batteries into the pack according to the polarities signs
shown below. The following batteries with 1.5V output can be used:
High-density and high-performance alkaline batteries
There are 6 battery slots. Slot 1 and 2 form one group and is marked “1”, slot 3 and 4 form the other group and is marked “2”,
while slot 5 and 6 form the other group and is marked “3”. Single “group” of batteries is needed to supply power to the camera,
but both can be used and is recommended.
Fig 4
4 Inserting SD card
Camera itself has no storage space to store the pictures. You need to insert a SD card to let the camera work correctly. SD and
SDHC (High Capacity) cards up to a maximum 64GB capacity are supported. High speed SD cards (SanDisk, Ultra or
Extreme series or similar) is recommended if 1280x720 or 1920x1080 video is needed.
Before inserting the SD card into the card slot, please make sure that the write-protect switch on the side of the card is “off”
(NOT in the “Lock” position).
SD card can be over write to ensure cycle use;
You can use SD card size up to 64GB. The camera will not turn on without a SD card inside.
Avoid using “Micro SD card” with adapter. Adapter might cause compatibility errors
NOTE: Every photo taken by this camera will be saved to the SD card even those being sent out wirelessly to the recipients.
You will always have access to the high resolution photos on the SD card.
WARNING: Be sure the camera’s power is switched OFF before inserting or removing SD cards or batteries.
5 Customizing camera settings
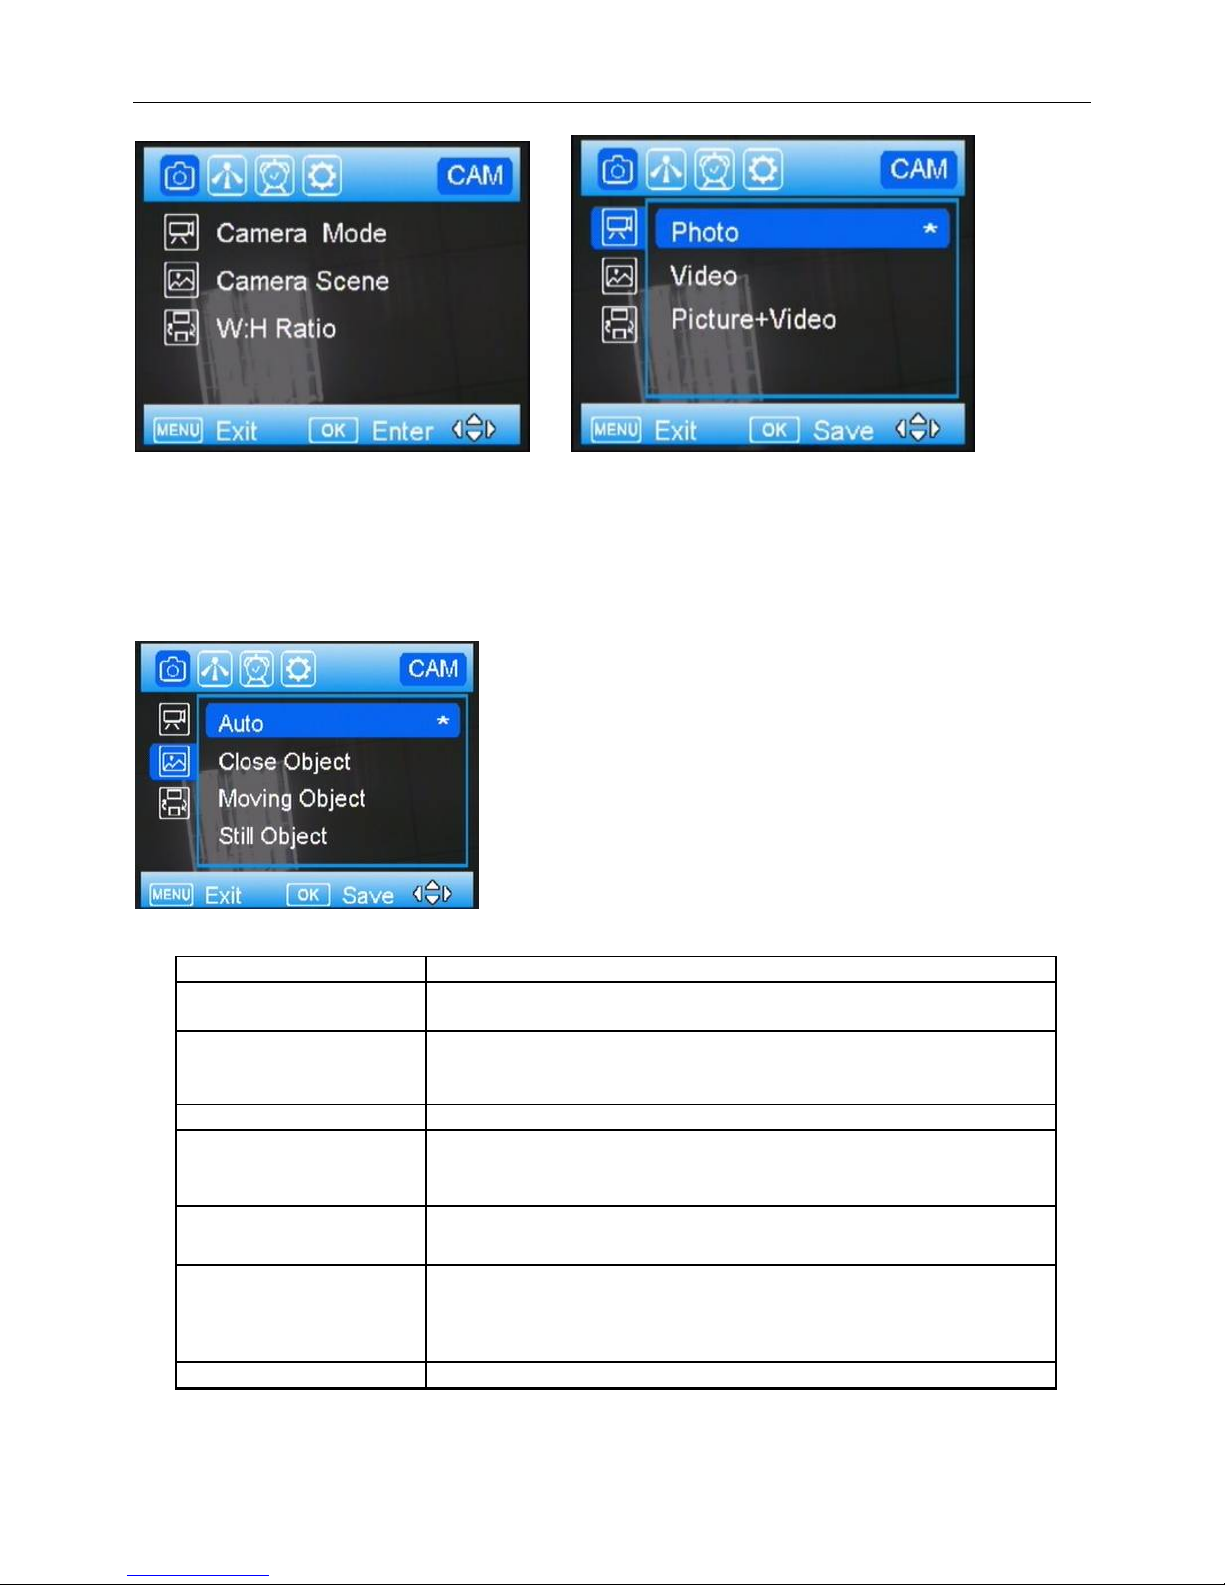
5.1 CAM TAB
Press the MENU button. You will see the screen shown in Fig.5,
Page 3
Fig 5 Fig 6
Select the CAM tab. Navigate down by pressing the ▼ button until the Camera Mode option is highlighted and press OK then
there are three options for you to choose shown in Fig.6. There are always a ‘*’ shows up beside every selected option.
5.1.1 Camera Scene
UV785 camera has rich camera scene settings, including moving object and close object, with the help of camera scene, you
can easily choose different combinations of shutter speed and exposure time according to particular cases.
Fig 7
Camera Scene
Description
Auto This optio
n is appropr
iate for most of the use.
We recommend
this option
for
quick setup camera. It takes 8MP photos in daytime and 3MP photos at night.
Close objects
This option is suitable for object
which
is within the
distance
between
3m
and
5m. The IR flash is dimmed to prevent excessive exposure.
Note: Keep in mind that the focal distance of the camera is 3m(10ft) to infinity.
Moving objects
This option is to reduce motion blur
when capturing
fast mov
ing objects
. Still objects
This option give
s a relatively
slow
shutter speed
to
get a
brighter
picture
. Chasing Photo
This option allows PIR
to be
triggered up to three times within 15s, without
constraint of the PIR interval.
2Bursts(
A
+M) Your camera can take a
2 shot burst every time the PIR is triggered to
take a
photo. One is using Auto scene, the other one using Moving objects scene to
take a no blur photo. It’s useful for home surveillance usage. “A” means Auto, ”M”
means moving.
3Bursts(
A)
To take 3 continuous photos after one trigger.
Also, you have access to custom settings just by clicking customize. See Fig.8.
 Loading...