

Uovision UV572 Instruction Manual
Panoramic Infrared Scouting Camera
UV572 Instruction Manual
(For UV572 Model)

Quick Start
1. Load the fully charged AA batteries, 12(recommended), 8 or
4(emergency); or connect 6V external power supply;
2. Insert the SD card (32GB or smaller)
Please note if you don’t insert the SD card, the camera will
not work.
3. Slide the power switch to the “SETUP” position to set up the
camera;
4. Press the “MENU” button to enter into the program menu, then
press the “up” or “down” arrow buttons for parameter settings as
described in the user’s manual. Press the “OK” button to save
parameter settings and exit;
Please note if there is no operation for about 3 minutes, the
camera will automatically shut down to save power. If you
want to continue, please toggle the power switch to SETUP
and enter MENU again.
5. Place the camera at the target area and turn on the camera(slide
the power switch to “ON”), the camera will take pictures or videos as
preset in step 4;
6. Press the “ ” button to capture photos or record a video
manually;
7. Press the “ ” button to playback the pictures/videos. Use the
“up” or “down” arrow buttons to scroll through pictures on the color
monitor;
8. To delete an image in SETUP mode, press the “ ” button to

review the image and then press the “DEL” button to delete the
image.
Key Notes
a. “MENU”: enter the program menu in preview mode.
b. “▲”“▼”“◄”“►”: for parameter settings as described in the user’s
manual.
“▲” is the shortcut to choose “Video”, while “▼” for the “Photo”.
c. “OK”: save parameter settings and play videos.
d. “ ”: exchange between playback and preview.
e. “DEL”: delete an image.
f. “ ”: capture a photo or record a video manually.
g. Switch: OFF: turn off the power; SETUP: change camera settings;
ON: enter working mode.
1 Instruction
Page
1
1
Instruction
1.1 General Description
Congratulations on your purchase of UV572 panoramic infrared
scouting camera. UV572 is a powerful and reliable performance
panoramic game camera.
Features:
12MP panoramic hunting camera (5MP real);
3 motion sensors cover 100°detection;
Wide lens: Field of view of 110°;
1080P/720P day/night high definition video with sound;
1 second trigger speed;
Three camera mode: photo, video, photo+video;
Time lapse;
SD card over write to ensure cycle use;
It is water resistant.
1.2 Camera Body Interfaces
Take a few moments to familiarize yourself with the camera
controls and displays. It is helpful to bookmark this section and refer
to it when reading through the rest of the manual.
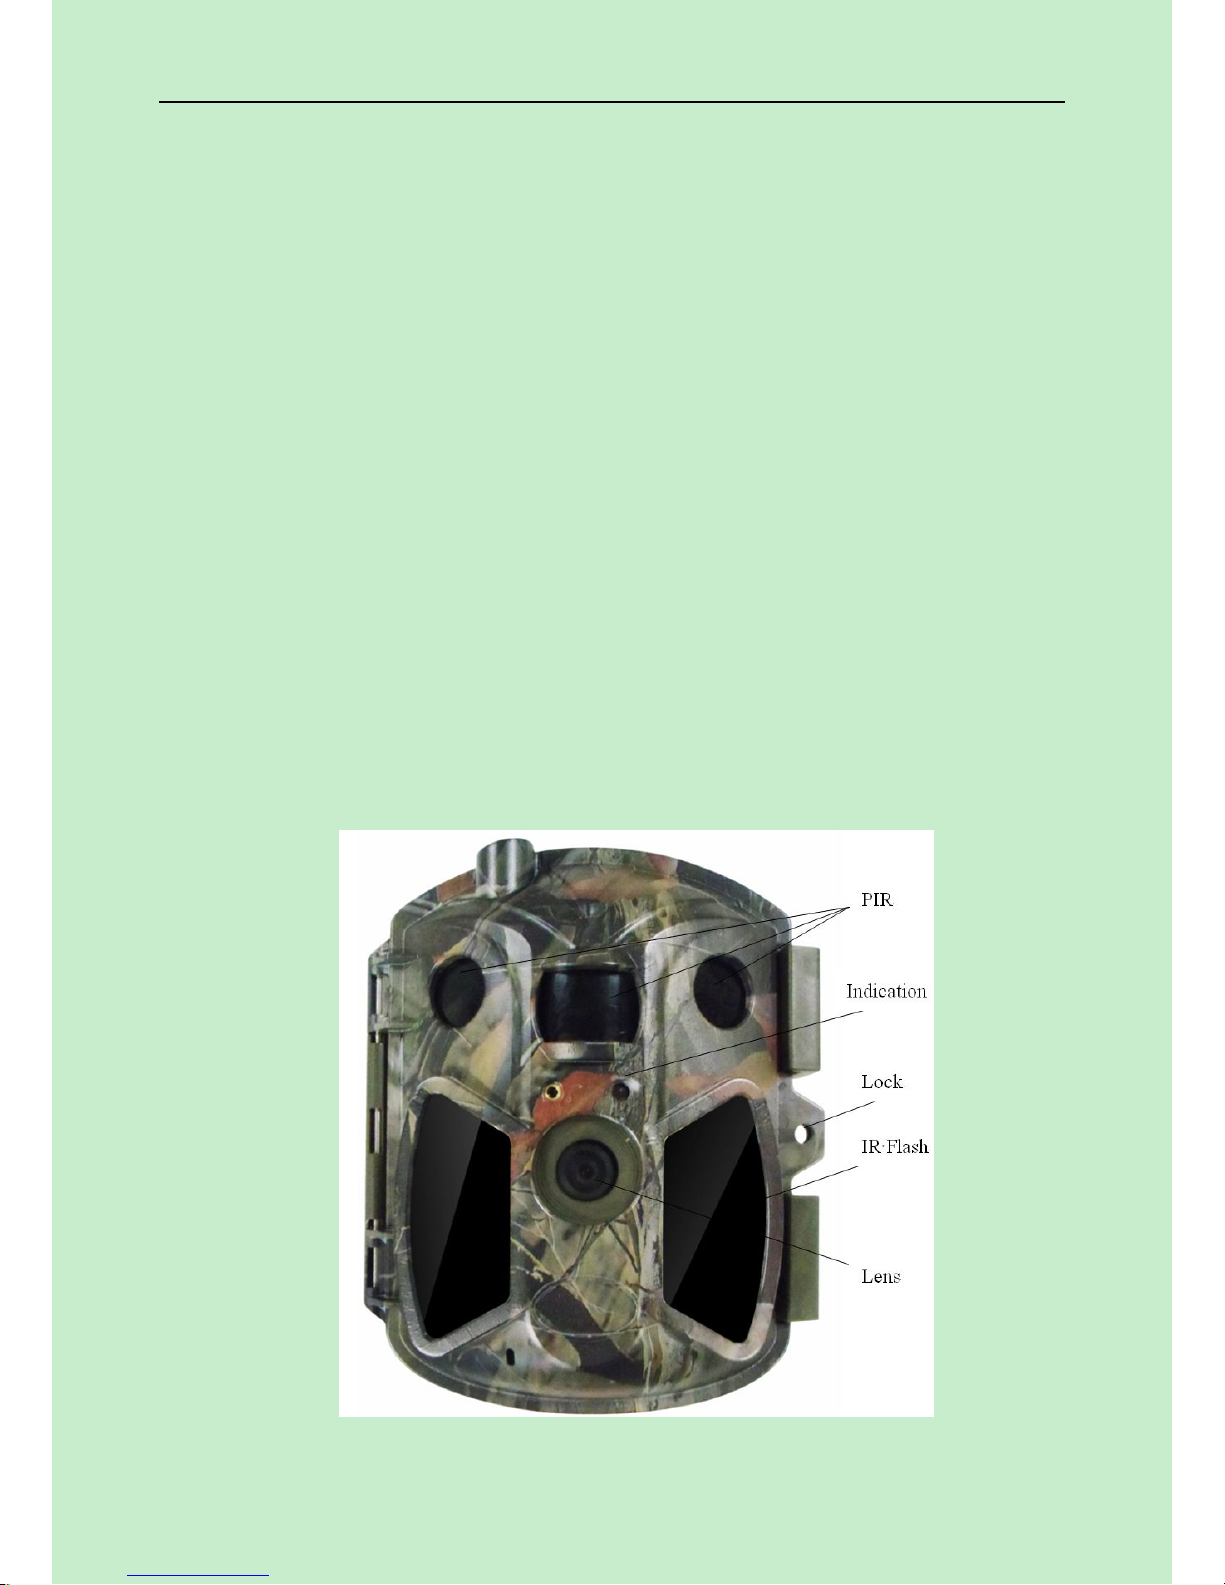
Fig 1: Front View
1 Instruction
Page
2
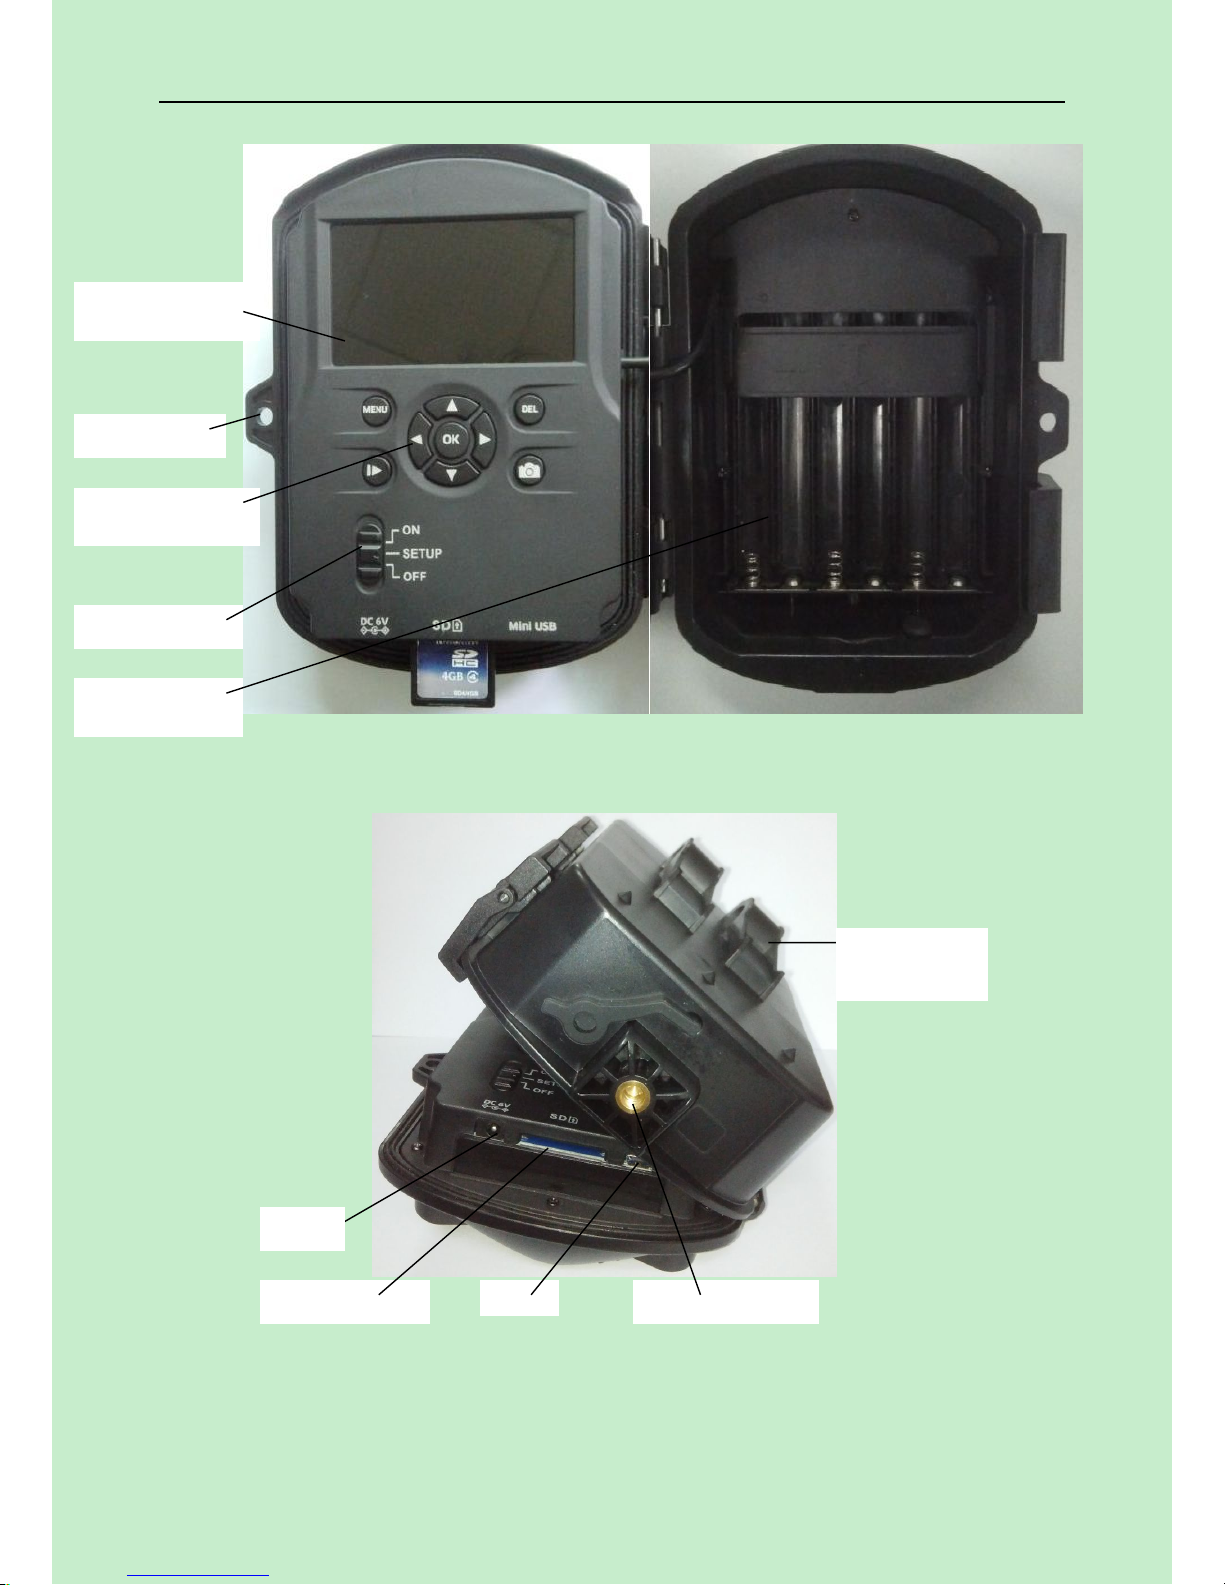
Fig 2: Operation Interface
Fig 3: Bottom view
Operation Panel
Power Switch
Battery Depot
Lock Hole
SD-card Slot
DC In
Bottom Screw
Display Screen
Mounting
Holes
 Loading...