

Uovision um565-3g User Manual

www.uovisioneurope.com
UOVISION UM565-3G 12MP
Wireless SMS controlled
Scouting Camera
User’s Manual

www.uovisioneurope.com
Content
1 GENERAL DESCRIPTION ..................................................... 1
2 CAMERA BUTTON CONTROL DIAGRAM .................................. 1
3 INSTALLING THE BATTERIES .............................................. 3
4 PURCHASING YOUR SIM CARD ............................................ 4
5 INSTALLING YOUR SIM CARD AND SD CARD ......................... 4
6 SETTING UP THE WIRELESS NETWORK ................................ 4
7 FORMATTING THE SD CARD ............................................... 5
8 SEND A TEST PHOTO ........................................................ 11
9 CUSTOMIZING THE CAMERA SETTINGS ............................... 12
10 CONTROLLING YOUR CAMERA USING SMS ......................... 16
11 VIEW OR DELETE PHOTOS ON THE COLOR DISPLAY ............ 19
12 TROUBLE SHOOTING ...................................................... 19
13 TRICKS AND TIPS ON FIELD SETUP ................................... 20
APPENDIX Ⅰ: TECHNICAL SPECIFICATIONS ........................... 22
APPENDIX Ⅱ: PARTS LIST ................................................... 23
Page 1
1 General Description
Congratulations on your purchase of UOVISION UM565 3G 12MP SMS
scouting camera. UM565 3G is a powerful and reliable performance
wireless game camera.
Features:
12MP invisible IR 3G camera
3G(WCDMA) network, faster transmission speed
SMS control, CamCtrl App compatible
Motion detection
Time lapse
aGPS location and camera rename
SD card over write to ensure cycle use
No glow black LEDs with 15m (50ft) range
Weather resistant (IP54)
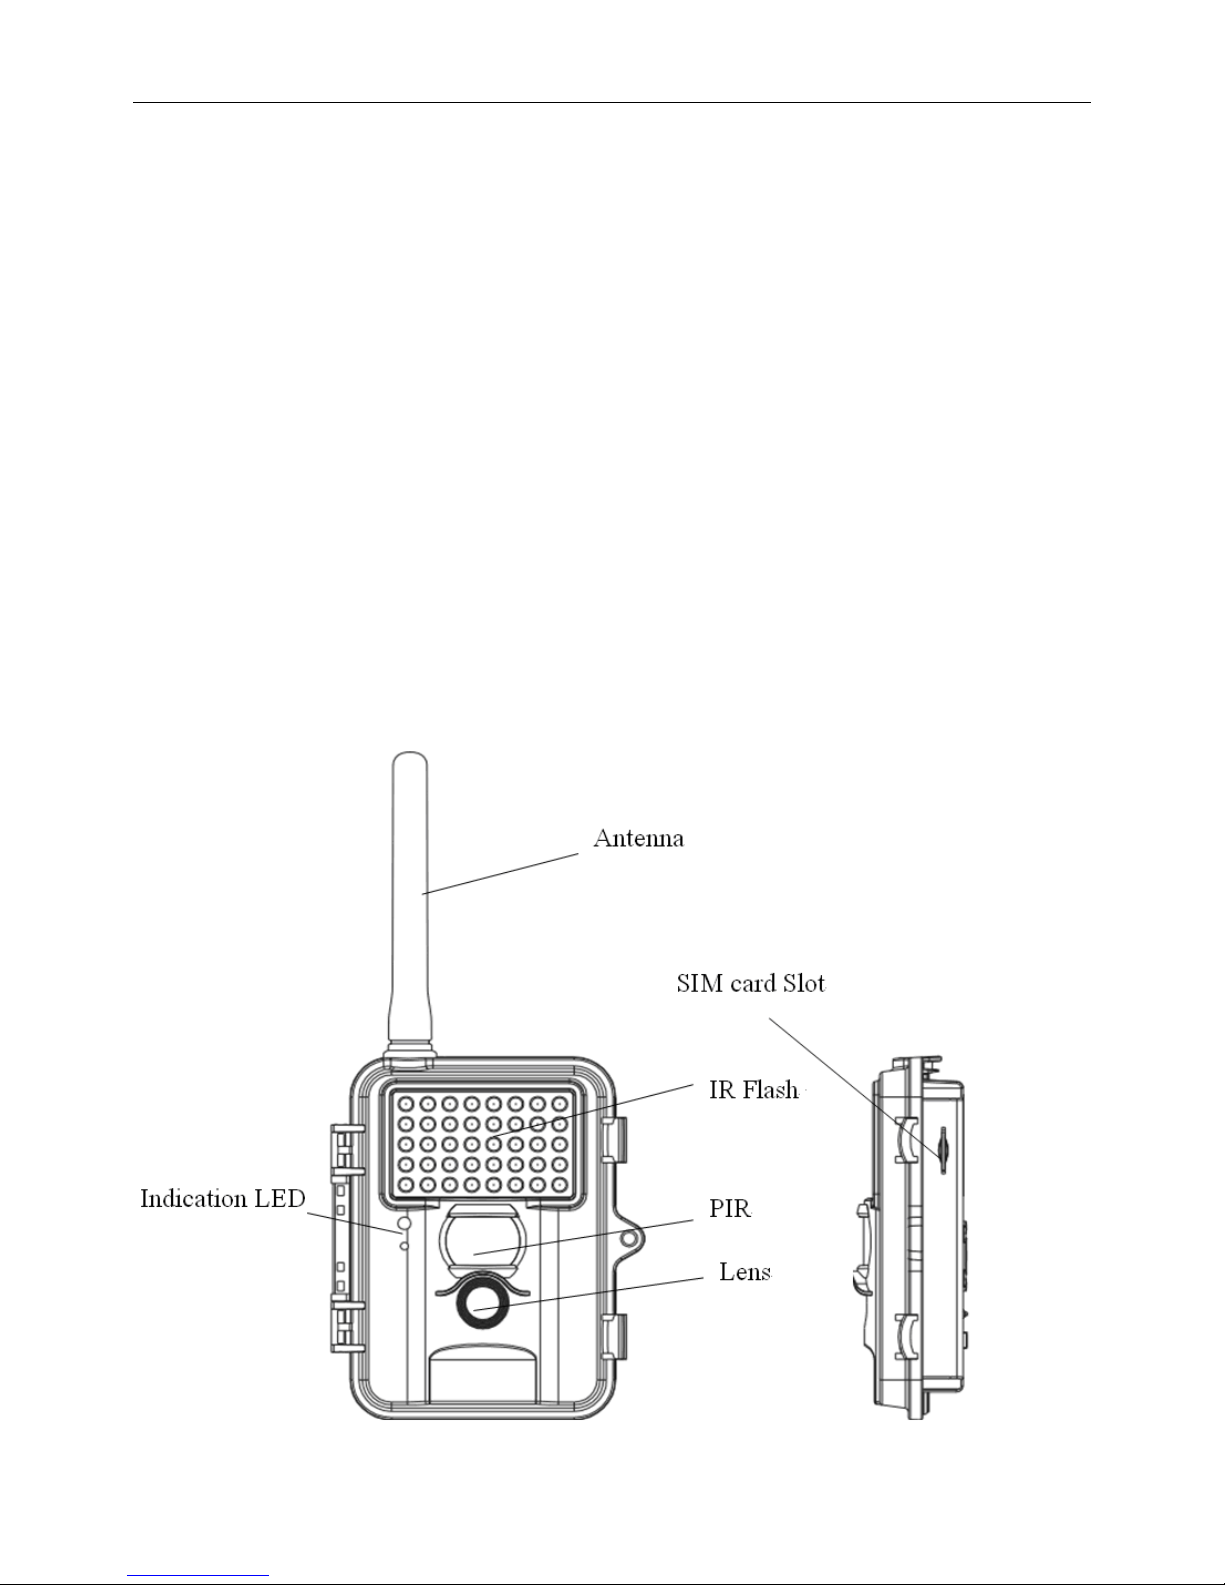
2 Camera button control diagram

Page 2
Fig 1: Front View
Fig 2: Operation Interface
Fig 3: Bottom view
Operation Panel:
MENU: To enter the menu, the power switch should on SETUP.
Page 3
▲▼◄►: Navigation arrows.(“▲”is the shortcut to choose “Video”, while
“▼”for the “Photo”.)
OK: Save parameter settings.
: Exchange between playback and preview.
DEL: To delete an image.
: To capture a photo or record a video manually. (Click again to
stop the video.).
Power Switch: OFF: turn off the power; SETUP: change camera
settings; ON: enter working mode.
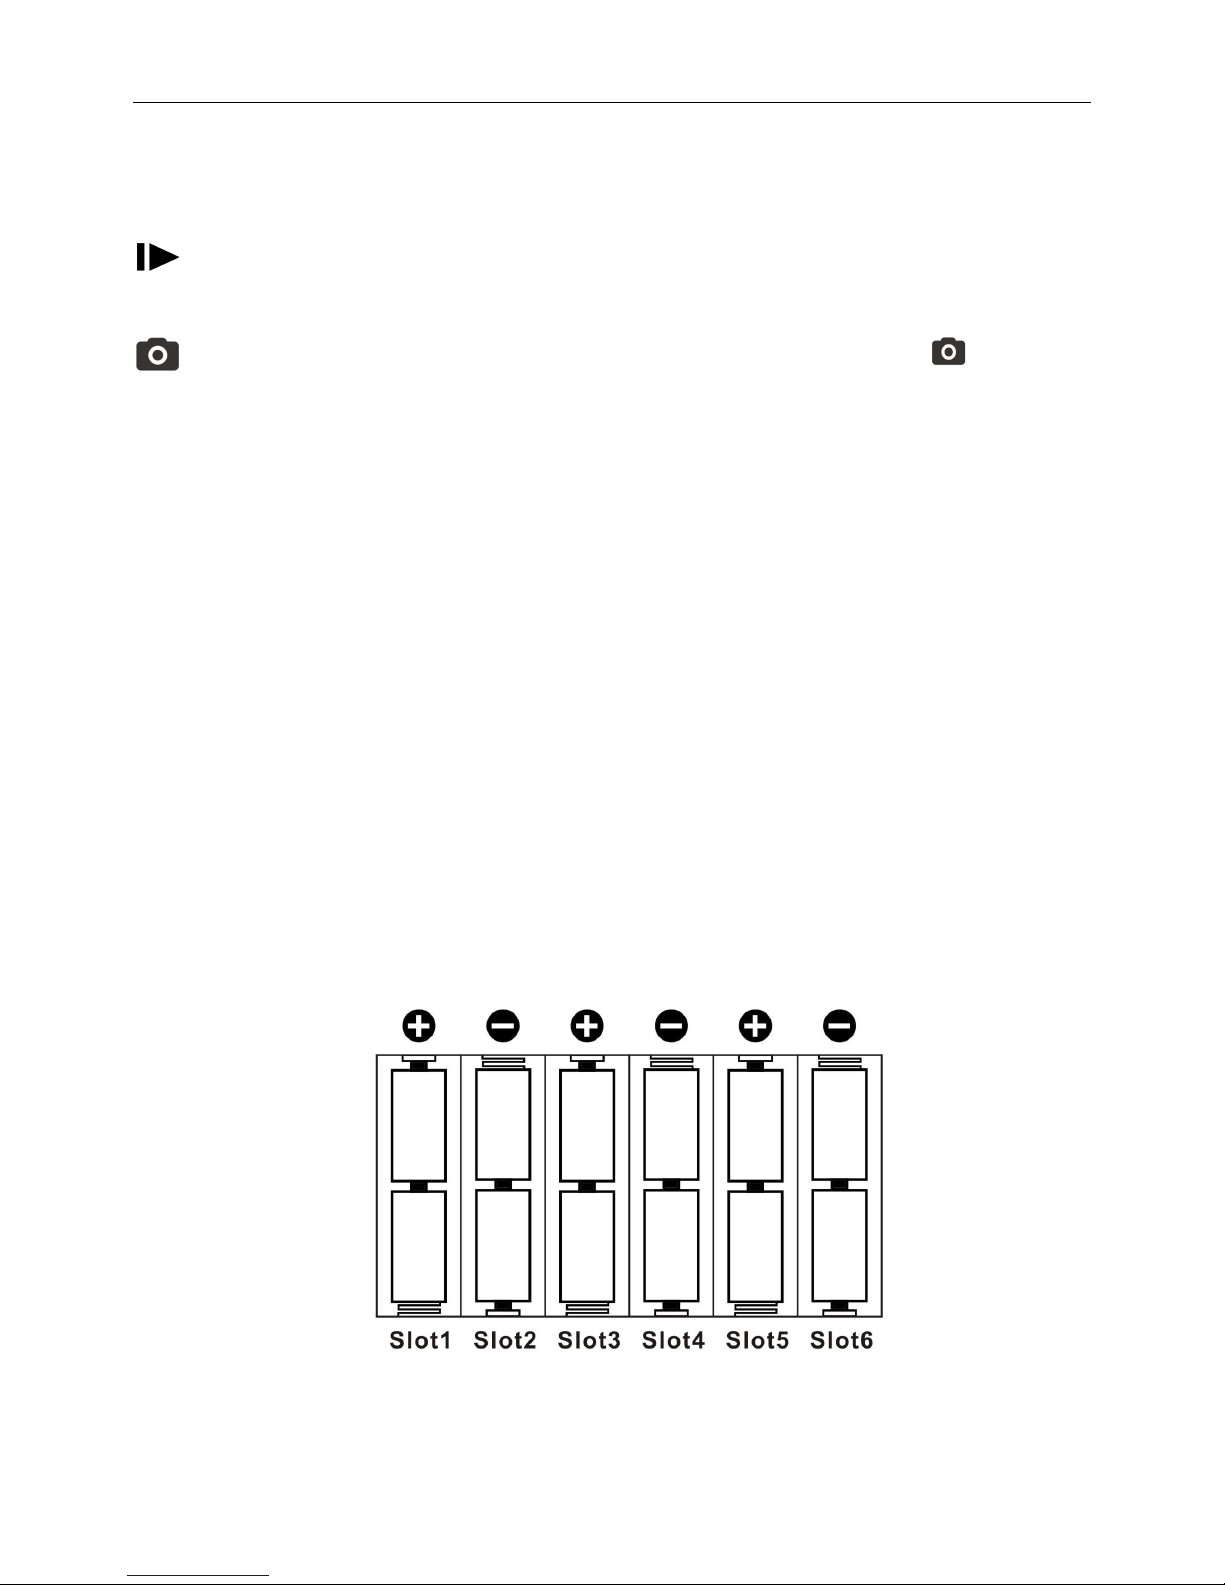
3 Installing the batteries
To supply power for the camera, 12pcs of 1.5V AA batteries are needed.
Confirm that the power switch is in the OFF position; load the fully
charged batteries into the pack according the polarities signs shown
below. The following batteries with 1.5V output can be used:
1. High-density and high-performance alkaline batteries
(Recommended)
2. Rechargeable alkaline batteries
3. Rechargeable NiMH batteries
There are 6 battery slots. Slot 1 and 2 form one group and is marked
“1”, slot 3 and 4 form the other group and is marked “2”, while slot 5 and
6 form the other group and is marked “3”. Single “group” of batteries is
needed to supply power to the camera, but both can be used and is
recommended.
Fig 4
Page 4
4 Purchasing your SIM card
The camera is designed to send the photos it takes via a 3G (WCDMA)
SIM card over the cellular network to any phone or email address
instantly once the photo is taken.
It also supports a GSM SIM card. But before using this function, you
need to open GPRS service from your service provider.
Be sure that the PIN Code of the SIM card is disabled before
inserting the SIM card. (You can disable the PIN of a SIM card via your
mobile phone. Then reinsert the card into your camera)
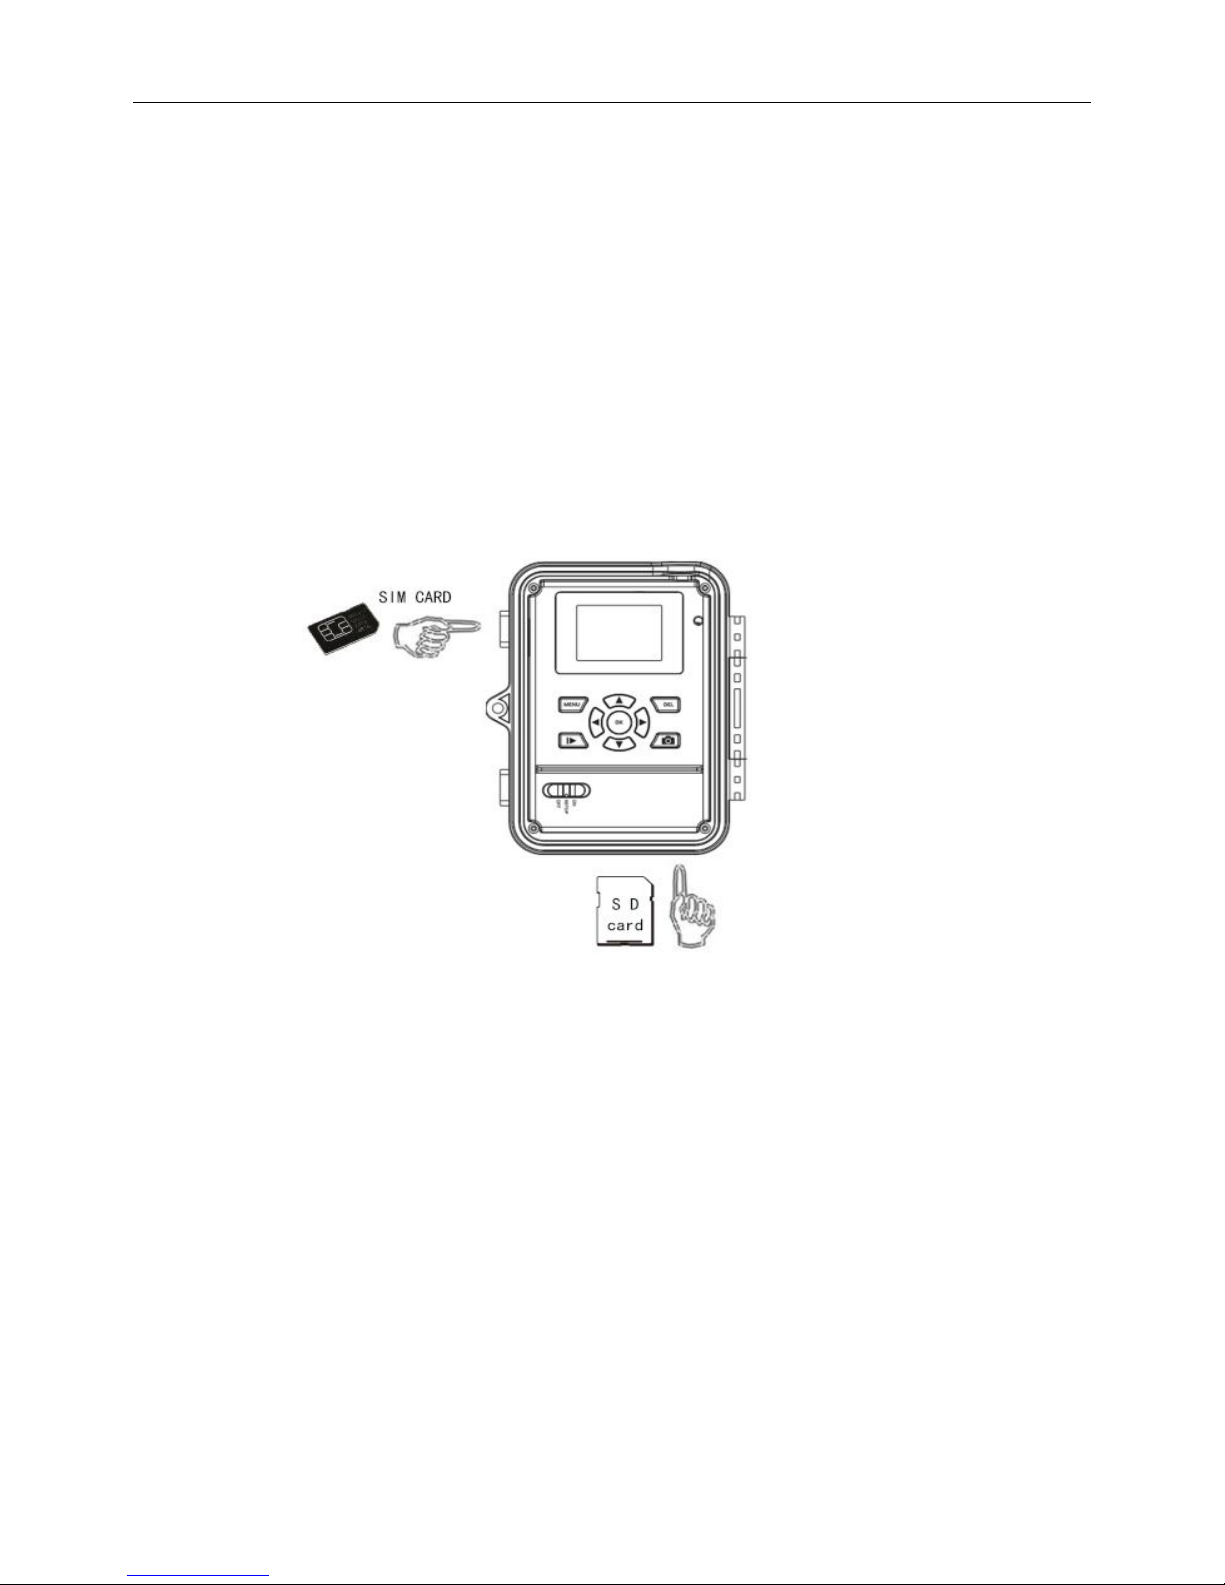
5 Installing your SIM card and SD card
Fig 5
Make sure the power switch is in the OFF position. You can use any
SD card size up to 32G. You must have the SD card in the camera to be
able to turn the camera on and set it up.
NOTE 1: Every photo taken with this camera will be saved to the SD
card even if it is sending the photos wireless. You will always have access
to the high resolution photos on the SD card just like with standard game
cameras.
NOTE 2: Please DO NOT USE the Micro SD card with adapter. Many
micro SD cards are not compatible with trail cameras
6 Setting up the wireless network
1) Slide power switch to the SETUP position. You will see the screen
shown below:

Page 5
Fig 6
The camera will search for cellular service first. So you will need to be
patient for about 10-20 seconds, as the camera does its initial set‐up and
looks for cellular service.
While finding the network you will see the word searching, Then
Searching Network in red on the screen. Once you see the IMEI
number-15-digit number show up at the top and the service bar
indicator show service bars, you are ready to move on.
Fig 8
7 Formatting the SD card
2) Press the MENU button. You will see the screen shown below:
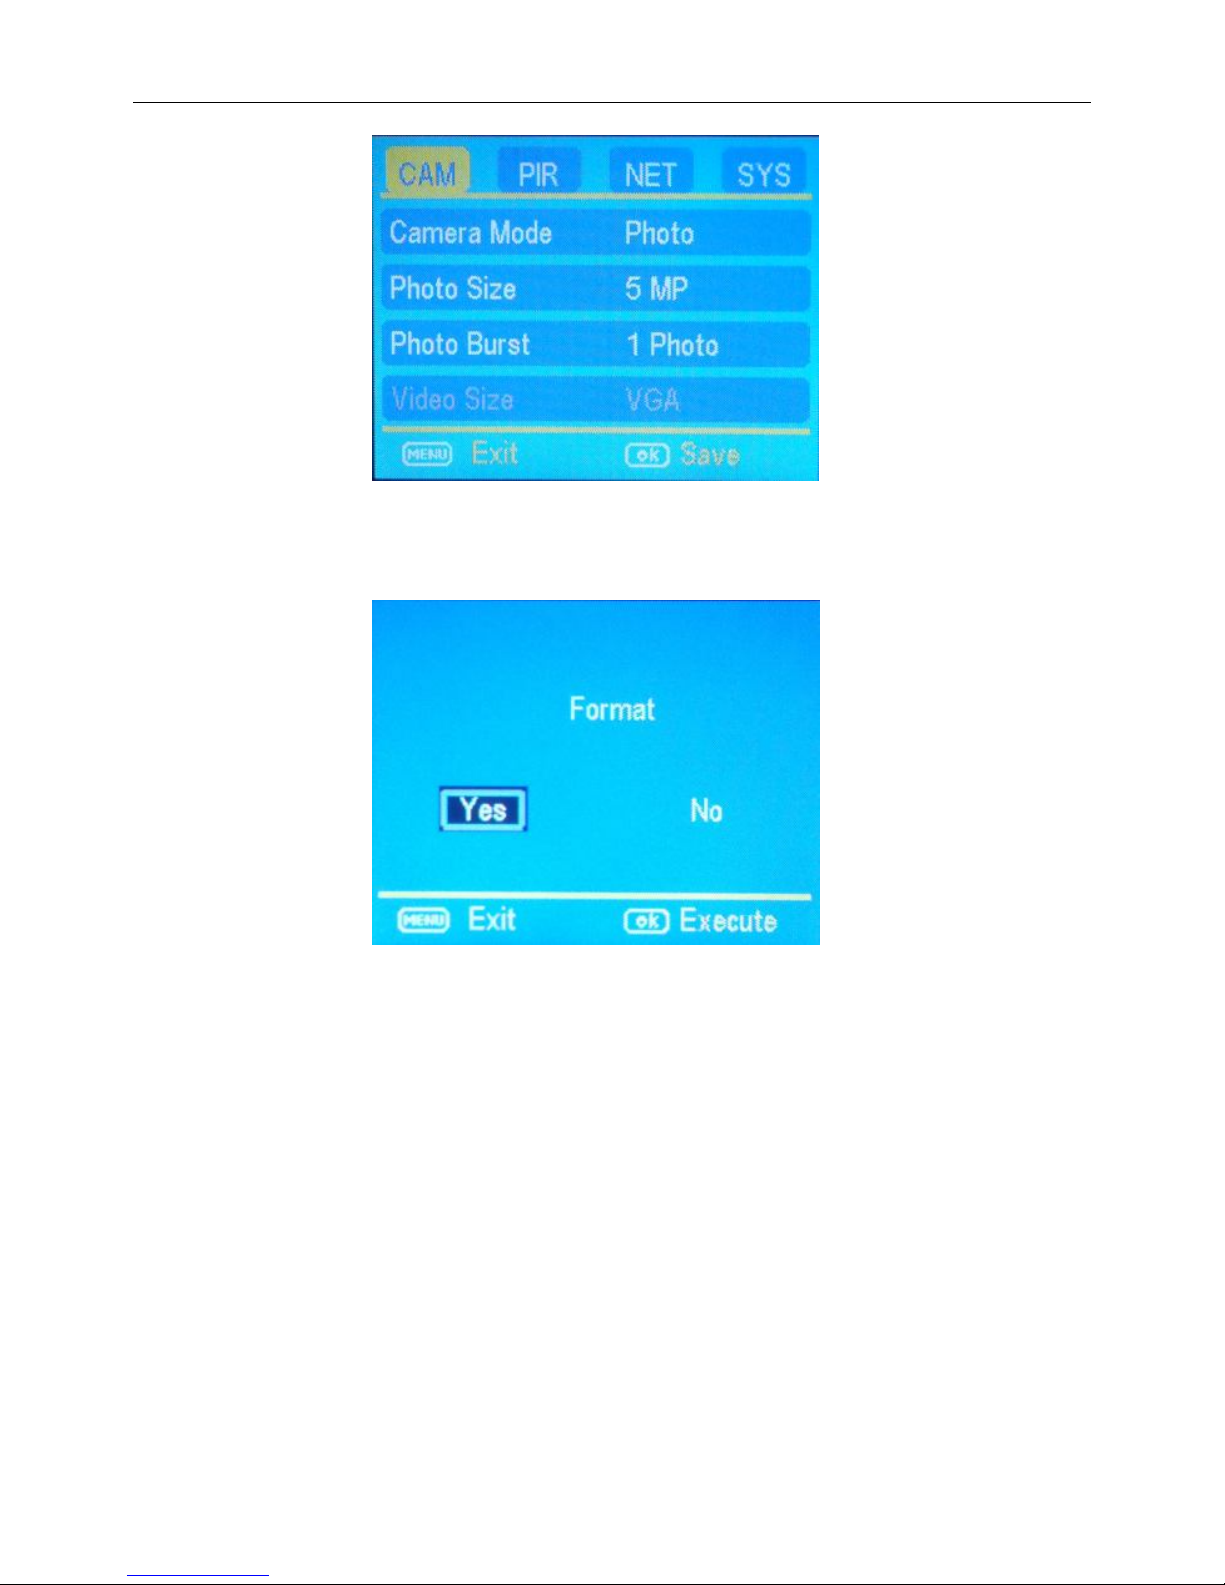
Page 6
Fig 9
Press the ►button 3 times to highlight the SYS tab. Navigate down
by pressing the button repeatedly until the FORMAT option is
highlighted and press OK then choose Yes to format.
Fig 10
8 Download and Use GSMSETUP APP
3) Next Press the ▲or ▼button repeatedly until only the SYS tab is
highlighted in yellow.
4)Press the ◄ arrow 1 time to highlight the NET tab and navigate
down to the DOWNLOAD TOOL and press OK.
5) Turn the camera off by sliding the power switch to the OFF position.
6) Remove the SD card from your camera and insert into your
personal PC card reader.
7) Locate the SD card reader in Windows Explorer and double click on
it to show its contents.
 Loading...