

Uovision PANDA UV535 User Manual

www.uovisioneurope.com
Page 1
UOVISION PANDA UV535 8.0MP
Digital Scouting Camera
User’s Manual

www.uovisioneurope.com
Page 2
Quick Start
1. Load 8pcs of NEW 1.5V AA size alkaline batteries,
or connect 6 V external power supply. If external power
source connected, the batteries can remain inside the
camera
2. Insert the SD card (32GB or smaller). Make sure the SD
card is not locked. Please DO NOT USE the Micro SD card
with adapter. Many micro SD cards are not compatible with
trail cameras
3. Slide the power switch to the “SETUP” position to set up
the camera
4. Press the “menu” button to enter into the program menu,
then press the “up” or “down” arrow buttons for parameter
settings as described in the user’s manual. Press the “OK”
button to save parameter settings and exit
5. Place the camera at the target area and turn on the
camera(slide the power switch to “ON”), the camera will
take pictures or videos as preset in step 4
6. Press the “►” to capture photos or record a video
manually;
7. Press the “OK” button to review the pictures. Use the
“up” or “down” arrow buttons to scroll through
pictures LCD display
8. To delete an image in SETUP mode, press the “OK” to
review the image, then press “menu” and choose

www.uovisioneurope.com
Page 3
Delete one, select yes to execute or No to Exit
Key Notes
a. “menu”: enter the program menu.
b. “▲”“▼”“◄”“►”: for parameter settings as described in
the user’s manual.
“▲”is the shortcut to choose “Video”, while “▼”for the
“Photo”.
c. “OK”: save parameter settings; Enter the playback
mode.
d. “►”: capture a photo or record a video manually.
e. Switch: ON in the upper position; SETUP in the middle;
OFF in the opposite down position
f. DC plug in diameter:4.0mm*1.7mm.
1 Instruction
Page 1
1 Instruction
1.1 General Description
This camera, is a digital animal surveillance camera, triggered by
any movement of humans or animals monitored by a high sensitive
Passive Infrared (PIR) motion sensor, and then automatically captures
high quality pictures up to 8MP or records video clips (QVGA or VGA)
according to default settings or preset customer settings.
It takes color pictures or videos under sufficient daylight. While at
night, the built-in infrared LED’s take clear pictures or videos
(monochrome).
There is a 1.7” color LCD display screen on the camera.
It is resistant against water and snow. The camera can also be
used as a portable digital camera.
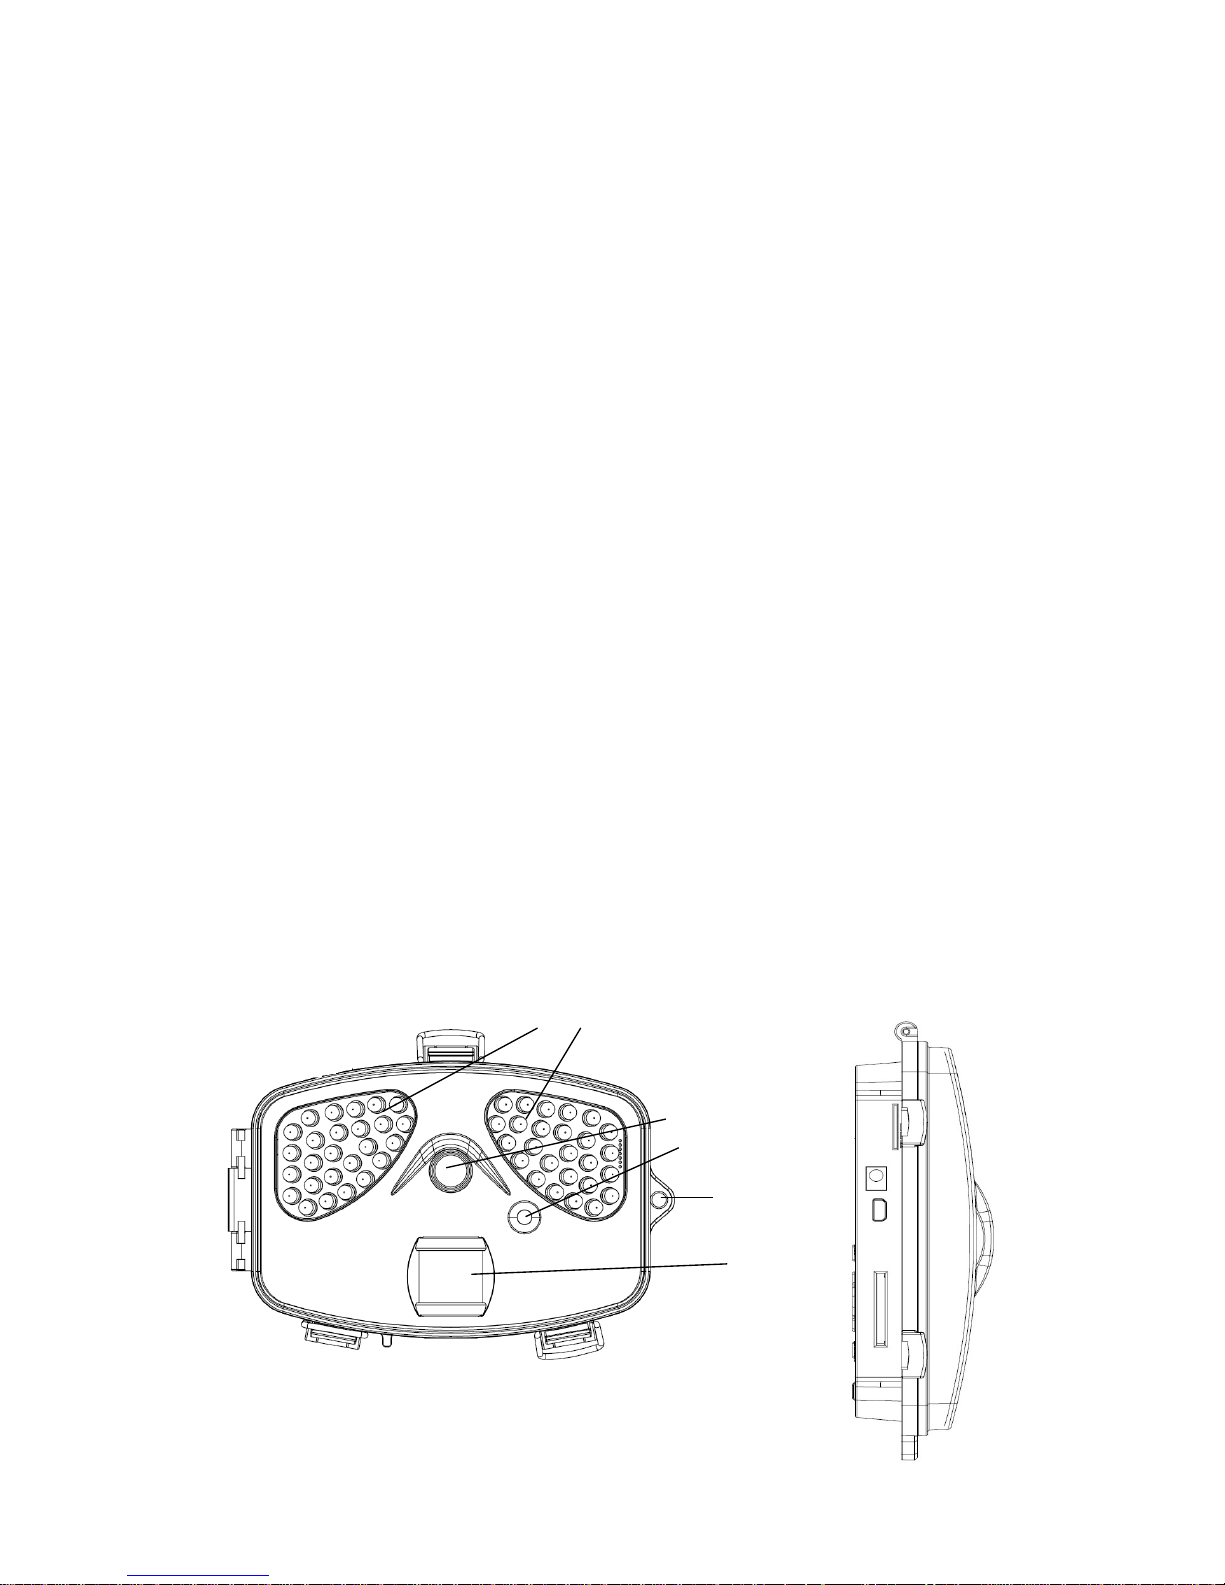
1.2 Camera Body Interfaces
The camera has the following I/O interfaces: USB connector,
SD-card slot and external DC power connector.
On the back of camera, there is a lock for theft-proof and an
adjuster to change the tilt when mounting on an irregular interface e.g.
tree.
Take a few moments to familiarize yourself with the camera
controls and displays. It is helpful to bookmark this section and refer
to it when reading through the rest of the manual.
Figure 1: Front View
IR Flash
Lens
Lock
PIR
Indication LED
 Loading...