

UNIZ 3D PRINTING SYSTEM
C86 M8 Y0 K0 C0 M0 Y0 K20
B
UNIZ Desktop 3D printer quick start guide
A
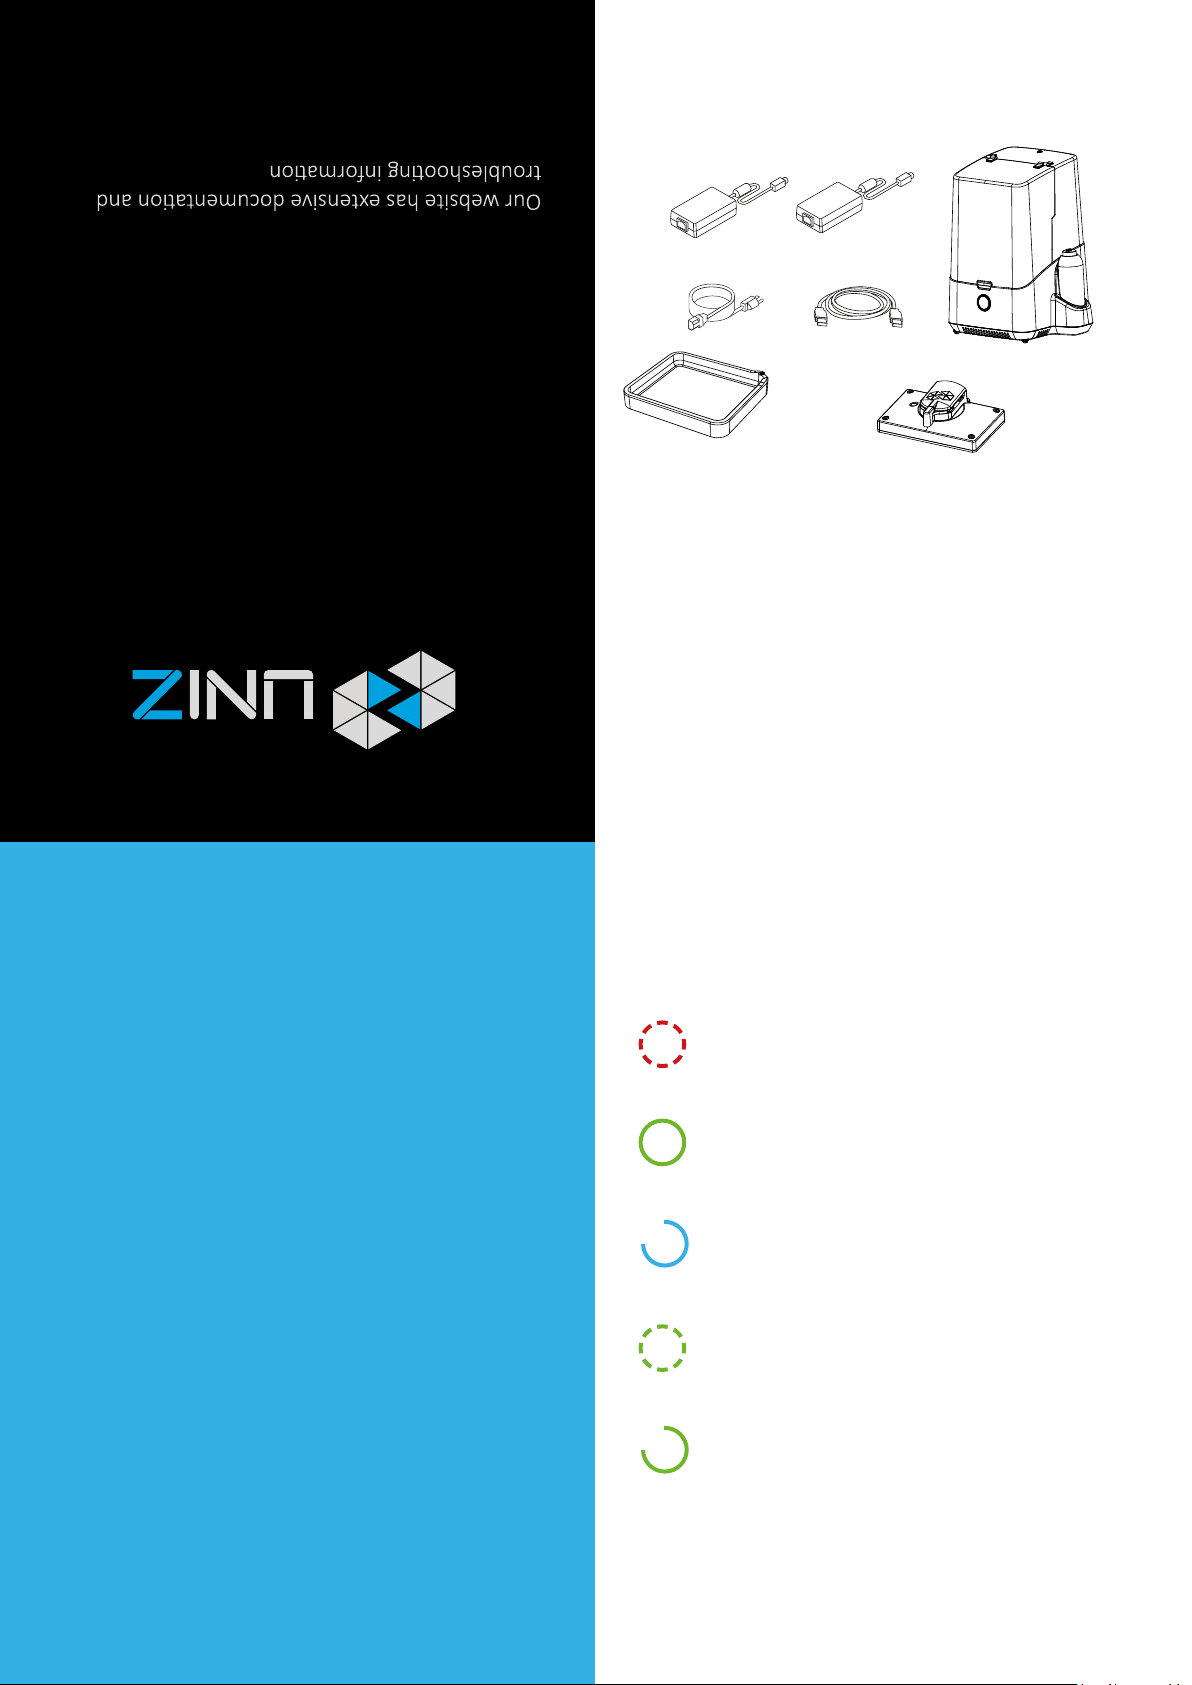
GETTING STARTED
C
E
A SLASH 3D printer
B Power Adapter
C Power Cable
D USB Cable
E Resin Tank
Build Plaorm
F
Resin Bole
G
*Slash-c DOES NOT have a resin pump or
automatic Level control & Liquid cooling system
D
G
F
FOR MORE INFORMATION
uniz.com/support
Our website has extensive docementation and troubleshooting information
to solve issues quickly on you own.
support@uniz.com
If you ever need help resolving an issue, please send an email to the address
above to contact our Support Team.
STORE
uniz.com/store
To learn about other UNIZ products, including UNIZ resins, please visit our
online store.
sales@uniz.com
If you have additional questions aboutant UNIZ product, please email our
Sales Team at the address above.
FEEDBACK
thoughts@uniz.com
We love to hear from you. Please give us feedback.
UNIZ Technology LLC
9400 Activity Rd Ste L, San Diego, California, 92126, United States
FRONT BUTTON COLOR GUIDE
Blinking red
Printer busy(Starting up/Paused/Z axis moving).
Green
Printer is ready for a command.
Progressing blue
Data transferring in progress.
Blinking green
Data transferred. Wait for a touch conrmation.
Progressing green
Printing in progress.
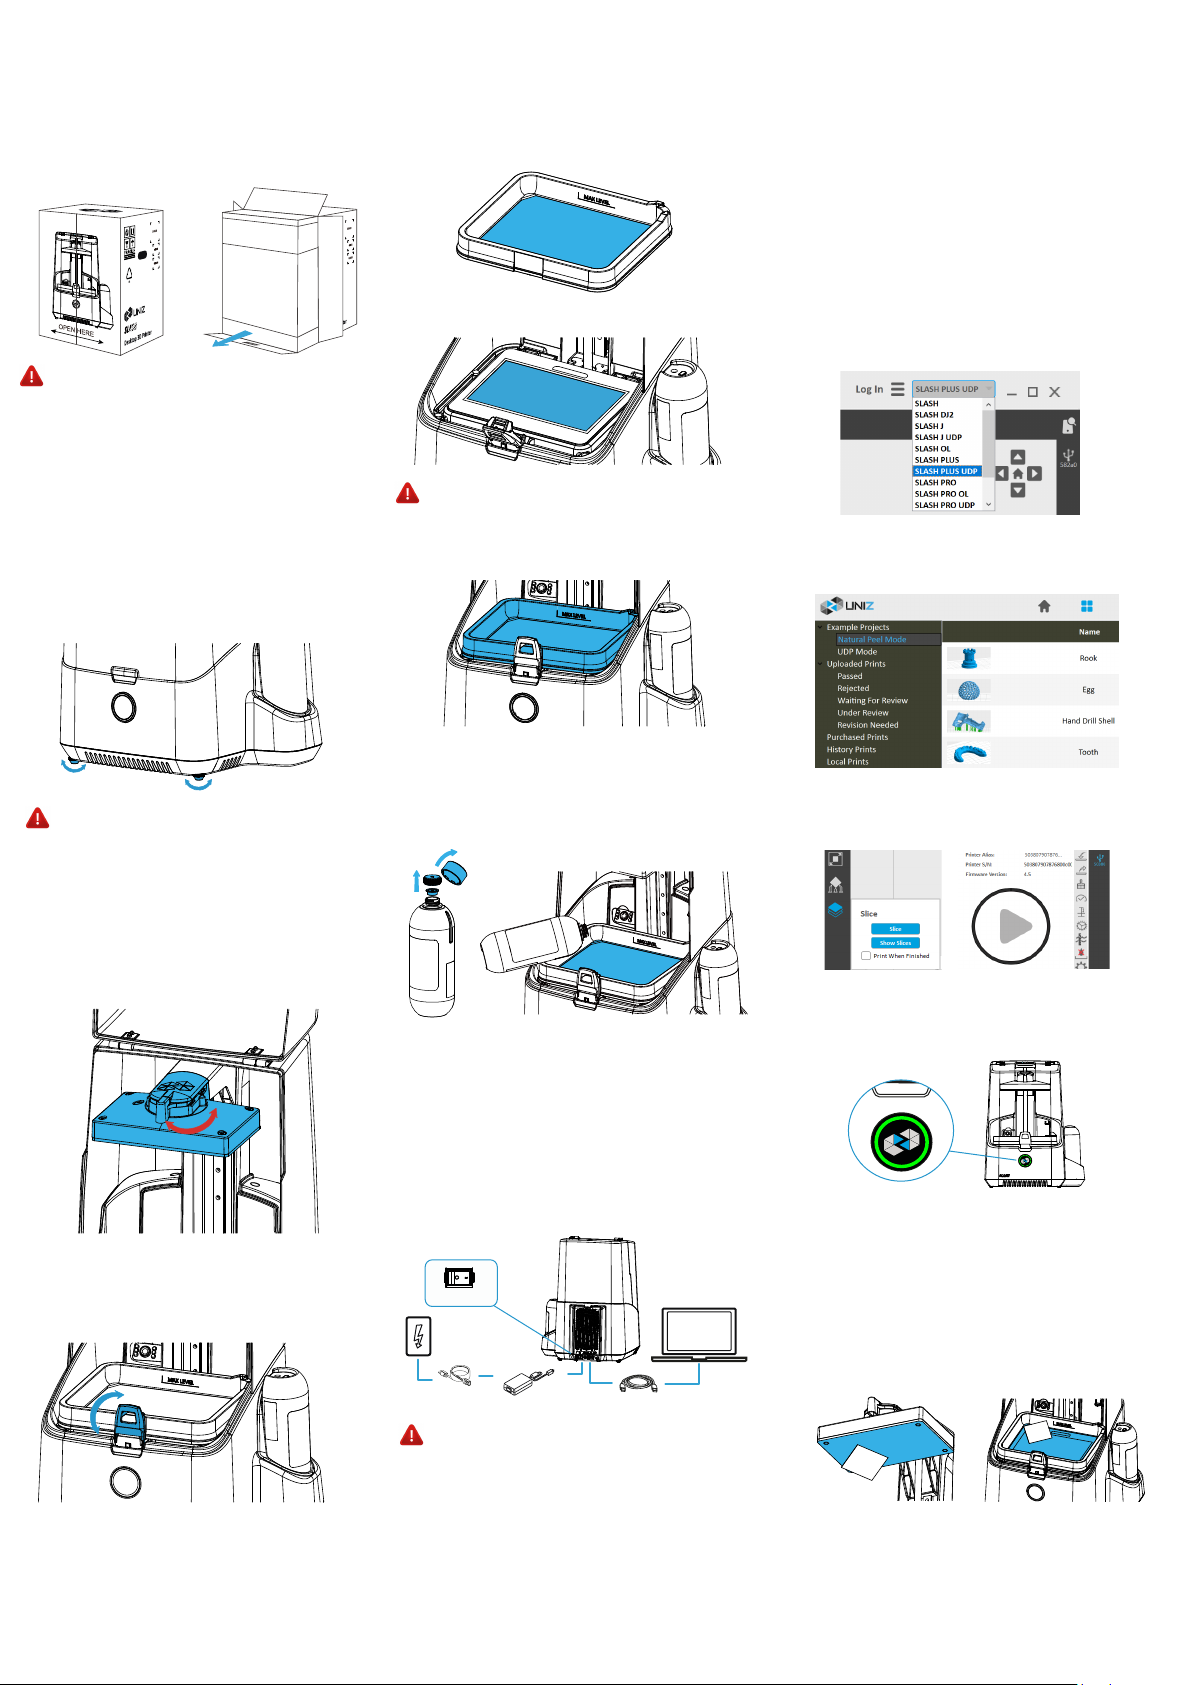
UNPACK YOUR SYSTEM
Pull the printer out.*
A
Please keep the original box and protectors
in case of future shipping or storing.
*Detailed packing list is in the box.
2. Check the Resin Tank, the film should be
intact.
3. Check the protective film on the LCD.
START THE FIRST PRINT
Download and install UNIZ Desktop.
G
https://www.uniz.com/software
Test print.*
H
1. Open the UNIZ Desktop software.
2. Select the corresponding printer type from the
drop-down list. The USB icon on the right means
the printer has been successfully connected.
①
SET-UP YOUR PRINTER
Posion the printer.
B
1. Place the printer on a leveled desk.
2. Adjust the four leveling screws under the
printer to level it. Check the leveling bubble
on the Build Platform for levelness.
Operate at room temperature (18-28°C).
Keep out of direct sunlight or other
intensive light sources.
Check the Build Plaorm.
C
1. Make sure the Build Platform is locked onto
the ARM firmly.
2. Turn the lock handle anticlockwise will unlock
the Platform.
a. Paste a new film if the old one is broken.
b. Check the LCD before print. Go K if it bulges.
4. Put the Resin Tank back and lock it.
Load the Resin.*
E
1. Take the Cap off the Resin Bottle.
2. Pour the resin into Resin Tank directly.
3. Put the Caps back and close the Front Cover.
②
3. Choose the LIBRARY interface and load a
Natural-Peel-Mode model.
③
④
Double click
⑤
4. Choose the Slice Function and click the Slice
button. When finished, click Start.
⑧
⑥
5. Touch the front button when the light is blinking
green to begin the first print.
⑦
⑨
Check the Resin Tank.
D
1. Turn the lock handle down will unlock
the Platform.
*For more details regarding usage and maintenance, please check User Manual.
Light it up.
F
1. Connect power adapter and cable.
2. Toggle the switch to ON.
3. Connect to your computer via USB cable.
Off On
Make sure the Power Adapter is connected
firmly or the printer may reboot when print
starts with insufficient power.
*Learn more deatils about how to print,
please check User Manual.
MAINTENANCE*
Always make sure the Build Plaorm and
J
Resin Tank are clear of debris.
 Loading...