


PCI TO USB CARD USER’S GUIDE
Introduction:
This USB Card is a high-performance PCI-to-USB add-in controller card. The Controller
is 100% compliant with the latest USB ( Universal Serial Bus ) and PCI Specification. The card is
designed to comply with the OHCI ( Open Host Controller Interface) specification, which is an open
standard that governs USB host Controllers. As a result, the card will be compatible with all USB
peripherals with proper device driver support.
Features:
a. Compliant with OHCI (Open Host Controller Interface) 1.0 , USB specification Rev1.0
b. Compliant with PCI Local Bus 2.1 specification
c. USB device bandwidth of up to 12Mbps
d. Supports up to 127 devices
e. Provides two fully compliant ports at 1.5Mbps/12Mbps
f. Full support of realtime dynamic insertion and removal of devices
g. Supports PCI-based 486, Pentium or Pentium II motherboards
h. Supports all USB devices: keyboard, mouse, monitor, scanner,
joystick, gamepad etc. up to 127 devices.
System Requirements:
printer, telephone,
IBM PC compatible
PCI specification support
MS Windows 95
®
OSR 2.1 or support MS Windows 98® or higher
Hardware Installation:
Step 1: Turn the power off on your computer and disconnect the power cable
Step 2: Open the computer case
Step 3: Select an open PCI slot. Remove the cover plate for that slot.
Step 4: Push the card into the slot
Step 5: Attach the card’s bracket to the back of the computer with the screw to fix
Step 6: Close the computer case
Step 7: Connect the power cable and turn the power on.
Software Installation for Windows 98:
Follow these steps to install the driver. See below:
Once Windows 95 or 98 starts up, it will automatically se nse the card and o pen the Add New Hardware
Wizard dialogue box. Follow the steps below to install the driver.
Step 1: Step 2:
Page 1-2
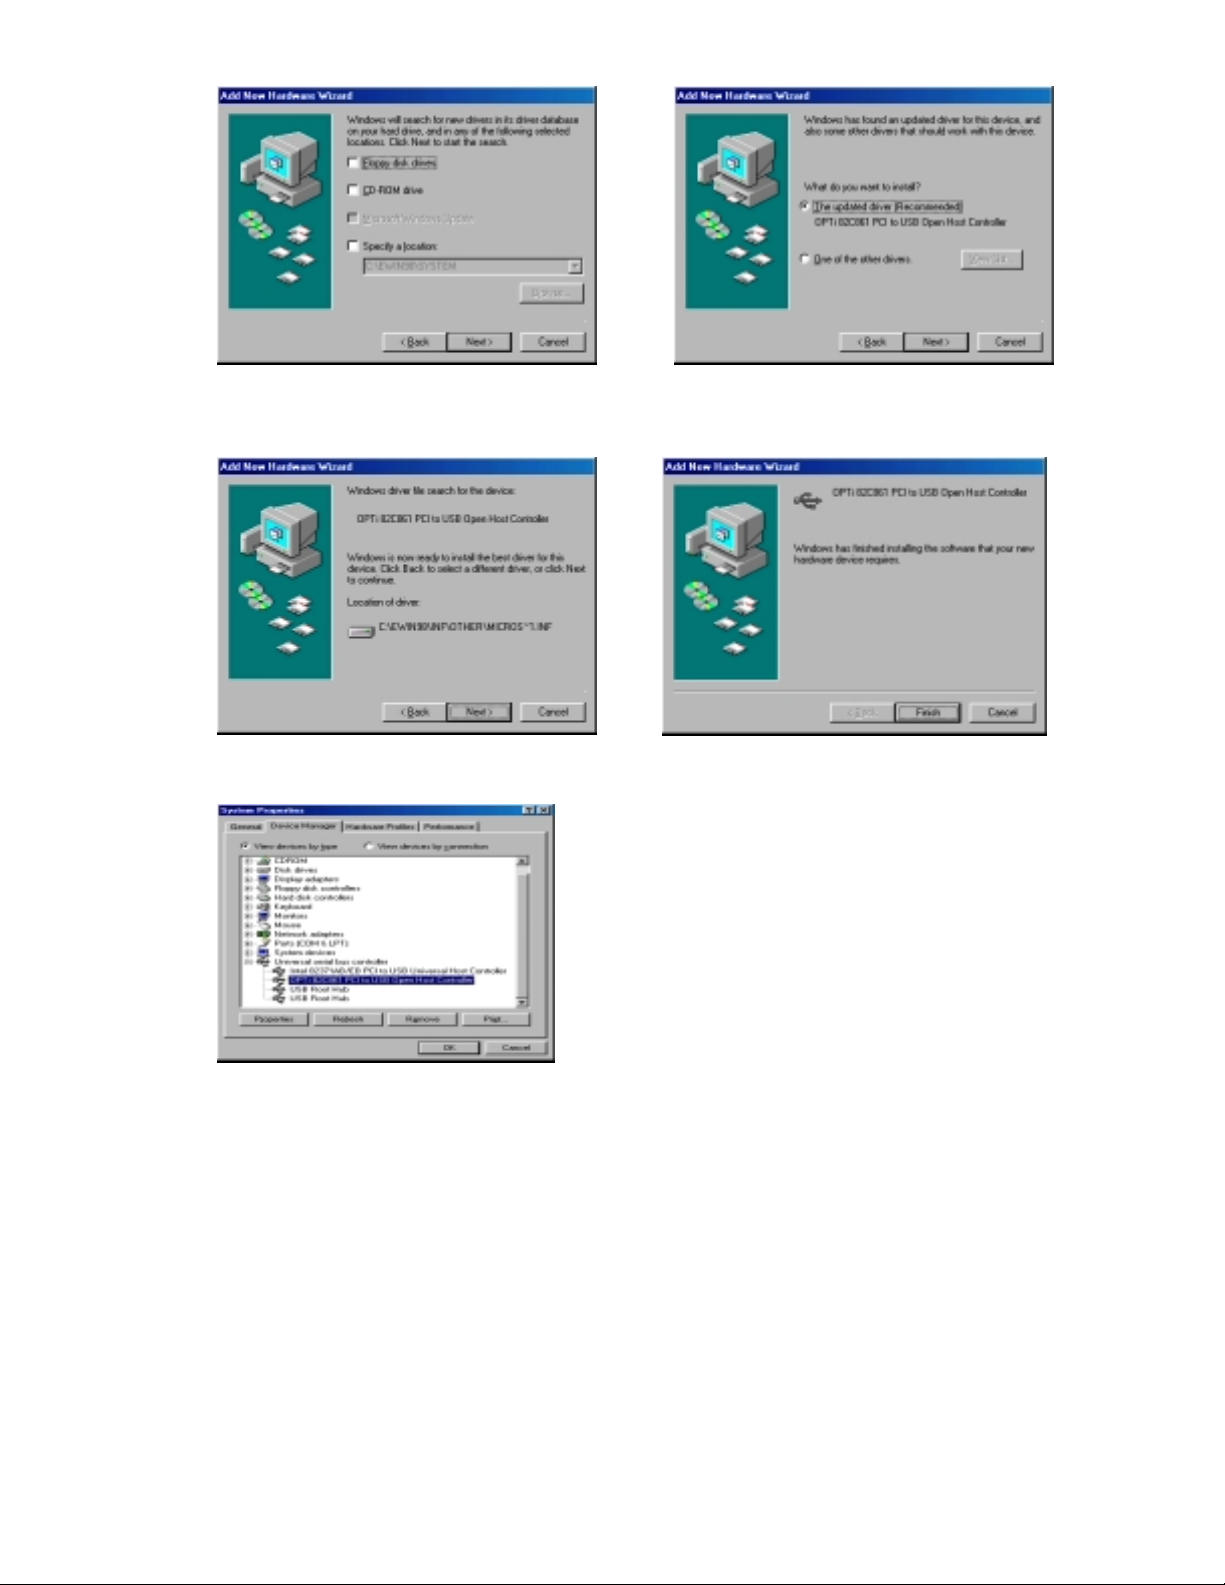
Click “Next” to continue Click “Next” to continue
Step 3 : Step 4 :
Select “Specify a Location”, path “A:\” for your
disk drive. Click “Next” to continue
Step 5 : Step 6 :
Click “Next” to continue Install completed. Click “Finish” to complete
Step 7 :
Click “Next” to continue
installation
Page 2-2
 Loading...