

Page 1
Distributor:
Bo Edin AB, founded in 1965, develops, produces and sell wireless loop systems and assistive listening devices under the brand name UniVox
®
. To ensure a high quality all products undergo careful tests and to fulfil our customers’ needs the wide range also includes products from other companies.
Approximately 50% of our sales are exported.
GORDON MORRIS LTD.
Unit 21, Wessex Park
Somerton Business Park
Somerton
Somerset
TA11 6SB
UniVox® DLS-50
Compact and powerful induction loop amplifier
UniVox
®
DLS-50
Thank you for choosing a UniVox product. We hope that you will be satisfied.
UniVox DLS-50 is a compact yet powerful loop amplifier for listening through your
hearing aid. Connect your TV, stereo, MP3, a microphone or any other sound
source that you want to hear clearly to the three inputs. Then complete the
installation by connecting your choice of loop pad, sofa loop cable, room loop cable and/or headphones.
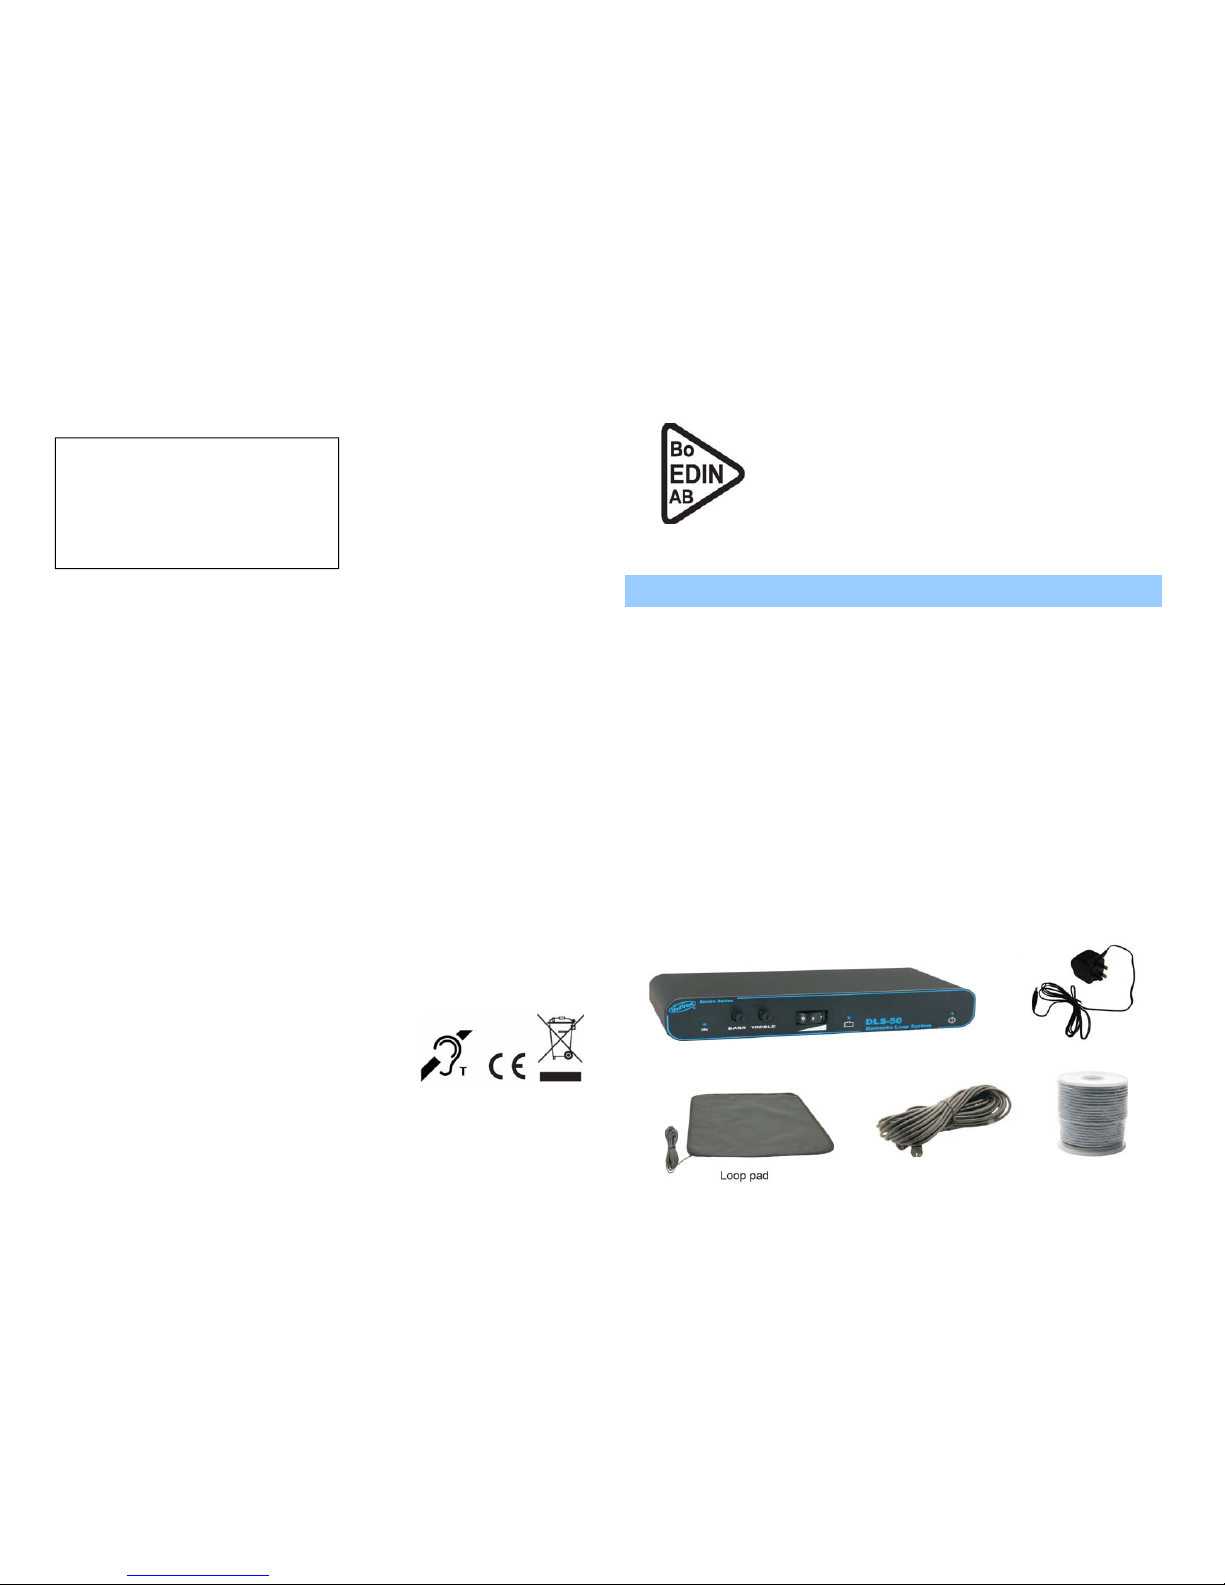
Loop amplifier
Sofa loop cable
Room loop cable
with clips
Power Supply
for TV/music/microphone
User Guide
The DLS-50 box contains loop amplifier and transformer as well as the chosen
loop solution (see pictures below). You can buy accessories making it possible to
use your DLS-50 in even more ways. For example you can connect DLS-50 to the
12V/cigarette lighter output in your car and with an extra loop pad and a splitter
cable it’s possible for two people to share one amplifier. You will find a list of
accessories at the end of this user guide.
Start by unpacking the parts. On the next pages we’ll explain how to connect your
UniVox DLS-50.
Page 2
UniVox® DLS-50
Place the amplifier and connect the chosen loop solution
Place the loop amplifier in a suitable place near the TV/stereo. If there is a need,
use the velcro pads included to fasten the amplifier to the side or back of the TV.
The amplifier has a very efficient cooling system and can therefore become hot
during use. For this reason, make sure the amplifier does not come into contact
with delicate materials.
Loop pad: Put the loop pad under/on the cushion in the sofa/chair where you
want to sit when watching TV. Connect it to the DIN output in the rear panel.
Sofa loop: Attach the sofa loop underneath the sofa (be careful if you use a stapler) or put the loop on the floor around the sofa, for example underneath the
carpet under the sofa. Connect it to the DIN output in the rear panel.
Room loop: The loop cable can for example be attached with the clips included
on the floor trim along the walls of the room. It can also be placed under the carpet or in the ceiling. The loop should not be positioned at mid height (approx. 1m
above the floor) as this will influence the performance of the system. Connect the
wire ends at the loop terminal in the rear panel.
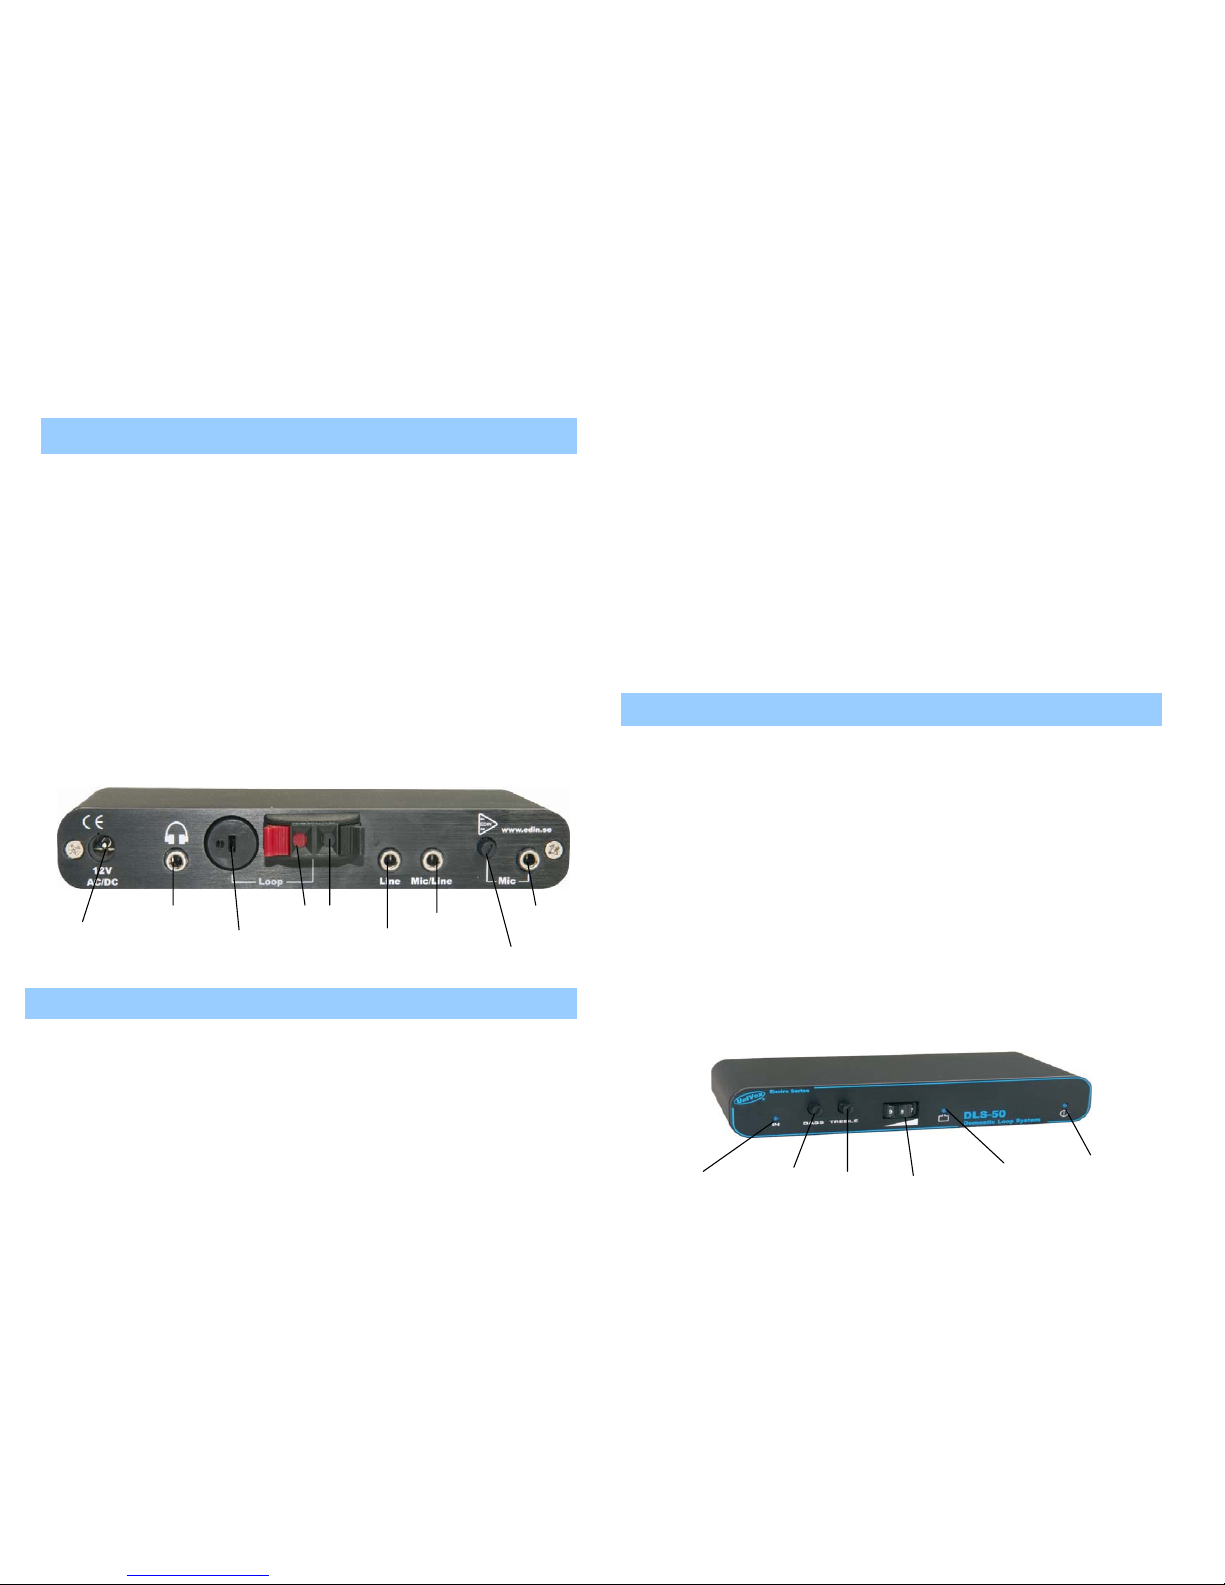
See the outputs in the rear panel in the picture below:
Transformer
Headphones
Loop pad/
sofa loop
Room loop
TV/
Stereo
Microphone
Microphone
sensitivity
TV/Stereo/
Microphone
DLS-50 has two inputs (3.5mm) that can be used to connect your TV, stereo or
other sound source and a special microphone input (3.5mm), which makes it
possible to pick up the sound from the TV speaker. The microphone input level can
be adjusted for this input.
See the inputs in the rear panel in the picture above.
Start by controlling your TV’s audio outputs and the outputs of the other input
sources you want to connect. Consult the manual for each source for information on
audio outputs (RCA, Scart etc.)
Connect DLS-50 to your TV and/or another sound source
UniVox® DLS-50
Bass and treble: You can adjust bass and treble if needed by using the two
controls in the front panel. If it’s hard to turn the controls by hand, use a small
screwdriver. Adjust the controls until desired sound balance is achieved.
Microphone sensitivity: If a microphone is connected to the amplifier the
input level of the microphone might need adjustment. This is done with the
control located at the special microphone input (Mic) in the rear panel. Proceed
as follows: Turn on your TV at desired volume or speak into the microphone.
Adjust the control until the indicator at the left in the front panel lights up in
programme peeks or when somebody speaks into the microphone. Now the right
level is set.
Attention! If no microphone is connected to the mic input the sensitivity
control should be turned to the left to avoid poor sound intelligibility.
Indication lights and controls
There are three blue LED’s in the front panel to indicate that all functions of the
amplifier work in a proper way:
Mains power: The mains power indicator is placed on the right side of the front
panel. If this LED is lit the amplifier is correctly connected to the mains outlet and
the amplifier is ready for use.
Correct microphone level: To the left the LED for indication of the microphone
sensitivity of the mic input is located. If the mic sensitivity control is correctly set,
this LED shall light up at programme peaks. If no microphone is connected this
LED is disabled.
Loop current: At the centre of the front panel the LED for loop current is located.
This LED is blinking according to the programme material and indicates that the
loop is not broken. Please note that this LED only indicates that there is current
floating in the loop, not that the level is sufficient.
The volume thumbwheel and the bass and treble controls are also located at
the front panel.
Indication microphone
sensitivity
Bass
control
Treble
control
Volume
control
Indication
loop current
Indication
mains power
Page 3

UniVox® DLS-50
Power Supply (ACM5005) 20VA, 230V/12V
Loop pad (ALP5002) 400 x 400 x 5mm, 10m cable grey
Sofa loop (ACA5009) 8m, incl. 10m extension cable, black
Room loop (ACM5203) 33 roll, incl. 100 clips, white
Autoscart (ACA5004) automatic scart connector, 3.5mm male
Adaptor cable for car use (ACM5201) for 12V/cigarette lighter output
Audio cable
Splitter cable
Boundary microphone –13A (MBU4007)
Handheld microphone (MHU4004)
Tie clip microphone (MTU4003)
Wall holder (ACM5008) aluminium, excl. screws, black
UniVox® DLS-50
Listen to music with headphones
Accessories and spare parts
Maintenance
DLS-50 with its built-in automatic volume control (AGC) is developed for superior
speech intelligibility when used as a loop amplifier. However, while listening to
music with your hearing aid/s in T position, the sound might be unsatisfactory.
This happens because most hearing aids limit certain frequencies, for example
bass tones, which might result in a flat sound without nuances.
You can receive a richer, more nuanced sound if you take off your hearing aid/s
and listen to the music with headphones connected to the headphones outlet in
the rear panel. The quality enhancement resulting from listening with headphones
depends on the type of hearing impairment you have and the type of headphones
you use
Under normal circumstances UniVox loop amplifiers do not need any special
maintenance. Should the unit becomes dirty, wipe the unit with a slightly damp
cloth. Do not use solvent or heavy cleaning agents.
UniVox® DLS-50
Troubleshooting
Service
Technical information
Environment
If the loop amplifier does not perform satisfactorily, check the following:
Does the mains power indicator light up? If not, make sure that the power
supply is correctly connected to the power outlet and to the amplifier.
Does the loop current indicator light up? As this indicator lights it’s a
guarantee that the system works. If not, check that the loop pad, sofa or room
loop is not broken and correctly connected. Check also all other connections.
Attention! If headphones are connected the loop current indicator is disabled.
The loop current indicator lights but there is no sound in the hearing aid/
headphones: check that the M-T-O switch of the hearing aid is in ‘T’ or ‘MT’
mode. Also check the status of your hearing aid batteries.
Bad sound quality? Adjust the loop current, bass and treble controls. Bass and
treble adjustment should normally not be needed.
Should the system not work after having made the product test as described
above, please contact Gordon Morris Ltd. for further instructions.
UniVox
®
DLS-50 fulfills the demands of the international standard -
IEC 60118-4:2006.
For additional information, please contact info@gordonmorris.co.uk. If required,
spare part lists or other technical documents can be ordered through this email
address also.
When this product is finished with, please follow existing disposal regulations.
Thus if you respect these instructions you ensure human health and
environmental protection.
Page 4

Purchase the right cable/s if you haven’t done that in connection with the
purchase of your DLS-50. A list of cables and other accessories/spare
parts can be found on page 6.
Connect your TV and/or other sound sources to the DLS-50 with the chosen
cable according to the following guidelines:
TV/other sound sources: Connect TV, stereo etc. to the line input (Line). If
you want to connect both TV and for example stereo, use the line input
(Line) for one of the sound sources and the combined mic/line input (Mic/
Line) for the other sound source.
If you watch TV by cable/satellite and also have a VHS or DVD player, we
recommend to connect an automatic Scart control (AutoScart, read more on
page 4). For connection to the TV’s Scart output we will supply a 3.5mm
stereojack with a 2 phono lead. We also supply a phono to scart adaptor
Microphone: If a microphone should be used, for example to make it
possible for someone else to talk to you while using the loop, it should
be connected to the special microphone input (Mic). The microphone
shall be an electret type microphone (13B or 13C, see Accessories and
spare parts on page 6).
It’s also possible to pick up TV or stereo sound by attaching a special microphone on the speaker grid (13A, see Accessories and spare parts on page
6). This microphone is normally connected to the combined mic/line input
(Mic/Line) but can also be connected to the special mic input (Mic) if you
want to adjust the input level. Take off the paper cover of the loose round
velcro pad and attach it to the speaker grid of the TV. Then use the attached
velcro pad on the microphone to attach it onto the speaker. The microphone
will then automatically be directed inwards and pick up the sound from the
speaker. If you want to pick up the sound of a surround system with the 13A
microphone, attach it to the centre speaker.
Transformer: Connect the transformer to the output for mains power in
the rear panel (12V AC/DC). Finally connect the transformer to a power
outlet.
UniVox® DLS-50
Automatic Scart Connection
If you want to connect UniVox DLS-50 to the Scart output of your TV you
should start with buying a special scart connector, UniVox AutoScart. UniVox
AutoScart always gives you the right sound in the loop, regardless if you watch
TV through your digibox, cable or satellite or watch DVD or VHS (see Accessories and spare parts).
If you already have a UniVox AutoScart, be sure that your TV works as intended with your VCR/DVD/satellite receiver/digibox. All units connected to
your TV’s Scart output must be serial connected (see example of serial connection below). If there are several Scart outputs on your TV you shall always
connect UniVox Autoscart to the Scart output no. 1 on your TV.
Following a proper connection the sound and picture on your TV will automatically
change to the program source you have chosen. This means that if you start your
VCR sound and picture automatically change to the VHS movie. In the same way
the sound and picture in your TV will automatically change to the sound and picture from the unit you have started if you start the DVD player, satellite receiver or
digibox.
Serial connection TV / Satellite/VHS
Scart cable between TV and satellite receiver
Scart cable between satellite receiver and
VHS
Adjusting sound level, tone and microphone sensitivity
When all connections are done the indicator for mains power on the right in the
front panel should light steadily. The system is now active and ready to use. It’s
now time to make your personal adjustments of loop current (volume), bass, treble
and microphone sensitivity to receive the best possible sound intelligibility. Start by
putting your hearing aid/s in T position.
Sound level: The sound level in the loop is adjusted with the volume control
(thumbwheel) in the front panel. The level can be adjusted up or down according
to the conditions on site and to your specific hearing loss. Adjust the thumbwheel
until you receive a comfortable level. It can be recommended to make a note of
the ideal level for future reference.
 Loading...