

Page 1
Atlas OCAP M1056.fm Page 1 Tuesday, March 24, 2009 4:45 PM
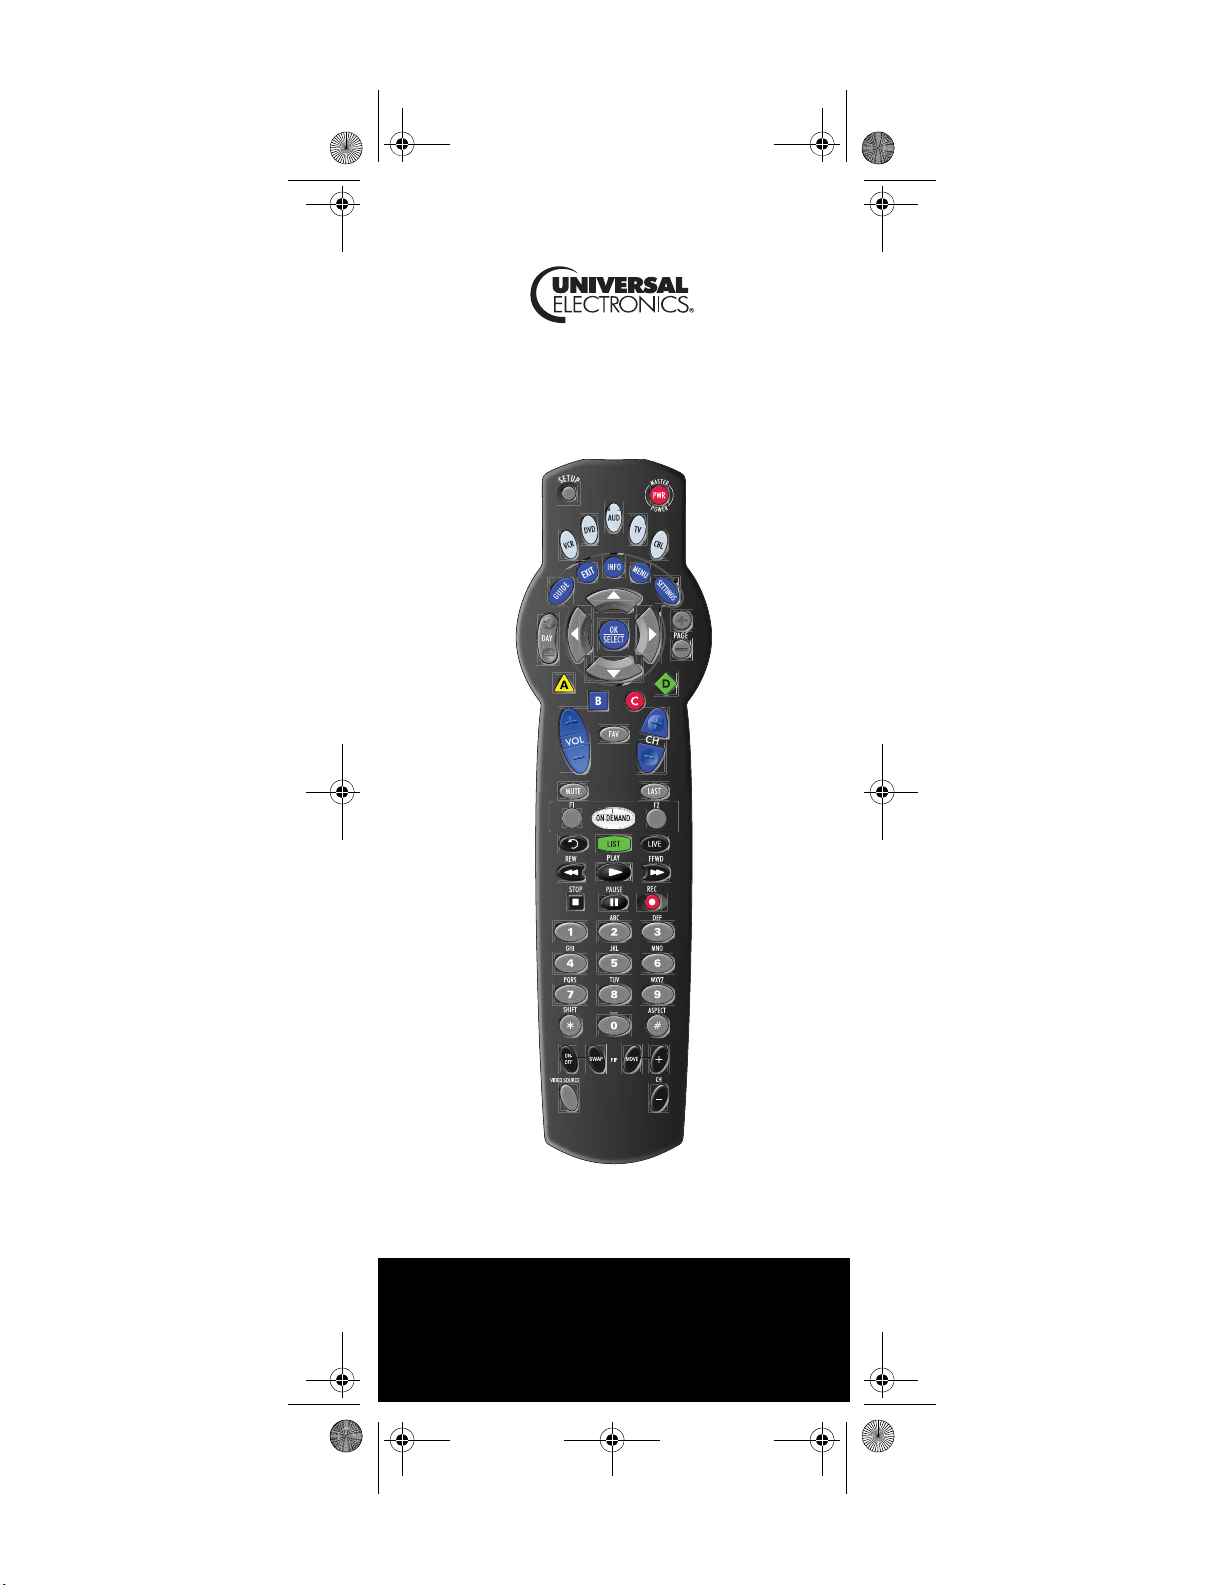
ATLAS OCAP 5-Device
Remote Control
Télécommande
ATLAS OCAP 5 appareils
Users Guide
Guide d'utilisation
PREPROGRAMMED FOR YOUR SET-TOP BOX
PRÉPROGRAMMÉE POUR VOTRE DÉCODEUR
Page 2

Atlas OCAP M1056.fm Page 2 Tuesday, March 24, 2009 4:45 PM
TABLE OF CONTENTS
Introduction . . . . . . . . . . . . . . . . . . . . . . . . . . . . . . . . . . . . . . . . . . . .4
Features and Functions . . . . . . . . . . . . . . . . . . . . . . . . . . . . . . . . . . . 5
Key Charts. . . . . . . . . . . . . . . . . . . . . . . . . . . . . . . . . . . . . . . . .6
Device Table . . . . . . . . . . . . . . . . . . . . . . . . . . . . . . . . . . . . . . . 8
Installing Batteries. . . . . . . . . . . . . . . . . . . . . . . . . . . . . . . . . . . . . . . 9
Programming Device Control. . . . . . . . . . . . . . . . . . . . . . . . . . . . . .10
Setting Up a Combo Unit. . . . . . . . . . . . . . . . . . . . . . . . . . . . . . . . . .11
Searching for Your Code . . . . . . . . . . . . . . . . . . . . . . . . . . . . . . . . .12
Checking the Codes . . . . . . . . . . . . . . . . . . . . . . . . . . . . . . . . . . . . . 13
Programming Channel Control Lock . . . . . . . . . . . . . . . . . . . . . . . .14
Unlocking Channel Control. . . . . . . . . . . . . . . . . . . . . . . . . . . 14
Locking Channel Control to CBL. . . . . . . . . . . . . . . . . . . . . . .14
Changing Volume Lock . . . . . . . . . . . . . . . . . . . . . . . . . . . . . . . . . . .15
Unlocking Volume Control for a Single Device (Individual
Volume Unlock) . . . . . . . . . . . . . . . . . . . . . . . . . . . . . . . . .15
Unlocking All Volume Control (Global Volume Unlock) . . . . .16
Locking Volume Control To One Mode (Global Volume Lock) 16
Programming Cable ID Lock. . . . . . . . . . . . . . . . . . . . . . . . . . . . . . . 17
Programming Macro Keys . . . . . . . . . . . . . . . . . . . . . . . . . . . . . . . .17
Programming a Macro Key. . . . . . . . . . . . . . . . . . . . . . . . . . .18
Clearing a Macro Key . . . . . . . . . . . . . . . . . . . . . . . . . . . . . . .18
Using the Master Power Key. . . . . . . . . . . . . . . . . . . . . . . . . . . . . . .19
Programming the Master Power Key . . . . . . . . . . . . . . . . . . .19
Using the Master Power Key. . . . . . . . . . . . . . . . . . . . . . . . . .20
Clearing the Master Power Key . . . . . . . . . . . . . . . . . . . . . . .20
Re-Assigning Device Keys. . . . . . . . . . . . . . . . . . . . . . . . . . . . . . . . .20
Clearing Custom Programming . . . . . . . . . . . . . . . . . . . . . . . . . . . .22
Activating Backlighting (Optional) . . . . . . . . . . . . . . . . . . . . . . . . . .22
Troubleshooting . . . . . . . . . . . . . . . . . . . . . . . . . . . . . . . . . . . . . . . .23
FCC Notice . . . . . . . . . . . . . . . . . . . . . . . . . . . . . . . . . . . . . . . . . . . .24
Additional Information . . . . . . . . . . . . . . . . . . . . . . . . . . . . . . . . . . . 24
Manufacturer’s Codes (Codes des manufacturiers) . . . . . . . . . . . . 54
Setup Codes for Audio Amplifiers. . . . . . . . . . . . . . . . . . . . . .54
Setup Codes for Audio Receivers. . . . . . . . . . . . . . . . . . . . . .54
Setup Codes for Audio Accessories . . . . . . . . . . . . . . . . . . . .57
Setup Codes for Cable Boxes/Converters . . . . . . . . . . . . . . .57
Setup Codes for DVD Players . . . . . . . . . . . . . . . . . . . . . . . . .59
Setup Codes for DVD Recorders. . . . . . . . . . . . . . . . . . . . . . . 64
Setup Codes for DVD Combos. . . . . . . . . . . . . . . . . . . . . . . . . 64
Satellite Receivers and DVR/PVR Systems. . . . . . . . . . . . . . . 65
Setup Codes for Satellite Receivers . . . . . . . . . . . . . . . . . . .65
Setup Codes for TVs . . . . . . . . . . . . . . . . . . . . . . . . . . . . . . . .67
Setup Codes for TVs (DLP) . . . . . . . . . . . . . . . . . . . . . . . . . . .75
Setup Codes for TVs (HDTV) . . . . . . . . . . . . . . . . . . . . . . . . . .75
Setup Codes for TVs (LCD) . . . . . . . . . . . . . . . . . . . . . . . . . . .78
Setup Codes for TV/DVD Combos . . . . . . . . . . . . . . . . . . . . . .78
Setup Codes for TV/VCR Combos . . . . . . . . . . . . . . . . . . . . . .79
www.urcsupport.com/atlasocap
2
Page 3
Atlas OCAP M1056.fm Page 3 Tuesday, March 24, 2009 4:45 PM
Setup Codes for TV/VCR/DVD Combos . . . . . . . . . . . . . . . . . .81
Setup Codes for VCRs. . . . . . . . . . . . . . . . . . . . . . . . . . . . . . .82
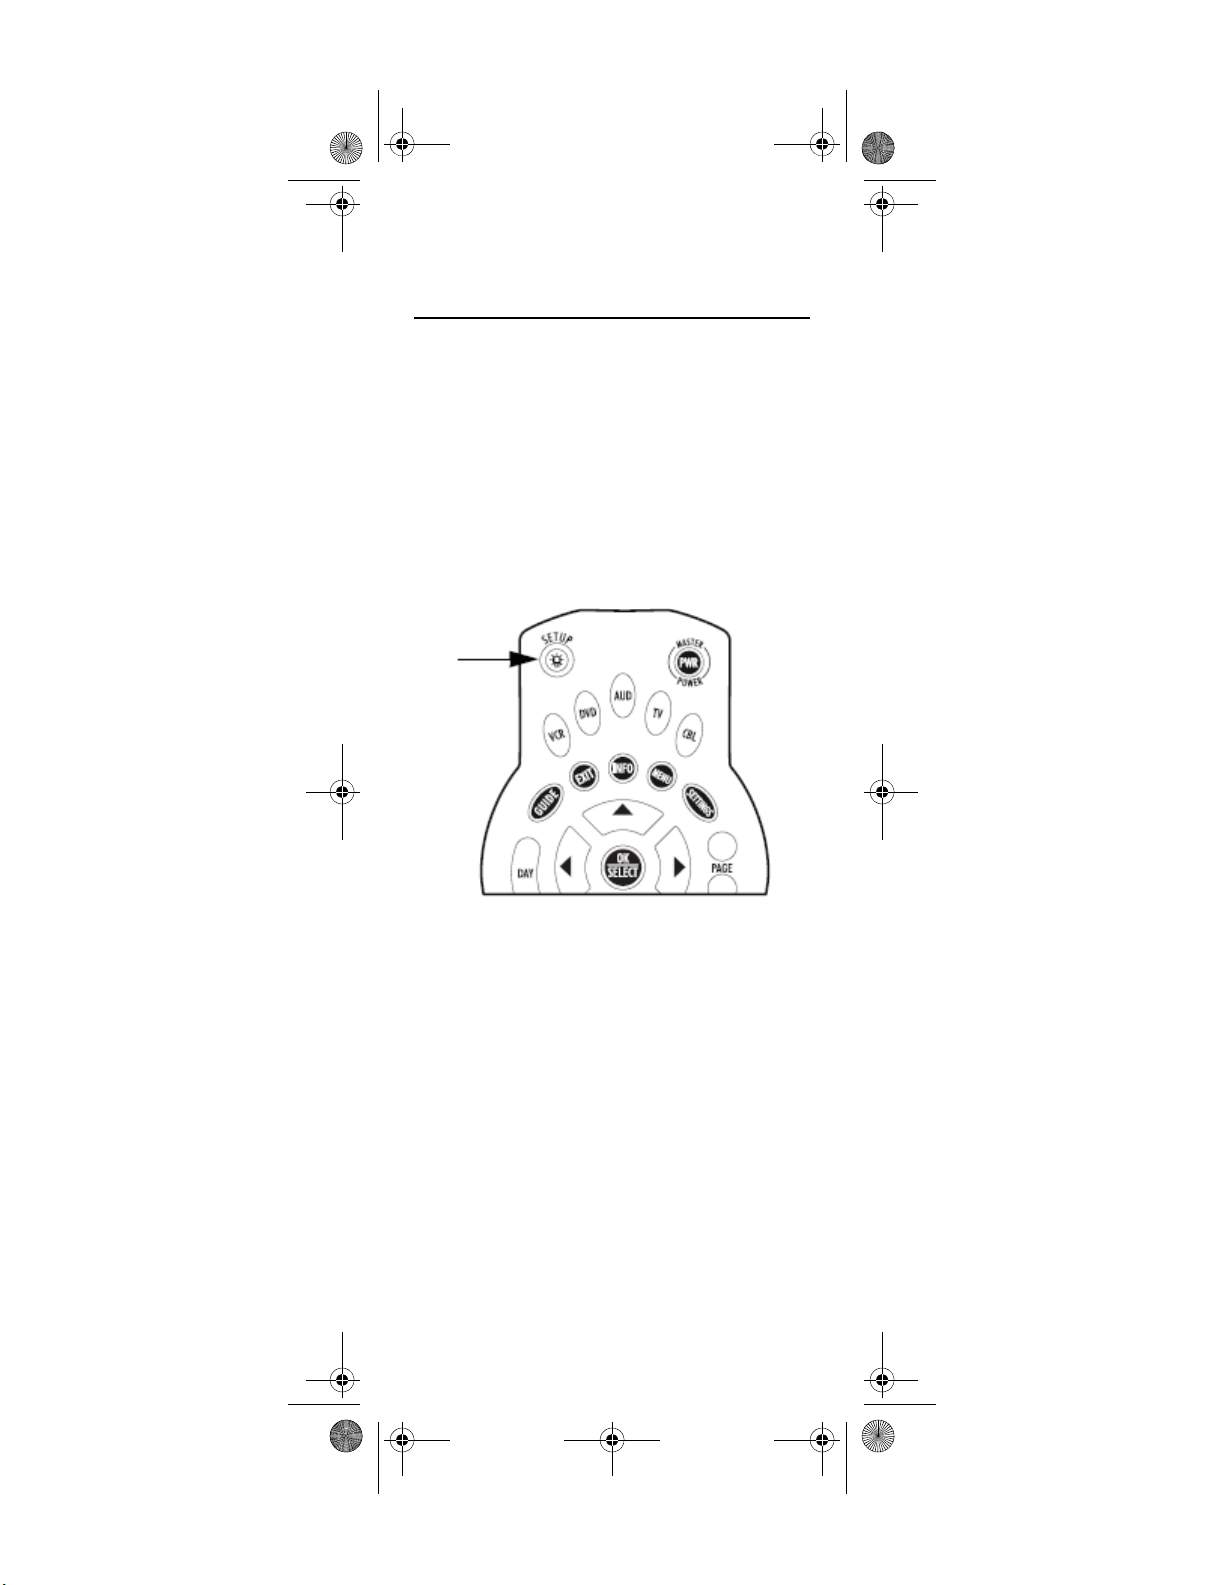
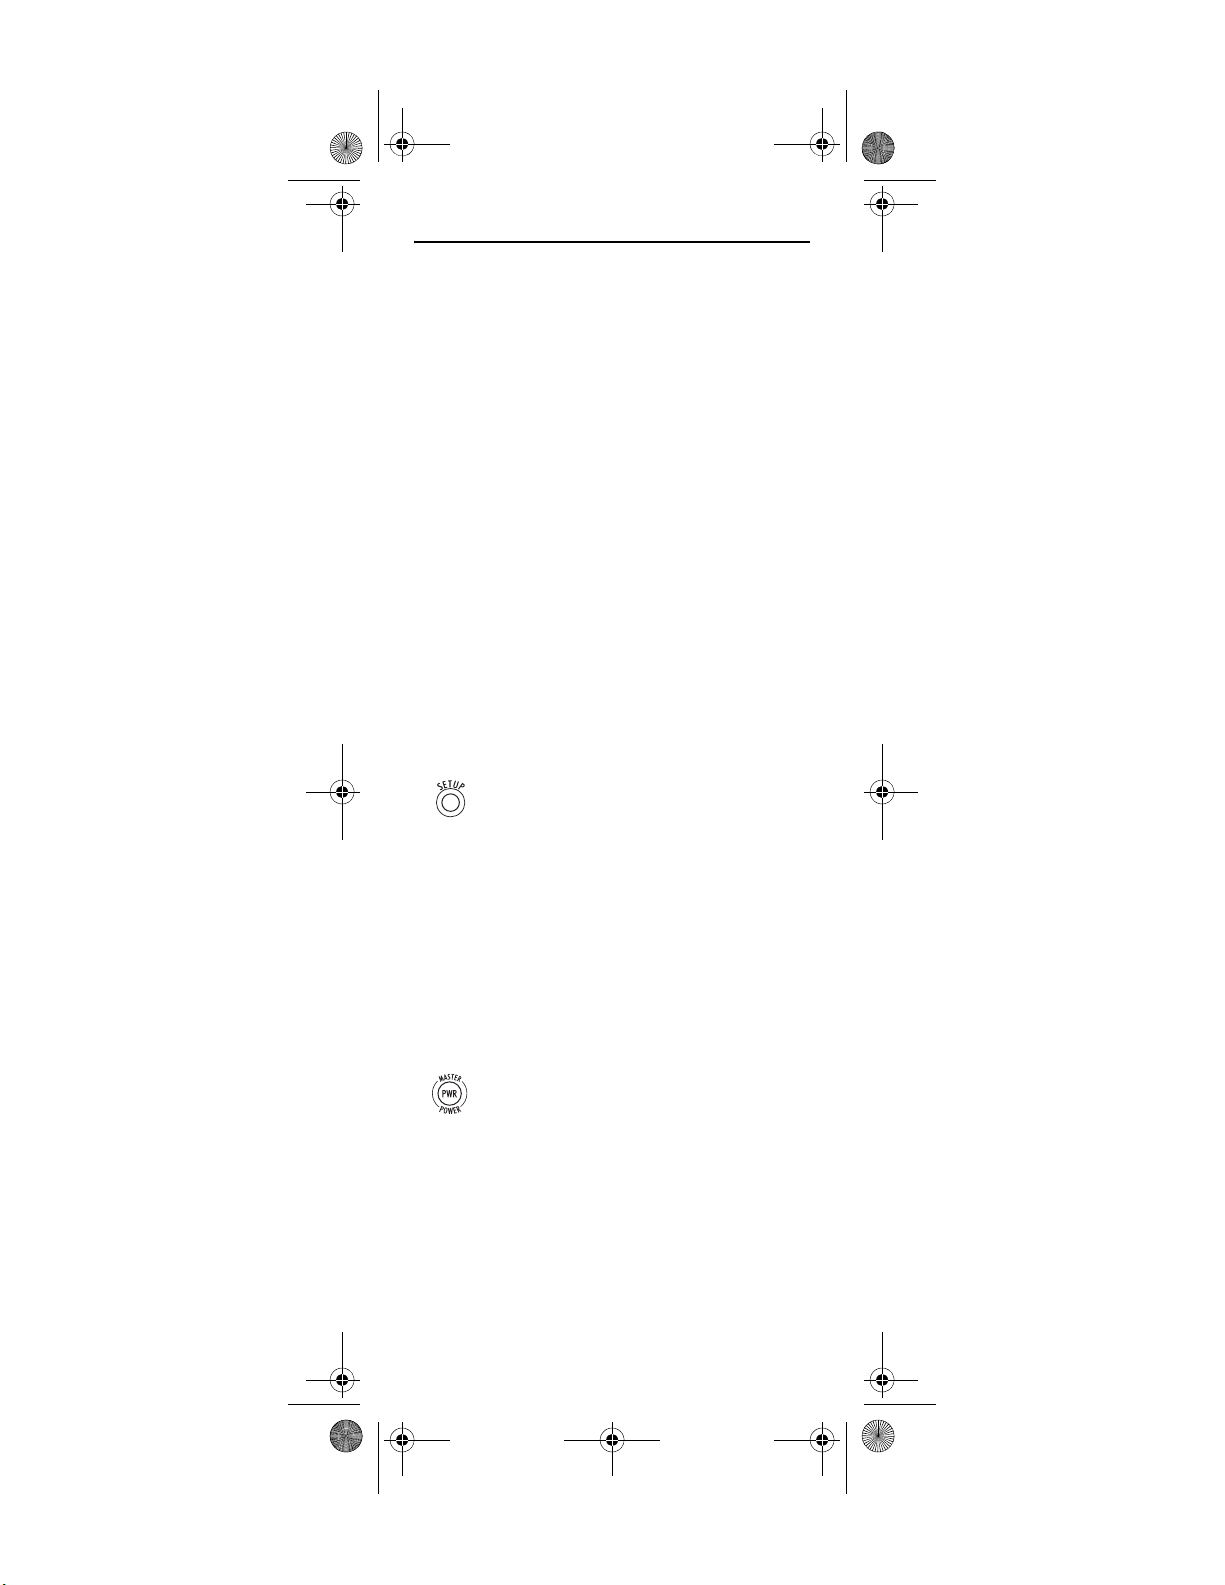
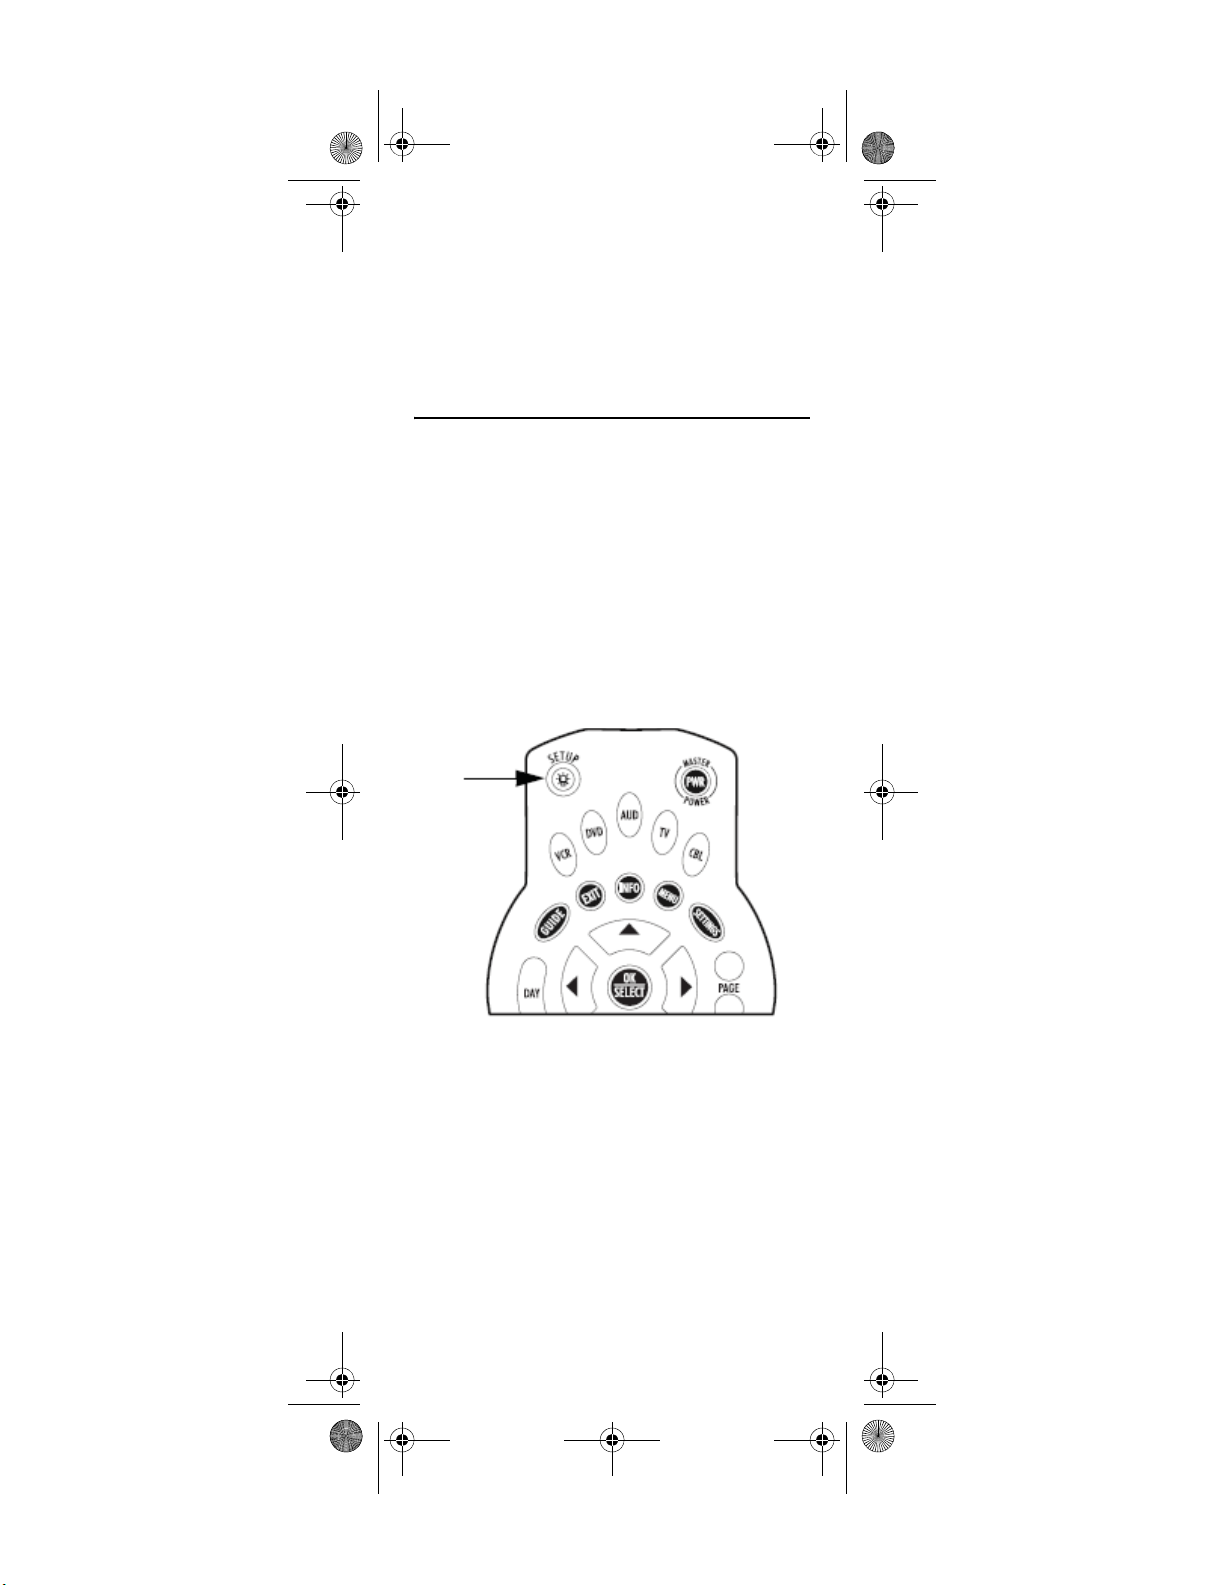
BACKLIGHTING TIPS
Some Atlas OCAP models include backlighting for
keypad illumination. If you have backlighting, you will
see a light bulb on the SETUP key, as shown below.
To Enable Backlighting
1. Press the SETUP key twice.
2. Backlighting will now turn on after any
To Disable Backlighting
1. Press the SETUP key twice.
2. Backlighting is now off.
keypress.
www.urcsupport.com/atlasocap
3
Page 4

Atlas OCAP M1056.fm Page 4 Tuesday, March 24, 2009 4:45 PM
INTRODUCTION
The Atlas OCAP 5-Device Remote Control by Universal
Electronics is our latest generation universal remote
control. Its sophisticated technology allows you to
consolidate up to five of your original home
entertainment remote controls into one easy-to-use
product. Moreover, its packed with advanced features
such as:
• Preprogrammed control to operate the cable
converter supplied by your cable service provider
• Dedicated keys to control popular functions on your
DVR/PVR (Digital/Personal Video Recorder)
• Programmable Master Power key for master on/off
control of your home entertainment equipment with
a single keystroke
• Programmable Macro Keys to allow you to activate
certain keys in a specific order
• Channel Lock to lock channel selection only to the
cable converter
• Volume Lock to lock volume controls to one mode or
individual modes
• Device Key Re-Assignment to remotely control a
second (duplicate) device
• Code Search to help program control of older or
discontinued components
• Color-coded keys to quickly locate popular
functions
• Code library for popular video and audio devices
• Backlighting (not available on all remotes)
Before using the product, you will need to install the
enclosed batteries and also perform some programming
to operate the specific home entertainment devices you
wish to control.
Please follow the instructions detailed in this manual to
set up the unit and then start enjoying your new remote
control and cable service.
www.urcsupport.com/atlasocap
4
Page 5
Atlas OCAP M1056.fm Page 5 Tuesday, March 24, 2009 4:45 PM
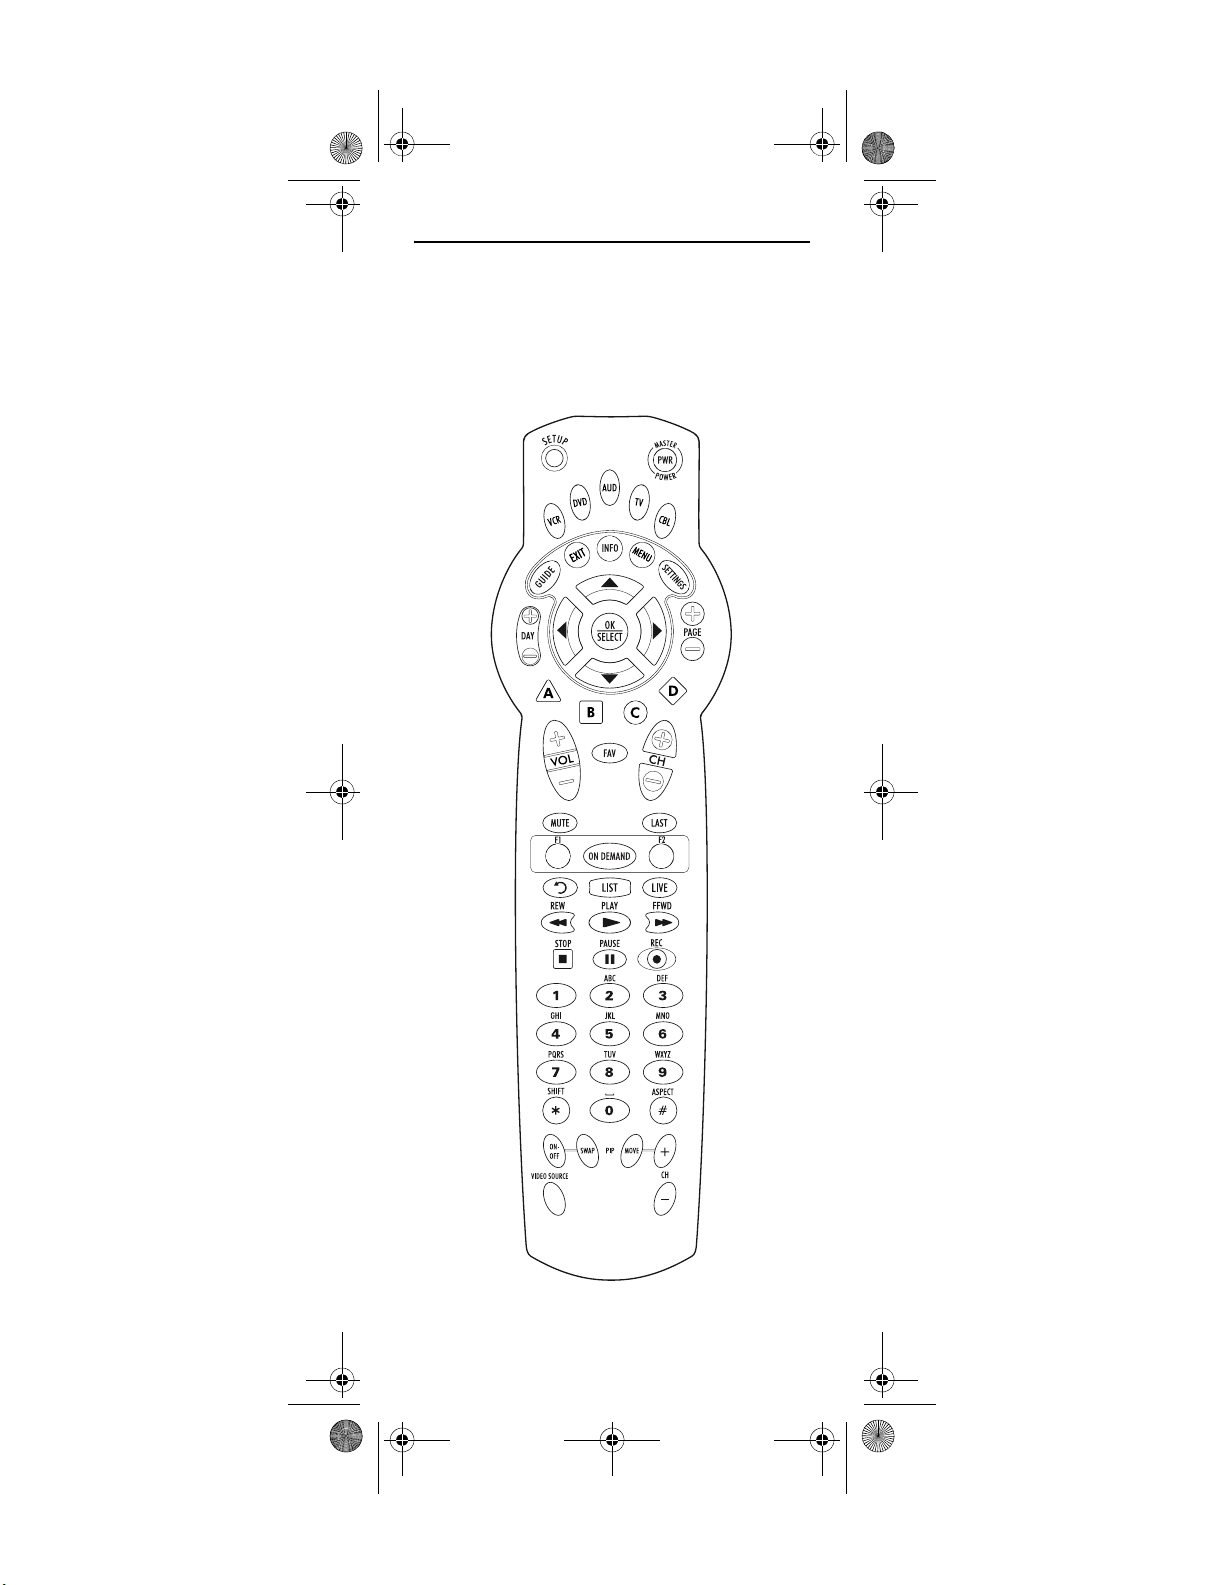
FEATURES AND FUNCTIONS
Use the illustration below to locate features on the Atlas
OCAP 5-Device Remote Control and then study the Key
Charts (on the next three pages) to learn how they
function.
To find out what type of devices can be controlled by
each device key after programming, see “Device Table”
on page 8 .
www.urcsupport.com/atlasocap
5
Page 6
Atlas OCAP M1056.fm Page 6 Tuesday, March 24, 2009 4:45 PM
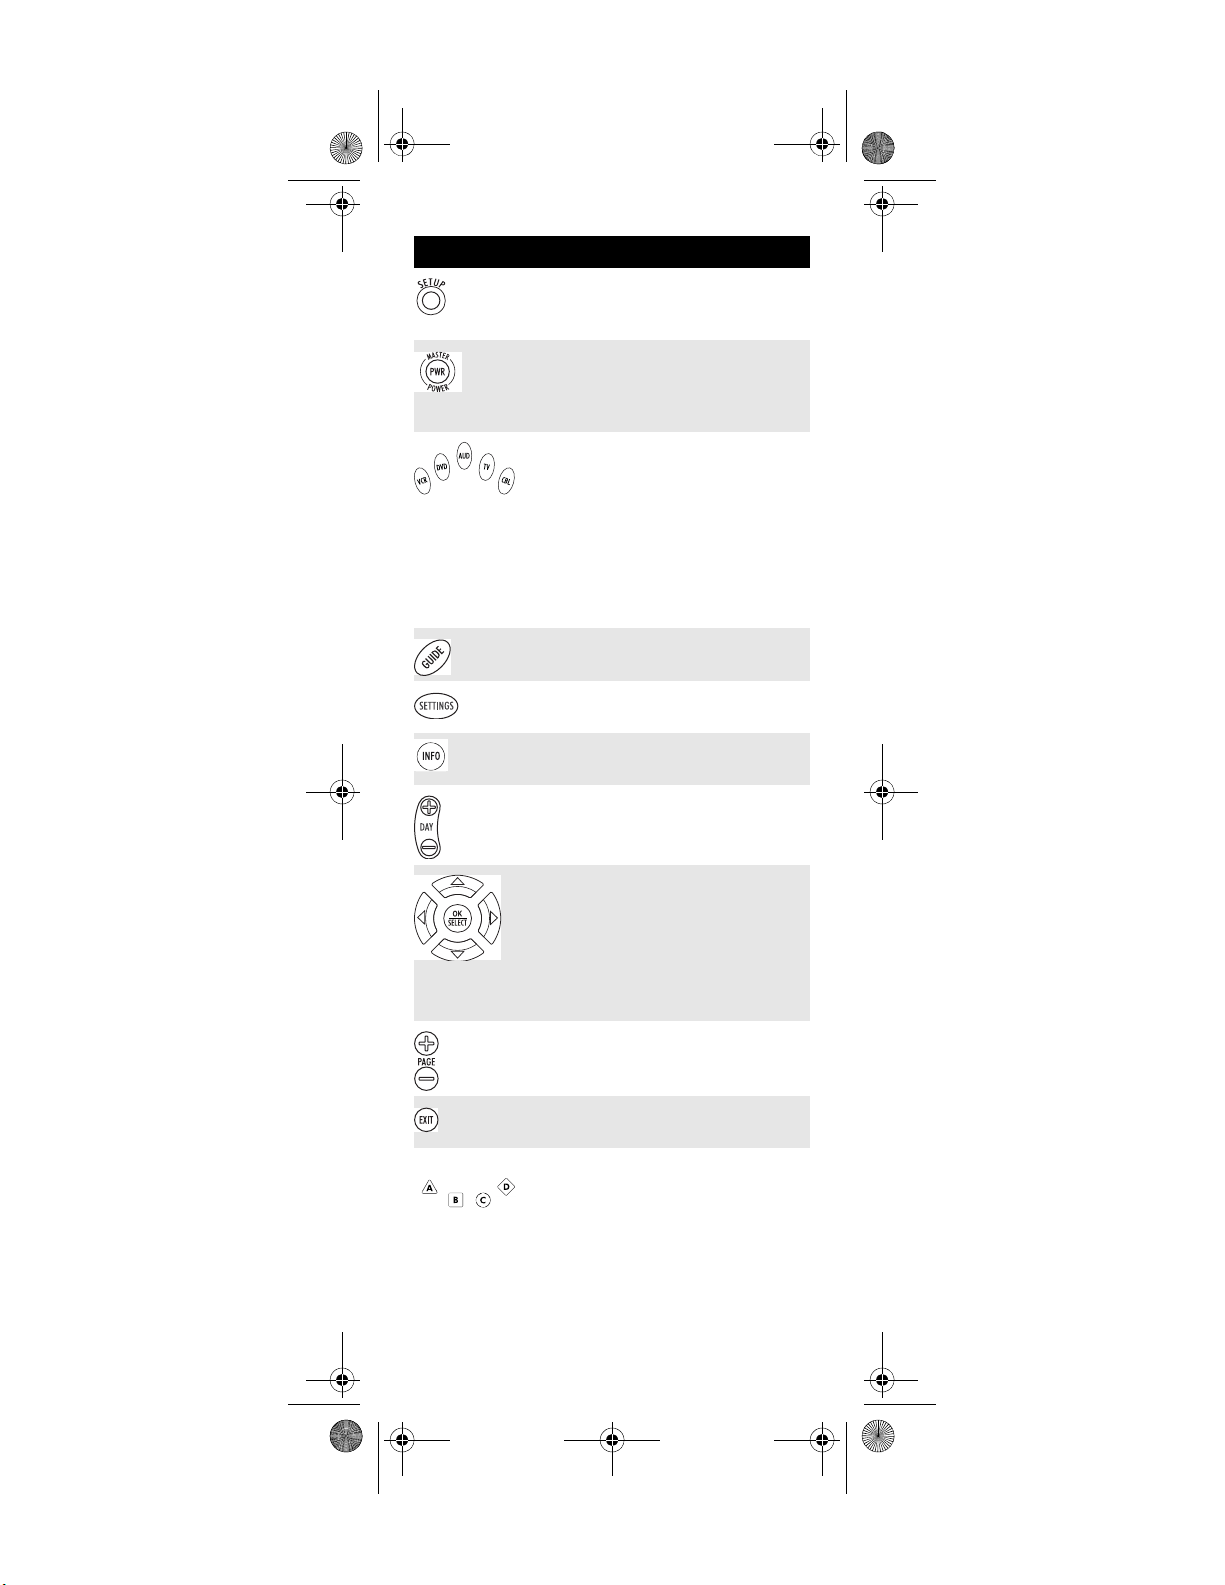
Key Charts
Key Function
Use SETUP for all programming
sequences. Also use to turn
backlighting on and off, if applicable.
Press PWR once to turn on or off a home
entertainment device. For MASTER
POWER control, see “Using the Master
Power Key” on page 19.
Press VCR, DVD, AUD, TV, or CBL once to
select a home entertainment device to
control. Also see “Device Table” on
page 8.
Each device key has an embedded LED
(red light) that blinks upon selection
and indicates the remote control is
working and (after programming) is
sending signals.
Use GUIDE to display the program
guide.
Press SETTINGS once to display available
interactive services.
Use INFO to display the current channel
and program information.
Use DAY+ (or DAY-) to move a day
forward (or back) on your cable
converter’s program guide.
Use the Cursor keys to move the cursor
in the program guide and menu screens
and to navigate within the interactive
service.
Use OK/SELECT to choose options, PPV
events, and to tune to programs from
the program guide.
Use PAGE+ (or PAGE-) to page up (or
page down) through menu screens and
the program guide.
Use EXIT to exit out of your cable
converters menu and guide.
Use A, B, C, or D to access additional
cable features (see your cable
converter’s manual).
www.urcsupport.com/atlasocap
6
Page 7
Atlas OCAP M1056.fm Page 7 Tuesday, March 24, 2009 4:45 PM
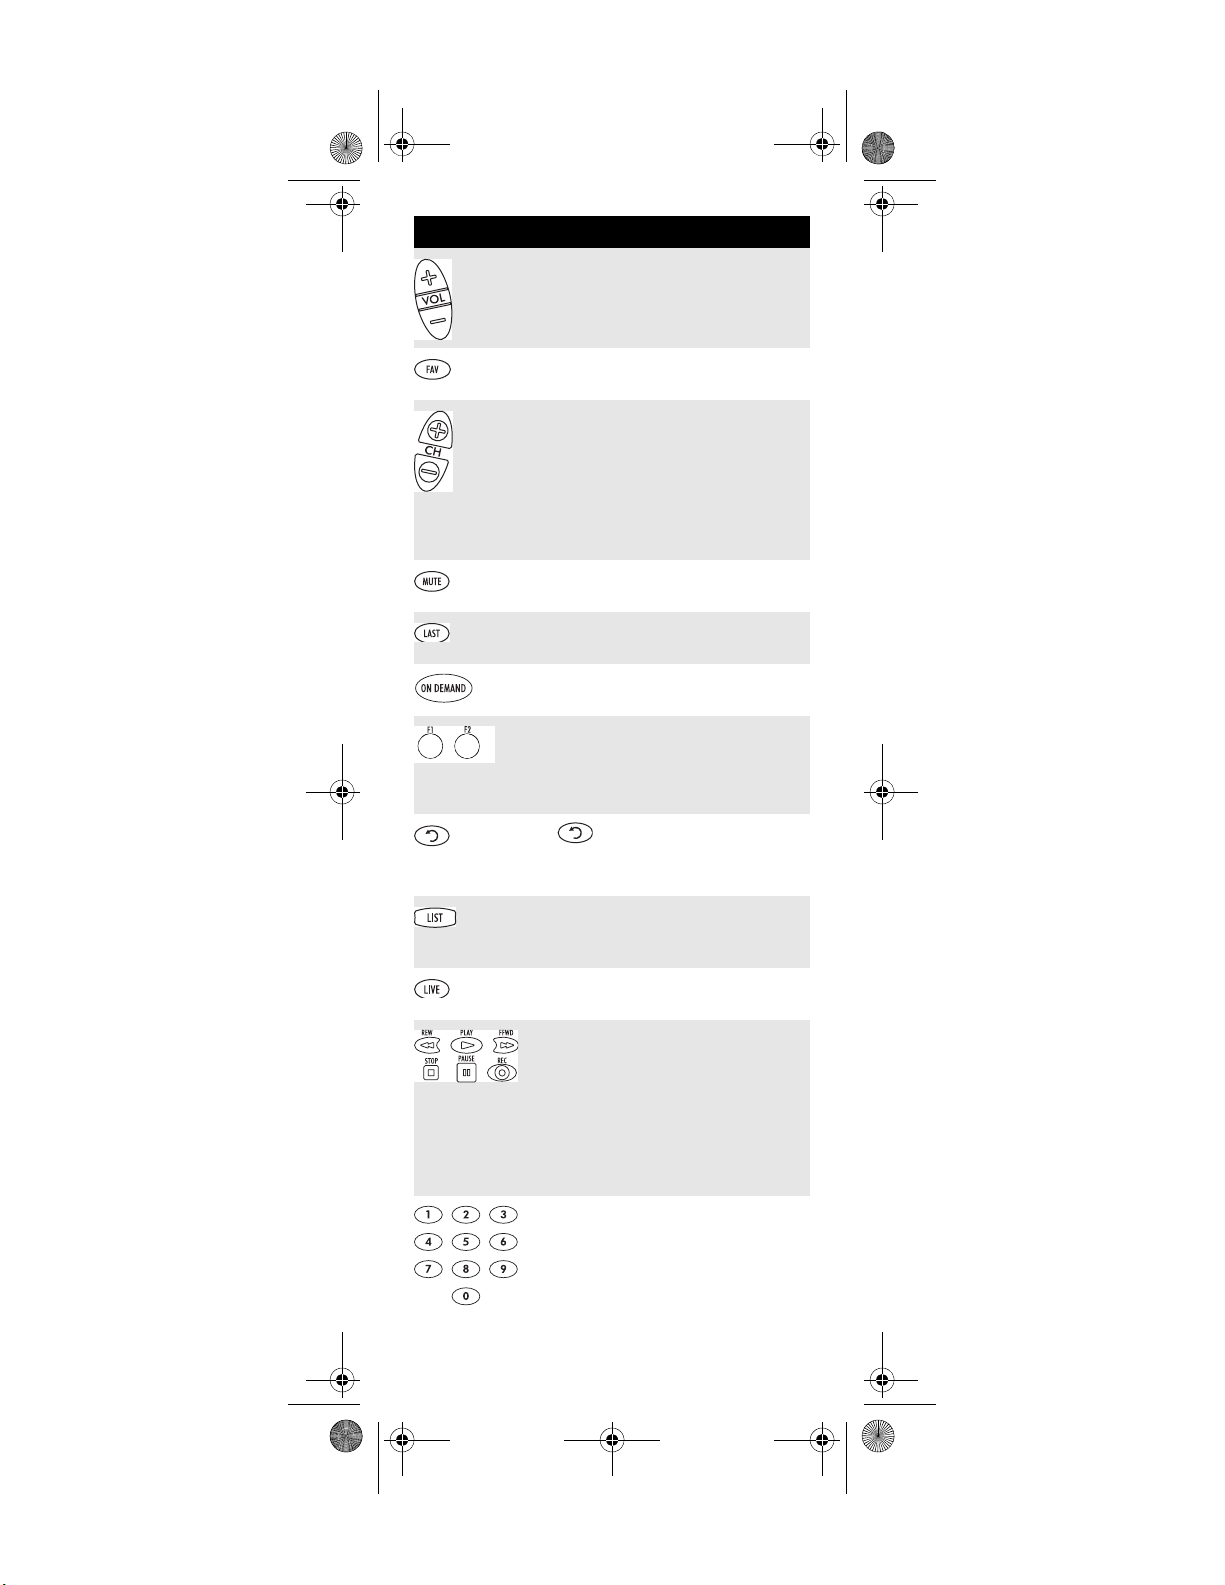
Key Function
Use VOL+ (or VOL-) to raise (or lower)
the audio volume.
Use FAV to cycle through your favorite
channels stored in your cable converter.
Use CH+ (or CH-) to select the next
higher (or lower) channel.
For DVD players, use these keys to skip
forward (or reverse) through chapters.
For amplifiers/receivers, use these keys
to select the next higher (or lower)
preset station.
Press MUTE once to turn the sound off
or on.
Press LAST once to recall the last
channel.
Press ON DEMAND to access Video on
Demand services.
Reserved for use as Macro keys (see
“Programming Macro Keys” on
page 17).
Use to command your PVR/DVR
cable box to instantly replay the last 7
seconds of a program you are watching.
Press LIST once to display a list of
recorded shows on your PV R/DVR cable
box.
Press LIVE to command your PVR/DVR
cable box to return to watching live TV.
In all modes except CBL, use REW, PLAY,
FFWD, STOP, and PAUSE to control a
VCR, DVD player, or a PVR (after
selecting a desired device). To record in
the VCR mode, press REC twice.
In the CBL mode, use these keys to
control the DVR/PVR functions of the
set-top box.
Use the keypad numbers (1-9, and 0) to
directly tune channels (e.g., 09).
For amplifiers/receivers, use the keypad
numbers to select inputs 1 through 10.
www.urcsupport.com/atlasocap
7
Page 8
Atlas OCAP M1056.fm Page 8 Tuesday, March 24, 2009 4:45 PM
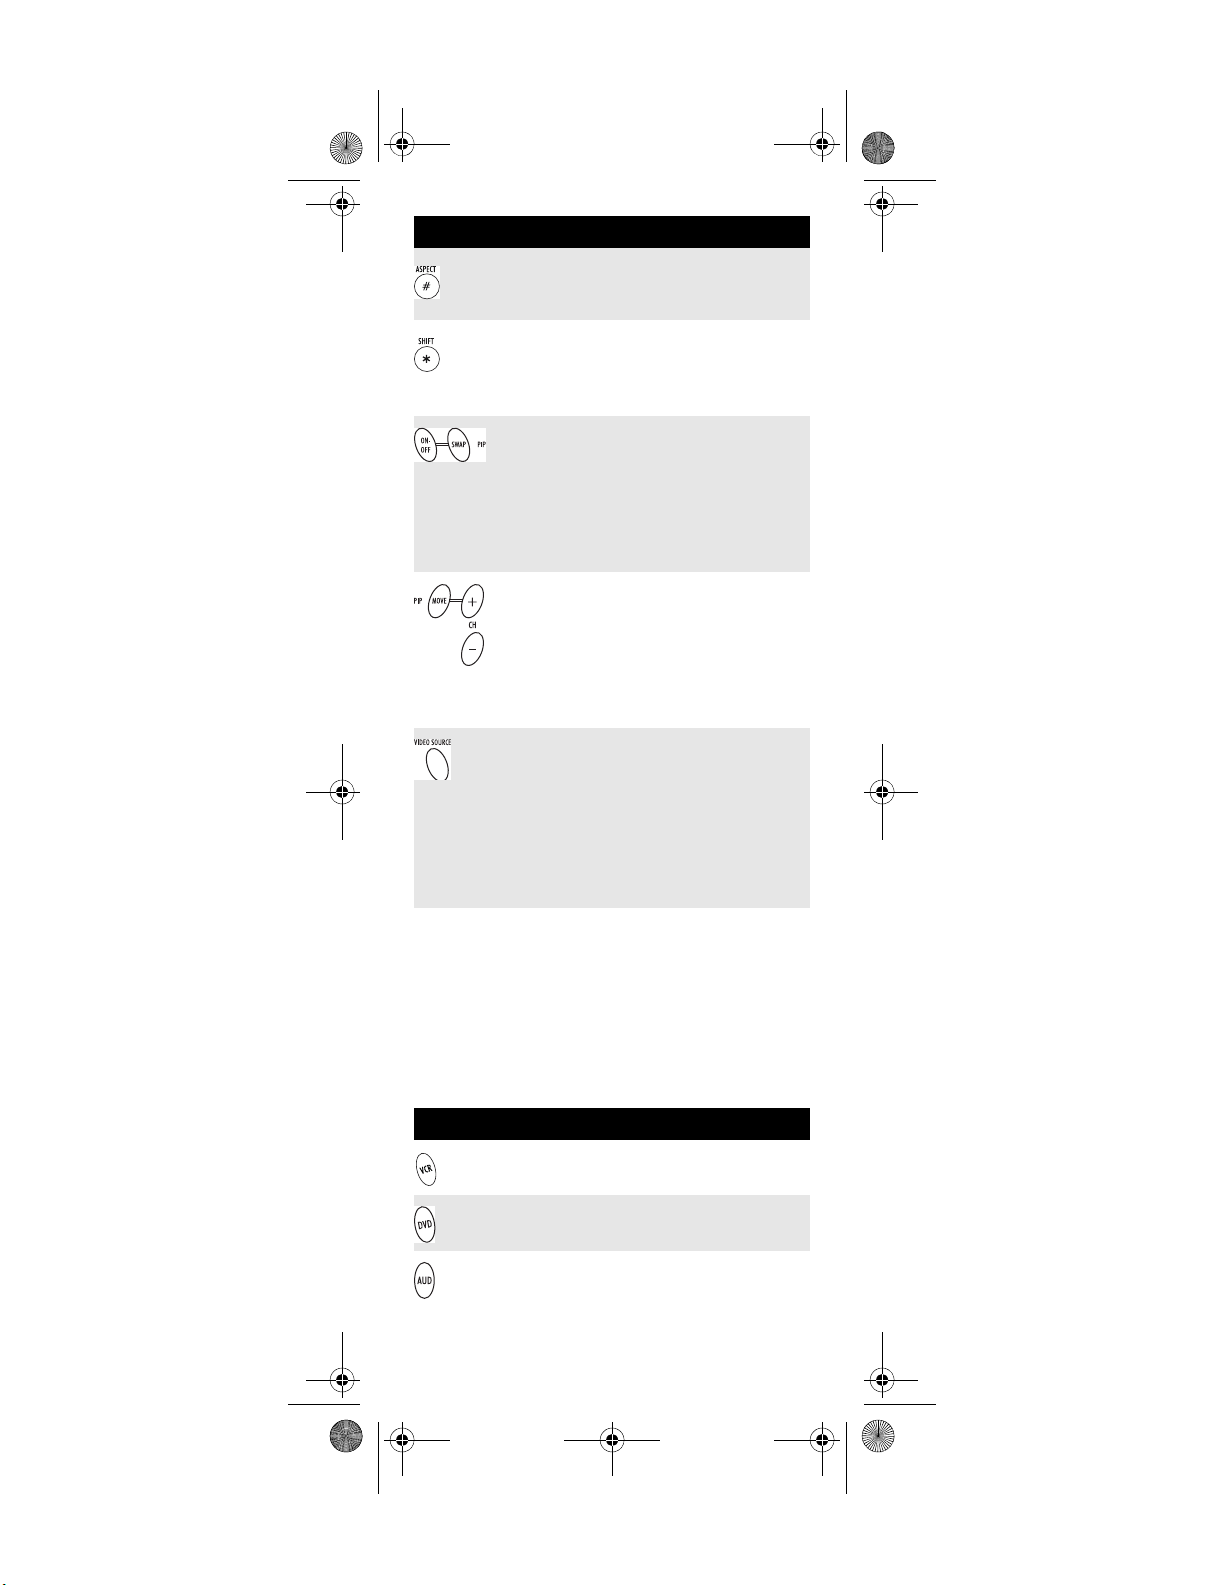
Key Function
P
ress
ASPECT
once to change the aspect
ratio of the show you are watching. (Not
available on all set-top boxes)
.
Press SHIFT to access additional cable
features (see your cable converter’s
manual).
Use PIP ON-OFF to switch the PictureIn-Picture feature on or off (if available
on your TV or cable service).
Use PIP SWAP to switch images and
sound between the main and window
pictures (if available on your TV or
cable service).
U
se
PIP MOVE
to move the window picture
to different positions in the main picture
(if available on your TV or cable
service).
Use PIP CH+ (or CH-) to select the next
higher (or lower) PIP channel (if
available on your TV or cable service).
In the CBL mode, use VIDEO SOURCE to
view other video sources (A or B)
instead of cable.
In all TV mode, use VIDEO SOURCE to
watch TV or video/DVD programs on a
desired device.
For amplifiers/receivers, use VIDEO
SOURCE to select an input source.
Device Table
NOTE: Please refer to the table below when
performing the instructions in
“Programming Device Control” on page 10 or
“Setting Up a Combo Unit” on page 11.
After programming, the Atlas OCAP 5-Device Remote
Control will be able to control the following types of
devices:
Device Key Controls these types of devices
VCR, TV/VCR Combo, PVR (Personal
Video Recorder), or extra DVD Player
DVD Player, or extra VCR, TV/VCR
Combo or PVR
Audio Amplifier, Tuner, or Receiver
www.urcsupport.com/atlasocap
8
Page 9
Atlas OCAP M1056.fm Page 9 Tuesday, March 24, 2009 4:45 PM
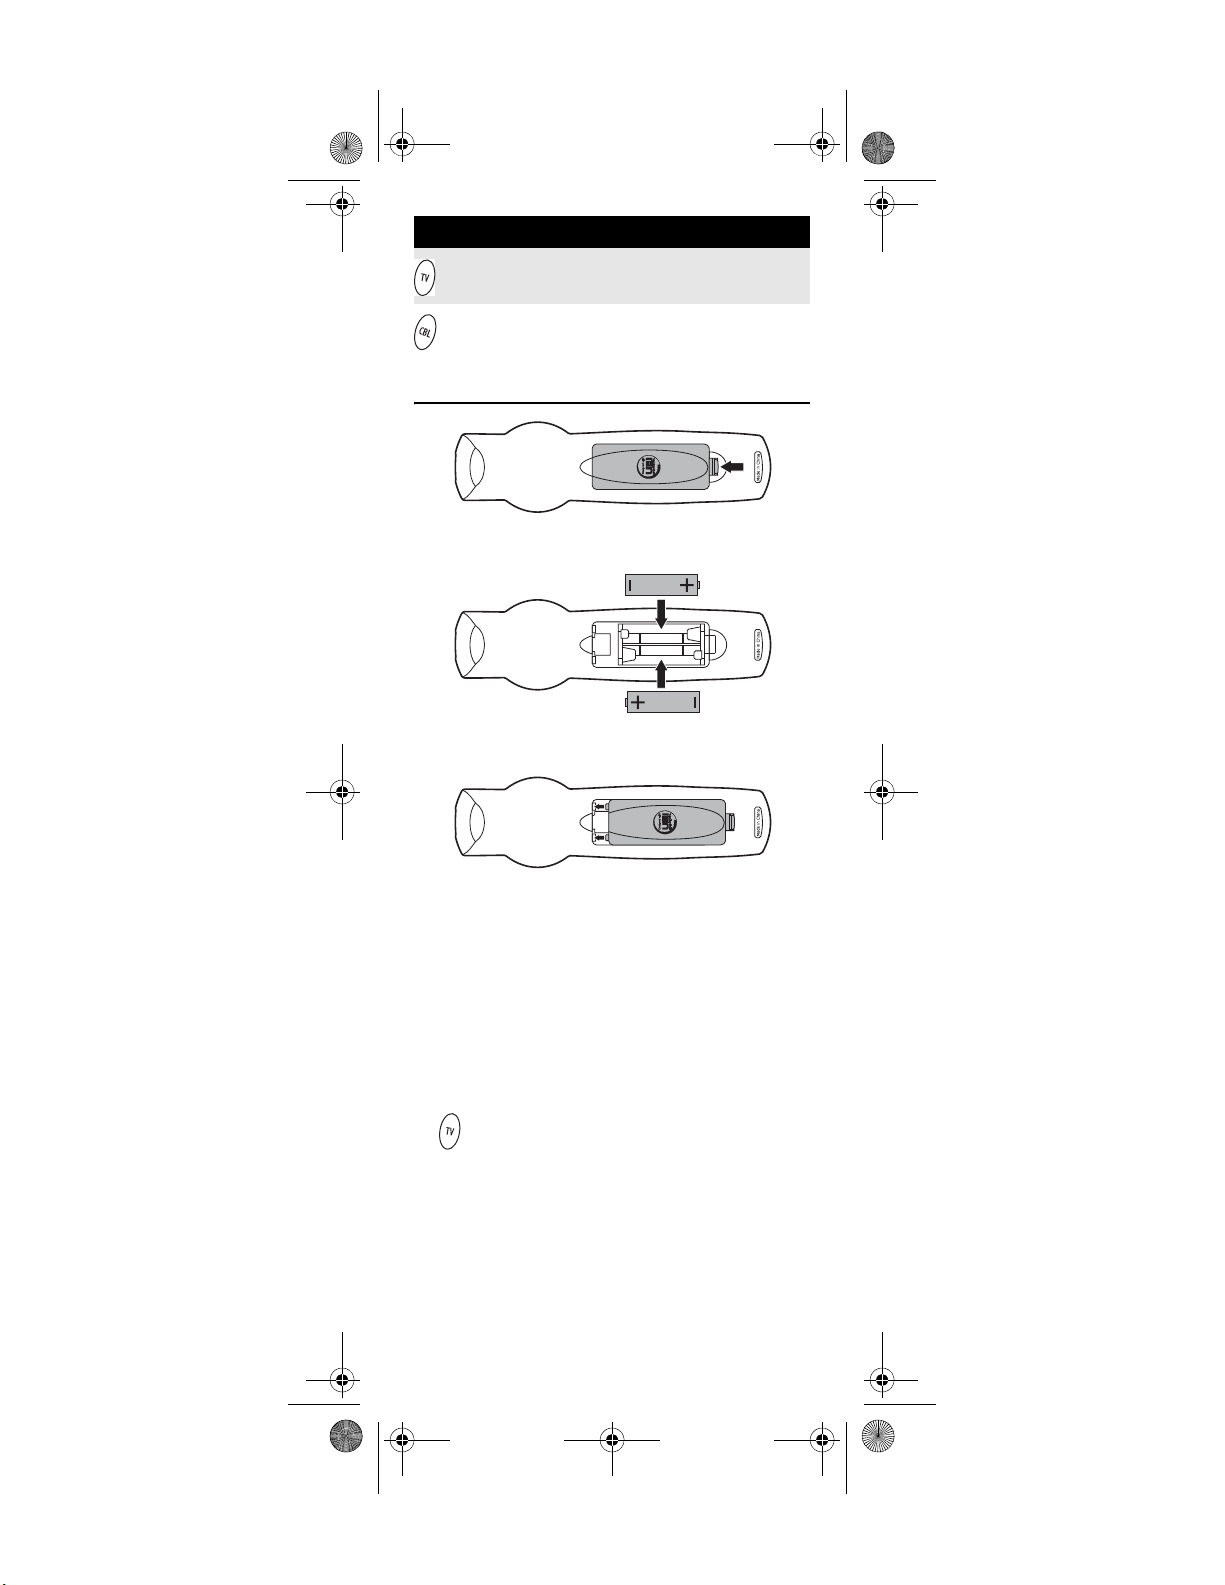
Device Key Controls these types of devices
Te l e v i s i o n
Cable Box (Converter) or Satellite
Receiver
INSTALLING BATTERIES
❶
❷
❸
1. On the back of the remote control, push the
tab and lift off the battery cover.
2. Locate the two (2) enclosed AA batteries.
Match the + and - marks with those in the
battery case, then insert them.
3. Align the covers keys with the cases holes and
4. Test the remote control by pressing any mode
NOTE: When batteries need replacement, the remote
press the cover back into place. The tab should
click when the cover is locked.
key (e.g., TV). If the batteries are inserted
correctly, the LED (red light) will blink once.
control will cease to operate. Replace the
batteries and the unit will be restored to its
full functionality, complete with your favorite
settings.
www.urcsupport.com/atlasocap
9
Page 10
Atlas OCAP M1056.fm Page 10 Tuesday, March 24, 2009 4:45 PM
PROGRAMMING DEVICE CONTROL
The Atlas OCAP 5-Device Remote Control is
preprogrammed to operate the cable box (converter)
provided by your cable system, an RCA TV, a Toshiba
DVD player, an RCA VCR, and a Pioneer audio receiver.
To control devices other than the default brands,
perform the following steps; otherwise skip this section.
NOTES: For control of a Combo device (for example, a
TV/VCR combo), skip this section and perform the inst ructions on “Setting Up a Combo
Unit” on page 11. Also refer to “Device Table”
on page 8 to find out which devices can be
programmed onto each device key.
If you have another brand of cable converter
or a satellite receiver you would like to control,
you’ll need to unlock the cable ID Lock before
changing the converter code (see “Programming Cable ID Lock” on page 17).
1. Turn on a device and, if applicable, insert
video media, (e.g., cassette or disc).
NOTE: Please read steps 2 through 4 completely
before proceeding. Highlight or write down
the codes and device you wish to program
before moving on to step 2.
2. On the remote control, press a device key once
(i.e., VCR, DVD, AUD, TV, or CBL); it will blink
once. Then press and hold SETUP until the
selected mode key blinks twice.
3. Use the “Manufacturer’s Codes (Codes des
manufacturiers)” starting on page 54) to
locate the type of device and brand name and
then enter the first four-digit code for your
device. If performed correctly, the selected
mode key will blink twice.
NOTE: If the selected mode key emits a long blink,
the entry is invalid. Repeat steps 2 through 3
and try entering the same code again.
4. Aim the remote control at the device and
press PWR once. The device should turn off. If
it does not, repeat steps 2 through 3, trying
each code for your brand until you find one
that works. If it still does not respond, try
searching for the code (see “Searching for
Your Code” on page 12).
NOTE: If the device does not have a PWR key, press
the(Play) key.
www.urcsupport.com/atlasocap
10
Page 11
Atlas OCAP M1056.fm Page 11 Tuesday, March 24, 2009 4:45 PM
5. Repeat steps 1 through 4 for each device you
want the remote control to operate. For future
reference, write down each working device
code in the boxes on the following page.
VCR C ode
Device Type:___________________
DVD Code
Device Type:___________________
AUD Co d e
Device Type:___________________
CBL Code
Device Type:___________________
TV Code
Device Type:___________________
SETTING UP A COMBO UNIT
If you own a combo unit such as a TV/VCR Combo or a
TV/DVD Combo, you need to follow special steps to set
it up. Perform the following instructions to control
combo device:
1. For a TV/VCR Combo, turn on your TV/VCR
Combo and insert a video cassette. (For a TV/
DVD Combo, insert a DVD).
2. On the remote control, press VCR once; it will
blink once. Then press and hold SETUP until
the VCR key blinks twice.
3. Use the “Manufacturer’s Codes (Codes des
manufacturiers)” starting on page 54 to locate
the brand name and enter the first four-digit
www.urcsupport.com/atlasocap
11
Page 12
Atlas OCAP M1056.fm Page 12 Tuesday, March 24, 2009 4:45 PM
code for your combo device (for example, TV/
VCR). If you perform this procedure correctly,
the VCR key will blink twice.
NOTE: If the VCR key did not blink twice after enter-
ing the codes last digit, repeat steps 2 through
3 and try entering the same code again.
If you’ve located a setup code that works for
your combo device (for example, a TV/VCR
Combo) and a separate TV code is also listed,
you’ll need to program this code into the
remote control to access volume control (see
“Programming Device Control” starting on
page 10).
4. Aim the remote control at your combo device
(for example, TV/VCR Combo) and press
PWR once. The device should turn off. If it
does not respond, repeat steps 2 through 3,
trying each code listed for your brand until
you find one that works. If it still does not
respond, try searching for the code
(“Searching for Your Code” starting on
page 12).
5. For future reference, write down each working
device code in the boxes below:
TV/VCR or TV/DVD Code
TV Code (if used)
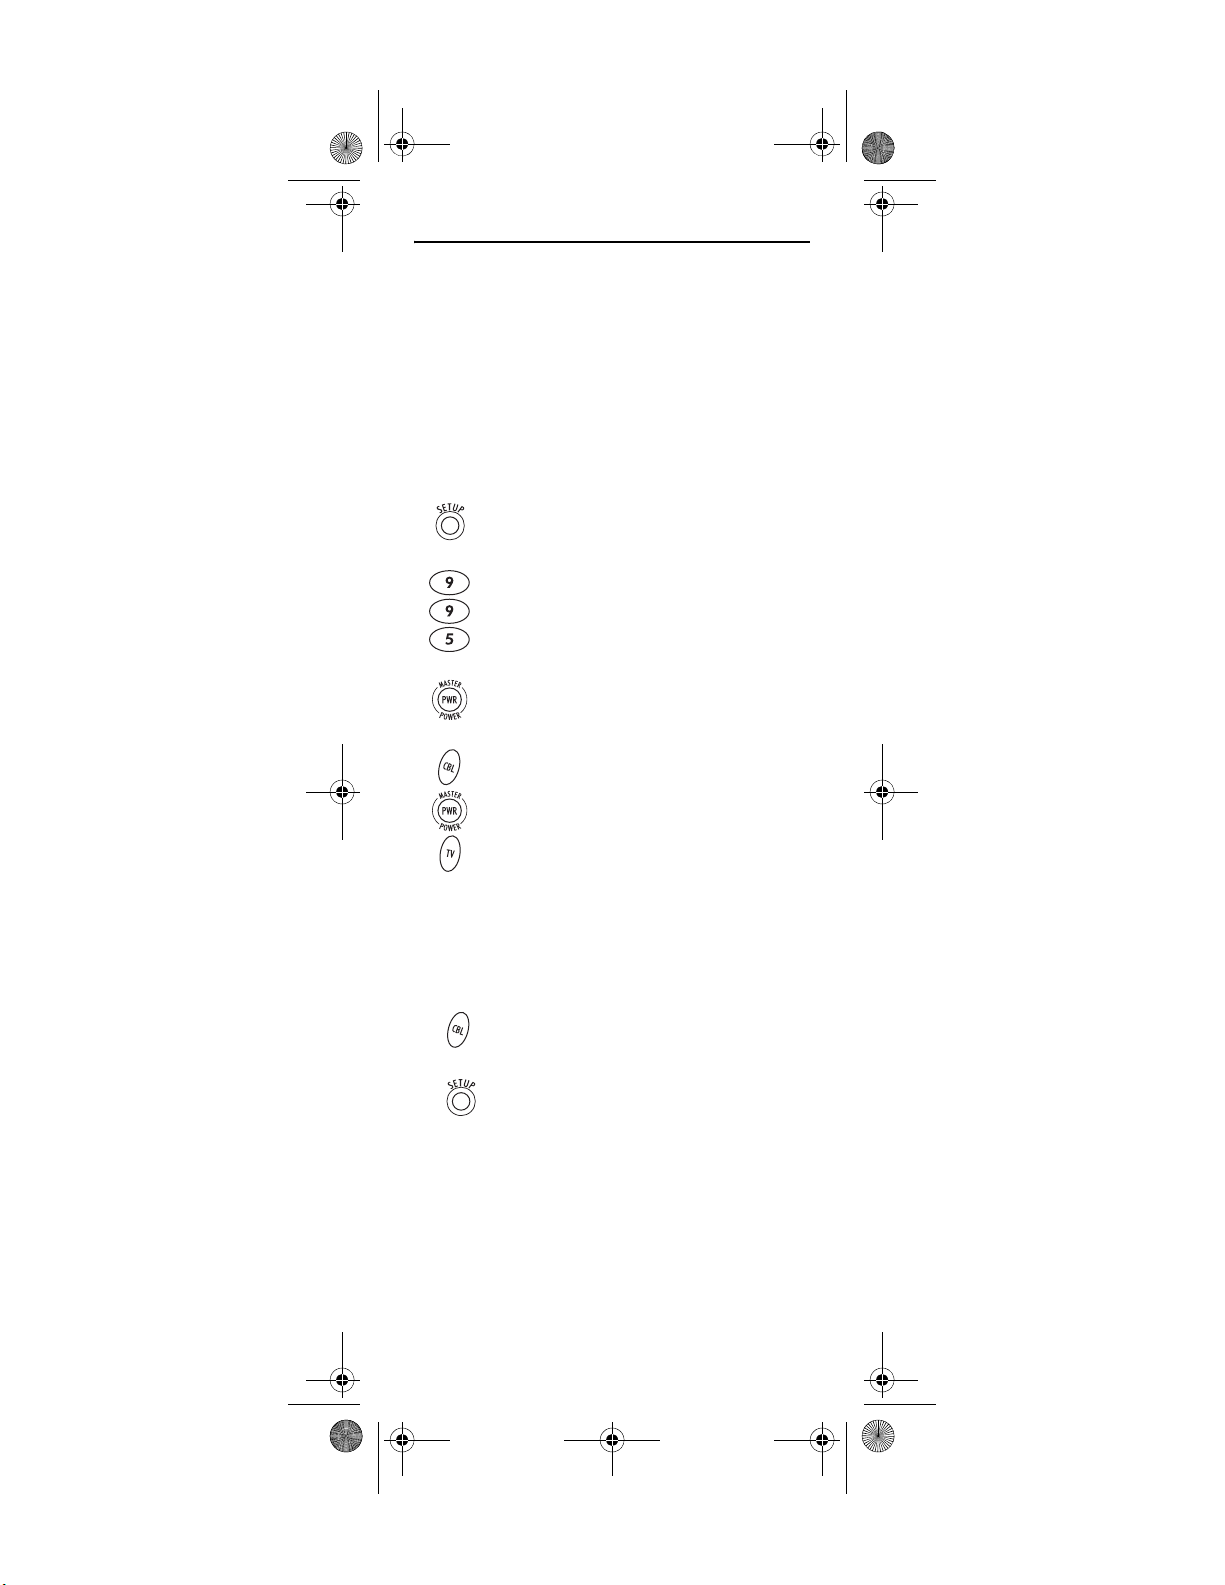
SEARCHING FOR YOUR CODE
If your home entertainment device does not respond to
the Atlas OCAP 5-Device Remote Control after tr ying all
of the codes listed for your brand, or if your brand is not
listed at all, try searching for your code.
For example, to search for a code for your TV:
1. Turn on your TV.
2. On the remote control, press TV once; it will
blink once. Then press and hold SETUP until
the TV key blinks twice.
3. Enter 9 9 1. The TV key will blink twice.
www.urcsupport.com/atlasocap
12
Page 13
Atlas OCAP M1056.fm Page 13 Tuesday, March 24, 2009 4:45 PM
4. Aim the remote control at the TV and press
PWR once.
5. Press and release the CH+ key continuously,
then stop when the TV turns off.
NOTE: In the search mode, the remote control will
send IR codes from its library to the selected
device, starting with the most popular code
first.
6. Press PWR. The TV should turn on, then press
SETUP to lock in the code.
NOTE: If the TV does not turn on during step 6, then
slowly press and release CH- to go back
through the codes, then press SETUP when the
TV turns on.
7. To search for the codes of your other devices,
repeat steps 1 through 6, but substitute the
appropriate key (e.g., VCR, DVD, AUD, or CBL)
for the device you are searching for.
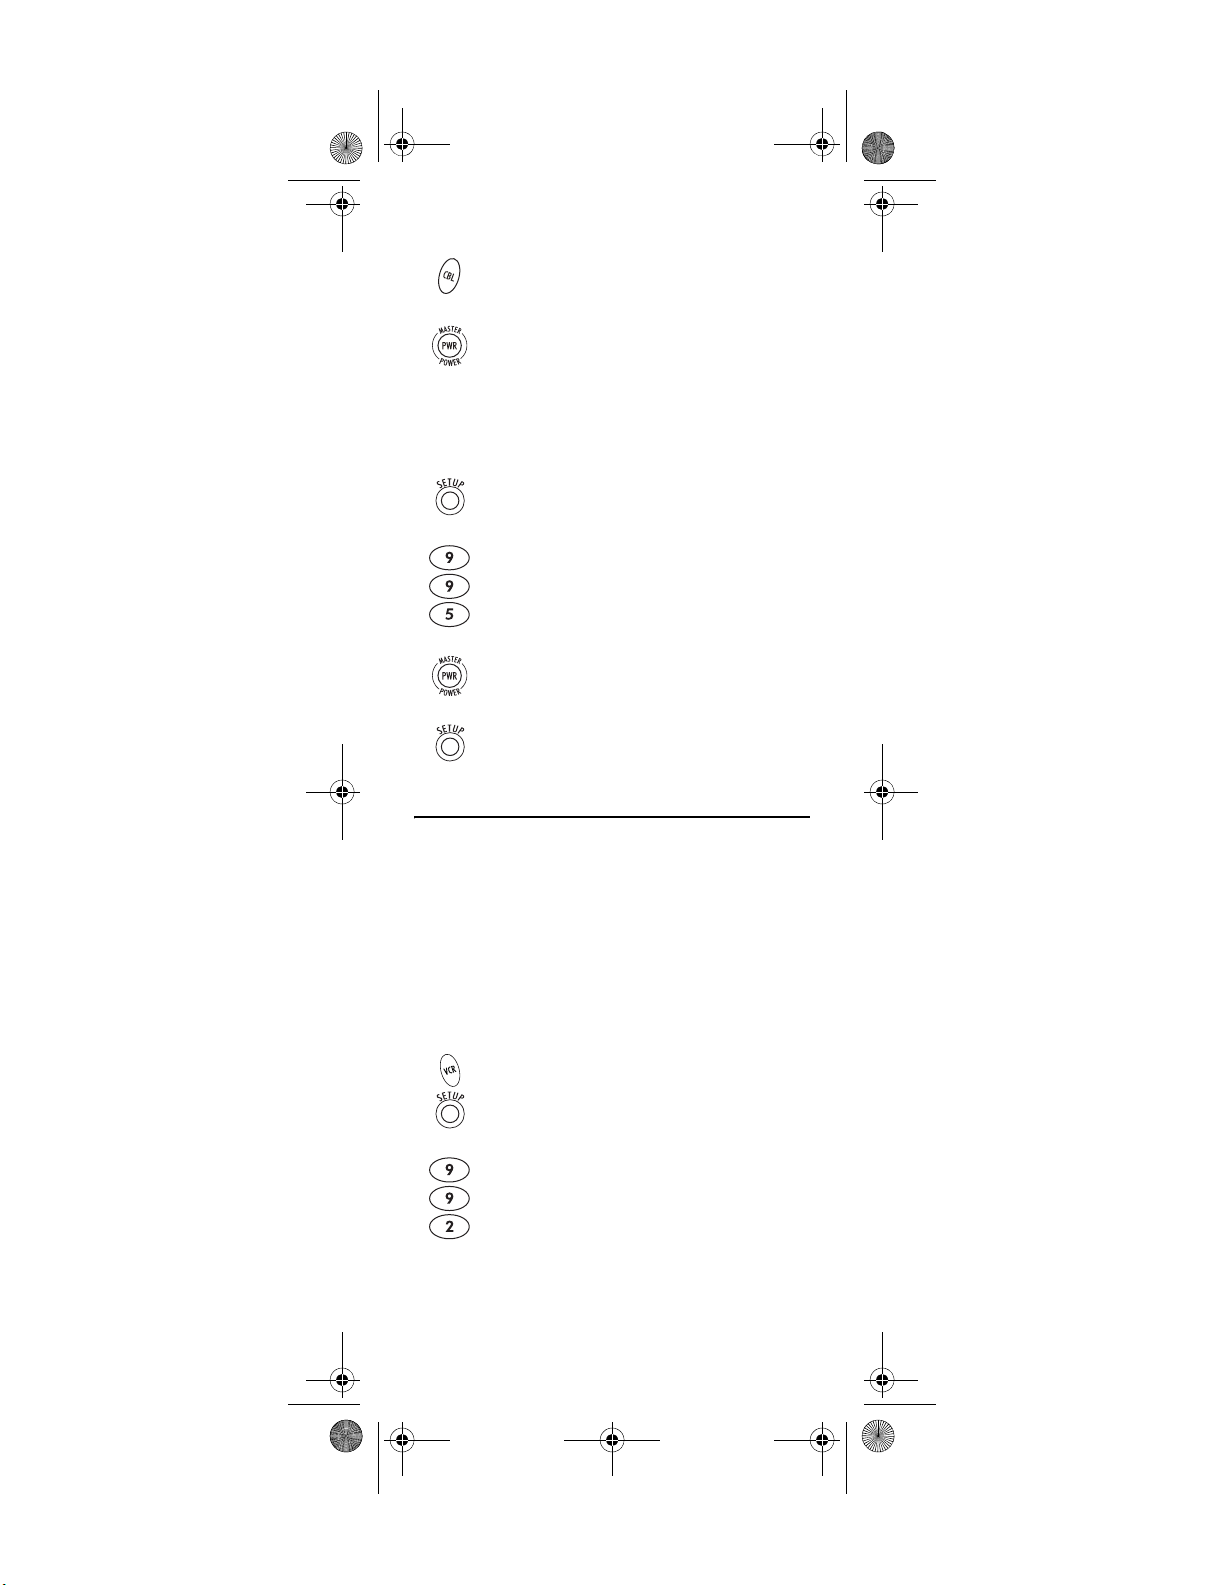
CHECKING THE CODES
If you have set up the Atlas OCAP 5-Device Remote
Control by searching for your device code (on the
previous page), you may need to find out which fourdigit code is operating your equipment.
F
or example, to find out which code is operating your TV
1. On the remote control, press TV once; it will
blink once. Then press and hold SETUP until
the TV key blinks twice.
2. Enter 9 9 0. The TV key will blink twice.
3. To view the code for the first digit, press 1
once. Count the number of times the TV key
blinks (e.g., 3 blinks = 3) and write down the
number in the leftmost TV Code box on
page 11.
NOTE: If a code digit is 0, the selected mode key will
not blink.
:
www.urcsupport.com/atlasocap
13
Page 14
Atlas OCAP M1056.fm Page 14 Tuesday, March 24, 2009 4:45 PM
4. Repeat step 3 three more times for the
remaining digits. Use 2 for the second digit, 3
for the third digit, and 4 for the fourth digit.
Finish writing down the code in the TV Code
boxes on page 11.
5. To check for other device codes, repeat steps 1
through 4, but substitute the appropriate key
(e.g., VCR, DVD, AUD, or CBL) for the device
you are checking. Write down the codes in the
appropriate boxes on page 11.
PROGRAMMING CHANNEL CONTROL LOCK
By default, the remote control’s channel-control
capabilities are locked to the cable converter. The
affected keys
will guarantee that you do not inadvertently change a
channel on your TV or VCR. However, you can deactivate this feature to allow full access to these keys in
the TV and VCR modes.
*
NOTE: This feature does not affect the AUD mode.
Unlocking Channel Control
1. On the remote control, press CBL once; it will
2. Enter 9 7 3. The CBL key will blink twice.
*
are 1 through 0, CH+, CH-, and LAST. This
blink once. Press and hold SETUP until the
CBL key blinks twice.
3. Press CH- once. The CBL key will blink four
times.
Now the remote control will provide TV and VCR
channel-control capabilities while in the TV or VCR
mode.
Locking Channel Control to CBL
1. On the remote control, press CBL once; it will
blink once. Press and hold SETUP until the
CBL key blinks twice.
2. Enter 9 7 3.The CBL key will blink twice.
www.urcsupport.com/atlasocap
14
Page 15
Atlas OCAP M1056.fm Page 15 Tuesday, March 24, 2009 4:45 PM
3. Press CH+ once. The CBL key will blink twice.
Now, regardless of what mode you select (except AUD),
the channel keys will only change channels on your cable
converter.
CHANGING VOLUME LOCK
Volume Lock allows you to control the volume through
the device identified as having your primary speaker(s),
regardless of which mode you are using. On the Atlas
OCAP 5-Device Remote Control, Global Volume Lock is
set to TV, so you can control TV volume while in the VCR,
DVD, TV or CBL mode. You can perform Individual
Volume Unlock on a selected device to set its volume
control for independent operation.
NOTE: The audio mode’s (AUD) volume controls are
Unlocking Volume Control for a Single Device
(Individual Volume Unlock)
1. Assuming Globa l Volume Lock is act ive, select
2. Enter 9 9 3. The last-selected device key will
active regardless of Volume Lock settings.
However, if you lock the volume controls to
the AUD mode, you will have control of the
audio device’s volume in all other modes (i.e.,
VCR, DVD, TV, and CBL). This can be an advan-
tage if, for example, you always listen to home
entertainment devices through your receiver’s
speakers.
a mode on the remote control that you want to
unlock (e.g., CBL) and press it once. Next,
press and hold SETUP until the device key
blinks twice.
blink twice.
3. Press VOL- once. The last-selected device key
will blink four times.
4. Repeat steps 1 through 3 for each device you
want volume to be unlocked.
Now, after you select a device that has volume unlocked
(e.g., CBL), pressing VOL+, VOL-,or MUTE, will control
only that device’s volume.
www.urcsupport.com/atlasocap
15
Page 16
Atlas OCAP M1056.fm Page 16 Tuesday, March 24, 2009 4:45 PM
Unlocking All Volume Control (Global Volume Unlock)
NOTE: Performing these instructions will set inde-
pendent volume control for all programmed
devices.
1. On the remote control, press and hold SETUP
until the last-selected device key blinks twice.
2. Enter 9 9 3. The last-selected device key will
blink twice.
3. Press VOL+ once. The last-selected device key
will blink four times.
Locking Volume Control To One Mode (Global
Volume Lock)
NOTE: The audio mode’s volume controls are active
regardless of Volume Lock settings. However,
if you lock the volume controls to the AUD
mode, you will control the audio device’s volume in all other modes (i.e., VCR, DVD, TV, or
CBL). This can be an advantage if, for example, you always listen to home entertainment
devices through your receiver’s speakers.
1. On the remote control, press and hold SETUP
until the last-selected device key blinks twice.
2. Enter 9 9 3. The last-selected device key will
blink twice.
3. Select a mode (e.g., TV or AUD) which you
want to use to control the volume. The
selected device key will blink twice.
Now, when you press VOL+, VOL-,or MUTE, the volume of
the selected device (e.g., TV) is controlled regardless of
mode.
www.urcsupport.com/atlasocap
16
Page 17
Atlas OCAP M1056.fm Page 17 Tuesday, March 24, 2009 4:45 PM
PROGRAMMING CABLE ID LOCK
The Atlas OCAP 5-Device Remote Control is locked at
the factory to operate your cable provider’s set top box.
However, if you have another brand or model of cable
converter or satellite service that you would like to
control, then you’ll need to perform the following steps
to unlock the ID Lock, enter a new manufacturer’s code,
and lock the ID Lock again.
1. Turn on the cable converter.
2. On the remote control, press CBL once; it will
blink once. Then press and hold SETUP until
the CBL key blinks twice.
3. Enter 9 8 2. The CBL key will blink four
times, indicating ID Lock is unlocked.
4. Perform the instructions under
5. On the remote control, press CBL once; it will
6. Enter 9 8 2. The CBL key will blink twice,
“Programming Device Control” on page 10 to
program device control for the desired cable
converter or satellite receiver.
When you are done, perform steps 5 and 6 on
this page to again lock the cable ID Lock.
blink once. Then press and hold SETUP until
the CBL key blinks twice.
indicating ID Lock is again locked.
PROGRAMMING MACRO KEYS
The Atlas OCAP 5-Device Remote Control includes two
macro keys (located directly below the MUTE and LAST
keys). Macro keys allow you to set up key macros to
acti vate cer tain keys i n a specif ic order. For exampl e, you
can set up a key macro to change the channels on your
TV, raise or lower the volume, and start recording on
your VCR, all with the touch of one key. If you want to
change the macros stored in a previously-programmed
macro key, you’ll need to clear the key first (see
“Clearing a Macro Key” on page 18).
www.urcsupport.com/atlasocap
17
Page 18
Atlas OCAP M1056.fm Page 18 Tuesday, March 24, 2009 4:45 PM
Programming a Macro Key
1. On the remote control, press and hold SETUP
until it blinks twice.
2. Enter 9 9 5. The SETUP key blinks twice.
3. Select a macro key (for example, F1) and
press it once.
4. Press the key sequence you want to program
into the macro. For example, to turn on your
TV and raise its volume, press TV followed by
VOL+.
NOTE: You can program up to 15 key presses into one
macro.
5. Press and hold SETUP until it blinks twice.
6. To add another macro, repeat steps 1 through
5, substituting the new key sequence to be
added in step 4.
NOTE: Programming more than five macros on the
same macro key overwrites previous settings.
Clearing a Macro Key
1. On the remote control, press and hold SETUP
until it blinks twice.
2. Enter 9 9 5. The SETUP key blinks twice.
3. Press the macro key you want to clear once.
4. Press and hold SETUP until it blinks twice.
This macro key is now clear and ready for
reprogramming (see “Programming a Macro Key” on
page 18). If desired, repeat these to clear another TuneIn key.
www.urcsupport.com/atlasocap
18
Page 19
Atlas OCAP M1056.fm Page 19 Tuesday, March 24, 2009 4:45 PM
USING THE MASTER POWER KEY
The Atlas OCAP 5-Device Remote Control has a unique
feature that allows you to sequentially turn up to five of
your home entertainment devices on or off with a single
key press.
NOTE: MASTER POWER (PWR) only works in the CBL
mode. If it is not programmed, only the cable
converter will turn on or off. In any other
mode, pressing MASTER POWER (PWR) once
will turn the selected device on or off.
Programming the Master Power Key
1. On the remote control, press and hold SETUP
until the last-selected device key blinks twice.
2. Enter 9 9 5. The last-selected device key
blinks twice.
3. Press PWR once.
4. For the first device you want in the power on
sequence, press a device key (e.g., CBL) once.
Then press PWR once. For the second device
in the power sequence, press its key once (e.g,
TV). Then press PWR.
5. Repeat step 4 up to four more times to add the
second, third, fourth, and fifth device, as
desired.
6. To save the settings and exit the program:
a. Press CBL once.
b. Press and hold SETUP until the CBL key blinks
twice.
www.urcsupport.com/atlasocap
19
Page 20
Atlas OCAP M1056.fm Page 20 Tuesday, March 24, 2009 4:45 PM
Using the Master Power Key
1. After programming, point the remote control
at the devices. Press CBL once.
2.
Press
PWR
once to sequentially turn the
programmed home entertainment devices on
or off.
You will see the devices turn on or off according to the
programmed sequence.
Clearing the Master Power Key
1. On the remote control, press and hold SETUP
until the last-selected device key blinks twice.
2. Enter 9 9 5. The last-selected device key
blinks twice.
3. Press and release PWR.
4. Press and hold SETUP until the CBL key blinks
twice.
RE-ASSIGNING DEVICE KEYS
The Atlas OCAP 5-Device Remote Control can be set up
to control a second device of an already-assigned type.
For example, to have the unit control a TV, a Cable
Converter, and two audio devices (for example, two
audio receivers), re-assign the unused VCR key to
operate the second audio device as follows:
NOTE: VCR is preset at the factory to control an RCA
1. On the remote control, press VCR once; it will
VCR. Performing the steps below will overwrite those settings.
blink once. Then press and hold SETUP until
the VCR key blinks twice.
2. Enter 9 9 2. The VCR key will blink twice.
www.urcsupport.com/atlasocap
20
Page 21
Atlas OCAP M1056.fm Page 21 Tuesday, March 24, 2009 4:45 PM
3. Press AUD once, then press VCR once. The VCR
key will blink twice.
The VCR key is now ready to be programmed for your
second audio device. See “Programming Device
Control” on page 10. To re-assign other device keys,
repeat these and substitute the key sequence using the
following chart:
NOTE: Only one device can be assigned to an unused
device key at a time.
To Re-Assign Perform Key Sequence
VCR as 2nd
VCRÆSETUPÆ9Æ9Æ2ÆAUDÆVCR
AUD ke y
VCR as 2nd
VCRÆSETUPÆ9Æ9Æ2ÆTVÆVCR
TV key
VCR as 2nd
VCRÆSETUPÆ9Æ9Æ2ÆCBLÆVCR
CBL key
VCR back to
VCRÆSETUPÆ9Æ9Æ2ÆVCRÆVCR
VCR
To re-assign another unused device key, substitute it for
the VCR key above and then perform the sequence. For
example, to re-assign an unused AUD key as a second
DVD key, perform
AUDÆSETUPÆ9Æ9Æ2ÆDVDÆAUD.
When a re-assignment is done, the selected device key
(e.g., AUD) will blink twice to confirm your choice. At
that time, you will need to program device control (see
“Programming Device Control” on page 10).
www.urcsupport.com/atlasocap
21
Page 22
Atlas OCAP M1056.fm Page 22 Tuesday, March 24, 2009 4:45 PM
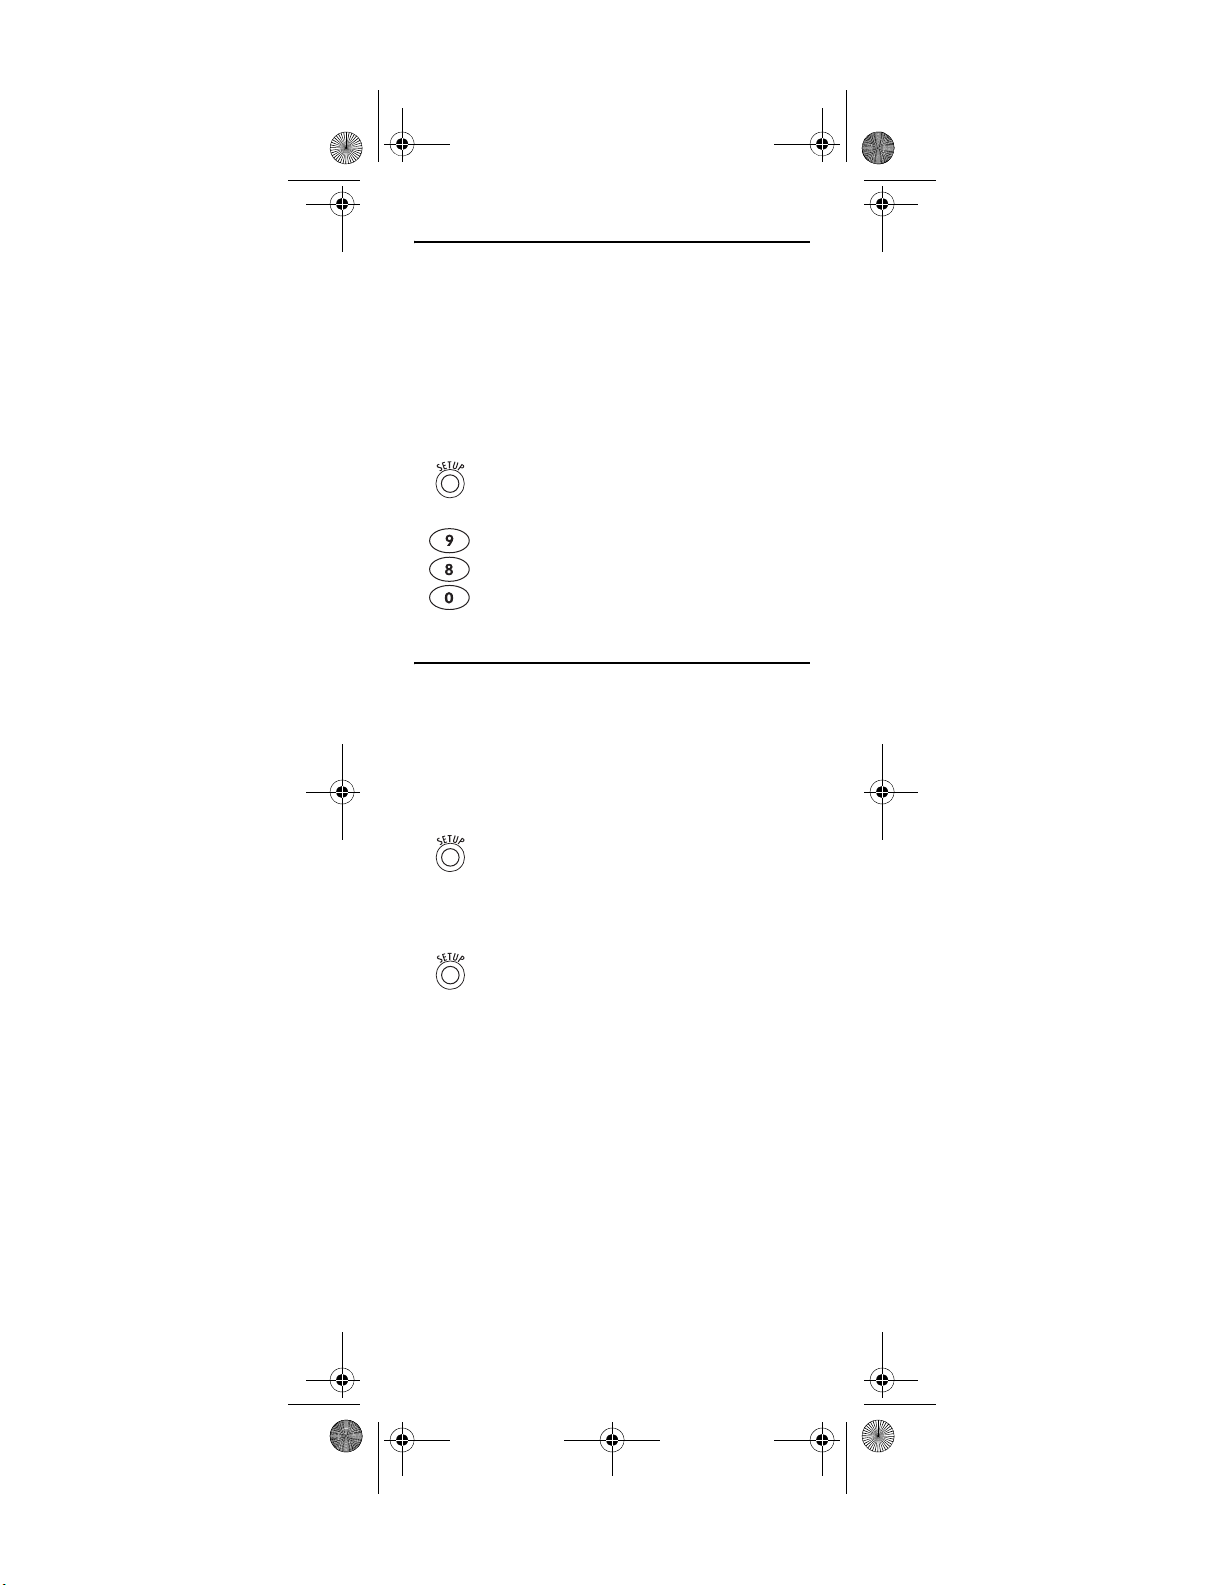
CLEARING CUSTOM PROGRAMMING
The Atlas OCAP 5-Device Remote Control contains a
Custom Programming Reset program. You can use it to
remove all custom programming, except your setup
codes and reassigned device keys.
IMPORTANT: Executing this program will erase all cus-
tom settings for Volume Lock, Learned Keys,
Tune-In Keys, and Channel Lock. However,
your device programming remains.
1. On the remote control, press and hold SETUP
until the last-selected device key blinks twice.
2. Enter 9 8 0. The last-selected device key
blinks twice, pauses, and blinks twice again to
confirm that all custom programming is
cleared.
ACTIVATING BACKLIGHTING (OPTIONAL)
On some models of your Atlas OCAP 5-Device Remote
Control, you can activate backlighting. Backlighting
enables your remote’s keypad to remain lit for five
seconds after you press any key. To enable backlighting
on a remote with that feature, perform the following
step:
1. Press SETUP twice within one second.
Backlighting is turned on.
To disable backlighting, perform the following step:
1. Press SETUP twice within one second.
Backlighting is turned off.
www.urcsupport.com/atlasocap
22
Page 23

Atlas OCAP M1056.fm Page 23 Tuesday, March 24, 2009 4:45 PM
TROUBLESHOOTING
PROBLEM: Device key does not blink when you press a
key.
SOLUTION: Replace the batteries with two (2) new AA
batteries (see “Installing Batteries” on page 9).
PROBLEM: Device key blinks when you press a key, but
home entertainment device does not respond.
SOLUTION: Make sure you are ai ming the remote control
at your home entertainment device and that you are
within 15 feet of the device you are trying to control.
PROBLEM: The remote control does not control home
entertainment devices or commands are not performing
properly.
SOLUTION: Try all listed codes for the device brand
being set up. Make sure all devices can be operated with
an infrared remote control.
PROBLEM: TV/VCR Combo does not respond properly.
SOLUTION: Use the VCR codes for your brand. Some
combo units may require both a TV code and a VCR
code for full operation (see page 11).
PROBLEM: No volume on a second TV.
SOLUTION: Follow instructions under “Changing
Volume Lock” on page 15.
PROBLEM: PLAY and STOP keys do not work on a
Motorola DCT-2000 cable converter.
SOLUTION: Re-program the CBL key for cable code 0476
(see “Programming Device Control” on page 10).
PROBLEM: Tried Search Method and still could not find
a working code.
SOLUTION: Try the Search Method again after clearing
out the device key as follows:
a. Press and hold SETUP until device key blinks twice.
b. Enter 9 9 2.
c. Press and release the device key to be cleared twice.
PROBLEM: Remote control does not turn on Sony or
Sharp TV/VCR Combo.
SOLUTION: For power on, these products require
programming TV codes on the remote control. For Sony,
use TV code 0000 and VCR code 0032. For Sharp, use
TV code 0093 and VCR code 0048.
www.urcsupport.com/atlasocap
23
Page 24
Atlas OCAP M1056.fm Page 24 Tuesday, March 24, 2009 4:45 PM
FCC NOTICE
This equipment has been tested and found to comply
with the limits for a class B digital device, pursuant to
part 15 of the FCC Rules. These limits are designed to
provide reasonable protection against harmful
interference in a residential installation. This equipment
generates, uses and can radiate radio frequency energy
and if not installed and used in accordance with the
instructions, may cause harmful interference to radio
communications.
However, there is no guarantee that interference will not
occur in a particular installation. If this equipment does
cause harmful interference to radio or television
reception, which can be determined by turning the
equipment off and on, the user is encouraged to try to
correct the interference by one or more of the following
measures:
• Reorient or relocate the receiving antenna.
• Increase the separation between the equipment and
receiver.
• Connect the equipment into an outlet on a circuit
different from that to which the receiver is
connected.
• Consult the dealer or an experienced radio/TV
technician for help.
This equipment has been verified to comply with the
limits for a class B computing device, pursuant to FCC
Rules. In order to maintain compliance with FCC
regulations, shielded cables must be used with this
equipment. Operation with non-approved equipment or
unshielded cables is likely to result in interference to
radio and TV reception. The user is cautioned that
changes and modifications made to the equipment
without the approval of manufacturer could void the
user’s authority to operate this equipment.
ADDITIONAL INFORMATION
This product does not have any user-serviceable parts.
Opening the case, except for the battery cover, may cause
permanent damage to your Atlas OCAP 5-Device Remote
Control.
• For help via the Internet, visit us at:
www.urcsupport.com
©Copyright 2006 by Universal Electronics Inc. No part of this
publication may be reproduced, transmitted, transcribed,
stored in any retrieval system, or translated to any language, in
any form or by any means, electronic, mechanical, magnetic,
optical, manual, or otherwise, without prior written
permission of Universal Electronics Inc.
M1056F 3/09
www.urcsupport.com/atlasocap
24
Page 25

Atlas OCAP M1056.fm Page 25 Tuesday, March 24, 2009 4:45 PM
TABLE DES MATIÈRES
Information Préliminaire . . . . . . . . . . . . . . . . . . . . . . . . . . . . . . . . .27
Caractéristiques et Fonctions . . . . . . . . . . . . . . . . . . . . . . . . . . . . . 28
Tableau des touches. . . . . . . . . . . . . . . . . . . . . . . . . . . . . . . .33
Tableau des appareils. . . . . . . . . . . . . . . . . . . . . . . . . . . . . . .33
Installation des piles . . . . . . . . . . . . . . . . . . . . . . . . . . . . . . . . . . . . 34
Réglage de la télécommande en fonction des appareils . . . . . . . .35
Réglage de la fonction combinée télé / vidéo . . . . . . . . . . . . . . . . . 37
Comment trouver le code de votre appareil . . . . . . . . . . . . . . . . . .38
Vérification des codes . . . . . . . . . . . . . . . . . . . . . . . . . . . . . . . . . . .39
Réglage du verrouillage du contrôle des chaînes . . . . . . . . . . . . . . 40
Déverrouillage du contrôle des chaînes . . . . . . . . . . . . . . . . 40
Verrouillage du contrôle des chaînes CBL. . . . . . . . . . . . . . . 41
Modification du verrouillage du volume. . . . . . . . . . . . . . . . . . . . . .41
Déverrouillage du réglage du volume pour un seul appareil
(déverrouillage du volume individuel) . . . . . . . . . . . . . . . 42
Déverrouillage du réglage de tous les volumes (déverrouillage
général du volume) . . . . . . . . . . . . . . . . . . . . . . . . . . . . . .42
Verrouillage du réglage du volume pour un mode (verrouillage
général du volume) . . . . . . . . . . . . . . . . . . . . . . . . . . . . . .42
Réglage du verrouillage du code d'identification du
câblodistributeur. . . . . . . . . . . . . . . . . . . . . . . . . . . . . . . . . . . . .43
Réglage des touches macro. . . . . . . . . . . . . . . . . . . . . . . . . . . . . . .44
Réglage d’une touche macro . . . . . . . . . . . . . . . . . . . . . . . . .45
Effacement du réglage d'une touche macro . . . . . . . . . . . . . 45
Utilisation de la touche master Power. . . . . . . . . . . . . . . . . . . . . . .46
Réglage de la touche Master Power . . . . . . . . . . . . . . . . . . . 46
Utilisation de la touche Master Power. . . . . . . . . . . . . . . . . .47
Effacement de la touche Master Power. . . . . . . . . . . . . . . . . 47
Modification de la fonction des touches . . . . . . . . . . . . . . . . . . . . .48
Effacement des réglages personnalisés . . . . . . . . . . . . . . . . . . . . . 48
Activer la fonction rétroéclairage (en option). . . . . . . . . . . . . . . . .50
Dépannage . . . . . . . . . . . . . . . . . . . . . . . . . . . . . . . . . . . . . . . . . . . .51
Avis de la FCC . . . . . . . . . . . . . . . . . . . . . . . . . . . . . . . . . . . . . . . . . .52
Information additionnelle. . . . . . . . . . . . . . . . . . . . . . . . . . . . . . . . .53
Manufacturer’s Codes (Codes des manufacturiers) . . . . . . . . . . . . 54
Codes de configuration pour les amplificateurs audio . . . . . 54
Codes de configuration pour les récepteurs audio. . . . . . . . 54
Codes de configuration pour accessoires audio . . . . . . . . . .57
Codes de configuration pour les décodeurs . . . . . . . . . . . . . 57
Codes de configuration pour les graveurs de DVD . . . . . . . .64
Codes de configuration pour combinés DVD . . . . . . . . . . . . .64
Récepteurs de signaux satellites et systèmes ENP. . . . . . . . 65
Codes de configuration pour les récepteurs de signaux
satellites . . . . . . . . . . . . . . . . . . . . . . . . . . . . . . . . . . . . . . 65
Codes de configuration pour systèmes ENP . . . . . . . . . . . . . 66
Codes de configuration pour téléviseurs. . . . . . . . . . . . . . . . 67
Codes de configuration pour téléviseurs (DLP) . . . . . . . . . . .75
Codes de configuration pour téléviseurs (TVHD) . . . . . . . . . .75
www.urcsupport.com/atlasocap
25
Page 26
Atlas OCAP M1056.fm Page 26 Tuesday, March 24, 2009 4:45 PM
Codes de configuration pour téléviseurs (ACL) . . . . . . . . . . . 76
Codes de configuration pour combinés TV / DVD . . . . . . . . . 78
Codes de configuration pour combinés TV / magnétoscope. 79
Codes de configuration pour combinés TV / magnétoscope /
DVD. . . . . . . . . . . . . . . . . . . . . . . . . . . . . . . . . . . . . . . . . . .81
Codes de configuration pour magnétoscopes . . . . . . . . . . . .82
CONSEILS CONCERNANT LA FONCTION
RÉTROÉCLAIRAGE
Certains modèles Atlas OCAP utilisent la technique de
rétroéclairage pour illuminer la télécommande. Si votre
modèle est rétroéclairé, vous verrez une petite ampoule
sur la touche SETUP, tel qu'illustré ci-dessous.
Pour activer la fonction rétroéclairage
1. Appuyez deux fois sur la touche SETUP.
2. La fonction rétroéclairage sera activée dès que
Pour désactiver la fonction rétroéclairage
1. Appuyez deux fois sur la touche SETUP.
2. La fonction rétroéclairage sera désactivée.
vous appuyez sur une touche.
www.urcsupport.com/atlasocap
26
Page 27

Atlas OCAP M1056.fm Page 27 Tuesday, March 24, 2009 4:45 PM
INFORMATION PRÉLIMINAIRE
L'ATLAS OCAP 5 APPAREILS de Universal Electronics
est notre plus récente télécommande universelle. Sa
technologie d'avant-garde vous permet de regrouper en
une seule télécommande jusqu'à 5 télécommandes
d'appareils faisant partie de votre système de
divertissement.
Facile à utiliser, l'Atlas OCAP 5 APPAREILS comprend
de nombreuses caractéristiques de pointe telles que :
• une commande préprogrammée pour le
fonctionnement du décodeur fourni par votre
câblodistributeur
• des touches spéciales permettant la programmation
de fonctions préférées sur votre lecteur DVD et votre
ENP (enregistreur numérique personnel
•la touche Master Power programmable qui permet
une mise en marche/arrêt générale de vos appareils
de divertissement, simplement en appuyant sur un
seul bouton
• des touches de syntonisation instantanée
programmables vous permettant d'activer certaines
touches dans un ordre spécifique
• la fonction de verrouillage de la sélection des
chaînes de votre décodeur
• la touche de verrouillage du réglage du volume pour
chaque appareil individuel ou pour l'ensemble des
appareils
• la commande permettant un nouveau réglage du
rôle des touches afin de faire fonctionner deux
appareils ayant la même fonction (deux lecteurs
DVD par exemple);
• la touche de recherche de code qui facilite la
programmation d'appareils moins récents ou dont
la production a cessé
• les touches de couleur qui vous permettent d'activer
rapidement vos fonctions préférées
• un répertoire de codes pour les appareils vidéo et
audio les plus répandus.
Avant d'utiliser ce produit, vous devez installer les piles
(comprises) et effectuer une programmation de base
afin de faire fonctionner les appareils de divertissement
que vous désirez utiliser.
Assurez-vous de suivre les indications de configuration
de l'appareil contenues dans le présent guide : vous
pourrez alors profiter pleinement de votre nouvelle
télécommande et de votre service de télévision par
câble.
www.urcsupport.com/atlasocap
27
Page 28

Atlas OCAP M1056.fm Page 28 Tuesday, March 24, 2009 4:45 PM
CARACTÉRISTIQUES ET FONCTIONS
L'illustration de l'Atlas OCAP 5 APPAREILS ci-dessous
vous permet de repérer les fonctions de cette
télécommande universelle et de comprendre leur
fonctionnement à l'aide du Tableau des touches (trois
prochaines pages).
Pour connaître quels types d'appareils peuvent être
contrôlés par chacune des touches, une fois celles-ci
programmées, consultez le «Tableau des appareils» à la
page 33.
www.urcsupport.com/atlasocap
28
Page 29

Atlas OCAP M1056.fm Page 29 Tuesday, March 24, 2009 4:45 PM
Tableau des touches
Touche Fonction
Utilisez la touche SETUP pour toutes les
séquences de programmation. Utilisezla également pour activer ou désactiver
la fonction rétroéclairage, le cas
échéant.
Utilisez la touche SETUP pour toutes les
séquences de programmation. Utilisezla également pour activer ou désactiver
la fonction rétroéclairage, le cas
échéant.
Appuyez sur la touche PWR une fois
pour mettre en marche / arrêter un
appareil de votre système de
divertissement.
Pour la fonction MASTER POWER,
consultez la section «Utilisation de la
touche master Power» à la page 46.
Appuyez une fois sur VCR, DVD, AUD, TV,
ou CBL pour sélectionner un des
appareils de votre système de
divertissement.
Consultez également le «Tableau des
appareils» à la page 33.
Chaque touche de cette fonction est
munie d'une DEL (voyant lumineux
rouge) qui clignote une fois que vous
avez choisi un appareil afin de vous
indiquer que la télécommande
fonctionne bien et (après avoir été
programmée) qu'elle émet des signaux.
Utilisez la touche GUIDE pour consulter
le guide de programmation.
Appuyez une fois sur la touche
SETTINGS pour afficher les
caractéristiques additionnelles de votre
service par câble.
Utilisez la touche INFO pour afficher
l'information sur la chaîne et la
programmation en cours.
Utilisez les touches DAY+ ou DAY- pour
modifier la date sur le guide de
programmation de votre décodeur.
www.urcsupport.com/atlasocap
29
Page 30

Atlas OCAP M1056.fm Page 30 Tuesday, March 24, 2009 4:45 PM
Touche Fonction
Utilisez les touches de curseurs pour
naviguer dans le guide de
programmation, dans les écrans de
menu et pour utiliser le service
interactif.
La touche OK/SELECT permet de choisir
les options, de sélectionner des
programmes à la carte (PPV) et de
syntoniser des programmes à partir du
guide de programmation.
Utilisez les touches PAGE+ ou PAGE-
pour changer les pages des écrans de
menu et du guide.
Appuyez sur EXIT pour quitter le menu
ou le guide de votre décodeur
numérique.
Appuyez sur la touche A, B, C ou D pour
afficher des options de télé par câble
additionnelles (consultez le manuel de
votre décodeur numérique).
Utilisez la touche VOL+ (ou VOL-) pour
augmenter (ou réduire) le volume.
Utilisez la touche FAV pour choisir
parmi vos chaînes préférées,
mémorisées dans votre décodeur
numérique.
Utilisez la touche FAV pour choisir
parmi vos chaînes préférées,
mémorisées dans votre décodeur
numérique.
Utilisez la touche CH+ (ou CH-) pour
passer à la chaîne suivante (ou
précédente).
En mode DVD, utilisez ces touches pour
effectuer la sélection des scènes.
En mode amplificateur / radio, utilisez
ces touches pour la sélection des postes
que vous aurez prédéterminés.
Appuyez une fois sur la touche MUTE
pour couper ou remettre le son.
Appuyez une fois sur la touche LAST
pour rappeler la dernière chaîne.
www.urcsupport.com/atlasocap
30
Page 31

Atlas OCAP M1056.fm Page 31 Tuesday, March 24, 2009 4:45 PM
Touche Fonction
Appuyez sur ON DEMAND pour accéder
aux services de vidéo sur demande.
Ces touches sont réservées pour être
utilisées comme touche macro (voir
«Réglage des touches macro» à la
page 44).
Cette touche vous permet, en mode
ENP, de revoir les 7 dernières secondes
de la programmation en cours.
Appuyez une fois sur la touche LIST
pour afficher la liste des émissions
enregistrées sur votre ENP.
Appuyez sur la touche LIVE pour
retourner à la programmation télé en
direct.
Pour tous les modes (sauf CBL), utilisez
les touches REW, PLAY, FFWD, STOP et
PAUSE pour commander un
magnétoscope, un lecteur DVD ou un
magnétoscope (après avoir
préalablement choisi l'appareil). Pour
enregistrer en mode magnétoscope
(VCR), appuyez deux fois sur la touche
REC.
En mode CBL, utilisez ces touches pour
commander les fonctions ENP du
décodeur numérique.
Utilisez les touches numériques (1~ 9
et 0) pour sélectionner directement les
chaînes (par exemple en faisant le 09).
Appuyez une fois sur la touche ASPECT
pour modifier le rapport de cadre de
l'image que vous regardez (non offert
sur tous les décodeurs).
Appuyez sur la touche SHIFT pour
afficher des options de télé par câble
additionnelles (consultez le manuel de
votre décodeur numérique).
www.urcsupport.com/atlasocap
31
Page 32

Atlas OCAP M1056.fm Page 32 Tuesday, March 24, 2009 4:45 PM
Touche Fonction
Utilisez la touche PIP ON-OFF pour
activer ou désactiver la fonction " Image
sur Image " (PIP - Picture-in-Picture) si
celle-ci est offerte sur votre téléviseur
ou par le biais de votre service de
câblodistribution.
Utilisez la touche PIP SWAP pour
basculer entre l'image principale et celle
en médaillon (si cette fonction est
offerte sur votre téléviseur ou par le
biais de votre service de
câblodistribution).
Utilisez la touche PIP MOVE pour
déplacer l'image en médaillon vers
d'autres positions dans l'image
principale (si cette fonction est offerte
sur votre téléviseur ou par le biais de
votre service de câblodistribution).
Utilisez la touche PIP CH+ (ou CH-)
pour sélectionner la chaîne suivante ou
précédente dans l'image en médaillon
(si cette fonction est offerte sur votre
téléviseur ou par le biais de votre
service de câblodistribution).
En mode CBL, utilisez la touche VIDEO
SOURCE pour voir d'autres sources
vidéo (A ou B) au lieu du câble.
Pour tous les modes TV, utilisez la
touche VIDEO SOURCE pour regarder la
télévision, une programmation vidéo
ou tout autre appareil. Pour les
amplificateurs / radios, utilisez la
touche VIDEO SOURCE pour
sélectionner une source d'entrée.
www.urcsupport.com/atlasocap
32
Page 33

Atlas OCAP M1056.fm Page 33 Tuesday, March 24, 2009 4:45 PM
Tableau des appareils
VEUILLEZ NOTER : consultez le tableau ci-dessous lor-
sque vous effectuez le «Réglage de la télécommande en fonction des appareils» à la page 35
ou le «Réglage de la fonction combinée télé /
vidéo» à la page 37.
Une fois programmée, la télécommande universelle Atlas OCAP 5 APPAREILS de Cogeco
vous permettra de commander les types
d'appareils suivants :
La touche
Device
contrôle ces types d'appareils
Magnétoscope, combiné télé / vidéo,
ENP (enregistreur numérique
personnel) ou lecteur DVD additionnel
lecteur DVD ou magnétoscope,
combiné télé / vidéo ou ENP
additionnels
amplificateur audio, radio ou autre
syntoniseur
téléviseur
décodeur pour signaux par câble ou
récepteur de signaux par satellite
www.urcsupport.com/atlasocap
33
Page 34

Atlas OCAP M1056.fm Page 34 Tuesday, March 24, 2009 4:45 PM
INSTALLATION DES PILES
❶
❷
❸
1. Au dos du boîtier de votre télécommande,
retirez le couvercle des piles.
2. Placez les deux piles AA (incluses) en faisant
correspondre les marques + et - des piles avec
celles du boîtier.
3. Alignez les onglets de fermeture du couvercle
4. Testez la télécommande en appuyant sur l'une
VEUILLEZ NOTER : la télécommande cessera de fonc-
des piles avec les trous du boîtier et remettez
le couvercle en place en appliquant une légère
pression. Vous entendrez un clic indiquant
que le couvercle est correctement fermé.
ou l'autre des touches de mode (ex. : TV). Si les
piles sont installées correctement, la DEL
(voyant lumineux rouge) clignotera une fois.
tionner si les piles sont faibles : ces dernières
devront alors être remplacées. Remplacez les
piles et votre télécommande retrouvera
l'ensemble de ses fonctionnalités, y compris
vos réglages préférés.
www.urcsupport.com/atlasocap
34
Page 35

Atlas OCAP M1056.fm Page 35 Tuesday, March 24, 2009 4:45 PM
RÉGLAGE DE LA TÉLÉCOMMANDE EN FONCTION
DES APPAREILS
La télécommande universelle Atlas OCAP 5 APPAREILS
de Cogeco est préprogrammée par défaut pour
fonctionner avec le décodeur numérique fourni par
votre câblodistributeur, un téléviseur RCA, un lecteur
DVD Toshiba, un magnétoscope RCA et un
amplificateur audio / radio de marque Pioneer.
Pour faire fonctionner des appareils autres que ceux
établis par défaut, suivez les étapes ci-dessous; sinon,
passez à la section suivante.
VEUILLEZ NOTER : pour le réglage d'un combiné télé /
vidéo, sautez cette section et consultez plutôt
les instructions sur la façon de «Réglage de la
fonction combinée télé / vidéo» à la page 37.
Reportez-vous également au «Tableau des
appareils» à la page 33 pour savoir quels
appareils peuvent être commandés par chacune des touches de mode.
Si vous possédez une autre marque de décodeur ou de récepteur de signaux satellites que
vous aimeriez contrôler, vous devrez déverrouiller le code de configuration avant de
modifier le code d'identification du décodeur
(voir «Réglage du verrouillage du code d'identification du câblodistributeur» à la page 43).
1. Allumez l'appareil et, si nécessaire, insérez le
support visuel (ex. : cassette ou disque).
VEUILLEZ NOTER : lisez bien les étapes 2 à 4 avant de
commencer. Prenez en note les codes et types
d'appareils que vous désirez programmer
avant de passer à l'étape 2.
2. Sur la télécommande, appuyez une fois sur
une des touches de mode (VCR, DVD, AUD, TV,
ou CBL) de façon à ce que le voyant lumineux
rouge clignote une fois. Ensuite, appuyez sur
la touche SETUP et tenez-la enfoncée jusqu'à
ce que la touche de mode choisie clignote
deux fois.
3. Consultez la section «Manufacturer’s Codes
(Codes des manufacturiers)» à la page 54
pour connaître le type et la marque d'appareil.
Ensuite, entrez le code à 4 chiffres
correspondant à votre type d'appareil. Si vous
effectuez cette opération correctement, la
touche lumineuse du mode choisi clignotera
deux fois.
www.urcsupport.com/atlasocap
35
Page 36

Atlas OCAP M1056.fm Page 36 Tuesday, March 24, 2009 4:45 PM
VEUILLEZ NOTER : si le voyant lumineux de la touche
choisie émet un clignotement prolongé, cela
signifie que le réglage a échoué. Répétez alors
les étapes 2 et 3 et tentez d'entrer le même
code.
4. Pointez la télécommande en direction de
l'appareil que vous désirez commander et
appuyez une seule fois sur PWR. L'appareil
devrait alors s'éteindre. Si cela ne fonctionne
pas, répétez les étapes 2 et 3 en essayant tous
les codes correspondant à la marque de
l'appareil jusqu'à ce que vous en trouviez un
qui fonctionne. Si cela ne fonctionne toujours
pas, essayez une recherche de code en suivant
les instructions à la section «Comment
trouver le code de votre appareil» à la page 38.
VEUILLEZ NOTER : si l'appareil n'est pas muni d'une
touche POWER, appuyez alors sur la touche
(Play).
5. Répétez les étapes 1 à 4 pour chacun des
appareils que vous voulez contrôler avec votre
télécommande universelle. Pour consultation
future, prenez soin de noter le code de chaque
appareil en usage dans les cases appropriées à
la page suivante.
Code VCR
Type d'appareil : __________________
Code DVD
Type d'appareil : __________________
Code AUD
Type d'appareil : __________________
Code CBL
Type d'appareil : __________________
www.urcsupport.com/atlasocap
36
Page 37

Atlas OCAP M1056.fm Page 37 Tuesday, March 24, 2009 4:45 PM
Code TV
Type d'appareil : __________________
RÉGLAGE DE LA FONCTION COMBINÉE
TÉLÉ / VIDÉO
Si vous possédez un appareil combiné télé / vidéo ou
télé / DVD, vous devez suivre des étapes particulières
pour le régler. Suivez les instructions suivantes pour
contrôler un appareil combiné :
1. Pour un appareil combiné télé / vidéo,
2. Sur la télécommande, appuyez une fois sur la
allumez l'appareil et insérez une
vidéocassette. Pour un appareil combiné télé /
DVD, insérez un DVD.
touche VCR. Le voyant lumineux clignotera
alors une fois. Ensuite, appuyez sur la touche
SETUP et tenez-la enfoncée jusqu'à ce que la
touche VCR clignote deux fois.
3. Utilisez les «Manufacturer’s Codes (Codes des
VEUILLEZ NOTER : si la touche VCR ne clignote pas
manufacturiers)» à la page 54 pour identifier
la marque de l'appareil et entrez le premier
code à 4 chiffres de votre appareil combiné
(par exemple, télé / VCR. Un double
clignoteme nt du voyant lumi neux de la touche
VCR vous indique que le code que vous avez
entré est le bon.
deux fois après avoir entré les derniers chiffres du code, vous devrez alors répéter les
étapes 2 et 3 et tenter d'entrer le même code.
Par contre, si vous trouvez un code de configuration qui fonctionne pour votre combiné
(par exemple, un combiné télé / VCR) et qu'il
existe dans la liste un autre code pour votre
téléviseur, vous devrez introduire ce code
dans la télécommande pour pouvoir contrôler
le volume (consultez la section «Réglage de la
télécommande en fonction des appareils» à la
page 35).
www.urcsupport.com/atlasocap
37
Page 38

Atlas OCAP M1056.fm Page 38 Tuesday, March 24, 2009 4:45 PM
4. Pointez la télécommande en direction de
votre combiné (par exemple, un combiné
télé / VCR) et appuyez une fois sur la touche
PWR. L'appareil devrait alors s'éteindre. Si
cela ne fonctionne pas, répétez les étapes 2 et
3 en essayant tous les codes correspondant à
la marque de l'appareil jusqu'à ce que vous en
trouviez un qui fonctionne. Si cela ne
fonctionne toujours pas, essayez une
recherche de code en suivant les instruct ions à
la section «Comment trouver le code de votre
appareil» à la page 38.
5. Pour consultation future, prenez soin de noter
le code de chaque appareil en usage dans les
cases appropriées ci-dessous :
Code télé / vidéo ou Code télé / DVD
Code télé (si nécessaire)
COMMENT TROUVER LE CODE DE VOTRE
APPAREIL
Si, après avoir essayé tous les codes listés pour la
marque de votre appareil, celui-ci ne répond pas à la
télécommande universelle Atlas OCAP 5 APPAREILS ou
si la marque de l'appareil ne figure pas sur la liste,
essayez de faire une recherche de code.
Par exemple, pour effectuer la recherche du code de
votre téléviseur :
1. Allumez le téléviseur.
2. Sur la télécommande universelle, appuyez
une fois sur la touche TV; le voyant lumineux
clignotera une fois. Appuyez ensuite sur la
touche SETUP et tenez-la enfoncée jusqu'à ce
que la touche TV clignote deux fois.
3. Entrez les chiffres 9 9 1 : la touche TV
clignotera deux fois
www.urcsupport.com/atlasocap
38
Page 39

Atlas OCAP M1056.fm Page 39 Tuesday, March 24, 2009 4:45 PM
4. Pointez la télécommande en direction de votre
téléviseur et appuyez une fois sur la touche
PWR.
5. Appuyez sur la touche CH+ et relâchez-la.
Continuez à appuyer sur cette touche jusqu'à
ce que l'appareil s'éteigne.
VEUILLEZ
NOTER :
en mode recherche, la télécommande envoie à
l'appareil choisi des codes infrarouges qu'elle
puise dans son répertoire, en commençant
par les codes les plus répandus.
6. Appuyez sur PWR. Le téléviseur devrait
s'allumer. Appuyez ensuite sur SETUP pour
verrouiller le code.
VEUILLEZ
NOTER :
si le téléviseur ne s'allume pas à cette étape,
appuyez lentement sur la touche CH- et
relâchez-la pour retourner aux codes; appuyez
ensuite sur SETUP lorsque le téléviseur s'est
allumé.
Pour effectuer une recherche de code pour les
autres appareils de votre système, répétez les
étapes 1 à 6 en choisissant cependant la touche appropriée à l'appareil que vous désirez
programmer (ex. : VCR, DVD, AUD ou CBL).
VÉRIFICATION DES CODES
Si vous avez programmé votre télécommande
universelle Atlas OCAP 5 APPAREILS à l'aide de la
procédure de recherche d'un code de la page précédente,
vous voudrez connaître le code à 4 chiffres attribué à
votre appareil. Par exemple, pour savoir quel code a été
attribué à votre téléviseur :
1. Appuyez une fois sur la touche TV de la
télécommande : le voyant lumineux clignotera
une fois. Ensuite, appuyez sur la touche SETUP
et tenez-la enfoncée jusqu'à ce que la touche
TV clignote deux fois.
2. Entrez les chiffres 9 9 0 : la touche TV
clignotera deux fois.
3. Pour connaître le premier numéro du code,
appuyez une fois sur la touche numérique 1.
Comptez le nombre de fois que le voyant de la
touche TV clignote (ex., 3 clignotements = le
chiffre 3). Inscrivez ce chiffre dans la première
case du code télé qui se trouve à la page 38.
www.urcsupport.com/atlasocap
39
Page 40

Atlas OCAP M1056.fm Page 40 Tuesday, March 24, 2009 4:45 PM
VEUILLEZ
NOTER :
si le chiffre d'un code est le 0, la touche choisie
ne clignotera pas.
4. Répétez l'étape 3 pour les 3 autres chiffres.
Utilisez la touche numérique 2 pour trouver le
deuxième chiffre, la touche 3 pour le
troisième chiffre et la touche 4 pour le
quatrième chiffre du code. En terminant,
inscrivez les chiffres du code dans les autres
cases du code télé qui se trouvent à la page 38.
5. Pour connaître les codes de vos autres
appareils, répétez les étapes 1 à 4, en utilisant
la touche de mode appropriée pour chacun
des appareils (ex. : VCR, DVD, AUD ou CBL).
Inscrivez les codes aux endroits à cet effet à la
page 38.
RÉGLAGE DU VERROUILLAGE DU CONTRÔLE
DES CHAÎNES
Par défaut, les paramètres de contrôle des chaînes de la
télécommande sont verrouillés en fonction du décodeur.
Les touches affectées* sont les touches 1 à 0 , CH+, CH-
et LAST. Ceci a pour but d'empêcher que vous changiez
involontairement de chaîne sur votre téléviseur ou votre
magnétoscope. Vous pouvez cependant désactiver cette
fonction pour vous permettre d'avoir un accès complet à
ces touches en mode TV ou VCR.
*
VEUILLEZ NOTER : cette fonction n'affecte pas le mode
AUD.
Déverrouillage du contrôle des chaînes
1. Sur la télécommande, appuyez une fois sur la
touche CBL : le voyant lumineux clignotera
une fois. Ensuite, appuyez sur la touche SETUP
et tenez-la enfoncée jusqu'à ce que la touche
CBL clignote deux fois.
2. Entrez les chiffres 9 7 3 : la touche CBL
clignotera deux fois.
3. Appuyez une fois sur la touche CH- : la touche
CBL clignotera quatre fois.
Ainsi, la télécommande offrira la possibilité de contrôler
les chaînes TV et VCR en mode TV ou VCR.
www.urcsupport.com/atlasocap
40
Page 41

Atlas OCAP M1056.fm Page 41 Tuesday, March 24, 2009 4:45 PM
Verrouillage du contrôle des chaînes CBL
1. Sur la télécommande, appuyez une fois sur la
touche CBL : le voyant lumineux clignotera
une fois. Ensuite, appuyez sur la touche SETUP
et tenez-la enfoncée jusqu'à ce que la touche
CBL clignote deux fois.
2. Entrez les chiffres 9 7 3 : la touche CBL
clignotera deux fois.
3. Appuyez une fois sur la touche CH+ : la touche
CBL clignotera deux fois.
Ainsi, peu importe le mode que vous choisissez (sauf
AUD), seules les options de contrôle de chaînes de votre
décodeur seront accessibles.
MODIFICATION DU VERROUILLAGE DU VOLUME
Le verrouillage du volume vous permet de contrôler le
volume à partir de l'appareil identifié à vos hautparleurs principaux, dans tous les modes. Sur la
télécommande Atlas OCAP 5 APPAREILS, le
verrouillage du volume général est réglé sur TV de façon
à pouvoir contrôler le volume du téléviseur lorsque vous
êtes en mode VCR, DVD, TV ou CBL. Vous pouvez
effectuer un déverrouillage individuel du volume sur un
appareil spécifique afin de pouvoir contrôler le volume à
partir de cet appareil.
VEUILLEZ NOTER : les commandes de volume du mode
audio sont actives et ce, peu importe les
réglages de " Verrouillage du volume ". Cependant, si vous verrouillez les commandes de
volume dans le mode AUD, vous pourrez
commander le volume de l'appareil audio
dans tous les autres modes (VCR, DVD, TV et
CBL). Cela peut être un avantage si, par exemple, vous écoutez toujours vos appareils à
l'aide des haut-parleurs de votre récepteur.
www.urcsupport.com/atlasocap
41
Page 42

Atlas OCAP M1056.fm Page 42 Tuesday, March 24, 2009 4:45 PM
Déverrouillage du réglage du volume pour un seul
appareil (déverrouillage du volume individuel)
1. En supposant que le Verrouillage général du
volume est activé, choisissez sur la
télécommande le mode que vous désirez
déverrouiller (ex. : CBL) en appuyant une fois
sur la touche. Ensuite, appuyez sur la touche
SETUP et tenez-la enfoncée jusqu'à ce que la
touche de mode clignote deux fois.
2. Entrez les numéros 9 9 3 : la dernière touche
de mode choisie clignotera deux fois.
3. Appuyez une fois sur la touche VOL- : la
dernière touche de mode choisie clignotera
quatre fois.
4. Répétez les étapes 1 à 3 de la présente section
pour chacun des appareils que vous voulez
déverrouiller.
Par la suite, après avoir choisi un appareil dont le
volume a été déverrouillé (ex. : CBL), vous pourrez
commander le volume de l'appareil uniquement dans
son propre mode en utilisant les touches VOL+, VOL- ou
MUTE.
Déverrouillage du réglage de tous les volumes
(déverrouillage général du volume)
VEUILLEZ NOTER : la procédure suivante rétablira les
paramètres de réglage du volume individuel
pour tous les appareils programmés.
1. Sur la télécommande, appuyez sur la touche
SETUP et tenez-la enfoncée jusqu'à ce que la
touche du dernier mode choisi clignote deux
fois.
2. Entrez les chiffres 9 9 3. La dernière touche
de mode choisie clignotera deux fois.
3. Appuyez une fois sur la touche VOL+. La
dernière touche de mode choisie clignotera
quatre fois.
Verrouillage du réglage du volume pour un mode
(verrouillage général du volume)
VEUILLEZ NOTER : les commandes de volume du mode
audio sont activées et ce, peu importe les
réglages du " Verrouillage du volume ". Cependant, si vous verrouillez les commandes de
www.urcsupport.com/atlasocap
42
Page 43

Atlas OCAP M1056.fm Page 43 Tuesday, March 24, 2009 4:45 PM
volume dans le mode AUD, vous pourrez
commander le volume de l'appareil audio
dans tous les autres modes (VCR, DVD, TV et
CBL). Cela peut être un avantage si, par exemple, vous écoutez toujours vos appareils à
l'aide des haut-parleurs de votre récepteur.
1. Sur la télécommande, appuyez sur la touche
2. Entrez les chiffres 9 9 3 : la dernière touche
3. Sélectionnez le mode (ex. : TV ou AUD) pour
Par la suite, vous serez en mesure de commander le
volume de l'appareil choisi (ex. : TV) en utilisant les
touches VOL-, VOL+ ou MUTE et ce, peu importe le mode
dans lequel vous serez.
SETUP et tenez-la enfoncée jusqu'à ce que la
dernière touche sélectionnée clignote deux
fois.
de mode choisie clignotera deux fois.
lequel vous voulez que le réglage du volume
soit verrouillé de façon générale. La touche de
mode choisie clignotera deux fois.
RÉGLAGE DU VERROUILLAGE DU CODE
D'IDENTIFICATION DU CÂBLODISTRIBUTEUR
La télécommande universelle Atlas OCAP 5 APPAREILS
est programmée par défaut pour fonctionner avec le
décodeur numérique de votre câblodistributeur.
Cependant, si vous désirez faire fonctionner un
décodeur d'une autre marque ou un récepteur de
signaux par satellite, vous devrez déverrouiller le code,
entrer un nouveau code de manufacturier et verrouiller
à nouveau le code.
1. Allumez votre décodeur numérique.
2. Sur la télécommande, appuyez une fois sur la
3. Entrez les chiffres 9 8 2 : la touche CBL
touche CBL : le voyant lumineux clignotera
une fois. Ensuite, appuyez sur la touche SETUP
et tenez-la enfoncée jusqu'à ce que la touche
CBL clignote deux fois.
clignotera quatre fois indiquant que le code
est déverrouillé.
www.urcsupport.com/atlasocap
43
Page 44

Atlas OCAP M1056.fm Page 44 Tuesday, March 24, 2009 4:45 PM
4. Suivez les instructions décrites à la section
«Réglage de la télécommande en fonction des
appareils» à la page 35 pour programmer le
décodeur numérique ou le récepteur de
signaux par satellite que vous voulez utiliser.
Par la suite, revenez à la présente page et
complétez les étapes 5 et 6 afin de verrouiller à
nouveau le code.
5. Sur la télécommande, appuyez une fois sur la
touche CBL : le voyant lumineux clignotera
une fois. Appuyez ensuite sur la touche SETUP
et tenez-la enfoncée jusqu'à ce que la touche
CBL clignote deux fois.
6. Entrez les chiffres 9 8 2 : la touche CBL
clignotera deux fois, indiquant que le code est
à nouveau verrouillé.
RÉGLAGE DES TOUCHES MACRO
La télécommande universelle Atlas OCAP 5 APPAREILS
comporte deux touches macro (ces touches sont situées
directement sous les touches MUTE et LAST). Ces touches
vous permettent de les programmer de façon à activer
certaines touches dans un ordre spécifique. Par exemple,
vous pouvez programmer une touche pour changer les
chaînes de votre téléviseur, hausser ou baisser le volume
et commencer à enregistrer à l'aide de votre
magnétoscope à l'aide d'une seule touche. Pour modifier
les macrofonctions emmagasinées dans une touche
macro programmée précédemment, vous devez d'abord
effacer la programmation de cette touche (voir
«Effacement du réglage d'une touche macro» à la
page 45).
www.urcsupport.com/atlasocap
44
Page 45

Atlas OCAP M1056.fm Page 45 Tuesday, March 24, 2009 4:45 PM
Réglage d’une touche macro
1. Sur la télécommande, appuyez sur la touche
SETUP et tenez-la enfoncée jusqu'à ce qu'elle
clignote deux fois.
2. Entrez 9 9 5. La touche SETUP clignotera
deux fois.
3. Sélectionnez une touche macro (par exemple,
F1) et appuyez une fois.
4. Appuyez sur la séquence de touches que vous
désirez programmer dans la fonction macro.
Par exemple, pour allumer votre téléviseur et
en augmenter le volume, appuyez sur la
touche TV suivie de la touche VOL+.
VEUILLEZ NOTER : vous pouvez programmer jusqu'à 15
touches de fonctions dans une macro.
5. Appuyez sur la touche SETUP et tenez-la
enfoncée jusqu'à ce qu'elle clignote deux fois.
6. Pour ajouter une autre macro, répétez les
étapes 1 à 5 en substituant la nouvelle
séquence de touches à être ajoutée à l'étape 4.
VEUILLEZ NOTER : la programmation de plus de cinq
macros sur une même touche macro écrase
les réglages précédents.
Effacement du réglage d'une touche macro
1. Sur la télécommande, appuyez sur la touche
SETUP et tenez-la enfoncée jusqu'à ce qu'elle
clignote deux fois.
2. Entrez 9 9 5. La touche SETUP clignotera
deux fois.
3. Appuyez une fois sur la touche macro que
vous voulez effacer.
4. Appuyez sur la touche SETUP et tenez-la
enfoncée jusqu'à ce qu'elle clignote deux fois.
www.urcsupport.com/atlasocap
45
Page 46

Atlas OCAP M1056.fm Page 46 Tuesday, March 24, 2009 4:45 PM
La programmation de cette touche macro est
maintenant effacée et une nouvelle programmation peut
être entrée pour cette touche (voir «Réglage d’une
touche macro» à la page 45). Si vous le désirez, vous
pouvez répéter ces étapes pour effacer la
programmation d'une touche macro.
UTILISATION DE LA TOUCHE MASTER POWER
El control remoto de dispositivo Atlas OCAP 5 con
Aprendizaje tiene una característica única que le
permite encender o apagar en secuencia hasta cinco de
sus dispositivos de entretenimiento del hogar con la
presión de un botón individual.
VEUILLEZ NOTER : la touche Master Power (PWR) ne
fonctionne uniquement qu'en mode CBL. Si
cette touche n'est pas programmée, seul le
décodeur se mettra en marche ou s'arrêtera.
Dans tous les autres modes, le fait d'appuyer
une fois sur la touche Master Power (PWR)
éteindra ou allumera l'appareil choisi.
Réglage de la touche Master Power
1. Sur la télécommande, appuyez sur la touche
SETUP et tenez-la enfoncée jusqu'à ce que la
touche du dernier appareil choisi clignote
deux fois.
2. Entrez les chiffres 9 9 5 : la touche du dernier
appareil choisi clignotera deux fois
3. Appuyez une fois sur la touche PWR.
4. Pour le premier appareil que vous voulez
programmer dans la séquence de mise en
marche, appuyez une fois sur la touche de
mode désirée (ex. : CBL), puis appuyez une
fois sur la touche PWR. Pour le deuxième
appareil dans la séquence de mise en marche,
appuyez une fois sur la touche correspondante
(ex. : TV). Appuyez ensuite sur PWR.
5. Répétez l'étape 4 pour ajouter des appareils
dans la séquence, jusqu'à un maximum de
quatre fois pour ajouter les deuxième,
troisième, quatrième et cinquième appareils,
si vous le désirez.
www.urcsupport.com/atlasocap
46
Page 47

Atlas OCAP M1056.fm Page 47 Tuesday, March 24, 2009 4:45 PM
6. Pour sauvegarder et quitter la fonction de
réglage de la séquence :
a. Appuyez une fois sur la touche CBL.
b. Appuyez sur la touche SETUP et tenez-la
enfoncée jusqu'à ce que la touche CBL clignote
deux fois.
Utilisation de la touche Master Power
1. Une fois la programmation terminée, pointez
la télécommande en direction des appareils.
Appuyez une fois sur la touche CBL.
2.
Appuyez une fois sur la touche
PWR
pour
mettre en marche ou éteindre vos appareils de
divertissement selon la séquence établie.
Vous verrez alors vos appareils se mettre en marche ou
s'éteindre selon la séquence que vous aurez
programmée.
Effacement de la touche Master Power
1. Sur la télécommande, appuyez sur la touche
SETUP et tenez-la enfoncée jusqu'à ce que la
touche du dernier appareil choisi clignote
deux fois.
2. Entrez les chiffres 9 9 5 : la touche du dernier
appareil choisi clignotera deux fois.
3. Appuyez sur la touche PWR et relâchez-la.
4. Appuyez sur la touche SETUP et tenez-la
enfoncée jusqu'à ce que la touche CBL clignote
deux fois.
www.urcsupport.com/atlasocap
47
Page 48

Atlas OCAP M1056.fm Page 48 Tuesday, March 24, 2009 4:45 PM
MODIFICATION DE LA FONCTION DES TOUCHES
La télécommande universelle Atlas OCAP 5 APPAREILS
peut être programmée afin de pouvoir commander deux
appareils de fonction identique. Par exemple, si vous
désirez que votre télécommande contrôle un téléviseur,
un décodeur et deux appareils audio (par exemple deux
récepteurs audio), vous devrez attribuer une nouvelle
fonction à la touche VCR non utilisée afin qu'elle puisse
commander le second appareil audio. Pour ce faire,
suivez les étapes suivantes :
VEUILLEZ NOTER : la touche VCR est préprogrammée
pour contrôler un magnétoscope de marque
RCA. En effectuant les étapes ci-dessous, vous
modifierez ces paramètres de réglage.
1. Sur la télécommande, appuyez une fois sur la
2. Entrez les chiffres 9 9 2 : la touche VCR
touche VCR : le voyant lumineux clignotera
une fois. Ensuite, appuyez sur la touche SETUP
et tenez-la enfoncée jusqu'à ce que la touche
VCR clignote deux fois.
clignotera deux fois.
3. Appuyez une fois sur la touche AUD, puis
appuyez une fois sur la touche VCR. Cette
dernière clignotera deux fois.
La touche VCR est maintenant prête à être programmée
pour votre second appareil audio. Consultez la section
«Réglage de la télécommande en fonction des appareils»
à la page 35.
Pour modifier la fonction d'autres touches, répétez ces
étapes et remplacez la séquence de touches selon les
indications apparaissant au tableau ci-dessous :
VEUILLEZ NOTER : seulement un appareil peut être
commandé par une touche de mode non utilisée.
Pour
programmer
VCR en tant
effectuez la séquence de touches
VCRÆSETUPÆ9Æ9Æ2ÆAUDÆVCR
que deuxième
touche AUD
VCR en tant
VCRÆSETUPÆ9Æ9Æ2ÆTVÆVCR
que deuxième
touche
www.urcsupport.com/atlasocap
48
Page 49

Atlas OCAP M1056.fm Page 49 Tuesday, March 24, 2009 4:45 PM
Pour
programmer
VCR en tant
effectuez la séquence de touches
VCRÆSETUPÆ9Æ9Æ2ÆCBLÆVCR
que deuxième
touche CBL
VCR à
VCRÆSETUPÆ9Æ9Æ2ÆVCRÆVCR
nouveau en
tant que
touche VCR
Pour attribuer une nouvelle fonction à une autre touche
de mode non utilisée, répétez la séquence en remplaçant
la touche VCR (dans le tableau précédent) par la touche
de mode pour laquelle vous voulez déterminer une
nouvelle fonction. Par exemple, si votre touche AUD
n'est pas utilisée et que vous voulez lui attribuer la
fonction de commande d'un deuxième lecteur DVD,
vous devrez alors effectuer la séquence suivante :
AUDÆSETUPÆ9Æ9Æ2ÆDVDÆAUD.
Lorsqu'une modification de fonction est établie, la
touche de mode choisie (telle qu'AUD) clignotera deux
fois pour confirmer votre choix. Par la suite, vous devrez
programmer la touche en fonction de l'appareil
(consultez la section «Réglage de la télécommande en
fonction des appareils» à la page 35).
EFFACEMENT DES RÉGLAGES PERSONNALISÉS
La télécommande Atlas OCAP 5 APPAREILSest dotée
d'un programme de Remise des réglages à la position
initiale. Vous pouvez l'utiliser pour effacer tous les
réglages personnalisés, sauf vos codes d'installation et
les touches réassignées.
IMPORTANT : le fait d'exécuter ce programme effacera
tous les réglages personnalisés pour le verrouillage du volume, les touches acquises, les
touches de syntonisation et le verrouillage de
chaîne. Toutefois, le réglage de votre appareil
est intact.
1. Sur la télécommande, appuyez sur la touche
SETUP et tenez-la enfoncée jusqu'à ce que la
dernière touche sélectionnée clignote deux
fois.
2. Entrez les chiffres 9 8 0 : la dernière touche
de mode choisie clignote deux fois, fait une
pause et clignote deux fois encore pour
confirmer que tous les réglages personnalisés
sont effacés.
www.urcsupport.com/atlasocap
49
Page 50

Atlas OCAP M1056.fm Page 50 Tuesday, March 24, 2009 4:45 PM
ACTIVER LA FONCTION RÉTROÉCLAIRAGE (EN
OPTION)
Sur certains modèles Atlas OCAP 5 APPAREILS, vous
pouvez activer la fonction rétroéclairage. La fonction
rétroéclairage permet aux touches de votre
télécommande de demeurer allumées pendant cinq
secondes après avoir appuyé sur une touche. Pour
activer la fonction rétroéclairage sur une télécommande
dotée de cette fonction :
1. Appuyez deux fois sur la touche SETUP en
moins d'une seconde. La fonction
rétroéclairage sera activée.
Pour désactiver la fonction rétroéclairage :
1. Appuyez deux fois sur la touche SETUP en
moins d'une seconde. La fonction
rétroéclairage sera désactivée.
www.urcsupport.com/atlasocap
50
Page 51

Atlas OCAP M1056.fm Page 51 Tuesday, March 24, 2009 4:45 PM
DÉPANNAGE
PROBLÈME : La touche de mode ne clignote pas quand
vous appuyez sur une touche.
SOLUTION : Remplacez les piles par 2 nouvelles piles
alcalines de type AA (voir «Installation des piles» à la
page 34).
PROBLÈME : La touche de mode clignote lorsque vous
appuyez sur une touche, mais l'appareil ne répond pas à
la commande.
SOLUTION : Vérifiez si la télécommande pointe bien en
direction de l'appareil et que vous vous trouvez à moins
de 4,5 mètres de ce dernier. De plus, assurez-vous
qu'aucun objet ne se trouve entre la télécommande et les
capteurs infrarouges des appareils.
PROBLÈME : La télécommande ne commande pas les
appareils de mon système de divertissement ou les
commandes ne fonctionnent pas adéquatement.
SOLUTION : Essayez tous les codes de manufacturiers
listés pour la marque de l'appareil que vous tentez de
programmer. Assurez-vous également que l'appareil
peut être contrôlé par une télécommande à infrarouge.
PROBLÈME : L'appareil combiné télé / vidéo ne répond
pas adéquatement.
SOLUTION : Utilisez les codes de manufacturiers pour
magnétoscopes relatifs à votre marque d'appareil.
Certains de ces appareils combinés nécessitent à la fois
un code de téléviseur et un code de magnétoscope afin
de fonctionner correctement (voir page 54).
PROBLÈME : Pas de son sur le deuxième téléviseur.
SOLUTION : Suivez les instructions au chapitre
«Modification du verrouillage du volume» à la page 41.
PROBLÈME : Les touches PLAY et STOP ne fonctionnent
pas avec le décodeur numérique DCT-2000 de Motorola.
SOLUTION : Reprogrammez la touche CBL avec le code
de câble 0476 (voir «Réglage de la télécommande en
fonction des appareils» à la page 35).
PROBLÈME : J'ai effectué une recherche de code et je
n'ai pas trouvé de code qui fonctionne.
SOLUTION : Effectuez une nouvelle recherche de code
après avoir effacé la programmation de la touche de
mode de la façon suivante :
a. Appuyez sur la touche SETUP et tenez-la enfoncée
jusqu'à ce que la touche de l'appareil clignote deux
fois.
b. Entre z 9 9 2.
c. Appuyez deux fois sur la touche de l'appareil
devant être effacée et relâchez-la.
www.urcsupport.com/atlasocap
51
Page 52

Atlas OCAP M1056.fm Page 52 Tuesday, March 24, 2009 4:45 PM
PROBLÈME : La télécommande ne parvient pas à mettre
en marche les appareils combinés télé / vidéo de marque
Sony et Sharp.
SOLUTION : Pour mettre en marche ces appareils, vous
devez programmer les codes de téléviseurs sur la
télécommande. Pour les appareils de marque Sony,
utilisez le code de téléviseur 0000 et le code de
magnétoscope 0032. Pour les appareils Sharp, utilisez le
code de téléviseur 0093 et le code de magnétoscope
0048.
AVIS DE LA FCC
Cet appareil a été testé de façon à satisfaire aux normes
des appareils numériques de classe B, en vertu de la
section 15 des Règlements de la Commission fédérale
des communications des États-Unis (Federal
Communications Commission - FCC). Ces normes sont
établies dans le but de fournir une protection
raisonnable contre le brouillage nuisible en installation
résidentielle. Cet appareil produit, utilise et peut émettre
des ondes radio. S'il ne fait pas l'objet d'une installation
et d'une utilisation conformes aux instructions, cet
appareil pourrait causer du brouillage nuisible pouvant
affecter les communications radio. Il ne peut y avoir de
garantie contre la présence de brouillage pour tout type
d'installation. Si cet appareil crée du brouillage nuisant à
la bonne réception radio et télévisuelle, l'utilisateur peut
tenter de remédier à cette situation en appliquant une ou
plusieurs des mesures suivantes (vous pouvez
déterminer si cet appareil crée du brouillage simplement
en l'arrêtant et en le remettant en marche pour
comparer la qualité de réception) :
• Réorientez ou déménagez l'antenne de réception
satellite.
• Augmentez la distance entre l'appareil et le
récepteur.
• Branchez cet appareil dans une prise de courant
autre que celle dans laquelle le récepteur est
branché.
• Pour de l'aide, consultez un concessionnaire ou un
technicien radio / télé qualifié.
Cet appareil a été vérifié de façon à satisfaire aux limites
des appareils informatiques de classe B, en vertu des
Règlements de la Commission fédérale américaine des
communications (Federal Communications
Commission - FCC). Afin de maintenir cette conformité
aux Règlements de la FCC, il est essentiel d'utiliser des
câbles blindés avec cet appareil. L'utilisation de cet
appareil avec du matériel non recommandé ou des
câbles non blindés, risque de créer du brouillage au
niveau de la réception radio et télévisuelle. L'utilisateur
www.urcsupport.com/atlasocap
52
Page 53

Atlas OCAP M1056.fm Page 53 Tuesday, March 24, 2009 4:45 PM
est avisé que toute modification apportée à cet appareil
sans l'approbation du manufacturier pourrait
contraindre l'utilisateur à ne plus utiliser son appareil.
INFORMATION ADDITIONNELLE
Ce produit ne contient aucune pièce pouvant être remplacée
par l'utilisateur. Le fait d'ouvrir le boîtier, sauf pour le
remplacement des piles, peut entraîner des dommages
permanents à votre télécommande universelle Atlas OCAP 5
appareils.
• Pour l'aide par l'intermédiaire de l'Internet,
rendez-nous visite à : www.urcsupport.com
© Corporation Universal Electronics Inc, 2006. Cette
publication, en tout ou en partie, ne peut être reproduite,
retransmise, transcrite, sauvegardée dans un programme de
consultation ou traduite dans une autre langue, de quelque
façon que ce soit (y compris par des moyens électroniques,
mécaniques, magnétiques, optiques, manuels ou autres), sans
le consentement écrit préalable de la Corporation Universal
Electronics Inc.
M1056F 3/09
www.urcsupport.com/atlasocap
53
Page 54

Atlas OCAP M1056.fm Page 54 Tuesday, March 24, 2009 4:45 PM
MANUFACTURER’S CODES (CODES DES
MANUFACTURIERS)
Setup Codes for Audio Amplifiers
Codes de configuration pour les amplificateurs audio
Adcom 0577, 1100
Bose 0674
Durabrand 1561
Elan 0647
GE 0078
Harman/Kardon 0892
JVC 0331
Left Coast 0892
Lenoxx 1561
Luxman 0165
Marantz 0892, 0321
McIntosh 0251
Nakamichi 0321
NEC 0264
Optimus 0395, 0823
Parasound 0246
Philips 0892
Pioneer 0823
Polk Audio 0892
RCA 0823
Realistic 0395
Sansui 0321
Shure 0264
Sony 0689, 0815, 1126
Soundesign 0078, 0211
Victor 0331
Wards 0078, 0211
Yamaha 0354, 0133
Setup Codes for Audio Receivers
Codes de configuration pour les récepteurs audio
ADC 0531
Aiwa 1405, 0189, 0121, 0405,
1243, 1388, 1641
Akai 1512
Alco 1390
www.urcsupport.com/atlasocap
54
Page 55

Atlas OCAP M1056.fm Page 55 Tuesday, March 24, 2009 4:45 PM
Amphion Media Works 1563, 1615
AMW 1563, 1615
Anam 1609, 1074
Apex Digital 1257, 1430, 1774
Arcam 1120
Audiotronic 1189
Audiovox 1390, 1627
B & K 0701, 0820, 0840
BK 0702
Bose 1229, 1629, 1841, 1933
Cambridge Soundworks 1370
Capetronic 0531
Carver 1189, 0189
Classic 1352
Coby 1389
Curtis Mathes 0080
Daewoo 1250
Delphi 1414
Denon 1360, 0004, 1142
Fisher 1801
Gateway 1517
Go Video 1532
Harman/Kardon 0110, 0189, 0891, 1304,
1306
Hitachi 1801
Integra 0135, 1298, 1320
JBL 0110, 1306
JVC 1374, 1495, 1811, 1871
Kenwood 1313, 1570, 1569, 0186
KLH 1390, 1412, 1428
Koss 1366, 1497
Lasonic 1798
LG 1293
Linn 0189
Liquid Video 1497
Magnavox 1189, 1269, 0189, 0391,
0531, 1514
Marantz 1189, 1269, 0189, 1289
Mitsubishi 1393
Norcent 1389
Nova 1389
www.urcsupport.com/atlasocap
55
Page 56

Atlas OCAP M1056.fm Page 56 Tuesday, March 24, 2009 4:45 PM
Onkyo 0135, 0842, 1298, 1320,
1531
Optimus 1023, 0080, 0186, 0531,
0670, 1074
Oritron 1366, 1497
Panasonic 1308, 1518, 0309, 0367,
1288, 1316, 1548, 1633,
1763, 1764
Philips 1189, 1269, 0189, 0391,
1120, 1266
Pioneer 1023, 0014, 0080, 0150,
0244, 0531, 0630, 1384
Polaroid 1508
Polk Audio 0189, 1289, 1414
Proscan 1254
RCA 1023, 1609, 1254, 0080,
0531, 1074, 1390, 1511
Rio 1869
Samsung 1295, 1500
Sansui 0189
Sanyo 1251, 1469, 1801
Sharp 0186, 1286
Sharper Image 1556
Sherwood 1077, 1517, 1653
Sirius 1627, 1811, 1987
Sonic Blue 1532, 1869
Sony 1058, 1441, 1258, 1759,
1622, 0474, 1349, 1406,
1442, 1558, 1658, 1758,
1858
Soundesign 0670
Stereophonics 1023
Sunfire 1313
Teac 1074, 1390, 1528
Technics 1308, 1518, 0309
Thorens 1189
Toshiba 1788
Venturer 1390
Wards 0189, 0014, 0080
XM 1406, 1414
Yamaha 0176, 0186, 1176, 1276,
1331, 1375
Zenith 0857, 1293
www.urcsupport.com/atlasocap
56
Page 57

Atlas OCAP M1056.fm Page 57 Tuesday, March 24, 2009 4:45 PM
Setup Codes for Audio Accessories
Codes de configuration pour accessoires audio
Accurian 1106
Altec Lansing 0607, 1056, 1485
Apple 1115, 1644
Cambridge Soundworks 1530
Creative 0872
D-Link 1522
DLO 1155
Integra 1789
iPort 1917
Marantz 1491
Motorola 1464
NaviPod 1644
Netgear 1785
Omnifi 1605
Onkyo 1789
Roku 1828
Sonance 1917
SSI 1522
Yamaha 1809, 1810
Setup Codes for Cable Boxes/Converters
Codes de configuration pour les décodeurs
ABC 0003, 0008, 0014, 0017
Americast 0899
Amino 1602, 1822
Bell & Howell 0014
Bell South 0899
Clearmaster 0883
ClearMax 0883
Coolmax 0883
Digeo 1187
Digi 0637
Director 0476
Dumont 0637
General Instrument 0476, 0810, 0276, 0003
GoldStar 0144
Hamlin 0009, 0273
i3 Micro 1602
www.urcsupport.com/atlasocap
57
Page 58

Atlas OCAP M1056.fm Page 58 Tuesday, March 24, 2009 4:45 PM
Jerrold 0476, 0810, 0276, 0003,
0012, 0014
Memorex 0000
Motorola 1376, 0476, 0810, 0276,
1187, 1254, 1106, 1540
Multitech 0883
Myrio 1602, 1822
Pace 1376, 1877, 0237, 0008
Panasonic 1376, 1877, 0000, 0107
Panther 0637
Paragon 0000
Philips 1305, 0317
Pioneer 1877, 0877, 0144, 0533
Pulsar 0000
Quasar 0000
RadioShack 0883
RCA 1256
Regal 0279, 0273
Runco 0000
Samsung 1376, 1877, 0144
Sasktel 1737
Scientific Atlanta 1877, 0877, 0477, 0008,
0017
Sejin 1602
Sony 1006
Starcom 0003
Supercable 0276
Supermax 0883
Thomson 1256
Tocom 0012
Torx 0003
Toshiba 0000
Tristar 0883
V2 0883
Viewmaster 0883
Vision 0883
Vortex View 0883
Zenith 0000, 0525, 0899
www.urcsupport.com/atlasocap
58
Page 59

Atlas OCAP M1056.fm Page 59 Tuesday, March 24, 2009 4:45 PM
Setup Codes for Cable/DVR/PVR Combos
Codes de configuration pour les combinés
décodeurs / ENP
Americast 0899
Amino 1822
Digeo 1187
General Instrument 0476, 0810
Jerrold 0476, 0810
Motorola 1376, 0810, 1187, 1106,
1540, 0476
Myrio 1822
Pace 1376,1877, 0237
Panasonic 1376, 1877
Pioneer 1877, 0877
RCA 1256
Sasktel 1737
Samsung 1376, 1877
Scientific Atlanta 1877, 0877
Sony 1006
Supercable 0276
Thomson 1256
Zenith 0899
Setup Codes for DVD Players
Codes de configuration pour les lecteurs DVD
Accurian 1072, 1416
Adcom 1094
Advent 1016
Aiwa 0641
Akai 0695, 0770, 0899, 1089
Alco 0790
Allegro 0869
Amphion Media Works 0872, 1245
AMW 0872, 1245
Apex Digital 0672, 0717, 0755, 0794,
0796, 0797, 0830, 1004,
1020, 1056, 1061, 1100
Arrgo 1023
Aspire Digital 1168, 1407
Audiologic 0736
Audiovox 0790, 1041, 1071, 1072,
1121, 1122
www.urcsupport.com/atlasocap
59
Page 60

Atlas OCAP M1056.fm Page 60 Tuesday, March 24, 2009 4:45 PM
Axion 1071, 1072
B & K 0655, 0662
BBK 1224
Bel Canto Design 1571
Blaupunkt 0717
Blue Parade 0571
Broksonic 0695, 0868, 1419
Buffalo 1882
Cary Audio Design 1477
CAVS 1057
Centrios 1577
Cinea 0831
Cinego 1399
CineVision 0876, 0833, 0869
Citizen 1277
Coby 0778, 0852, 1086, 1107,
1165, 1177, 1351
Craig 0831
Curtis Mathes 1087
CyberHome 0816, 0874, 1023, 1024,
1117, 1129, 1502, 1537
D-Link 1881
Daewoo 0784, 0705, 0833, 0869,
1169, 1172, 1234, 1242,
1441, 1443
Denon 0490, 0634
Desay 1407, 1455
Diamond Vision 1316, 1609, 1610
Disney 0675, 1270
Dual 1068, 1085
Durabrand 1127
DVD2000 0521
Emerson 0591, 0675, 0821, 1268
Enterprise 0591
ESA 0821, 1268, 1443
Fisher 0670, 1919
Funai 0675, 1268, 1334
Gateway 1073, 1077, 1158
GE 0522, 0815, 0717
www.urcsupport.com/atlasocap
60
Page 61

Atlas OCAP M1056.fm Page 61 Tuesday, March 24, 2009 4:45 PM
Go Video 0744, 0715, 0741, 0783,
0833, 0869, 1044, 1075,
1099, 1144, 1158, 1304,
1443, 1730
Go Vision 1071, 1072
GoldStar 0741
GPX 0699, 0769
Greenhill 0717
Harman/Kardon 0582, 0702
Hitachi 0573, 0664, 1247, 1919
Hiteker 0672
iLo 1348, 1472
Initial 0717, 1472
Innovative Technology 1542
Insignia 1268
Integra 0627
Jaton 1078
JBL 0702
Jensen 1016
JSI 1423
JVC 0558, 0623, 0867, 1164,
1275, 1602, 1863
jWin 1049, 1051
Kawasaki 0790
Kenwood 0490, 0534, 0682, 0737
KLH 0717, 0790, 1020, 1149,
1261
Konka 0711, 0719, 0720, 0721
Koss 0651, 0896, 1423
Kreisen 1421
Landel 0826
Lasonic 0798, 1173
Lenoxx 1127
LG 0591, 0741, 0801, 0869,
1526
LiteOn 1058, 1158, 1416, 1440
Loewe 0511
Magnavox 0503, 0539, 0646, 0675,
0821, 1268, 1506
Malata 0782, 1159
Marantz 0539
McIntosh 1273
www.urcsupport.com/atlasocap
61
Page 62

Atlas OCAP M1056.fm Page 62 Tuesday, March 24, 2009 4:45 PM
Memorex 0695, 0831, 1270
Microsoft 0522, 1708
Mintek 0839, 0717, 1472
Mitsubishi 1521, 0521
Momitsu 1082
NAD 0741
Nakamichi 1222
NEC 0785
Nesa 0717, 1603
NeuNeo 1454
Next Base 0826
NexxTech 1402
Norcent 1003, 0872, 1107, 1265,
1457
Onkyo 0503, 0627, 0792
Oppo 1224, 1525
OptoMedia Electronics 0896
Oritron 0651
Panasonic 0490, 0632, 0703, 1362,
1462, 1490, 1762
Philips 0503, 0539, 0646, 0675,
0854, 1260, 1267, 1354
Pioneer 0525, 0571, 0631, 0632
Polaroid 1020, 1061, 1086, 1245,
1316, 1478, 1480, 1482
Polk Audio 0539
Portland 0770
Presidian 0675, 1072
Prima 1016
Primare 1467
Princeton 0674
Proscan 0522
ProVision 0778
Qwestar 0651
RCA 0522, 0571, 0717, 0790,
0822, 1022, 1132, 1193
Rio 0869
RJTech 1360
Rotel 0623, 1178
Rowa 0823
Sampo 0698, 0752, 1501
www.urcsupport.com/atlasocap
62
Page 63

Atlas OCAP M1056.fm Page 63 Tuesday, March 24, 2009 4:45 PM
Samsung 0490, 0573, 0820, 0899,
1044, 1075
Sansui 0695
Sanyo 0670, 0695, 0873, 1919
Sensory Science 1158
Sharp 0630, 0675, 0752, 1256
Sharper Image 1117
Sherwood 0633, 0770, 1043, 1077,
1889
Shinsonic 0533, 0839
Sigma Designs 0674
Sonic Blue 0869, 1099
Sony 0533, 1533, 0864, 1033,
1431, 1432, 1433, 1548,
1892
Sound Mobile 1298
Sova 1122
Sungale 1074, 1532
Superscan 0821
SVA 0860, 1105
Sylvania 0675, 0821, 1268
Symphonic 0675, 0821
TAG McLaren 0894
Teac 0790, 0809
Technics 0490, 0703
Technosonic 0730
Techwood 0692
Terapin 1031
Theta Digital 0571
Toshiba 0503, 0695, 1045, 1154,
1854
Tredex 0799, 0800, 0803, 0804
Urban Concepts 0503
US Logic 0839
Valor 1298
Venturer 0790
Vialta 1509
Vizio 1064, 1226
Vocopro 1027, 1360
Xbox 0522, 1708
Xwave 1001
www.urcsupport.com/atlasocap
63
Page 64

Atlas OCAP M1056.fm Page 64 Tuesday, March 24, 2009 4:45 PM
Yamaha 0490, 0539, 0545
Zenith 0503, 0591, 0741, 0869
Zoece 1265
Setup Codes for DVD Recorders
Codes de configuration pour les graveurs de DVD
Accurian 1416
Apex Digital 1056
Aspire Digital 1168
Coby 1086
CyberHome 1129, 1502
Funai 0675, 1334
Gateway 1073, 1158
Go Video 0741, 1158, 1304, 1730
iLo 1348
JVC 1164, 1275
Kreisen 1421
LG 0741
LiteOn 1158, 1416, 1440
Magnavox 0646, 0675, 1506
Panasonic 0490
Philips 0646
Pioneer 0631
Polaroid 1086
RCA 0522
Samsung 0490
Sensory Science 1158
Sharp 0675
Sony 1033, 1431, 1432, 1433
Sylvania 0675
Zenith 0741
Setup Codes for DVD Combos
Codes de configuration pour combinés DVD
Akai 0695
Audiovox 1071, 1121, 1122
iLo 1472
Initial 1472
LG 1526
Mintek 1472
RCA 1193
www.urcsupport.com/atlasocap
64
Page 65

Atlas OCAP M1056.fm Page 65 Tuesday, March 24, 2009 4:45 PM
Satellite Receivers and DVR/PVR Systems
Récepteurs de signaux satellites et systèmes ENP
Setup Codes for Satellite Receivers
Codes de configuration pour les récepteurs de signaux
satellites
AlphaStar 0772
Amino 1615
Chaparral 0216
Coolsat 1806
Crossdigital 1109
DirecTV 1377, 0392, 0566, 0639,
1639, 1142, 0247, 0749,
1749, 0724, 0819, 1856,
1076, 1108, 0099, 1109,
1392, 1414, 1442, 1443,
1444, 1609, 1640
Dish Network System 1505, 1005, 0775, 1170,
1775
Dishpro 1505, 1005, 0775, 1775
Echostar 1505, 1005, 0775, 1170,
1775
Expressvu 0775, 1775
GE 0566
General Instrument 0869
GOI 0775, 1775
Goodmans 1246
Hisense 1535
Hitachi 0819, 1250
HTS 0775, 1775
Hughes Network Systems 1142, 0749, 1749, 1442,
1443, 1444
Humax 1790
iLo 1535
JVC 0775, 1170, 1775
LG 1226, 1414
Magnavox 0724, 0722
Memorex 0724
Mitsubishi 0749
Motorola 0869
NEC 1270
Next Level 0869
Panasonic 0247, 0701
Pansat 1807
www.urcsupport.com/atlasocap
65
Page 66

Atlas OCAP M1056.fm Page 66 Tuesday, March 24, 2009 4:45 PM
Paysat 0724
Philips 1142, 0749, 1749, 0724,
1076, 0722, 0099, 1442
Proscan 0392, 0566
Proton 1535
RadioShack 0869
RCA 0566, 0855, 0143, 1392
Samsung 1377, 1276, 1108, 1109,
1442, 1609
Sanyo 1219
SKY 0856
Sony 0639, 1639, 1640
Star Choice 0869
Tivo 1142, 1442, 1443, 1444
Toshiba 0749, 1749, 0790, 1285
UltimateTV 1392, 1640
Ultrasat 1806
Uniden 0724, 0722
US Digital 1535
USDTV 1535
Voom 0869
Zenith 1856, 0856
Setup Codes for DVR/PVR Systems
Codes de configuration pour systèmes ENP
Amino 1615
DirecTV 1377, 0392, 0639, 1142, 1076,
0099, 1392, 1442, 1443, 1444,
1640
Dish Network System 1505, 0775
Dishpro 1505, 0775
Echostar 1505, 0775, 1170
Expressvu 0775
Hughes Network Systems1142, 1442, 1443, 1444, 0739
JVC 1170
Motorola 0869
Philips 1142, 1442, 0739
Proscan 0392
RCA 1392
Samsung 1442, 0739
Sony 0639, 1640
www.urcsupport.com/atlasocap
66
Page 67

Atlas OCAP M1056.fm Page 67 Tuesday, March 24, 2009 4:45 PM
Star Choice 0869
Setup Codes for TVs
Codes de configuration pour téléviseurs
A-Mark 0003
Abex 0032
Accurian 1803
Action 0873l
Admira 0093, 0463
Advent 0761, 0783, 0815, 0817, 0842,
1933
Adventura 0046
Aiko 0092
Aiwa 0701
Akai 0812, 0702, 0030, 0098, 0672,
1207, 1903, 1935
Alaron 0179, 0183, 0216
Albatron 0700, 0843
Ambassador 0177
America Action 0180
Ampro 0751
Anam 0180, 0004, 0009, 0068
Anam National 0055, 0161
AOC 0030, 0003, 0019, 0052, 0137,
0185, 1365
Apex Digital 0748, 0879, 0765, 0767, 0890,
1217, 1943
Archer 0003
Astar 1548
Audiovox 0451, 0180, 0092, 0003, 0623,
0710, 0802, 0846, 0875, 1284,
1937, 1951, 1952
Aventura 0171
Axion 1937
Belcor 0019
Bell & Howell 0154, 0016
BenQ 1032, 1315
Bradford 0180
Brockwood 0019
Broksonic 0236, 0463, 0003, 1935, 1938
Byd:sign 1309, 1311
www.urcsupport.com/atlasocap
67
Page 68

Atlas OCAP M1056.fm Page 68 Tuesday, March 24, 2009 4:45 PM
Cadia 1283
Candle 0030, 0046, 0056, 0186
Carnivale 0030
Carver 0054, 0170
CCE 0217, 0329
Celebrity 0000
Celera 0765
Champion 1362
Changhong 0765
Cinego 1986
Citizen 0060, 0030, 0092, 0039, 0046,
0056, 0186, 0280
Clairtone 0185
Clarion 0180
Commercial Solutions 1447, 0047
Concerto 0056
Contec 0180, 0157, 0158, 0185
Craig 0180, 0161
Crosley 0054
Crown 0180, 0039
Curtis Mathes 0047, 0054, 0154, 0451, 0093,
0060, 0702, 0030, 0145, 0166,
1347, 1147, 0747, 0466, 0056,
0039, 0016
CXC 0180
CyberHome 0794
Cytron 1326
Daewoo 0451, 0092, 1661, 0019, 0039,
0066, 0067, 0091, 0623, 0661,
0672
Daytron 0019
Dell 1080, 1178, 1264, 1403
Denon 0145, 0511
Denstar 0628
Diamond Vision 1996, 1997
Dumont 0017, 0019
Durabrand 0463, 0180, 0178, 0171, 1034,
0003
Dwin 0720, 0774
Dynatech 0049
Electroband 0000, 0185
Electrograph 1623, 1755
www.urcsupport.com/atlasocap
68
Page 69

Atlas OCAP M1056.fm Page 69 Tuesday, March 24, 2009 4:45 PM
Electrohome 0381, 0389, 0409
Emerson 0154, 0236, 0463, 0180, 0178,
0171, 1963, 1944, 0623, 0282,
0280, 0270, 0185, 0183, 0182,
0181, 0179, 0177, 0158, 0039,
0038, 0019
Emprex 1422, 1546
Envision 0030, 0813, 1365
Epson 0833, 0840, 1290
ESA 0812, 0171, 1944, 1963
Fisher 0154, 0159
FlexVision 0710
Fujitsu 0179, 0186, 0683, 0809, 0853
Funai 0180, 0171, 0179, 1271, 1963
Futuretech 0180
Gateway 1001, 1002, 1003, 1004, 1755,
1756
GE 1447, 0047, 0051, 0451, 0178,
1347, 0747, 0282, 0279, 0251,
0174, 0138, 0135, 0055, 0029,
0027, 0021
Gibralter 0017, 0030, 0019
Go Video 0886
GoldStar 0178, 0030, 0001, 0002, 0019,
0032, 0106, 0409
Goodmans 0360
Gradiente 0392
Grunpy 0180, 0179
Haier 1034, 0768
Hallmark 0178
Hannspree 1348, 1351, 1352
Hantarex 1338
Harley Davidson 0043, 0179
Harman/Kardon 0054, 0078
Harvard 0180, 0068
Havermy 0093
Helios 0865
Hello Kitty 0451
Hewlett Packard 1088, 1089, 1101, 1494, 1502
Hisense 0748
www.urcsupport.com/atlasocap
69
Page 70

Atlas OCAP M1056.fm Page 70 Tuesday, March 24, 2009 4:45 PM
Hitachi 1145, 0145, 0016, 0032, 0038,
0056, 0095, 0097, 0151, 0173,
0227, 0279, 0409, 0413, 0797,
1960
HP 1088, 1089, 1101, 1494, 1502
Hyundai 0849, 1219, 1294
iLo 1286, 1603, 1990
Infinity 0054
Initial 1603, 1990
Insignia 0171, 1204, 1326, 1517, 1963,
2002
Inteq 0017
Janeil 0046
JBL 0054
JCB 0000
Jensen 0761, 0050, 0815, 0817, 1299,
1933
JVC 0053, 0036, 0069, 0160, 0169,
0182, 0731, 1253
Kamp 0216
Kawasho 0158, 0216, 0308
Kaypani 0052
KEC 0180
Kenwood 0030, 0019
KLH 0765, 0767, 1962
Kloss 0024, 0046, 0078
KMC 0106
Konka 0628, 0632, 0638, 0703, 0707
Kost 1262, 1483
KTV 0180, 0030, 0039, 0183, 0185,
0217, 0280
LG 1265, 0178, 0442, 0700, 0829,
0856, 1178, 1325, 1423, 1758,
1993
Loewe 0136
Logik 0016
Luxman 0056
LXI 0047, 0054, 0154, 0156, 0178,
0148, 0747
Magnavox 1454, 0054, 0030, 0706, 1963,
1944, 1525, 1254, 1198, 0802,
0386, 0230, 0187, 0186, 0179,
0096, 0036, 0028, 0024, 0020
Majestic 0015, 0016
www.urcsupport.com/atlasocap
70
Page 71

Atlas OCAP M1056.fm Page 71 Tuesday, March 24, 2009 4:45 PM
Marantz 0054, 0030, 0444, 0704, 0854,
0855, 1154, 1398
Matsushita 0250, 0650
Maxent 0762, 1211, 1755
Megapower 0700
Megatron 0178, 0145, 0003
MEI 0185
Memorex 0154, 0463, 0150, 0178, 0016,
0106, 0179
MGA 0150, 0178, 0030, 0019, 0155
Midland 0047, 0017, 0051, 0032, 0039,
0135, 0747
Mintek 1603, 1990
Minutz 0021
Mitsubishi 0093, 1250, 0150, 0178, 0014,
0019, 0098, 0155, 0331, 0358,
0836, 0868, 1550
Monivision 0700, 0843
Motorola 0093, 0055, 0835
Moxell 0835
MTC 0060, 0030, 0019, 0049, 0056,
0091, 0185, 0216
Multitech 0180, 0049, 0217
NAD 0156, 0178, 0866
NEC 0030, 0019, 0036, 0056, 0170,
0434, 0497, 0882, 1398, 1704
Neovia 1338
NetTV 0762, 1755
Nikko 0178, 0030, 0092, 0317
Noblex 0430
Norcent 0748, 0824, 1089, 1365, 1589,
1590, 1591
Norwood Micro 1286, 1296, 1303
Noshi 0018
NTC 0092
Olevia 1144, 1240, 1331, 1610
Olympus 1342
Onwa 0180
Optimus 0154, 0250, 0166, 0650
Optoma 0887
Optonica 0093, 0165
Orion 0236, 0463, 1463, 0179
www.urcsupport.com/atlasocap
71
Page 72

Atlas OCAP M1056.fm Page 72 Tuesday, March 24, 2009 4:45 PM
Panasonic 0250, 0051, 0055, 0162, 0226,
0338, 0375, 0650, 1291, 1410,
1941, 1946, 1947
Penney 0047, 0156, 0051, 0060, 0178,
0030, 1347, 0747, 0309, 0149,
0138, 0135, 0110, 0039, 0032,
0027, 0021, 0019, 0018, 0003,
0002
Petters 1523
Philco 0054, 0030, 0019, 0020, 0028,
0096, 0302
Philips 1454, 0054, 0690, 1154, 1483
Pilot 0030, 0019, 0039
Pioneer 0166, 0038, 0172, 0679, 0866,
1260, 1398
Polaroid 0765, 0865, 1262, 1276, 1314,
1316, 1326, 1327, 1328, 1341,
1498, 1523, 1991, 1992
Portland 0092, 0019, 0039
Prima 0761, 0783, 0815, 0817, 1933
Princeton 0700, 0717
Prism 0051
Proscan 1447, 0047, 0747, 1347
Proton 0178, 0003, 0031, 0052, 0466
Protron 1320, 1323
Proview 0835, 1401, 1498
Pulsar 0017, 0019
Quasar 0250, 0051, 0055, 0165, 0219,
0650
RadioShack 0047, 0154, 0180, 0178, 0030,
0019, 0032, 0039, 0056, 0165,
0409, 0747
RCA 1447, 0047, 2002, 1958, 1953,
1948, 1547, 1347, 1247, 1147,
1047, 0747, 0679, 0278, 0174,
0135, 0090, 0038, 0029, 0019,
0018
Realistic 0154, 0180, 0178, 0030, 0019,
0032, 0039, 0056, 0165
Rhapsody 0183, 0185, 0216
Runco 0017, 0030, 0251, 0497, 0603,
1398
Sampo 0030, 0032, 0039, 0052, 0100,
0110, 0762, 1755
www.urcsupport.com/atlasocap
72
Page 73

Atlas OCAP M1056.fm Page 73 Tuesday, March 24, 2009 4:45 PM
Samsung 0060, 0812, 0702, 0178, 0030,
1903, 1575, 1395, 1312, 1060,
0814, 0766, 0427, 0408, 0329,
0056, 0032, 0019
Samsux 0039
Sansui 0463, 1409, 1935
Sanyo 0154, 0088, 0107, 0146, 0159,
0232, 0484, 0799, 0893, 1142
Sceptre 0878, 1217, 1360, 1599
Scimitsu 0019
Scotch 0178
Scott 0236, 0180, 0178, 0019, 0179,
0309
Sears 0047, 0054, 0154, 0156, 0178,
0171, 0015, 0056, 0146, 0148,
0149, 0159, 0168, 0179, 0281,
0747
Sharp 0093, 0039, 0153, 0157, 0165,
0220, 0281, 0386, 0398, 0491,
0688, 0689, 0818, 0851, 1602
Sheng Chia 0093
Sherwood 1399
Shogun 0019
Signature 0016
Signet 1262
SIM2 Multimedia 1297
Simpson 0186, 0187
Sony 1100, 0000, 0011, 0080, 0111,
0273, 0353, 0810, 0834, 1317
Soundesign 0180, 0178, 0179, 0186
Sova 1320, 1952
Soyo 1520
Spectricon 0003, 0137
Squareview 0171
SSS 0180, 0019
Starlite 0180
Studio Experience 0843
Superscan 0093, 0864
Supre-Macy 0046
Supreme 0000
SVA 0748, 0587, 0768, 0865, 0870,
0871, 0872
www.urcsupport.com/atlasocap
73
Page 74

Atlas OCAP M1056.fm Page 74 Tuesday, March 24, 2009 4:45 PM
Sylvania 0054, 0030, 0171, 0020, 0028,
0065, 0096, 0381, 1271, 1944,
1963
Symphonic 0180, 0171, 1944
Syntax 1144, 1240, 1331
Tandy 0093
Tatung 0003, 0049, 0055, 0396, 1101,
1285, 1286, 1287, 1288, 1361,
1756
Technics 0250, 0051
Technol Ace 0179
Technovox 0007
Techview 0847
Techwood 0051, 0003, 0056
Teknika 0054, 0180, 0150, 0060, 0092,
0016, 0019, 0039, 0056, 0175,
0179, 0186, 0312, 0322
Telefunken 0702, 0056, 0074
Tera 0031
Thomson 0209, 0210
TMK 0178, 0056, 0177
TNCi 0017
Toshiba 0154, 1256, 0156, 1265, 0060,
1945, 1935, 1704, 1656, 1635,
1356, 1343, 1325, 1306, 1156,
0845, 0832, 0650, 0149, 0036
Tosonic 0185
Totevision 0039
Trical 0157
TVS 0463
Ultra 0391, 1323
Universal 0027
Universum 1337
US Logic 1286, 1303
Vector Research 0030
Victor 0053
Video Concepts 0098
Vidikron 0054, 0242, 1398
Vidtech 0178, 0019, 0036
Viewsonic 0797, 0857, 0864, 0885, 1330,
1342, 1578, 1627, 1755
Viking 0046, 0312
Viore 1207
www.urcsupport.com/atlasocap
74
Page 75

Atlas OCAP M1056.fm Page 75 Tuesday, March 24, 2009 4:45 PM
Visart 1336
Vizio 0864, 0885, 1499, 1756, 1758
Wards 0054, 0178, 0030, 1156, 0866,
0202, 0179, 0174, 0165, 0111,
0096, 0080, 0056, 0029, 0028,
0027, 0021, 0020, 0019, 0016
Waycon 0156
Westinghouse 0885, 0889, 0890, 1282, 1577
White Westinghouse 0463, 0623
Wyse 1365
Yamaha 0030, 0019, 0769, 0797, 0833,
0839
Zenith 0017, 0463, 1265, 0178, 0092,
0016
Zonda 0003
Setup Codes for TVs (DLP)
Codes de configuration pour téléviseurs (DLP)
Hewlett Packard 1494
HP 1494
LG 1265
Magnavox 1525
Mitsubishi 1250
Optoma 0887
Panasonic 1291
RCA 1447
Samsung 0812, 1060, 1312
SVA 0872
Toshiba 1265, 1306
Vizio 1499
Setup Codes for TVs (HDTV)
Codes de configuration pour téléviseurs (TVHD)
Advent 0842
Hitachi 1960
Marantz 0854
Mitsubishi 0150
Panasonic 0250, 0650, 1291
Pioneer 0679
Princeton 0717
RCA 1447
www.urcsupport.com/atlasocap
75
Page 76

Atlas OCAP M1056.fm Page 76 Tuesday, March 24, 2009 4:45 PM
Samsung 0812, 0702
Sharp 0688, 0689
Toshiba 1256
Setup Codes for TVs (LCD)
Codes de configuration pour téléviseurs (ACL)
Accurian 1803
Action 0873
Akai 1935
AOC 1365
Apex Digital 0890, 1217
Astar 1548
Audiovox 0180, 0710, 0802, 0846,
0875, 1284, 1937, 1951,
1952
BenQ 1315
Byd:sign 1309, 1311
Cadia 1283
CyberHome 0794
Dell 1080, 1178, 1264
Emprex 1422, 1546
Envision 0813, 1365
FlexVision 0710
Funai 0171
Go Video 0886
Hannspree 1348, 1351
Hewlett Packard 1088
HP 1088
Hyundai 0849, 1219, 1294
iLo 1286, 1603, 1990
Initial 1603, 1990
Insignia 1204, 1517, 2002
Jensen 1299
Kost 1262
LG 0856, 1178, 1993
Magnavox 1454, 0802, 1198
Marantz 0855
Maxent 0762, 1211
Mintek 1603, 1990
Mitsubishi 1250
NetTV 0762
www.urcsupport.com/atlasocap
76
Page 77

Atlas OCAP M1056.fm Page 77 Tuesday, March 24, 2009 4:45 PM
Norcent 1365, 1589, 1591
Norwood Micro 1286, 1296
Olevia 1144, 1240, 1331, 1610
Panasonic 0650, 1941
Petters 1523
Philips 1454, 1483
Polaroid 1262, 1276, 1316, 1341,
1498, 1523
Protron 1320, 1323
Proview 1401
RCA 0047, 1958
Sampo 0762
Samsung 0812, 0766, 0814, 1395,
1575
Sansui 1409
Sanyo 1142
Sceptre 0878, 1217, 1360, 1599
Sharp 0093, 0818, 1602
Sherwood 1399
Signet 1262
Sony 0810
Sova 1320
Soyo 1520
Superscan 0864
SVA 0587, 0870, 0871
Sylvania 0171, 1271
Symphonic 0171
Syntax 1144, 1240, 1331
Tatung 1286
Techview 0847
Toshiba 0845, 1343, 1635, 1656
Ultra 1323
US Logic 1286
Vidikron 1398
Viewsonic 0857, 0864, 0885, 1330,
1578, 1627
Visart 1336
Vizio 0864, 0885, 1756
Westinghouse 0885, 0889, 0890, 1282,
1577
Wyse 1365
www.urcsupport.com/atlasocap
77
Page 78

Atlas OCAP M1056.fm Page 78 Tuesday, March 24, 2009 4:45 PM
Zenith 1265
Setup Codes for TV/DVD Combos
Codes de configuration pour combinés TV / DVD
Controlled by the TV
Contrôlé par le téléviseur
Accurian 1803
Advent 1933
Akai 1935
Apex Digital 1943
Audiovox 1937, 1951, 1952
Axion 1937
Broksonic 1935
Cinego 1986
Diamond Vision 1997
Emerson 1963
ESA 1963
Funai 1963
Hitachi 1960
iLo 1990
Initial 1990
Insignia 1963, 2002
Jensen 1933
KLH 1962
LG 1993
Magnavox 1963
Mintek 1990
Panasonic 1941
Polaroid 1991
Prima 1933
RCA 1948, 1958, 2002
Samsung 1903
Sansui 1935
Sova 1952
Sylvania 1963
Toshiba 1635, 1935
Controlled by the DVD
Contrôlé par le DVD
Advent 1016
Akai 0695
www.urcsupport.com/atlasocap
78
Page 79

Atlas OCAP M1056.fm Page 79 Tuesday, March 24, 2009 4:45 PM
Apex Digital 0830
Audiovox 1071, 1121, 1122
Axion 1071
Broksonic 0695
Cinego 1399
Diamond Vision 1610
Emerson 0675, 1268
ESA 1268
Funai 1268
Go Vision 1071
Hitachi 1247
iLo 1472
Initial 1472
Insignia 1268
Jensen 1016
KLH 1261
Konka 0719, 0720
LG 1526
Magnavox 1268
Mintek 1472
Panasonic 1490
Philips 0854, 1260
Polaroid 1480
Prima 1016
RCA 1022, 1193
Samsung 0899
Sansui 0695
Sova 1122
Sylvania 0675, 1268
Toshiba 0695
Setup Codes for TV/VCR Combos
Codes de configuration pour combinés TV /
magnétoscope
Controlled by the TV
Contrôlé par le téléviseur
America Action 0180
Audiovox 0180
Emerson 0236
www.urcsupport.com/atlasocap
79
Page 80

Atlas OCAP M1056.fm Page 80 Tuesday, March 24, 2009 4:45 PM
Controlled by the VCR
Contrôlé par le magnétoscope
America Action 0278
Audiovox 0278
Broksonic 0002, 0479, 1479
Citizen 1278
Colt 0072
Curtis Mathes 1035
Daewoo 0637, 1278
Emerson 0002, 0294, 0479, 0593,
1278, 1479
Funai 0000
GE 0240, 0807, 1035, 1060
GoldStar 1237
Harley Davidson 0000
Hitachi 0000
LG 1037
Lloyd's 0000
Magnasonic 0593, 1278
Magnavox 0000, 0593, 1781
Magnin 0240
Memorex 0162, 0454, 1037, 1162,
1237, 1262
MGA 0240
Mitsubishi 0807
Optimus 0162, 0454, 0593, 1162,
1262
Orion 0002, 0479, 1479
Panasonic 0162, 1035, 1162, 1262
Penney 0240, 1035, 1237
Quasar 0162, 1035, 1162
RadioShack 0000, 1037
RCA 0240, 0807, 1035, 1060
Samsung 1014
Sansui 0000, 0479, 1479
Sanyo 0240
Sears 0000, 1237
Sony 0000, 1232
Sylvania 1781
Symphonic 0000, 0593
Thomas 0000
www.urcsupport.com/atlasocap
80
Page 81

Atlas OCAP M1056.fm Page 81 Tuesday, March 24, 2009 4:45 PM
Toshiba 0845, 1145
White Westinghouse 0637
Zenith 0000, 0479, 0637, 1479
Setup Codes for TV/VCR/DVD Combos
Codes de configuration pour combinés
TV / magnétoscope / DVD
Controlled by the TV
Contrôlé par le téléviseur
Akai 1903
Broksonic 1938
Diamond Vision 1996
Emerson 1944
ESA 1944
Magnavox 1944
Panasonic 1946, 1947
Polaroid 1992
RCA 1953
Sylvania 1944
Symphonic 1944
Toshiba 1945
Controlled by the DVD
Contrôlé par le DVD
Akai 0899
Broksonic 0868
Diamond Vision 1609
Emerson 0821
ESA 0821
Funai 1334
Magnavox 0821
Panasonic 1362, 1462
Polaroid 1482
RCA 1132
Sharp 0630
Superscan 0821
Sylvania 0821
Symphonic 0821
Toshiba 1045
Controlled by the VCR
Contrôlé par le magnétoscope
Sharp 0807
www.urcsupport.com/atlasocap
81
Page 82

Atlas OCAP M1056.fm Page 82 Tuesday, March 24, 2009 4:45 PM
Setup Codes for VCRs
Codes de configuration pour magnétoscopes
ABS 1972
Admiral 0048, 0209
Adventura 0000
Aiko 0278
Aiwa 0037, 0000, 0124, 0307,
0468
Akai 0041, 0049, 0053, 0061,
0106, 0175
Alienware 1972
America Action 0278
American High 0035
Asha 0240
Audiovox 0037, 0278
Beaumark 0240
Bell & Howell 0104
Broksonic 0184, 0121, 0209, 0002,
0211, 0295, 0361, 0479,
1479, 1815
Calix 0037
Canon 0035, 0102
Capehart 0020
Carver 0081
CCE 0072, 0278
Citizen 0037, 0278, 1278
Colt 0072
Craig 0037, 0047, 0240, 0072,
0271
Curtis Mathes 0060, 0035, 0162, 0041,
0760, 1035
Cybernex 0240, 0051
CyberPower 1972
Daewoo 0045, 0278, 0020, 0561,
0637, 1278
Daytron 0020
Dell 1972
Denon 0042
DirecTV 0739
Durabrand 0039, 0038
Dynatech 0000
www.urcsupport.com/atlasocap
82
Page 83

Atlas OCAP M1056.fm Page 83 Tuesday, March 24, 2009 4:45 PM
Electrohome 0037
Electrophonic 0037
Emerex 0032
Emerson 0037, 0184, 0000, 0121,
0043, 0209, 0002, 0278,
1479, 1278, 0637, 1593,
0593, 0561, 0510, 0479,
0361, 0295, 0294, 0212,
0211, 0208, 0088, 0068,
0061, 0036
Fisher 0047, 0104, 0054, 0066
Fuji 0035, 0033
Funai 0000, 0593, 1593
Garrard 0000
Gateway 1972
GE 0060, 0035, 0240, 0065,
0202, 0760, 0761, 0807,
1035, 1060
Go Video 0232, 0279, 0432, 0526,
0643
GoldStar 0037, 0038, 0018, 1237
Gradiente 0000, 0408
Grundig 0195
Harley Davidson 0000
Harman/Kardon 0081, 0038, 0075
Harwood 0072, 0068
Headquarter 0046
Hewlett Packard 1972
HI-Q 0047
Hitachi 0000, 0042, 0041, 0065,
0082, 0089, 0105, 0166
Howard Computers 1972
HP 1972
Hughes Network Systems 0042, 0739
Humax 0739
Hush 1972
iBUYPOWER 1972
Jensen 0041
JVC 0067, 0041, 0008, 0206,
0207, 0384, 1707
KEC 0037, 0278
Keen 0693
Kenwood 0067, 0041, 0038, 0384
www.urcsupport.com/atlasocap
83
Page 84

Atlas OCAP M1056.fm Page 84 Tuesday, March 24, 2009 4:45 PM
KLH 0072
Kodak 0035, 0037
LG 1037
Linksys 1972
Lloyd's 0000, 0208
Logik 0072
LXI 0037
Magnasonic 0593, 1278
Magnavox 0035, 0039, 0081, 0000,
0149, 0110, 0563, 0593,
1593, 1781
Magnin 0240
Marantz 0035, 0081
Marta 0037
Matsushita 0035, 0162, 1162
Media Center PC 1972
MEI 0035
Memorex 0035, 0162, 0037, 0048,
0039, 0047, 0240, 0000,
0104, 0209, 0046, 0307,
0454, 0479, 1037, 1162,
1237, 1262
MGA 0240, 0043, 0061
MGN Technology 0240
Microsoft 1972
Mind 1972
Minolta 0042, 0105
Mitsubishi 0067, 0043, 0061, 0075,
0173, 0443, 0807
Motorola 0035, 0048
MTC 0240, 0000
Multitech 0000, 0072
NAD 0058
NEC 0104, 0067, 0041, 0038,
0040, 0050, 0082
Nikko 0037
Nikon 0034
Niveus Media 1972
Noblex 0240
Northgate 1972
Olympus 0035, 0226
Onkyo 0222
www.urcsupport.com/atlasocap
84
Page 85

Atlas OCAP M1056.fm Page 85 Tuesday, March 24, 2009 4:45 PM
Optimus 1062, 0162, 0037, 0048,
0104, 0058, 0432, 0454,
0593, 1048, 1162, 1262
Optonica 0062
Orion 0184, 0209, 0002, 0295,
0479, 1479
Panasonic 1062, 0035, 0162, 0077,
0102, 0225, 0226, 0227,
0378, 0454, 0616, 1035,
1162, 1262
Penney 0035, 0037, 0240, 0042,
0038, 0040, 0054, 1035,
1237
Pentax 0042, 0065, 0105
Philco 0035
Philips 0035, 0081, 0062, 0110,
0618, 0739, 1081, 1181
Pilot 0037
Pioneer 0067, 0058
Polk Audio 0081
Portland 0020
Presidian 1593
Profitronic 0240
Proscan 0060, 0202, 0760, 0761,
1060
Protec 0072
Pulsar 0039, 0051
Quarter 0046
Quartz 0046
Quasar 0035, 0162, 0077, 0454,
1035, 1162
RadioShack 0000, 1037
Radix 0037
Randex 0037
RCA 0060, 0240, 0042, 0149,
0058, 0065, 0077, 0105,
0106, 0202, 0760, 0761,
0807, 0880, 1035, 1060
Realistic 0035, 0037, 0048, 0047,
0000, 0104, 0046, 0062,
0066
ReplayTV 0614, 0616
Ricavision 1972
Ricoh 0034
www.urcsupport.com/atlasocap
85
Page 86

Atlas OCAP M1056.fm Page 86 Tuesday, March 24, 2009 4:45 PM
Runco 0039
Salora 0075
Samsung 0240, 0045, 0051, 0053,
0739, 1014
Samtron 0643
Sanky 0048, 0039
Sansui 0000, 0067, 0209, 0041,
0082, 0271, 0479, 1479
Sanyo 0047, 0240, 0104, 0046,
0159
Scott 0184, 0045, 0121, 0043,
0210, 0211, 0212
Sears 0035, 0037, 0047, 0000,
0042, 0104, 0046, 0054,
0066, 0105, 1237
Sharp 0048, 0062, 0807, 0848
Shintom 0072
Shogun 0240, 0051
Singer 0072
Sonic Blue 0614, 0616
Sony 0035, 0032, 0033, 0000,
0011, 0034, 0636, 1032,
1232, 1972
Stack 9 1972
STS 0042
Sylvania 0035, 0081, 0000, 0043,
0110, 0593, 1593, 1781
Symphonic 0000, 0593, 1593
Systemax 1972
Tagar Systems 1972
Tatung 0041
Teac 0000, 0041
Technics 0035, 0162
Teknika 0035, 0037, 0000, 0052
Thomas 0000
Tivo 0618, 0636, 0739, 1996
TMK 0240, 0036, 0208
Toshiba 0045, 0043, 0066, 0210,
0212, 0366, 0845, 1008,
1145, 1972, 1996
Totevision 0037, 0240
Touch 1972
Unitech 0240
www.urcsupport.com/atlasocap
86
Page 87

Atlas OCAP M1056.fm Page 87 Tuesday, March 24, 2009 4:45 PM
Vector 0045
Vector Research 0038, 0040
Video Concepts 0045, 0040, 0061
Videomagic 0037
Videosonic 0240
Viewsonic 1972
Villain 0000
Voodoo 1972
Wards 0060, 0035, 0048, 0047,
0081, 0240, 0000, 0042,
0072, 0149, 0062, 0212,
0760
White Westinghouse 0209, 0072, 0637
XR-1000 0035, 0000, 0072
Yamaha 0038
Zenith 0039, 0033, 0000, 0209,
0034, 0479, 0637, 1139,
1479
ZT Group 1972
www.urcsupport.com/atlasocap
87
Page 88

Atlas OCAP M1056.fm Page 88 Tuesday, March 24, 2009 4:45 PM
M1056F
Revision 3.0
 Loading...