

Page 1

UAD S
OFTWARE
S
ERSION
V
YSTEM
6.3.2
M
ANUAL
Universal Audio, Inc.
1700 Green Hills Road
Scotts Valley, CA 95066-4926
Voice: +1-831-440-1176
Fax: +1-831-461-1550
www.uaudio.com
Customer Support
USA (toll-free): 1-877-698-2834
International: +1-831-1176
Page 2

N
OTICES
Disclaimer
This manual provides general information, preparation for use, installation and
operating instructions for Universal Audio UAD Powered Plug-Ins. The
information contained in this manual is subject to change without notice.
Universal Audio, Inc. makes no warranties of any kind with regard to this
manual, or the product(s) it refers to, including, but not limited to, the implied
warranties of merchantability and fitness for a particular purpose.
Universal Audio, Inc. shall not be liable for errors contained herein or direct,
indirect, special, incidental, or consequential damages in connection with the
furnishing, performance, or use of this material or the product(s).
Damage Requiring Service
The unit should be serviced by qualified service personnel when:
• The AC power supply cord or the plug has been damaged;
• Objects have fallen or liquid has been spilled into the unit;
• The unit has been exposed to rain;
• The unit does not operate normally or exhibits a marked change in
performance;
• The unit has been dropped, or the enclosure damaged.
Important Safety Instructions
Before using this unit, be sure to carefully read the applicable items of these
operating instructions and the safety suggestions. Afterwards keep them handy
for future reference. Take special care to follow the warnings indicated on the
unit, as well as in the operating instructions.
Water and Moisture
Do not use the unit near any source of water or in excessively moist
environments.
Object and Liquid Entry
Care should be taken so that objects do not fall, and liquids are not spilled, into
the enclosure through openings.
Ventilation
When installing the unit in a rack or any other location, be sure there is
adequate ventilation. Improper ventilation will cause overheating, and can
damage the unit.
Heat
The unit should be situated away from heat sources, or other equipment that
produces heat.
Power Sources
The unit should be connected to a power supply only of the type described in
the operating instructions, or as marked on the unit.
Power Cord Protection
AC power supply cords should be routed so that they are not likely to be walked
on or pinched by items placed upon or against them. Pay particular attention to
cords at plugs, convenience receptacles, and the point where they exit from the
unit. Never take hold of the plug or cord if your hand is wet. Always grasp the
plug body when connecting or disconnecting AC.
Cleaning
The external unit should be cleaned only with a damp cloth and mild soap if
necessary. Chemical cleaners may damage the silkscreen and/or finish.
Nonuse Periods
The AC power supply cord of the unit should be unplugged from the AC outlet
when left unused for a long period of time.
FCC Compliance
This equipment has been tested and found to comply with the limits for a Class
B digital device, pursuant to part 15 of the FCC Rules. These limits are designed
to provide reasonable protection against harmful interference in a residential
installation.
This equipment generates, uses and can radiate radio frequency energy and, if
not installed and used in accordance with the instructions, may cause harmful
interference to radio communications. However, there is no guarantee that
interference will not occur in a particular installation.
If this equipment does cause harmful interference to radio or television
reception, which can be determined by turning the equipment off and on, the
user is encouraged to try to correct the interference by one or more of the
following measures:
• Reorient or relocate the receiving antenna.
• Increase the separation between the equipment and receiver.
• Connect the equipment into an outlet on a circuit different from that to which
the receiver is connected.
• Consult the dealer or an experienced radio/TV technician for help.
Caution: Changes or modifications not expressly approved by Universal Audio
could void the user's authority to operate the equipment.
Warranty
The Warranty for all Universal Audio hardware is one (1) year from date of
purchase, including parts and labor.
Service & Support
Even the best-built audio equipment in the world will sometimes fail. In those
rare instances, our goal here at UA is to get you up and running again as soon
as possible. If you are experiencing problems with your UAD product, please
visit the Universal Audio website at http://www.uaudio.com to validate
compatibility, and read the FAQs regarding UAD products. If you still require
service, contact UA Tech Support at 877-MY-UAUDIO, or visit
http://www.uaudio.com/support/contact.html to create a help ticket, and we
will help troubleshoot your system. (Canadian and overseas customers should
contact their local distributor, which can be found using the Dealer Locator at
http://www.uaudio.com.) When calling Tech Support for assistance, please
have the product serial number available, and have your unit set up in front of
you, turned on, and exhibiting the problem. This will help us diagnose and
solve any problems as quickly as possible. Thank you.
The user should not attempt to service the unit beyond that described in the
operating instructions. All other servicing should be referred to qualified service
personnel.
UAD System Manual
Version 121016
Page 3

Universal Audio, Inc.
End User License Agreement
By installing the software and clicking through this window, you confirm your
acceptance of the Universal Audio End User License Agreement, as well as the
Universal Audio terms of service and privacy policy, and any additional ThirdParty Software terms, all of which can be found at:
http://www.uaudio.com/eula
This Universal Audio End-User License Agreement ("Agreement") is between
Universal Audio, Inc. ("Universal Audio") and you. IMPORTANT - PLEASE
READ THIS LICENSE AGREEMENT CAREFULLY BEFORE
INSTALLING THIS SOFTWARE. By using the Universal Audio software
("Universal Audio Software"), you accept these terms. The Universal Audio
Software may be distributed with software or components from third-parties
("Third-Party Software"). Use of Third-Party Software is also subject to the
terms of this EULA, although certain third parties may have additional terms
found at: http://www.uaudio.com/eula. The Universal Audio Software and
Third-Party Software shall be collectively referred as "Software" in this
Agreement.
If you do not accept these terms, do not use the Software provided with this
installation. Instead, return the Software to the reseller for a refund or credit or,
if you purchased your Software license directly from Universal Audio, contact
Universal Audio for information at 877-MY-UAUDIO (877-698-2324). For a
list of authorized resellers, see: http://www.uaudio.com/where-to-buy.html.
1. Limited Use License. The Software is licensed, not sold, by Universal Audio
or its Third-Party Software suppliers ("Suppliers") to the original end user for
use only on the terms set forth in the Agreement. If and only if your Software is
purchased through a Universal Audio Authorized Dealer or Distributor,
Universal Audio, as Licensor, grants you, as an end user Licensee, a nonexclusive license to use the Software (which includes computer software,
updates and any bug fixes subsequently delivered and associated media, printed
materials and "online" or electronic documentation) with a single computer
unit at a single location.
2. Title. The Software is owned by Universal Audio or its Suppliers as
applicable, and is protected by copyright laws and international treaty
provisions, as well as other intellectual property laws and treaties. Universal
Audio (or its Suppliers, as applicable) retains title to and ownership of the
Software and all copies, as well as any rights not specifically granted. This
Agreement only gives you certain rights to use the Software and related
documentation, which may be revoked if you do not follow these terms.
3. Limited Rights to Install and Use the Software.
(i) Permitted use and restrictions. You may install the Software into the memory
of a single computer for your internal business use or your own personal
enjoyment, but may not redistribute or electronically transfer the Software to
someone else's computer or operate it in a time-sharing or service-bureau
operation. Additionally, you may only use the Software on a computer that
contains a maximum of eight (8) UAD Devices, specifically four UAD-1
devices and four UAD-2 devices. "UAD Devices" includes UAD-1 and UAD2 cards, as well as the UAD-Xpander, UAD-2 Satellite and Apollo products.
The sole exceptions are—if you are a licensee of the UAD-2 Solo/Laptop card,
UAD-2 Satellite or Apollo, you may link those UAD Devices to an existing
computer previously registered.
(ii) Reverse engineering and copying limitations. You may make one copy of the
Software for backup purposes only (and replacement backup copies in the event
of loss of or damage to a backup copy), provided you include all copyright
notices contained on the original media on the backup copy. You may not
modify, translate, adapt, reverse engineer, decompile, create other works from,
or disassemble the Software or any portions thereof (except and to the extent
that applicable law expressly permits reverse engineering, decompilation or
disassembly). Similarly, you may not copy, modify, adapt, transfer, or create
other works based upon the printed materials and "online" or electronic
documentation accompanying or published for use with the Software (the
"Documentation").
(iii) Technical limitations. The Software may include technological measures,
whether in the Software or in bundled hardware or both, that are designed to
prevent or detect unlicensed use of the Software. Circumvention of these
technological measures is prohibited, except and only to the extent that
applicable law expressly permits, despite this limitation. Any attempt to
circumvent technical limitations may render the Software or certain features
unusable or unstable, and may prevent you from updating or upgrading the
Software.
(iv) No reconfiguration. The Software is licensed for installation and use only
in the manner it was provided to you, as configured by an automated
installation program provided with the Software, or as described in Universal
Audio's Documentation. You may not separate the components contained in
the Software or otherwise reconfigure the Software to circumvent technical
limitations on the use of the Software or to otherwise exceed the scope of your
license.
4. Export, Renting and Transfer Restrictions. You may not export, convey, rent,
sublicense, or otherwise distribute the Software or any rights therein to any
person or entity. You may, however, transfer the Software license, but only
under the following limited terms and conditions:
(i) Eligible transferees. You may transfer the license and remainder of the
Limited Warranty to a transferee, only if (a) the Software license transfer is done
in connection with a permitted Hardware transfer, as detailed at
http://www.uaudio.com/support/uad/transfer-faq; (b) You have provided
registration details (your name, hardware ID(s), user e-mail ID, buyer's name
and buyer's e-mail address) to Universal Audio at info@uaudio.com in advance
of the transfer; and (c) the transferee has agreed to be bound by the terms of this
license by registering with Universal Audio at http://www.uaudio.com/my. Any
permitted transferee may not subsequently transfer this license.
(ii) Eligible products. The Software may only be transferred in connection with
up to four (4) UAD-1 devices and four (4) UAD-2 devices per user account.
Special exceptions may arise where the use of more than eight (8) UAD Devices
is required. These cases are generally related to areas of education and multiroom facilities, and require advanced approval if requesting to sell or transfer
over eight (8) UAD Devices per account. If you have questions or are seeking
an exception, please contact customer support at 877-MY-UAUDIO (877698-2324).
5. Limited Warranty. Universal Audio and its Suppliers grant solely to you a
limited warranty for a period of ninety (90) days from the original purchase date
that the media on which the Software is distributed shall be substantially free
from material defects. Your exclusive remedy under this warranty (at Universal
Audio's option) is to return and have replaced the inaccurate media containing
the Software or receive a refund of the price paid. NEITHER UNIVERSAL
AUDIO NOR ITS SUPPLIERS WARRANT THAT THE SOFTWARE
WILL MEET YOUR REQUIREMENTS OR THAT ITS OPERATION
WILL BE UNINTERRUPTED OR ERROR-FREE. EXCEPT AS
SPECIFIED HEREIN, UNIVERSAL AUDIO AND ITS SUPPLIERS
MAKE NO WARRANTIES OR REPRESENTATIONS, EXPRESS OR
IMPLIED, REGARDING THE SOFTWARE, DOCUMENTATION, OR
MEDIA, AND HEREBY EXPRESSLY DISCLAIMS THE WARRANTIES
OF MERCHANTABILITY, FITNESS FOR A PARTICULAR PURPOSE,
AND NONINFRINGEMENT OF THIRD PARTY RIGHTS.
FURTHERMORE, UNIVERSAL AUDIO DOES NOT WARRANT OR
MAKE ANY REPRESENTATIONS REGARDING THE USE OR THE
RESULTS OF THE USE OF THE SOFTWARE OR DOCUMENTATION
IN TERMS OF THEIR CORRECTNESS, ACCURACY, RELIABILITY,
OR OTHERWISE. NO ORAL OR WRITTEN INFORMATION OR
ADVICE GIVEN BY UNIVERSAL AUDIO OR A UNIVERSAL AUDIOAUTHORIZED REPRESENTATIVE SHALL CREATE A WARRANTY
OR IN ANY WAY INCREASE THE SCOPE OF THIS WARRANTY.
EXCEPT AS SPECIFIED HEREIN, SHOULD THE SOFTWARE PROVE
DEFECTIVE, YOU (AND NOT UNIVERSAL AUDIO OR A UNIVERSAL
AUDIO-AUTHORIZED REPRESENTATIVE OR SUPPLIER) ASSUME
THE ENTIRE COST OF ALL NECESSARY SERVICING, REPAIR, OR
CORRECTION. SOME JURISDICTIONS DO NOT ALLOW THE
EXCLUSION OF IMPLIED WARRANTIES, SO THE ABOVE
EXCLUSION MAY NOT APPLY TO YOU.
Page 4

6. Excluded Products. Universal Audio and its Suppliers give NO warranty for
Software free of charge, including Software designated as "limited release," "prerelease," "loan," "beta" or "test." This Software is provided "AS IS."
7. Limitation of Liability. UNIVERSAL AUDIO AND ITS SUPPLIERS
SHALL HAVE NO LIABILITY TO YOU WHETHER IN CONTRACT,
TORT, NEGLIGENCE OR PRODUCTS LIABILITY, FOR ANY CLAIM,
LOSS, OR DAMAGE, INCLUDING BUT NOT LIMITED TO LOST
PROFITS, LOSS OF USE, BUSINESS INTERRUPTION, LOST DATA,
OR LOST FILES, OR FOR ANY INDIRECT, SPECIAL, INCIDENTAL
OR CONSEQUENTIAL DAMAGES OF ANY KIND OR NATURE
WHATSOEVER ARISING OUT OF OR IN CONNECTION WITH THE
USE OF OR INABILITY TO USE THE SOFTWARE OR
DOCUMENTATION, OR THE PERFORMANCE OR OPERATION OF
THE SOFTWARE, EVEN IF UNIVERSAL AUDIO OR ITS SUPPLIERS
HAS BEEN ADVISED OF THE POSSIBILITY OF SUCH DAMAGES.
SOME STATES DO NOT ALLOW THE EXCLUSION OR LIMITATION
OF INCIDENTAL OR CONSEQUENTIAL DAMAGES, SO THE ABOVE
EXCLUSION OR LIMITATION MAY NOT APPLY TO YOU. IN NO
EVENT SHALL UNIVERSAL AUDIO'S TOTAL LIABILITY TO YOU
FOR ALL DAMAGES, LOSSES, AND CAUSES OF ACTION WHETHER
IN CONTRACT, TORT (INCLUDING NEGLIGENCE) OR
OTHERWISE EXCEED THE AMOUNT PAID BY YOU FOR THE
SOFTWARE.
8. Termination. To the extent permitted by law, and without prejudice to any
other rights Universal Audio may have, Universal Audio may terminate your
license if you materially breach these terms and conditions. Upon termination
by Universal Audio, you will return to Universal Audio, at your expense, the
Software, including Documentation, and any copies thereof.
9. Notice to U. S. Government End Users. The software is a "commercial item"
as that term is defined in 48 CFR 2.101 (Oct. 2005), consisting of "commercial
computer software documentation," as such terms are used in 48 CFR 12.212
(Sept. 2005). Consistent with 48 CFR 12.212 and 48 CFR 227.7202-1
through 227.7202-4 (June 2005), all U.S. Government End Users acquire the
software with only those rights set forth herein. All software provided to the
U.S. Government pursuant to solicitations issued prior to December 1, 1995 is
provided with "Restricted Rights" as provided for in FAR, 48 CFR 52.227-14
(June 1987) or DFAR, 48 CFR 252.227-7013 (Oct. 1988) as application. This
provision does not apply if you are not affiliated with the government of the
United States of America.
Should you have any questions concerning this Agreement, please contact
Universal Audio at 1700 Green Hills Road, Scotts Valley, CA, 95066-4926
USA, +1-831-440-1176 voice, +1-831-461-1550 fax, www.uaudio.com web.
Copyright
(c) 2012 Universal Audio, Inc. All rights reserved.
This manual and any associated software, artwork, product designs, and design
concepts are subject to copyright protection. No part of this document may be
reproduced, in any form, without prior written permission of Universal Audio,
Inc. Your rights to the Software are governed by the accompanying End-User
license agreement.
Trademarks
Universal Audio, the Universal Audio "diamond" logo, UAD, UAD Series,
UAD-1, UAD-2, UAD-2 SOLO, UAD-2 DUO, UAD-2 QUAD, "Powered
Plug-Ins", 1176LN, 1176SE, Teletronix, LA-2A, LA-3A, LA-610, LA610MkII, 2-1176, 2-610, 6176, 710 Twin-Finity, 2192, 4-710d, Cambridge
EQ, DreamVerb, Plate 140, Precision Limiter, RealVerb Pro, Precision Buss
Compressor, Precision De-Esser, Precision Maximizer, Satellite DUO, Satellite
QUAD, Apollo and "Analog Ears | Digital Minds," are trademarks or registered
trademarks of Universal Audio, Inc. Other company and product names
mentioned herein are trademarks of their respective owners.
Last Updated March 27, 2012
10. Export restrictions. The Software is subject to United States export laws and
regulations. If you are subject to U.S. laws, you must comply with these laws,
which include restrictions on destinations, end users and end use. For further
information, please see http://www.bis.doc.gov.
11. Consent to Use Data. Universal Audio may collect and use technical
information about the Software and hardware devices you use in connection
with the Software in a manner that does not personally identify you. Universal
Audio may use this information to improve our products or to provide
customized services or technologies. Universal Audio may also disclose this
information to third parties so that they may improve the way their products or
services interact with the Software.
12. Third-Party Software and Information. This EULA governs any ThirdParty Software distributed by Universal Audio. Universal Audio may include
information about third party products and services, including links to Web
sites run by others. Universal Audio is not responsible for, and does not endorse
or sponsor, this third-party information.
13. Miscellaneous. This Agreement shall be governed by and construed in
accordance with the laws of the United States and the State of California, as
applied to agreements entered into and to be performed entirely within
California between California residents. If for any reason a court of competent
jurisdiction finds any provision of this Agreement or portion thereof to be
unenforceable, that provision or part thereof shall be enforced to the maximum
extent permissible so as to effect the intent of the parties, and the remainder of
this Agreement shall continue in full force and effect. This Agreement
constitutes the entire agreement between the parties with respect to the use of
the Software and Documentation, and supersedes all prior or contemporaneous
understandings or agreements, written or oral, regarding such subject matter.
No amendment to or modification of this Agreement will be binding unless in
writing and signed by a duly authorized representative of Universal Audio.
Page 5

TABLE OF CONTENTS
Chapter 1. Introduction . . . . . . . . . . . . . . . . . . . . . . . . . . . . . . . . . . . . . . . . . .
Welcome!
Features
The UAD System
Package Contents
UAD Documentation Overview
Online Documentation
Customer Support
. . . . . . . . . . . . . . . . . . . . . . . . . . . . . . . . . . . . . . . . . . . . . . . . . . . . . . . . . . . . . . . . . . . . . 8
. . . . . . . . . . . . . . . . . . . . . . . . . . . . . . . . . . . . . . . . . . . . . . . . . . . . . . . . . . . . . . . . . . . . . 10
. . . . . . . . . . . . . . . . . . . . . . . . . . . . . . . . . . . . . . . . . . . . . . . . . . . . . . . . . . . . . . 11
. . . . . . . . . . . . . . . . . . . . . . . . . . . . . . . . . . . . . . . . . . . . . . . . . . . . . . . . . . . . . 11
. . . . . . . . . . . . . . . . . . . . . . . . . . . . . . . . . . . . . . . . . . . . . . . . . . 11
. . . . . . . . . . . . . . . . . . . . . . . . . . . . . . . . . . . . . . . . . . . . . . . . . . . . . . . . . 13
. . . . . . . . . . . . . . . . . . . . . . . . . . . . . . . . . . . . . . . . . . . . . . . . . . . . . . . . . . . . . 14
Chapter 2. UAD Installation . . . . . . . . . . . . . . . . . . . . . . . . . . . . . . . . . . . . . .
Overview
Install Videos
System Requirements
Supported Hosts
Latest Information & Software Updates
UAD Software Installation
UAD Hardware Installation
Authorization
Authorize Plug-Ins Procedure
Offline Authorization
Verifying Installation
Software Removal
Using Unlicensed Plug-Ins (Demo Mode)
Learn More
. . . . . . . . . . . . . . . . . . . . . . . . . . . . . . . . . . . . . . . . . . . . . . . . . . . . . . . . . . . . . . . . . . . . 15
. . . . . . . . . . . . . . . . . . . . . . . . . . . . . . . . . . . . . . . . . . . . . . . . . . . . . . . . . . . . . . . . . 15
. . . . . . . . . . . . . . . . . . . . . . . . . . . . . . . . . . . . . . . . . . . . . . . . . . . . . . . . . . . 16
. . . . . . . . . . . . . . . . . . . . . . . . . . . . . . . . . . . . . . . . . . . . . . . . . . . . . . . . . . . . . . 16
. . . . . . . . . . . . . . . . . . . . . . . . . . . . . . . . . . . . . . . . . . . . 17
. . . . . . . . . . . . . . . . . . . . . . . . . . . . . . . . . . . . . . . . . . . . . . . . . . . . . . . 18
. . . . . . . . . . . . . . . . . . . . . . . . . . . . . . . . . . . . . . . . . . . . . . . . . . . . . . 20
. . . . . . . . . . . . . . . . . . . . . . . . . . . . . . . . . . . . . . . . . . . . . . . . . . . . . . . . . . . . . . . . . 22
. . . . . . . . . . . . . . . . . . . . . . . . . . . . . . . . . . . . . . . . . . . . . . . . . . . . 23
. . . . . . . . . . . . . . . . . . . . . . . . . . . . . . . . . . . . . . . . . . . . . . . . . . . . . . . . . . 24
. . . . . . . . . . . . . . . . . . . . . . . . . . . . . . . . . . . . . . . . . . . . . . . . . . . . . . . . . . . 26
. . . . . . . . . . . . . . . . . . . . . . . . . . . . . . . . . . . . . . . . . . . . . . . . . . . . . . . . . . . . . 27
. . . . . . . . . . . . . . . . . . . . . . . . . . . . . . . . . . . . . . . . . . . 27
. . . . . . . . . . . . . . . . . . . . . . . . . . . . . . . . . . . . . . . . . . . . . . . . . . . . . . . . . . . . . . . . . . 27
8
15
Chapter 3. UAD System Overview . . . . . . . . . . . . . . . . . . . . . . . . . . . . . . . . .
The UAD Environment
The UAD Hardware
The UAD Software
The DAW Environment
My.uaudio.com
Authorization
. . . . . . . . . . . . . . . . . . . . . . . . . . . . . . . . . . . . . . . . . . . . . . . . . . . . . . . . . . . . . . . . . 35
. . . . . . . . . . . . . . . . . . . . . . . . . . . . . . . . . . . . . . . . . . . . . . . . . . . . . . . . . . 28
. . . . . . . . . . . . . . . . . . . . . . . . . . . . . . . . . . . . . . . . . . . . . . . . . . . . . . . . . . . . 28
. . . . . . . . . . . . . . . . . . . . . . . . . . . . . . . . . . . . . . . . . . . . . . . . . . . . . . . . . . . . . 31
. . . . . . . . . . . . . . . . . . . . . . . . . . . . . . . . . . . . . . . . . . . . . . . . . . . . . . . . . 33
. . . . . . . . . . . . . . . . . . . . . . . . . . . . . . . . . . . . . . . . . . . . . . . . . . . . . . . . . . . . . . . 35
Chapter 4. My.uaudio.com. . . . . . . . . . . . . . . . . . . . . . . . . . . . . . . . . . . . . . .
Optional Plug-Ins
Authorization Overview
Demo Mode
UA Online Store
Buying Plug-Ins
Transferring UAD devices and licenses
UAD System Manual - 5 - Table of Contents
. . . . . . . . . . . . . . . . . . . . . . . . . . . . . . . . . . . . . . . . . . . . . . . . . . . . . . . . . . . . . . 36
. . . . . . . . . . . . . . . . . . . . . . . . . . . . . . . . . . . . . . . . . . . . . . . . . . . . . . . . 37
. . . . . . . . . . . . . . . . . . . . . . . . . . . . . . . . . . . . . . . . . . . . . . . . . . . . . . . . . . . . . . . . . . 40
. . . . . . . . . . . . . . . . . . . . . . . . . . . . . . . . . . . . . . . . . . . . . . . . . . . . . . . . . . . . . . 41
. . . . . . . . . . . . . . . . . . . . . . . . . . . . . . . . . . . . . . . . . . . . . . . . . . . . . . . . . . . . . . . 42
. . . . . . . . . . . . . . . . . . . . . . . . . . . . . . . . . . . . . . . . . . . . 43
28
36
Page 6

TABLE OF CONTENTS
Chapter 5. Using Multiple UAD Devices. . . . . . . . . . . . . . . . . . . . . . . . . . . . . .
Overview
Plug-In License Policy
Authorizing Multiple Devices
Power Requirement
Multidevice DSP Loading
Device Info Display
Disabling Devices
Host CPU
. . . . . . . . . . . . . . . . . . . . . . . . . . . . . . . . . . . . . . . . . . . . . . . . . . . . . . . . . . . . . . . . . . . . 44
. . . . . . . . . . . . . . . . . . . . . . . . . . . . . . . . . . . . . . . . . . . . . . . . . . . . . . . . . . 44
. . . . . . . . . . . . . . . . . . . . . . . . . . . . . . . . . . . . . . . . . . . . . . . . . . . . 44
. . . . . . . . . . . . . . . . . . . . . . . . . . . . . . . . . . . . . . . . . . . . . . . . . . . . . . . . . . . . 45
. . . . . . . . . . . . . . . . . . . . . . . . . . . . . . . . . . . . . . . . . . . . . . . . . . . . . . . 46
. . . . . . . . . . . . . . . . . . . . . . . . . . . . . . . . . . . . . . . . . . . . . . . . . . . . . . . . . . . . 46
. . . . . . . . . . . . . . . . . . . . . . . . . . . . . . . . . . . . . . . . . . . . . . . . . . . . . . . . . . . . . 46
. . . . . . . . . . . . . . . . . . . . . . . . . . . . . . . . . . . . . . . . . . . . . . . . . . . . . . . . . . . . . . . . . . . . 47
Chapter 6. UAD Meter & Control Panel . . . . . . . . . . . . . . . . . . . . . . . . . . . . . .
Overview
Launching the UAD Meter & Control Panel Application
Using the UAD Meter
UAD Meter Elements
UAD Control Panel
System Information Panel
Plug-Ins Panel
Configuration Panel
FireWire Panel
Help & Support Panel
. . . . . . . . . . . . . . . . . . . . . . . . . . . . . . . . . . . . . . . . . . . . . . . . . . . . . . . . . . . . . . . . . . . . 48
. . . . . . . . . . . . . . . . . . . . . . . . . . . . . . . 49
. . . . . . . . . . . . . . . . . . . . . . . . . . . . . . . . . . . . . . . . . . . . . . . . . . . . . . . . . . 49
. . . . . . . . . . . . . . . . . . . . . . . . . . . . . . . . . . . . . . . . . . . . . . . . . . . . . . . . . . . 50
. . . . . . . . . . . . . . . . . . . . . . . . . . . . . . . . . . . . . . . . . . . . . . . . . . . . . . . . . . . . 51
. . . . . . . . . . . . . . . . . . . . . . . . . . . . . . . . . . . . . . . . . . . . . . . . . . . . . . . 52
. . . . . . . . . . . . . . . . . . . . . . . . . . . . . . . . . . . . . . . . . . . . . . . . . . . . . . . . . . . . . . . . 55
. . . . . . . . . . . . . . . . . . . . . . . . . . . . . . . . . . . . . . . . . . . . . . . . . . . . . . . . . . . 58
. . . . . . . . . . . . . . . . . . . . . . . . . . . . . . . . . . . . . . . . . . . . . . . . . . . . . . . . . . . . . . . . 64
. . . . . . . . . . . . . . . . . . . . . . . . . . . . . . . . . . . . . . . . . . . . . . . . . . . . . . . . . . 69
44
48
Chapter 7. Using UAD Powered Plug-Ins . . . . . . . . . . . . . . . . . . . . . . . . . . . .
Overview
Launching a UAD Powered Plug-In
The UAD Plug-In Window
UAD Toolbar
LiveTrack Mode
Adjusting Parameters
Shortcuts
DSP Loading Information
Automation
. . . . . . . . . . . . . . . . . . . . . . . . . . . . . . . . . . . . . . . . . . . . . . . . . . . . . . . . . . . . . . . . . . . . 71
. . . . . . . . . . . . . . . . . . . . . . . . . . . . . . . . . . . . . . . . . . . . . . . 71
. . . . . . . . . . . . . . . . . . . . . . . . . . . . . . . . . . . . . . . . . . . . . . . . . . . . . . 72
. . . . . . . . . . . . . . . . . . . . . . . . . . . . . . . . . . . . . . . . . . . . . . . . . . . . . . . . . . . . . . . . . 73
. . . . . . . . . . . . . . . . . . . . . . . . . . . . . . . . . . . . . . . . . . . . . . . . . . . . . . . . . . . . . . . 75
. . . . . . . . . . . . . . . . . . . . . . . . . . . . . . . . . . . . . . . . . . . . . . . . . . . . . . . . . . 77
. . . . . . . . . . . . . . . . . . . . . . . . . . . . . . . . . . . . . . . . . . . . . . . . . . . . . . . . . . . . . . . . . . . . . 78
. . . . . . . . . . . . . . . . . . . . . . . . . . . . . . . . . . . . . . . . . . . . . . . . . . . . . . . 79
. . . . . . . . . . . . . . . . . . . . . . . . . . . . . . . . . . . . . . . . . . . . . . . . . . . . . . . . . . . . . . . . . . 80
71
External MIDI Control . . . . . . . . . . . . . . . . . . . . . . . . . . . . . . . . . . . . . . . . . . . . . . . . . . . . . . . . . . 81
Operating Levels . . . . . . . . . . . . . . . . . . . . . . . . . . . . . . . . . . . . . . . . . . . . . . . . . . . . . . . . . . . . . . 81
Chapter 8. Tempo Sync . . . . . . . . . . . . . . . . . . . . . . . . . . . . . . . . . . . . . . . . . 82
Overview . . . . . . . . . . . . . . . . . . . . . . . . . . . . . . . . . . . . . . . . . . . . . . . . . . . . . . . . . . . . . . . . . . . . 82
Tempo Sync Plug-Ins . . . . . . . . . . . . . . . . . . . . . . . . . . . . . . . . . . . . . . . . . . . . . . . . . . . . . . . . . . . 82
Available Note Values . . . . . . . . . . . . . . . . . . . . . . . . . . . . . . . . . . . . . . . . . . . . . . . . . . . . . . . . . 83
Range Limits. . . . . . . . . . . . . . . . . . . . . . . . . . . . . . . . . . . . . . . . . . . . . . . . . . . . . . . . . . . . . . . . . . 84
UAD System Manual - 6 - Table of Contents
Page 7

TABLE OF CONTENTS
Entering Values . . . . . . . . . . . . . . . . . . . . . . . . . . . . . . . . . . . . . . . . . . . . . . . . . . . . . . . . . . . . . . . 84
Out of range . . . . . . . . . . . . . . . . . . . . . . . . . . . . . . . . . . . . . . . . . . . . . . . . . . . . . . . . . . . . . . . . . 85
Modes with Tempo Sync. . . . . . . . . . . . . . . . . . . . . . . . . . . . . . . . . . . . . . . . . . . . . . . . . . . . . . . . 85
Roland RE-201 Sync . . . . . . . . . . . . . . . . . . . . . . . . . . . . . . . . . . . . . . . . . . . . . . . . . . . . . . . . . . . 85
Chapter 9. UAD Delay Compensation . . . . . . . . . . . . . . . . . . . . . . . . . . . . . . . 86
Latency & Delay Compensation . . . . . . . . . . . . . . . . . . . . . . . . . . . . . . . . . . . . . . . . . . . . . . . . . . 86
Upsampled Plug-Ins. . . . . . . . . . . . . . . . . . . . . . . . . . . . . . . . . . . . . . . . . . . . . . . . . . . . . . . . . . . . 87
Upsampling Values Table . . . . . . . . . . . . . . . . . . . . . . . . . . . . . . . . . . . . . . . . . . . . . . . . . . . . . . . 88
Live Processing. . . . . . . . . . . . . . . . . . . . . . . . . . . . . . . . . . . . . . . . . . . . . . . . . . . . . . . . . . . . . . . . 89
Chapter 10. UAD-2 SOLO/Laptop . . . . . . . . . . . . . . . . . . . . . . . . . . . . . . . . . . 90
Overview . . . . . . . . . . . . . . . . . . . . . . . . . . . . . . . . . . . . . . . . . . . . . . . . . . . . . . . . . . . . . . . . . . . . 90
UAD-2 SOLO/Laptop Details. . . . . . . . . . . . . . . . . . . . . . . . . . . . . . . . . . . . . . . . . . . . . . . . . . . . 92
Important SOLO/Laptop Notes . . . . . . . . . . . . . . . . . . . . . . . . . . . . . . . . . . . . . . . . . . . . . . . . . . 95
Chapter 11. UAD-2 Satellite . . . . . . . . . . . . . . . . . . . . . . . . . . . . . . . . . . . . . . 96
Overview . . . . . . . . . . . . . . . . . . . . . . . . . . . . . . . . . . . . . . . . . . . . . . . . . . . . . . . . . . . . . . . . . . . . 96
UAD-2 Satellite Details . . . . . . . . . . . . . . . . . . . . . . . . . . . . . . . . . . . . . . . . . . . . . . . . . . . . . . . . . 97
UAD-2 Satellite Installation. . . . . . . . . . . . . . . . . . . . . . . . . . . . . . . . . . . . . . . . . . . . . . . . . . . . . . 98
UAD-2 Satellite Operation . . . . . . . . . . . . . . . . . . . . . . . . . . . . . . . . . . . . . . . . . . . . . . . . . . . . . 101
Important UAD-2 Satellite Notes . . . . . . . . . . . . . . . . . . . . . . . . . . . . . . . . . . . . . . . . . . . . . . . . 103
FireWire Basics . . . . . . . . . . . . . . . . . . . . . . . . . . . . . . . . . . . . . . . . . . . . . . . . . . . . . . . . . . . . . . 105
FireWire Bandwidth . . . . . . . . . . . . . . . . . . . . . . . . . . . . . . . . . . . . . . . . . . . . . . . . . . . . . . . . . . 109
FireWire Bandwidth vs. UAD DSP . . . . . . . . . . . . . . . . . . . . . . . . . . . . . . . . . . . . . . . . . . . . . . . 111
FireWire Bus Power. . . . . . . . . . . . . . . . . . . . . . . . . . . . . . . . . . . . . . . . . . . . . . . . . . . . . . . . . . . 112
Chapter 12. History . . . . . . . . . . . . . . . . . . . . . . . . . . . . . . . . . . . . . . . . . . . 114
Bill Putnam Sr. . . . . . . . . . . . . . . . . . . . . . . . . . . . . . . . . . . . . . . . . . . . . . . . . . . . . . . . . . . . . . . . 114
Classic Compressors . . . . . . . . . . . . . . . . . . . . . . . . . . . . . . . . . . . . . . . . . . . . . . . . . . . . . . . . . . 118
Pros Talk UA . . . . . . . . . . . . . . . . . . . . . . . . . . . . . . . . . . . . . . . . . . . . . . . . . . . . . . . . . . . . . . . . 121
Thank You . . . . . . . . . . . . . . . . . . . . . . . . . . . . . . . . . . . . . . . . . . . . . . . . . . . . . . . . . . . . . . . . . . 125
UAD System Manual - 7 - Table of Contents
Page 8

CHAPTER 1
Introduction
Welcome!
Congratulations, and welcome to the UA Family! You now own the best
sounding, most powerful sonic upgrade available for your DAW. The UAD-2
and version 6 software represents the culmination of a multi-year development effort delivering the latest in state-of-the-art audio processing technology
and is the next evolution of the revolutionary, award-winning UAD Powered
Plug-Ins & DSP Device Platform.
For many years our customers have been asking for a UAD with more power
and the UAD-2 is all about putting more power in your hands – more power
to track, mix and master. The UAD-2 OCTO offers, on average, an incredible
20 times the power of the UAD-1, while the UAD-2 Duo offers 5 times, and
UAD-2 Solo offers 2.5 times the power. The UAD-2 Quad supports an aweinspiring 128-channel Neve 88RS mixer at 44.1k. That’s a full console for the
largest of professional mixes on ONE incredibly priced UAD-2 device!
Up to four UAD-2 devices can be mixed and matched to conveniently scale
the DSP power you want at the price you can afford. Start with a Nevana 32
and instantly run a 32 channel Neve 88RS console. Then, simply add more
devices for additional outboard FX or more mix channels as your needs grow.
Pro power-users can now use up to four UAD-2 Quads for the most demanding applications with equivalent potency to 40 UAD-1 cards! Now inside-thebox mixing is as powerful as outside.
Once you’re settled in with your new UAD-2 select from our ever growing
Powered Plug-Ins Collection to custom build your own virtual mixing console,
mastering console, mix sidecar, or inboard dream-FX-rack. UA’s exclusive
collection of revered studio gear includes classics from Neve®, Roland/BOSS®, Helios®, Fairchild, Pultec, SPL®, Moog®, Empirical Labs®,
Manley Laboratories®, dbx®, Studer®, Ampex®, SSL®, Harmon/Lexicon®,
and others, plus of course UA’s own 1176, LA-2A, and LA-3A compressors,
and our critically acclaimed Precision Series lineup. Digital recreations of
other seminal analog studio gems from other legendary analog manufacturers are always on the way.
UAD System Manual - 8 - Chapter 1: Introduction
Page 9

The UAD-2 also includes version 6 of the UAD software, which has major
driver enhancements and an all-new UAD Meter & Control Panel. Version 6
features multicore-aware drivers, LiveTrack™ for low-latency tracking and
monitoring through UAD-2 plug-ins, and L.O.D.E.™ [Live Optimizing DSP Engine], which dynamically balances the load on the UAD-2. The new UAD
Meter & Control Panel offers improved status monitoring, easy Quick-Click
Plug Purchasing, Help and Support resources, Software Updates, and improved rollover help. There’s also a new streamlined web shopping experience via a completely re-designed UA website with integrated audio and
video demo’s, tutorials, in-depth webzine articles, FAQ’s and enhanced support so you can really get the most out of your UAD-2.
Developing the UAD-2 as well as Universal Audio’s entire line of quality audio products designed to meet the needs of the modern recording studio while
retaining the character of classic vintage equipment—has been a very special
experience for me and for all who have been involved. We hope that you will
enjoy using your UAD-2 and Powered Plug-Ins as much as we do.
Thanks for your support of Universal Audio.
Sincerely,
Bill Putnam, Jr.
CEO, Owner
UAD System Manual - 9 - Chapter 1: Introduction
Page 10

Features
• High-bandwidth x1 PCI Express card (PCIe 2.0 compatible)
• UAD-2 SOLO: low-profile, half-height, short PCIe card
• UAD-2 DUO/QUAD/OCTO: full-height, short PCIe card
• UAD-2 Satellite: DUO or QUAD in FireWire enclosure w/power supply
• 1, 2, 4, or 8 Analog Devices SHARC floating-point processors
• Multi-device support for up to four UAD-2’s in one system
• Cross-Platform* for Mac and PC
• Supports VST, RTAS, and Audio Units plug-in formats
• 44.1, 48, 88.2, 96, 176.4, 192 kHz sample rate support for all plug-ins
• Drivers optimized for modern multi-thread and multi-processor architectures
• Real-time and faster than real-time processing for mix bounces
• LiveTrack™ low-latency mode for monitoring, tracking, and performance
(PCIe devices only)
*UAD-2 Satellite and Apollo are Mac Only
• L.O.D.E.™ (Live Optimizing DSP Engine) automatically balances DSP
loads*
• LoadLock™ ensures resource availability on loaded plug-ins
• UAD Meter & Control Panel application
• UAD Toolbar for preset management
• Simple Registration/Authorization process via one button click
• World’s best plug-in library with premier titles from Neve®, Roland®,
Moog®, SPL®, Manley®, Empirical Labs®, SSL®, Pultec, and more
• 14-day full function demo for all plug-ins; try before you buy
• UAD Powered Plug-Ins™ available at the my.uaudio.com online store
UAD System Manual - 10 - Chapter 1: Introduction
Page 11

The UAD System
Package Contents
UAD Powered Plug-Ins is a hardware-plus-software system that consists of one
or more UAD-2 DSP accelerator devices combined with the Powered Plug-Ins
software. Various UAD-2 products are available to accommodate your particular computer system, processing needs, and budget. For the complete
product lineup, visit our website at:
• www.uaudio.com
For a detailed overview about the UAD Powered Plug-Ins system and how it
operates, see Chapter 3, “UAD System Overview.”
Each UAD retail package includes:
• Printed Information Sheet
• UAD DSP hardware device
• UAD Software Installer CD-ROM (with PDF user documentation)
• UAD-2 Satellite has additional contents (see Chapter 11, “UAD-2 Satellite”)
UAD Documentation Overview
This section describes the various instructional and technical resources that
are available for installing, using, and troubleshooting UAD Powered PlugIns. Documentation for the product line is available in written, video, and online formats.
ReadMe The ReadMe contains important, late-breaking information that may not be
available in other locations. Please review all the information in the ReadMe
before installing or using UAD Powered Plug-Ins. The ReadMe file is presented
for viewing during the software installation process, and it is installed to:
Windows • Start Menu>All Programs>UAD Powered Plug-Ins
Mac • Startup Disk/Applications/Powered Plug-Ins Tools
UAD System Manual - 11 - Chapter 1: Introduction
Page 12

Operation Manuals
Documentation for UAD-2 and Powered Plug-Ins are separated by areas of
functionality, as described below. The user manuals are on the software CDROM, and also placed inside the Powered Plug-Ins Documentation folder on
the hard drive during software installation.
UAD System Manual
The UAD System Manual (PDF only) is the operation manual for overall UAD
functionality and applies to the entire UAD product line. It contains detailed
information about installing and configuring UAD devices, the UAD Meter &
Control Panel application, how to use UAD Powered Plug-Ins within a DAW,
obtaining optional plug-in licenses at the UA online store, and more. It includes everything about UAD except Apollo-specific information and individual UAD Powered Plug-In descriptions.
UAD Plug-Ins Manual
The features and functionality of all the individual UAD Powered Plug-Ins are
detailed in the UAD Plug-Ins Manual (PDF only). Refer to this document to
learn about the operation, controls, and interface of each plug-in.
Direct Developers
UAD Powered Plug-Ins includes plug-ins from our Direct Developer partners.
Documentation for these 3rd-party plug-ins are separate files that are written
and provided by the plug-in developers themselves. The filenames for these
plug-ins are the same as the plug-in names.
Installed Locations
The UAD and Direct Developer manual files are copied to the hard drive by
the software installer to the following locations:
Windows • Start Menu>All Programs>UAD Powered Plug-Ins>Documentation
Mac • Startup Disk/Applications/Powered Plug-Ins Tools/Documentation
Manual Conventions
UAD Powered Plug-Ins is a cross-platform solution for both Windows and Mac
computers.* The UAD hardware device can be installed into either platform;
it is the exact same hardware for both platforms. Operation of the plug-ins is
practically identical regardless of the host system platform and application.
However, certain platform-specific instructions will differ according to the host
system you are using.
*UAD-2 Satellite and Apollo are Mac only.
UAD System Manual - 12 - Chapter 1: Introduction
Page 13

Platforms Instructions in this guide that are platform-specific are indicated with a head-
ing in red letters. Instructions that are identical regardless of platform are not
differentiated.
Windows Instructions specific to the Windows platform use this red Windows heading.
Mac Instructions specific to the Mac platform use this red Mac heading.
UAD Nomenclature
Unless specified otherwise, for descriptive purposes within this manual,
“UAD-2” and “UAD” means all UAD-2 family products (SOLO, DUO, QUAD,
OCTO, Satellite, Apollo).
Screen Shots Screenshots in this manual may be taken from the Windows and/or Mac ver-
sion of the software, and are used interchangeably when the content and
functionality of the screenshot is the same on both platforms. Slight variations
in the appearance of a screenshot between operating systems are inevitable.
When the content of and function of the software represented in a screenshot
is identical on both platforms, no differentiation is made in the screenshot title.
If there is a significant difference between platforms, screenshots from both
platforms are included.
Online Documentation
The technical support pages on our website offer a wealth of helpful information that is not included in the documentation contained within the software
bundle. Please visit our support pages for important information including the
latest software, release notes, updated technical news, and more. The main
UAD Powered Plug-Ins support link is:
Support Website • www.uaudio.com/support
Videos Our website also contains many helpful videos that explain how to install
UAD hardware and software, register and authorize the products, obtain optional plug-ins, and more:
• www.uaudio.com/videos
Blog Our blog is published regularly and contains lots of useful and interesting in-
formation. How-to pages, artist/producer/engineer interviews, support Q &
A, detailed scientific notes, and other fascinating articles make the our blog
a great place to routinely visit:
• www.uaudio.com/blog
UAD System Manual - 13 - Chapter 1: Introduction
Page 14

Users Forum The unofficial UAD Powered Plug-Ins users forum, for the exchange of tips and
information, is on the world wide web at:
• www.studionu.com/uadforums
Customer Support
Customer support is provided by Universal Audio staff to all registered UAD
Powered Plug-Ins users (see “Registration” on page 41 for details).
Support Hours Our support specialists are available to assist you via email and telephone
during our normal business hours, which are from 9am to 5pm, Monday
through Friday, Pacific Standard Time.
Phone Support Customer Service & Technical Support
USA toll-free: 877-MY-UAUDIO (1-877-698-2834)
International: +1-831-440-1176
FAX: +1-831-461-1550
Online Support To request online support, please visit our support page, then click the blue
“Submit Support Ticket” button in the right column to create a help ticket:
• www.uaudio.com/support
Factory Address Universal Audio, Inc.
1700 Green Hills Road
Scotts Valley, CA 95066-4926
USA
Main Website • www.uaudio.com
Feedback Your feedback on the performance and features of UAD Powered Plug-Ins is
very important to us. Please send your comments and suggestions to us. Comments (not technical support issues) may be sent to:
• info@uaudio.com
UAD System Manual - 14 - Chapter 1: Introduction
Page 15

CHAPTER 2
UAD Installation
Overview
UAD Powered Plug-Ins installation and configuration consists of four steps:
• UAD software installation
Insert the enclosed CD-ROM and run the installer.
• UAD hardware installation
Follow the instructions in this chapter.
• UAD device registration
Add your device to your my.uaudio.com Account.
• UAD plug-in authorization
Download and apply UAD authorization file.
These steps are detailed in this chapter. Your host computer must meet the
hardware and software requirements to operate properly, and you need a
supported VST, RTAS, or Audio Units host application to run the UAD Powered Plug-Ins.
Install Videos
UAD-2 Satellite
This UAD product has its own set of hardware connection and operation instructions. Refer to Chapter 11, “UAD-2 Satellite” for complete details.
UAD-2 SOLO/Laptop
This UAD product has its own set of hardware connection and operation instructions. Refer to Chapter 10, “UAD-2 SOLO/Laptop” for complete details.
Our website contains many helpful support videos that explain how to install
the hardware and software, register and authorize the product, obtain optional plug-ins, and more:
• www.uaudio.com/videos
UAD System Manual - 15 - Chapter 2: UAD Installation
Page 16

System Requirements
UAD Powered Plug-Ins require the following hardware and software
Windows (32-bit and 64-bit):
• Windows 7 Home Premium, Professional, or Ultimate Edition
Mac OS X (32-bit and 64-bit):
• Mac OS X 10.6 Snow Leopard, 10.7 Lion, or 10.8 Mountain Lion
All Platforms:
• 2GB available hard drive space
• Available PCI Express (PCIe) slot for each UAD-2 card
• Available Firewire 800 or Firewire 400 port for UAD-2 Satellite
• 1024 x 800 minimum display resolution
• Internet connection or CD-ROM drive for software installation
• Internet connection required for registration and plug-in authorization
Supported Hosts
• Compatible VST, RTAS, or Audio Units plug-in host application software
(see Table 1 on page 17)
UAD Powered Plug-Ins, when combined with a plug-in host application, is a
technically complex system with many variables. Because the host application
environment is integral to the system but is completely out of our control, we
cannot claim compatibility with all hosts that may claim to support the use of
VST, RTAS, and/or Audio Units plug-ins.
We test the specific host applications listed in Table 1 on page 17 below for
compatibility with UAD Powered Plug-Ins. We recommend the latest versions
of these host applications for optimum performance. Host applications that
are not listed may work with UAD Powered Plug-ins, but compatibility with
them cannot be guaranteed.
UAD System Manual - 16 - Chapter 2: UAD Installation
Page 17

Table 1. Supported UAD Host Applications
Supported UAD Hosts
Avid Pro Tools LE, 9, & 10 (Mac & PC)
Avid Pro Tools HD (Mac & PC)
Steinberg Cubase/Nuendo (Mac & PC)
Ableton Live (Mac & PC)
Apple Logic Pro (Mac)
Cakewalk Sonar (PC)
MOTU Digital Performer (Mac)
For detailed technical information about using UAD Powered Plug-Ins with
these supported hosts, please review the Host Application Notes pages on the
UAD website:
• www.uaudio.com/support/uad/compatibility
Latest Information & Software Updates
Technical Updates
Software Updates
Updated UAD technical information is regularly posted to the UA website.
Please visit the UAD support pages for the latest bulletins:
• www.uaudio.com/support
The CD-ROM in the retail package may not contain the latest UAD software.
Check our website for software updates:
• www.uaudio.com/downloads
If the UAD software is already installed, the UAD Meter & Control Panel application has a convenient button that checks for the most recent version (see
“Check for Updates” on page 52).
UAD System Manual - 17 - Chapter 2: UAD Installation
Page 18

UAD Software Installation
Install Software First
If you are installing UAD Powered Plug-Ins for the first time, install the software
before installing the UAD device(s). This is particularly important on Windows
systems for plug-and-play functionality. If you are updating to a newer version
of the software or installing additional UAD devices, it is not necessary to remove the previous UAD software or hardware from the system, but you should
still install the newer software before adding new devices.
Note: The UAD Powered Plug-Ins software installer is identical for all UAD
hardware (there are only two UAD installers, one each for Win & Mac).
Install Options The UAD software is comprised of many components, and the version of all
the components must match for proper operation. When the UAD installer is
run, all existing UAD components are deleted to avoid version mismatch.
Therefore, it is necessary to select all the desired driver and plug-in format options during each UAD installation. Partial installations are not possible.
Important: Select all desired options each time the UAD installer is run. Pre-
viously installed components are deleted during installation.
Win & Mac Software installation and removal for Windows and Mac platforms have their
own particular procedures; each are described below.
Important: Close all open files and applications before starting the instal-
lation procedure. Specifically, make sure the UAD Meter & Control Panel and
all UAD host applications are not running.
Windows Install Software Installation Procedure for Windows Systems
Important: Verify the computer system date and time are set correctly be-
fore installing the software and/or launching the UAD Meter & Control Panel
application for the first time.
1. Launch the software installer.
• To install from CD-ROM, insert the UAD Powered Plug-Ins CD. If the installer
doesn’t automatically run, double click the Setup.exe application located at
the root of the CD.
• To install from a download, double-click the downloaded software archive,
which is an executable application. The installer will run automatically.
2. Setup will guide you through the installation procedure. Take care to select
the proper component package(s) for your system.
UAD System Manual - 18 - Chapter 2: UAD Installation
Page 19

3. When installation has completed, power down your computer to install the
UAD devices(s) following the instructions on page 20. If the UAD device is
already installed or you are updating, simply restart the system.
4. After restarting, the New Hardware Wizard will try to locate the new driv-
ers. Follow these steps:
• a) Select the “Install the software automatically (Recommended)” option,
and click “Next.”
• b) The UAD device driver will be installed, click “Finish” when it is complete.
Software installation is now complete. Proceed to the Authorization section (page 22).
You can use the UAD Meter & Control Panel to verify installation (see “Verify-
ing Installation” on page 26.)
Note: If you want to install the UAD plug-ins into another application, run the
installer again.
Mac Install Software Installation Procedure for Mac Systems
Important: Verify the computer system date and time are set correctly be-
fore installing the software and/or launching the UAD Meter & Control Panel
application for the first time.
1. Launch the software installer.
• To install from CD-ROM, insert the UAD Powered Plug-Ins CD. Open the CD
window, then double-click the application named “UAD Powered Plug-Ins
Installer.”
• To install from a download, first decompress the downloaded zip archive by
double-clicking it. Then double-click the UAD Powered Plug-Ins Installer application.
2. The installer will guide you through the installation procedure. Take care to
select the proper component package(s) for your system.
3. Restart the computer after the software is installed.
Software installation is now complete. Proceed to hardware installation or if that is done
already, proceed to the Authorization section (page 22).
Verify Install You can use the UAD Meter & Control Panel to verify installation (see “Verify-
ing Installation” on page 26.)
UAD System Manual - 19 - Chapter 2: UAD Installation
Page 20

Installed Locations
The UAD Meter & Control Panel application and UAD documentation is copied to these locations on the hard drive during installation:
Windows • C:\Program Files\Universal Audio\Powered Plug-Ins
You can access these files from the Windows Start Menu at:
• Start>All Programs>UAD Powered Plug-Ins
The VST plug-in files are installed to the location specified during installation.
Mac • Startup Disk/Applications/Powered Plug-Ins Tools
The plug-in files are installed to the standardized OS X locations:
• VST: Startup Disk/Library/Audio/Plug-Ins/VST/Powered Plug-Ins
• Audio Units: Startup Disk/Library/Audio/Plug-Ins/Components
• RTAS: Startup Disk/Library/Application Support/Digidesign/Plug-Ins
UAD Hardware Installation
Note: The UAD software should be installed before installing the UAD DSP
device(s). See the previous section for software installation instructions.
UAD-2 SOLO/Laptop
UAD-2 SOLO/Laptop is a UAD product designed for use with the ExpressCard expansion slot typically found on notebook computers. It has its own set
of hardware connection and operation instructions. Refer to Chapter 10,
“UAD-2 SOLO/Laptop” for complete details.
UAD-2 Satellite The UAD-2 Satellite is a UAD product that is designed for use with the Firewire
port. This product has its own set of hardware connection and operation instructions. Refer to Chapter 11, “UAD-2 Satellite” for complete details.
About PCI and PCI Express
PCI and PCI-X should not be confused with PCI Express (also known as PCIe).
PCIe is not compatible with PCI or PCI-X because PCIe uses a completely different connector (see Figure 1 on page 21).
UAD-2 SOLO, DUO, and QUAD cards are all PCIe cards. They will ONLY
work in PCI Express (PCIe) slots. Be careful to only install the UAD-2 card into
a PCIe slot.
UAD System Manual - 20 - Chapter 2: UAD Installation
Page 21
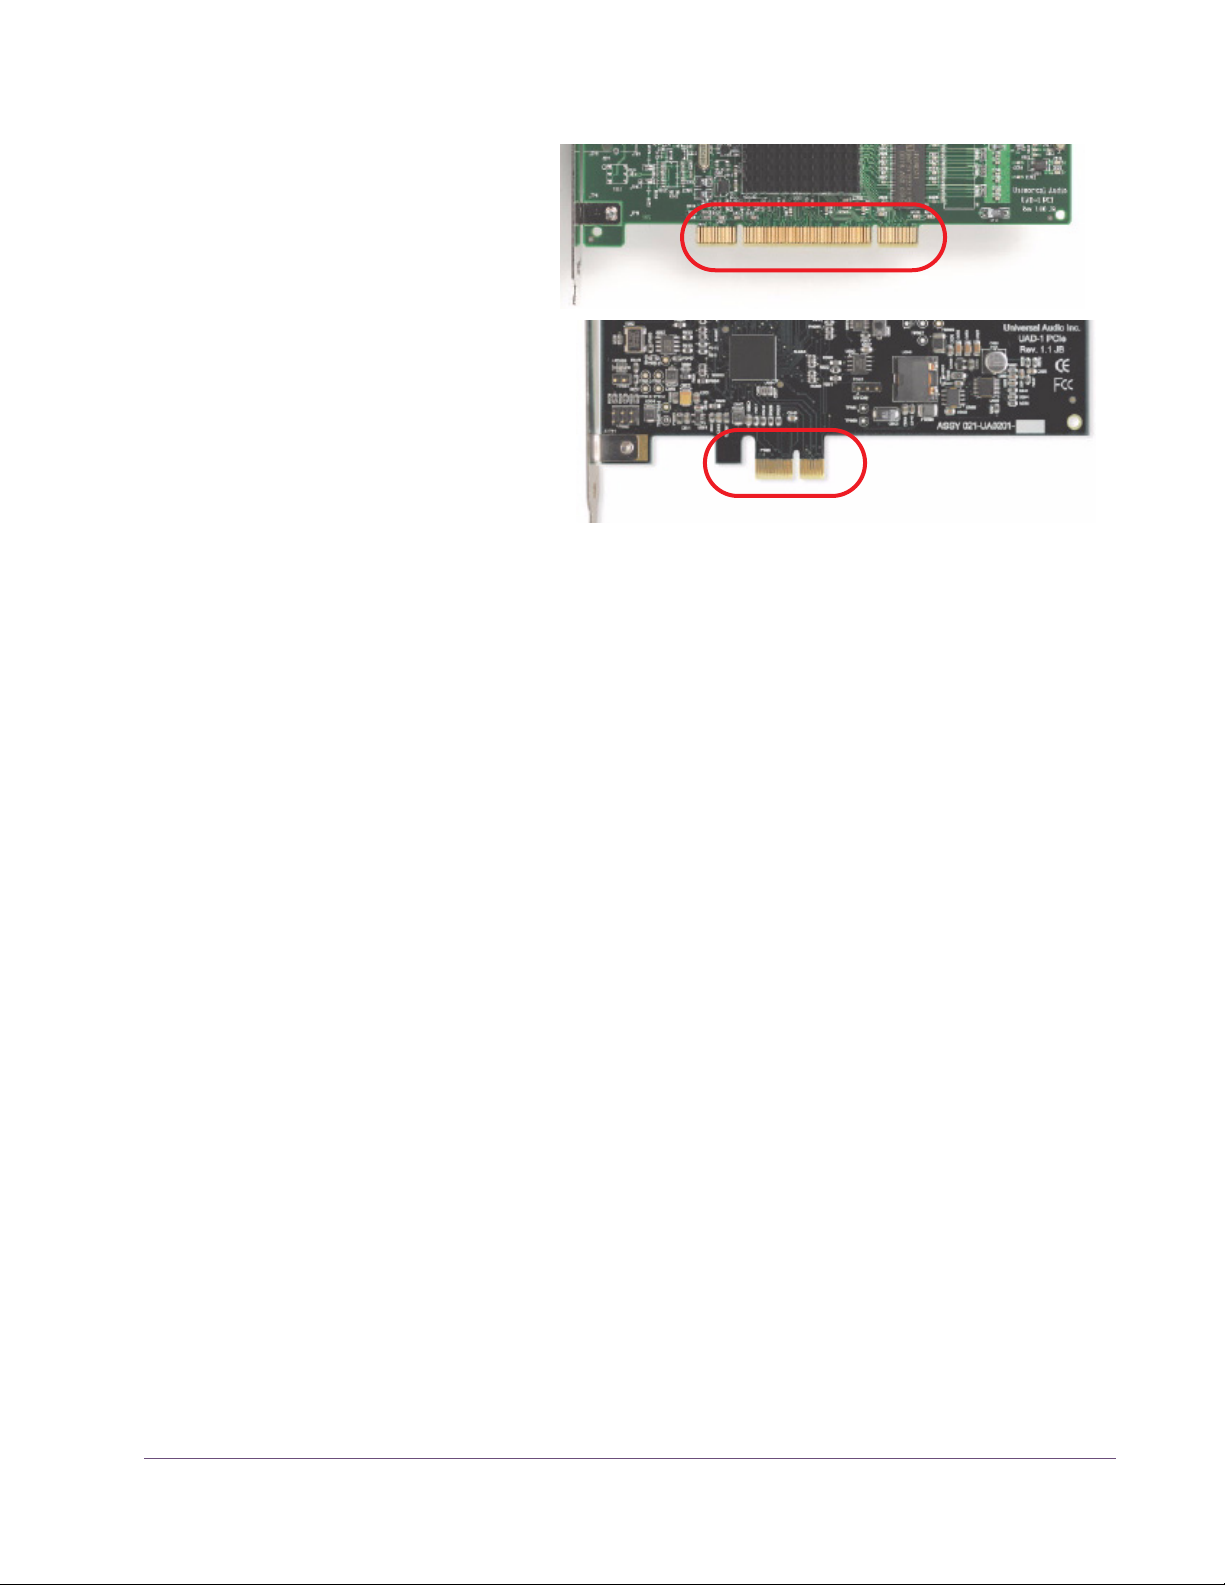
PCI/PCI-X
PCI Express (PCIe)
Figure 1. PCI and PCIe connectors are incompatible.
UAD-2 PCIe Speed
Installing the UAD Cards
UAD-2 cards are “x1” PCIe cards. Although these cards can be installed into
any speed PCIe slot (x1/x4/x8/x16), putting a them in any PCIe slot faster
than x1 will not improve UAD performance.
After installing the UAD Powered Plug-Ins software, install the UAD DSP
card(s). Hardware installation is the same for all platforms.
Note: If necessary, refer to the computer manufacturer’s documentation for
instructions about installing PCIe cards.
To install the UAD DSP card(s):
1. Install the UAD software first (page 18).
2. Power down the computer system.
3. Open the computer case.
4. Remove the rear screw and cover of an available PCIe expansion slot.
5. Before handling the UAD card, discharge any static electricity by touching
the metal casing of the power supply.
6. Remove the UAD card from its protective anti-static bag. Do not touch the
gold edge connector contacts.
UAD System Manual - 21 - Chapter 2: UAD Installation
Page 22
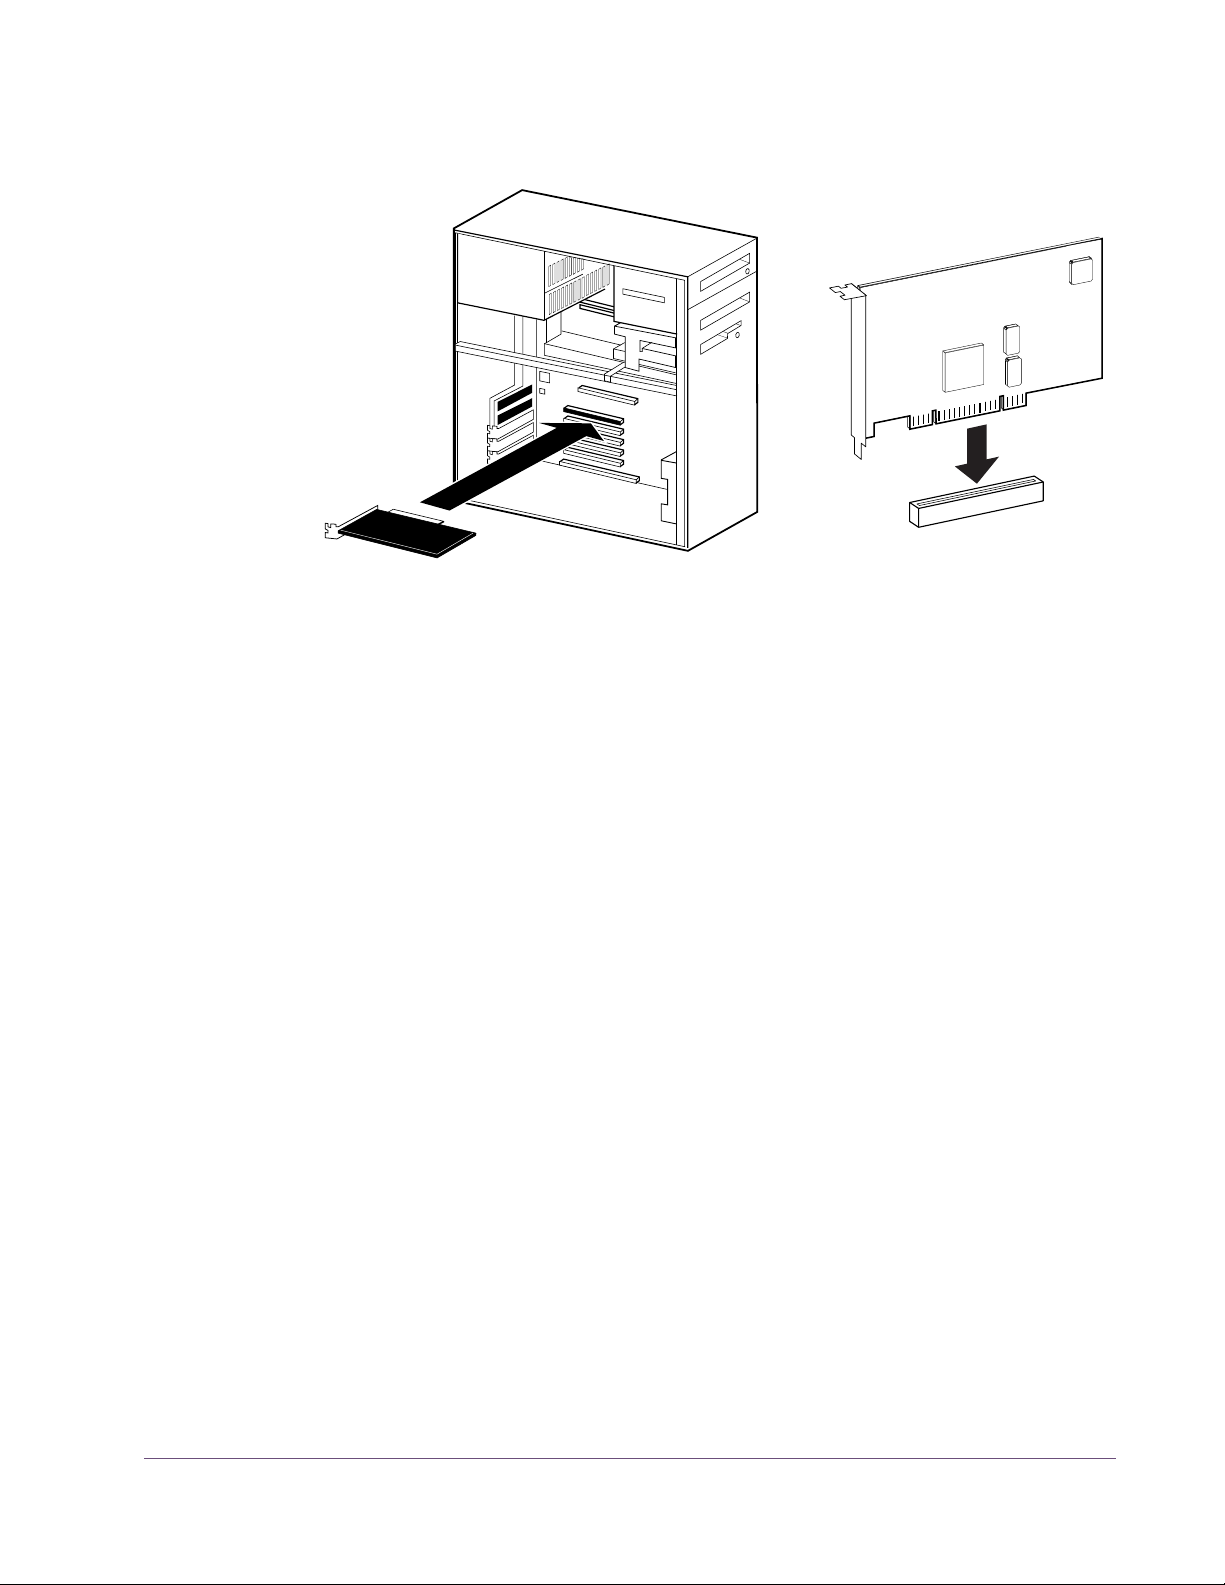
7. Hold the card gently by the top edges, and line up its connector with the slot
inside the computer.
Figure 2. UAD-2 card installation in PCIe slot.
8. When the connector and slot are aligned, press the card into the slot with
firm, even pressure. The card should “pop” into place. The top of the slot on
the motherboard should be flush and parallel with the edge of the UAD
card.
Authorization
9. Secure the card with the previously removed screw.
10. Replace the computer case.
Hardware installation is now complete. Proceed to Authorization in the next section.
Your UAD device must be registered at my.uaudio.com to download an authorization file, and you need a my.uaudio.com account to register the device. These steps are detailed in the“Authorize Plug-Ins Procedure” on
page 23.
Important: All UAD plug-ins must be authorized before they can be used
(unauthorized plug-ins can be used in demo mode for 14 days without authorization). Authorization is accomplished by clicking the “Authorize Plug-Ins”
button in the UAD Meter & Control Panel application. The procedure is in the
next section.
UAD System Manual - 22 - Chapter 2: UAD Installation
Page 23

Authorize Plug-Ins Procedure
This procedure provides only the step-by-step process for UAD authorization.
A complete overview of UAD authorization, my.uaudio.com, and the UA online store is in Chapter 4, “My.uaudio.com.”
Note: The following procedure requires an internet connection on the UAD
host computer. To authorize from a system that is not online, see “Offline Au-
thorization” on page 24.
Online Authorization
To download and apply the UAD authorization file when connected to the internet:
1. Install the UAD Powered Plug-Ins software and the UAD hardware using the
procedures detailed in this chapter (the system must be operating properly).
2. Launch the UAD Meter & Control Panel application (see page 49) and
open the Plug-Ins panel (see page 51).
3. Click the “Authorize Plug-Ins” button (page 55). The my.uaudio.com online
store opens in the default web browser.
• If you don’t already have a my.uaudio.com account, you are directed to create one. Follow the instructions online.
• If you already have a my.uaudio.com account, login with your email address and password. If your password is lost, the store can email it to you.
4. Your device will be automatically registered and added to your “My Sys-
tems” computer group, and your authorization file is generated.
5. Click the “Download Authorization” button at the bottom of the registration
page to download the “auth.uad2” file. The authorization file is downloaded by the browser to the location specified in the browser preferences.
6. Double click the auth.uad2 file. The authorization is loaded onto the UAD
device(s) and after a few seconds the “Authorizations Updated Successfully” window appears (Figure 3).
Online UAD authorization is now complete, and UAD Powered Plug-Ins are ready for use.
UAD System Manual - 23 - Chapter 2: UAD Installation
Page 24
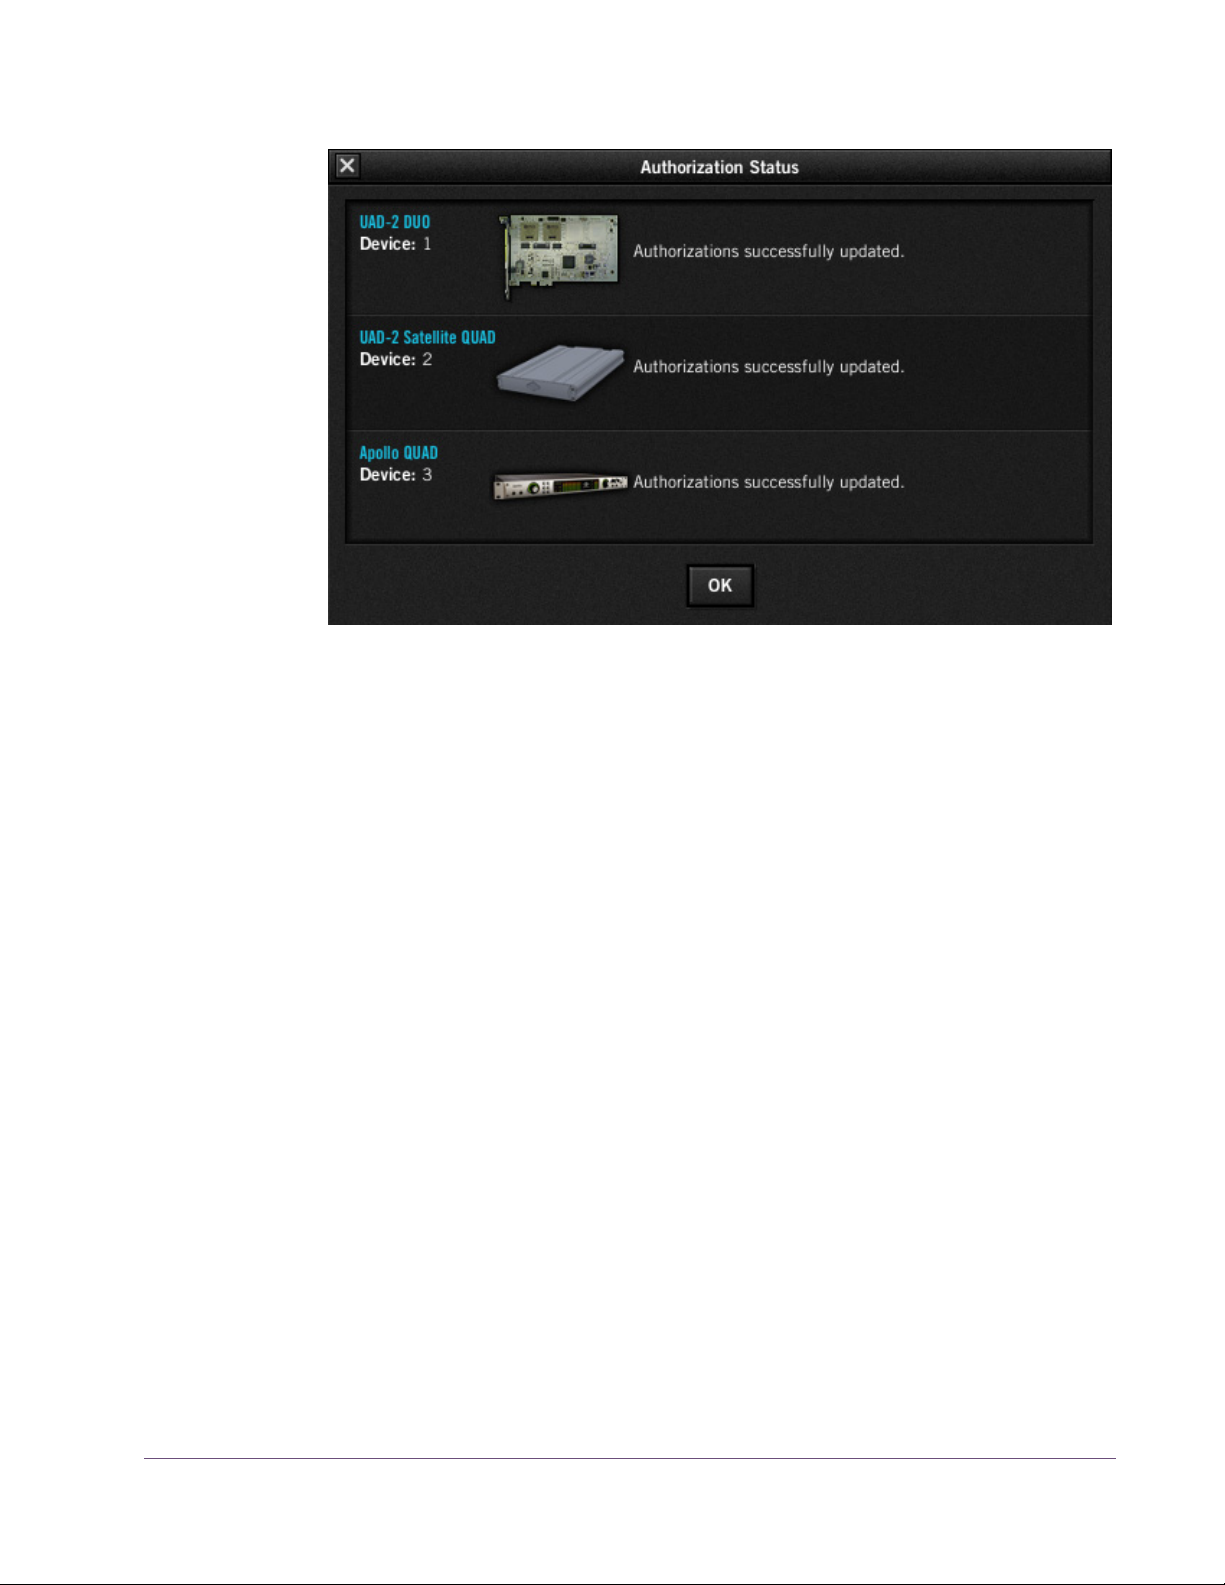
Figure 3. The authorization successful window
Offline Authorization
Note: If the UAD computer is not connected to the internet, you will need to
manually transfer the registration URL into the browser of a web-enabled computer.
To download and apply the UAD authorization file if not connected to the internet:
1. Install UAD Powered Plug-Ins software and the UAD hardware using the
2. Launch the UAD Meter & Control Panel application (see page 49) and
3. Click the “Authorize Plug-Ins” button (page 55). The default web browser
4. You must enter this URL into a web-connected computer, so either:
procedures detailed in this chapter (the system must be operating properly).
open the Plug-Ins panel (see page 51).
opens with the registration URL in the address bar (and you may get an error that the computer is not connected to the internet).
a) Drag the URL icon to the Desktop to create a weblink shortcut (preferred,
Figure 4 on page 25) then transfer the weblink shortcut to the internet com-
puter via a storage device or network, OR
b) Carefully write down the URL, EXACTLY as it appears.
5. Go to the URL using a web browser on an internet-connected computer.
Double-click the transferred weblink shortcut, or enter the URL as noted.
UAD System Manual - 24 - Chapter 2: UAD Installation
Page 25

•If you don’t already have a my.uaudio.com account, you are directed to
create one. Follow the instructions online.
•If you already have a my.uaudio.com account, login with your email address and password. If your password is lost, the store can email it to you.
6. Your device will be automatically registered and added to your “My Sys-
tems” Computer group, and your authorization file is generated.
7. The authorization file should begin downloading automatically. Click the
“Download Authorization” link to download the auth file if not.
8. Transfer the authorization file to the UAD computer via a storage device or
network.
9. Double-click the authorization file. The authorization is loaded onto the
UAD device(s) and after a few seconds the “Authorizations Updated Successfully” window appears (Figure 3).
Online UAD authorization is now complete, and UAD Powered Plug-Ins are ready for use.
1. Click + hold this URL icon in the browser’s address bar, then...
2. Drag the icon to the Desktop and release to create a weblink shortcut for easier transfer.
Figure 4. To authorize a system that is not connected to the internet, create a weblink shortcut on the
UAD system for easier transfer of the URL to an online system.
UAD System Manual - 25 - Chapter 2: UAD Installation
Page 26

Verifying Installation
The UAD Meter & Control Panel displays the current resource loads of the
UAD DSP hardware device in realtime. It also contains the System Information
panel, where UAD software and hardware installation can be verified to ensure the system is working properly.
To confirm proper UAD installation and operation:
1. Launch the UAD Meter & Control Panel application (see page 49).
2. Open the System Information panel (see page 51).
3. When the UAD device is displayed in the Hardware area and its status is
“OK” then the UAD driver is communicating with the UAD device and the
system is operating properly.
UAD-2 LED The UAD-2 has an LED indicator. This LED provides certain indications about
the operational state of the UAD-2. The location of the LED depends on the
UAD-2 product. On UAD-2 PCIe cards, the LED is on the mounting bracket of
the card. On the SOLO/Laptop, the LED is next to the UA logo on the black
housing. On UAD-2 Satellite, the LED is on the rear panel.
Alternating red and green
When the LED alternates between solid red and solid green, the device is
powered up properly but the UAD driver is not yet loaded or communicating
with the device. This is the expected state if the device is installed but the software is not yet installed, or when booting the system and the UAD driver is not
yet loaded.
Solid green
When the LED is solid green, the UAD driver is loaded and properly communicating with the device. This is the normal state when using UAD Powered
Plug-Ins.
Solid red or other blinking patterns
When the LED is producing any pattern other than the two conditions above,
there is a problem with communication between the driver and the device. Try
a cold reboot (complete power down) and/or reinstalling the UAD software
before contacting customer support.
UAD System Manual - 26 - Chapter 2: UAD Installation
Page 27

Software Removal
To remove all UAD software from the computer:
Windows 1. From the Windows Start Menu at, select:
• Start>All Programs>UAD Powered Plug-Ins>Remove UAD Powered Plug-Ins
2. The UAD software is removed.
Mac 1. Launch the UAD Powered Plug-Ins Installer application. Click through the
splash screen and license agreement.
2. When you get to the install screen, select “Uninstall” from the drop menu.
3. Click the “Uninstall” button. The UAD software is removed.
4. Drag the UAD Meter & Control Panel icon out of the Dock.
UAD software removal is complete.
Important: Power down the computer before removing any UAD cards.
Using Unlicensed Plug-Ins (Demo Mode)
To run unlicensed UAD plug-ins after authorization, see “Demo Mode” on
page 40. To redeem vouchers or coupons, or purchase additional UAD
plug–in licenses, see “UA Online Store” on page 41.
Learn More
After installation, registration, and authorization, you’re ready to use UAD
Powered Plug-Ins. We especially recommend reading chapters 3, 4, 6, and
7 in this manual to gain important insights about using the product.
Visit our support site for the latest technical information and additional information not included with the software, or to contact technical support about
any technical difficulties:
• www.uaudio.com/support
Our website also contains many helpful videos that explain how to install the
hardware and software, register, authorize, and use the product, obtain optional plug-ins, and more:
• www.uaudio.com/videos
UAD System Manual - 27 - Chapter 2: UAD Installation
Page 28

CHAPTER 3
UAD System Overview
The UAD Environment
The complete UAD Powered Plug-Ins environment consists of many components. These components are:
• One or more UAD DSP hardware accelerator devices
• The UAD device drivers
• The UAD plug-ins
• The host computer system
• The plug-in host application software (DAW)
• An audio hardware input/output interface and its drivers
All these components operate together simultaneously within one computer to
form the complete audio processing system.
The UAD Hardware
The other UAD component is your account at my.uaudio.com (page 36) and
the UA online store, where UAD devices are registered, UAD coupons are redeemed, and UAD plug-in licenses and authorizations are obtained. Although my.uaudio.com is not required during normal system use, it is essential for initializing the overall UAD system because authorization is required
to use UAD-Powered Plug-Ins (see “Authorization Overview” on page 37).
The UAD DSP (Digital Signal Processing) hardware accelerator devices provide the “power” behind UAD Powered Plug-Ins. Most UAD plug-ins use extremely complex algorithms to provide the quality sound and accurate modeling Universal Audio is famous for. The UAD processor engines are significantly more optimized to perform the complex DSP routines required for these
algorithms than a standard desktop computer CPU can deliver.
All UAD-2 devices are Mac and Windows compatible unless stated otherwise; the hardware is identical for both OS platforms.
Note: Multiple UAD hardware types can be used concurrently in the same
computer. For details, see Chapter 5, “Using Multiple UAD Devices.”
UAD System Manual - 28 - Chapter 3: UAD System Overview
Page 29
UAD-2 Family UAD-2 is our second-generation UAD product line that offers
many improvements over the original UAD-1; most notable is
significantly increased DSP horsepower. Each UAD-2 DSP provides approximately 2.5x the processing power of the UAD-1,
therefore one UAD-2 OCTO offers approximately 20 times the
processing power of UAD-1.
A variety of UAD-2 models are available to suit various processing and protocol needs. Each model is defined by its number of DSP chips (1, 2, 4, or 8)
and its connection protocol (PCIe or Firewire). Up to four UAD-2 devices can
be run concurrently in one system.
Note: UAD-1 is a discontinued product.
SOLO/DUO/ QUAD/OCTO
UAD-2 PCIe Cards
UAD-2 SOLO/Laptop
UAD-2 devices are designated as SOLO, DUO, QUAD, or
OCTO which indicates the number of SHARC® DSP chips
in each device. SOLO devices have one DSP, DUO devices
have two DSPs, QUAD devices have four DSPs, and OCTO
devices have eight DSPs.
UAD-2 PCI-Express (PCIe) cards are available in
SOLO, DUO, QUAD, and OCTO configurations.
All UAD-2 PCIe cards use the PCIe “x1” architec-
ture, which offers plenty of data bandwidth for
even the most demanding audio processing requirements, such as four UAD-2
OCTOs (32 DSPs) in the same system.
The UAD-2 SOLO/Laptop is a self-contained UAD-2
Solo device housed entirely within an ExpressCard/34 expansion card for use with notebook systems. No external cables or power is required, for the
ultimate in mobile DSP capability. UAD-2 SOLO/Laptop has special instructions for installation, connectivity, and use. See Chapter 10, “UAD-2 SOLO/Laptop” for complete details.
Note: UAD-2 SOLO/Laptop is a discontinued product.
UAD System Manual - 29 - Chapter 3: UAD System Overview
Page 30
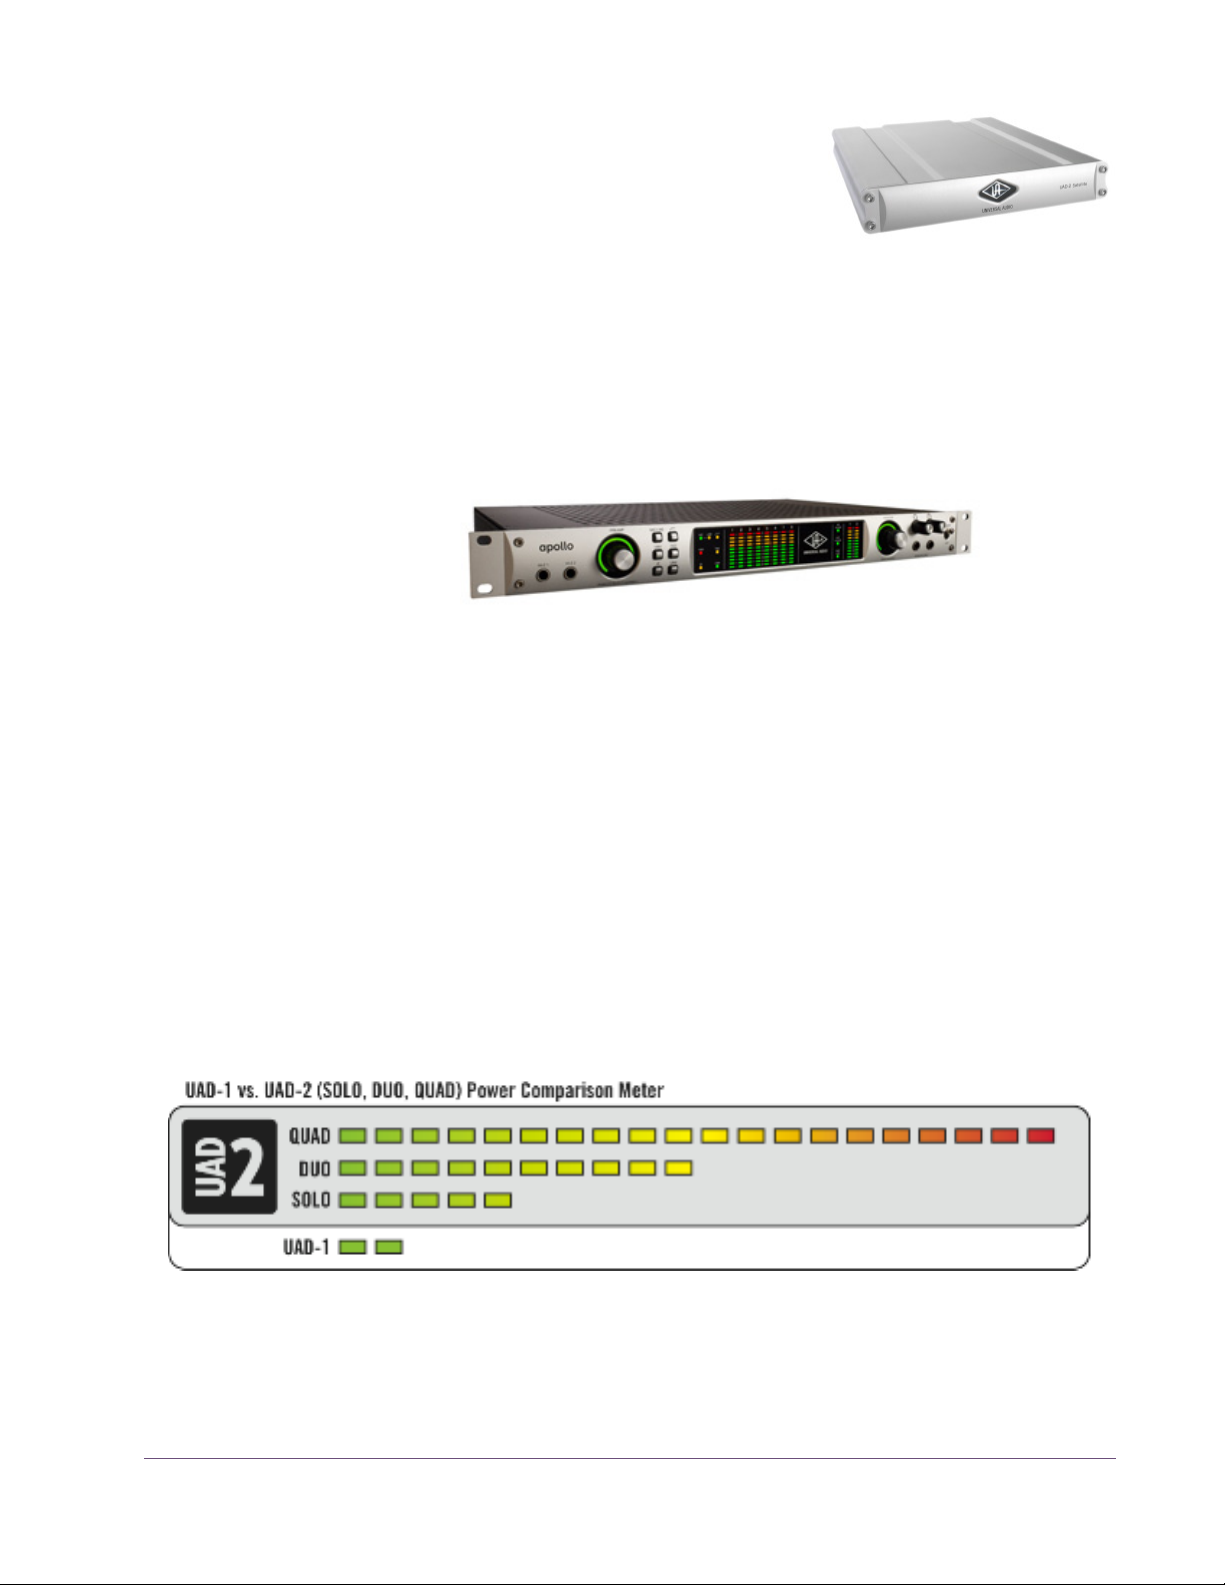
UAD-2 Satellite The UAD-2 Satellite is available in DUO and
QUAD versions and is enclosed in an attractive
housing that uses an external power supply. It
connects via Firewire, enabling Powered
Plug-Ins on Mac systems that don’t have PCIe or
ExpressCard slots. See Chapter 11, “UAD-2
Satellite” for complete details.
Apollo Apollo is UA’s high-resolution 18 x 24 audio interface with class-leading
sound quality, Realtime UAD Processing, FireWire/Thunderbolt connectivity,
and elegant hardware design and workflow.
The UAD functionality of Apollo’s built-in UAD-2 processor is documented in
this manual. However, functionality that is unique to Apollo is documented
seperately in the Apollo hardware and software manuals.
UAD-2 Products UAD-2 devices are available in a variety of retail configurations to best ac-
commodate your budget and processing requirements. The products have
various DSP counts (Solo/Duo/Quad), form factors (PCIe, FireWire), and
plug-in bundles. For complete details about all available products, visit:
• www.uaudio.com
UAD System Manual - 30 - Chapter 3: UAD System Overview
Page 31

The UAD Software
The UAD Powered Plug-Ins software consists of the UAD installer, the UAD
plug-ins, the UAD Meter & Control Panel application, the UAD device drivers,
and the user documentation.
Installer The UAD Powered Plug-Ins software installer contains all the
UAD software components (plug-ins, drivers, and documentation) and copies them to disk during installation. There is
one UAD software installer for each OS platform (Windows
and Mac). The UAD software installer supports all variations
of UAD hardware devices.
Powered Plug-Ins
Optional Plug-Ins
Powered Plug-ins are the VST, RTAS, and Audio Units
plug-in files that are loaded within the host application. The
plug-ins are where the graphical user interface (GUI) is seen
(Figure 18 on page 72) and where the various control parameters can be manipulated to achieve the desired result.
The UAD software installer always installs the complete suite
of all available Powered Plug-Ins. However, all of the installed UAD plug-ins
may not be licensed. The included licenses depends on the retail package
bundle (see “Bundled Plug-Ins” on page 36).
Most UAD plug-ins require optional licenses to run without restrictions. Optional plug-in licenses are obtained at my.uaudio.com, the Universal Audio
online store. Licenses can be purchased separately, or they can be purchased
with coupons that are bundled in most retail packages.
Demo Mode
UAD plug-ins that are unlicensed can be run in Demo Mode in a 14-day trial
period without any functional restrictions. See page 40 for details.
Bundled Licenses and Coupons
Your account at the my.uaudio.com online store is where bundled software
and coupons are redeemed and where additional licenses can be purchased.
See Chapter 4, “My.uaudio.com” for details.
Note: When you purchase an optional license, you don’t download that in-
dividual plug-in. Instead, you download a newer authorization, which enables the plug-in file that is already installed.
UAD System Manual - 31 - Chapter 3: UAD System Overview
Page 32

UAD Meter & Control Panel
The UAD Meter & Control Panel (page 48) is a utility application that is used to monitor and configure UAD device resources. It has two main windows: the UAD Meter,
and the UAD Control Panel.
The UAD Meter window (Figure 7 on page 48) displays
the current DSP, program, and memory status of the UAD
hardware in realtime. The UAD Control Panel window
(page 51) has multiple panels that display and modify
various system, plug-in, and global configuration parameters.
UAD Drivers The UAD device drivers are the low-level system software files that instruct the
host computer system on how to communicate with the UAD hardware device(s). The UAD drivers are loaded during system startup so the UAD devices
are ready to be used when the plug-in host application is launched.
In addition to instructing the OS on how to control the UAD hardware, the
driver acts as a software “middleman” between the host application and the
UAD hardware. The host application uses the driver to route UAD signals in
the DAW.
User Documentation
Each UAD device family (UAD-2 or Apollo) has its own set of drivers. One or
both are specified during UAD software installation, depending on which device type(s) you intend to use.
UAD Buffers and Latency
The UAD drivers use “buffers” to shuttle audio signals to and from the device.
This means the digital data is transferred in small batches instead of continuously. Buffering induces a very small audio latency (delay) that is inherent in
most digital audio systems and can be detected in certain situations.
UAD latency is managed automatically by most host applications and can be
reduced to undetectable levels in the UAD-2 (see “LiveTrack Mode” on
page 75). Latency and buffers are discussed in greater detail in Chapter 9,
“UAD Delay Compensation.”
Various instructional and technical resources are available for installing, using, and troubleshooting UAD Powered Plug-Ins. UAD
documentation is available in written, video, and online formats.
For details about user documentation, see “UAD Documentation
Overview” on page 11.
UAD System Manual - 32 - Chapter 3: UAD System Overview
Page 33

The DAW Environment
The digital audio workstation
(DAW) environment is a complete
system where audio production
takes place (either with or without
UAD Powered Plug-Ins). The UAD
system is an add-on to a computer-based DAW that can dramatically improve the sonic quality and performance of the DAW,
while still working entirely from
within the DAW.
A computer-based DAW consists of the host computer hardware and its operating system (OS) software, the plug-in host application (DAW software),
and an audio input/output (I/O) interface and its drivers.
Host Computer The host computer is the system that the host DAW application software runs
on and the UAD devices are installed into. The host computer must meet minimum technical requirements and have one or more compatible expansion
slots to use with UAD hardware. See “System Requirements” on page 16 for
complete details.
Operating System
The host computer runs an operating system (e.g., Windows 7 or Mac OS X) that defines the OS “platform” of the
system. UAD Powered Plug-Ins is a cross-platform product
that is (for practical purposes) functionally identical on
Windows and Mac systems (except as otherwise noted).
Host Application The plug-in host application is the software DAW environment where audio
recording, playback, mixing, and other production functions are controlled.
UAD plug-ins are accessed and operated from within the host software application.
Each host application has a unique feature set and different methods of operation, including how to use plug-ins. However, once UAD plug-ins are
loaded, UAD plug-in operation is identical in all host applications.
UAD System Manual - 33 - Chapter 3: UAD System Overview
Page 34

Each host application has its own set of system requirements. In addition to
the UAD-specific system requirements, the host computer must meet the host
application system requirements.
Because the host application environment is integral to the UAD system but is
completely out of our control, we cannot claim compatibility with all hosts that
may support use of the UAD plug-in formats. See “Supported Hosts” on
page 16 for complete details.
Plug-In Formats UAD Powered Plug-Ins includes support for VST, RTAS, and Audio Units
plug-in formats. These formats define the software protocols that the host application uses for plug-in processing.
UAD Powered Plug-Ins operations are (for practical purposes) functionally
identical in all three plug-in formats. The format of the installed UAD plug-in
files are specified during UAD software installation.
VST
The VST (“Virtual Studio Technology”) plug-in format is developed by Steinberg and is supported by various Windows and Mac host applications.
RTAS
The RTAS (“Real-Time AudioSuite”) plug-in format is developed by Avid and is supported by Pro Tools host applications on Windows and Mac platforms.
Audio Units
The Audio Units (“AU”) plug-in format protocol was developed
by Apple and is supported by various host applications on the
Mac platform only.
Audio Interface The audio hardware input/output (“I/O”) interface is how audio signals get
into and out of the host computer. An audio interface is a hardware+driver
device that can have analog or digital I/O, or both. The interface is usually
where the analog-to-digital (“A/D”) and digital-to-analog (“D/A”) audio conversions take place. Universal Audio’s Apollo is an audio interface.
UAD System Manual - 34 - Chapter 3: UAD System Overview
Page 35

My.uaudio.com
I/O Drivers
The audio interface is a hardware device that requires a software device
driver for the host computer OS. In addition to instructing the OS on how to
control the interface hardware, the driver acts as a software “middleman” between the host application and the I/O ports. The host application uses the
driver to access the I/O for signal routings.
I/O Buffers and Latency
Like the UAD device, audio interface driver also uses “buffers” to shuttle audio
signals to and from the I/O (see “UAD Buffers and Latency” on page 32).
Smaller I/O buffer settings produce lower latencies which is useful when monitoring tracks while recording performances, but usually results in a higher
host computer CPU load since the system has to work harder transferring
data. Latency and buffers are discussed in greater detail in Chapter 9, “UAD
Delay Compensation.”
Authorization
My.uaudio.com is the UA online store, where UAD devices are registered to
your account and authorization files can be obtained. Bundled plug-ins and
coupons are redeemed at the store and optional plug-in licenses can be purchased there as well. For complete details about my.uaudio.com, including
accounts, registration, purchasing plug-ins at the online store, and more, see
Chapter 4, “My.uaudio.com.”
All UAD plug-ins must be authorized before they can be used. Authorization
is accomplished by simply clicking the “Authorize Plug-Ins” button (page 55)
in the UAD Meter & Control Panel. For complete details about the authorization system, see “Authorization Overview” on page 37.
UAD System Manual - 35 - Chapter 3: UAD System Overview
Page 36

CHAPTER 4
My.uaudio.com
My.uaudio.com is the Universal Audio online store where UAD devices are
registered to your account and UAD plug-in authorizations are obtained. Bundled plug-in coupons are redeemed at the store and optional plug-in licenses
can be purchased at my.uaudio as well. This chapter provides details about
UAD plug-in authorization and licensing, and the my.uaudio.com store.
Important: All UAD plug-ins must be authorized before they can be used.
Authorization is accomplished by clicking the “Authorize Plug-Ins” button
(page 55) in the UAD Meter & Control Panel. For instructions, see “Authorize
Plug-Ins Procedure” on page 23. For complete details, see “Authorization
Overview” on page 37.
Figure 5. Accessing my.uaudio.com at www.uaudio.com
Optional Plug-Ins
Most UAD Powered Plug-Ins require optional licenses to run without restrictions. Optional plug-in licenses are obtained at my.uaudio.com, the Universal
Audio online store. Licenses can be purchased separately (page 42), or they
can be purchased with coupons that are bundled in most retail packages.
Bundled Plug-Ins UAD plug-ins that are bundled with the UAD device are automatically li-
censed when the device is registered. After registration, the Authorization File
must be loaded to enable the bundled plug-ins.
UAD System Manual - 36 - Chapter 4: My.uaudio.com
Page 37

Note: UAD devices must be authorized to run bundled (included) plug-ins.
See “Authorization Overview” on page 37 for details.
Coupons Coupons included in UAD retail packages have dollar values that are as
“good as cash” for buying UAD plug-ins at my.uaudio.com. Coupons are applied to your my.uaudio.com account automatically when you register your
device by clicking the Authorize Plug-ins button. After registration, the coupon
dollar amount is in your account as a credit, ready to be applied to your store
purchase.
Coupons expire after a limited time period, and they can be used only once.
Tip: Coupons are a great reason to subscribe to promotional announce-
ments. Email subscription preferences are specified on your “My Profile”
page at my.uaudio.com (see “My Profile” on page 42).
Plug-Ins are already installed
The UAD software installer always installs the complete suite of available
UAD plug-ins to the hard drive during installation. Therefore when you purchase an optional license, you don’t download that individual plug-in. Instead, you download a newer authorization file, which activates the plug-in
file that is already installed.
Important: Older versions of the UAD software may not include all the lat-
est UAD plug-ins. To ensure all UAD plug-ins are installed, and for optimum
performance, we recommend updating to the latest UAD version. See “Check
for Updates” on page 52.
Authorization Overview
All UAD plug-ins must be authorized before they can be used. Authorization
is accomplished by clicking the Authorize Plug-ins button in the UAD Meter &
Control Panel, then loading the downloaded authorization file. For instructions, see “Authorize Plug-Ins Procedure” on page 23.
Video Help Our support website contains many helpful videos that explain how to register
and authorize the product, obtain optional plug-ins, and more:
• www.uaudio.com/blog/cat/videos
Procedure This section is a detailed overview of the entire UAD authorization system. For
the step-by-step authorization instructions, see “Authorize Plug-Ins Procedure”
on page 23 in Chapter 2, “UAD Installation.”
UAD System Manual - 37 - Chapter 4: My.uaudio.com
Page 38

Note: Without authorization, UAD plug-ins can be enabled to run for 14
days without functional limitations in a timed demo mode (see “Demo Mode”
on page 40).
Important: Your UAD device must be registered at my.uaudio.com to
download an authorization file, and you need a my.uaudio.com account to
register the device.
Authorize Plug-Ins
The registration/account/authorization process isn’t
as complicated as it may seem. The entire routine involves simply clicking the “Authorize Plug-Ins” button (page 55) in the UAD
Meter & Control Panel. Clicking this button automatically registers the installed UAD devices, generates the authorization file, and downloads it to
disk.
Just double-click the downloaded authorization file or drag onto any UAD
Meter & Control Panel icon and you’re ready to use UAD Powered Plug-Ins.
When authorizing, you’ll be prompted to log into your account if you aren’t
already, and if you don’t already have an account, you’ll be prompted create
one.
Authorization File
The “auth.uad2” authorization file, which is obtained by clicking the “Authorize Plug-Ins” button (page 55), contains the license key(s) that enable UAD
plug-ins to run on associated UAD devices. The authorization file is generated
at my.uaudio.com then downloaded to the local hard drive automatically.
Loading To load a downloaded authorization file, just double-click it, or drag-drop it
onto any UAD Meter & Control Panel application icon/shortcut/alias (see
Figure 3 on page 24).
My Systems The UAD devices and plug-ins that you own and can authorize can be found
in your My Systems page at my.uaudio.com. My Systems keeps track of
which UAD devices are in which computer, and the authorization status of
each UAD plug-in. The current license state is also shown in the “Plug-Ins”
panel in the UAD Meter &Control Panel application.
My Systems is managed automatically by my.uaudio.com and the UAD software. When “Authorize Plug-Ins” is clicked, devices in the host system are
added to My Systems. When an authorization file is downloaded, it reflects
the current state of My Systems.
UAD System Manual - 38 - Chapter 4: My.uaudio.com
Page 39

System All the UAD devices installed in a single host computer system, and the UAD
plug-in license status for those devices, is referred to as a “System” (formally
known as “Group”) on the My Systems page at my.uaudio.com. When you
click the “Authorize Plug-Ins” button, UAD devices in the host computer are
automatically registered and added to a System.
The UAD hardware identification numbers for each UAD device in a single
host computer are stored in the same System. Authorization files generated at
my.uaudio.com are constrained to only authorize the licensed UAD plug-ins
running on the UAD devices in the same System. The same authorization file
authorizes all the devices and plug-ins in the host computer.
If you register a UAD device that is in a second host computer using the same
my.uaudio account, a second System is automatically created at My Systems.
In accordance with the “Plug-In License Policy” on page 44, you can’t have
UAD devices from two separate computers in the same System. Each System
generates a unique authorization file.
Authorization Notes
• UAD devices must be authorized to run bundled (included) plug-ins. See
“Authorization Overview” on page 37 for details.
• Without authorization, UAD plug-ins can be enabled to run for 14 days
without functional limitations in a timed demo mode (see “Demo Mode” on
page 40).
• Older versions of the UAD software may not include all the latest UAD
plug-ins. To ensure all UAD plug-ins are installed, and for optimum performance, we recommend updating to the latest UAD version. See “Check for
Updates” on page 52.
• Optional plug-ins are contained within the UAD software installer, not the
“auth.uad2” authorization file. Download and install the latest UAD software version to ensure the optional plug-ins that you are authorizing are installed.
• The auth.uad2 authorization file contains plug-in license keys for the spe-
cific UAD devices in each computer group at My Systems. The file will not
authorize any other UAD devices.
• An authorization file is not associated to the host computer or the UAD in-
staller in any way. Instead, it is associated with the UAD devices at My Sys-
tems (it’s the UAD hardware that is authorized, not the UAD plug-ins or
computer).
UAD System Manual - 39 - Chapter 4: My.uaudio.com
Page 40

Demo Mode
• During authorization, the UAD plug-in license state is stored on the UAD-2
device. If the UAD-2 is moved to another computer, it is not necessary to reload an authorization file.
All unlicensed UAD plug-ins include a free 14-day trial evaluation period.
When the demonstration mode is activated, the plug-in will run without functional limitations for 14 days. Demo mode can be activated once only. After
the demo trial period has expired, demo mode cannot be activated again on
the same UAD device.
If an unlicensed plug-in is loaded and its demo has never been started, a dialog appears with instructions to start the demo and the option to visit the online store to purchase the license. If you don’t start the demo or purchase a license, the plug-in interface appears and can be manipulated, but audio is not
processed by the plug-in.
Important: The 14 day demo period can only be activated once, and can-
not be stopped or restarted during this period! We recommend you do not activate demo mode until you have the time to thoroughly check out its sound
and functionality.
Demo Activation To activate demo mode:
1. Ensure UAD Powered Plug-Ins version 5.0 or higher is already installed and
configured properly (see Chapter 2, “UAD Installation”).
2. Launch the UAD Meter & Control Panel application (page 49).
3. Select “Plug-Ins...” from the Control Panel Menu (page 51). The UAD
Plug-Ins panel (Figure 11 on page 57) appears.
4. Click the Start Demo button for the desired UAD plug-in. A confirmation
window appears and the timed demo can be activated or demo activation
can be cancelled.
The timed demo is activated for 14 days.
Demo Notes • In addition to the Plug-Ins panel, Demo mode can also be activated directly
from the UAD Toolbar (see page 73).
• Manipulating the computer’s system date and time will result in a decreased
demo period.
UAD System Manual - 40 - Chapter 4: My.uaudio.com
Page 41

UA Online Store
The UA online store at my.uaudio.com (Figure 6) is where optional UAD
plug-in licenses and other UA products can be purchased. Promotional coupons are also redeemed here. All UAD device registrations and plug-in authorizations are managed here as well.
My.uaudio.com can be accessed from most pages at www.uaudio.com by
clicking the link in at the upper left of a webpage. The direct URL for the
my.uaudio.com online store is: http://my.uaudio.com.
Figure 6. Accessing the UA online store from www.uaudio.com
Registration Registration at my.uaudio.com is required for all UAD users to obtain UAD de-
vice authorizations, redeem coupons, purchase optional UAD plug-in licenses, get software updates, and receive customer support. It is also an opportunity for you to inform us of your system details so we can serve you
better, and for us to keep you informed about important updates and new
product announcements.
Account A my.uaudio.com account is required to use UAD- Powered Plug-Ins, because
UAD plug-ins must be authorized for use, and authorization can only occur after the UAD device is registered to an account. UAD registration also entitles
you to free UAD Customer Support and special promotional offers.
Creation
The first time you visit my.uaudio.com you are prompted to create your account. Your email address is your account login. You’ll be prompted to enter
your name, address, and password, and set your email notification preferences.
UAD System Manual - 41 - Chapter 4: My.uaudio.com
Page 42

Login
When you revisit my.uaudio.com, you are prompted to login to your account.
Your email address is your account login; the password was specified when
the account was created. If you forget your password you can have the store
email your password to you. You have the option to stay logged in (via a
browser cookie) if desired so you don’t have to keep entering the credentials.
My Profile “My Profile” is where product registration details such as name and mailing
address are stored and edited. Your email subscription preferences are also
set here so you can choose whether or not to receive email announcements for
our webzine and promotional offers.
Your email address is your my.uaudio.com account identifier and login. You
can change the email address (and the my.uaudio.com login) on the My Profile page.
Buying Plug-Ins
To obtain optional UAD plug-in licenses, simply visit www.uaudio.com,
browse the complete line of plug-ins at our secure online store, and complete
your purchase with several payment options or use any coupon credit that
was applied during device registration or promotional offers.
Purchase Procedure
Lots of product information such as features, specifications, audio/video
demos, and reviews are available on the plug-in product pages at the store to
help you make your buying decisions.
To purchase and authorize an optional UAD plug-in:
1. Visit the UA Online Store at www.uaudio.com (Figure 6 on page 41).
2. Add the items you whish to purchase to your shopping cart (you may need
to login to your Account).
3. Click “View cart” or the Checkout button when ready to proceed to check-
out. The payment page appears.
4. Select payment method and provide payment details. If applicable, apply
any discount coupons.
5. Click the Continue button. The order confirmation page appears.
UAD System Manual - 42 - Chapter 4: My.uaudio.com
Page 43

6. Verify the order on the confirmation page, then click Confirm Order once
only. The transaction is processed, and the Checkout Success page ap-
pears. Purchased UAD plug-in licenses are issued immediately to My Sys-
tems. Any authorization file downloaded after this point contains the
license for the newly purchased plug-in(s).
7. Download a new Authorization File by clicking the Download Authoriza-
tions button. The auth.uad2 file is downloaded to the location specified in
the web browser preferences.
8. Double-click the downloaded authorization file. The authorization is
loaded onto the UAD device(s) and after a few seconds the “Authorizations
Updated Successfully” window (page 24) appears.
The purchased UAD plug-in is now licensed and fully authorized.
Transferring UAD devices and licenses
Ownership of UAD devices and UAD plug-in licenses can be transferred from
one my.uaudio.com account to another to accommodate the used equipment
marketplace. Certain restrictions apply. Please visit the UAD transfer page for
instructions, policies, and FAQ:
• www.uaudio.com/support/uad/transfer-faq
Transfer Video Our Videos page has a video about UAD device transfers:
• www.uaudio.com/videos
UAD System Manual - 43 - Chapter 4: My.uaudio.com
Page 44

CHAPTER 5
Using Multiple UAD Devices
Overview
Multiple UAD-2 devices can be used in a single host computer system for increased DSP capacity. The UAD-2 devices in the multidevice system can be
mixed and/or matched in any combination (see “The UAD Hardware” on
page 28).
When multiple UAD-2 devices are installed in the host computer, the DSP and
memory load of the devices are automatically balanced dynamically as UAD
plug-ins are loaded and unloaded. With multiple devices, there is no major
difference in operating procedures, except that more UAD Powered Plug-Ins
can be loaded simultaneously in the session.
Mixed UAD System
The UAD drivers support up to four UAD-2 devices running in the same host
computer system concurrently. The devices can be any combination within the
UAD-2 family (PCIe, Satellite, SOLO/Laptop, Apollo).
Plug-In License Policy
The Universal Audio End-User License Agreement (“EULA”) on page 3 grants
you the non-exclusive right to use UAD Powered Plug-Ins on a single computer
at a single location.
Since you can run up to four UAD-2 devices type in the same computer, each
individual UAD plug-in license will authorize all the devices in one computer.
As an example, if you have four UAD-2 devices but run a dual-device system
in two separate computers, you are required to purchase separate licenses for
the second system.
Authorizing Multiple Devices
When you buy an optional plug-in, your purchased license is valid for all the
UAD devices in the computer. The license is tied to the specific UAD devices
in the System (see page 39) when the license was purchased. For example,
if you have two devices when you purchase a plug-in, your authorization file
will authorize both devices.
UAD System Manual - 44 - Chapter 5: Using Multiple UAD Devices
Page 45
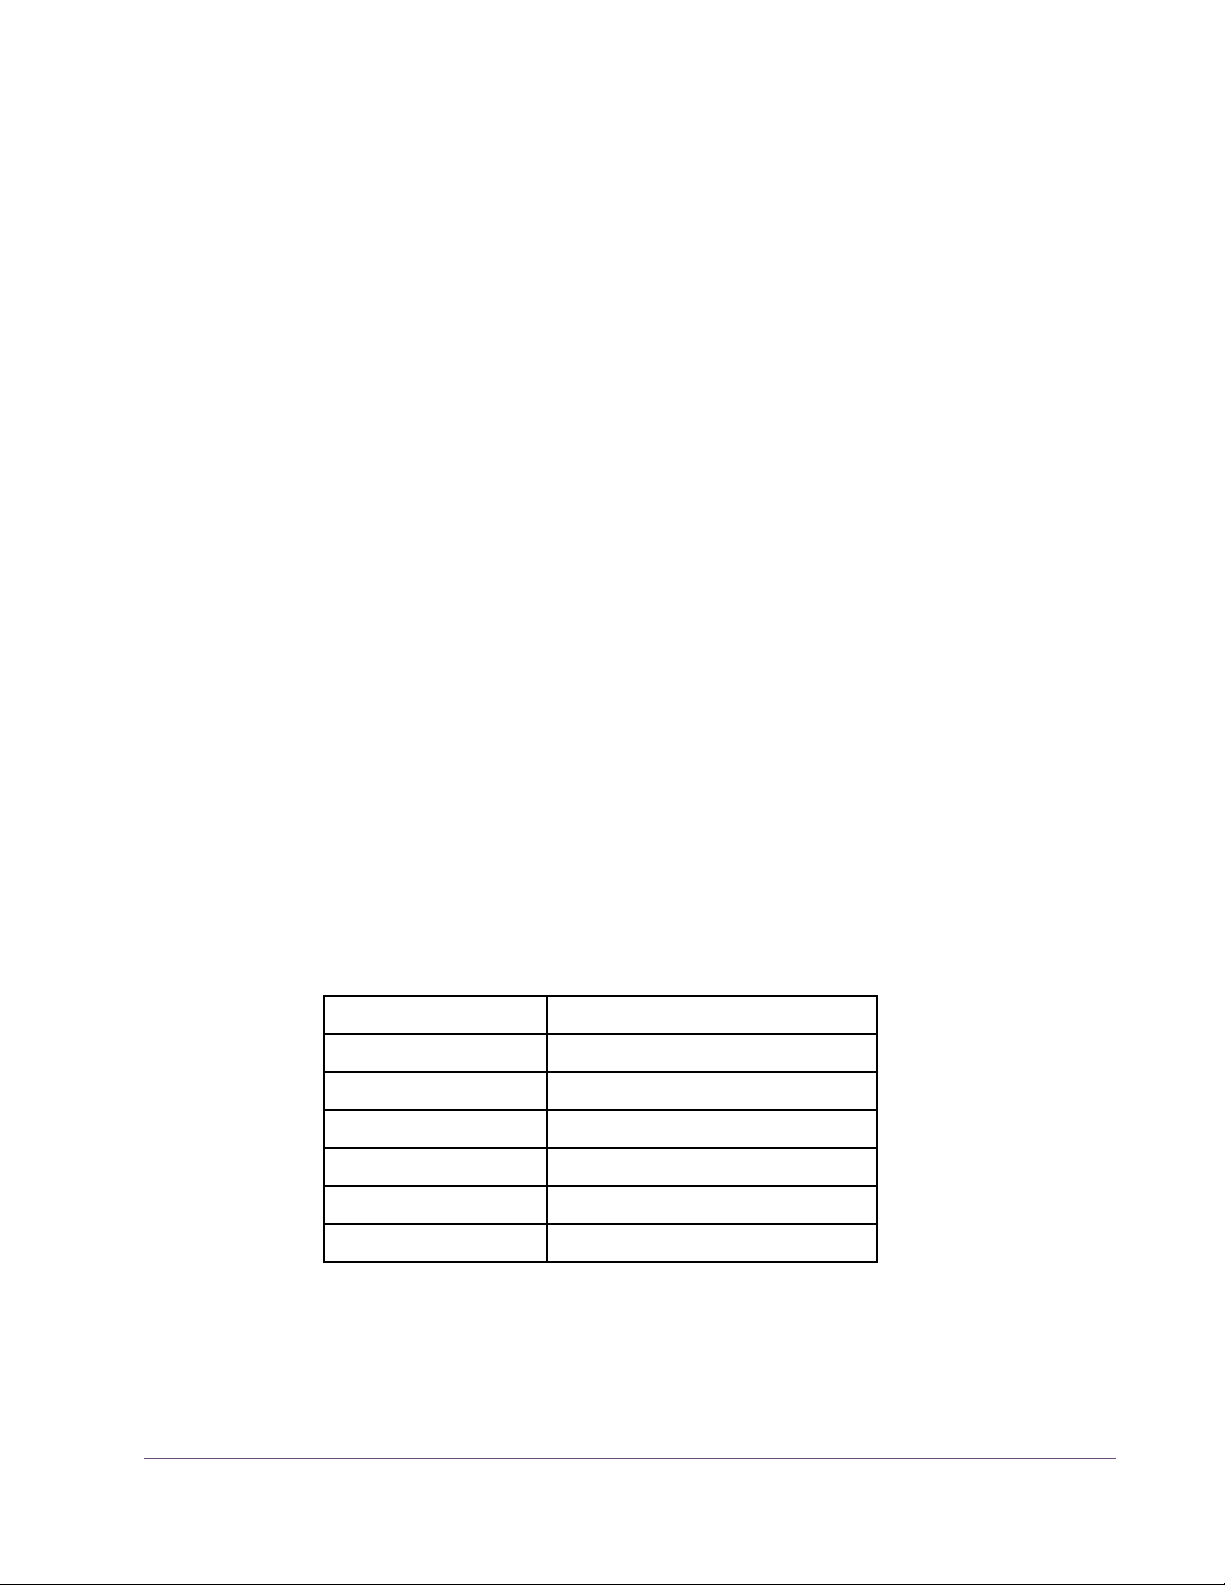
If you have one device during a plug-in purchase then later acquire another
device(s) and add it to the same computer, simply download a new authorization file and it will authorize the additional device with your existing plug-in
licenses. Your license(s) apply to all devices in the same computer system.
Each individual device must be authorized in order to run optional plug-ins,
however multiple installed devices are authorized simultaneously. If one device is authorized then another device is added without downloading a new
authorization, the optional plug-in will only load on the previously authorized
device. To obtain a new authorization file for additional devices, use the “Authorize Plug-ins” button (page 55) in the UAD Meter & Control Panel.
Power Requirement
Each UAD PCIe card draws power from the PCIe expansion slot that it is installed in. The total power draw of all the installed cards must not exceed the
power that can be adequately delivered by the host computer.
The UAD device power requirements are listed in Table 2 on page 45. These
figures are measurements of the actual power draw for these devices when
running at full DSP load.
Note: UAD-2 Satellite cannot be powered by the Firewire bus. It requires the
included external power supply adapter for operation.
Important: If insufficient power is available to UAD devices, unpredictable
behavior may result.
Table 2. UAD Power Requirements by Device Type
UAD Device Type Maximum Power Draw
UAD-2 SOLO 5 Watts
UAD-2 DUO 7 Watts
UAD-2 QUAD 10 Watts
UAD-2 SOLO/Laptop 3.5 Watts
UAD-2 Satellite (DUO)* 4 Watts (*via external power supply)
UAD-2 Satellite (QUAD)* 7 Watts (*via external power supply)
UAD System Manual - 45 - Chapter 5: Using Multiple UAD Devices
Page 46

Windows The PCI specification provides for up to 25W per device, however some host
systems don't provide this much power. When designing a computer DAW
system, a common rule of thumb is to provide an extra 50%–100% of headroom over the estimated maximum total power draw of all components in the
system.
Note: Don’t skimp on the power supply unit. When building a custom sys-
tem, a high quality sufficiently-rated PSU is critical for system stability.
IRQ Conflicts Under rare conditions running multiple UAD cards may cause an IRQ conflict
which can cause system instability or freezes. If this occurs, try moving the
UAD card(s) to different slots and/or contacting UA for technical assistance.
Multidevice DSP Loading
DSP loading in a multidevice system behaves the same as in a single UAD-2
DUO, QUAD, or OCTO system (these devices have multiple DSPs), and is
managed automatically by the UAD software. See “DSP Loading Information”
on page 79 for details.
Device Info Display
Disabling Devices
UAD DSP and memory resources used
for each installed
device, and the ability to enable/disable individual devices, is displayed
in the System Infor-
mation window.
See “System Information Panel” on page 52 for complete details.
Individual UAD devices can be disabled using the Device Enabled
function (see page 54). This can be useful, for example, if creating a
session on a system with multiple devices that will be transferred to a
system with fewer devices.
UAD System Manual - 46 - Chapter 5: Using Multiple UAD Devices
Page 47

Host CPU
Devices are disabled only while the UAD Meter & Control Panel application
is open. When the UAD Meter & Control Panel is quit, disabled devices are
re-enabled.
Note: For optimum results, quit any applications using UAD plug-ins before
disabling/enabling devices.
If a UAD Powered Plug-In is loaded on a device then that device is subsequently disabled, an error message will be displayed. This occurs because a
plug-in is assigned to a device when it is first instantiated. It stays assigned to
the same device until it is de-instantiated (for example, removed from the insert slot).
Using more than one device can cause a slight increase in host CPU loads, so
disabling unused devices can help you squeeze in a bit more host performance if you need it. Using additional devices on the PCIe bus requires host
resources, so running 15 UAD plug-ins on three devices at five plug-ins per
device may require more host CPU than running the same 15 UAD plug-ins on
one device.
For example, if you are trying to minimize latency during tracking by using a
smaller buffer size (which will increase host CPU loading, even on non-UAD
systems) and need a bit more host CPU, disabling one or more UAD devices
during tracking may give the extra pinch of host CPU you need. The buffer
size can then be increased and the UAD device(s) re-enabled for mixing.
UAD System Manual - 47 - Chapter 5: Using Multiple UAD Devices
Page 48

CHAPTER 6
UAD Meter & Control Panel
Overview
The UAD Meter & Control Panel application is used to
monitor UAD device resources, confirm the UAD system is
operating properly, and configure the global UAD
Powered Plug-Ins system parameters.
The UAD Meter window displays the current DSP, pro-
gram, and memory status of the UAD hardware in realtime. Figure 7 shows how the UAD Meter appears on when UAD-2 devices
are installed in the system.
The UAD Control Panel Window (page 51) has multiple panels that display
and modify various system, plug-in, and configuration parameters.
Quit Minimize Control Panel menu button
Program memory gauge
Disable current
plug-ins button
Figure 7. The UAD Meter window
Memory gauge
FireWire Bandwidth gauge
(Satellite/Apollo only)
DSP usage gauge Averaged loads
UAD System Manual - 48 - Chapter 6: UAD Meter & Control Panel
Page 49

Note: The Quit, Minimize, and Menu button positions shown in Figure 4 are
as they appear on Mac systems. The button positions are reversed on Windows systems, reflecting the conventions for each OS platform.
Launching the UAD Meter & Control Panel Application
Windows To launch the UAD Meter in Windows:
1. Double-click the UAD Meter & Control Panel shortcut that was optionally
placed on the Desktop during installation. OR,
2. Access the application from:
Start Meu>All Programs>UAD Powered Plug-Ins. OR,
3. Double-click the executable file on the hard drive located at
C:Program Files/Universal Audio/Powered Plug-Ins/UADPerfMon.exe.
Mac To launch the UAD Meter in Mac OS X:
1. Single-click the UAD Meter & Control Panel alias that was placed in the
Dock during installation. OR,
2. Double-click the UAD Meter & Control Panel application that was installed
to Applications/Powered Plug-Ins Tools during installation.
Using the UAD Meter
The UAD Meter & Control Panel can be launched or quit at any time. It does
not need to be open or active to use UAD Powered Plug-Ins. It is completely
independent and does not require a host application. You can move the UAD
Meter to a convenient location on your screen by dragging its window title
bar.
Always On Top The UAD Meter window can be set to normal or “Always on top” view mode.
In normal mode, the window can be covered by windows of the foreground
application. When in Always on top mode, the Meter window always
“floats” on top of other windows, even when other applications are in the
foreground, so you can always see the meter and access the disable buttons
(page 50). This setting is saved when the meter is quit.
To enable Always on top mode, click the control panel menu button in the
Meter window title bar (Figure 8 on page 52) and select “Always on top”
from the drop menu (or use the keyboard shortcut shown in the menu). The
mode is active when a checkbox appears next to the item in the drop menu.
UAD System Manual - 49 - Chapter 6: UAD Meter & Control Panel
Page 50

Note: If “No Devices Found” appears in the UAD Meter window instead of
the expected buttons and gauges, then the UAD drivers are not communicating with the UAD hardware. If this occurs, double-check hardware and software installations and/or contact customer support.
UAD Meter Elements
Refer to Figure 7 on page 48 for these element descriptions.
Title Bar The Title Bar (the strip across the top of the UAD Meter window) contains but-
tons to quit the UAD Meter & Control panel application, minimize the UAD
Meter window, and a drop menu to access the Control Panel window functions.
Disable Current The Disable Current button disables all UAD Powered Plug-Ins
that are currently running. This enables you to add new UAD
plug-ins for offline processing, or easily compare the sound of
the processed and unprocessed audio.
Resource Gauges
When the button glows blue, UAD plug-ins are active. Click
the button to disable the active plug-ins; the button changes to
black with blue lettering. New UAD plug-ins can still be
added; click the button again to re-activate all UAD plug-ins.
Note: Disable Current stays active only while the UAD Meter & Control Panel
application is open. When the UAD Meter & Control Panel is quit, Disable
Current is deactivated.
The UAD resource loads are displayed in the UAD Meter window, which are
constantly updated in realtime even when the UAD Meter is not the foreground application. This allows you to monitor UAD loads as needed, for example when deciding which UAD plug-ins to load, based upon how much
DSP is available.
The UAD resources are displayed as bar graphs and as percentages.
Averaged Loads
The load for each gauge represents the average for all UAD devices in use.
For example, if one UAD-2 QUAD is installed, the UAD-2 DSP load is an average of the four SHARC DSP processors on the QUAD. If two UAD-2 QUADs
are installed, then the eight processors are averaged.
UAD System Manual - 50 - Chapter 6: UAD Meter & Control Panel
Page 51

Individual Loads
The loads of individual devices in a multidevice setup (or the individual DSP
loads in a multi-DSP UAD-2 device) can be viewed in the UAD System Information panel (see page 52).
DSP The DSP gauges display the amount of digital signal processing resources that
are being used by the UAD Powered Plug-Ins algorithms. DSP is the primary
hardware “juice” that powers the UAD Powered Plug-Ins algorithms.
When UAD plug-ins are disabled, DSP requirements are decreased.
Program This resource shows how muchUAD-2 program memory is in use. Program
memory is an on-chip memory that is specific to the UAD-2 DSP processor(s)
and is used for certain UAD plug-in resources.
Each unique UAD-2 plug-in uses a bit of program memory. If many different
UAD-2 plug-ins are loaded simultaneously, it is possible for this resource to
run out before DSP overload occurs. This point is considered and factored in
by the automatic UAD-2 load balancing routines.
Memory The Memory gauges indicate the percentage of UAD RAM that is currently in
use. It indicates the total available UAD memory available, regardless of the
number of DSP processors that are installed.
Memory is used for echo, delay lines, reverb, and similar spatial processing.
When UAD plug-ins are disabled but not unloaded, memory requirements are
not decreased. In this case, the memory remains loaded so that reverb tails
and delay lines are not cut off when the plug-in is disabled (if supported by the
host).
UAD Control Panel
The UAD Control Panel is where detailed system information is displayed and
global UAD Powered Plug-Ins settings are modified. The UAD Control panel
has four panels, organized into similar areas of functionality: System Information, Plug-Ins, Configuration, and Help & Support.
Accessing the Control Panels
The main UAD Control Panel window is accessed from the UAD Meter window. To open the Control Panel, click the menu button in the UAD Meter window Title Bar (Figure 8 on page 52). After clicking the menu button, the available functions are listed in the drop menu.
UAD System Manual - 51 - Chapter 6: UAD Meter & Control Panel
Page 52
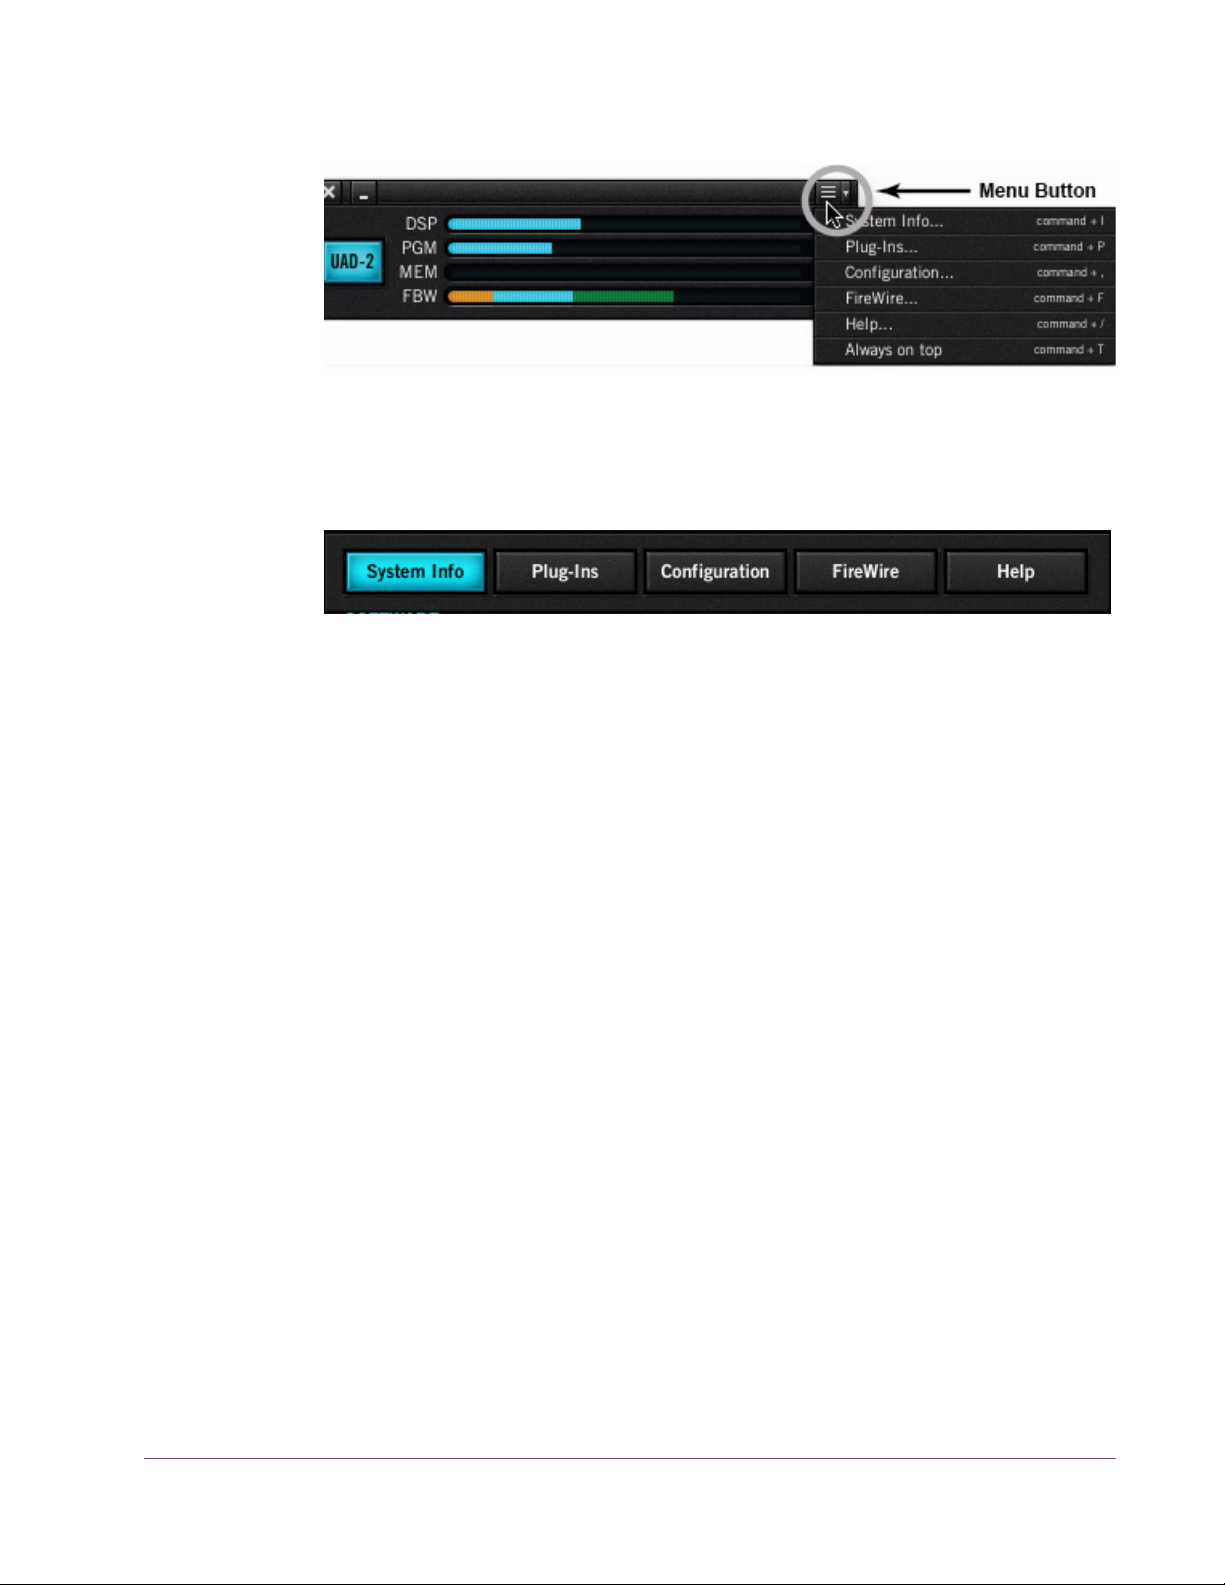
Figure 8. Click the Menu Button to access the UAD Control Panel drop menu
Once the main UAD Control Panel window is open, the individual window
panels are accessed by clicking the title buttons (Figure 9).
Figure 9. The Control Panel window panel buttons
Note: The FireWire button is only displayed if UAD-2 Satellite or Apollo is
connected.
System Information Panel
The System Information panel (Figure 10 on page 53) displays detailed UAD
software and hardware information and contains several useful buttons.
Software
Version String
Section
The currently installed UAD Powered Plug-Ins software version is displayed.
Important: The UAD driver and plug-in versions must match. If they don’t,
a “driver mismatch” error will occur when attempting to process audio. If this
occurs, you must reinstall and/or reauthorize the UAD software.
Check for Updates
This button checks our web server to find out if a more recent version of the
UAD software is available than is currently installed. We recommend running
the latest version of UAD Powered Plug-Ins for maximum stability and the latest
features, such as new plug-ins.
UAD System Manual - 52 - Chapter 6: UAD Meter & Control Panel
Page 53

Figure 10. The UAD System Information panel
Plug-In Latency Section
UAD plug-in latency is displayed here. The calculation is based on the audio
I/O interface buffer size and the sample rate. The window uses this information to calculate and display the resulting latency in samples and milliseconds.
Note: Displayed latency does not reflect the actual lowered latency value
when LiveTrack mode (page 75) is active.
The displayed latency is the audio I/O interface buffer size when Extra Buffering (page 61) is off. When Extra Buffering is on, the displayed latency is the
audio I/O interface buffer size plus 64 samples.
UAD System Manual - 53 - Chapter 6: UAD Meter & Control Panel
Page 54

Note: The displayed sample latency number does not include the extra sam-
ples produced by upsampled UAD plug-ins. For more detailed information
about the extra samples and latency, see Chapter 9, “UAD Delay Compen-
sation.”
Hardware Section
Detailed information about each UAD device and its DSP is displayed in the
Hardware area (Figure 10 on page 53). If you have several devices installed, use the scrollbar to see the other devices.
Device Status For each installed device, a small picture of the hardware and its status is dis-
played. When the device displays Status: OK the hardware is operating
properly. The total number of UAD plug-ins loaded on each device is also displayed here.
Device Enabled Individual UAD devices can be disabled using the Device Enabled but-
ton. This can be useful, for example, if creating a session on a system
with multiple devices that will be transferred to a system with fewer devices or to streamline the performance of the host system when multiple devices are not needed.
Click the button to disable an individual device. The device is enabled when the button is blue. For additional information regarding
multidevice use, see Chapter 5, “Using Multiple UAD Devices.”
Devices remain disabled only while the UAD Meter & Control Panel application is open. When the UAD Meter & Control Panel is quit, disabled devices
are re-enabled.
Note: Disabling devices does not disable plug-ins already running on the de-
vice; it only prevents additional plug-ins from being loaded onto it.
Important: For optimum results, quit any host applications using UAD
plug-ins before disabling/enabling devices.
DSP Load If more than one UAD DSP is installed, information for each of the processors
is displayed. DSP, Program (“PGM”), and Memory (“MEM”) loads are displayed as a percentage of total available load for that processor.
The number of UAD plug-ins (“PLG”) running on each individual processor is
also displayed.
UAD System Manual - 54 - Chapter 6: UAD Meter & Control Panel
Page 55

Save Detailed
System Profile
Plug-Ins Panel
Clicking this button will generate a detailed system profile and prompt you for
a location to save the text file to disk. This file contains an even greater level
of detail than the System Information panel, which can be useful for troubleshooting or if UA Customer Support requests this document when providing
assistance.
The profile lists the version strings of the individual UAD software components, installed device type(s) with serial and hardware ID numbers, host computer information, and detailed authorization status for all UAD plug-ins.
The Plug-Ins panel (Figure 11 on page 57) displays the current authorization
status of all UAD plug-ins. This is also where you can activate plug-in Demo
Mode (“UA Online Store” on page 41) and configure UAD plug-ins to run on
a specific device. Use the scrollbar to view plug-ins that are not visible in the
list.
Authorize Plug-ins button
This important button links directly to your account at the UA online store to automatically gen-
erate and download an authorization file for
your UAD plug-ins. If you do not already have an account, you are redirected
to the registration page to create one.
Important: UAD plug-ins require authorization before they can be used. For
detailed information, see “Authorization Overview” on page 37. Without authorization, UAD plug-ins can be enabled to run for 14 days without functional limitations in a timed demo mode (see “Demo Mode” on page 40).
The complete procedure for UAD device authorization is detailed in
Chapter 2, “UAD Installation.” See “Authorize Plug-Ins Procedure” on
page 23 for complete step-by-step instructions. If the UAD computer is not
connected to the internet, see “” on page 24.
Plug-In Column All currently installed UAD Powered Plug-Ins are displayed in the Plug-In col-
umn. Use the scrollbar to view the entire list if necessary.
Status Column The Status column reflects the current state of each UAD plug-in. After the au-
thorization file is loaded (“Authorization Overview” on page 37), the status
will show one of the following:
UAD System Manual - 55 - Chapter 6: UAD Meter & Control Panel
Page 56

Authorized for all devices
The plug-in is fully licensed and authorized to run on all devices in the system.
Start Demo
The demo period has not been started for the plug-in. Click the “START
DEMO” button to begin the 14-day trial period.
Demo (days remaining)
If the14-day trial period has been activated but is not yet expired, the number
of days remaining is displayed here in green text.
Important: The 14-day demo period can only be activated once, and can-
not be stopped or restarted during this period! We recommend you do not activate demo mode until you have the time to thoroughly check out its sound
and functionality. See “Demo Mode” on page 40 for detailed information.
UAD System Manual - 56 - Chapter 6: UAD Meter & Control Panel
Page 57

Figure 11. The UAD Plug-Ins panel
Help Column Clicking the Help button (“?”) opens a link to the plug-in product page on
the UA online store.
Buy Column Clicking the Buy button adds the plug-in to your shopping card at the UA
online store. See “UA Online Store” on page 41 for purchasing details.
UAD System Manual - 57 - Chapter 6: UAD Meter & Control Panel
Page 58

Configuration Panel
The UAD Configuration Panel is where most of the global UAD settings and
preferences are specified for all UAD devices. Refer to Figure 12 on page 59
for the parameter descriptions.
The parameters that are displayed in the Configuration Panel are dependent
upon the UAD hardware that is currently installed and the OS platform (Windows or Mac). For example, if you have only UAD-2 devices installed in a
Windows system, you will not see Mac-specific parameters.
Note: All UAD-2 parameters apply to UAD-2 PCIe cards, UAD-2 SOLO/Lap-
top, UAD-2 Satellite, and Apollo unless otherwise noted.
UAD System Manual - 58 - Chapter 6: UAD Meter & Control Panel
Page 59

Figure 12. The UAD Configuration panel
DSP Load Limiting Overview
Without UAD Powered Plug-Ins installed, overloading the host system with native (host based) plug-ins can cause dropouts and possibly system lockup.
Steinberg hosts, for example, provide a switch that allows you to trade latency for stability when the system is overloaded. Similarly, the UAD DSP load
cannot exceed 100% without unpredictable behavior.
UAD System Manual - 59 - Chapter 6: UAD Meter & Control Panel
Page 60

With the Limit DSP Load feature, the UAD DSP can also be limited so the load
cannot exceed 100%, thereby increasing overall system stability in high load
situations. With very heavy UAD loads, DSP load limiting may also improve
host CPU performance.
There are many variables that affect DSP load (sample rate, buffer size, parameter values, mono/stereo, automation, host system, etc). Although these
variables are taken into account, the resulting measurement cannot be absolutely accurate. This is due to variations in system configurations, specifically
PCI/PCIe bus loading which is impossible to predict. Systems that are heavily
loaded due to the presence of other devices or suboptimal configuration may
cause additional DSP loading that cannot be predicted by the UAD plug-in
load calculator. The DSP load limit should be reduced in this case.
It is possible for certain (non-typical) conditions to be met where another UAD
plug-in can’t be added, even when the UAD Meter says you should have DSP
available when compared to the DSP Load Limit value.
Note: When Limit DSP Load is enabled and the DSP load limit is exceeded
when instantiating a new UAD plug-in, an overload message will appear and
the plug-in toolbar will display “DISABLED.” Even though its interface will
load, the plug-in will not process audio.
UAD-2 DSP parameters apply to UAD-2 PCIe cards, UAD-2 SOLO/Laptop,
and UAD-2 Satellite unless otherwise noted.
Limit DSP Load This setting determines the maximum
UAD DSP load. If performance issues
such as overloads, dropouts, stuttering,
and/or crackles persist, change the UAD DSP load value by clicking the triangles to the right of the percentage display.
UAD-2 DSP load limiting is always on. 100% (the default value) is the maximum available setting.
UAD-2 DSP LoadLock
DSP LoadLock (UAD-2 only) reserves the maximum
UAD-2 DSP load required by each plug-in, even if cer-
tain plug-in features are disabled. This ensures there
will always be enough DSP if those features are later enabled, or when automating parameters that affect the DSP load.
UAD System Manual - 60 - Chapter 6: UAD Meter & Control Panel
Page 61

Disabling LoadLock increases available UAD-2 DSP by turning off unused features in certain plug-ins, but may cause problems with previously saved sessions that had all plug-in features enabled, or when automating parameters
that affect the DSP load.
Enabling DSP LoadLock is recommended for optimum performance. Disable
LoadLock when you need to squeeze in that extra bit of DSP resources.
Note: Changes to this setting do not take effect until all open sessions con-
taining UAD plug-ins are reloaded.
UAD-2 Extra Buffering
clude Sony Vegas, Acid, and Soundforge, and Sonar Cakewalk.
In other hosts, you can disable this mode to reduce latency. If your application
is incompatible with reduced latency when Extra Buffering is off, a dialog will
be displayed indicating that Extra Buffering is required.
Note: Changes to this setting do not take effect until all open sessions con-
taining UAD plug-ins are reloaded.
Host Compatibility
Windows Enable CPU Optimization
When this setting is enabled, host CPU usage is significantly reduced, particularly when running larger numbers of plug-ins and/or small buffer sizes. Incidents of host CPU overloads with high graphical activity are also significantly reduced.
Extra Buffering adds an additional 64 samples of buff-
ering for increased host application compatibility. Ap-
plications that are known to require Extra Buffering in-
The default value is ON. We recommend leaving this setting enabled on all
Windows systems.
Important: If UAD-2 plug-ins are already loaded when the setting is
changed, the host application must be restarted for the change to take effect.
UAD System Manual - 61 - Chapter 6: UAD Meter & Control Panel
Page 62

Mac Release all DSP resources on Audio Unit bypass
Some Audio Unit hosts dynamically bypass plug-ins when they are not being
used during playback, for example when no audio is present at the current
playback position. During this dynamic bypassing, UAD plug-ins stay loaded
on the device, which reduces glitches in playback.
This setting affects the Audio Units platform only. Checking the “Release all
DSP resources on AudioUnit bypass” option will unload UAD plug-ins from
the device during dynamic bypassing. When the option is checked, UAD DSP
usage may be reduced during dynamic bypassing, but the possibility of
glitching during playback is increased.
Note: Changes to this setting do not take effect until all open sessions con-
taining UAD plug-ins are reloaded.
Mac Force Logic to use “live mode” for tracks with UAD plug-ins
When UAD plug-ins and Logic 7.2.1 (and higher) are used together and this
setting is checked, all Logic tracks with UAD plug-ins are forced into Logic's
“live mode” and latency is reduced. Reduced latency is useful for tracking
when Logic's Software Monitoring feature is active.
Note: Logic's “live mode” is unrelated to UAD-2's LiveTrack Mode.
When this setting is active, UAD-2 latency is the same as the hardware I/O
buffer. In Logic versions prior to 7.2.1 (and later versions when live mode is
disabled), UAD latency is determined by the larger of the audio interface
hardware I/O buffer size and the Process Buffer Range setting within Logic.
When Logic’s “live mode” is NOT active and this setting is NOT enabled, the
minimum Process Buffer Range setting (“Small”) in Logic 7 corresponds to
512 samples, meaning the minimum possible UAD latency is 512 samples for
UAD-2 (the current latency is displayed in the UAD Meter System Information
panel). Latency can be further reduced by using LiveTrack Mode (UAD-2
only).
On multi-processor machines Live Mode forces all plug-ins on tracks with UAD
plug-ins (and any aux/buses fed by those tracks) to run on one processor
only. To allow host-based (native) plug-ins to run on all processors under these
conditions, deactivate this setting.
Note: Changes to this setting do not take effect until all open sessions con-
taining UAD plug-ins are reloaded.
UAD System Manual - 62 - Chapter 6: UAD Meter & Control Panel
Page 63

User Interface Settings
Controls Mode
This setting determines how UAD Powered Plug-In parameter knobs respond
to adjustment. Three control modes are offered: Circular, Relative Circular,
and Linear. Select the desired mode from the drop menu.
Note: To increase resolution when in adjusting rotary controls in circular and
relative circular modes, increase the radius of the mouse relative to the knob
while dragging (i.e. move the mouse farther away from the knob while dragging in a circular motion).
Linear (slider)
In Linear mode, the knob is adjusted by dragging horizontally or vertically
instead of by rotating. This behavior is similar to moving a physical fader.
Circular (jump)
In Circular mode, the software knobs behave similar to physical rotary knobs.
Values are changed by clicking on the knob then rotating in a circular direction. When the edge of the knob is clicked, the parameter value jumps to the
mouse position.
Relative Circular (grab)
Relative Circular mode operates similar to Circular mode, but the knob value
does not jump to the mouse position when clicked. Instead, the knob value is
modified relative to its original value.
In this mode you can click anywhere on the knob to make an adjustment originating at the original value. You don’t have to click on the current knob position.
Use Host Mode
When Use Host Mode is checked, the control mode set within the host application preferences is used if this feature is supported by the host. This setting
forces the host to override the control mode set in the UAD user interface settings.
Note: When Use Host Mode is checked, the UAD Meter user interface set-
tings have no effect unless control mode is NOT supported by the host.
Mac Toggle initial value modifier
Holding the specified modifier key while clicking a parameter control will toggle between the value of the control when the editor was opened and its last
edited value. This feature is not supported under Windows.
UAD System Manual - 63 - Chapter 6: UAD Meter & Control Panel
Page 64

This parameter also affects the “select + click” modifier. For a complete list of
keyboard shortcuts, see “Shortcuts” on page 78.
Info Display This area displays helpful text about parameters in the Configuration panel.
Hover the mouse over a Configuration setting to view the informational text.
FireWire Panel
The UAD FireWire Panel (Figure 13 on page 65) is where settings specific to
UAD-2 Satellite and Apollo are configured (FireWire settings do not apply to
UAD PCI/PCIe devices). UAD-2 Satellite and Apollo are external UAD devices that connect via FireWire as opposed to PCI/PCIe or ExpressCard.
Note: The FireWire Panel is only displayed if UAD-2 Satellite and/or Apollo
is connected.
FireWire System The FireWire System parameters pertain to the configuration of the FireWire
bus. These settings affect UAD-2 Satellite and Apollo performance and can
also affect external FireWire audio interface and hard drive performance if
they are connected to the same FireWire bus.
The primary function of the FireWire System settings is to reduce the UAD-2
Satellite FireWire bandwidth allocation and/or link speed when other
FireWire devices are on the same bus, or if other performance issues arise.
Note: The FireWire System settings cannot be changed when UAD plug-ins
are loaded. Quit all UAD plug-in host software to make changes to these settings.
Important: FireWire device connection methods can affect the FireWire
bus speed. See “FireWire Bandwidth” on page 109 for details.
For more information about FireWire and using it with UAD-2 Satellite and
Apollo, see “FireWire Basics” on page 105, “FireWire Bandwidth vs. UAD
DSP” on page 111, and “FireWire Bus Power” on page 112.
UAD System Manual - 64 - Chapter 6: UAD Meter & Control Panel
Page 65

Figure 13. The UAD FireWire panel
Current Link Speed
The current speed of the FireWire link between the host computer and UAD-2
Satellite and/or Apollo is displayed here. The active link speed can be
changed with the Target Link Speed control if FW400 and FW800 are both
supported by the host system.
If the host computer has multiple FireWire buses (this is rare), up to two speeds
will be displayed, with the values separated by a comma.
UAD System Manual - 65 - Chapter 6: UAD Meter & Control Panel
Page 66

Note: If the host computer supports FireWire 800 and the Target Link Speed
is set to 800, but the Current Link Speed still displays 400, check the bus ordering of the FireWire devices. See “Mixing FireWire Speeds” on page 108
for information on how to properly combine FireWire 400 and FireWire 800
devices on the same bus.
Target Link Speed
UAD Bandwidth Allocation
The desired speed of the FireWire link between the host computer and the
UAD-2 Satellite or Apollo is set here (the actual link speed is shown in the Cur-
rent Link Speed display). To change the value, click the down arrow to display
the drop menu, then select the desired value. The setting cannot be changed
when UAD plug-ins are loaded.
Target Link Speed should be set to 800 when supported by the host computer.
However, some FireWire devices may not always perform flawlessly. Changing the Target Link Speed to 400 may actually improve performance and/or
stability on systems not optimized for FireWire 800 operation.
Tip: Twice as many UAD-2 Satellite or Apollo plug-ins can be run at 800 ver-
sus 400, so configure the FireWire system to run at 800 if supported by the
computer.
This parameter determines how much of the total available FireWire bus
bandwidth will be reserved for UAD-2 Satellite or Apollo plug-ins. Limiting the
bandwidth used by UAD-2 Satellite or Apollo ensures that other FireWire devices on the same bus will have enough bandwidth to function properly.
To change the value, click the increment/decrement arrows, click/hold the
current target value to display a drop menu, or double-click the value for direct text entry. The maximum available value is 85%.
Note: The value cannot be changed when UAD plug-ins are active.
Although the amount of FireWire bandwidth reserved by UAD-2 Satellite or
Apollo depends on the UAD Bandwidth Allocation setting, the amount of DSP
used by any UAD plug-in does not affect FireWire bandwidth (UAD plug-ins
that use very little DSP require the same FireWire bandwidth as DSP-intensive
UAD plug-ins). See “FireWire Bandwidth vs. UAD DSP” on page 111 for details.
UAD System Manual - 66 - Chapter 6: UAD Meter & Control Panel
Page 67

It is important to note that all devices on the FireWire bus share the available
data bandwidth of the bus, including hard drives and audio interfaces as well
as UAD-2 Satellite and Apollo. Therefore all of the bandwidth cannot be allocated for UAD use if FireWire hard drives and/or audio interfaces are on
the same bus. See “FireWire Bandwidth” on page 109 for additional information.
To determine the proper value for the UAD Bandwidth Allocation:
1. Connect and power up all the FireWire devices (host computer, audio in-
terfaces, hard drives, UAD-2 Satellite) on the FireWire bus.
2. If running an audio interface on the FireWire bus, ensure the audio inter-
face drivers are installed and configured correctly (specifically, all the audio inputs and outputs that will be used should be enabled).
3. Run the UAD host (DAW) software but DO NOT run any UAD plug-ins, at
the HIGHEST SAMPLE RATE that will be used in the session (the sample rate
may be reduced after UAD Bandwidth Allocation is set).
4. View FireWire Gauge in the “Bandwidth Metering” section of the FireWire
Panel UAD-2 Satellite (page 68) when UAD plug-ins are NOT running. The
value indicated in orange is the percentage of FireWire bandwidth that is
used by audio interface I/O streams.
UAD Bandwidth Allocation Example
5. Subtract the “Used by other devices” percentage from 100% and enter the
difference as the UAD Bandwidth Allocation.
6. If you are using FireWire hard drives for audio session data on the same
bus, the UAD Bandwidth Allocation will need to be reduced to accommodate the FireWire hard drive usage.
If all the FireWire devices on the bus except UAD-2 Satellite use 20% of the
available FireWire bandwidth (from steps 1 through 4 above), enter 80% as
the UAD Bandwidth Allocation (100% – 20% = 80%).
Tip: If FireWire performance issues occur, leaving a bit of unused FireWire
bandwidth (headroom), so the total usage for all devices is less than 100%.
To leave 5% of the bandwidth available for headroom in the example above,
you’d enter 75% for UAD Bandwidth Allocation (20% bandwidth without
UAD-2 Satellite + 75% for UAD-2 Satellite = 95% total FireWire bandwidth).
This is especially applicable if using FireWire hard drives on the same bus for
audio session data.
UAD System Manual - 67 - Chapter 6: UAD Meter & Control Panel
Page 68

Plug-In Calculator
The Plug-In Calculator displays the maximum number of stereo UAD plug-ins
that can be run on UAD-2 Satellite and Apollo with the current FireWire Sys-
tem settings at a given sample rate.
Note: The Plug-In Calculator is for informational purposes only; it does not
actually affect UAD FireWire or DSP performance in any way.
Max Stereo Plug-Ins
The maximum number of stereo UAD plug-ins that can run on UAD-2 Satellite
and Apollo, based upon the FireWire System settings and a given session
sample rate, is displayed here. The number changes if/when session sample
rate changes.
The UAD instantiation count at the current settings could exceed this number
If used in true mono configurations. Note that some host software uses stereo
plug-in processing even when used on a mono track.
At the following sample rate
This parameter selects the sample rate used by the Plug-In Calculator. To
change the value, click the down arrow to display the drop menu, then select
the desired value.
When a UAD plug-in is loaded by the host software, the session sample rate
is entered automatically. In this scenario, the parameter cannot be modified
until the host is quit.
Note: The “At the following sample rate” parameter is only used by the
Plug-in Calculator; it does not affect the actual sample rate of the UAD system
or the host software.
Bandwidth Metering
Bandwidth Metering pertains to the FireWire bus that UAD-2 Satellite and
Apollo are attached to. The items displayed in this area are for informational
purposes only; there are no settings here that can be changed.
If the host computer has multiple FireWire buses (this is rare), up to two bandwidth gauges will be displayed, one for each bus.
Used by UAD This number displays the percentage of FireWire bus bandwidth that is used
by UAD plug-ins running on UAD-2 Satellite and Apollo. The number cannot
exceed the value set by the UAD Bandwidth Allocation parameter.
UAD System Manual - 68 - Chapter 6: UAD Meter & Control Panel
Page 69

Used by other devices
This number displays the percentage of FireWire bus bandwidth that is used
by all FireWire audio interface devices connected to the bus. The number is
used to help determine an optimum value for the UAD Bandwidth Allocation
parameter.
FireWire Gauge The FireWire Gauge (Figure 14) reflects the FireWire bus bandwidth cur-
rently used by UAD-2 Satellite, Apollo, and all other FireWire peripheral devices (e.g., audio interfaces and hard drives).
The gauge graphically displays the UAD Bandwidth Allocation (green), the
bandwidth used by active UAD plug-ins (blue), bandwidth used by audio interfaces (orange), and bandwidth available for FireWire hard drives (black).
The FireWire Gauge in the FireWire control panel is also displayed in the
UAD Meter when UAD-2 Satellite or Apollo is connected (see Figure 7 on
page 48).
Available FW bandwidth (headroom)
Total available Firewire bus bandwidth
UAD Bandwidth Allocation
(blue + green)
Used by
other devices
(orange)
UAD (blue)
Figure 14. Elements of the UAD FireWire Gauge
Available for UAD
Used by
(green)
Total allocated
bandwidth
(UAD + other
devices)
Important: FireWire bandwidth is unrelated to UAD DSP loads. See
“FireWire Bandwidth vs. UAD DSP” on page 111 for details.
Info Display This area displays helpful text about parameters in the FireWire panel. Hover
the mouse over a FireWire setting to view the informational text.
Help & Support Panel
The Help & Support panel (Figure 15) contains numerous helpful weblinks to
help you get the most out your UAD Powered Plug-Ins experience.
UAD System Manual - 69 - Chapter 6: UAD Meter & Control Panel
Page 70

The button names are self-explanatory. Click a button to launch the URL in
your default web browser (you must be connected to the internet to launch the
web pages). If the UAD computer isn’t online, much of the information is in the
manual you’re reading now; find it in Table of Contents, Index, or search.
“View User Manual” is the only button that doesn’t link to the internet. Instead,
licking this button opens the UAD User Manual (the file you’re reading now).
Figure 15. The UAD System Help & Support panel
UAD System Manual - 70 - Chapter 6: UAD Meter & Control Panel
Page 71

CHAPTER 7
Using UAD Powered Plug-Ins
Overview
Once the UAD device(s) and Powered Plug-Ins have been properly installed,
the UAD Powered Plug-Ins are accessed and used just like any host-based
plug-in. All UAD Powered Plug-Ins can run concurrently with each other and
with host-based plug-ins simultaneously, in any combination.
UAD-2 Powered Plug-Ins support up to 32-bit, 192 kHz operation. Resolution
is limited only the by resolution of the host application. Please note that Powered Plug-Ins running at 96 kHz use twice as much UAD DSP resources than
those used at 48kHz, and so forth.
Launching a UAD Powered Plug-In
Cubase SX & Nuendo SX
Each host application has its own particular methods for instantiating (launching) a plug-in. Consult the host application documentation for specific instructions on loading and using plug-ins with the application.
Figure 16. Launching a UAD Powered Plug-In in Steinberg Cubase and Nuendo
UAD System Manual - 71 - Chapter 7: Using UAD Powered Plug-Ins
Page 72

Logic Pro
Figure 17. Launching a UAD Powered Plug-In in Apple Logic Pro
The UAD Plug-In Window
One typical UAD plug-in window is shown in Figure 18. The graphical user
interface (GUI) typically contains several control parameters for modifying the
behavior of the plug-in, and display elements such as meters, for visual feedback. The UAD Toolbar (common to all UAD plug-ins) is also displayed.
Typical interactive control parameters
Display-only element (not a control parameter)
UAD Toolbar (common to all UAD plug-ins)
Figure 18. Typical UAD plug-in window
UAD System Manual - 72 - Chapter 7: Using UAD Powered Plug-Ins
Page 73

Controls View Some host applications have an alternate plug-in display mode feature called
Controls View, Parameter Mode, or similar terminology. This mode typically
displays the control parameters as a list with simple sliders, switches, and
menus (the appearance is controlled by the host), which some users prefer.
Consult the host documentation for how to display this view.
Figure 19. A UAD plug-in showing controls view
UAD Toolbar
Below every UAD Powered Plug-In (when displayed in normal GUI view) is the
UAD Toolbar (Figure 20). The Toolbar has several useful features that make
using UAD plug-ins more convenient.
Settings drop-menu
Device that plug-in
is running on
Figure 20. Anatomy of the UAD Toolbar
LiveTrack button
Status indicator
Help drop-menu
Buy plug-in button
UAD System Manual - 73 - Chapter 7: Using UAD Powered Plug-Ins
Page 74

Settings Menu The Settings menu provides a convenient way to manage
your UAD plug-in parameter settings. To select the functions, click the folder icon in the Toolbar, then select an action from the drop-menu that appears.
The Settings load/save feature supports presets but not
banks. To load and save banks, use the host’s bank management feature (if
available).
Note: UAD plug-in settings are saved within a project session file by the host
software, and settings are recalled when the project file is loaded. This occurs
automatically without using the preset load/save feature.
Preset/Settings Compatibility
Load/Save Preset
Load/save and copy/paste of parameter values between the same UAD plugin type is supported. You can also load/save/copy/paste between “SE” and
“full” plug-ins of the same type, for example between UAD Neve 33609 and
UAD Neve 33609SE when you need to squeeze out a bit more DSP performance without losing your settings.
Preset Families
Functions in the menu are also supported between CS-1 “family” plug-ins. Preset load/save and settings copy/paste are all interchangeable within the
UAD CS-1 family, which includes CS-1, DM-1, DM-1L, EX-1, and RS-1.
When the Load Preset or Save Preset function is selected, the standard operating system load/save file dialogs are presented. Preset files can then be
loaded (if the plug-in is the same type), or saved to any disk location.
Default Preset Locations
When the load/save functions are used, the OS load/save file dialogs default to the standard UAD preset location. Although UAD presets can be
loaded from (and saved to) any disk location, using the default location is a
convenient method to organize all your presets in one location.
When saving, the Presets folder is created if it doesn’t already exist. A subfolder with the UAD plug-in name is also created, so presets for the same plugin are all in the same folder. When loading presets, the open file dialog looks
inside the subfolder for that plug-in.
UAD System Manual - 74 - Chapter 7: Using UAD Powered Plug-Ins
Page 75

Windows The default preset location is inside the Presets folder, which is created within
the folder specified during software installation. For example, if the default location was selected when running the installer, the location would be:
• C:\Program Files\Universal Audio\Powered Plugins\Presets
Note: This default location can be changed during installation; the new lo-
cation will be remembered as the default.
Mac On Mac OS X systems, the default preset location is:
• Startup Disk/Library/Application Support/Universal Audio/Presets
Copy/Paste Settings
Settings can copied and pasted directly between
UAD plug-ins (within the compatibility guidelines)
without using the interim step of creating a preset
file.
To copy/paste settings between UAD plug-ins, select Copy Settings from the
drop-menu of the source plug-in, then select Paste Settings from the drop-menu
of the destination plug-in.
Note: If the menu displays “Cannot Paste Settings” then settings were not
copied first, or the paste destination is an incompatible plug-in.
LiveTrack Mode
Overview LiveTrack Mode reduces latency on an active UAD-2 plug-in to the
lowest possible amount. This feature is highly useful for monitoring
processed audio when recording live performances.
Reduced latency in LiveTrack Mode is accomplished by circumventing the
standard buffering processes. Normally, UAD-2 signal data is buffered at the
audio interface I/O sample buffer size (such as 128, 512, or 1024 samples)
which results in a processing delay.
In LiveTrack Mode, UAD-2 signal data is transferred and processed “immediately” instead of being buffered, resulting in reduced latency.
Note: LiveTrack Mode is available exclusively with UAD-2 PCIe devices.
When a UAD-2 FireWire device (UAD-2 Satellite or Apollo) are in use by the
system, LiveTrack Mode cannot be used.
UAD System Manual - 75 - Chapter 7: Using UAD Powered Plug-Ins
Page 76

Increased Host Loading using LiveTrack
When LiveTrack is active, host CPU loading increases. The host load is directly proportional to the DSP load of the UAD plug-in(s) in LiveTrack mode,
however host CPU is never used for Powered Plug-in processing.
Extra Latency using LiveTrack
When extra buffering is enabled (page 61) or when upsampled UAD plug-ins
(page 87) are used with LiveTrack, latency is increased. Extra buffering adds
64 samples, and each upsampled plug-in using LiveTrack adds the value from
Table 7 on page 88.
Note: For more detailed information about latency and buffers, see
Chapter 9, “UAD Delay Compensation”.
LiveTrack Activation
To activate LiveTrack Mode, click the microphone icon in the UAD2 Toolbar. The mode is active when the mic icon is red.
LiveTrack Mode can be activated simultaneously on multiple UAD-2 plug-ins.
However, host system CPU loads will increase with each LiveTrack Mode instance.
Status Indicator The Status indicator (see Figure 20 on page 73) displays information about
the current state of the plug-in. Each state is described below.
Start Demo
When “START DEMO” is displayed, the 14-day trial period
for the particular plug-in has never been activated. Clicking
this button will start the demonstration period (you can also start the demo in
the Control Panel’s Plug-In Status column (page 55).
Demo Active
After starting the demo, and when the plug-in is still within
the active 14-day trial period, the number of days remain-
ing in demo mode is displayed here.
Important: The 14 day demo period can only be activated once, and can-
not be stopped or restarted during this period! We recommend you do not activate demo mode until you have the opportunity to thoroughly check out its
sound and functionality. See “Demo Mode” on page 40 for more information.
UAD System Manual - 76 - Chapter 7: Using UAD Powered Plug-Ins
Page 77

Disabled
When “DISABLED” is displayed in red, the plug-in will not process audio. This can occur in two situations; either the demo period has expired (click the Buy button!), or the UAD DSP is over-
loaded and there are not enough device resources to run the plug-in.
Status Blank
When no text is displayed in the Status area, the plug-in is fully authorized (licensed) and operating normally. In this state, the Buy button is not displayed.
Buy Button When the plug-in is not fully licensed, the Buy button is displayed. If
the computer is connected to the internet, clicking Buy links to the UA
online store so you can purchase the license. See “UA Online Store” on
page 41 for purchasing details.
Help Menu The Help drop-menu contains a couple handy shortcuts for your
convenience. To select the shortcuts, click the “question” icon in
the Toolbar, then a shortcut from the drop-menu that appears.
Select “Manual” to open the UAD Plug-Ins Manual. Select “Web Info” to visit
the product pages for the plug-in on our website (internet connection required).
Adjusting Parameters
The parameter settings for each of the UAD Powered Plug-Ins can be adjusted
to achieve a desired effect. Parameter values are easily modified by dragging
sliders, rotating knobs, clicking switches and buttons, or by selecting values in
a drop-menu. The functions of all parameters are detailed in later chapters.
The parameter adjustment style can be Circular, Relative Circular, or Linear.
For more information, see “User Interface Settings” on page 63.
Note: To increase resolution when adjusting rotary controls in circular and
relative circular modes, increase the radius of the mouse relative to the knob
while dragging (i.e. move the mouse farther away from the knob while dragging).
UAD System Manual - 77 - Chapter 7: Using UAD Powered Plug-Ins
Page 78

Text Entry Parameter values can be modified directly with text entry. To enter a param-
eter value using text entry, single-click the parameter value text. The text value
will highlight, indicating it is ready to receive a new value. Type in a new
value, then press Return, Enter, or Tab, or click outside of the text box. Press
Esc if you want to revert to the prior setting without entering the new value.
Values entered via text entry are rounded to the closest significant digit. If an
entered value is out of range, it will be ignored.
To enter time values, the units must be specified. m =milliseconds, and s = seconds. Examples: 400 milliseconds = 0.400s or 400m; 1.5 seconds = 1.5s or
1500m.
Scroll Wheel If your mouse has a scroll wheel, it can be used to adjust knob and slider con-
trols if the host application supports this functionality. Place the mouse cursor
over any knob or slider control to increment or decrement the parameter value
with the scroll wheel.
Keyboard
Control
(Mac)
Shortcuts
If you control-click a control it selects that control for keyboard control. This is
useful for when you're in circular mode, and you want to fine-adjust a control.
Normally, clicking on a control in this mode makes the value jump to where
you clicked. Control-clicking will select the control so that you can use the keyboard to adjust it, without making its value jump first.
Table 3 on page 79 lists the keyboard shortcuts that are available for modi-
fying parameter values. When using keyboard shortcuts, the last edited control will be modified (or, on Mac, you can use control-click to select a different
control as the target for keyboard shortcuts without changing the control's
value).
Note: Not all host applications support sending keystrokes to plug-ins.
UAD System Manual - 78 - Chapter 7: Using UAD Powered Plug-Ins
Page 79

Table 3. Keyboard shortcuts
Keyboard Action: Result:
Control + Click Parameter (Mac only) Select parameter for keyboard control
(without changing its value)
Shift + Drag Fine Control
UpArrow
RightArrow
Shift + PageUp
DownArrow
LeftArrow
Shift + PageDown
Shift + UpArrow
Shift + RightArrow
PageUp
Shift + DownArrow
Shift + LeftArrow
PageDown
Control + Click parameter (Windows)
Modifier* + Click parameter (Mac)
(*Modifier key set in Configuration Window)
Control + Shift + Click parameter (Windows)
Modifier* + Shift + Click parameter (Mac)
(*Modifier key set in Configuration Window)
DSP Loading Information
The UAD devices feature either one (UAD-2 Solo), two (UAD-2 Duo), or four
(UAD-2 Quad) on-board DSP chips for processing Powered Plug-Ins.
Increment Fine
Decrement Fine
Increment Coarse
Decrement Coarse
Toggle initial editor setting (the value when the
editor window was last opened)
Revert to initial editor setting (the value when the
editor window was last opened)
Multi-DSP UAD-2 systems use significantly enhanced load balancing routines.
UAD-2 plug-ins are always allocated as efficiently as possible, which is not
necessarily on the DSP with the lowest resource usage.
UAD FireWire Devices
Because Firewire has significantly less bandwidth than the PCIe protocol, if
UAD-2 Satellite and/or Apollo is running with UAD-2 PCIe card(s) in a multidevice system, UAD plug-ins will load on the UAD-2 card(s) before the
Firewire device in order to maximize Firewire bandwidth. See “FireWire
Bandwidth vs. UAD DSP” on page 111 for more information.
UAD System Manual - 79 - Chapter 7: Using UAD Powered Plug-Ins
Page 80

More Loading Notes
• UAD DSP usage is proportional to the host application sample rate and sys-
tem PCIe bus speed. Therefore, more plug-ins can be used simultaneously in
a 44.1K session than in a 96K session, and likewise a higher speed bus will
use less DSP load than a slower bus.
• Bypassing individual components will conserve DSP on some UAD plug-ins.
For example, bypassing the compressor in the EX-1 when only the EQ is in
use, and/or bypassing any of the unused bands of the EX-1 EQ will use less
UAD DSP (unless DSP LoadLock is enabled).
• The UAD DSP resources required by each successive UAD Powered Plug-In
instance will slightly decrease.
• A chart showing expected plug-in counts can be found on our website:
uaudio.com/support/uad/compatibility/instance-chart.html
Host CPU Loads • The host system memory and CPU are never used for Powered Plug-Ins pro-
cessing. However, there will always be a small amount of load on the host
CPU induced by data transfers and user interface operations. This is unavoidable when using any DSP device.
Automation
• When LiveTrack Mode is active, host CPU load is increased. See “LiveTrack
Mode” on page 75 for details.
Every UAD Powered Plug-In parameter can be automated if this feature is supported by the host application. Each host application has its own particular
methods for automation. Consult the host application documentation for specific instructions on using automation with the application.
UAD Powered Plug-Ins reduce their DSP load when bypassed or disabled, but
not their memory load. This feature allows for automatable load balancing of
DSP power, and keeps the track delay constant to avoid on/off clicks.
Note: If there is not enough DSP available when automating, the plug-in may
not turn on. When this occurs, “DISABLED” is displayed in the UAD Toolbar.
UAD System Manual - 80 - Chapter 7: Using UAD Powered Plug-Ins
Page 81

External MIDI Control
UAD Powered Plug-In parameters can be controlled by an external MIDI controller, if this feature is supported by the host application. Each host application has its own particular methods for external MIDI control. Consult the host
application documentation for specific instructions on using external MIDI
control with the application.
Operating Levels
Except as noted in Table 4 below, the internal operating level of most UAD
Powered Plug-Ins is typically –18 dBFS. 0 dBFS is calibrated to +4 dBu with
18 dB of headroom, so 0 dBFS is the equivalent of +22 dBu in the analog domain.
Table 4. UAD Powered Plug-In Internal Operating Levels
UAD Powered Plug-In Typical Internal Operating Level 0 dBFS Equivalent
Most –18 dBFS +22 dBu
Ampex ATR-102 –12 dBFS +16 dBu
Manley Massive Passive –14 dBFS +18 dBu
Neve 33609 (selectable) –14 dBFS
–18 dBFS
–22 dBFS
Studer A800 –12 dBFS +16 dBu
+18 +dBu
+22 +dBu
+26 +dBu
UAD System Manual - 81 - Chapter 7: Using UAD Powered Plug-Ins
Page 82

CHAPTER 8
Tempo Sync
Overview
The time-based parameters of several UAD Powered Plug-Ins can be synchronized to the tempo of the host application using the Tempo Sync feature.
When Tempo Sync is activated, the time-based parameters that are available
for synchronization are changed to note duration values, and will sync to the
tempo of the host application using the displayed note value.
Figure 21. The Tempo Sync feature within UAD DM-1L
Note: Not all host applications support Tempo Sync. In such hosts, the tempo
sync features will not function.
Tempo Sync Plug-Ins
Tempo Sync is supported in the UAD plug-ins listed in Table 5.
Table 5. UAD Plug-Ins with Tempo Synchronization
UAD CS-1 UAD Moog Filter
UAD Cooper Time Cube UAD Moog Filter SE
UAD EP-34 UAD MXR Flanger/Doubler
UAD DM-1 UAD Roland RE-201
UAD DM-1L UAD RS-1
UAD System Manual - 82 - Chapter 8: Tempo Sync
Page 83

Sync Activation To activate Tempo Sync, click the “Sync” button within the plug-in interface.
The Sync button “LED” will illuminate and the time parameters will change
from a time-based display to a note value (see Figure 21).
Note: When Tempo Sync is activated, the plug-in will automatically switch
the time or rate parameter(s) to the nearest available note value(s) given the
range of the parameter in question and the current tempo.
Available Note Values
The note values that are available for selection are listed in Table 6 on
page 83. The values are listed in musical notation as a division of measures.
For example 1/4 = one quarter note, 1/1 = one whole note, 4/1 = four
whole notes, and so forth.
The available note values were chosen to allow syncing to tempo in odd time
signatures as well the common 4/4 time signature.
LFO rate parameters have their note values listed from longest to shortest,
since long note values correspond to slow LFO rates.
Table 6. Tempo Sync available note values
1/64D*
1/64
1/32T
1/32
1/16T
1/32D
1/16
1/8T
1/16D
1/8
5/32*
1/4T
1/8D
1/4
5/16
1/2T
1/4D
1/2
5/8
1/1T
1/2D
1/1
5/4
1/1D
7/4
2/1
3/1
4/1
5/1
6/1
8/1
9/1
12/1
16/1
D = Dotted
T= Triplet
* = RE-201 only
A quarter note is always a quarter note, independent of the time signature. In
different time signatures a quarter note can represent different numbers of musical beats (e.g. 6/8 ) or different fractions of a bar (e.g. 5/4). For example,
say the time signature is 6/8 and the delay time tempo sync note value is
1/4. If a sound occurs on beat one of the measure then its delay will occur on
beat 3, which is 1/4 note (i.e. two 8th notes) later.
Note: The “beat” value in a sequencer's BPM tempo setting always refers to
a quarter note, independent of time signature.
UAD System Manual - 83 - Chapter 8: Tempo Sync
Page 84

Range Limits
Entering Values
Some parameters in Tempo Sync mode cannot access the entire note value
range in Table 4, because their maximum values would always be out of
range above certain note values (assuming a maximum usable tempo of 300
BPM; 250BPM for Roland RE-201). These parameter limits are:
• DM-1, RS-1 time – 300ms: maximum 1/4D
• DM-1L time – 2400ms: maximum 3/1
• Roland RE-201 Head 1 range: 5/32 – 1/64
• Roland RE-201 Head 2 range: 1/4 – 1/32
• Roland RE-201 Head 3 range: 1/2T – 1/32D
In addition to adjusting the parameter knob, the two following methods can
be used for entering Tempo Sync values.
Arrow Keys
After clicking the parameter to select it, the arrow keys can be used to scroll
through available note values.
Text Entry
Direct text entry is also available (see “Text Entry” on page 78). Any notation
values can be entered (fraction or decimal), and the values are automatically
converted to the nearest appropriate setting.
For example: If 3/4 or 6/8 is entered using text entry, 1/2D is displayed because a dotted half note equals three quarter notes, which is the duration of
one measure in a time signature of 3/4 or 6/8. If 12/8 is entered with text
entry, 1/1D is displayed because a dotted whole note equals six quarter
notes, which is the duration of one measure in a time signature of 12/8 (or
two measures in a time signature of 3/4 or 6/8).
This means you can create a tempo sync duration of one measure for any time
signature by simply typing in the time signature (assuming there is a match in
the beat table).
Similarly, if 1/12 is entered with text entry, 1/8T is displayed because an
eighth note triplet is equivalent to one-twelfth of a measure (if in 4/4 time).
UAD System Manual - 84 - Chapter 8: Tempo Sync
Page 85

Out of range
When a parameter note value is out of range of the current tempo note value,
the note value is displayed in parentheses on a red background (Figure 22).
Figure 22. Tempo Sync note value display
Modes with Tempo Sync
The UAD DM-1 and UAD DM-1L plug-ins (and DM-1 within CS-1) have a
Mode menu that switches the plug-in operation between delay, chorus, and
flanger mode. In these plug-ins, when the Mode is set to DualDelay and PingPong, the delay Time and modulation Rate parameters are simultaneously
available for Tempo Sync.
However, when the plug-in is set to a Chorus or Flanger mode, only the Rate
is available for Tempo Sync. This enables the more typical and musical chorus/flange effect by only syncing the modulation Rate to the tempo while the
delay time remains constant.
Roland RE-201 Sync
ships. Values that are imprecise approximations (but are within the available
delay time range) are displayed with a “+” or “–” symbol. The leading head
in the current mode is accurately synced; the other values are based on the
fixed tape head relationship. Note that when a parameter note value is out of
range of the current tempo note value, the note value flashes (instead of in parentheses on a red background as in Figure 22).
When the RE-201is in Tempo Sync
mode, note values can be imprecise
due to the fixed tape head relation-
UAD System Manual - 85 - Chapter 8: Tempo Sync
Page 86

CHAPTER 9
UAD Delay Compensation
Latency & Delay Compensation
When UAD Powered Plug-Ins are used, audio data to be processed by a Powered Plug-In is sent by the host application to the UAD device. The audio is
then processed by the UAD device and sent back to the host application. This
back-and-forth shuffling of audio data is called “buffering” and it produces a
latency (delay) in the audio signal being processed.
Latency is inherent in digital audio systems and it can be detected in certain
situations. Latency time in a DAW is usually determined by the sample rate
and audio I/O interface hardware buffer size settings.
If this latency is not compensated, the processed audio will not be perfectly
aligned (synchronized) with unprocessed audio. Fortunately, modern audio
plug-in host applications automatically compensate for this latency by simply
enabling the delay compensation function in the preference settings. Most
hosts provide full plug-in delay compensation throughout the entire signal
path, including inserts, sends, groups/buses, and outputs
Host Application Settings
UAD latency and plug-in delay compensation is managed automatically by
all modern DAWs using automatic plug-in delay compensation. Additionally,
latency can be reduced to undetectable levels in the UAD-2 PCIe card by bypassing host buffering altogether (see “LiveTrack Mode” on page 75).
Note: Delay compensation is fully automatic and requires no user interven-
tion when UAD Powered Plug-Ins are used in hosts that support latency delay
compensation.
For optimum results, the delay compensation feature should be enabled in the
host application. This will provide automatic compensation when UAD plugins are used. This option is usually found in the audio or plug-in preference settings window. The specific location of the setting for this option can be found
in the host DAW documentation.
Latency compensation has various names depending on the host. It’s usually
referred to as “Automatic Delay Compensation” (ADC), “Plug-In Delay Compensation” (PDC) or a similar related name.
UAD System Manual - 86 - Chapter 9: UAD Delay Compensation
Page 87

Upsampled Plug-Ins
Some UAD plug-ins use an internal sample rate of 192 kHz to achieve sonic
design goals. This upsampling results in a larger latency than other UAD plugins. Therefore, they require more compensation to remain perfectly synchronized with other tracks.
Note: Compensating upsampled UAD plug-ins is performed automatically
by the host application when latency compensation is enabled in the host.
Upsampled Compensation Notes
• Compensating for upsampled UAD plug-ins is not required when these plug-
ins are used for program material on the output bus, where latency is not a
consideration (because the entire mix is delayed by the same amount).
• The latency in Table 7 on page 88 is also produced when LiveTrack mode
(page 75) is used with upsampled plug-ins.
• Upsampled plug-in latency cannot be displayed in the “Plug-In Latency Sec-
tion” on page 53 due to technical limitations.
• The Precision Multiband (PMB) and Ampex ATR-102 plug-ins have a signif-
icantly larger latency than other upsampled plug-ins because of their complex algorithms. Because manually compensating for these plug-ins in hosts
that don’t support full plug-in delay compensation can be complicated, to
avoid timing errors in these hosts we generally recommend using these plugins only on outputs, so no manual compensation is required.
Note: Use the Precision Multiband and Ampex ATR-102 only on outputs (as
their design was intended), or only in hosts that have full plug-in delay compensation.
UAD System Manual - 87 - Chapter 9: UAD Delay Compensation
Page 88

Upsampling Values Table
Table 7 lists the additional latency produced by upsampled UAD plug-ins.
Table 7. Upsampled UAD plug-ins with additional latencies
Upsampled Plug-In 44.1 48 88.2 96 176.4 192
Precision Limiter 64 69 129 140 259 281
Neve 33609
FATSO Jr./Sr.
Massive Passive
Moog Filter
Studer A800
UA 1176 Limiter Collection
Precision Maximizer 67 67 67 67 42 42
Helios Type 69
Harrison 32C
Neve 1073, 1081, 31102
Precision EQ
Pultiec EQ/Pultec-Pro
SSL E Channel Strip
Trident A-Range
Precision Multiband 15,360 16,896 30,720 33,792 61,440 66,048
Little Labs IBP 32 32 14 14 1 1
Lexicon 224 84 79 90 97 107 116
EMT 250* (see note) 75 11 85 24 107 50
Ampex ATR-102 2262 2455 4408 4798 8818 9598
MXR Flanger/Doubler 31 31 0 0 0 0
Sample Rate (kHz)
55 55 55 55 88 88
31 31 13 13 0 0
*EMT 250 Note The EMT 250's anti-aliasing filters for its A/D and D/A conversion are not lin-
ear-phase filters; therefore our emulation does not have a latency that is the
same at all frequencies. Thus, we cannot report to the delay compensation engines a delay that is correct for all frequencies. The value we report is good
at low frequencies, but becomes off at high frequencies.
For example, when the plug-in is in Delay program mode and set with zero
delay time and predelay values, the plug-in output will not be completely cancelled when mixing with flipped phase against an unprocessed track; high
frequencies will leak through. However, the latency through the dry side of the
wet/dry mix, and the latency when the plugin is bypassed via the EMT 250
Power switch, do not have this issue and will be fully compensated by the
DAW.
UAD System Manual - 88 - Chapter 9: UAD Delay Compensation
Page 89

Live Processing
The previous discussions of delay compensation applies primarily to playback and mixing of existing tracks. During recording (tracking), the primary
concern usually centers around getting the absolute lowest possible latency
out of your hardware and software combination. The lower the latency is, the
closer you can get to a realtime, “ears match the fingers” performance situation in the digital environment where some latency is unavoidable.
Realtime latency is displayed in the System Information panel (page 52)
within the UAD Meter & Control Panel application.
Live processing latency is determined by the audio interface I/O buffer size
setting. The lower the buffer size, the lower the latency.
UAD-2 PCIe LiveTrack Mode
UAD-2 PCIe devices use an advanced buffering architecture that delivers no
additional latency when tracking by using LiveTrack Mode. See “LiveTrack
Mode” on page 75 for details.
UAD System Manual - 89 - Chapter 9: UAD Delay Compensation
Page 90

CHAPTER 10
UAD-2 SOLO/Laptop
Overview
ExpressCard™ is a computer expansion slot typically used in notebook computers. Utilizing a 2.5Gbps differential serial link, ExpressCard conveniently
leaves slower USB and Firewire connections free for dongles, Audio I/O, and
hard drives, while operating at full PCI Express bandwidth.
UAD-2 SOLO/Laptop is a compact ExpressCard version of the UAD-2 SOLO
card. The UAD-2 SOLO/Laptop brings all the power of the UAD-2 to portable
digital audio workstation users. The UAD-2 SOLO/Laptop enables large, professional mixes on notebook DAWs without the need for external cabling or
a power supply. See “UAD-2 SOLO/Laptop Details” on page 92.
Once installed and configured, it is functionally identical to its UAD card
counterparts (see “The UAD Hardware” on page 28 for a UAD hardware
overview).
Note: UAD-2 SOLO/Laptop is a discontinued product.
Documentation UAD SOLO/Laptop is a hardware system designed for use with UAD Pow-
ered Plug-Ins, which is the companion software package that includes the
drivers, plug-ins, and software documentation.
Instructions in this chapter are specific to UAD-2 SOLO/Laptop only, and apply in addition to the other chapters. To get the most from this product, please
review the following additional information:
Important Information
Important user information is presented on a printed document within the UAD
ExpressCard product retail package. It provides details that may not be included in this manual. Please review the information carefully.
Technical Updates
Updated UAD technical information is regularly posted to the UA website.
Please visit the UAD support pages for the latest bulletins:
• uaudio.com/support/uad/
UAD System Manual - 90 - Chapter 10: UAD-2 SOLO/Laptop
Page 91

ExpressCard Videos
Our support website contains many helpful videos that explain how to install
the hardware and software, register and authorize the product, obtain optional plug-ins, and more:
• http://www.uaudio.com/support/uad/videos.html
UAD-2 SOLO/Laptop Instructions
All instructions that apply specifically to UAD-2 SOLO/Laptop are in the
“UAD-2 SOLO/Laptop Details” section, beginning on page 92.
UAD System Manual - 91 - Chapter 10: UAD-2 SOLO/Laptop
Page 92

UAD-2 SOLO/Laptop Details
Features • UAD-2 Solo in a self-contained, compact ExpressCard/34 package
(can be used in ExpressCard/54 slots with included adapter)
• 44.1-192k DSP Audio Accelerator for notebook computers
• Ultra-fast (2.5Gbps) ExpressCard/34 interface
• No external cables or power supply necessary
• Same potent DSP power as UAD-2 Solo
Package Contents
SOLO/Laptop System Requirements
The UAD-2 SOLO/Laptop package should contain the following items:
• UAD-2 SOLO/Laptop ExpressCard
• ExpressCard/34 to ExpressCard/54 Adapter
• UAD DSP Family Quickstart Guide DVD
• UAD Powered Plug-Ins software CD-ROM
• Important Information Sheet
• Universal Audio Full Line Catalog
To use the UAD-2 SOLO/Laptop, your system must meet the minimum system
requirements for UAD Powered Plug-Ins (see “System Requirements” on
page 16) in addition to the UAD ExpressCard product-specific requirements.
UAD-2 SOLO/Laptop requires the following hardware and software:
• UAD Powered Plug-ins software v5.3.1 or higher (included)
• Available ExpressCard/34 or ExpressCard/54 expansion slot
• UAD version 5.5.0 or higher is recommended for best performance
Software
Install Software First
Installation
Software installation for UAD ExpressCard products is the exact same procedure as those for UAD cards. Install the software before the hardware. Please
refer to “UAD Software Installation” on page 18 for detailed procedures.
Software Updates
The CD-ROM in the retail package may not contain the latest UAD software.
Please check our website for software updates:
UAD System Manual - 92 - Chapter 10: UAD-2 SOLO/Laptop
Page 93

• http://www.uaudio.com/support/uad/downloads/
• If the UAD software is already installed, the UAD Meter & Control Panel has
a convenient button that links to the updates page (“Check for Updates” on
page 52).
ExpressCard/34 to ExpressCard/54 Adapter
The UAD-2 SOLO/Laptop device uses the ExpressCard/34 form factor. When the device is installed in
systems with the wider ExpressCard/54 slot, the enclosed ExpressCard/34 to ExpressCard/54 adapter
should be used for the most reliable connection.
The adapter has two tabs on the bottom and one in the
middle that snap into place on the SOLO/Laptop device.
To install the ExpressCard/34 to ExpressCard/54 Adapter:
1. Line up the bottom two tabs on the adapter with the
corresponding holes on the SOLO/Laptop device.
The wide end of the adapter aligns with the non-connector end of the ExpressCard.
2. Snap in the middle tab and the adapter will click into
place. Done!
To remove the adapter, snap it off by holding the SOLO/Laptop device and
gently bending the adapter down.
Inserting the SOLO/Laptop
Note: The UAD-2 SOLO/Laptop device may be inserted before or after the
system is booted.
Important: Install the UAD software before inserting the device.
To install the UAD-2 SOLO/Laptop device:
1. Ensure that UAD v5.3.1 (or higher) software is already installed and that
the system was restarted after software installation.
2. Ensure that all audio plug-in host software is quit.
3. Slide the UAD-2 SOLO/Laptop ExpressCard fully into the host computer’s
ExpressCard/34 expansion slot (or ExpressCard/54 expansion slot with
the adapter) until it is firmly seated.
UAD System Manual - 93 - Chapter 10: UAD-2 SOLO/Laptop
Page 94

4. The LED on the SOLO/Laptop will initially flash red/green, indicating the
hardware is powered by the computer but the UAD drivers are not yet
loaded. Within a few seconds of inserting the device (or after startup is
complete, if inserted when powered down), the LED should glow steady
green, indicating the UAD drivers are loaded.
UAD-2 SOLO/Laptop is ready for use.
Removing the SOLO/Laptop
SOLO/Laptop Authorization
Important: The proper sequence must be followed before removing the
UAD-2 SOLO/Laptop device from the computer to avoid system instability
and/or data loss.
Note: The UAD-2 SOLO/Laptop device may be removed when the system is
active, as long as the steps below are followed.
To remove the UAD-2 SOLO/Laptop device:
1. Save your sessions and quit all UAD host software (audio applications and
the UAD Meter & Control Panel).
2. Remove the UAD ExpressCard from the expansion slot. Done!
Note: It is not necessary to power down the device in software using the
“Power Off Card” function (Mac Menu Bar) or “Safely Remove Hardware”
(Windows Task Bar) before removing the device.
After initial installation, the UAD-2 SOLO/Laptop should be registered and
authorized (it can run in demo mode for 14 days without authorization). See
“Authorization” on page 22 for full explanation and procedures.
Existing UAD Licenses
If you already have UAD device(s) in a desktop system, you can share those
UAD licenses with UAD-2 SOLO/Laptop. This option is presented during initial device registration; please consider your options carefully when registering.
UAD System Manual - 94 - Chapter 10: UAD-2 SOLO/Laptop
Page 95

Important SOLO/Laptop Notes
For maximum system stability and reduced possibility of data loss, please observe these operational requirements when operating UAD-2 SOLO/Laptop:
Sleep Important: Close sessions and remove UAD-2 SOLO/Laptop before sleep!
Before putting the computer into system sleep/hibernate/standby mode, quit
all UAD host software and remove the UAD-2 SOLO/Laptop device. Otherwise, unpredictable behavior and/or loss of session data could occur.
“Hot” Removal Important: Do not remove UAD-2 SOLO/Laptop while UAD plug-ins are
loaded!
Removing the device when it is active could cause the system to crash. Quit
all UAD hosts before removing the device.
ExpressCard/54
adapter
(Windows)
Red/Green LED
(Windows)
Use the ExpressCard/34 to ExpressCard/54 adapter with ExpressCard/54 slots
The UAD-2 SOLO/Laptop device uses the ExpressCard/34 form factor.
When the device is installed in systems with the wider ExpressCard/54 slot,
the enclosed ExpressCard/34 to ExpressCard/54 adapter should be used
for the most reliable connection. See“ExpressCard/34 to ExpressCard/54
Adapter” on page 93 for details.
Reinsert the UAD-2 SOLO/Laptop if the LED flashes red/green.
Occasionally the LED on the UAD-2 SOLO/Laptop device may flash red and
green after booting is complete and/or when inserting the device after boot.
If this occurs, simply remove then reinsert the device, which should cause the
LED to remain steady green.
UAD System Manual - 95 - Chapter 10: UAD-2 SOLO/Laptop
Page 96

CHAPTER 11
UAD-2 Satellite
Overview
UAD Powered Plug-Ins via FireWire
Duo and Quad Versions
UAD-2 Satellite is a UAD-2 DSP accelerator that connects to the host computer
via FireWire 800 or FireWire 400 and hosts UAD-2 Powered Plug-Ins on Mac
OS X systems. Unlike previous UAD-2 PCIe products, UAD-2 Satellite is a completely external unit with power supply that does not require a PCIe or ExpressCard interface. This freedom from PCIe requirements enables the full
UAD-2 Powered Plug-Ins library and DSP acceleration for select FireWire
equipped Intel-based Apple computers – notably notebook and desktop-all-in-ones such as iMac, Mac mini, and MacBook Pro.
Once installed and configured, UAD-2 Satellite is functionally similar to its
UAD-2 PCIe card counterparts. The main difference between UAD-2 Satellite
and UAD-2 PCIe cards is differing architectures (FireWire versus PCIe). See
“The UAD Hardware” on page 28 and “UAD-2 Family” on page 29 for UAD
hardware overviews.
Note: “LiveTrack Mode” is unavailable when UAD-2 Satellite is connected.
UAD-2 Satellite is available in two versions: Duo and Quad. The only difference between these two models is the number of processors inside the device
(and therefore the available DSP horsepower). The Duo or Quad designator
is silk-screened on the bottom of the Satellite housing.
Documentation UAD-2 Satellite is designed for use with UAD Powered Plug-ins, the compan-
ion software package that includes the drivers, plug-ins, and documentation.
Instructions in this chapter are specific to UAD-2 Satellite operations only, and
apply in addition to the other chapters. To get the most from your UAD-2 Satellite, please review the following additional information:
Important Information
Important user information is presented on a printed document within the
UAD-2 Satellite retail package. This sheet provides late-breaking details that
are not included in this manual. Please review the information carefully.
UAD System Manual - 96 - Chapter 11: UAD-2 Satellite
Page 97

Technical Updates
Updated technical information and the latest UAD software is regularly
posted to the UA website. Please visit the UAD support pages for the latest
UAD-2 Satellite support bulletins:
• http://www.uaudio.com/support/uad/satellite-support
UAD-2 Satellite Instructions
All instructions that apply specifically to UAD-2 Satellite are in the “UAD-2 Sat-
ellite Installation” section beginning on page 98.
About FireWire
This chapter contains information about the FireWire protocol and how to use
it with UAD-2 Satellite. For details, see “FireWire Basics” on page 105,
“FireWire Bandwidth” on page 109, “FireWire Bandwidth vs. UAD DSP” on
page 111, and “FireWire Bus Power” on page 112.
UAD-2 Satellite Details
Important: The information in these sections apply to UAD-2 Satellite
ONLY. For UAD-2 Solo/Laptop, see Chapter 10, “UAD-2 SOLO/Laptop”.
Features • UAD-2 Duo or Quad in an external housing chassis
• 44.1 – 192 kHz DSP Audio Accelerator for FireWire computers
• FireWire 800 & 400 interface
• Same potent DSP power as UAD-2 Duo or Quad
• Kensington Security Slot for anti-theft cables
Package
The UAD-2 Satellite retail package should contain the following items:
Contents
• UAD-2 Satellite unit (Duo or Quad version)
• External power supply with international AC plug adapters
• FireWire 800 (9-pin) cable
• UAD Powered Plug-Ins software installer on CD-ROM
• Important Information Sheet
• Universal Audio Full Line Catalog
UAD System Manual - 97 - Chapter 11: UAD-2 Satellite
Page 98

Satellite System Requirements
To use UAD-2 Satellite, your system must meet the minimum system requirements for UAD Powered Plug-Ins in addition to the UAD-2 Satellite product-specific requirements below.
UAD-2 Satellite requires the following hardware and software:
• Mac OS X 10.6.8 Snow Leopard or OS X 10.7.3 Lion (Intel systems only)
• Available FireWire 800 or FireWire 400 interface port
• See “System Requirements” on page 16 for additional requirements
UAD-2 Satellite Installation
Install Software First
Software Updates
Satellite Install Location
The software installation procedure for UAD-2 Satellite is the exact same procedure as those for UAD cards. Install the software before the hardware unless you are updating a previous installation. Refer to “UAD Software Instal-
lation” on page 18 for detailed procedures.
The CD-ROM in the retail package may not contain the latest UAD software.
Please check our website for software updates:
• http://www.uaudio.com/support/uad/downloads.html
If the UAD software is already installed, the UAD Meter & Control Panel has
a convenient button that links to the updates page (“Check for Updates” on
page 52).
When selecting a location to position UAD-2 Satellite during installation and
use, consider these points:
• The unit should be positioned on a secure, stable surface and not moved
during operation. This will help prevent the disruption of signals from cables
and/or connectors if they are accidentally bumped (or worse).
• For proper ventilation to prevent overheating, place UAD-2 Satellite on a
hard, flat surface and do not cover the unit. Allow air to circulate underneath the chassis. Multiple UAD-2 Satellite units may be safely stacked.
• High levels of radio-frequency radiation could interfere with proper opera-
tion. If possible, avoid placement near unshielded monitors, radio transmitters, and similar equipment.
UAD System Manual - 98 - Chapter 11: UAD-2 Satellite
Page 99

Security Slot The Kensington Security Slot is on the
rear panel. This feature helps prevent
theft when used with an optional locking
cable such as the Kensington MicroSaver
Security Cable. Refer to the instructions
that come with the optional cable.
External Power Supply
UAD-2 Satellite includes an external international DC power supply with
changeable AC connectors to match the AC socket in various countries
(Figure 23).
Figure 23. UAD-2 Satellite external DC power supply and changeable AC connectors
To change the AC connector:
1. Press and hold the button on the AC connector marked “PUSH.”
2. Rotate the AC prongs counter-clockwise to remove the connector.
3. Insert the desired connector and rotate clockwise until it snaps into place.
Figure 24. Changing the AC connector
Note: The removable connectors are keyed so they cannot be inserted incor-
rectly.
UAD System Manual - 99 - Chapter 11: UAD-2 Satellite
Page 100

Connecting UAD-2 Satellite
Important: Install the UAD software before connecting UAD-2 Satellite (see
“UAD Software Installation” on page 18). UAD-2 Satellite may be connected
before or after the system is booted.
To connect UAD-2 Satellite:
1. Ensure that the UAD Powered Plug-Ins software is already installed and that
the system was restarted after software installation. See “UAD Software In-
stallation” on page 18 for specific instructions.
2. Ensure that all UAD plug-in host software is quit.
3. Select a suitable location for the UAD-2 Satellite chassis (see “Satellite In-
stall Location” on page 98).
4. Connect the AC end of the External Power Supply to an AC outlet. If you
need a different AC connector for your country, see page 99.
5. Connect external power supply output cable to the DC input on the rear
panel of the UAD-2 Satellite chassis.
6. Connect one end of the FireWire cable to the FireWire port on the host
computer.
Disconnecting UAD-2 Satellite
7. Connect the other end of the FireWire cable to the UAD-2 Satellite chassis.
8. Turn on UAD-2 Satellite using the power switch on the rear panel. The unit
may be powered on before connecting without consequence.
UAD-2 Satellite connections are complete.
You are now ready to use UAD-2 Satellite. See “UAD-2 Satellite Operation”
on page 101. Additional connection methods are detailed later in this chap-
ter.
Important: The proper sequence must be followed before disconnecting
UAD-2 Satellite from the computer to avoid unpredictable behavior and/or
data loss.
To disconnect UAD-2 Satellite:
1. Save your sessions and quit all UAD host software (audio applications and
the UAD Meter & Control Panel).
2. Disconnect UAD-2 Satellite from the FireWire port. Done!
Note: UAD-2 Satellite may be disconnected when it and/or the computer is
powered, as long as the steps above are followed.
UAD System Manual - 100 - Chapter 11: UAD-2 Satellite
 Loading...