

Page 1
Max
Unitron TrueFit quick reference tting guide
Max™ oers max power and max protection. Max is the only Super Power
on the market with Power Adaptation Manager to provide the rst t that
clients expect, gently and automatically transitioning them to safer gain
levels that will protect their hearing in the end. Powered by Era,™ Max
oers features that are optimized for severe to profound hearing loss and
focused on maximizing intelligibility without compromising awareness.
Fight over-amplication and provide the best possible long term hearing
outcomes with Max.
Programming Max in Unitron TrueFit soware
This quick reference guide will lead you through the steps of a simplied
tting for Max hearing instruments using Unitron’s TrueFit™ tting
soware.
To detect the hearing instrument(s), choose your desired programming
interface.
•
If using iCube, insert the batteries into the hearing instruments and
close the battery door.
•
If using NOAHlink or HI-PRO, li the programming port cover and insert
the programming cable into the programming port.
Note: Hearing instrument controls, accessories, easy-t, easy-DAI, audio streaming and
automatic microphone options are deactivated during programming.
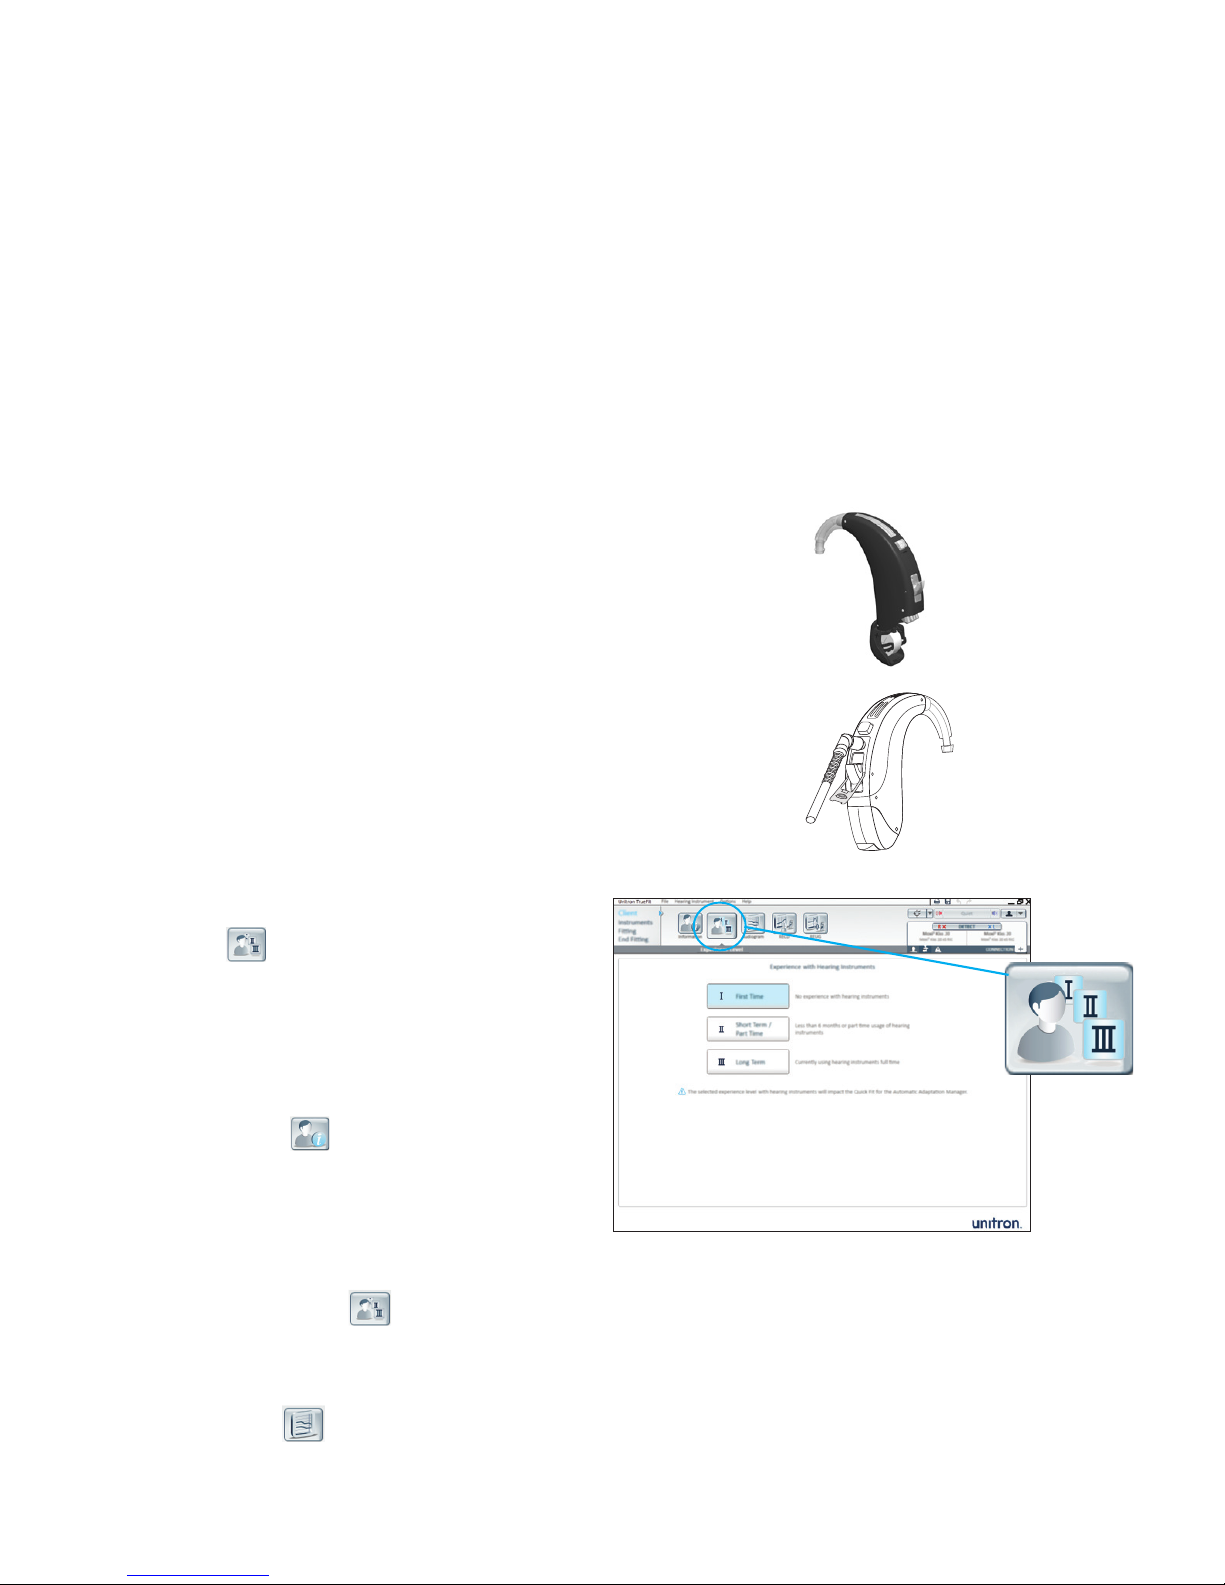
1. Client
NOAH
Within Client, click on Experience Level and
enter the client’s experience level with hearing
instruments.
Standalone
a. Information
Within Client, click on Information. Click the New
Client button, enter the client’s information and
click Save. Click the Blank Session button to begin
a new session.
b. Experience Level
Within Client, click on Experience Level, enter the client’s experience
level with hearing instruments.
c. Audiogram
Within Client, click on Audiogram, enter the client’s audiogram and
select the transducer used for audiometry.
When using iCube, insert
the battery into the
battery compartment.
When using NOAHlink
or HI-PRO, insert the
programming cable
into the hearing
instrument.
Select the client’s hearing instrument experience level.
Page 2
2. Instruments
a. Selection
1. Within Instruments, click on Selection and choose
your desired programming interface from the
drop-down list under the detect button.
2. Click the Detect button. The hearing instrument
model, style, matrix and serial number are
displayed, and the communication status is
updated.
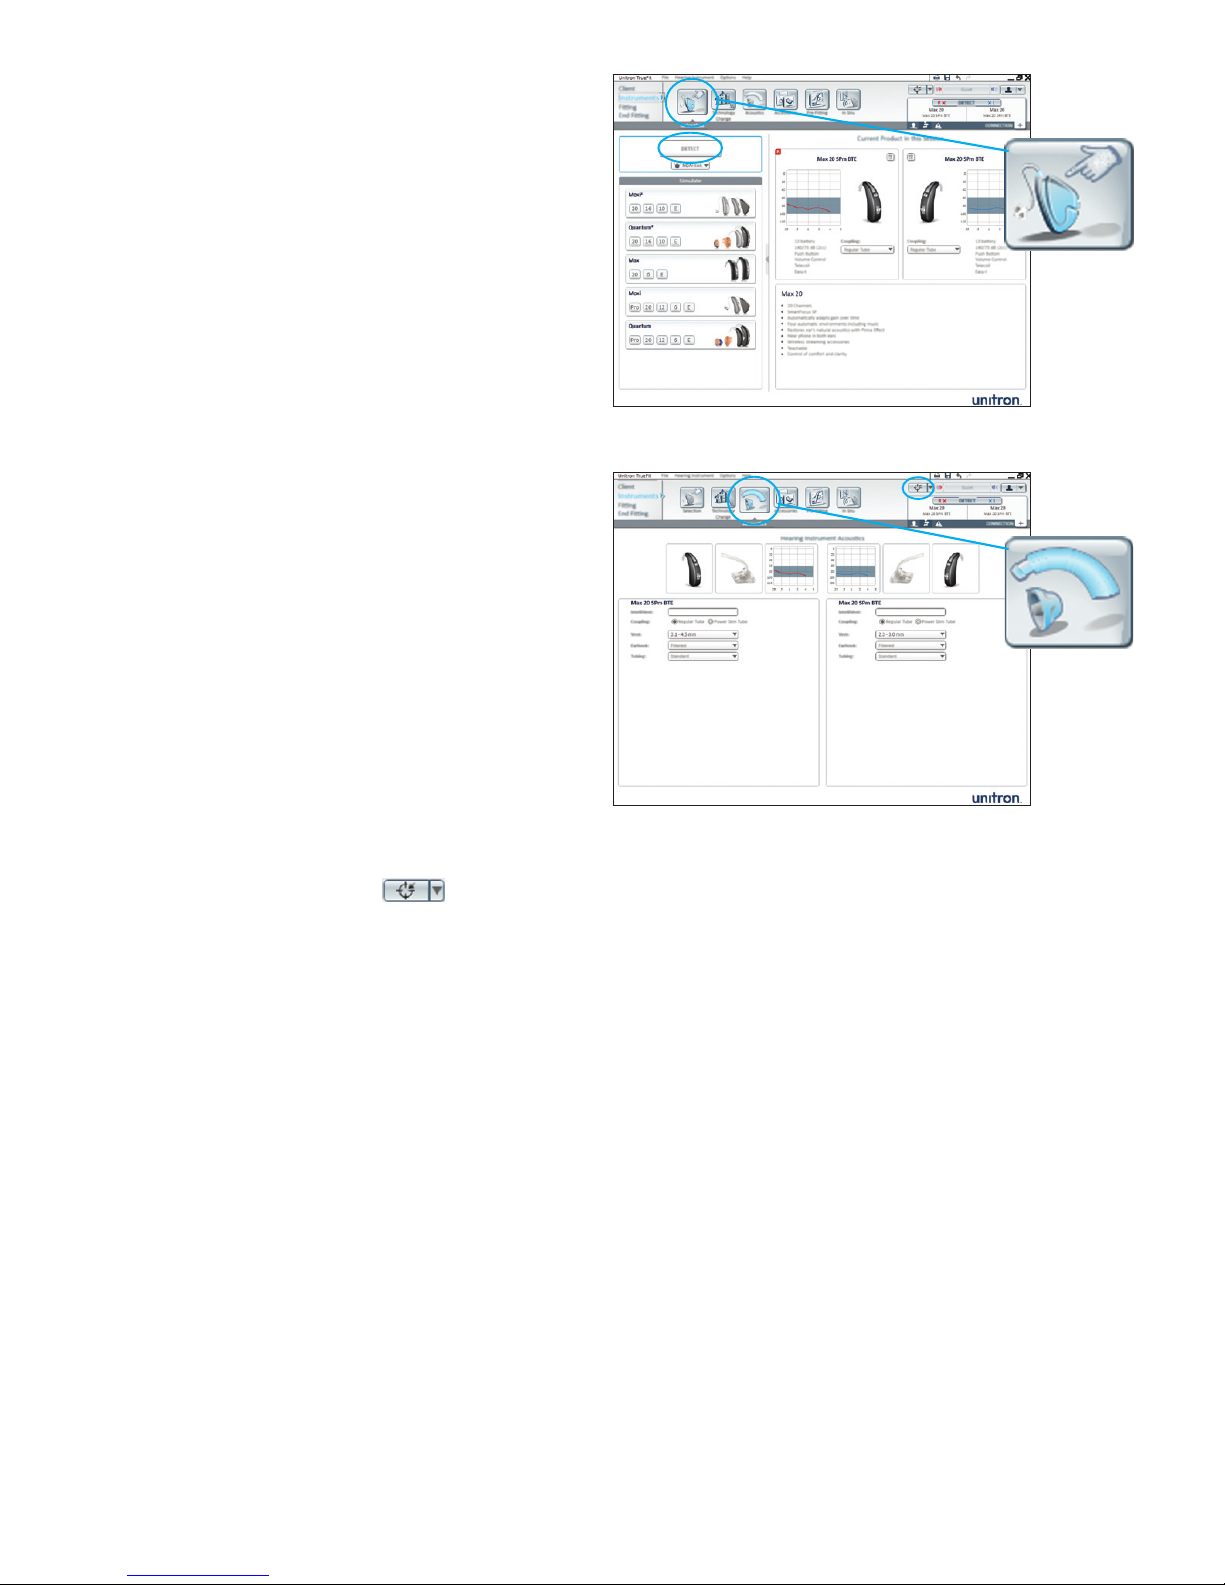
b. Acoustics
1. Within Instruments, click on Acoustics to congure
items such as: coupling, venting, earhook, tubing,
ear piece and tubing length.
2. If you have ordered an earmold/ear piece with
IntelliVent, enter the code and the soware will
automatically congure the hearing instrument for
optimal venting.
3. You can select Regular Tube or Power Slim Tube.
4. For Power Slim Tube, select the ear piece type,
vent and tubing length.
5. For regular tubing and an earhook, select the vent
size, earhook type and tubing type.
6. Click the Quick Fit button.
Within Acoustics, you can congure items such as:
coupling, venting, earhook, tubing, ear piece and
tubing length.
Select Detect to connect to the hearing instruments and
display the associated model, style and serial number.
Page 3

c. Accessories
1. Within Instruments, click on Accessories.
2. Click on the icon of the accessory you are pairing
to the hearing instrument(s).
3. Click the Activate button to pair the selected
accessory. Follow the on-screen instructions.
3. Fitting
a. Feedback optimization
1. Within Fitting, click on Feedback Optimization.
2. Click the Start feedback test button and follow
the on-screen instructions to perform feedback
optimization for each hearing instrument.
b. Tuning
1. Within Fitting, click on Tuning to manually ne
tune the listening programs. If desired, congure
the Adaptation Manager, Occlusion Manager,
Bass Enhancer, So/Mod/Loud controls, MPO/
Gain/CR/TK controls and Frequency Compression.
Fitting Advice can also be used to suggest and
apply ne tuning solutions.
2. Click Soft/Mod/Loud Controls. From the program selector list, choose
the desired program(s) to adjust. Select the desired input level (so,
moderate, loud or all) and frequency region for adjustment. Increase
or decrease settings using the +/- buttons.
3. Click MPO/Gain/CR/TK. From the program selector list, choose the
desired program(s) to adjust. Select the desired adjustment (MPO,
Gain, CR or TK) and frequency region for adjustment. Increase or
decrease settings using the +/- buttons.
Choose the icon of the accessory you are pairing.
Select Activate to begin the pairing process.
Perform feedback optimization for each hearing
instrument.
Page 4

4. End tting
Within End Fitting, you can congure volume
control settings, push button and lever
congurations and beep notications along with
other hearing instrument options.
1. To end the tting, click on Fitting Summary and
select the Print & Save button.
2. To close the session, click on the Close Session
button.
3. Aer closing the session:
•
If using iCube, restart your hearing
instrument(s) by opening and closing the
battery door(s).
•
If using NOAHlink or HI-PRO, remove the program cable,
insert the batteries and close the battery door.
B/13-026 027-5722-02
For more information about tting Max hearing instruments or Unitron
TrueFit tting soware, visit the Help feature within Unitron TrueFit.
Within End Fitting, you can view a summary of your tting.
 Loading...