

Page 1
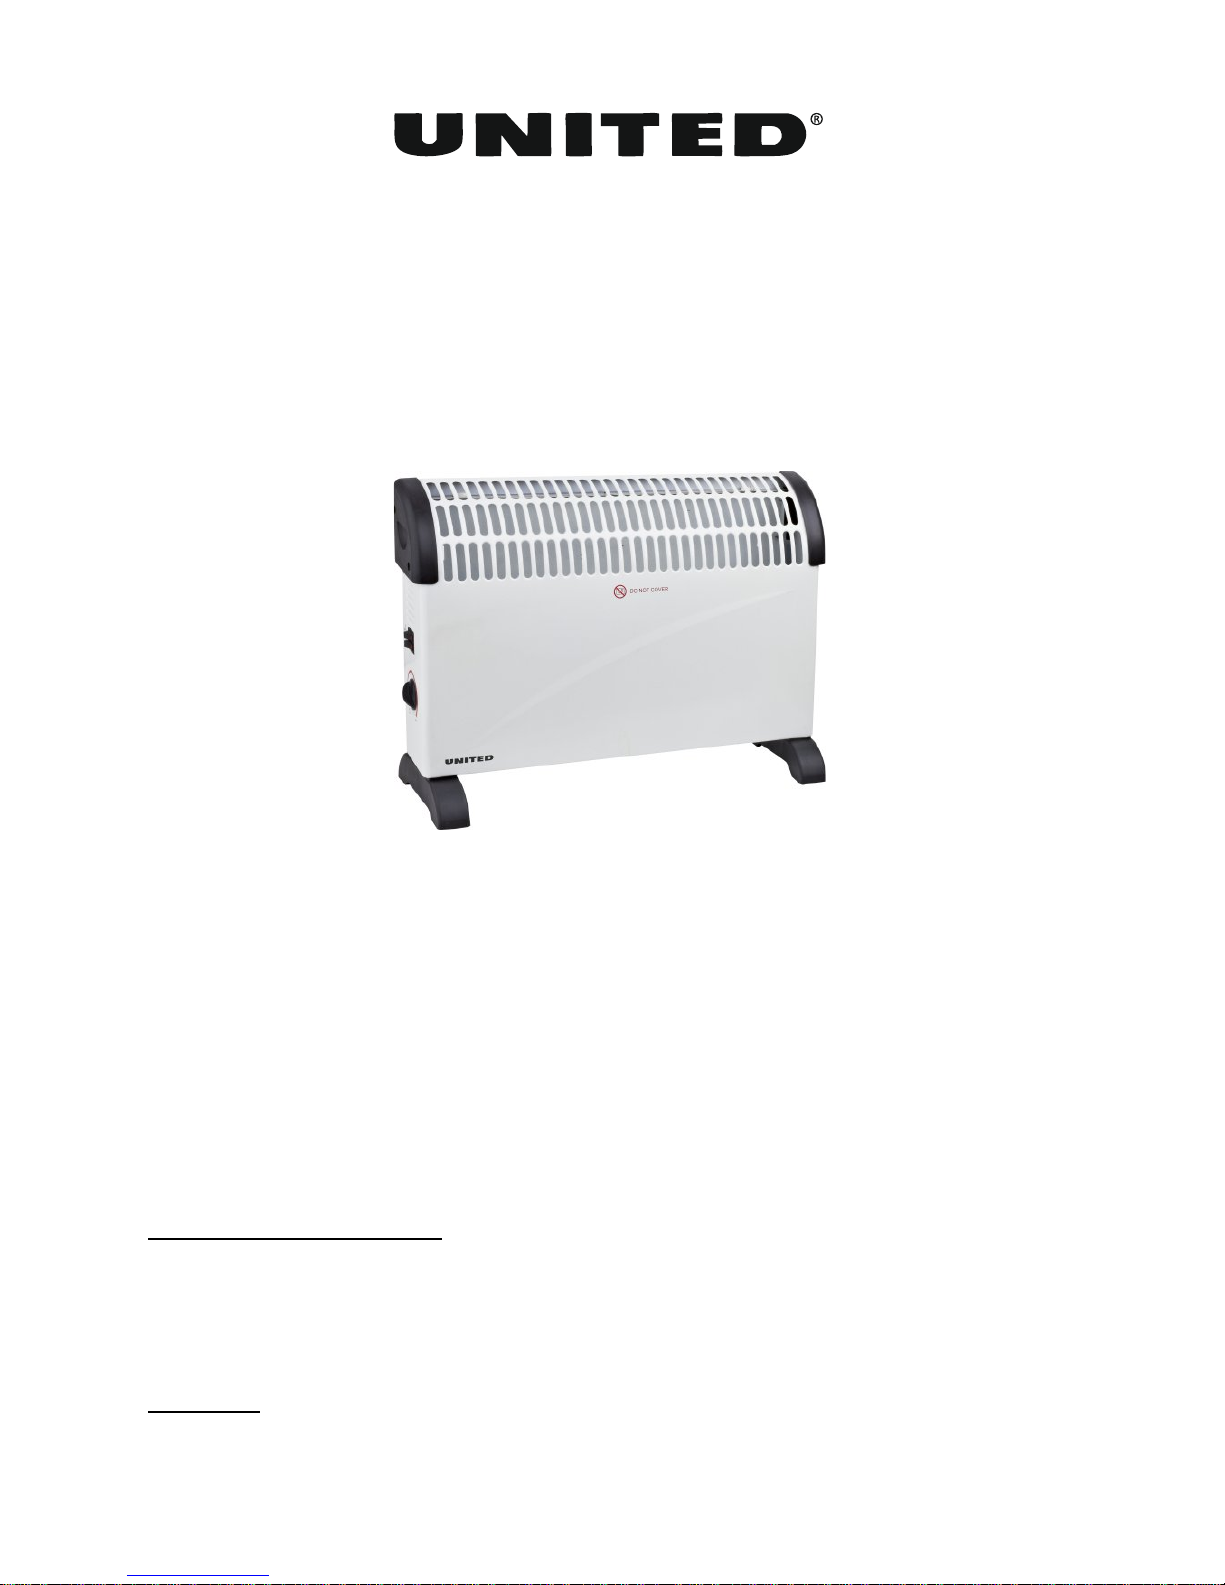
CONVECTOR HEATER
USERS INSTRUCTIONS
MODEL: UHC-827
TECHNICAL CHARACTERISTICS
Convector heater
RATED POWER INPUT: 2000W
RATED VOLTAGE RANGE: AC230V 50Hz
IMPORTANT Read these instructions fully before using the h eater. Retain these instructions for future
reference.
Page 2
ASSEMBLY OF THE HEATER
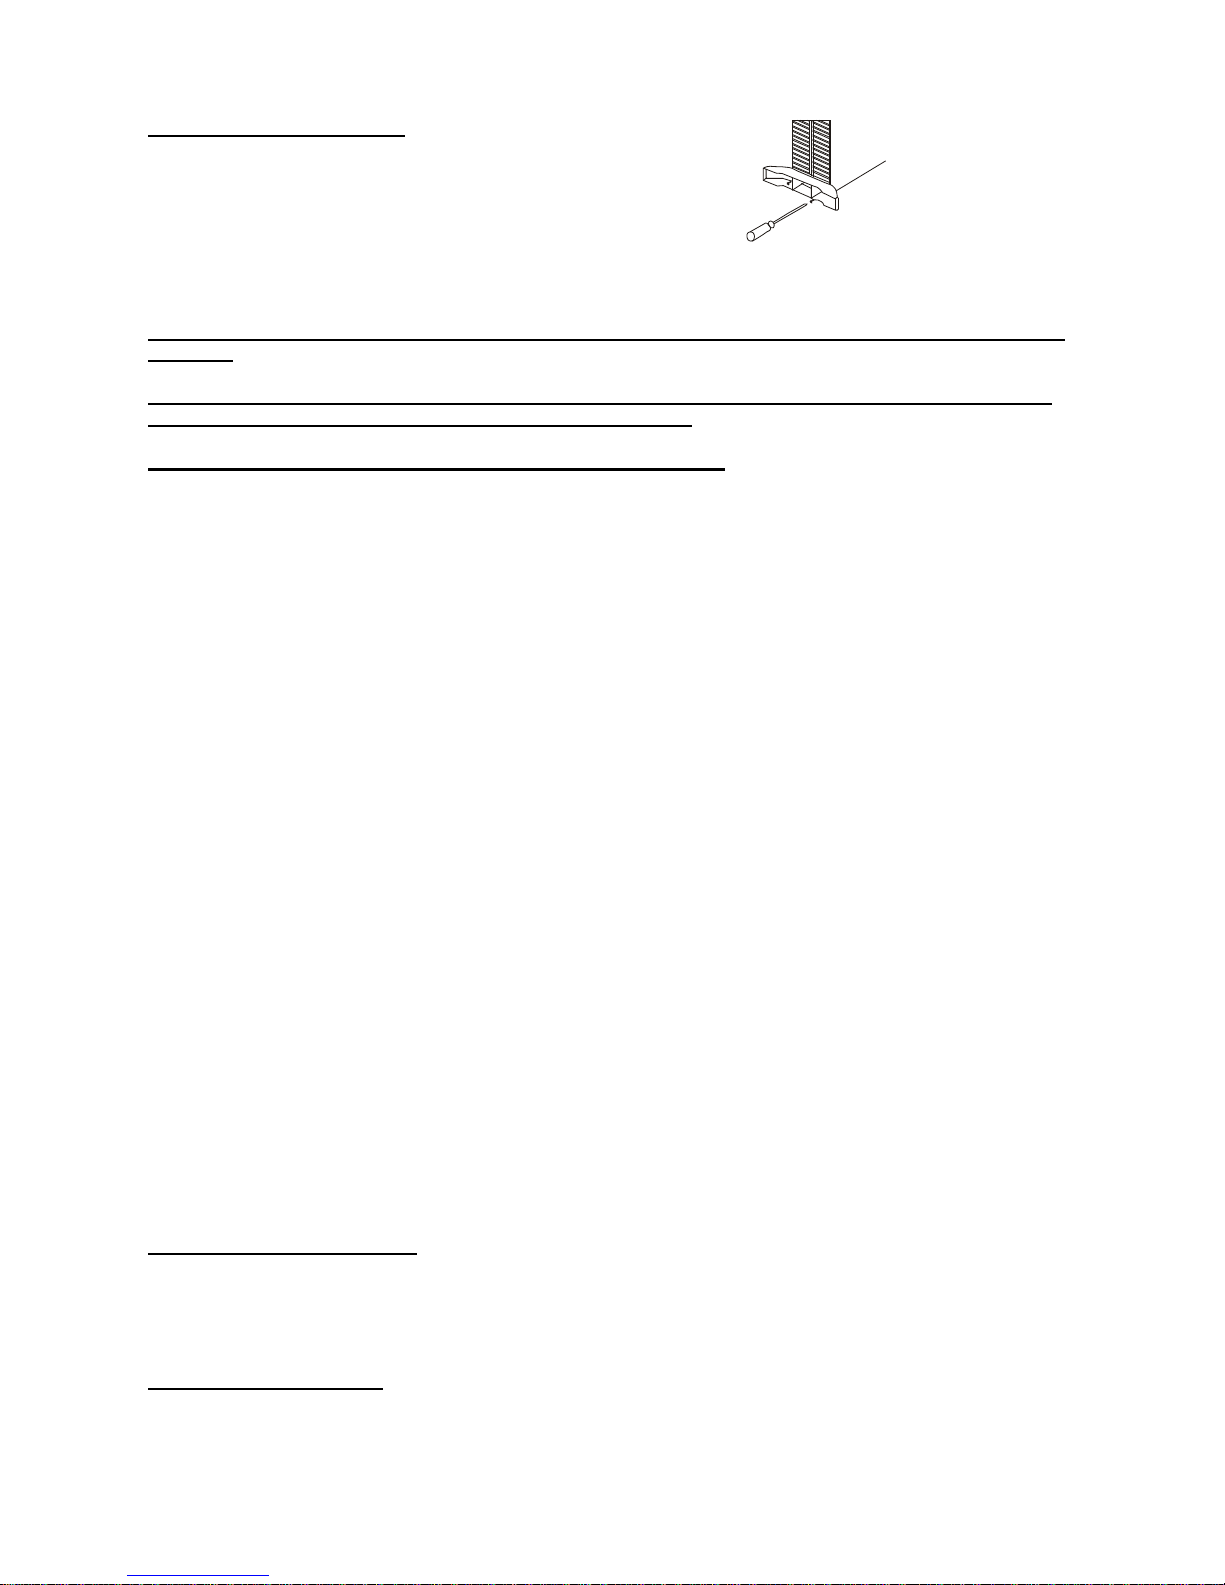
Before using the heater, the feet (supplied separately in the carton),
must be fitted to the unit. These are to be attached to the base of
the heater using the 4 self-tapping screws provided, taking care to
ensure that they are located correctly in the bottom ends of the
heater side moldings
IMPORTANT Read these instructions fully before usin g th e heater. Retain these instructions for future
reference
NOTE: THESE HEATERS ARE INTENDED FOR DOMESTIC USE ONLY. THEY CAN BE USED AS BOTH
PORTABLE APPLIANCE AND WALL MOUNTING APPLIANCE.
SAFETY INSTRUCTIONS (to be read before operating the heater)
1) Do not use the heater unless the feet are correctly attached if the heater is used as portable appliance.
2) Ensure the power supply to the socket into which the heater is plugged is in accordance with the rating
label on the heater and that the socket is earthed.
3) Keep the mains lead away from the hot body of the heater.
4) The heater is not intended for use in bathrooms, laundry areas or similar indoor locations. Never place
the heater where it may fall into a bathtub or other water container.
5) Do not use outdoors.
6) Do not cover or obstruct any of the heat outlet grilles or the air intake openings of the heater.
7) Do not place the heater on carpets having a very deep pile.
8) Always ensure that the heater is placed on a firm level surface. Ensure that the heater is not
positioned close to curtains or furniture as this could create a fire hazard.
9) Do not position the heater in front of, or immediately below, a wall socket.
10) Do not insert any object through the heat outlet or air intake grilles of the heater.
11) Do not use the heater in areas where flammable liquids are stored or where flammable fumes may be
present.
12) Particular care should be taken when the heater is situated in areas occupied by children or invalids.
13) Always unplug the heater when moving it from one location to another.
14) Do not use the heater if the power cord is damaged. If the power cord is damaged it must be replaced
by a recognised service agent or other qualified person. If the plug is damaged, see Plug
Replacement details below.
15) Young children should be supervised to ensure that they do not play with the appliance.
16) This appliance is not intended for use by persons (including children) with reduced physical,
sensory or mental capabilities, or lack of experience and knowledge, unless they have been given
supervision or instruction concerning use of the appliance by a person responsible for their safety.
CAUTION: In order to avoid a hazard due to inadvertent resetting of the thermal cut-out this appliance must
not be supplied through an external switching device such as a timer or connected to a circuit that is
regularly switched on and off by the utility
OPERATION OF THE HEATER
NOTE: It is normal when the heaters are turned on for the first time or when they are turned on after having
not been used for a long period of time the heaters may emit some smell and fumes. This will disappear when
the heater has been on a short while.
Using of Convector heater
Choose a suitable location for the heater, taking into account the safety instructions above.
Insert the plug of the heater into a suitable socket.
Turn the thermostat knob fully in a clockwise direction to the maximum setting.
Page 3
Turn on the heating elements by means of the rocker switches on the side panel. When the heating elements
are on the switches will illuminate. For maximum heat output both switches should be on.
When the desired room temperature has been reached, the thermostat knob should be turned slowly anticlockwise until the thermostat is heard to click off and the lights on the element switches are seen to go out.
After this the heater will keep the air temperature in the room at the set temperature by switching on and off
automatically.
CLEANING THE HEATER
Always un-plug the heater from the wall socket and allow it to cool down before cleaning.
Clean the outside of the heater by wiping with a damp cloth and buff with a dry cloth.
Do not use any detergents or abrasives and do not allow any water to enter the heater.
STORING THE HEATER
When the heater is not used for long periods of time it should be protected from dust and stored in a clean dry
place.
WALL- MOUNTING THE HEATER
Caution: - there should be a distance of at least 40 cm between the lower part of the appliance and the floor.
- the feet must be removed before mounting the appliance on the wall
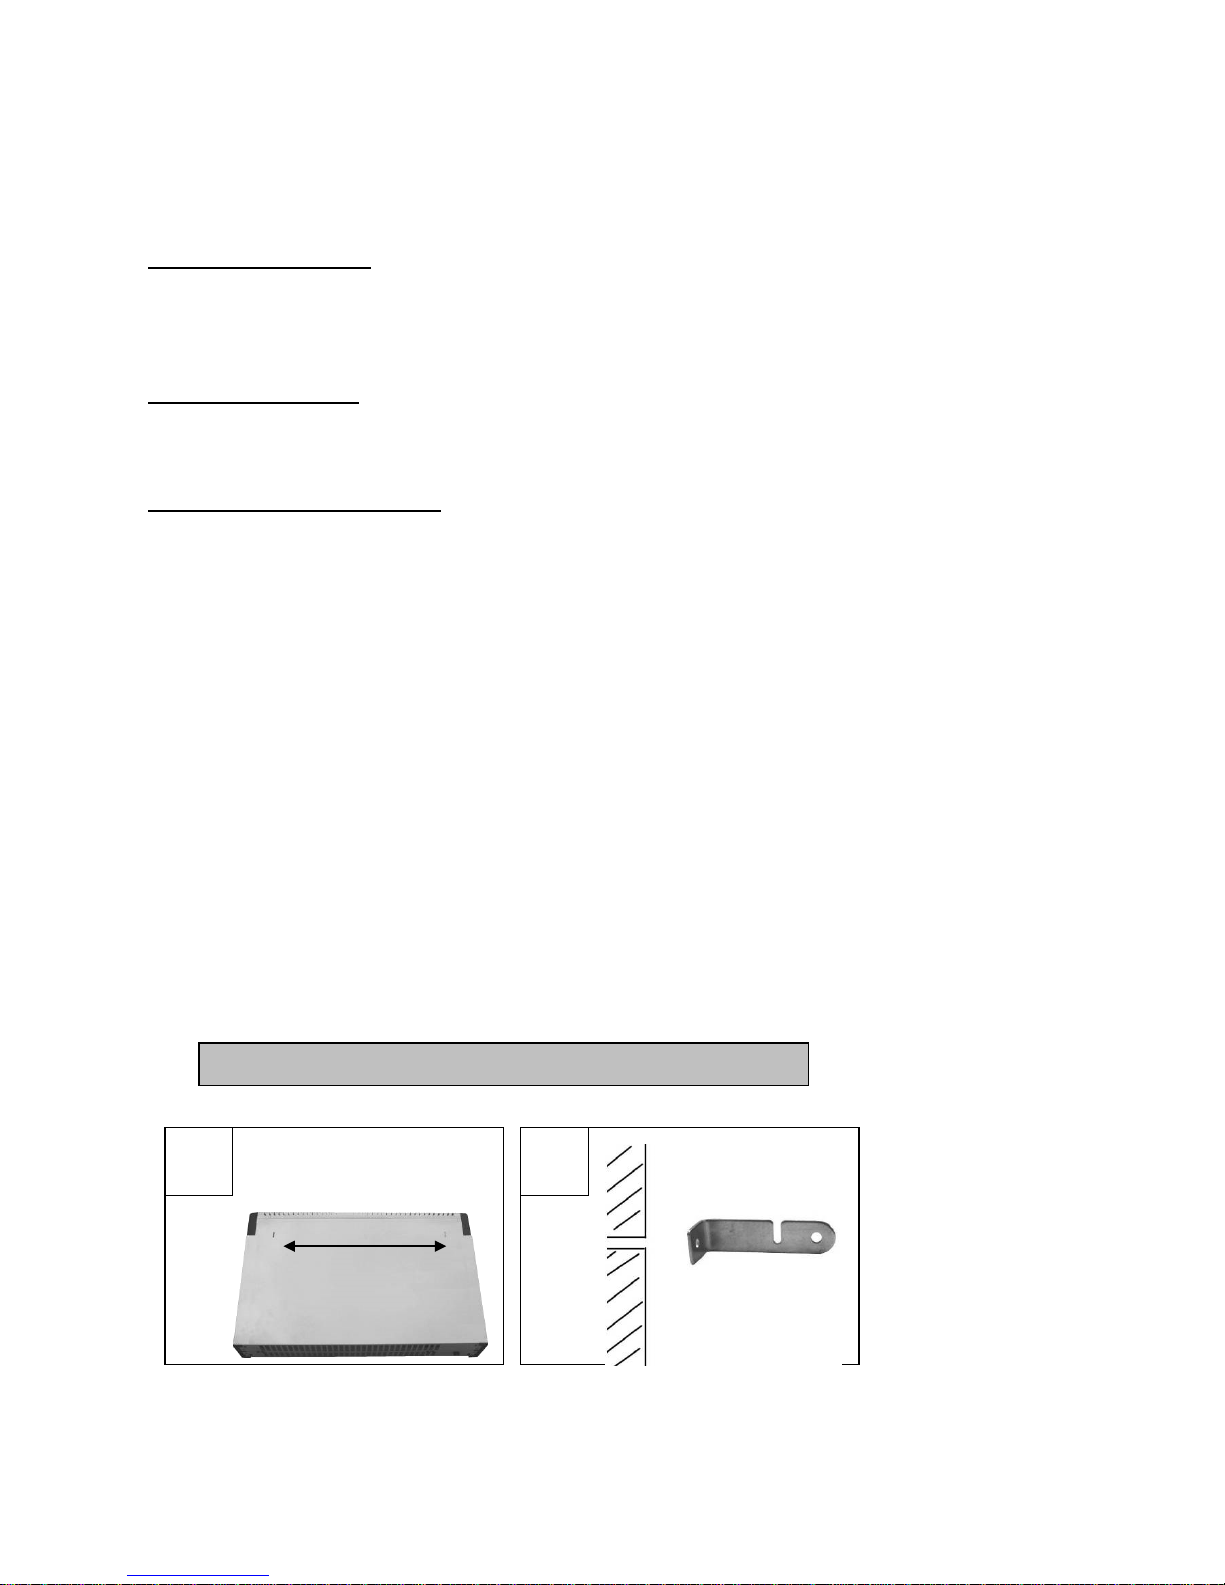
1. Measure the distance between the two slots situated at the back of the appliance (see picture A)
2. Drill two holes at the same distance in the wall and insert a plug in each hole you just drilled. Place the
brackets facing the holes as indicated on picture B and attach them in this position with the screws
supplied.
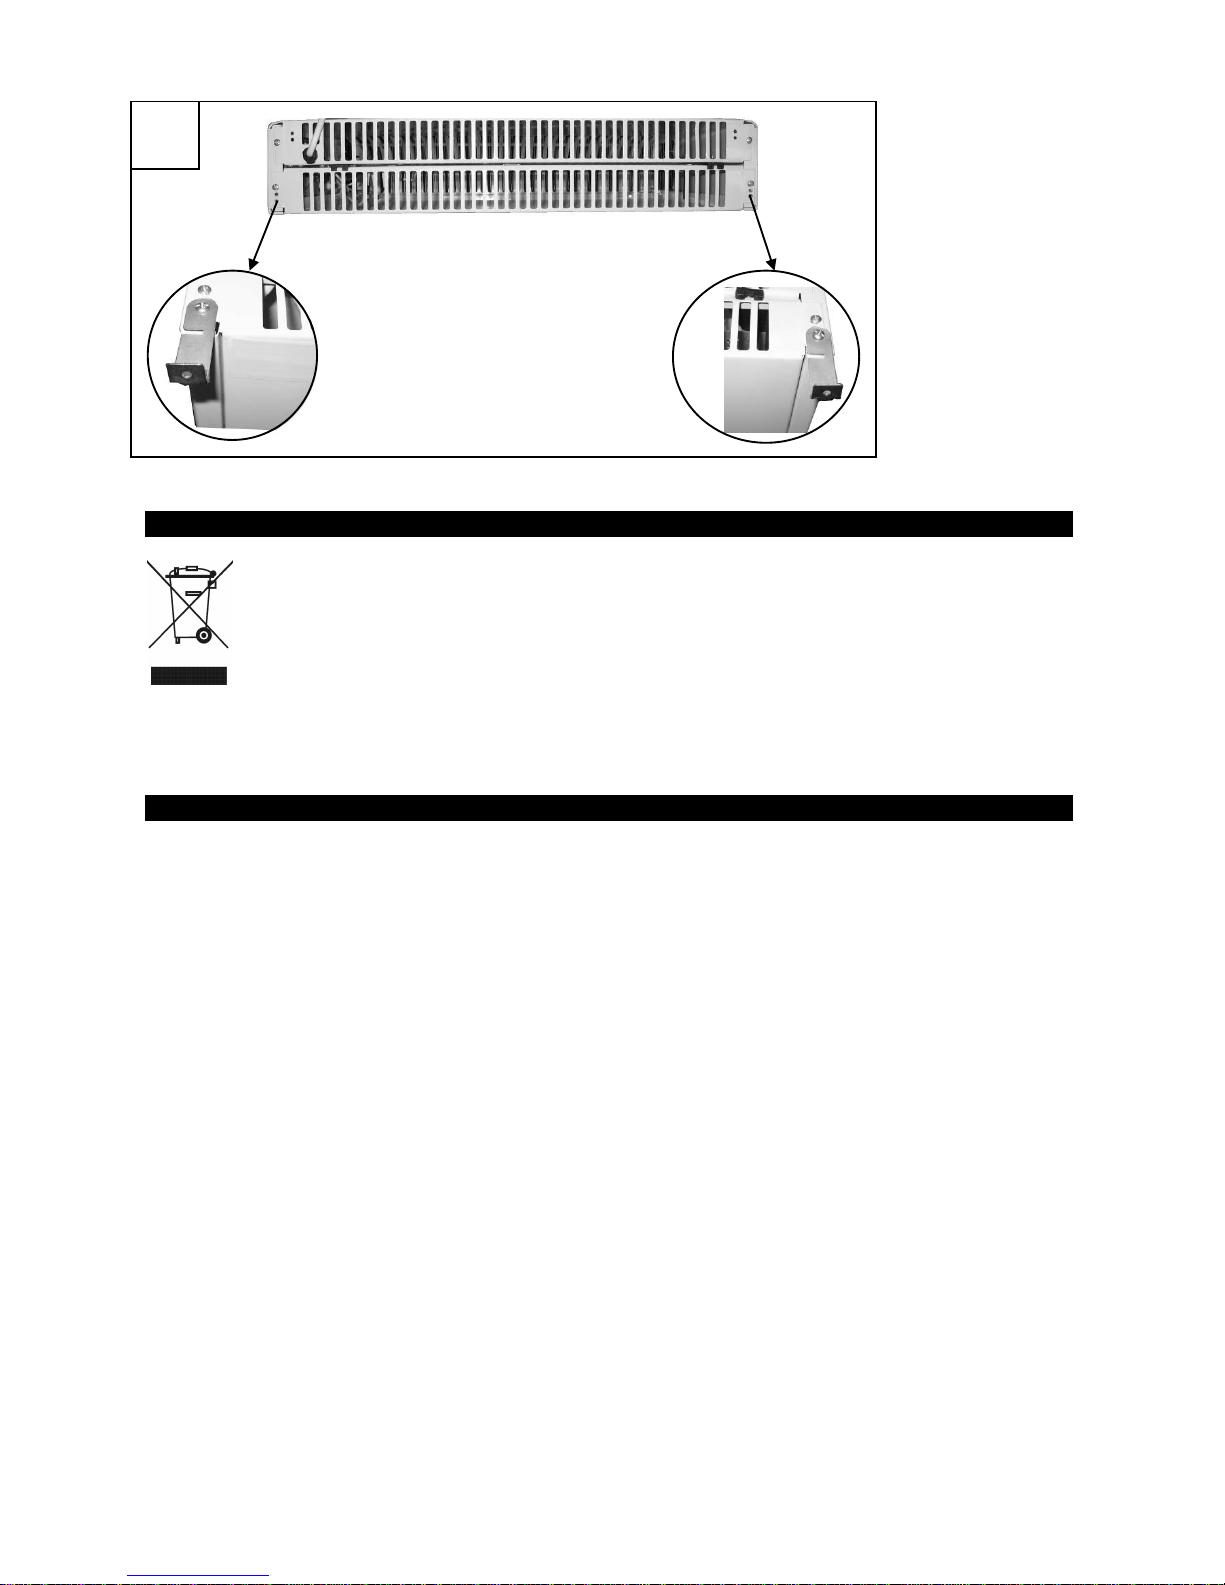
3. Before attaching the appliance on the brackets, attach the two other brackets underneath the appliance as
indicated on picture C.
4. Attach the appliance on the wall. To do so, hold it in such way that the slots are facing the brackets; insert
the appliance halfway onto the brackets until the appliance can go down into the grooves of the brackets.
5. As soon as the appliance is positioned correctly, take a pencil and mark a dot in the hole of each bracket
situated underneath the appliance.
6. Then take off the appliance by proceeding the other way around compared to point 4 above.
7. Drill a hole in the wall on each dot you just marked and insert a plug in each hole.
8. Attach the appliance back on the wall as indicated in point 4, insert screws through the brackets
underneath the appliance and tighten without forcing.
Wall-mounting
A
X 2
B
Page 4
NOTICE ABOUT RECYCLING
Your product is designed and manufactured with high quality materials and components which can be
recycled and reused.
This symbol means that electrical and electronic equipment, at their end-of-life, should be disposed of
separately from your household waste. Please dispose of this equipment at your local community waste
collection/ recycling centre.
In the European Union there are separate collection systems for used electrical and electronic products.
Please help us to conserve the environment we live in!
DECLARATION OF CONFORMITY
This product complies with the requirements of the directives
EMC Directive 04/108/EC
Low Voltage Directive 06/95/EC
RoHS2 Directive 11/65/EU
declare that this product is in compliance with the following no r ms :
EN55014-1:2006/+A1:2009/+A2:2011
EN55014-2:1997/+A1:2001/+A2:2008
EN61000-3-2:2006/+A1:2009/+A2:2009
EN61000-3-3:2013
EN60335-2-30:2009+A11:2012
EN60335-1:2012
EN62233:2008
EXCLUSIVE IMPORTER IN GREECE:
Amiridis – Savvidis S.A.
33, Vas. Olgas avenue - 54641, Thessalon iki , Gree ce
Tel: +30 2310850107, Fax: +30 2310854176
45, Posidonos street - 18344, Moschato, Athens, Greece
Tel: +30 210 9402064, Fax: +30 210 9402137
87, 17
th
November street - 55535, Pylaia, Thes s al oni ki, Greece
Tel: +30 2310944944, Fax: +30 2310944940
www.united-electronics.gr
C
 Loading...