

UNITED TVC5044 Owner's Manual
0EMN02509
T6627SH*****
EN
Printed in Malaysia
TV-Video Combi
TVC5044
Owner’s Manual
PAL
Table of Contents
Safety Information..............................................................................................................................................2
Before Using This Product ................................................................................................................................2
Installation .........................................................................................................................................................5
TV Functions......................................................................................................................................................9
Playback ..........................................................................................................................................................10
Manual Recording............................................................................................................................................11
Timer Recording ..............................................................................................................................................12
Other Functions ...............................................................................................................................................13
Maintenance ....................................................................................................................................................14
Troubleshooting Guide ....................................................................................................................................15
Specifications ..................................................................................................................................................15
Declaration of Conformity ...............................................................................................................................16
Features
• Automatic Operations
• On Screen Display
• Teletext Reception
• Sleep Timer
• Auto Repeat Playback
• One Touch Recording
• Timer Recording
• Auto Head Cleaner
•NTSC Playback
Supplied Accessories
•Owner’s manual
• Remote control
• Two R6 batteries
Important Copyright Information
Unauthorised recording or use of broadcast television
programming, video tape, film or other copyrighted material
may violate applicable copyright laws. We do not take
responsibility for the unauthorised duplication, use, or other
acts which infringe upon the rights of copyright owners.
A Note About Recycling
This product’s packaging materials are recyclable and can be
reused. Please dispose of any materials in accordance with your
local recycling regulations.
Batteries should never be thrown away or incinerated but
disposed of in accordance with your local regulations
concerning chemical wastes.
Model/Serial Number
This appliance has a serial number located on the rear panel.
Please note down the model number and serial number and
retain the information for your records.
Model number:
Serial number:
T6627SH(EN).fm Page 1 Thursday, January 22, 2004 1:27 PM
2
EN
Safety Information
WARNING:
• Live parts inside. Do not remove any screws.
• To avoid fire or electric shock, do not expose
this unit to rain or moisture.
• Dangerous voltage inside
• As soon as the unit is connected to the power
supply, some components are in constant
operation. To power off the unit completely you
must disconnect it from the mains or power it
off with the main switch.
Precautions
• Use only cassettes with the VHS mark with this unit.
• Do not attempt to open the cabinet. There are no parts you
can service inside. Refer all servicing to qualified service
personnel.
• Slots and openings in the cabinet and the sides or bottom
are provided for ventilation. To ensure reliable operation
and to protect the unit from overheating, these openings
must not be blocked or covered.
• Avoid installation in enclosed spaces such as bookcases
unless proper ventilation is provided.
• Keep the unit away from radiators and other heat sources.
• Avoid use near strong magnetic fields.
• Do not push objects of any kind into the unit through the
cabinet slots or openings as they could touch electrically
live parts or short circuit parts resulting in a fire or electric
shock.
• Never spill liquid on this unit. If liquid is spilled and
penetrates into the unit, consult qualified service personnel.
• Use this unit in a horizontal (flat) position only.
• Do not place any combustible objects on the device
(candles, etc.).
Dew Warning
Moisture condensation may occur inside the unit when it is
moved from a cold place to a warm place, after heating up a
cold room, or under conditions of high humidity. Do not use
the unit for at least 2 hours until it is dry inside.
Before Using This Product
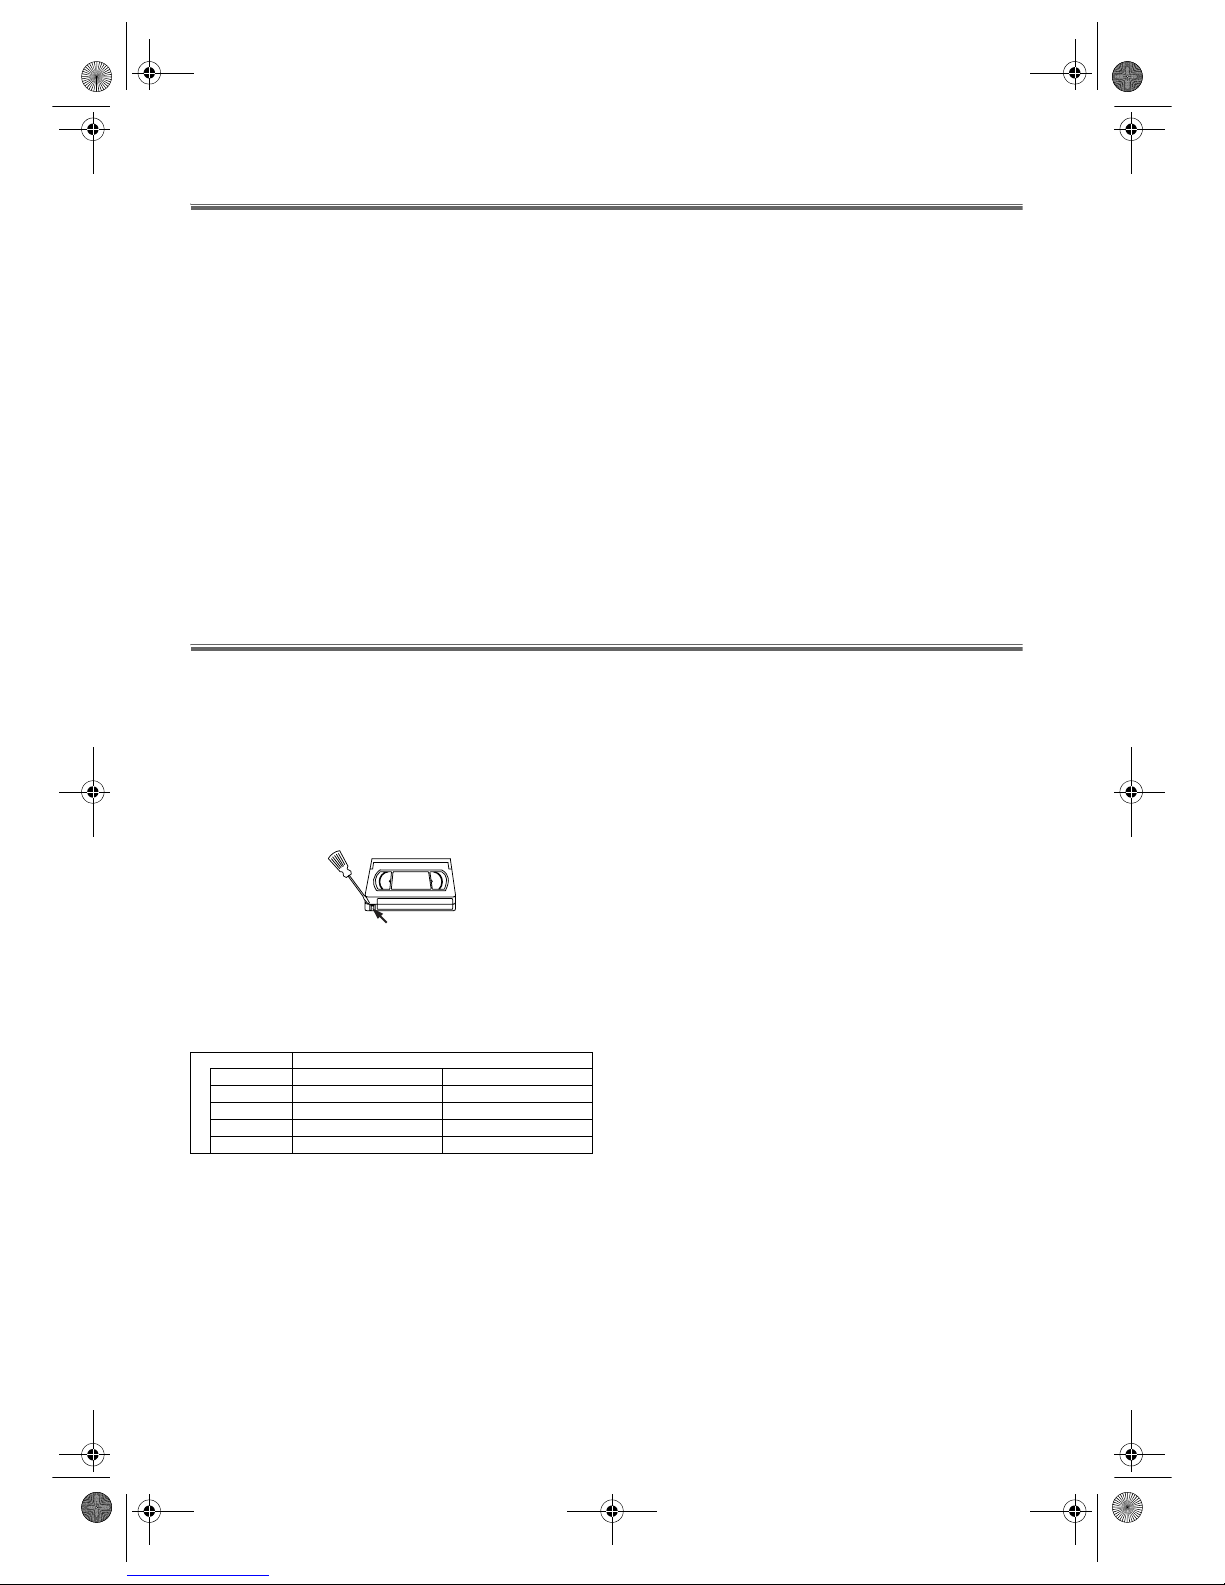
Video Cassette Tape
This unit will operate with any cassette that bears the VHS
mark. For best results, we recommend the use of high-quality
tapes. Do not use poor quality or damaged tapes.
You can prevent accidental erasing of a recording by breaking
off the erase-prevention tab on the back edge of the cassette. If
you decide to record on the tape again, cover the hole with
plastic tape.
Two Different Tape Speeds
Before recording, select the tape speed : SP mode (Standard
Play) or LP mode (Long Play). The table below shows the
maximum recording/playback time using E-60, E-120, E-180
or E-240 tapes in each mode.
TV Colour System
Different countries use different television colour systems.
Tapes recorded in the PAL or NTSC system can be played
back on this unit. Usually, the picture on the TV screen will
be in black and white when you play back a tape that is
recorded in a different colour system.
Tapes recorded in the NTSC system can be played back on
this unit. This feature is only available in the SP and SLP
mode. When playing back such tapes, the picture may roll up
or down, shrink vertically and black bars may appear both at
the top and bottom of the screen. If this occurs, you can adjust
the tracking control manually by pressing
PROG +/- until the
streaks disappear.
Tape Type Recording/Playback Time
Tape Speed SP Mode LP Mode
E-60 1 hour 2 hours
E-120 2 hours 4 hours
E-180 3 hours 6 hours
E-240 4 hours 8 hours
Ta b
T6627SH(EN).fm Page 2 Thursday, January 22, 2004 1:27 PM
3
EN
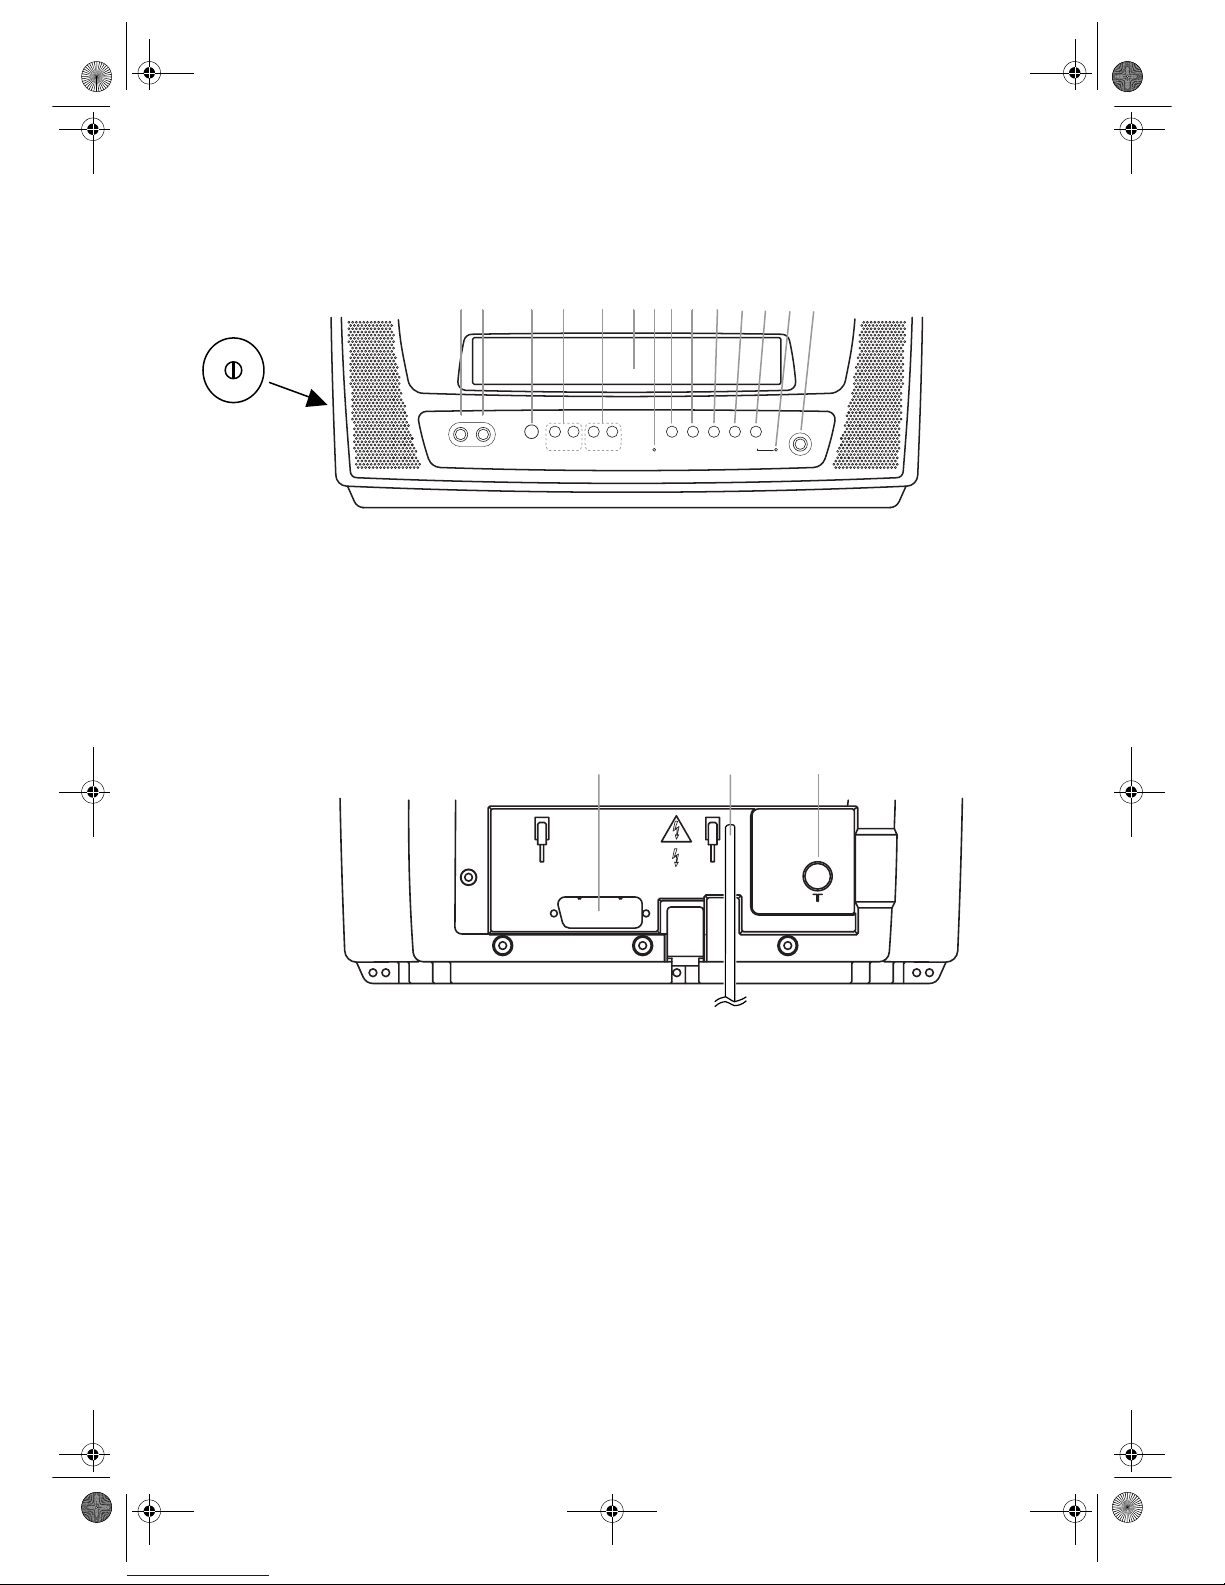
Controls and Connections
All the buttons mentioned in this manual without specific notice are ones on the remote control.
Front Panel
1. main power switch
2. VIDEO input socket
3. AUDIO input socket
4. STANDBY-ON/y button
5. VOL +/– buttons
6. PROG +/– buttons
7. Cassette compartment
8. STANDBY indicator
9.
CA (STOP/EJECT) button
10.
h (Rewind) button
11.
B (PLAY) button
12.
D (Fast Forward) button
13.
I (RECORD) button
14. RECORD indicator
15. HEADPHONE jack
Rear Panel
1. EXT1/AV1 scart socket
2. Power cord
3. AERIAL socket
Caution: If you power off by pressing the main power switch, TIMER recordings are IMPOSSIBLE!
-
VOL
+
STANDBY-ON
y
-
PROG
+
C A E B D I
VIDEO AUDIO
2 3 4 5 6 7 8 9 10 11 12 13 14 15
1
EXT 1/AV1
BORD MARKINGS
CAUTION
FUSES RATINGS DEPEND
ON FIELD RATE SEE P.C.
POZOR
V PRISTROJI JE VYSOKE NAPETI
PRED ODEJMUTIM KRYTU NUTNO
VY JMOUT VIDLICI SITOVEHO
PRIVODU ZE ZASUVKY
VIGYAZAT!
VIGYAZAT,NAGYFESZULTSEG!
A KESZULEK BURKOLATANAK
ELTAVOLITASA ELETVESZELYES!
13
2
T6627SH(EN).fm Page 3 Thursday, January 22, 2004 1:27 PM
4
EN
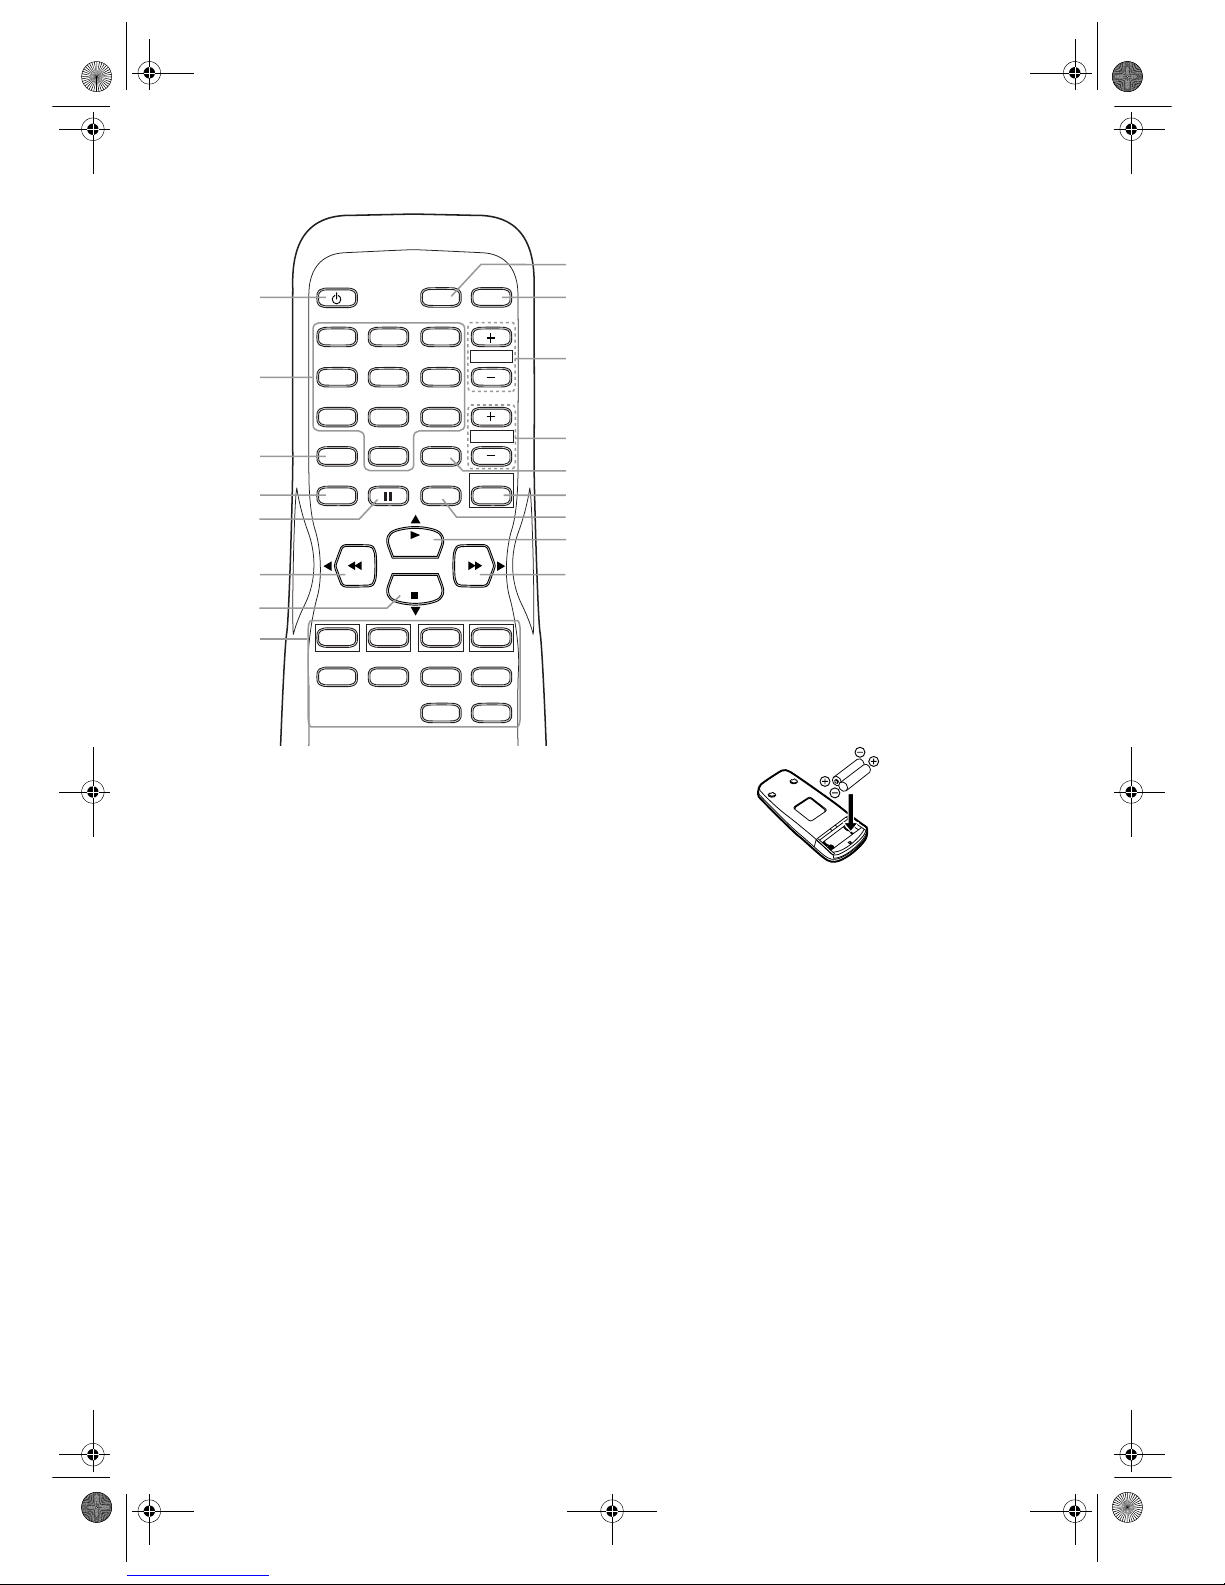
Remote Control
*This button does not function on this unit.
1. STANDBY-ON/y button
2. number buttons
3. SLEEP button
4. RECORD button
5. PAUSE button
6.
h/s button
7. STOP
C/p button
8.
D/B button
9. PLAY
B/K button
10. CLEAR button
11. MENU button
12. VOL + / – button
13. PROG + / – button
14. STATUS button
15. MUTE button
16. Red button / Green button / Yellow button / Blue
button
TEXT button
REVEAL button
EXPAND button
SUBCODE button
HOLD button
INDEX button
To insert the batteries:
Install two R6 batteries matching the polarity indicated inside
the battery compartment.
Caution
Do not mix old and new batteries. (Also never mix alkaline
batteries with manganese batteries.)
7
1
4
8
2
5
9
0
3
6
PAUSE
PLAY
STOP
RECORD
SLEEP SYSTEM
VOL
MENU
PROG
STATUSMUTE
STANDBY-ON
TEXT REVEAL EXPAND
SUBCODE
HOLD INDEX
CLEAR
8
9
10
11
*
12
13
14
15
6
7
16
4
5
3
2
1
T6627SH(EN).fm Page 4 Thursday, January 22, 2004 1:27 PM
5
EN
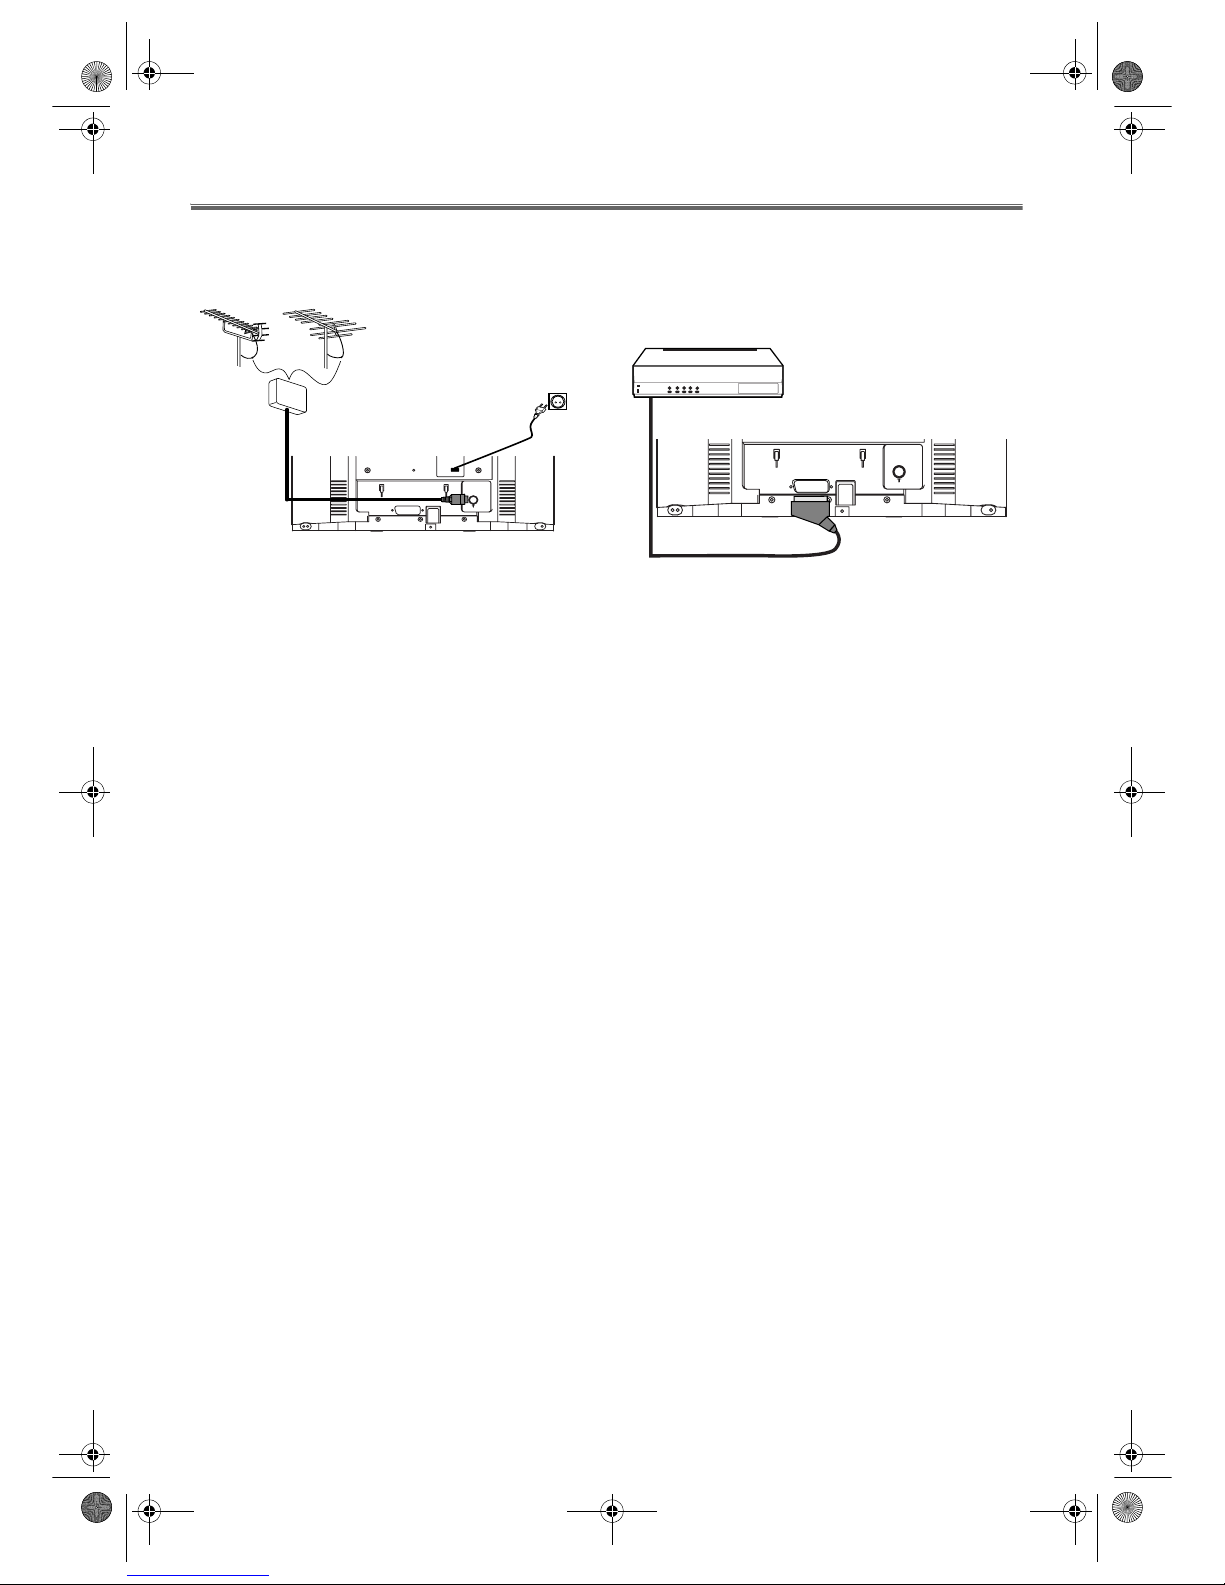
Installation
Connecting the TV-Video Combi
Connecting the Cable
1) Insert the VHF/UHF TV aerial coaxial cable plug into the
AERIAL socket at the back of the unit.
2) Plug this unit into an AC outlet.
3) If the little red STANDBY indicator on the front panel
does not light on, power on the unit with the main power
switch. The main power switch is located on the left side
panel.
Connecting Additional Devices
You can connect an additional device such as decoder, satellite
receiver, camcorder, etc. to the EXT1/AV1 scart socket.
The scart socket to be connected is usually marked 'AV' or
'TV' on the decoder or satellite receiver.
You can also use the front AUDIO/VIDEO input sockets.
Note:
• To receive the signals from an external source , select an
input mode ‘AV1’ or ‘AV2’ on this unit by pressing
PROG +/- or the number buttons.
• If you are using the EXT1/AV1 scart socket, select ‘AV1’. If
you are using the front AUDIO/VIDEO input sockets,
select ‘AV2’ .
EXT1/AV1
VHF/UHF
MIXER
UHF
VHF
EXT1/AV1
T6627SH(EN).fm Page 5 Thursday, January 22, 2004 1:27 PM
 Loading...