

Page 1

SRD650 package content
• robust boot cable
• Stylus Bungee Cord
• HT650
(with battery door,
TP protection film,
Warning sticker for first
Time charging)
•Standard battery 1100mAH
• Stylus
• Wrist Strap
• Power adaptor with
regional plugs
( English version comes with 3 plugs,
Sim. Ch and Tra. Ch version
comes with 1 plug)
Page 2
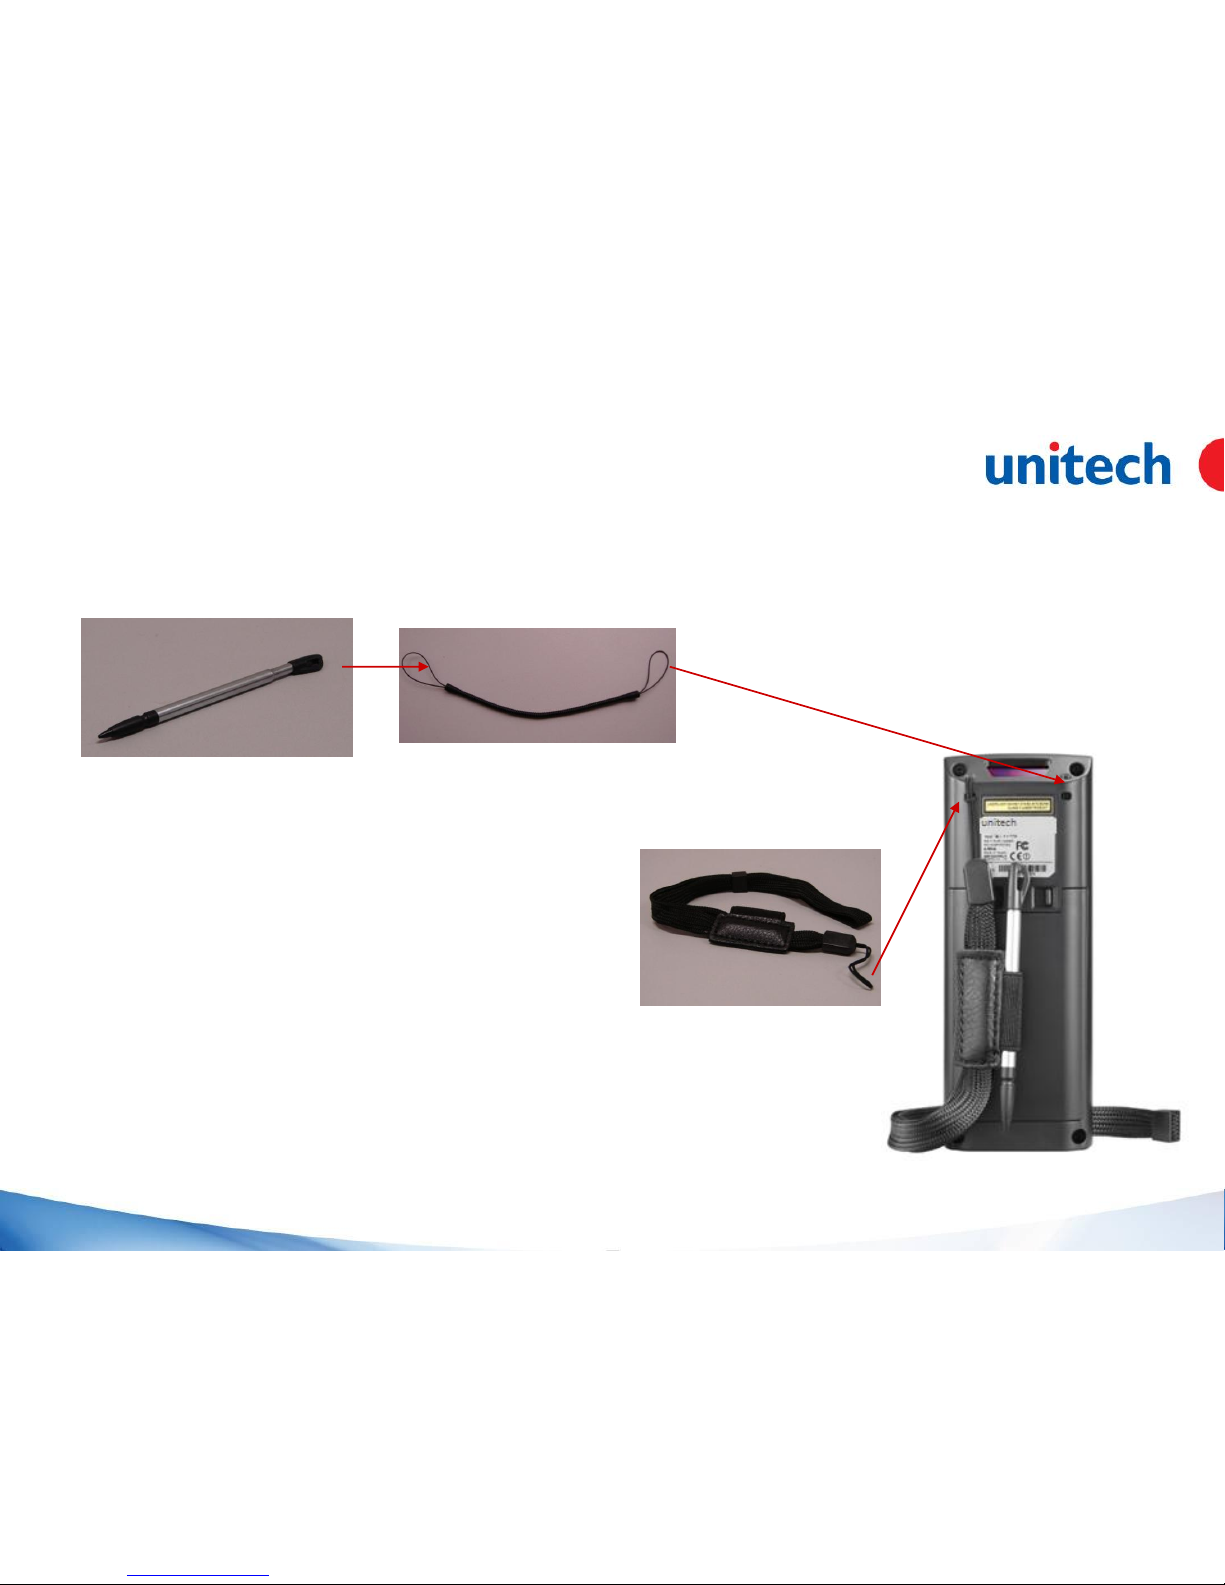
Installing stylus & handstrap
3.Pull one side of the handstrap
though the hole at the terminal
1.Pull one side of the bungee cord
though the hole at the stylus
2.Pull the other side of the
bungee cord though the
hole at the terminal
Page 3

Page 4
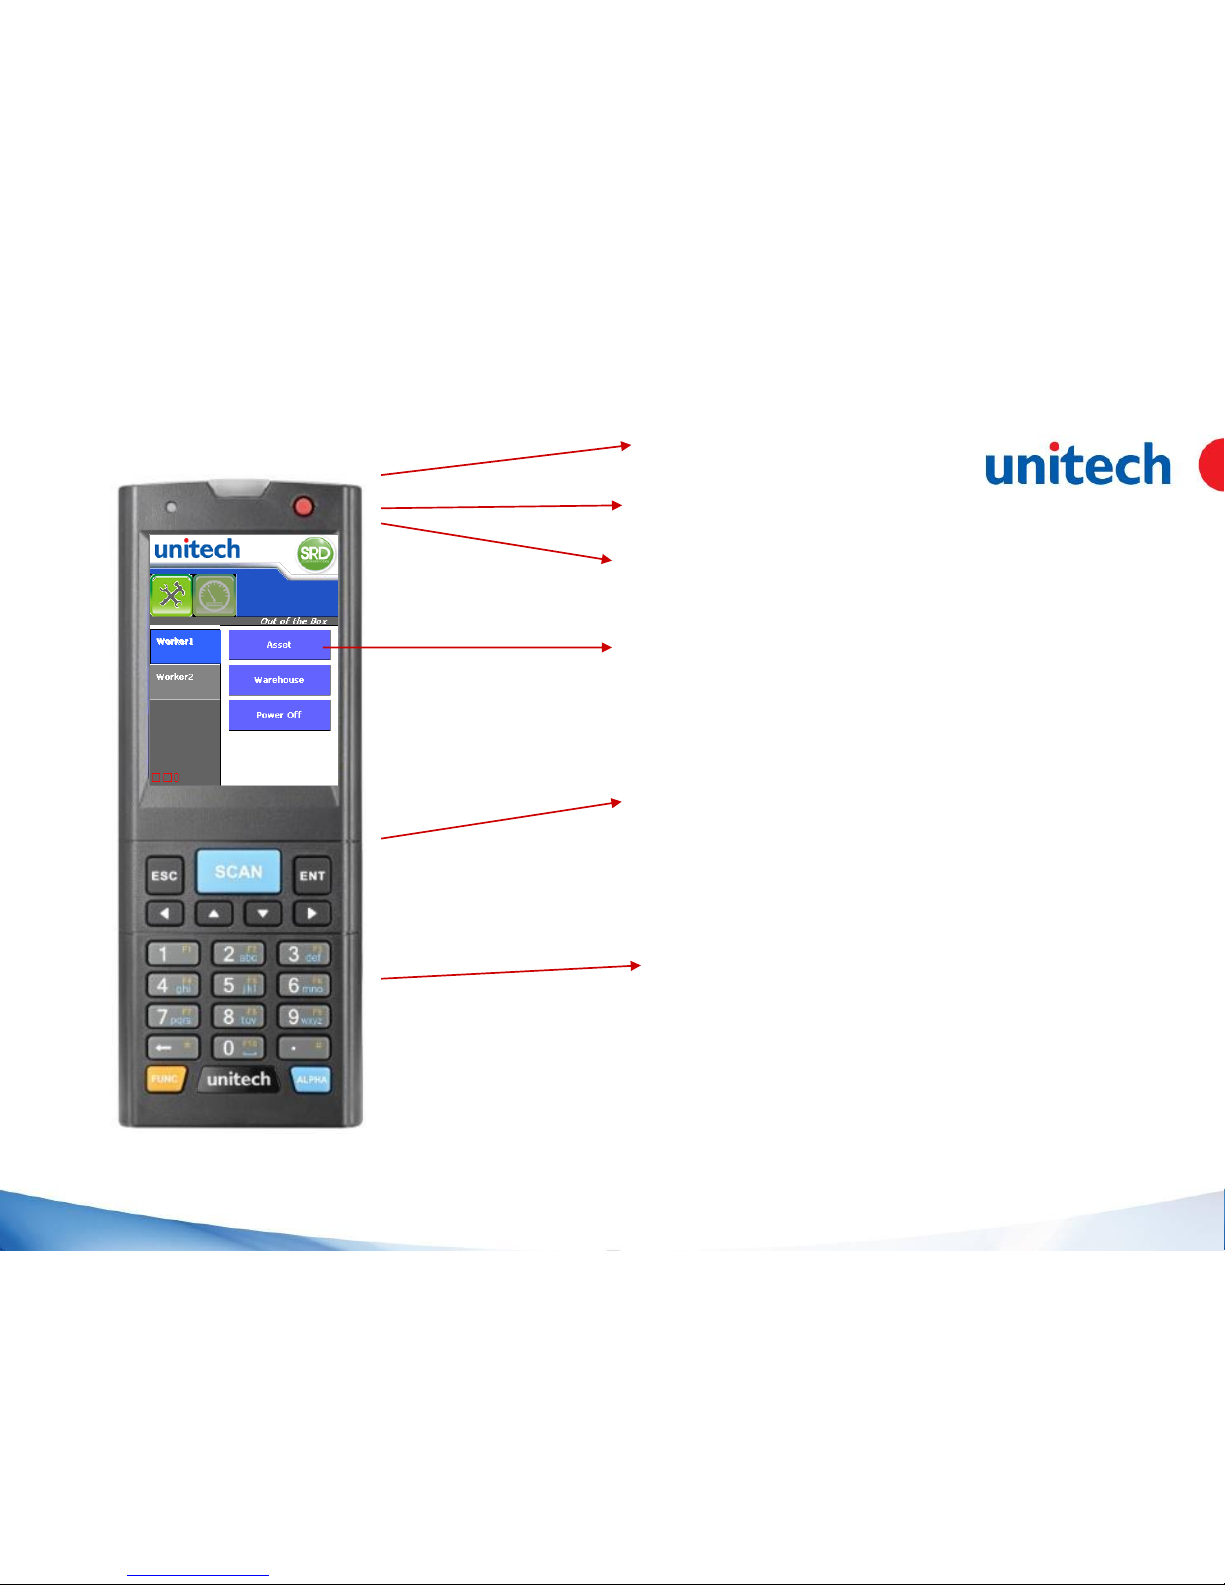
Overview
• Large Front side Scan Key
• Preloaded apps in kiosk mode environment
•Displayed on 2.4” TFT qVGA (240x320 ) LCD
• 22 keys with Function mode and Alpha input
• Power Key
• Scanner Indicator
• Charging Indicator
Page 5
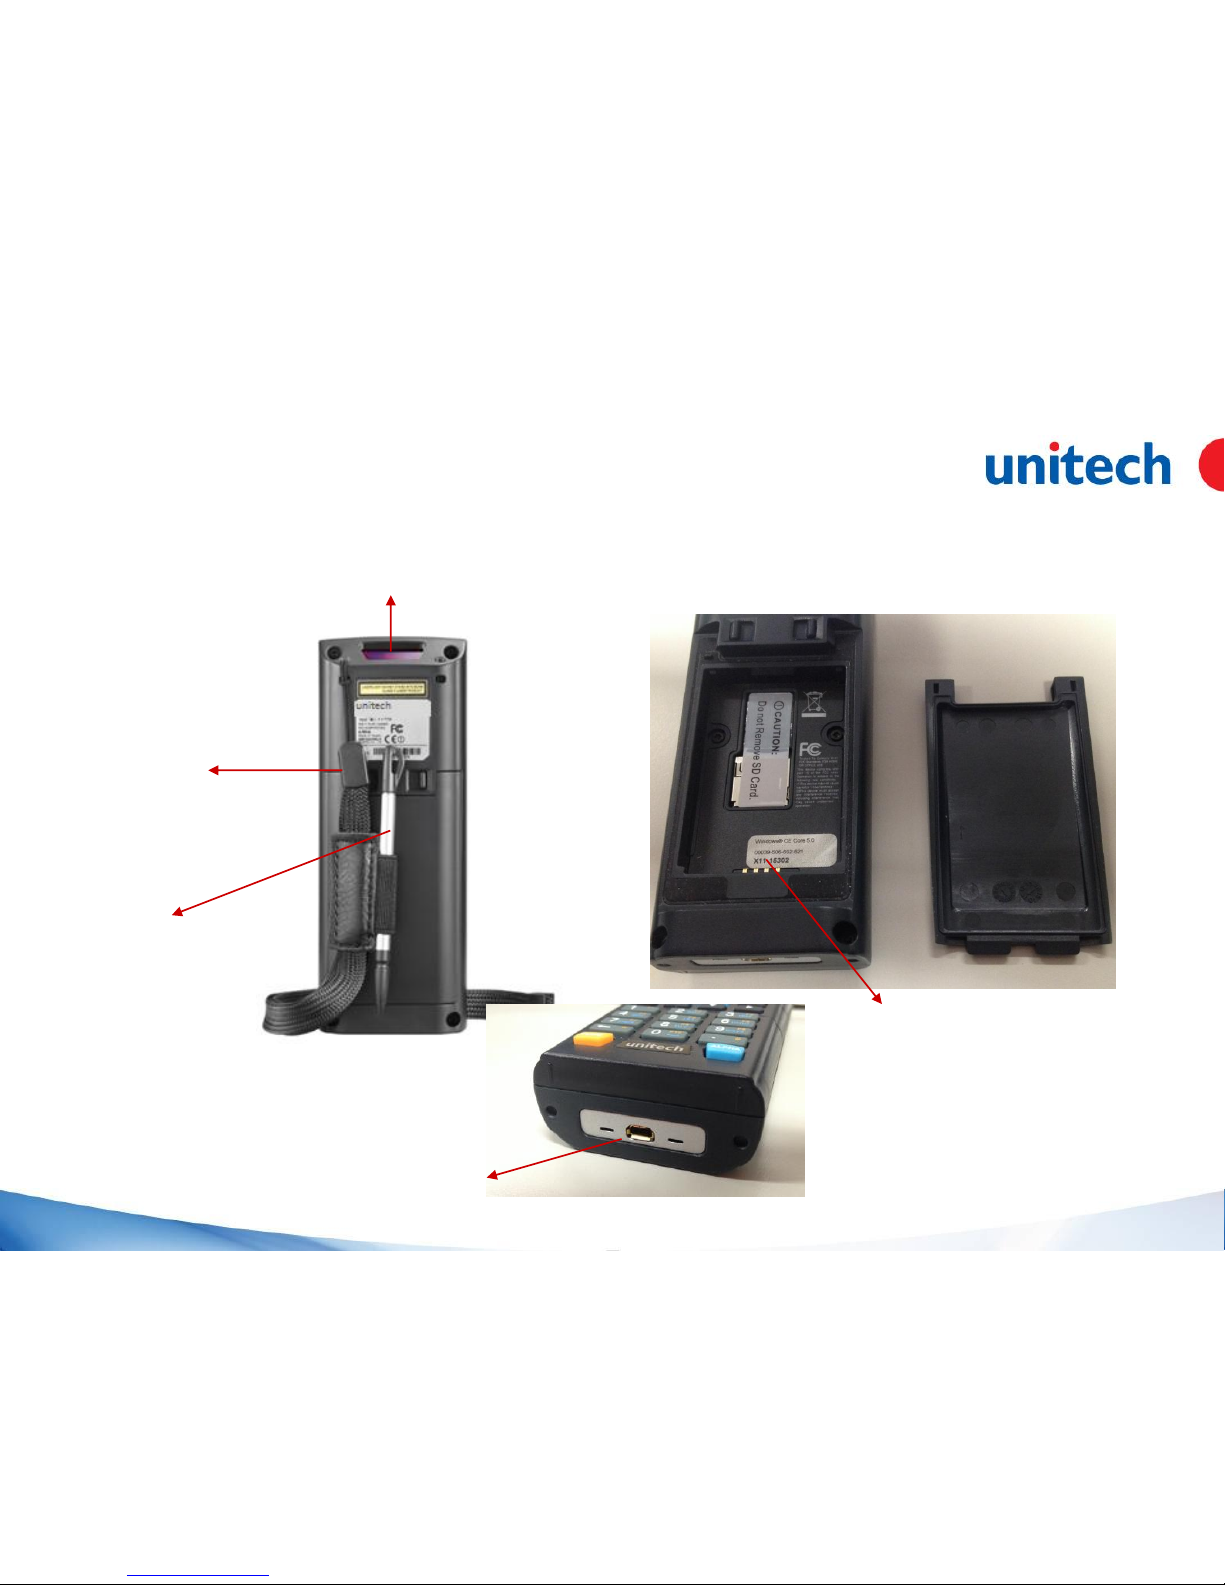
Overview
• 1D Linear Laser Scanner
• Handstrap
• Stylus
• Battery contact pins, in
the battery compartment
• Charging
&Communication
connector
Page 6

USB cradle
• Cradle Power on indicator
• Battery Charger indicator,
for second battery
•Red : Charging
•Green : Fully charged
• For Power
adaptor
• For USB
communication
• Second Battery charger
(For both standard/Ext.
Batteries)
Page 7

SRD650 USB cradle
Package content
• USB cradle with Battery charger
5000-900009G
• USB communication Cable
• screws to fix cradle on objects
Page 8

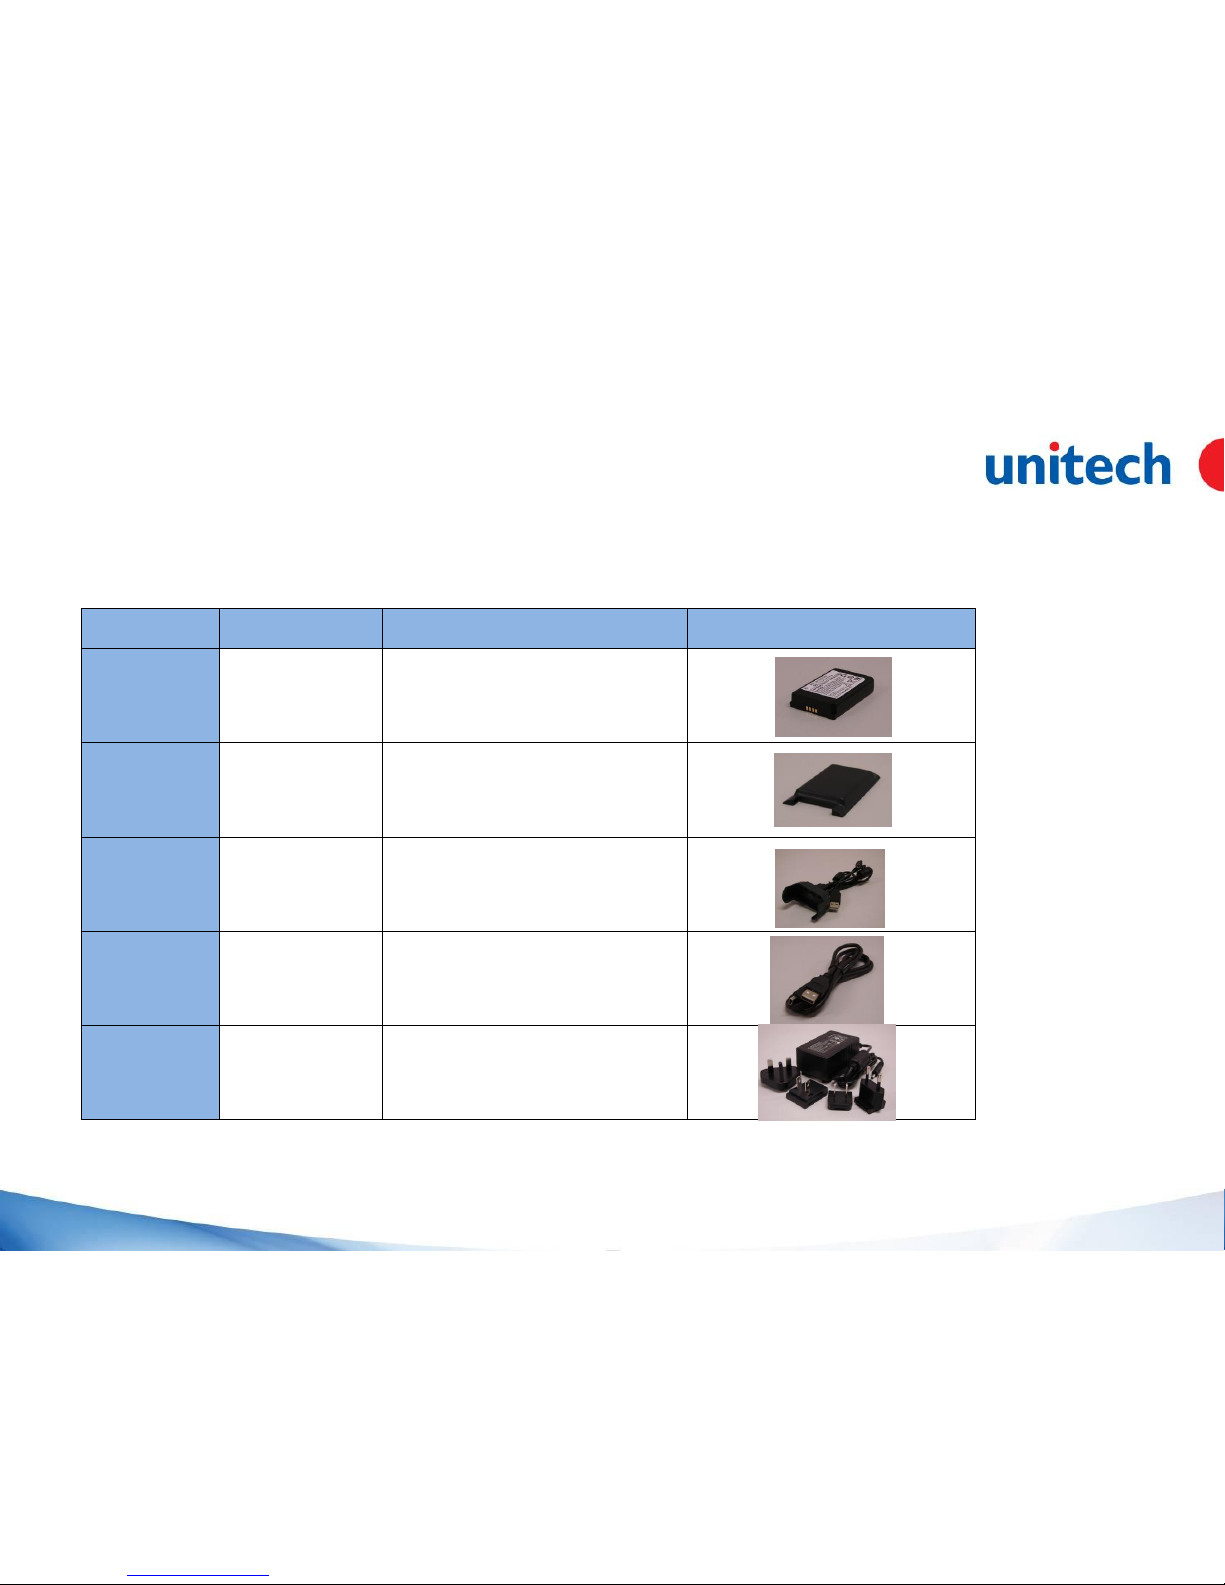
SRD650 Accessories List
Part Number Description Photos
1 383642G Stylus Bungee Cord
2 5500-900012G Stylus
3 5500-900013G Wrist Strap with stylus bag
4 1400-900018G
Standard battery pack
1100mAH
5 5500-900014G Standard battery door
Page 9
SRD650 Accessories List
Part Number Description Photos
6 1400-900019G
Extended Battery pack
1840mAH
7 5500-900015G Extended Battery door
8 1550-900071G USB Communication Cable
9 1550-900072G USB cable
10 1010-900015G
Power adaptor pack with US
CN EU UK plugs
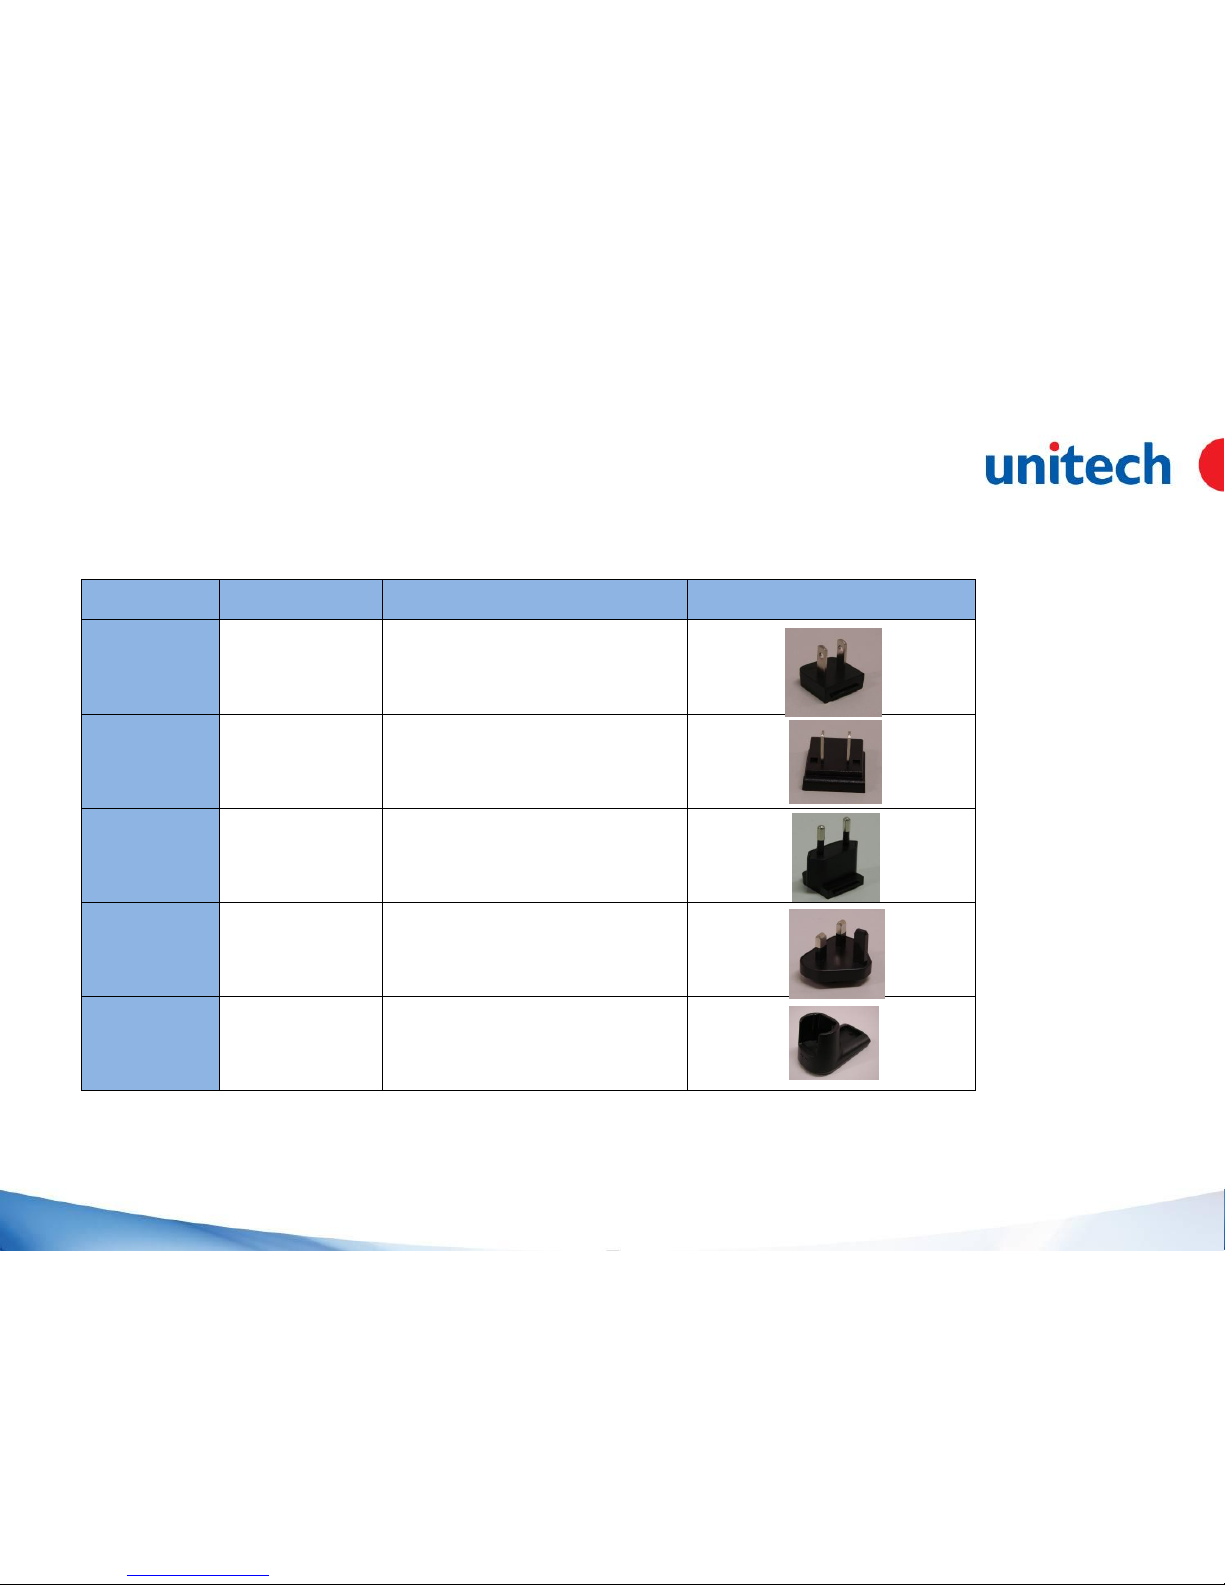
Page 10
SRD
650 Accessories List
Part Number Description Photos
11 1010-900016G US Plugs pack
12 1010-900017G China Plugs pack
13 1010-900018G EU Plugs pack
14 1010-900019G UK Plugs pack
15 5000-900009G
Single Slot USB cradle (Cradle,
QRG, 2 screws, USB com. cable)
Page 11

• Main menu, with options
•Worker
•Settings
• Worker-menu with 2 sub
options and application
buttons
Page 12

•Select “Settings”
• Select “Diagnose”
•Inspect/adjust Wifi.
(if terminal has WiFi on-board)
•Start communication to PC
(using Microsoft’s Mobile
Device Centre, MDC)
•Inspect/adjust barcode
scanner
•Warm reboot the terminal
Page 13
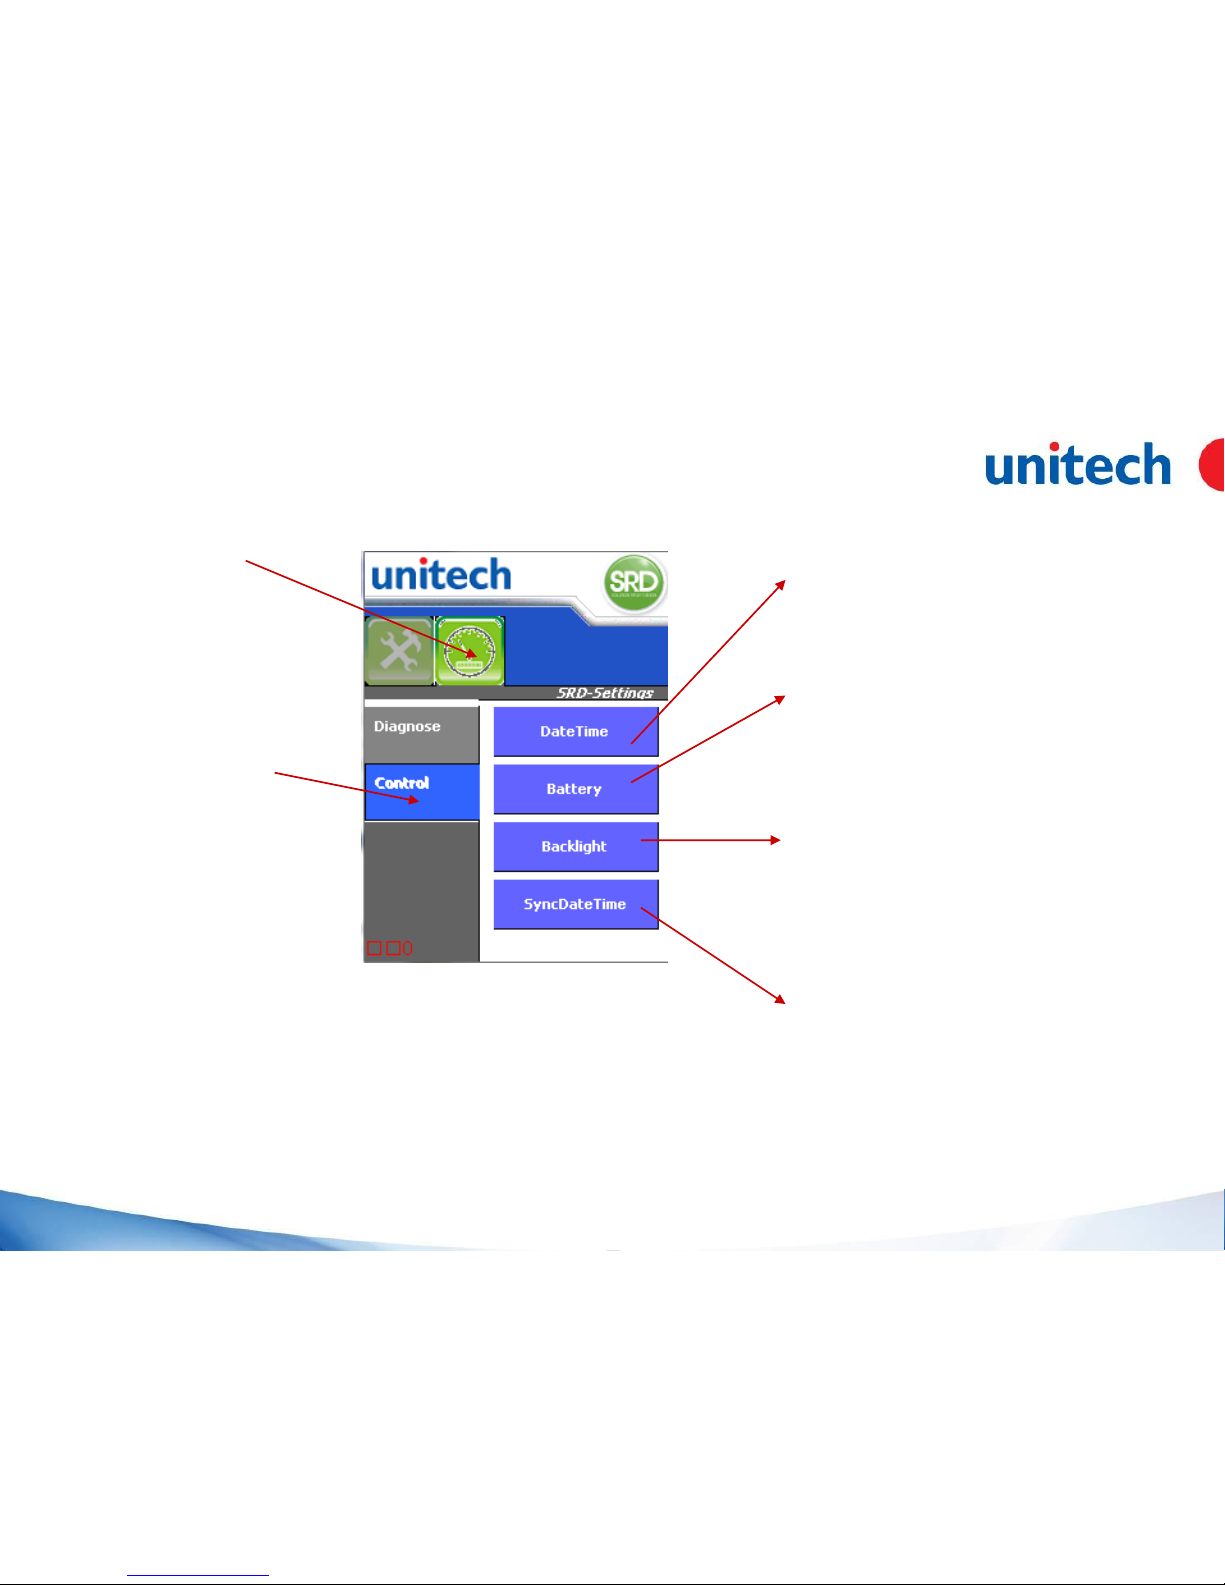
•Select “Settings”
• Select “Control”
•Manually set date and time
•Adjust power properties
•Adjust Backlight properties
•Automatically set date and
time. The terminal needs to
“connected”
Page 14
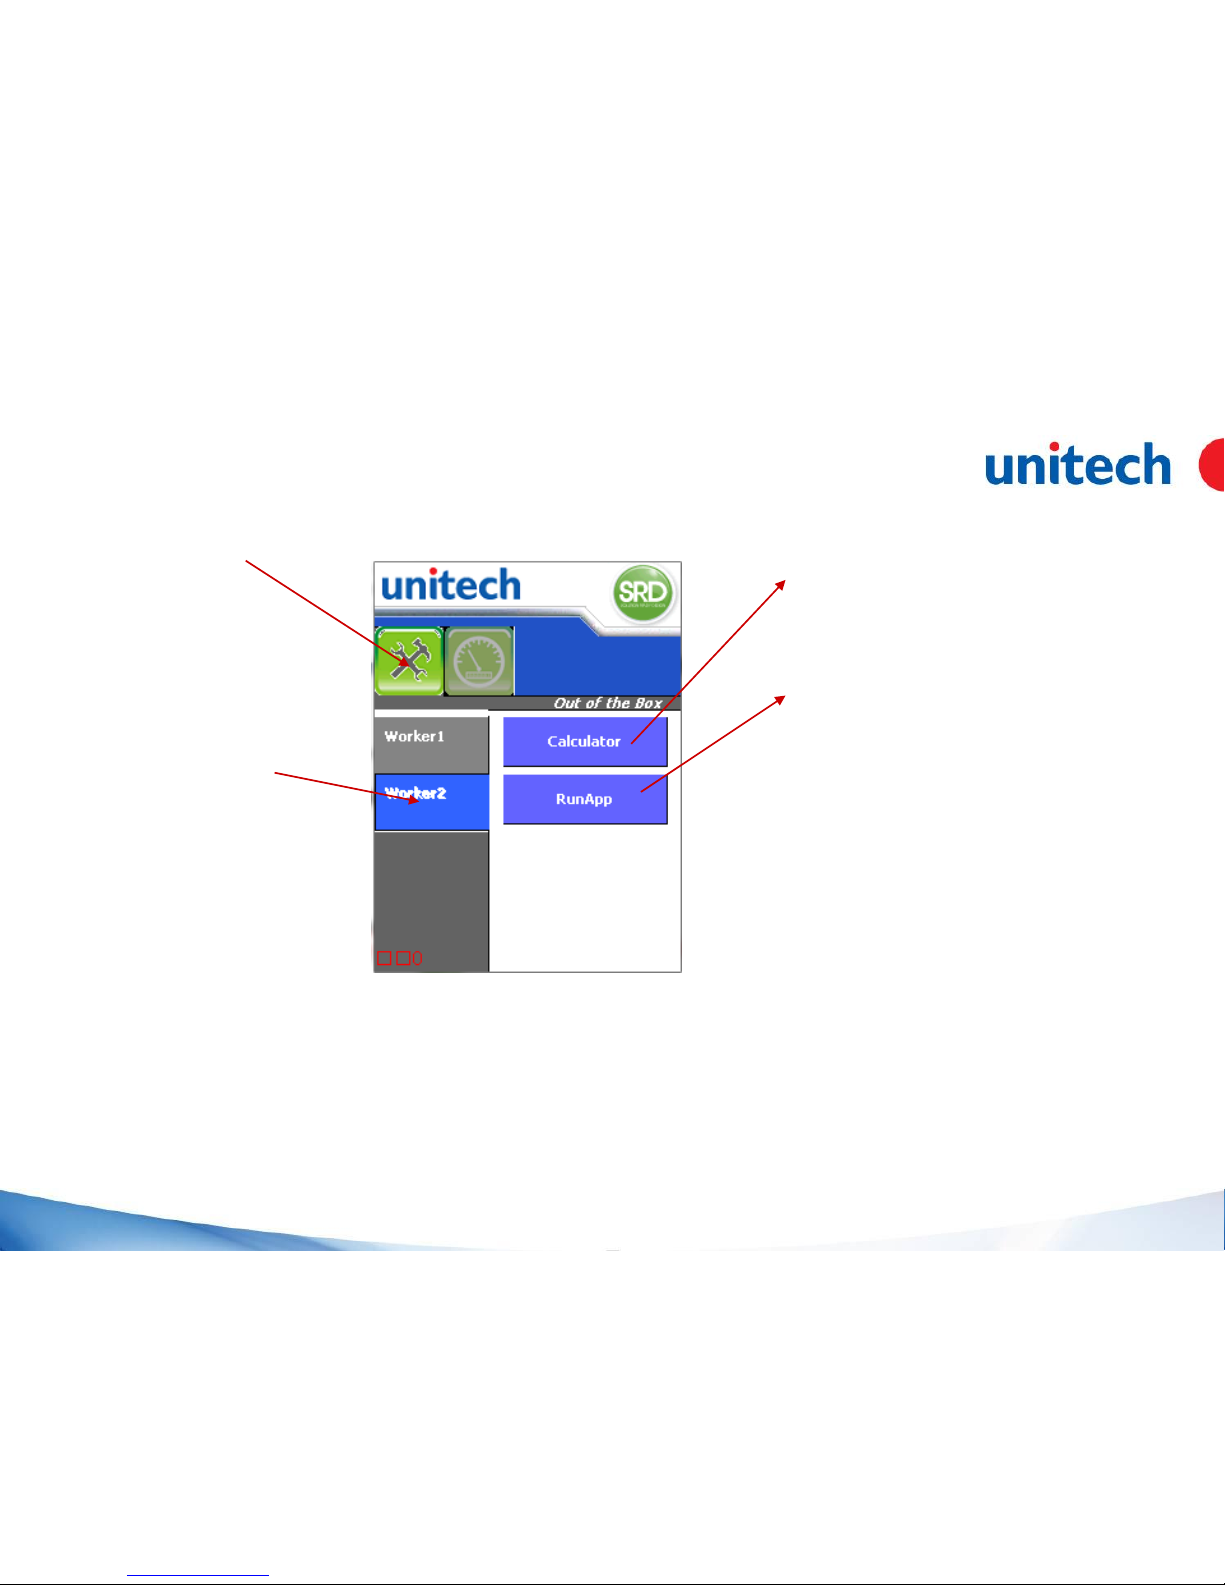
•Select “Worker”
• Select “Worker2”
•Calculator as usefull app to
an operator
•…………..
Page 15

•Select “Worker”
• Select “Worker1”
•Sample app “Asset” tracking
•Sample app “Warehouse”
Goods out
•On screen suspend
Page 16

 Loading...