

Page 1
Copyright 2008 Unitech Electronics Co., Ltd. All rights reserved. Unitech is a registered trademark of Unitech Electronics Co., Ltd.
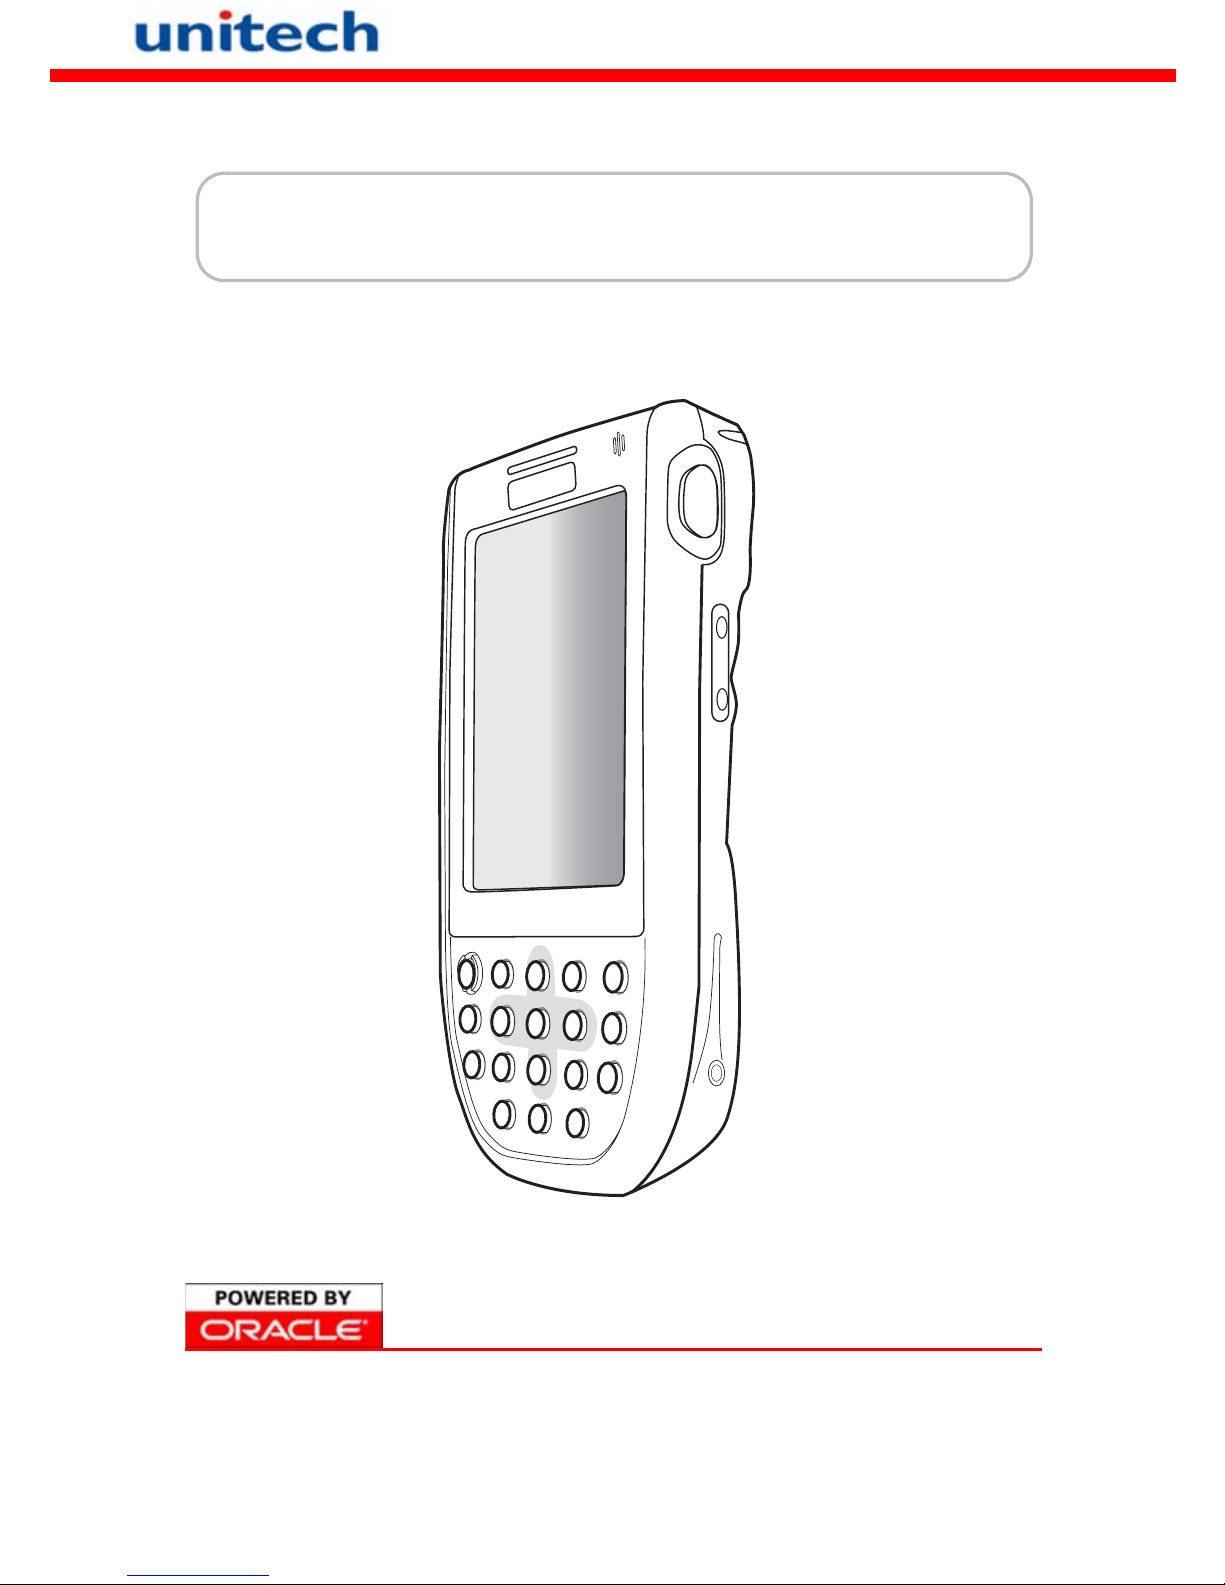
PA600 Rugged Enterprise PDA
Quick Reference Guide
400577G RevB
unitech
unitech
unitech is a member of Oracle Embedded Software Licensing Program
Page 2
Copyright 2008 Unitech Electronics Co., Ltd. All rights reserved. Unitech is a registered trademark of Unitech Electronics Co., Ltd.
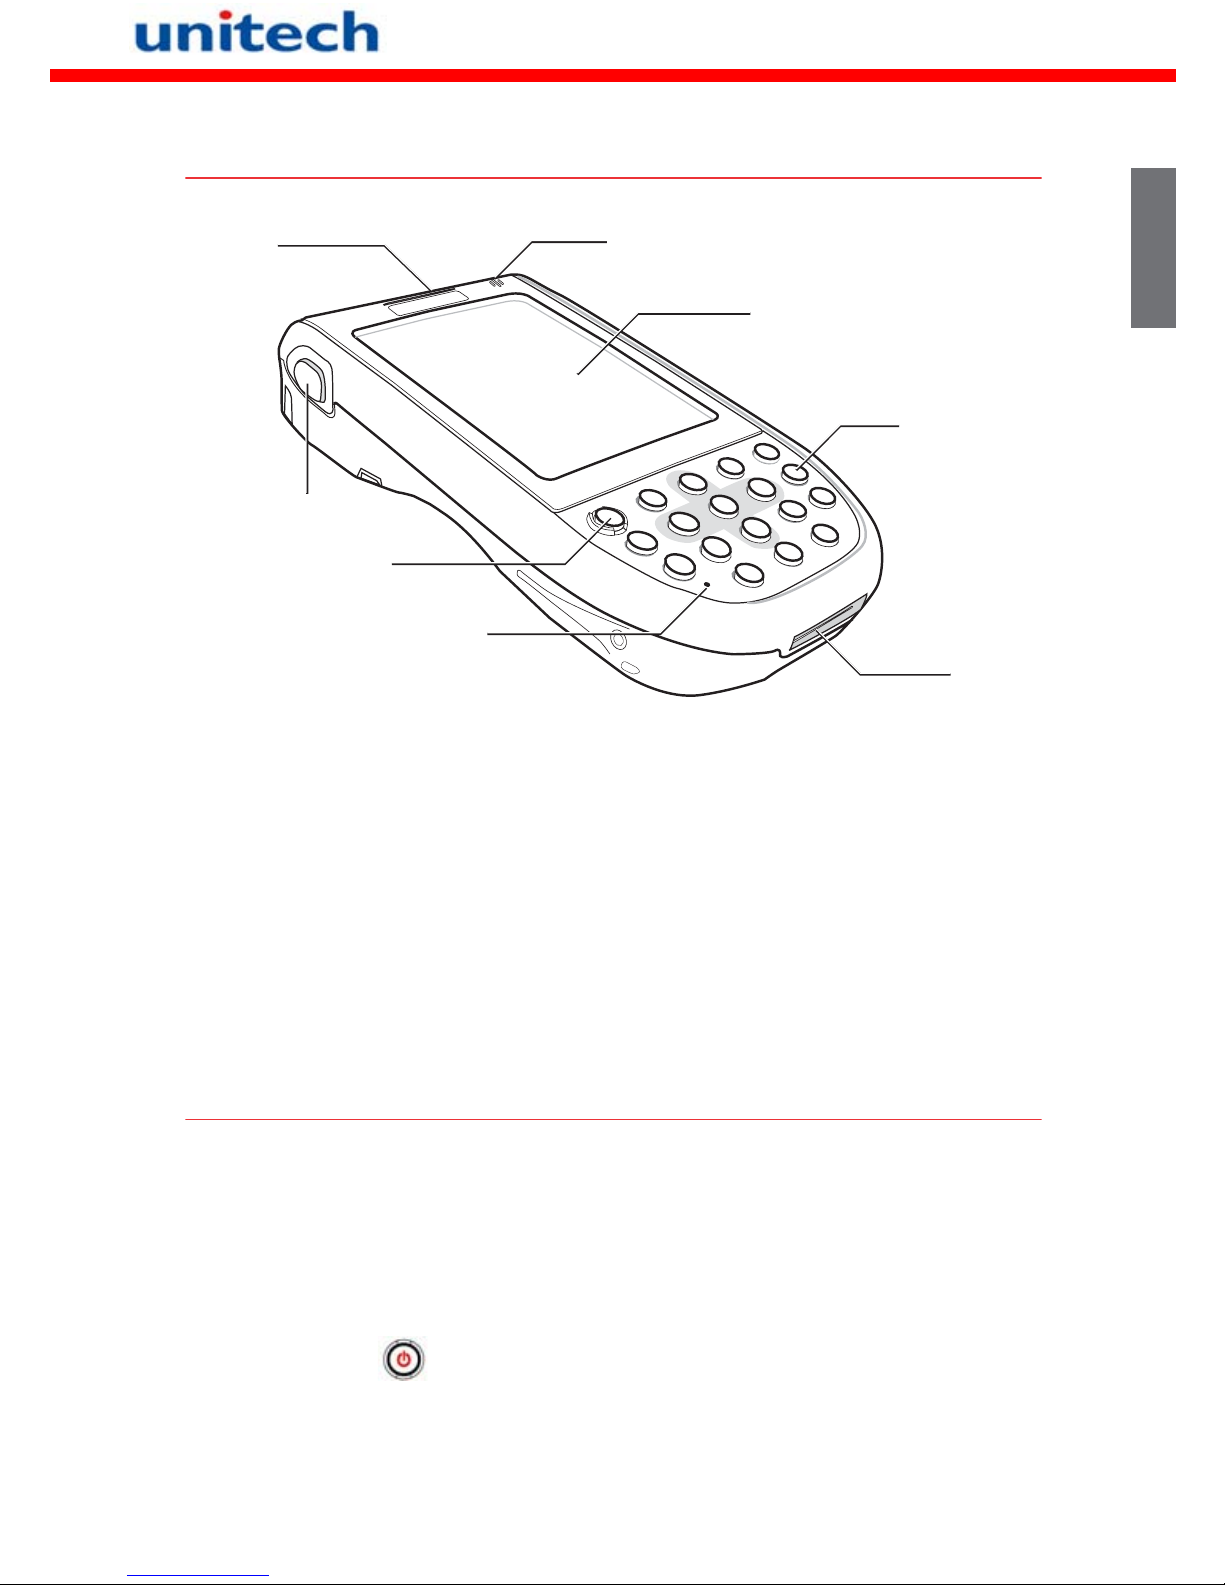
Front Left V iew
Turning the PA 600 on for the First Time
After you have initially charged your device for about 12 hours, the device is
ready to be used. Y ou can now st art up your device where you’ll calibrate the
display, learn some basic stylus usage, and set up the system time zone,
date and time.
Powering On
1. Turn on your device by pressing the power button on the front panel.
1 Status indicator 5 Universal connector
2 Left scanner trigger button 6 Keypad
3 Power button 7 LCD Touch screen
4 Microphone 8 Speaker
1
2
4
3
5
6
7
8
English
Page 3

Copyright 2008 Unitech Electronics Co., Ltd. All rights reserved. Unitech is a registered trademark of Unitech Electronics Co., Ltd.
Back View
9 Battery compartment 14 Stylus
10 Battery Compartment release latc h 15 Strap holder
11 Reset button 16 Memory card slot
12 Handstrap 17 Barcode scanner window
13 Speaker
9
10
11
13
15
14
12
16
17
English
Page 4
Copyright 2008 Unitech Electronics Co., Ltd. All rights reserved. Unitech is a registered trademark of Unitech Electronics Co., Ltd.
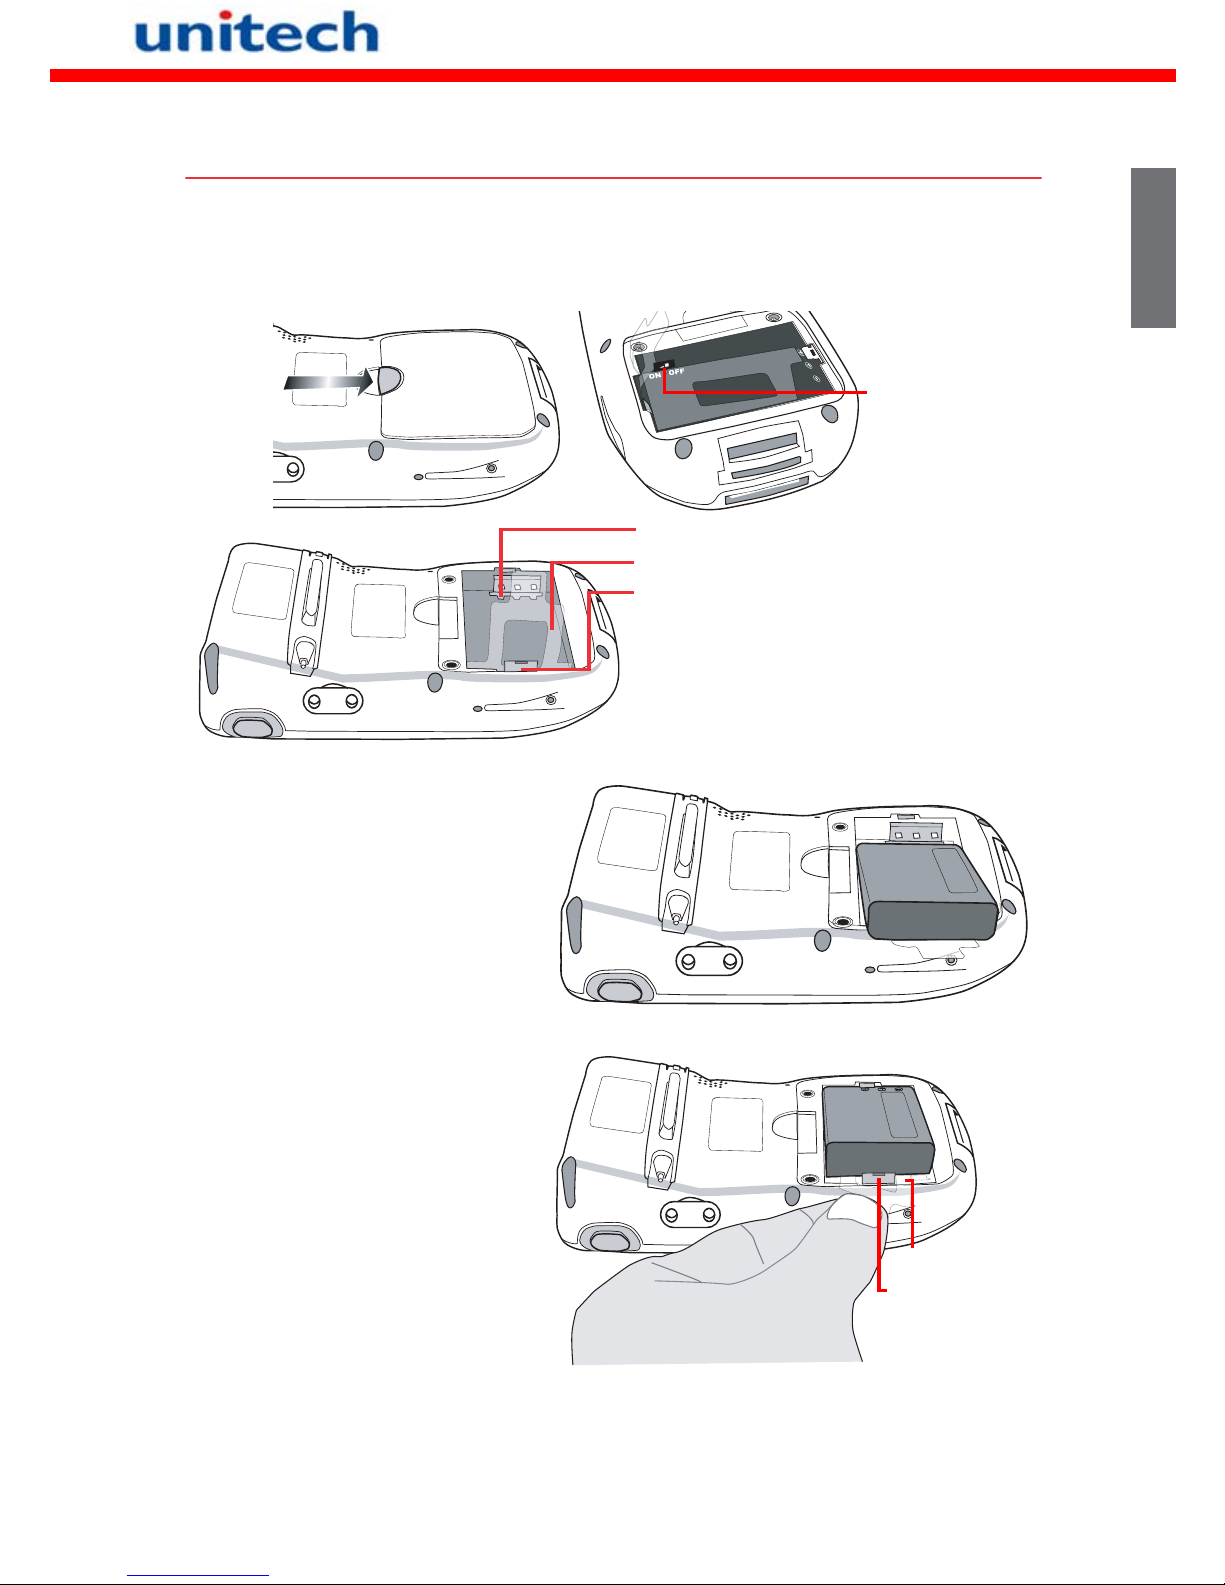
Installing the Battery
1 Open the battery compartment by pushing the latch in the direction of the
arrow and lifting up (A). Turn the Backup Battery Switch on (B).
2 Position the battery p ack,
making sure the battery
contacts are aligned with
the contacts in the compartment and the battery
is placed on top of the
plastic tab, as shown in
the following illustration.
3 Slide the battery pack
into the battery bay
while simultaneously
pulling the plastic tab
and battery hook until
the battery clicks into
place.
4 Replace the battery compartment cover.
The battery compartment is displaye d:
Compartment contacts
Plastic battery tab
Battery hook
A
Backup Battery
Switch
B
Plastic tab
Battery hook
English
Page 5

Copyright 2008 Unitech Electronics Co., Ltd. All rights reserved. Unitech is a registered trademark of Unitech Electronics Co., Ltd.
Charging the Battery
Turn the backup battery switch on before charging the battery. Data you
entered may not be properly stored until the built-in backup battery has been
adequately charged.
1 Press and hold the connector button on the USB chargin g cable and con nect it
to the PA600 (1).
2 Plug the AC adapter cable into the power jack on the USB charging cable (2).
3 Connect the AC adapter into an electrical outlet (3).
Using the SD/MMC memory card
1 Remove the four screws from SD compartment cover and remove the cover.
3
2
1
2
Insert the SD card with the notched
corner as shown by the icon on the case.
English
Page 6

Copyright 2008 Unitech Electronics Co., Ltd. All rights reserved. Unitech is a registered trademark of Unitech Electronics Co., Ltd.
Keypads and Function Buttons
When the Function button is
pressed, an icon appears in
the operating system:
Function activated icon
Turns the PA600 on and off.
Number 1, Left soft key
Alphanumeric 2, a, b, c , Up key
Alphanumeric 3, d, e, f, Right soft key
Enter key, OK
Back space, Escape key
Alphanumeric 4, g, h, i, Left key
Alphanumeric 5, j, k, l
Alphanumeric 6, m, n, o , Right key
function keys
Tab , Windows Main Menu key
Alphanumeric 7, p, q, r, s , brightness -
Alphanumeric 8, t, u, v , Do wn ke y
Alphanumeric 9, w, x, y, z, brightness +
Alpha
Asterisk, Illuminates keypad
Number 0, space
Period , Pound, Slash
English
Page 7

Copyright 2008 Unitech Electronics Co., Ltd. All rights reserved. Unitech is a registered trademark of Unitech Electronics Co., Ltd.
Vista frontal izquierda
Para encender el PA600 por primera vez
Después de cargar el dispositivo durante unas 12 horas, estará listo para su
uso. Ahora podrá arrancar en dispositivo para calibrar la pantalla, aprender
el manejo básico del lápiz, configurar la zona horaria del sistema y ajustar la
fecha y la hora.
Encendido
1. ara encender el dispositivo, pulse el botón de encendido del panel frontal.
1 Indicador de estado 5 Conector universal
2 Botón izquierdo de activación del escáner 6 Teclado
3 Botón de encendido 7 Pantalla táctil LCD
4 Micrófono 8 Altavoz
1
2
4
3
5
6
7
8
Español
Page 8

Copyright 2008 Unitech Electronics Co., Ltd. All rights reserved. Unitech is a registered trademark of Unitech Electronics Co., Ltd.
Vista posterior
9 Compartimiento de la batería 14 Lápiz
10 Pestillo del compartimiento de la
batería
15 Soporte de la correa
11 Botón de restablecimiento 16 Ranura de la tarjeta de memoria
12 Correa de mano 17 Ventana del escáner de códigos de
barras
13 Altavoz
9
10
11
13
15
14
12
16
17
Español
Page 9

Copyright 2008 Unitech Electronics Co., Ltd. All rights reserved. Unitech is a registered trademark of Unitech Electronics Co., Ltd.
Instalación de la batería
1 Abra el compartimiento de la batería pulsando el pestillo en la dirección de la
flecha y levantándolo (A). Encienda el interruptor de la batería de reserva (B).
2 Coloque las baterías,
asegurándose de que los
contactos estén alineados con los contactos
del compartimiento y la
batería esté coloca d a
sobre la lengüeta de
plástico, como se muestra en la siguiente ilustración.
3 Deslice la bat-
ería en su compartimiento al
tiempo que tira
de la lengüeta
de plástico y de
la pinza de
fijación hasta
que la batería
quede colocada
en su sitio.
4 Vuelva a colocar la tapa del compartimiento de la batería.
Contactos del compartimiento
Lengüeta de plá stico de la batería
Pinza de sujeción de la batería
Se muestra el compartimiento de la
batería:
A
Interruptor de
la batería de
reserva
B
Pinza de sujeción
Lengüeta de plástico
Español
Page 10

Copyright 2008 Unitech Electronics Co., Ltd. All rights reserved. Unitech is a registered trademark of Unitech Electronics Co., Ltd.
Carga de la batería
Encienda el interruptor de la batería de reserva antes de cargar la batería.
Los datos que ha introducido puede que no se guarden bien hasta que se
haya cargado adecuadamente la batería de reserva incorporada.
1 Mantenga pulsado el botón del conector del cable d e carga USB y conéctelo al
PA600 (1).
2 Conecte el cable adaptador de CA a la clavija de alimentación del cable de
carga USB (2).
3 Conecte el adaptador de CA a la toma eléctrica (3).
Uso de la tarjeta de memoria SD/MMC
1 Retire los cuatro tornillos de la tapa del compartimiento SD y retírela.
3
2
1
2
Inserte la tarjeta SD con la esquina cortada tal y como se muestra en el icono
de la carcas.
Español
Page 11

Copyright 2008 Unitech Electronics Co., Ltd. All rights reserved. Unitech is a registered trademark of Unitech Electronics Co., Ltd.
Botones del teclado y de función
Cuando se pulsa el botón
Función, aparece un icono
en el sistema operativo:
Icono de función activada
Enciende y apaga el PA600.
Numérico 1, tecla de softw are izquie rda
Alfanumérico 2, a, b, c, tecla Arriba
Alfanumérico 3, d, e, f, tecla de
software derecha
Tecla Intro, Aceptar
Retroceso, tecla Escape
Alfanumérico 4, a, b, c, tecla Izqu ierda
Alfanumérico 5, j, k, l
Alfanumérico 6, m, n, o, tecla Derecha
teclas de función
Tab, tecla Windows
Alfanumérico 7, p, q, r, s , brillo -
Alfanumérico 8, t, u, v, tecla A bajo
Alfanumérico 9, w, x, y, z, brillo +
Alpha
Asterisco, ilumina el teclado
Número 0, espacio
Punto, libra, Raya vertical
Español
 Loading...