

Page 1

256Z
MDR616, 608, 604 manual_V0.94
MANUAL
Please read instructions thoroughly before operation and retain it for future reference.
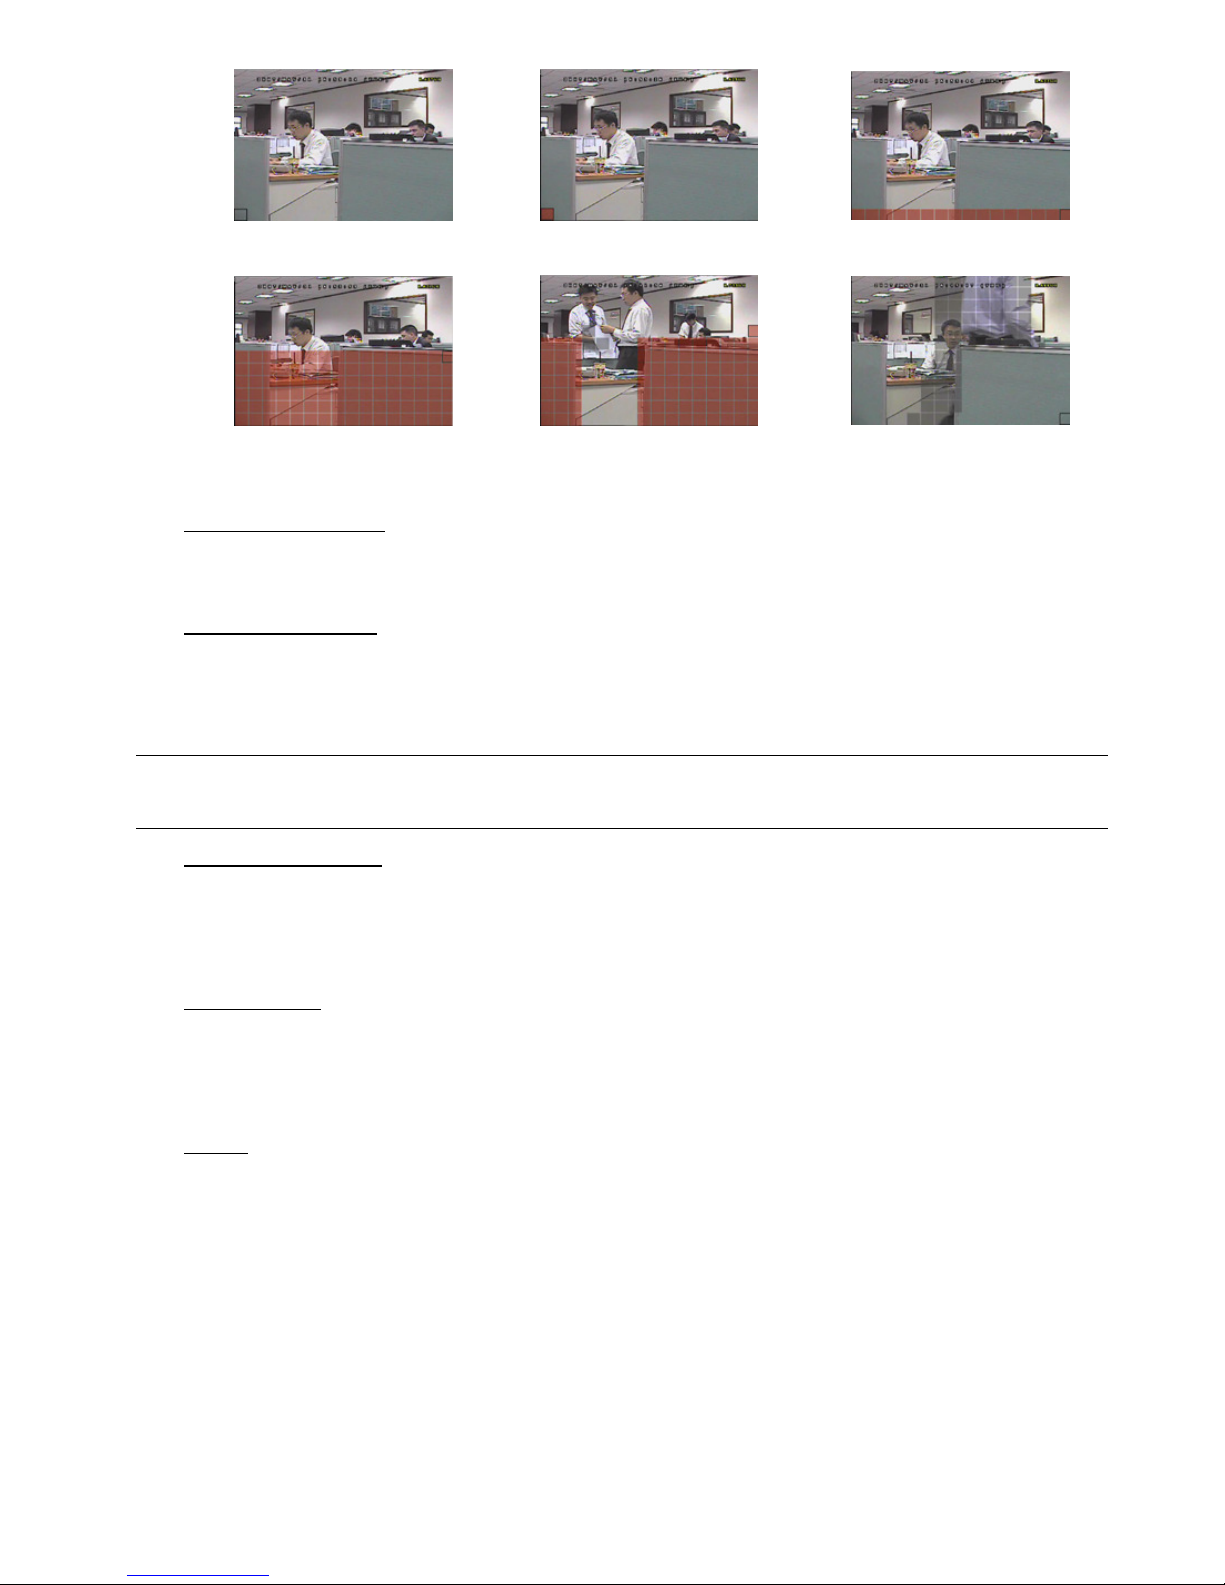
The image shown above may differ from the actual product appearance.
Page 2
IMPORTANT SAFEGUARD
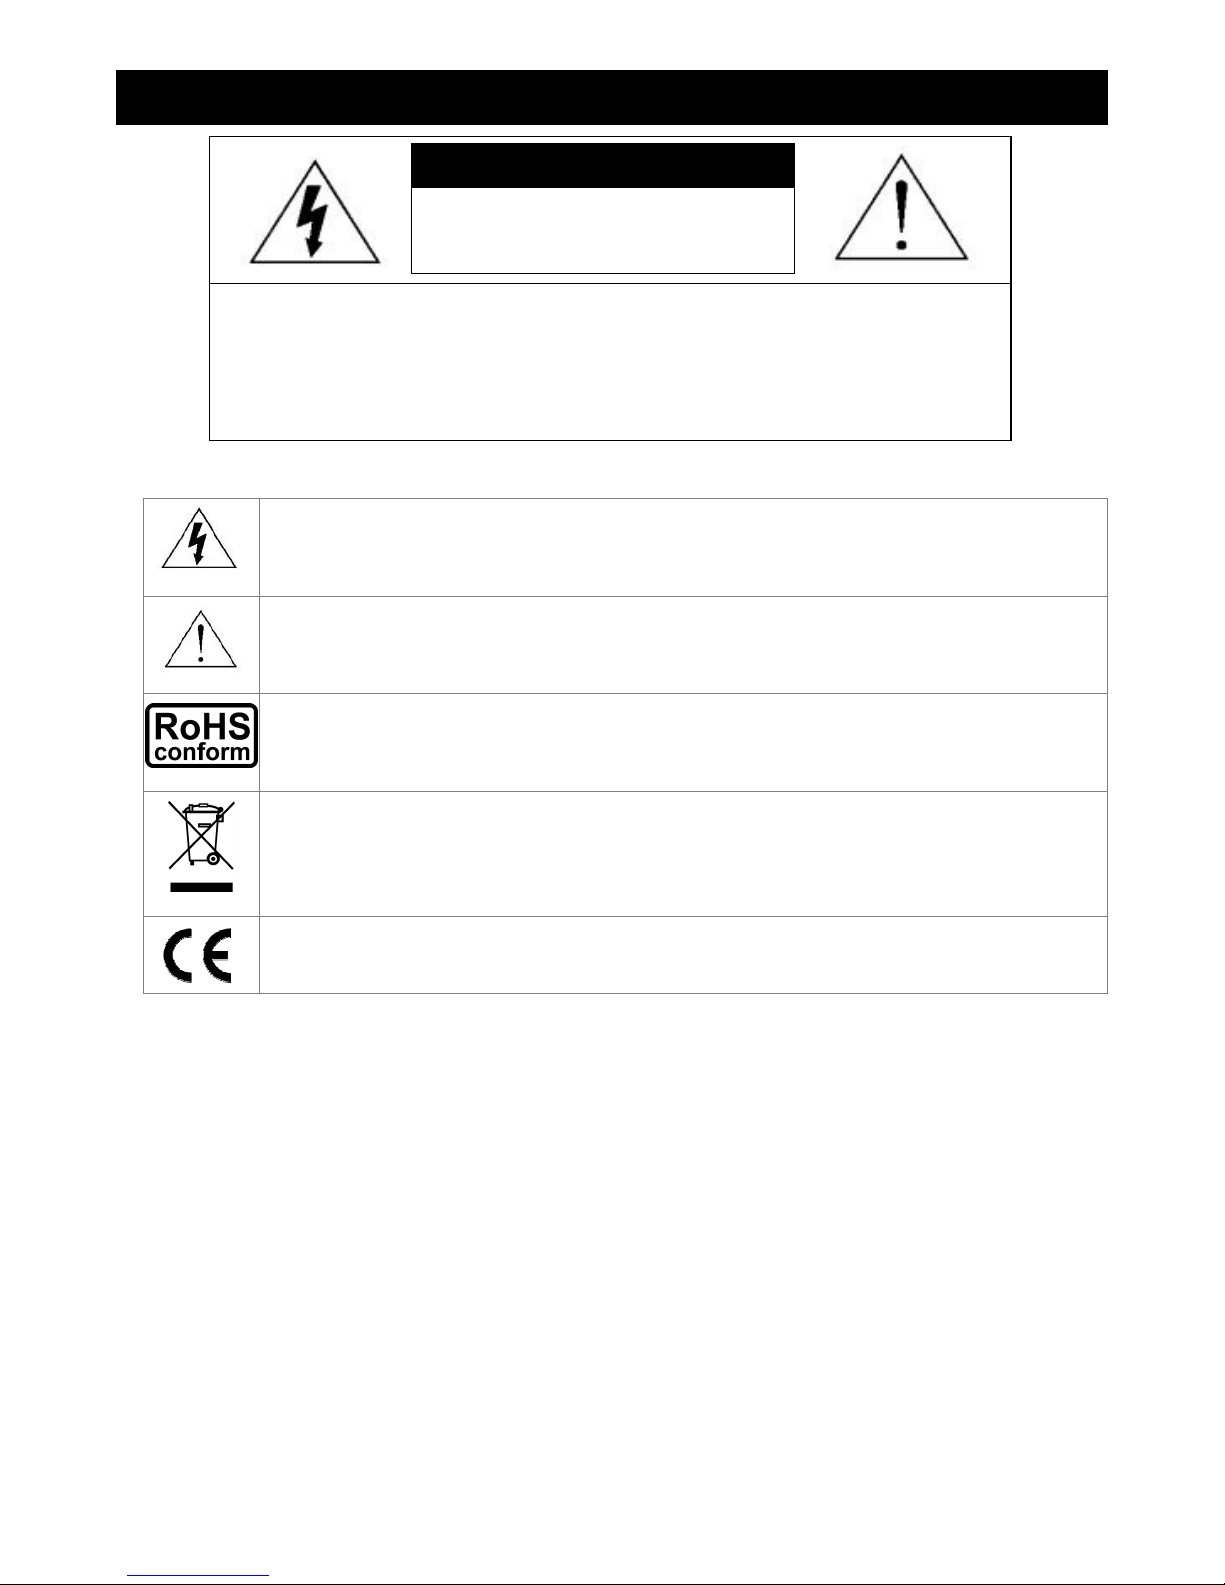
Graphic Symbol Explanation
The lightning flash with arrowhe
ad symbol, within an equilateral triangle, is intended to alert the user to
the presence of uninsulated “dangerous voltage” within the product’s enclosure that may be of sufficient
magnitude to constitute a risk of electric shock to persons.
This exclam
ation point within an equilateral triangle is intended to alert the user to the presence of
important operating and maintenance (servicing) instructions in the literature accompanying the
appliance.
All lead-free products offered by the company comply w
ith the requirements of the European law on the
Restriction of Hazardous Substances (RoHS) directive, which means our manufacture processes and
products are strictly “lead-free” and without the hazardous substances cited in the directive.
The crossed-ou
t wheeled bin mark symbolizes that within the European Union the product must be
collected separately at the product end-of-
life. This applies to your product and any peripherals marked
with this symbol. Do not dispose of these products as unsorted municip
al waste. Contact your local
dealer for procedures for recycling this equipment.
This apparatus is manufactured to comply with the radio interference requirements.
Disclaimer
We reserve the right to revise or remove any content in this manual at any time. We do not warrant or assume any
legal liability or responsibility for the accuracy, completeness, or usefulness of this manual. The content of this manual is
subject to change without notice.
MPEG4 Licensing
THIS PRODUCT IS LICENSED UNDER THE MPEG-4 VISUAL PATENT PORTFOLIO LICENSE FOR THE
PERSONAL AND NON-COMMERCIAL USE OF A CONSUMER FOR (i) ENCODING VIDEO IN COMPLIANCE WITH
THE MPEG-4 VISUAL STANDARD (“MPEG-4 VIDEO”) AND/OR (ii) DECODING MPEG-4 VIDEO THAT WAS
ENCODED BY A CONSUMER ENGAGED IN A PERSONAL AND NON-COMMERCIAL ACTIVITY AND/OR WAS
OBTAINED FROM A VIDEO PROVIDER LICENSED BY MPEG LA TO PROVIDE MPEG-4 VIDEO. NO LICENSE IS
GRANTED OR SHALL BE IMPLIED FOR ANY OTHER USE. ADDITIONAL INFORMATION INCLUDING THAT
RELATING TO PROMOTIONAL INTERNAL AND COMMERCIAL USES AND LICENSING MAY BE OBTAINED FROM
MPEG LA, LLC. SEE HTTP://WWW.MPEGLA.COM.
Version
Firmware: 1066-1007-1013-1006-L8-6C1B
Licensed Software AP: 0030
CAUTION:
To reduce the risk of electric shock, do not expose this apparatus to rain or moisture.
Only operate this apparatus from the type of power source indicated on the label.
The company shall not be liable for any damages arising out of any improper use,
even if we have been advised of the possibility of such damages.
CCAAUUTTIIOONN
RRIISSKK OOFF EELLEECCTTRRIICC SSHHOOCCKK
Page 3

TABLE OF CONTENTS
1. OVERVIEW ................................................................................................................................1
1.1 Product Description .............................................................................................................................................1
1.2 Features ..............................................................................................................................................................1
1.3 Specifications ......................................................................................................................................................2
1.4 Package Contents ...............................................................................................................................................2
2. FRONT AND REAR PANELS ....................................................................................................3
2.1 Front Panel..........................................................................................................................................................3
2.2 Rear Panel ..........................................................................................................................................................5
3. CONNECTIONS AND SETUP (Take 16CH DVR as an example) ............................................................7
3.1 HDD Installation ..................................................................................................................................................7
3.2 Camera Connection ............................................................................................................................................7
3.3 Power Setup........................................................................................................................................................8
3.4 Date and Time Setting.........................................................................................................................................8
3.5 Password Setting ................................................................................................................................................9
3.6 System Diagram..................................................................................................................................................9
4. BASIC OPERATION (Take 16CH DVR as an example) .........................................................................10
4.1 Live Page ..........................................................................................................................................................10
4.2 Recording..........................................................................................................................................................10
4.3 Playback............................................................................................................................................................11
4.4 Key Lock and Unlock......................................................................................................................................... 11
4.5 Upgrade.............................................................................................................................................................12
4.6 Search...............................................................................................................................................................12
5. MAIN MENU.............................................................................................................................13
5.1 Menu Configuration ...........................................................................................................................................13
5.2 Menu Operation Instruction ...............................................................................................................................13
6. QUICK START MENU..............................................................................................................14
6.1 Status ................................................................................................................................................................14
6.2 Manual Record ..................................................................................................................................................15
6.3 Timer .................................................................................................................................................................15
6.4 Date...................................................................................................................................................................17
7. ADVANCED MENU (Take 16CH DVR as an example) ...........................................................................19
7.1 Advanced Configuration ....................................................................................................................................19
7.1.1 Camera .....................................................................................................................................................19
7.1.2 Detection...................................................................................................................................................20
7.1.3 Alert...........................................................................................................................................................21
7.1.4 Network.....................................................................................................................................................22
7.1.5 Display ......................................................................................................................................................24
7.1.6 Record ......................................................................................................................................................25
7.2 System Info .......................................................................................................................................................26
7.3 Event Log ..........................................................................................................................................................27
7.3.1 Quick Search ............................................................................................................................................27
7.3.2 HDD Info ...................................................................................................................................................28
7.3.3 Event Log..................................................................................................................................................28
Page 4

7.4 Backup ..............................................................................................................................................................28
7.4.1 USB BACKUP...........................................................................................................................................29
7.4.2 DISK BACKUP..........................................................................................................................................30
8. REMOTE OPERATION (Take 16CH DVR as an example) .....................................................................31
8.1 Supplied Licensed Software AP ........................................................................................................................31
8.1.1 Installation & Network Connection ............................................................................................................31
8.1.2 General AP Operation ...............................................................................................................................32
Record..........................................................................................................................................................32
Playback .......................................................................................................................................................32
Network Backup ...........................................................................................................................................33
8.1.3 AP Control Panel.......................................................................................................................................34
8.1.4 AP Functions.............................................................................................................................................35
Image Display...............................................................................................................................................35
Address Book ...............................................................................................................................................35
Miscellaneous Control ..................................................................................................................................37
Information....................................................................................................................................................53
DVR Control .................................................................................................................................................54
8.2 IE Web Browser ................................................................................................................................................56
8.3 QuickTime Player ..............................................................................................................................................58
APPENDIX 1 PIN CONFIGURATION...........................................................................................59
APPENDIX 2 COMPATIBLE USB FLASH DRIVE BRAND .........................................................61
APPENDIX 3 COMPATIBLE HDD BRAND..................................................................................62
APPENDIX 4 TROUBLESHOOTING...........................................................................................63
APPENDIX 5 DEFAULT VALUE ..................................................................................................64
Page 5

OVERVIEW
-1-
1. OVERVIEW
1.1 Product Description
This MPEG-4 multiplex network DVR series combines remote surveillance, burglar prevention, evidentiary recording,
and graphical multilingual OSD features. To quickly backup, a DVD writer (optional) and USB interface are built in for
your choices except for network backup.
1.2 Features
MPEG4 Technology
MPEG4 compression format providing crystal clear images with real time performance
MPEG4 web transmitting for faster transmission and clearer images via network
Graphical and Multilingual OSD Interface
Intelligent Motion Trigger Recording
Advanced motion detection feature (with 4 individually adjustable parameters)
Scheduled motion detection recording
Quick search
Supports pre-alarm recording (8MB)
Excellent CIF Image Quality and Performance
The CIF image quality is highly improved for more clear and detailed image
Multiplex Operation
Allows live display, record, playback, backup and network operations at the same time
Backup Function
Supports DVD writer (optional), USB 2.0 flash drive and network backup
Remote surveillance
Supports remote surveillance up to 5 users simultaneously via the licensed software AP and IE web browser
Free upgrade to advanced functions
Allows you to upgrade DVR functions without any changes
Covert Recording
Blank screen replaces live displays to achieve covert recording
A/V Support
16CH & 8CH: Supports 4 audio-in, 1 audio-out to record sounds
4CH: Supports 4 audio-in, 1 audio-out to record sounds
General
Supports IR remote control, PTZ camera operations through RS485
Support system auto recovery after power reconnected
Supports auto video system detection (NTSC / PAL)
Ensures the authentication of recorded images with watermark function
Supports TCP/IP, PPPoE, DHCP and DDNS network connection
Page 6
OVERVIEW
-2-
1.3 Specifications
MODEL 16CH 8CH 4CH
Video System NTSC / PAL (auto detection)
Video Compression Format MPEG4
Video Input
(Composite video signal 1 Vp-p 75Ω BNC)
16 Channels 8 Channels 4 Channels
Video Loop Output
(Composite video signal 1 Vp-p 75Ω BNC)
16 Channels 8 Channels 4 Channels
Video Output
Main Monitor Output: Composite video signal 1 Vp-p 75Ω BNC
Call Monitor Output: Composite video signal 1 Vp-p 75Ω BNC
Maximum Recording Rate (Frame) 720×480 pixels with 30 IPS <NTSC> / 720×576 pixels with 25 IPS <PAL>
Maximum Recording Rate (Field) 720×240 pixels with 60 IPS <NTSC> / 720×288 pixels with 50 IPS <PAL>
Maximum Recording Rate (CIF) 352×240 pixels with 120 IPS <NTSC> / 352×288 pixels with 100 IPS <PAL>
Adjustable Recording Speed (Frame) 30, 15, 7, 3 IPS <NTSC> / 25, 12, 6, 3 IPS <PAL>
Adjustable Recording Speed (Field) 60, 30, 15, 7 IPS <NTSC> / 50, 25, 12, 6 IPS <PAL>
Adjustable Recording Speed (CIF) 120, 60, 30, 15 IPS <NTSC> / 100, 50, 25, 12 IPS <PAL>
Multilingual OSD YES
Image Quality Setting Best / High / Normal / Basic
Hard Disk Storage (HDDs are optional) Accommodate 2 HDDs Accommodate 1 HDD
HDD Quick Cleaning Quick clean up the “index system” of the recorded files (750GB under 2 seconds)
Recording Mode Manual / Timer / Motion / Alarm / Remote
Watermark YES
Refresh Rate
480 IPS for NTSC /
400 IPS for PAL
240 IPS for NTSC /
200 IPS for PAL
120 IPS for NTSC /
100 IPS for PAL
Multiplex Operation Pentaplex: live display, record, playback, backup and network
Audio I/O
4 audio inputs, 1 audio
output (Mono)
4 audio inputs, 1 audio
output (Mono)
1 audio input, 1 audio
output (Mono)
Motion Detection Area 16 × 12 grids per camera for all channels
Motion Detection Sensitivity 4 adjustable variables with precise calculation for motion detection
Pre-alarm Recording Yes (8 MB)
Backup Device 1. USB 2.0 flash drive; 2. DVR writer (optional); 3 Network
USB Interface Front panel * 1
Web Transmitting Compression Format MPEG4
Ethernet 10/100 Base-T. Support remote control and live view via Ethernet
Remote Operation Software
Licensed software AP, IE browser
*Operating System: Windows 2000 and Windows XP
Network Protocol TCP/IP / PPPOE / DHCP / DDNS
IR Transmitter Control YES
PTZ Control YES
Alarm I/O 16 inputs, 1 output 8 inputs, 1 output 4 inputs, 1 output
Picture Zoom 2X digital zoom
Key Lock YES
Video Loss Detection YES
Camera Title Support up to 6 letters
Video Adjustable Hue / Color / Contrast / Brightness
Date Display Format YY/MM/DD, DD/MM/YY, MM/DD/YY, and OFF
Daylight Saving YES
Power Source DC 19V
Power Consumption 64 W
Operating Temperature 10 ~ 40 (50~104)
Dimensions (mm) 432(W) × 90(H) × 326(D) 375(W) × 61(H) × 281(D)
System Recovery System auto recovery after power reconnected
*
The specifications are subject to change without notice.
1.4 Package Contents
□ Digital video recorder (DVR) * 1 □ HDD bracket screws (spare parts) * 4
□ Adapter and power cord * 1 □ DSUB PIN connector * 1
□ Free licensed software AP disc * 1 □ IR remote controller * 1
□ Manual & quick start & IR remote control manual * 1 □ AAA size battery * 2
Note: Before using the IR remote controller, please install the batteries first.
Page 7

FRONT AND REAR PANELS
-3-
2. FRONT AND REAR PANELS
2.1 Front Panel
1) LED Indication
The following LEDs will be on when:
/ POWER: power is connected
/ HDD: HDD is reading or recording / HDD Full: HDD is full
/ ALARM: any event alarm is triggered
/ TIME: timer recording is activated
/ PLAY: when the DVR is playback
STANDBY: when the DVR is standby
HDD Full: HDD is full
REC: when the DVR is recording
2) (USB port)
To quickly backup or upgrade firmware/OSD, you can insert a compatible USB flash drive into this USB port. Before
using the USB flash drive, please use your PC to format the USB flash drive as “FAT32” first.
Note: For the list of compatible USB flash drives, please refer to “APPENDIX 2 COMPATIBLE USB FLASH
DRIVE BRAND” at page 61.
3) IR receiving zone
If the control panel is removed from the DVR and used as a remote controller, aim the remote controller at this area
to control the DVR operation.
4) Password Entering
Use the number buttons to enter the DVR password. Or use / buttons to setup the password.
5) Channel Display Selection
Use the number buttons select the channel. Or press “SHIFT + CH” and “SHIFT + CH” buttons to select the
channel.
6) SNAP
When the DVR is not under the menu mode, connect a USB drive to the DVR and then press “SNAP” button to take
a snapshot picture of the current live image on the monitor.
7) LIST (Event List Search)
To quick search the recorded files by event list, press “LIST” button or “SHIFT + LIST” buttons to show all types of the
event lists.
ALARM: List the information of the alarm-trigger-recorded files.
MANUAL: List the information of the manual-recorded files. The DVR will save one recorded file once any recording setting is changed
MOTION: List the information of the motion-trigger-recorded files.
SYSTEM: List the information of the system-recorded files. The DVR system will save one recorded file every one hour.
TIMER: List the information of the timer-recorded files.
8) PLAY
Press this button to playback the recorded video.
9) MENU
Press this button to enter / exit the quick start menu.
In the sub-layer of the advanced setting menu,
press this button to confirm the settings and go back to the upper layer.
Page 8
FRONT AND REAR PANELS
-4-
10) ENTER
Confirm the password entering.
Under the advanced menu, use this button to confirm the settings and go back to the upper layer.
11) EJECT /
Press this button to open / close the DVD-RW drive.
12) SLOW
Under the playback mode, press “SLOW” button or “SHIFT + SLOW” buttons to slowly playback the recorded file (by
1/4 speed or 1/8 speed).
13) ZOOM
Press this button to enlarge the image of the selected channel.
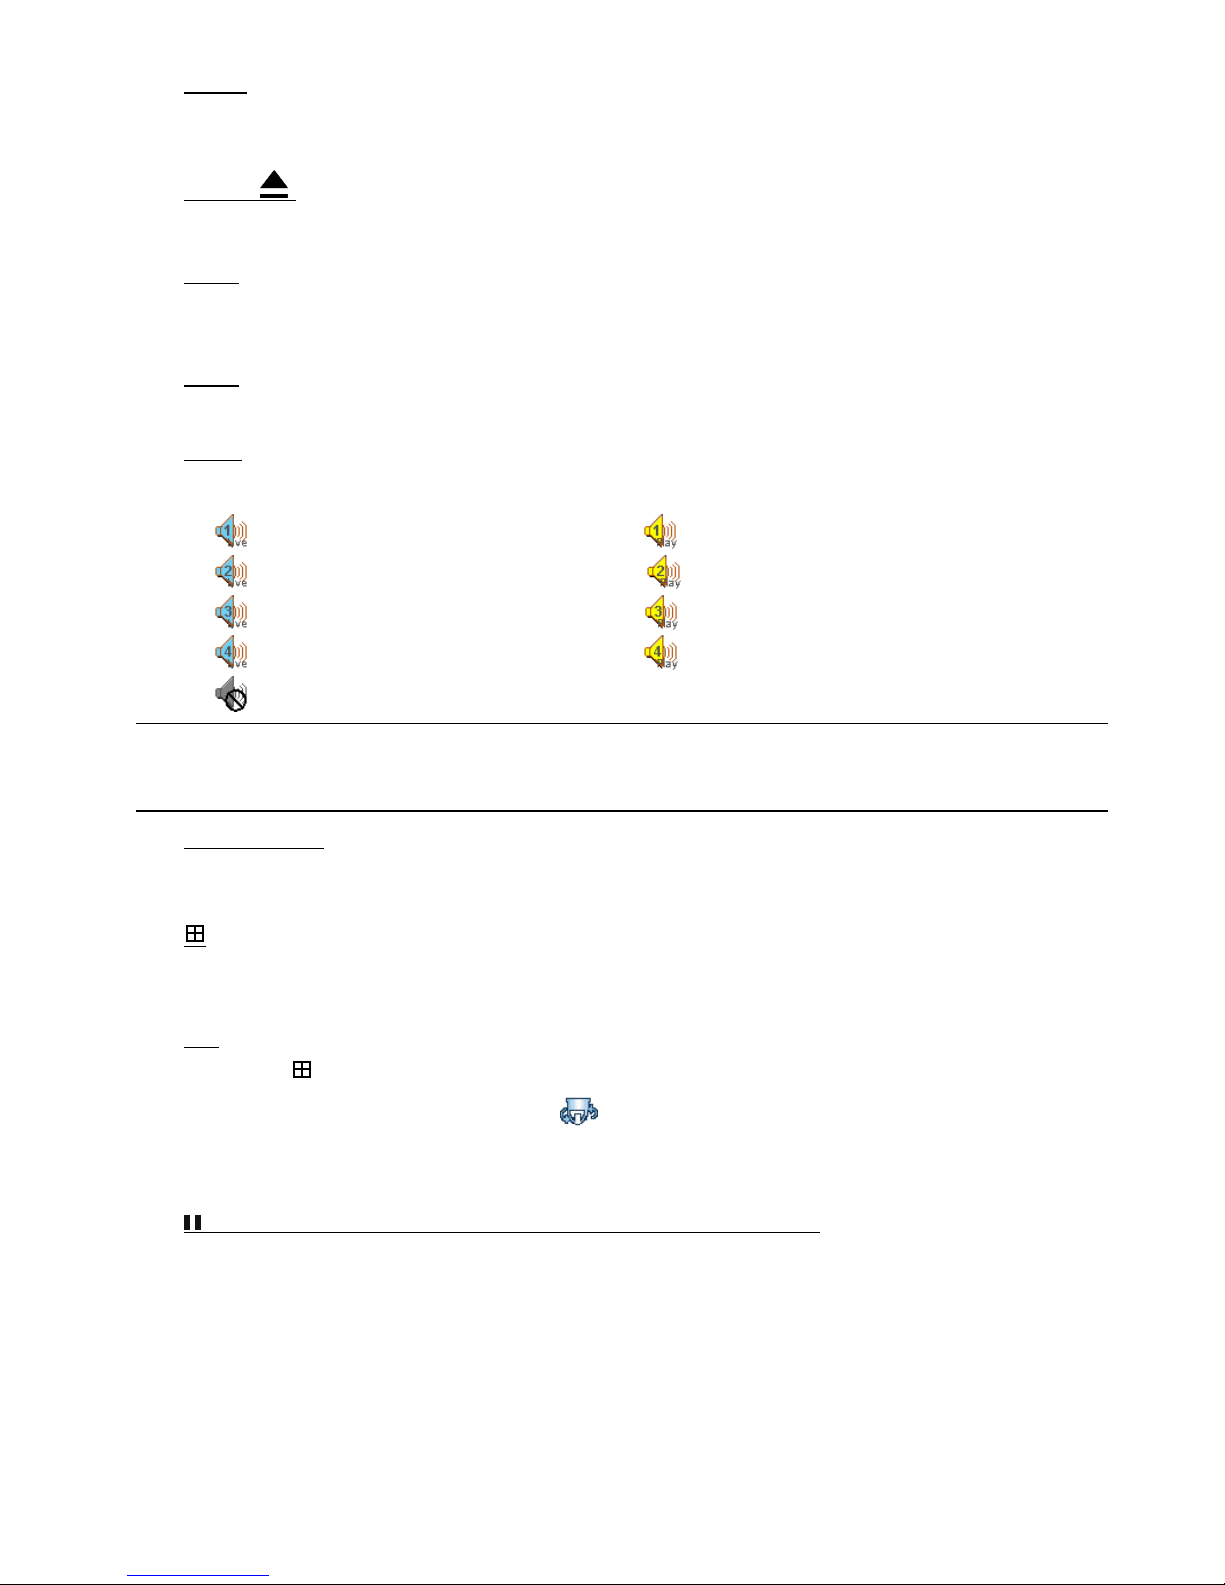
14) AUDIO
Press “SLOW + ZOOM” buttons or “SHIFT + AUDIO” buttons to select the live or playback sound of the audio
channels.
Icon “ ” means: Live audio of the 1st audio channel / Icon “ ” means: Playback audio of the 1st audio channel
Icon “ ” means: Live audio of the 2nd audio channel / Icon “ ” means: Playback audio of the 2nd audio channel
Icon “ ” means: Live audio of the 3rd audio channel / Icon “ ” means: Playback audio of the 3rd audio channel
Icon “ ” means: Live audio of the 4th audio channel / Icon “ ” means: Playback audio of the 4th audio channel
Icon “ ” means: The audio channel is not selected.
Note: If you want to make a video backup with audio, please connect audio cameras to the channels which
support the audio function
For 16CH & 8CH DVR, the audio channels are CH1, CH2, CH3 and CH4.
15) SEQ (Sequence)
Press “SEQ” button or “SHIFT + SEQ” buttons the DVR will enter full screen sequence mode. Press again to exit the
sequence mode.
16)
16CH: Press this button to show the 4 / 9 / 16 channel display modes.
8CH: Press this button to show the 4 / 9 channel display modes.
17) PTZ
Press “SEQ + ” buttons or “◄◄ + ►►” buttons at the same time to enter / exit the PTZ control mode.
In the PTZ control mode (Indicated by the icon “ ”):
Zoom in: Press "" button ; Zoom out: Press "" button
Adjust PTZ angle: Press "UP”, “DOWN”, “LEFT” or “RIGHT" buttons
18) (PAUSE/UP/ +), ◄◄ (REW/LEFT), ►► (FF/RIGHT), ▓ (STOP/DOWN/ -)
Press one of these direction buttons to move the cursor up/down/left/right.
Under the DVR menu mode, these direction buttons can use for the following operation:
▲ ▼: Make the selection / Change the settings.
◄ ►: Go to the upper layer or sub-layer / Make the selection.
Under the playback mode, press these buttons to pause / stop / fast rewind / fast forward the playback file.
Page 9
CONNECTIONS AND SETUP
-5-
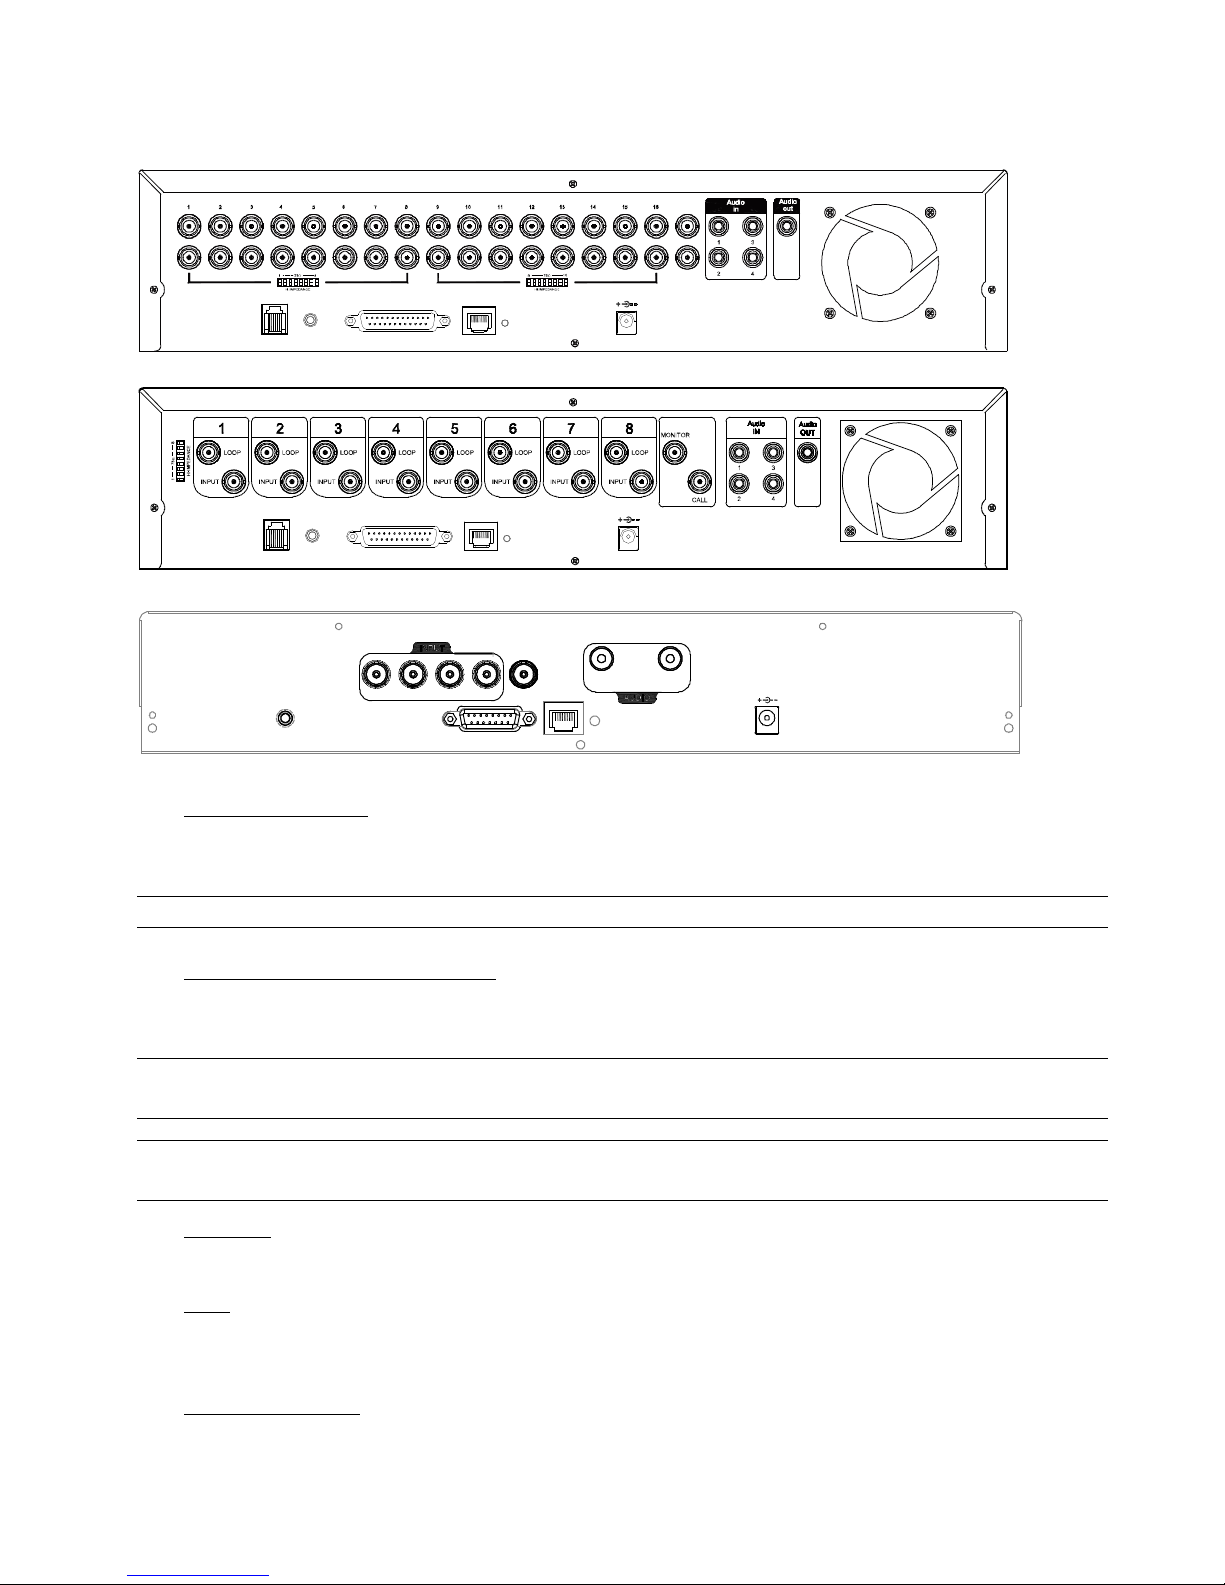
2.2 Rear Panel
16CH
DC19V
ACT.
LINK
LAN
EXTERNALI/ O
IR
RS485
LOOP
INPUT
CALL
MONITOR
8CH
DC19V
ACT.
LINK
LAN
EXTERNALI/O
IR
RS485
4CH
IR
EXT ERNAL I/O
LAN
ACT .
LIN K
DC 19V
MON ITO RMO NIT OR
OUTIN
1 2 3 4
1) 75Ω / HI-IMPEDANCE
When using LOOP function, set the impedance switch at your DVR rear panel to HI-IMPEDANCE to decrease
interferences. Otherwise, switch to 75Ω.
Note: The default setting is 75Ω.
2) LOOP / INPUT (1 ~ 16CH or 1 ~ 8CH)
LOOP: Video output connector.
INPUT: Connect to video sources, such as cameras.
Note: The DVR will automatically detect the video system of the camera, please make sure that the cameras are properly
connected to the DVR and power-supplied before the DVR is turned on.
Note: If you want to make a video backup with audio, please connect audio cameras to the channels which support the audio
function. For 16CH & 8CH DVR, the audio channels are CH1, CH2, CH3 and CH4.
3) MONITOR
Connect to a CRT monitor for video output.
4) CALL
Connect to CALL monitor to show the channel display one by one.
When any alarm is triggered, CALL monitor will show the image of the triggered channel for a period of time.
5) Audio IN (1 / 2 / 3 / 4)
Connect to audio sources, such as cameras equipped with the audio function.
When users start recording, the audio input will also be recorded with corresponding video channel.
Page 10

CONNECTIONS AND SETUP
-6-
The audio source connected to the “Audio 1” will be recorded with the video of the “CH1”.
The audio source connected to the “Audio 2” will be recorded with the video of the “CH2”.
The audio source connected to the “Audio 3” will be recorded with the video of the “CH3”.
The audio source connected to the “Audio 4” will be recorded with the video of the “CH4”.
Note: If you want to make a video backup with audio, please connect audio cameras to the channels which
support the audio function
For 16CH & 8CH DVR, the audio channels are CH1, CH2, CH3 and CH4.
For 4CH DVR, the audio channel is CH1.
6) Audio OUT
Connect to a monitor or speaker with 1 mono audio output.
7) IR
Connect the IR receiver extension line for remote control.
8) EXTERNAL I/O
Insert the supplied 25PIN DSUB to this port for connecting external devices (external alarm, etc).
For detailed I/O port PIN configuration, please refer to “APPENDIX 1 PIN CONFIGURATION”.
9) LAN
Connect to Internet by LAN cable.
10) LINK ACT.
When your DVR is connected to the Internet, this LED will be on.
11) DC 19V
Connect to the supplied adapter.
12) Fan
Page 11
CONNECTIONS AND SETUP
-7-
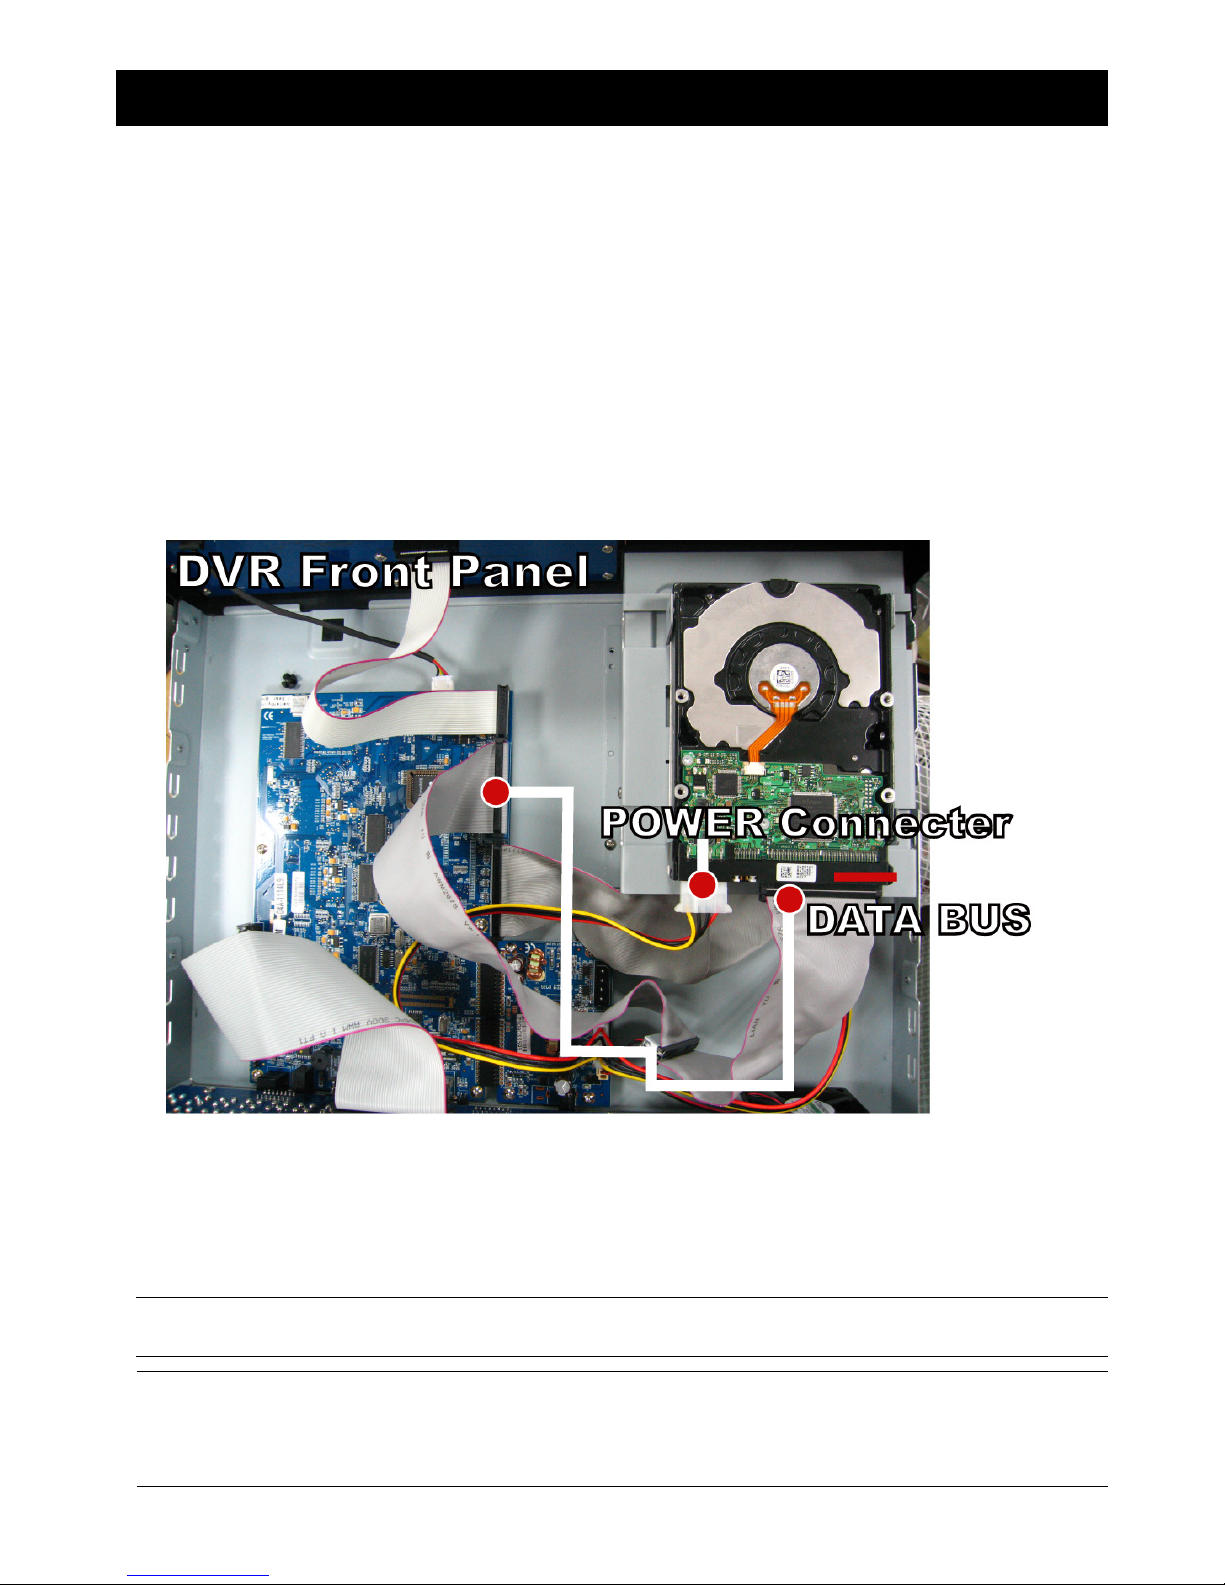
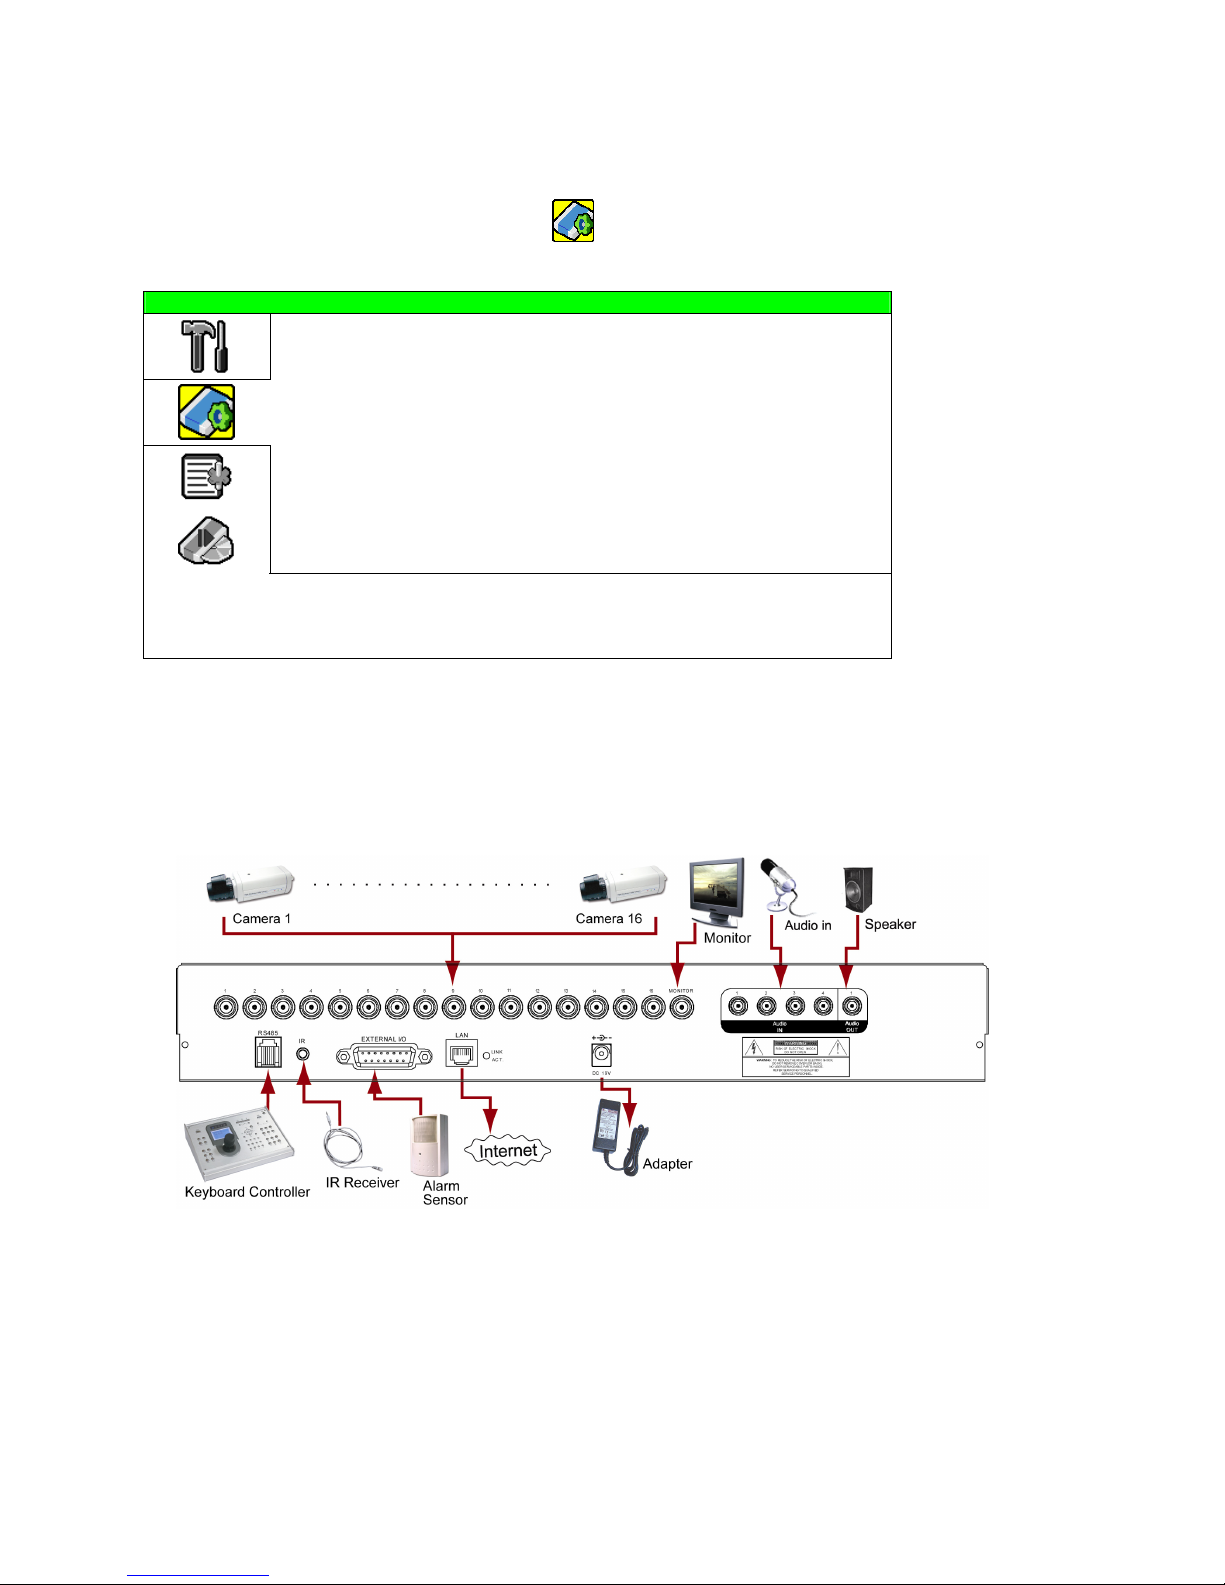
3. CONNECTIONS AND SETUP (Take 16CH DVR as an example)
3.1 HDD Installation
The HDDs must be installed before the DVR is turned on.
Step 1: Loose the screws on the upper cover and open the upper cover of the DVR.
Step 2: Screw out the HDD bracket.
Step 3: Get a suitable brand HDD and set the HDD mode (Master).
Step 4: Align the screw holes of the bracket with the HDD’s screw holes. Screw the HDD onto the HDD bracket.
Step 5: Screw the HDD bracket back to the DVR base.
Step 6: Connect the HDD to the power connector and IDE BUS (make sure to align the HDD precisely for pin
connection).
Step 7: Close the upper cover of the DVR, and fasten all the screws you loosened in Step 1.
3.2 Camera Connection
The cameras must be connected and power-supplied before the DVR is turned on. Connect the camera with the
indicated power supply. And then connect the camera video output to the DVR video input port with a coaxial cable or
RCA lines with BNC connectors (The DVR will automatically detect the video system of the camera).
Note: For detailed DVR video input / output ports, please refer to “2.2 Rear Panel” at page 5.
For detailed camera operation, please refer to its own manual.
Note: If you want to make a video backup with audio, please connect audio cameras to the channels which
support the audio function
For 16CH & 8CH DVR, the audio channels are CH1, CH2, CH3 and CH4.
For 4CH DVR, the audio channel is CH1.
Page 12

CONNECTIONS AND SETUP
-8-
3.3 Power Setup
This device should be operated only with the type of power source indicated on the manufacturer’s label. Connect the
indicated AC power cord to the power adapter, and plug into an electrical outlet. Power LED “ ” will be on as blue. It
takes approximately 10 to 15 seconds to boot the system.
3.4 Date and Time Setting
Before operating your DVR, please set the date and time on your DVR first.
Press MENU button and enter the password to go to the quick-start menu list. The default admin password is 0000.
Move the cursor to the icon and you can set the date / time / daylight saving in this menu list.
QUICK START
CHANNEL TITLE ON
EVENT STATUS ON
IMAGE SIZE CIF
QUALITY BEST
IMAGE PER SECOND 120
RECORD TIMER OFF
DETECTION TIMER OFF
DATE 2007 / AUG / 08 21 : 30 : 00
FORMAT Y / M / D
DAYLIGHT SAVING OFF
ADVANCE SELECT BACK NEXT ENTER
Note: If the time and date settings return to their default values after the DVR is rebooted, please charge
the DVR for at least 24-48 straight hours. Please contact your local retailer if the situation still occurs.
Page 13
CONNECTIONS AND SETUP
-9-
3.5 Password Setting
Press MENU button and enter the password to go to the quick-start menu list. And then move the cursor to
“ADVANCE” to enter the advanced setting menu.
In the “ADVANCE” menu, move the cursor to “ SYSTEM INFO ”. Select “PASSWORD” and press ENTER
button to enter the submenu to set the password (four digits). The default admin password is 0000.
SYSTEM INFO
SERIAL TYPE RS485
BAUD RATE 2400
HOST ID 0
PASSWORD XXXX
RESET DEFAULT RESET
CLEAR HDD HDD-MASTER-1
UPGRADE START
AUTO KEYLOCK (SEC) 30
LANGUAGE ENGLISH
VIDEO FORMAT NTSC
VERSION 1049-1007-1011-1001-L6-6C1B
PLEASE CONSULT YOUR INSTALLER FOR ADVANCE SETTINGS
SELECT BACK NEXT ENTER
3.6 System Diagram
After you finish all the connections and setup, a surveillance system is established and you can experience the
marvelous and useful functions of this DVR. The diagram below illustrates all the available connections of this DVR for
you to picture your surveillance system.
Page 14
BASIC OPERATION
-10-
4. BASIC OPERATION (Take 16CH DVR as an example)
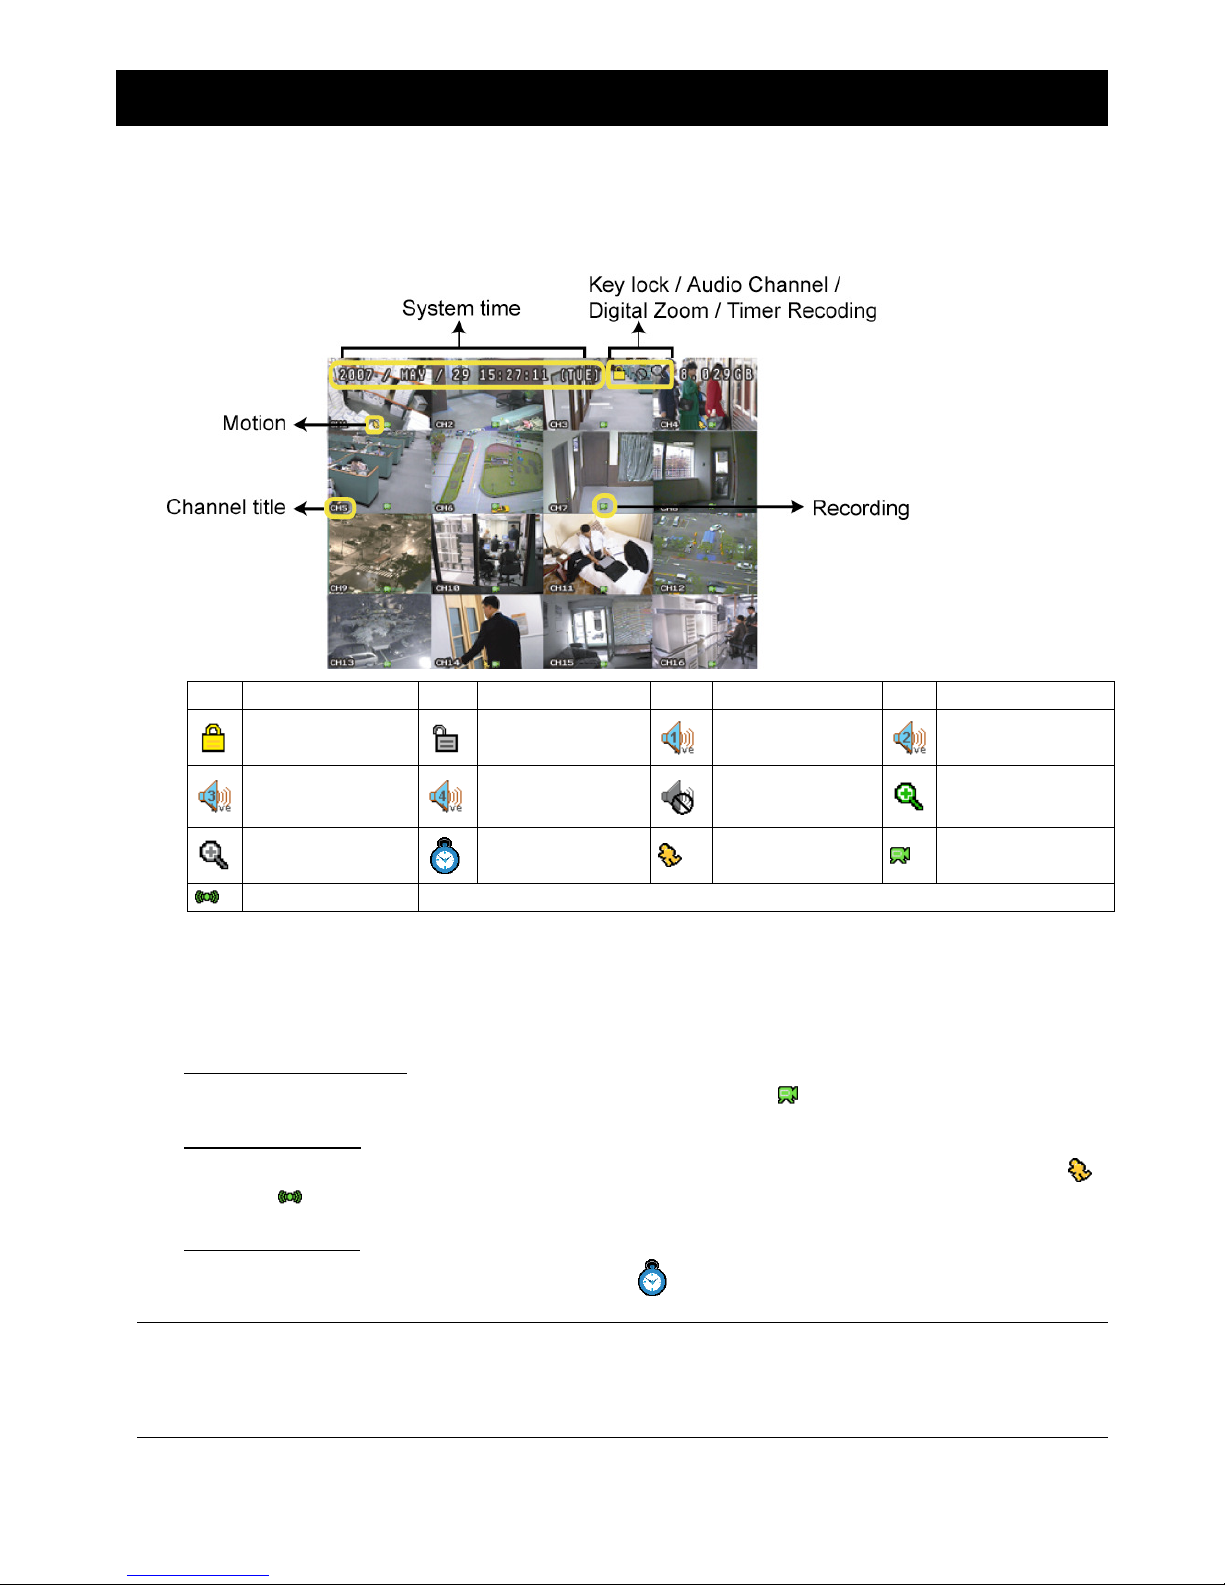
4.1 Live Page
In this live page of the DVR, you can see the live viewing of 1- / 4- / 9- / 16-cut screen.
Icon Function Icon Function Icon Function Icon Function
Key lock
Key unlock
1st live audio
channel
2nd live audio
channel
3rd live audio
channel
4th live audio
channel
Audio channel
unselected
Digital zoom mode
Digital zoom
unselected
Timer recording
Motion
Recording
Alarm
4.2 Recording
When the recording and the pre-alarm function are activated, this device will overwrite 8GB data from the oldest for
continuous recording without notice.
1) Continuous Recording Icon
When the DVR is properly connected with camera, you can see the icon “ ” (recording) on the screen.
2) Event Recording Icon
When the motion / alarm detection is activated, once motion or external alarm happens, you will see the icon “ ”
(motion) or “ ” (external alarm) on the screen.
3) Timer Recording Icon
When the timer record is activated, you will see the icon “ ” (timer) on the screen.
Note: The audio source connected to the “Audio 1” will be recorded with the video of the “CH1”.
The audio source connected to the “Audio 2” will be recorded with the video of the “CH2”.
The audio source connected to the “Audio 3” will be recorded with the video of the “CH3”.
The audio source connected to the “Audio 4” will be recorded with the video of the “CH4”.
Page 15
BASIC OPERATION
-11-
4.3 Playback
Press the “PLAY” button on the DVR control panel, and the device will playback the latest recorded video.
Note: There must be at least 8192 images of recorded data for playback to work properly. If not, the device
will stop playback. For example, if the IPS is set to 30, the recording time should be at least 273
seconds (8192 images / 30 IPS) for the playback to work properly.
1) Fast Forward (►►) / Fast Rewind (◄◄)
You can increase the speed for fast forward and rewind on this device. In the playback mode:
Press “►►“ once to get 4X speed forward and press twice to get 8X speed, etc. And the maximum speed is 32X.
Press “◄◄“ once to get 4X speed rewind and press twice to get 8X speed, etc. And the maximum speed is 32X.
Note: During playback, the image size of the recording (Frame, Field or CIF) will be shown on the screen.
2) Pause ( ) / Image Jog
Press “PAUSE” or “ ” button to pause the playback.
In the Pause mode:
Press “►►” button once to get one frame forward.
Press “◄◄” button once to get one frame rewind.
3) Stop /
Press “STOP” or “” button under playback mode, the screen of this device will return to live monitoring mode.
4) Slow Playback
Press “SLOW” button to get 1/4X speed playback and press twice to get 1/8X speed playback.
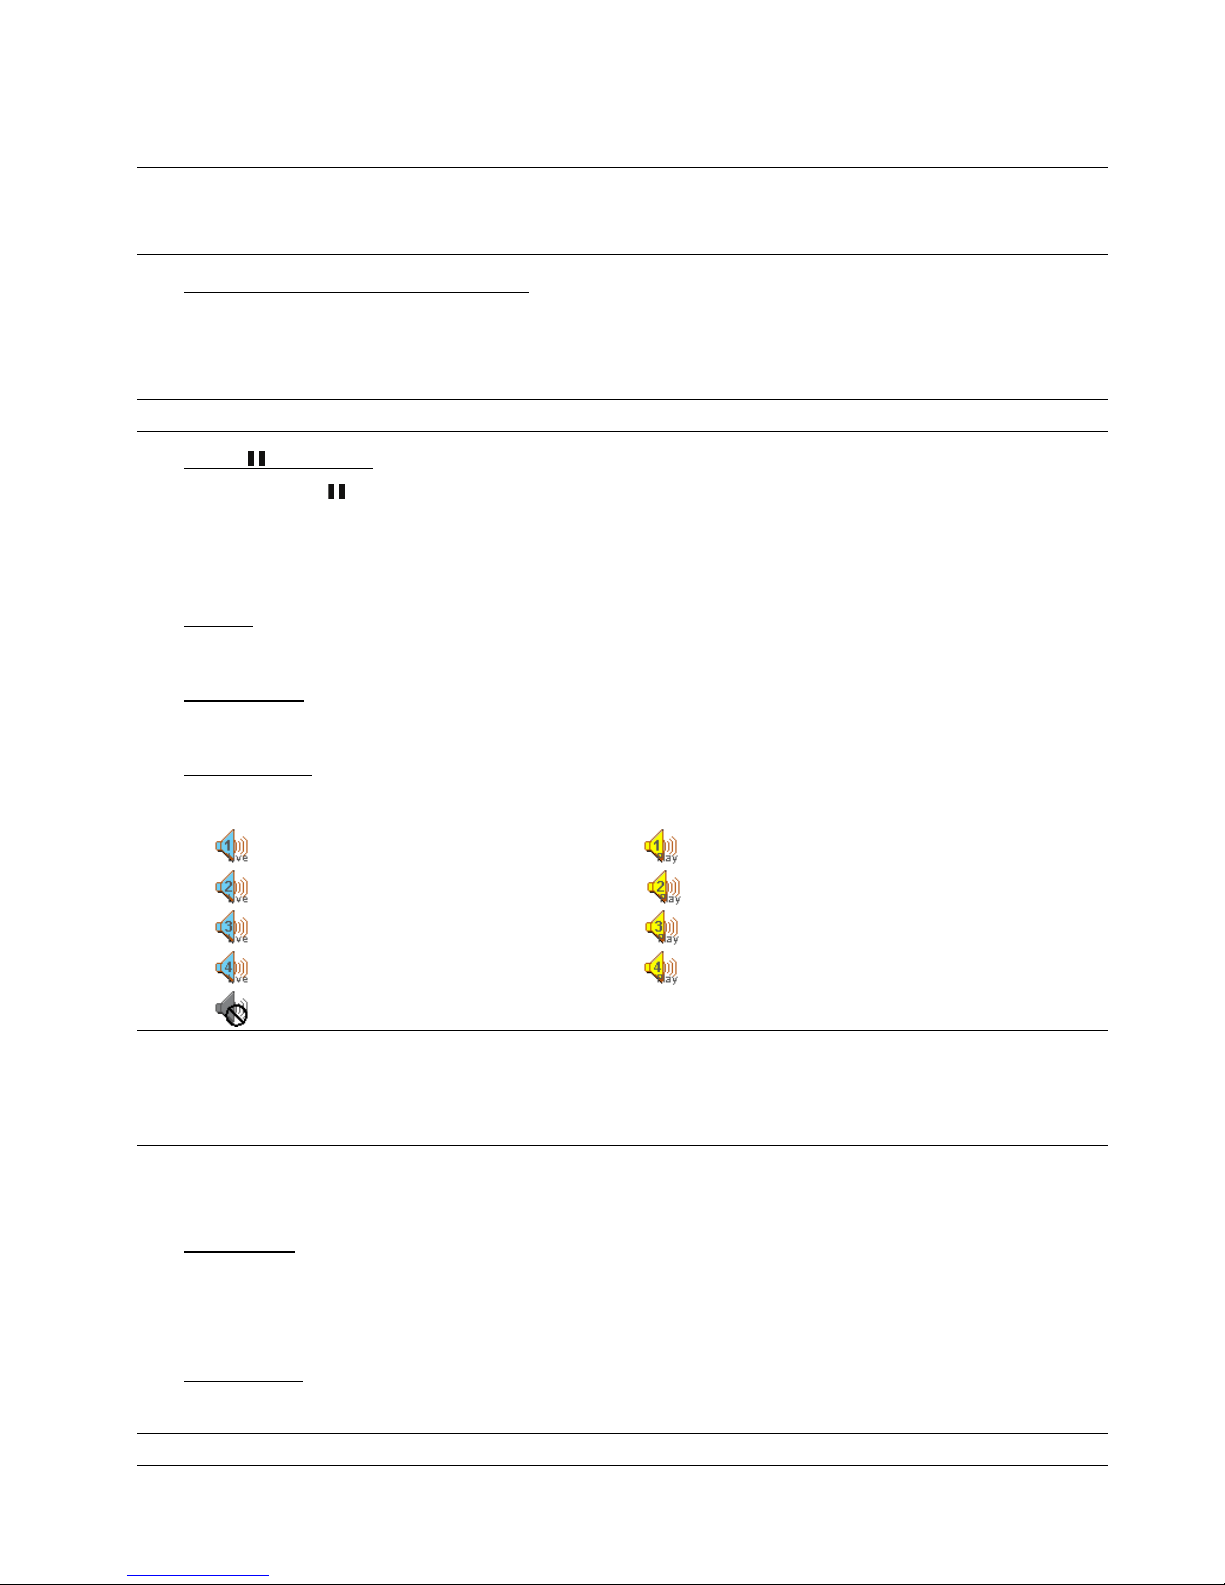
5) Audio Playback
Press “SLOW + ZOOM” buttons or “SHIFT + AUDIO” buttons to select the live or playback sound of the audio
channels.
Icon “ ” means: Live audio of the 1st audio channel / Icon “ ” means: Playback audio of the 1st audio channel
Icon “ ” means: Live audio of the 2nd audio channel / Icon “ ” means: Playback audio of the 2nd audio channel
Icon “ ” means: Live audio of the 3rd audio channel / Icon “ ” means: Playback audio of the 3rd audio channel
Icon “ ” means: Live audio of the 4th audio channel / Icon “ ” means: Playback audio of the 4th audio channel
Icon “ ” means: The audio channel is not selected.
Note: If you want to make a video backup with audio, please connect audio cameras to the channels which
support the audio function
For 16CH & 8CH DVR, the audio channels are CH1, CH2, CH3 and CH4.
For 4CH DVR, the audio channel is CH1.
4.4 Key Lock and Unlock
1) Key Lock On:
Press “MENU + ENTER” buttons on the DVR control panel to lock keys.
Or set the time-out after which the key lock function is activated (Never / 10 SEC / 30 SEC / 60 SEC). Please refer to
section “7.2 System Info” at page 26.
2) Key Lock Off:
Enter the DVR password to exit “Key Lock” mode.
Note: For the password setting, please refer to the section “at page 8.”
”
Page 16
BASIC OPERATION
-12-
4.5 Upgrade
Firmware / Multilanguage OSD Upgrade
1) Use USB to upgrade firmware or OSD:
Step 1. Format the USB memory device as FAT32 format first.
Step 2. Get the upgrade files from your distributor and save the upgrade files in your USB flash device (do not change
the file name).
Step 3. In the “ ” (SYSTEM INFO) menu, move the cursor to “UPGRADE”, and press ENTER button.
Step 4. Select “YES”, and press ENTER button again to confirm upgrade.
2) Use AP software to remotely upgrade firmware or OSD:
Step 1. Save the upgrade files at your PC (do not change the file name) and then login to the AP software.
Step 2. Press “ ” (Miscellaneous Control) button to show the miscellaneous control panel. In the miscellaneous
control panel, press “ ” (Tools) button on the miscellaneous control panel to enter the AP upgrade window.
Step 3. Enter the user name, password, IP address and port number of the DVR.
Step 4. Press “Firmware” or “Language” tab as needed, and press “Add” to select the firmware or OSD files to
upgrade.
Step 5. Press “Update Firmware” or “Update Language” button to start the upgrade.
Note: For remote upgrade details, please see “Tools” at page 47.
4.6 Search
1) Search by List
Press “LIST” button on the DVR control panel to show the list for all types of the recorded files. Choose the list you
want to view and press ENTER button to start playback.
ALARM List the information of the alarm-trigger-recorded files.
MANUAL List the information of the manual-recorded files. The DVR will save one recorded file once
any recording setting is changed
MOTION List the information of the motion-trigger-recorded files.
SYSTEM List the information of the system-recorded files. The DVR system will save one recorded file
every one hour.
TIMER List the information of the timer-recorded files.
2) Search by Time
In the “ ” (EVENT LOG) menu list, move the cursor to “QUICK SEARCH”, and press ENTER button to enter the
quick search menu. You can search any specific events by time (Year / Month / Day / Hour / Min) and directly play the
file you find.
3) Search the Record Event by Log on the AP Software
Press “ ” (Miscellaneous Control) button to show the miscellaneous control panel. In the miscellaneous control
panel, press “ ” (Log) button to enter the “Log View” page. In this log view page, you can see the list of three
different types of recording (User / Motion / Alarm) and press “Play” button to directly playback the file.
Page 17

MAIN MENU
-13-
5. MAIN MENU
5.1 Menu Configuration
CHANNEL TITLE
EVENT STATUS
STATUS
IMAGE SIZE
QUALITY
RECORD
IMAGE PER SECOND
RECORD TIMER
TIMER
DETECTION TIMER
DATE
FORMAT
QUICK START MENU
DATE
DAYLIGHT SAVING
CAMERA
DETECTION
ALERT
NETWORK
DISPLAY
ADVANCE CONFIG
RECORD
SERIAL TYPE
BAUD RATE
HOST ID
PASSWORD
RESET DEFAULT
CLEAR HDD
UPGRADE
AUTO KEYLOCK (SEC)
LANGUAGE
VIDEO FORMAT
SYSTEM CONFIG
VERSION
QUICK SEARCH
HDD INFO
EVENT LOG
EVENT LOG
ADVANCED MENU
BACKUP USB BACKUP
5.2 Menu Operation Instruction
ITEM FUNCTION
QUICK START MENU: View & change the settings of the quick start menu items
MENU Enter / exit the quick start menu
▲ ▼ Make the selection / Change the setting
◄ ► Go to the upper layer or sub-layer / Make the selection
ENTER Confirm the password entering
ADVANCED MENU:
In the quick start menu, move the cursor to the icon “ ” and press “▼”
button to
enter the advanced setting menu.
ENTER Go to the sub-layer of the advanced menu
MENU
Under the sub-layer of the advanced setting menu, use this button to confirm the
settings and go back to the upper layer.
NEXT Move the cursor to this item and press ENTER button to go the next page.
BACK Move the cursor to this item and press ENTER button to go the previous page.
Other operations in the advanced menu are the same as in the quick start menu.
Page 18
QUICK START MENU
-14-
6. QUICK START MENU
Press MENU button and enter the password to go to the quick-start menu list. The default admin password is 0000.
Users can change the password later. Please refer to the section “7.2 System Info” at page 26.
6.1 Status
In this menu list, you can check and change some display settings.
Move the cursor to icon and you will see the following screen:
QUICK START
CHANNEL TITLE ON
EVENT STATUS ON
IMAGE SIZE CIF
QUALITY BEST
IMAGE PER SECOND 120
RECORD TIMER OFF
DETECTION TIMER OFF
DATE 2007 / AUG / 08 21 : 30 : 00
FORMAT Y / M / D
DAYLIGHT SAVING OFF
ADVANCE SELECT BACK NEXT ENTER
The submenu items are described below:
1) CHANNEL TITLE
Select to display the channel title or not (ON / OFF).
2) EVENT STATUS
Select to display the symbols of the event or not (ON / OFF).
Page 19
QUICK START MENU
-15-
6.2 Manual Record
In this menu list, you can set record settings.
Move the cursor to icon and you will see the following screen:
QUICK START
CHANNEL TITLE ON
EVENT STATUS ON
IMAGE SIZE CIF
QUALITY BEST
IMAGE PER SECOND 120
RECORD TIMER OFF
DETECTION TIMER OFF
DATE 2007 / AUG / 08 21 : 30 : 00
FORMAT Y / M / D
DAYLIGHT SAVING OFF
ADVANCE SELECT BACK NEXT ENTER
The submenu items are described below:
1) IMAGE SIZE
Select one of the image sizes: FRAME, Field or CIF.
2) QUALITY
Select one of the 4 quality options: BEST, HIGH, NORMAL and BASIC.
3) IMAGE PER SECOND
Select the images per second for MANUAL RECORD. The options are as following:
NTSC IPS PAL IPS
FRAME 3, 7, 15, 30 FRAME 3, 6, 12, 25
FIELD 7, 15, 30, 60 FIELD 6, 12, 25, 50
CIF 15, 30, 60, 120
CIF 12, 25, 50, 100
6.3 Timer
In this menu list, you can schedule different sets of time for recording and detection function.
Page 20

QUICK START MENU
-16-
Move the cursor to icon and you will see the following screen:
QUICK START
CHANNEL TITLE ON
EVENT STATUS ON
IMAGE SIZE CIF
QUALITY BEST
IMAGE PER SECOND 120
RECORD TIMER OFF
DETECTION TIMER OFF
DATE 2007 / AUG / 08 21 : 30 : 00
FORMAT Y / M / D
DAYLIGHT SAVING OFF
ADVANCE SELECT BACK NEXT ENTER
The submenu items are described below:
1) RECORD TIMER
Use the ▲ ▼ button to change the setting (ON / OFF). When it’s set to “ON”, press enter button to go to its submenu
for further settings.
RECORD TIMER
0 2 4 6 8 10 12 14 16 18 20 22 24
SUN
MON
TUE
WED
THU
FRI
SAT
PLEASE CONSULT YOUR INSTALLER FOR ADVANCE SETTINGS
MOVE SELECT
X axis: 0 ~ 24 hours. Each time interval within a square is two hours (divided into four 30-minutes).
Y axis: Monday ~ Sunday.
Operation: Move the cursor to the start time point, and press enter to set the start time point (marked in red color).
Then, press ▲ ▼◄ ► button to set the timer-recording schedule. After setup, press enter button again to create an
ending time point (marked in yellow color) and press MENU button to exit.
2) DETECTION TIMER
Use the
▲ ▼ button to change the setting (ON / OFF). When it’s set to “ON”, press enter button to go to its submenu
for further settings.
Page 21
QUICK START MENU
-17-
DETECTION TIMER
0 2 4 6 8 10 12 14 16 18 20 22 24
SUN
MON
TUE
WED
THU
FRI
SAT
PLEASE CONSULT YOUR INSTALLER FOR ADVANCE SETTINGS
MOVE SELECT
X axis: 0 ~ 24 hours. Each time interval within a square is two hours (divided into four 30-minutes).
Y axis: Monday ~ Sunday.
Operation: Move the cursor to the start time point, and press enter to set the start time point (marked in red color).
Then, press ▲ ▼◄ ► button to set the timer-recording schedule. After setup, press enter button again to create an
ending time point (marked in yellow color) and press MENU button to exit.
Note: This function here is only for detection timer setup and activation. For motion detection function
setup and activation, please refer to section “7.1.2 Detection” at page “20”
6.4 Date
In this menu list, you can set up the system date and time for this device.
Press MENU button to enter the main menu list. Move the cursor to icon and you will see the following
screen:
QUICK START
CHANNEL TITLE ON
EVENT STATUS ON
ON
IMAGE SIZE CIF
QUALITY BEST
IMAGE PER SECOND 120
RECORD TIMER OFF
DETECTION TIMER OFF
DATE 2007 / AUG / 08 21 : 30 : 00
FORMAT Y / M / D
DAYLIGHT SAVING OFF
ADVANCE SELECT BACK NEXT ENTER
Page 22

QUICK START MENU
-18-
The submenu items are described below:
1) DATE
Set the current date and time. The default order is “YEAR – MONTH – DATE HOUR : MIN : SEC”.
2) FORMAT
Select one date format from the following 3 options: Y-M-D / M-D-Y / D-M-Y.
3) DAYLIGHT SAVING
Use the ▲ ▼ button to specify whether to use daylight-saving time (ON / OFF). When it’s set to “ON”, press enter
button to go to its submenu for further settings.
DAYLIGHT SAVING
START TIME 4TH – SUN – MAR 24 : 00 : 00
END TIME 4TH – SUN – OCT 24 : 00 : 00
ADJUST 01 : 00
PLEASE CONSULT YOUR INSTALLER FOR ADVANCE SETTINGS
SELECT BACK NEXT ENTER
Set the start time and end time, and adjust the daylight saving time in hour. The above example means during the
daylight-saving time period (starting from the 4th Sunday of March and ending on the 4th Sunday of October), the system
time will plus one hour. After setup, press enter button again to create an ending time point and press (menu) button
to exit.
Note: If the time and date settings return to their default values after the DVR is rebooted, please charge
the DVR for at least 24-48 straight hours. Please contact your local retailer if the situation still occurs.
Page 23

ADVANCED MENU
~19~
7. ADVANCED MENU (Take 16CH DVR as an example)
Press MENU and enter the password to go to the quick-start menu list. And then move the cursor to “ADVANCE” to
enter the advanced setting menu. The default admin password is 0000. Users can change the password later. Please
refer to the section “7.2 System Info” at page 26.
It is recommended to consult your installer to set up this advanced menu.
7.1 Advanced Configuration
In this menu list, you can check or change CAMERA / DETECTION / ALERT / NETWORK / DISPLAY settings.
Move the cursor to “ ” (ADVANCE CONFIG) icon and you will see the following screen:
ADVANCE CONFIG
CAMERA
DETECTION
ALERT
NETWORK
DISPLAY
RECORD
PLEASE CONSULT YOUR INSTALLER FOR ADVANCE SETTINGS
SELECT BACK NEXT ENTER
7.1.1 Camera
In this submenu, you can make advanced camera settings, such as changing the camera title, or adjust the
brightness. Move the cursor to “CAMERA”, and press ENTER button. You will see the following screen:
CAMERA
TITLE BRIG CONT SATU HUE COV. REC
CH1 128 098 128 128 OFF ON
CH2 128 098 128 128 OFF ON
CH3 128 098 128 128 OFF ON
CH4 128 098 128 128 OFF ON
CH5 128 098 128 128 OFF ON
CH6 128 098 128 128 OFF ON
CH7 128 098 128 128 OFF ON
CH8 128 098 128 128 OFF ON
CH9 128 098 128 128 OFF ON
CH10 128 098 128 128 OFF ON
CH11 128 098 128 128 OFF ON
CH12 128 098 128 128 OFF ON
NEXT
PLEASE CONSULT YOUR INSTALLER FOR ADVANCE SETTINGS
SELECT BACK NEXT ENTER
The submenu items are described below. While you changing the camera setting, you can preview the changing on
the screen.
Page 24

ADVANCED MENU
~20~
1) TITLE
You can change the default camera naming here. The default title is the channel number.
Move the cursor to the camera title you want to change, and press ENTER button on the control panel of the DVR to
access the character selection screen. Assign a new name to the camera up to six characters (letters or symbols or
numbers).
2) BRIG / CONT / SATU / HUE
You can adjust the brightness/contrast/saturation/hue of each channel here. The default value of CONT is 098, and
others are 128. The value is adjustable from 0 to 255.
3) COV
Select if you want to mask the selected channel under recording (ON / OFF). When this function is activated, the
wording “COV.” Will be shown on the channel screen.
4) REC
Select if you want to enable recording for the selected channel (ON / OFF). When this function is activated, the
symbol “ ” will be shown on the channel screen.
7.1.2 Detection
In this submenu, you can set up detection-related functions.
Move the cursor to “DETECTION”, and press ENTER button. You will see the following screen:
DETECTION
TITLE DET AREA LS SS TS RE ALARM
CH1 OFF SETUP 07 03 02 10 OFF
CH2 OFF SETUP 07 03 02 10 OFF
CH3 OFF SETUP 07 03 02 10 OFF
CH4 OFF SETUP 07 03 02 10 OFF
CH5 OFF SETUP 07 03 02 10 OFF
CH6 OFF SETUP 07 03 02 10 OFF
CH7 OFF SETUP 07 03 02 10 OFF
CH8 OFF SETUP 07 03 02 10 OFF
CH9 OFF SETUP 07 03 02 10 OFF
CH10 OFF SETUP 07 03 02 10 OFF
NEXT
PLEASE CONSULT YOUR INSTALLER FOR ADVANCE SETTINGS
SELECT BACK NEXT ENTER
The submenu items are described below:
1) TITLE
Show the camera title of each channel set in “CAMERA”.
2) DET
Select if you want to activate the motion detection function for the selected channel (ON/OFF).
3) AREA
There are 16 × 12 grids per camera for all channels. Pink blocks represent the area that is not being detected while
the transparent blocks are the area under detection.
Press ENTER button on the control panel of the DVR to set the detection area. You will see similar screens as the
following:
Page 25
ADVANCED MENU
~21~
Transparent blocks are the area
under detection.
Press
ENTER button to confirm the
start area.
Press ◄ / ► button to choose the
width of the detection area.
Press ▲ / ▼ button to choose the
height of the area.
You can also set up multi-detection
area.
When any movement is detected,
you will see the grids are flashing.
4) LS (Level of Sensitivity)
“LS” is to set the sensitivity of comparing two different images. The smaller the value is, the higher sensitivity for
motion detection. The highest sensitivity setting is 00, and the lowest sensitivity setting is 15. The default value is 07.
5) SS (Spatial Sensitivity)
“SS” is to set the sensitivity for detecting the size of one object (the number of the grids) on the screen. The smaller
the value is, the higher sensitivity for motion detection.
The highest sensitivity setting is 00, and the lowest sensitivity setting is 15. The default setting is 03.
Note: The default setting of SS is 03, which means once an object is detected more than 3 grids, the
system will get triggered. So the value of SS must be less than the number of grids that you set up
for the motion detection area.
6) TS (Time of Sensitivity)
“TS” is to set the sensitivity regarding how long one object stays in the detection area and triggers the recording. The
smaller the value is, the higher sensitivity for motion detection.
The highest sensitivity setting is 00, and the lowest sensitivity setting is 15. The default setting is 02.
7) RE (Reference)
“RE” is to set a reference for detection. The default value is 10, which means the DVR will compare 10 continuous
images at one time according to the sensitivity of LS, SS, TS simultaneously.
The bigger the value is, the higher sensitivity for motion detection. The highest sensitivity is 61.
8) ALARM
Select N.C. / N.O. for the alarm polarity. The default alarm value is OFF.
7.1.3 Alert
In this menu list, you can set alerts for different kinds of situations, such as when HDD is full.
Page 26

ADVANCED MENU
~22~
Move the cursor to “ALERT”, and press ENTER button. You will see the following screen:
ALERT
EXT. ALERT ON
INT. BUZZER ON
KEY BUZZER ON
VLOSS BUZZER ON
MOTION BUZZER ON
ALARM BUZZER ON
ALARM DURATION (SEC) 05
PLEASE CONSULT YOUR INSTALLER FOR ADVANCE SETTINGS
SELECT BACK NEXT ENTER
The submenu items are described below:
1) EXT. ALERT
Select to enable or disable the sound when any external alarm is triggered (ON / OFF).
2) INT. BUZZER
Select to enable or disable the sound (ON / OFF) for all the internal buzzers: KEY BUZZER, VLOSS BUZZER,
MOTION BUZZER, and ALARM BUZZER.
Note: When this item is set to OFF, item 3) to item 6) will be disabled even though they are set to ON.
3) KEY BUZZER
Select to enable or disable the sound when pressing the buttons on the front panel (ON / OFF).
4) VLOSS BUZZER
Select to enable or disable the sound when video loss happened (ON / OFF).
5) MOTION BUZZER
Select to enable or disable the sound when any motion alarm is triggered (ON / OFF).
6) ALARM BUZZER
Select to enable or disable the sound when any internal alarm is triggered (ON / OFF).
7) ALARM DURATION (SEC)
Press “ENTER” or “” / “” button to set the duration time of alarm recording in second (5 / 10 / 20 / 40).
7.1.4 Network
In this menu list, you can set up the network.
Move the cursor to “NETWORK”, and press ENTER button to enter the submenu.
You will see the following screen:
NETWORK
NETWORK TYPE STATIC
IP 192 . 168 . 001 . 012
GATEWAY 192 . 168 . 001 . 254
NETMASK 255 . 255 . 252 . 000
PRIMARY DNS 168 . 095 . 001 . 001
SECONDARY DNS 139 . 175 . 055 . 244
PORT 0080
PLEASE CONSULT YOUR INSTALLER FOR ADVANCE SETTINGS
SELECT BACK NEXT ENTER
Page 27

ADVANCED MENU
~23~
The submenu items are described below:
STATIC
1) NETWORK TYPE
Select the network type as STATIC and set all the information needed in the DVR.
2) NETWORK INFORMATION (IP / GATEWAY / NETMASK)
Key in all the network information obtained from your ISP (Internet Service Provider).
3) DNS (PRIMARY DNS / SECONDARY DNS)
Key in the IP address of the domain name server obtained from your ISP (Internet Service Provider).
4) PORT
The valid number ranges from 1 to 9999. The default value is 80. Typically, the TCP port used by HTTP is 80.
However in some cases, it is better to change this port number for added flexibility or security.
See the example below:
STATIC
NETWORK TYPE STATIC
IP 192 . 168 . 001 . 012
GATEWAY 192 . 168 . 001 . 254
NETMASK 255 . 255 . 252 . 000
PRIMARY DNS 168 . 095 . 001 . 001
SECONDARY DNS 139 . 175 . 055 . 244
PORT 0080
PLEASE CONSULT YOUR INSTALLER FOR ADVANCE SETTINGS
SELECT BACK NEXT ENTER
PPPOE
1) NETWORK TYPE
Select the network type as PPPOE.
2) USER NAME / PASSWORD
Set the “username” and “password” subscribed from your ISP supplier
3) DNS (PRIMARY DNS / SECONDARY DNS)
Key in the IP address of the domain name server obtained from your ISP (Internet Service Provider).
4) PORT
The valid number ranges from 1 to 9999. The default value is 80. Typically, the TCP port used by HTTP is 80.
However in some cases, it is better to change this port number for added flexibility or security.
See the example below:
PPPOE
NETWORK TYPE PPPOE
USER NAME ac123456
PASSWORD tech123456
IP 000 . 000 . 000 . 000
GATEWAY 000 . 000 . 000 . 000
NETMASK 000 . 000 . 000 . 000
PRIMARY DNS 168 . 095 . 001 . 001
SECONDARY DNS 139 . 175 . 055 . 244
PORT 0080
PLEASE CONSULT YOUR INSTALLER FOR ADVANCE SETTINGS
SELECT BACK NEXT ENTER
Page 28

ADVANCED MENU
~24~
Note: The PPPOE function needs to have one “username” and one “password” subscribed from one ISP
supplier, and a “DDNS account” to correspond the dynamic IP address to a specific “Hostname”.
For detailed PPPOE settings, please refer to “Network” at page 41. For detailed DDNS settings, please
refer to “DDNS” at page 42.
DHCP
1) NETWORK TYPE
Select the network type as DHCP.
2) DNS (PRIMARY DNS / SECONDARY DNS)
Key in the IP address of the domain name server obtained from your ISP (Internet Service Provider).
3) PORT
The valid number ranges from 1 to 9999. The default value is 80. Typically, the TCP port used by HTTP is 80.
However in some cases, it is better to change this port number for added flexibility or security.
See the example below:
DHCP
NETWORK TYPE DHCP
IP 000 . 000 . 000 . 000
GATEWAY 000 . 000 . 000 . 000
NETMASK 000 . 000 . 000 . 000
PRIMARY DNS 168 . 095 . 001 . 001
SECONDARY DNS 139 . 175 . 055 . 244
PORT 0080
PLEASE CONSULT YOUR INSTALLER FOR ADVANCE SETTINGS
SELECT BACK NEXT ENTER
Note: This DHCP function needs to be supported by a router or a cable modem network with DHCP services,
and a “DDNS account” to correspond the dynamic IP address to a specific “Hostname”, for this
function to work properly.
For detailed DHCP settings, please refer to “Network” at page 41. For detailed DDNS settings, please
refer to “DDNS” at page 42.
7.1.5 Display
In this menu list, you can set up the settings of display.
Move the cursor to “DISPLAY”, and press ENTER button to enter the submenu. You will see the following screen:
DISPLAY
DE-INTERLACE ON
QUAD DWELL DURATION (SEC) 03
FULL SCREEN DWELL DURATION (SEC) 03
PLEASE CONSULT YOUR INSTALLER FOR ADVANCE SETTINGS
SELECT BACK NEXT ENTER
The submenu items are described below:
1) DE-INTERLACE
Select to enable or disable the de-interlace function (ON / OFF).
Note: If you set the recording image size as “FRAME”, please TURN ON de-interlace function.
If you set the recording image size as “CIF”, please TURN OFF the de-interlace function.
Page 29

ADVANCED MENU
~25~
2) QUAD DWELL DURATION (SEC)
Set the quad dwell duration time (3 / 5 / 10 / 15 seconds).
3) FULL SCREEN DWELL DURATION (SEC)
Set the full screen dwell duration time (3 / 5 / 10 / 15 seconds).
7.1.6 Record
In this menu list, you can set up the record settings.
Move the cursor to “RECORD”, and press ENTER button to enter the submenu. You will see the following screen:
RECORD
MANUAL RECORD ENABLE ON
EVENT RECORD ENABLE ON
TIMER RECORD ENABLE ON
EVENT RECORD IPS 120
TIMER RECORD IPS 120
PRE-ALARM RECORD ON
PLEASE CONSULT YOUR INSTALLER FOR ADVANCE SETTINGS
SELECT BACK NEXT ENTER
The submenu items are described below:
1) MANUAL RECORD ENABLE
Set the manual recording function on / off.
2) EVENT RECORD ENABLE
Set the event recording function on / off.
3) TIMER RECORD ENABLE
Set the timer recording function on / off.
4) EVENT RECORD IPS
Select the images per second for EVENT RECORD (Recording that is triggered by an alarm or a motion).
The options are as following:
NTSC IPS PAL IPS
FRAME 3, 7, 15, 30 FRAME 3, 6, 12, 25
FIELD 7, 15, 30, 60 FIELD 6, 12, 25, 50
CIF 15, 30, 60, 120
CIF 12, 25, 50, 100
5) TIMER RECORD IPS
Select the images per second for TIMER RECORD (Recording that is activated according to the scheduled time).
The options are as following:
NTSC IPS PAL IPS
FRAME 3, 7, 15, 30 FRAME 3, 6, 12, 25
FIELD 7, 15, 30, 60 FIELD 6, 12, 25, 50
CIF 15, 30, 60, 120
CIF 12, 25, 50, 100
6) PRE-ALARM RECORD
Select to enable or disable the pre-alarm function (ON / OFF).
When pre-alarm and event recording functions are both activated, the DVR will record 8MB data before any alarm /
motion is triggered.
Page 30

ADVANCED MENU
~26~
7.2 System Info
In this menu list, you can check or change some system settings.
Move the cursor to “ ” (SYSTEM INFO) icon, you will see a similar screen as the following:
SYSTEM INFO
SERIAL TYPE RS485
BAUD RATE 2400
HOST ID 0
PASSWORD XXXX
RESET DEFAULT RESET
CLEAR HDD HDD-MASTER-1
UPGRADE START
AUTO KEYLOCK (SEC) 30
LANGUAGE ENGLISH
VIDEO FORMAT NTSC
VERSION 1049-1007-1011-1001-L6-6C1B
PLEASE CONSULT YOUR INSTALLER FOR ADVANCE SETTINGS
SELECT BACK NEXT ENTER
The submenu items are described below:
1) SERIAL TYPE
Here shows the serial type of the DVR (RS-485).
2) BAUD RATE
Set the baud rate of the DVR (2400 / 9600 / 19200 / 38400 / 57600).
3) HOST ID
Set the ID of the DVR (0 ~ 254).
4) PASSWORD
Reset the password for accessing the DVR system. You can set the 4-digit password.
5) RESET DEFAULT
Press ENTER button to reset all settings as default, and select “YES” to confirm or “NO” to cancel.
6) CLEAR HDD
Select the HDD you want to clear. Press ENTER button and select “YES” to confirm to clear HDD or “NO” to cancel.
7) UPGRADE (For upgrading firmware / OSD)
Before using the USB flash drive, please use your PC to format the USB flash drive as FAT32 format first. Then, save
the upgrade file in a compatible USB flash drive, and insert it into the USB port at the front panel.
Press ENTER button and select “YES” to confirm upgrade or “NO” to cancel.
Note: For the list of compatible USB flash drives, please refer to “APPENDIX 2 COMPATIBLE USB FLASH
DRIVE BRAND” at page 61.
8) AUTO KEYLOCK
Set the time-out in second after which the key lock function is activated (Never / 10 / 30 / 60).
9) LANGUAGE (Multilingual OSD)
Select the language of the OSD.
10) VIDEO FORMAT
Here shows the information of the DVR video format (NTSC / PAL).
Page 31

ADVANCED MENU
~27~
11) VERSION
Here shows the firmware version information.
7.3 Event Log
In this menu list, you can quickly search the recorded file by time and view all the HDD and event information (event
type, time and channel).
Move the cursor to “ ” (EVENT LOG) icon, and press ENTER button. You will see the following screen:
EVENT LOG
QUICK SEARCH
HDD INFO
EVENT LOG
PLEASE CONSULT YOUR INSTALLER FOR ADVANCE SETTINGS
SELECT BACK NEXT ENTER
7.3.1 Quick Search
In this menu list, you can search any specific events by time and directly play the file you find.
Move the cursor to “QUICK SEARCH”, and press ENTER button.
You will see a similar screen as the following:
TIME SEARCH
DATE 2007 / JUN / 11 22 : 48 : 00
SEARCH HDD ALL HDD
START
PLEASE CONSULT YOUR INSTALLER FOR ADVANCE SETTINGS
SELECT BACK NEXT ENTER
The submenu items are described below:
1) DATE
Select the specific time period (YEAR / MONTH / DAY / HOUR / MIN) that you want to search.
2) SEARCH HDD
Change to the HDD you want if there are more than 1 HDD in your DVR.
3) START
Move the cursor to “START” and press ENTER button to search and directly playback the recorded files.
Page 32

ADVANCED MENU
~28~
7.3.2 HDD Info
In this menu list, you can view the remaining capacity of all the connected HDDs in this device.
Move the cursor to “HDD INFO”, and press ENTER button. You will see a similar screen as the following:
HDD INFO
HDD NUM HDD SIZE (GB) HDD NUM HDD SIZE (GB)
HDD–MASTER–1 236.000 HDD–SLAVE–1 NO HDD
PLEASE CONSULT YOUR INSTALLER FOR ADVANCE SETTINGS
SELECT BACK NEXT ENTER
7.3.3 Event Log
In this menu list, you can view all the event information (event type, time and channel) or clear all log records.
Move the cursor to “EVENT LOG”, and press ENTER button. You will see a similar screen as the following:
EVENT LOG
EVENT TIME COMMENT
POWER ON 2007 / MAY / 30 20:27:49 16
VLOSS 2007 / MAY / 30 20:05:05 06
VLOSS 2007 / MAY / 30 20:00:11 09
VLOSS 2007 / MAY / 30 16:00:08 14
VLOSS 2007 / MAY / 30 15:09:32 13
VLOSS 2007 / MAY / 30 11:00:08 12
VLOSS 2007 / MAY / 30 10:27:33 11
VLOSS 2007 / MAY / 30 08:05:55 10
DEFAULT 2007 / MAY / 30 08:05:26 09
POWER ON 2007 / MAY / 30 08:00:22 08
PREV NEXT CLEAN
PLEASE CONSULT YOUR INSTALLER FOR ADVANCE SETTINGS
SELECT BACK NEXT ENTER
Note: A new log will be added in the system log when the HDD data is overwritten or the recording starts
after DVR reboots.
7.4 Backup
In this menu list, you can choose to make a copy for a specified period time to a compatible USB flash drive for your
own purpose.
The backup file can be played directly in your PC via the supplied licensed software AP. For detailed AP playback,
please refer to the section “Playback” at page 53.
Note: If you want to make a video backup with audio, please connect audio cameras to the channels which
support the audio function
For 16CH & 8CH DVR, the audio channels are CH1, CH2, CH3 and CH4.
Page 33

ADVANCED MENU
~29~
Move the cursor to “ ” (BACKUP), and press ENTER button. You will see the following screen:
BACKUP
USB BACKUP
DISK BACKUP
PLEASE CONSULT YOUR INSTALLER FOR ADVANCE SETTINGS
SELECT BACK NEXT ENTER
7.4.1 USB BACKUP
Before making USB backup, please check if:
a) The USB flash drive is supported by your DVR. If not, the message “USB ERROR” will be shown on the screen.
For the list of the compatible USB flash drives, please refer to “APPENDIX 2 COMPATIBLE USB FLASH
DRIVE BRAND” at page 61.
b) The format of your USB flash drive must be "FAT32". If not, please format it as “FAT32” in your PC.
c) There is no data in the USB flash drive. If yes, it’s recommended to clear all data in the USB flash drive before
starting the backup.
Move the cursor to “USB BACKUP”, and press ENTER button. You will see a similar screen as the following:
USB BACKUP
START TIME 2007 / MAY / 31 13:00:05
END TIME 2007 / MAY / 31 13:10:05
AVAILABLE SIZE 1960.0MB
CHANNEL 01 □ 02 □ 03 □ 04
□ 05 □ 06 □ 07 □ 08
□ 09 □ 10 □ 11 □ 12
□ 13 □ 14 □ 15 □ 16
HDD NUM ALL HDD
START
PLEASE CONSULT YOUR INSTALLER FOR ADVANCE SETTINGS
SELECT BACK NEXT ENTER
The submenu items are described as below:
1) START TIME
Select the start time of the backup.
2) END TIME
Select the end time of the backup.
3) AVAILABLE SIZE
Display the available capacity in the inserted USB flash drive.
Page 34

ADVANCED MENU
~30~
4) CHANNEL
Select channels by pressing ENTER button to change the symbol in front of the channel number.
Symbol “ ” means that this channel is selected to backup.
Symbol “ □ ” means that this channel is not selected to backup.
5) HDD NUM
Press ENTER button to select the HDD containing the data you need.
6) START
Press ENTER button to start copying the chosen data to the USB flash drive.
Note: If you want to make a video backup with audio, please connect audio cameras to the channels which
support the audio function
For 16CH & 8CH DVR, the audio channels are CH1, CH2, CH3 and CH4.
7.4.2 DISK BACKUP
Before making disk backup, please check if the type of your DVD is DVD-R. The maximum number of backup files in
the CD or DVD is 41.
Note: During the backup process, a file player will also be copied into your disk, and you will see a message
“BACKUP PLAYER” shown on the screen.
Move the cursor to “DISK BACKUP”, and press “ENTER” button. You will see a similar screen as the following:
DISK BACKUP
START TIME 2007 / DEC / 25 19:00:05
END TIME 2007 / DEC / 25 21:00:05
AVAILABLE SIZE 3.79 GB
CHANNEL 01 □ 02 □ 03 □ 04
□ 05 □ 06 □ 07 □ 08
□ 09 □ 10 □ 11 □ 12
□ 13 □ 14 □ 15 □ 16
HDD NUM ALL HDD
START
PLEASE CONSULT YOUR INSTALLER FOR ADVANCE SETTINGS
SELECT BACK NEXT ENTER
The submenu items and their functions are almost the same as USB BACKUP. For the description of the submenu
items, please refer to the previous page.
The process below describes how to make a disk backup:
a) Press “EJECT” button to open the disk tray. Put the DVD into a DVD-RW drive, and press “EJECT” button again to
close the disk tray..
b) Go to “DISK BACKUP” menu, and set the start time, end time, channels and HDD.
c) Move the cursor to “START”, and press “ENTER” to start backup.
While DVD backup is processing, users will see the backup completed percentage on the screen.
d) After DVD backup is completed, “DISK BURN FINISH” will be prompted on the screen. Press “EJECT” button to
eject the DVD tray and get the DVD.
e) Put the DVD into the DVD-ROM drive of your PC. Double click the file to convert it into “VSE” format. Play the
converted file in your PC to see if the backup is successful.
Note: The supported PC operation systems are Windows 2000 and Windows XP.
Page 35

REMOTE OPERATION
~31~
8. REMOTE OPERATION (Take 16CH DVR as an example)
You can also control the DVR remotely via the supplied licensed software AP (hereafter called the “AP”), IE web
browser, and Apple’s QuickTime player.
8.1 Supplied Licensed Software AP
8.1.1 Installation & Network Connection
1) Install the software
Place the supplied CD-ROM into your DVD- / CD-ROM drive. The installation process will automatically start.
Follow the on-screen instructions to install the application programs.
After installation, a shortcut icon “ ” will be shown on your PC desktop.
2) Network Connection
LLooccaall CCoonnnneeccttiioonn ((vviiaa LLAANN))
f) Connect the DVR to your PC via a RJ-45 network line. The default DVR IP address is “192.168.1.10”,
and the default user name and password are both “admin”.
g) Set the PC’s IP address as “192.168.1.XXX ” (1~255, except 10) in order to make the PC and DVR
under the same domain.
h) Double-click “ ” icon on your PC desktop to enter the AP control panel. By defaults, the “Address
Book” ( ) panel will be displayed on the right side of the AP control panel.
i) Click “ ” (Address Book) “ ” (Add) button to key in the default IP address, user name,
password, and port number of the DVR you intend to connect.
OR
Click “ ” (Search) “ ” (Refresh) to search the available IP address(es) of other DVR(s)
under the same domain as your PC’s IP address. The found address(es) will be listed, and can be added
into the address book by clicking “ ” (Add into address book).
For details, please see “ ” (Search) at page 36.
j) Double-click the IP address you just added into the address book to log in. When you’re logged in, the
“Event” panel will be shown by defaults.
RReemmoottee CCoonnnneeccttiioonn ((vviiaa IInntteerrnneett))
a) Double-click “ ” icon on your PC desktop to enter the AP control panel. By defaults, the “Address
Book” panel will be displayed on the right side of the AP control panel.
b) Click ” ” (Address Book) ” ” (Add) button to key in the IP address, user name,
password, and port number of the DVR you intend to connect.
Page 36

REMOTE OPERATION
~32~
The default DVR values are as follows:
Item Default Value
IP address 192.168.1.10
User name admin
Password admin
Port 80
OR
Click ” ” (Search) ” ” (Refresh) to search the available IP address(es) of other DVR(s)
under the same domain as your PC’s IP address. The found address(es) will be listed, and can be added
into the address book by clicking ” ” (Add into address book).
For details, please see “ ” (Search) at page 36.
c) Double-click the IP address you just added into the address book to log in. When you’re logged in, the
“Event” panel will be shown by defaults.
8.1.2 General AP Operation
Record
To record remotely at the same time when any event alarm is triggered at the DVR side, click “ ” (Miscellaneous
Control) → “ ” (Record Setting) to go to the “Record Setting” page. Check the record type(s) you want, and
assign the location to save the recordings by double-clicking the “Video Path” cell.
If “Manual” is checked, click “ ” (Record) on the main control panel to start the manual recording immediately, and
the recordings will be saved in the specified location. The red text indication “REC” will be shown at the top left corner
of the image display view.
If “Motion” and / or “Alarm” are checked, the recording function will also be enabled at the remote side when any
event is triggered at the DVR side, and the recordings will be saved in the specified location.
For details, please see “Record Setting” at page 38.
Playback
To play a recording, click “ ” (Miscellaneous Control) → “ ” (Log), and select the “Record” tab or “Backup” tab.
A list of all the recordings will be shown by defaults, and you can also sort out the logs you want to speed up the
search time.
For details, please see “Log” at page 49.
Page 37

REMOTE OPERATION
~33~
To immediately play a recording, select a log from the list, and click “Play” button, or double-click the selected log.
Then, the playback control panel will be shown at the bottom of the main control panel similar to the following.
For the playback control panel details, please see “Playback Screen” at page 53.
Network Backup
Click “
” (Miscellaneous Control) → “ ” (Backup) to go into the “Download” page as follows, and you can
select a specific time range or event to make a video backup remotely. For details, please see “Backup” at page 38.
Page 38

REMOTE OPERATION
~34~
8.1.3 AP Control Panel
After setting up the network information, login user name and password, double-click “ ” on the PC desktop to
open and log into the AP control panel. You will see a screen similar to the following with 7 major sections:
NO. Button Function Description
1111
N/A Image Display
The place where the images are displayed.
For details, please see “8.1.4 AP Functions” at page 35.
2222
Address Book
Click to show the predefined IP address(es). You can add, remove or search the IP address
to log in the DVR remotely.
Two sub-functions are available for this button: Address Book and Search.
For details, please see “Address Book ” at page 35.
3333
Miscellaneous
Control
Click to show the main operation functions: audio volume control, color setting, backup,
DVR setting, upgrade, and find event logs.
For details, please see “Miscellaneous Control ” at page 37.
4444
/
Record Click to start / stop the manual recording.
5555
Snapshot
Click to take a snapshot of the current view. The snapshot will be saved in the path you
specified in “Record Setting”. Please refer to “Record Setting” at page 38 for details.
6666
Information
Click to show the current network connection details.
For details, please see “Information
” at page 53.
7777
DVR Control
Click to go to the DVR control panel to operate the DVR remotely.
For details, please see “DVR Control ” at page 54.
Page 39

REMOTE OPERATION
~35~
8.1.4 AP Functions
Image Display
NO. Button Function Description
1111
Live / Playback /
Download Display
Switch
If you want to switch among the live view, playback view and download
view, click the blue tab “Live”, “Play” or “Download” to make a switch.
Live: When you are logged in, this tab with the live view is displayed by
defaults.
Play: When a video clip is selected in “Logs” and played, this tab with the
palyback view is displayed.
Download: When the downloaded video clip is selected in “Logs” and
played, this tab with the downloaded video clip is displayed.
2222
Full Screen
Click to view the images in the full screen mode.
To exit the full screen mode, press “Esc” key on the keyboard.
3333
Close
Click to close the current image display view.
If the last image display view is closed, you will be logged out
automatically.
Address Book
This view is displayed when the AP is activated for you to log in / out the DVR from the current address list, or search
the available IP address as follows:
Page 40

REMOTE OPERATION
~36~
((AAddddrreessss BBooookk))
Click to view the pre-defined DVR access details.
To log in, choose one IP address from the address list, and click the address twice; to log out, click the
connected IP address twice.
Tip: You can also click “ ” in the image display section to log out (see “Image Display” at page 35).
You can also create new IP address information, or modify or remove the current IP address information.
NO. Button Function Description
1
Add
Click to directly add one IP address for login. Key in the DVR access information
needed, and click “Apply” and “Close”.
2
Edit
Select one current IP address from the address list, and click this button to
modify the DVR access information as needed.
3
Remove Select one IP address from the address list, and click this button to delete it.
((SSeeaarrcchh))
Click to search and view the available IP address(es) for the DVR connection. You can choose one address to
add into the address book, edit the details, or update the address list.
NO. Button Function Description
4
Add into
address book
Select from the available IP address list, and click this button to add the selected
address to the address book.
Page 41

REMOTE OPERATION
~37~
5
Setting
Select from the available IP address list, and click this button to edit the setting.
6
Refresh Click to update the available IP address list.
Miscellaneous Control
Click “ ” (Miscellaneous Control) on the AP control panel, and 7 functions are available as follows:
NO.
Button Function Description
1111
Audio Volume Control
To adjust the volume of the audio channel, press and drag
the volume slider.
2222
Color Setting
Click this button to adjust the brightness / contrast / hue /
saturation for a single channel or the whole channels. For
details, please see “Color Setting” at page 37.
3333
Backup
To make a video backup remotely, click this button, and you
will go to the download setting page. For details, please see
“Network Backup” at page 33.
4444
Record Setting
Click to go to the detailed record setting. Please refer to
“Record Setting” at page 38 for details.
5555
Dvr Setting
Click to go into the detailed DVR setting. Please refer to “Dvr
Setting” at page 38 for details.
6666
Tools
Click to update the firmware version, multilingual OSD and
boot display of your DVR remotely. Please refer to “Tools” at
page 47 for details.
7777
Log
Click to view all event and recording logs, search the desired
log(s) by date, or playback the recording of the selected log.
For details, please refer to “Log” at page 49 .
CCoolloorr SSeettttiinngg
Click “ ” to go into the “Color Setting” page, and you can adjust the brightness / contrast / hue / saturation for
a single channel or all channels.
Page 42

REMOTE OPERATION
~38~
Choose the desired channel from the drop-down list, and click and drag the slider to make adjustment. Click
“ ” to apply the change to the selected channel, or “ ” to apply to all channels.
Note: You need to be a supervisor to operate this function. For details, please see “Account” at page 40.
BBaacckkuupp
Click “ ” (Backup) to go into the “Download” page, and you can select a specific time range or event to
make a video backup remotely.
Note: You need to be a supervisor to operate this function. For details, please see “Account” at page 40.
NO.
Function Description
1111
IP Address / Port / User Name / Password Check if the network connection information of the DVR within which
contains the video data you need is correct.
2222
HDD Number / Channel Specify the hard disk (HDD Number) and channel number (Channel)
within which have the video data you need.
3333
Download by Time Specify the time range within which has the video data you want in the
“Start Time” and “End Time” columns.
4444
Download by Event Select an event log from the event list. This list shows all logs in the
specified DVR from the latest to the earliest.
To quickly find the events you need, check or uncheck the event type
“System” / “Manual” / “Alarm” / “Motion”, and select the log you want.
To view the earlier or later logs that are not shown in the current page,
click “Prev. Page” or “Next Page”.
To refresh the event list, click “Reload”.
5555
File Path Assign the location where the backup files are saved.
6666
Display To view the backup images simultaneously when the download process
is in progress, select the checkbox “Display”. You will see the backup
images while the images are being downloaded to the PC or notebook.
To simply backup images without previewing, deselect the checkbox
“Display”. You will only see a message box indicating the total time
needed, the current status and the saving location.
7777
Download / Cancel Click “Download” to start or “Cancel” to discard the video backup.
RReeccoorrdd SSeettttiinngg
Press “ ” to go into the “Record Setting” page, and you can set which type of the recording is enabled, and
where the recorded data / snapshots are saved remotely in your PC.
Page 43

REMOTE OPERATION
~39~
Manual / Motion / Alarm
In this section, you can select which type of the recording will be enabled. There are 3 options: Manual / Motion /
Alarm.
Path Setting
Select and view the location for saving the recorded video and snapshot pictures.
To change the saving path for the recorded video clips or snapshots, check the drive you want, click the cell of
“Video Path” or “Picture Path” twice, and select a new path for saving the video clips or snapshots.
DDvvrr SSeettttiinngg
Click “ ” to view, set or modify the DVR setting. All the changes you make here will be applied to the connected
DVR.
Note: You need to be a supervisor to operate this function. For details, please see “Account” at page 40.
General
In “General” and its sub-menus, “Account” and “OnLineUser”, you can view and set some common settings, such
as the turbo step, make account setting, and check the information for all current on-line users.
Page 44

REMOTE OPERATION
~40~
In “General”, you will see the following items:
Item Description
Firmware Version Display the current firmware version of your DVR.
MAC Address Display the MAC address.
Turbo Step Speed up the menu selection under the AP from 1 to 30.
Ex: If the value of the turbo step is set to 5, one mouse-click will function as 5 mouse-clicks when you click
one of the buttons / / / in the DVR control panel.
Title Provide a title for this DVR. Only 16 characters are allowed.
Account
In “General” → “Account”, you can create a new account for login, or delete or modify the existing account
setting.
To add an account, click “New”, and fill in the following columns. Then, click “Apply” to save your
setting and create a new account.
Column Description
User Name Set a user name that will be used for remote login. The user name allows up to 10 characters.
Password Set the password that will be used for remote login. The password allows up to 8 characters.
User Level Set the security level of an account to give the permission to control different AP functions. There are 4 user
levels: Supervisor, Power User, Normal User and Guest.
For the functions each level is allowed to use, please see the information below:
Supervisor Power User Normal User Guest
Address Book
● ● ● ●
Miscellaneous Control
Color Setting ●
X X X
Backup ●
X X X
Record Setting ● ● ● ●
Dvr Setting ●
X X X
Tools ●
X X X
Log ● ● ● ●
Record
● ● ● ●
Snapshot
● ● ● ●
Information
● ● ● ●
Dvr Control
● ●
(except Menu
key)
●
(except Menu &
audio channel
keys)
X
Life Time Select how long this account is allowed to stay online (1 MIN / 5 MIN / 10 MIN / 1 HOUR / 1 DAY / INFINITE)
To modify an existing account, select the account you want, change the setting, and click “Apply”.
To remove an existing account, select the account you want, and click “Delete”.
Page 45
REMOTE OPERATION
~41~
To save your changes, click “Apply”.
To define the maximum account creation number, key in the number in “Max User(s)” column from 1 to
20, and click “Update”.
OnLineUser
In “General” → “OnLineUser”, you can check all the online user information. To update the user information,
click “Refresh”.
Network
In “Network” and its sub-menu, “DDNS”, you can set the DVR network configuration. The network configuration
allows the DVR to connect to the LAN or Internet.
Select the network type you will be using for DVR connection. There are 3 network connection types: Static IP,
PPPOE and DHCP.
Note: PPPOE and DHCP network connection types are required to apply the DDNS service to get a
“Hostname” to correspond to a dynamic IP address. Please refer to “DDNS” at page 42 for details.
Function Description
Web Port Typically, the default TCP port used by HTTP is 80. However, in some cases, it is better to change this port number
for added flexibility or security. The valid web port number ranges from 1 to 9999.
Static IP Computers are communicated and recognized by their own unique IP addresses over the Internet. “Static IP”
provided by your ISP (Internet Service Provider) means the IP address of the computer is fixed.
Key in the server IP address, gateway and network information provided by your ISP provider to configure a static IP
network connection.
PPPOE PPPOE stands for Point-to-Point Protocol over Ethernet. Users can easily have the Internet service as long as
they’re ready for the following things: 1) Insert an Ethernet card into the PC. 2) Obtain the ADSL service via any ISP.
3) Obtain and install the PPPOE software CD.
Page 46

REMOTE OPERATION
~42~
Function Description
When everything is ready, choose the “PPPOE” IP type, and key in the user name and password provided by your
ISP. Then, select “Network” → “DDNS” to set DDNS settings.
For detailed DDNS settings, please refer to “DDNS” at page 42.
DHCP This DHCP function needs to be supported by a router or cable modem network with the DHCP service. Choose the
“DHCP” IP type, and select “Network” → “DDNS” to set DDNS settings.
For detailed DDNS settings, please refer to “DDNS” at page 42.
DDNS
You need to apply a DDNS account before setting PPPOE or DHCP connection. DDNS is a service for
transforming the dynamic IP corresponding to a specific “host name”. Go to a website which provide free
DDNS services and apply a host name.
DDNS Apply:
a). Go to a website which provide the free DDNS service, for example, http://www.dyndns.org.
b). Create an account in DynDNS.
c). After creating one account, users will receive a confirmation E-mail within a few minutes. To complete the
registration, please follow the instructions received.
Users must complete these steps within 48 hours to complete the registration. If the confirmation E-mail was
not received within an hour, request “password reset” (http://www.dyndns.org/account/resetpass/).
d). Use the DDNS username and password to log into the DynDNS.
e). Create a host name:
After login, click “Account” → “My Service” → “Add Host Services” → “Add Dynamic DNS Host”. Enter
and choose a host name, and click “Add Host”. Then, your DDNS host name is created.
Page 47

REMOTE OPERATION
~43~
Video
In “Video”, you can set the video web transmission size and quality, and the frame rate for transmitting.
Function Description
JPEG Choose the image size (4CIF / CIF) and picture quality (BEST / HIGH / NORMAL / BASIC) when
the web transmission format is JPEG.
MPEG Choose the image size (4CIF / CIF) and picture quality (BEST / HIGH / NORMAL / BASIC) when
the web transmission format is MPEG.
FrameRate Choose the frame rate for transmitting (FULL / HALF / ONE THIRD / QUARTER / FIFTH).
Dvr
In “Dvr” and its sub-menus, “Camera”, “Detection”, “Record”, “Record Timer”, “Alert” and “Display,” you can set
DVR general functions, such as the host ID, the record schedule, alerts, motion detection, and text or icon display,
etc.
In “Dvr”, you can see the following items:
Function Description
Host ID Set the host ID from 0 to 254. The default value is 0.
System Type Display the current system type (NTSC / PAL). It’s automatically detected.
DeInterlace Choose to reduce (ON) or ignore (OFF) the vibration of the paused picture.
Daylight Saving
Specify whether to use daylight saving time (ON / OFF).
If this function is enabled, set the time period (START / END), and adjust the daylight saving time in hours
(ADJUST).
Menu Operation
Select the time-out in seconds after which the DVR keys will be automatically locked when no one is
operating the DVR for a period of time (0 / 30 / 60 / 120). The default value is 30.
Serial Type
Display the serial type (RS485) used by this DVR. It’s automatically detected.
BaudRate
Choose a baud rate used by this DVR from the drop-down list (2400 / 9600 / 19200 / 38400 / 57600 /
115200). The default value is 2400.
Page 48

REMOTE OPERATION
~44~
Camera
In “Dvr” → “Camera”, you can specify a channel to enable the recording function by selecting the check box
“Record”, choose to activate the “Covert Recording” function by selecting the check box “Cover”, and rename
the channel title which will be displayed in the live view screen by double-clicking the channel title.
Detection
Select the desired channel, and click “Edit” to enter the motion detection sensitivity and area-setting page.
Please see the description below for each function:
Function Description
DETECT Enable (ON) or disable (OFF) the function of “Motion Detection”.
If this function is enabled, you might need to set the motion detection sensitivity or simply keep the
default values. For details, please see the description below.
Motion Detection
Sensitivity
(LS / SS / TS / RE)
Set the detection sensitivity in 4 different adjustable factors (LS / SS / TS / RE).
LS
“Level of Sensitivity”, is to set the sensitivity of comparing two different images. The smaller the
value is, the higher sensitivity for motion detection.
The highest sensitivity setting is 0, and the lowest sensitivity setting is 15. The default value is 7.
SS
“Spatial Sensitivity”, is to set the sensitivity for detecting the size of one object (the number of the
grids) on the screen. The smaller the value is, the higher sensitivity for motion detection.
The highest sensitivity setting is 0, and the lowest sensitivity setting is 15. The default setting is 3.
TS
“Time of Sensitivity”, is to set the sensitivity regarding how long one object stays in the detection area
and triggers the recording. The smaller the value is, the higher sensitivity for motion detection.
The highest sensitivity setting is 0, and the lowest sensitivity setting is 15. The default setting is 2.
RE
“
Reference
”, is to set a reference for detection. The default value is 10, which means the DVR will
Page 49

REMOTE OPERATION
~45~
Function Description
compare 10 continuous images at one time according to the sensitivity of LS, SS, TS simultaneously.
The bigger the value is, the higher sensitivity for motion detection. The highest sensitivity is 61.
Alarm Select N.C. (normal closed) / N.O. (normal opened) / OFF for the alarm polarity. For N.C. / N.O.
contact details, please refer to “APPENDIX 2”.
Motion Detection
Setting Area
Set the motion detection area by selecting the area grids with your mouse. Pink grids represent the
area that is not being detected while the transparent grids are the area under detection. You can set
multiple areas under detection.
Click “” (Clear All) to set the whole area undetected.
Click “” (Select All) to set the whole area under detection.
Apply / Return To save the setting, click “Apply” and return to “Dvr Setting” window.
To discard the setting, click “Return” to directly return to “Dvr Setting” window without saving.
Record
In “Dvr” → “Record”, you will see the following items for DVR record settings.
Function Description
Image Size / Quality Choose the image size (FRAME / FIELD / CIF) and quality (BEST / HIGH / NORMAL / BASIC).
Manual Record / Event
Record / Timer Record
Select the record type that the DVR will take recording (Yes / No), and select the IPS setting (120 / 60 /
30 / 15) for the selected record type.
Pre-Alarm Record Check this option if you want to enable the pre-alarm recording function.
When any alarm is triggered, the DVR will record 8MB video data before the alarm event is actually
happened.
Record Timer
In this menu list, you can set the record schedule for normal recording or motion recording.
Page 50

REMOTE OPERATION
~46~
Routine / Motion
Click “Routine” tab to select the time range for continuous recording, or
“Motion” tab to select the time range within which the recording will be on when any movement is
detected.
Time Table
Find the day and time you want to enable the recording. Then, click to select the time interval(s). Each
interval represents 30 minutes.
To enable the recording all the time, click “”; to clear the record timer setting, click “”.
Alert
In “Alert”, you can set the DVR to beep for notification when there’s any alert happened. Check the buzzer
option you want, and set how long the beep sound will be lasted.
Function Description
Ext Alert Check this option to enable the external alert.
Buzzer Enable This option must be checked for “Motion Buzzer”, “Alarm Buzzer” and “Video Loss
Buzzer” to take effects.
Motion Buzzer / Alarm Buzzer /
Video Loss Buzzer / Key Input
Check one of these 4 options, and you will hear the beep sound when any movement is
detected / the alarm is triggered / video loss occurs / any DVR key is pressed.
Duration Set the alert and buzzers to beep for 5 / 10 / 20 / 40 seconds.
Display
In “Display”, you can choose whether to display some text indication or icons, set the channel display switch
time-out, set the DVR time remotely, and select the date format (Y-M-D / M-D-Y / D-M-Y).
Page 51

REMOTE OPERATION
~47~
Function Description
Title Select to display the channel title in the live view.
Event Select to display the event symbol in the live view.
Full Sequence Duration /
Quad Sequence Duration
Set the time-
out in seconds (3 / 5 / 10 / 15) after which the channel display will be switched by
one channel (Full Sequence Duration) or by four channels (Quad Sequence Duration).
Server Time Set the DVR time remotely.
Date Format Choose the date display format appropriate to your location (Y-M-D, M-D-Y and D-M-Y).
TToooollss
Click “ ” to upgrade the firmware version, multilingual OSD and boot display of your DVR (Update Server).
Note: You need to be a supervisor to operate this function. For details, please see “Account” at page 40.
Update Server
3 update options are available for this function: Firmware, Language and Logo.
Before performing any update, finish the following settings first:
1) Choose the IP address of the DVR whose firmware needs to be updated from the drop-down list, or click
“Search” to find.
2) Key in the user name, password and port number used to access your DVR remotely.
3) Select the update option (Firmware / Language / Logo) you want. For details, please see the description
below.
‧Firmware
To upgrade your DVR firmware remotely, click “Firmware” tab, and follow the steps below:
a). In the “Firmware” section, you will see the current firmware version. To upgrade the firmware version of
your DVR, click “Add” to locate and select the firmware file. The file will be shown in the firmware list.
b). If you want to backup your system before upgrading the firmware version of your DVR, select “System
Backup” in the “Configure File” section, click “…” to specify the location for saving system backup, and
click “Backup” to start the backup process.
c). To start upgrading the DVR firmware, choose the file from the firmware list, and click “Update Firmware”
to start the upgrade process.
Page 52

REMOTE OPERATION
~48~
‧Language
To update the DVR OSD language, click “Language” tab, and follow the steps below:
a). Get the language files you want to update from your distributor.
b) Click “Add” to locate and select the files needed. The files will be shown in the list. If you add the wrong file,
select it and click “Remove”.
c). To start updating the OSD language, choose the files from the list, and click “Update Language” to start
the upgrade process.
‧Logo
To replace the logo shown in the DVR boot display, click “Logo” tab, and follow the steps below:
a). Prepare a graphic file in the “BMP” format for replacement.
Note: Use the image software to set the image size to 320 * 240, and save the image as an 8-bit (64-color)
image in the "BMP" format.
b) Click “Add” to locate and select the graphic file. The file will be shown in the list. If you add the wrong file,
select it and click “Remove”.
c). To start updating the logo, choose the file from the list, and click “Update Logo” to start the upgrade
process.
Page 53

REMOTE OPERATION
~49~
LLoogg
Click “ ” to view all the event and record logs (All), or search for the specific log(s) by date or by record type
(Condition).
There are three types of logs: Event, Record and Backup. To playback the recorded data for a specific record or
backup log, select the log, and double-click to start the video playback.
For detailed playback operation, please refer to “Playback” at page 53.
Event
Select “All” to show all event logs, or “Condition” to search for the specific log(s) by date.
All
Button Description
Query This button is effective when “Condition” is selected.
Delete / Delete All
Click “Delete” to remove the selected log(s), or click “Delete All” to clear the current log
list.
Tip: To select more logs all at once, press and hold the “Ctrl” key on your keyboard, and
click to select the logs you want to remove.
Close
Click “Close” to quit this window.
Note: When “All” is selected, the date selection function (From / To), “Record Type” and “Query” are
disabled.
Page 54

REMOTE OPERATION
~50~
Condition
Button / Function Description
Date Selection
(From / To)
Choose the specific date range including the event / record logs you might want.
Query When all the search criteria are set, click to search the specified logs. The result will be
displayed in the log list, arranged by time from the earliest to the latest.
Delete / Delete All Click “Delete” to remove the selected log(s), or click “Delete All” to clear the current log list.
Tip: To select more logs all at once, press and hold the “Ctrl” key on your keyboard, and click to
select the logs you want to remove.
Close
Click “Close” to quit this window.
Record
Select “All” to show all record logs, or “Condition” to search for the specific log(s) by date or by record type.
All
Page 55

REMOTE OPERATION
~51~
Button Description
Query This button is effective when “Condition” is selected.
Delete / Delete All Click to remove the unnecessary log / all logs.
Play Click to play the selected record log. The playback panel will be shown for your further
operation. For playback details, please see “Playback Screen” at page 53.
Repair Click to fix the log with errors.
Apply
This button is available in the “Record” tab when the “Reserve” checkbox is
checked or unchecked.
If you want to keep an important record log for future reference and it can’t be removed,
check the “Reserve” checkbox, and click “Apply”. The selected log will be kept and won’t
be deleted when somebody accidentally or intentionally chooses it and click “Delete” or
“Delete All”.
Close
Click “Close” to quit this window.
Note: When “All” is selected, the date selection function (From / To), “Record Type” and “Query” are
disabled.
Condition
Button / Function Description
Date Selection
(From / To)
Choose the specific date range including the event / record logs you might want.
Record Type This section is enabled only when the “Record” tab is selected.
Select the record type you want to search (User / Alarm / Motion).
Query When all the search criteria are set, click to search the specified logs. The result will be
displayed in the log list, arranged by time from the earliest to the latest.
Delete / Delete All Click “Delete” to remove the selected log(s), or click “Delete All” to clear the current log list.
Tip: To select more logs all at once, press and hold the “Ctrl” key on your keyboard, and click to
select the logs you want to remove.
Play Click to play the selected record log. The playback panel will be shown for your further operation.
For playback details, please see “Playback Screen” at page 53.
Repair Click to fix the log with errors.
Apply
This button is available in the “Record” tab when the “Reserve” checkbox is checked or
unchecked.
If you want to keep an important record log for future reference and it can’t be removed, check
the “Reserve” checkbox, and click “Apply”. The selected log will be kept and won’t be deleted
when somebody accidentally or intentionally chooses it and click “Delete” or “Delete All”.
Close
Click “Close” to quit this window.
Page 56

REMOTE OPERATION
~52~
Backup
Select “All” to show all download logs, or “Condition” to search for the specific log(s) by date.
All
Button Description
Query This button is effective when “Condition” is selected.
Delete / Delete All
Click “Delete” to remove the selected log(s), or click “Delete All” to clear the current log
list.
Tip: To select more logs all at once, press and hold the “Ctrl” key on your keyboard, and
click to select the logs you want to remove.
Close
Click “Close” to quit this window.
Note: When “All” is selected, the date selection function (From / To), “Record Type” and “Query” are
disabled.
Condition
Page 57

REMOTE OPERATION
~53~
Button / Function Description
Date Selection
(From / To)
Choose the specific date range including the event / record logs you might want.
Query When all the search criteria are set, click to search the specified logs. The result will be
displayed in the log list, arranged by time from the earliest to the latest.
Delete / Delete All Click “Delete” to remove the selected log(s), or click “Delete All” to clear the current log list.
Tip: To select more logs all at once, press and hold the “Ctrl” key on your keyboard, and click to
select the logs you want to remove.
Play Click to play the selected download log. The playback panel will be shown for your further
operation. For playback details, please see “Playback Screen” at page 53.
Close
Click “Close” to quit this window.
Playback Screen
When you select and play the recorded data for a specific log in “ ” (Log) “Record” or “Backup”, you will
immediately go into the playback mode, and the following playback panel appears. For the function of each
part on the panel, please refer to the following description.
NO. Function Description
1111
Playback / Download
Info Display
This area shows the detailed playback / download information, such as the file name,
record date and time, and the speed, etc.
2222
Playback Progress Bar This area shows the playback progress and the progress percentage.
3333
Playback Operation This area is enabled only when the playback is started.
(Rewind) / (Forward) / (Stop) / (Pause) / (Play)
Rewind / Forward
Click once to get 2X fast rewind / forward, twice to get 4X, three times to get 8X, and four
times to get 16X the highest.
4444
De-Interlace Click to reduce the vibration of the paused picture.
Information
To view the current network connection details, click this button.
Page 58
REMOTE OPERATION
~54~
DVR Control
When the AP is connected to the DVR, this DVR control panel will be enabled, and you can control the DVR
remotely. For the function of each button, please refer to the following description.
NO. Function Description
1
Click the channel No. (CH1 ~ CH16) to see the live view of the selected channel.
Click the view mode you want to see. There are 10 modes for your choice:
View CH1, CH2, CH5 and CH6 View CH3, CH4, CH7 and CH8
View CH9, CH10, CH13 and CH14 View CH11, CH12, CH15 and CH16
View the 1st channel of the selected 4-cut view mode
View the 2nd channel of the selected 4-cut view mode
View the 3rd channel of the selected 4-cut view mode
View the 4th channel of the selected 4-cut view mode
View CH1 ~ CH9
View the whole 16 channels
2
Channel
Selection
You can also click “ ” or “ ” to go to the previous / next channel of the selected channel.
This 4-cut view button is disabled because this DVR doesn’t support this button. To choose the quad view,
please select
/ / / .
Page 59

REMOTE OPERATION
~55~
NO. Function Description
3 Digital Zoom
Click to zoom in / out the selected channel image.
4 Full Sequence /
Quad Sequence
Quad Sequence
Click to display the 4 quad display modes one by one.
The 1st view is CH1, CH2, CH5 & CH6,
the 2nd view is CH3, CH4, CH7 & CH8,
the 3rd view is CH9, CH10, CH13 & CH14, and
the 4th view is CH11, CH12, CH15 & CH16.
When the 4th view is displayed, it will start from the 1st view again.
To exit from this display mode, click any other channel display button.
Full Sequence
Click to display each channel one by one, starting from CH1. When CH16 is displayed, it will start from CH1 again.
To exit from this display mode, click any other channel display button.
5 Key Lock
Click to enable the DVR key lock function.
To unlock the DVR, key in your password, and click .
6
Search
Click “ ” to enter the DVR full search menu.
You can check all the logs here, and select one of them to payback.
7 Playback (Stop) / (Pause) / (Rewind) / (Play) / (Slow Playback) / (Forward)
Rewind / Forward
Click once to get 4X fast rewind / forward, twice to get 8X, three times to get 16X, and four times to get 32X the
highest.
Slow Playback
Click once to get 4X slow playback and twice to get 8X slow playback.
8 Audio Channel
Selection
Click the button 1, 2, 3 or 4 to hear the audio from the audio channel 1, 2, 3 or 4.
For the audio channel(s) of each model, please see “11). / ” in the section “2.1 Front Panel” at page 3.
In the live mode, you can only hear the live audio; in the playback mode, you can only hear the playback audio.
9 Menu and Arrow
Keys
Click “ ” (Menu) to enter the menu / exit the menu mode.
Click the arrow keys to move the cursor and make the selection:
/ : Move the cursor up / down to select the previous / next menu or sub-menu function, or change the setting.
/ : Move the cursor left / right to the previous / next sub-menu items.
10 Enter
Click “ ” to confirm the setting or enter your selection.
11 Turbo
To speed up the menu selection or the control of the PTZ camera via the AP, users can activate the turbo function
by clicking “ ”.
Page 60

REMOTE OPERATION
~56~
8.2 IE Web Browser
You can view the images or operate your DVR with IE web browser.
Note: The supported PC operation systems are Windows 2000 and Windows XP.
Step 1: Key in the IP address used by your DVR in the URL address box, such as 60.121.46.236, and press Enter. You
will be prompted to enter the user name and password to access the DVR.
If the port number your DVR used is NOT 80, you need to key in the port number additionally. The format is
ip add ress: por tnum. For example, for IP address 60.121.46.236 and port No. 888, please key
in ”http://60.121.46.236:888” into the URL address box, and press “Enter”.
Step 2: Enter the user name and password, the same as the ones used at AP login, and press “OK”. You will see a
similar screen as the following when the login information is correct.
NO. Function Description
1 Home
Press to go to the main page of the DVR
2
Config.
Press to go to the detailed DVR setting.
3
Menu and Arrow
Keys
Press to enter the menu / exit the menu mode.
Press the arrow keys to move the cursor and make the selection:
/ : Move the cursor up / down to select the previous / next menu or sub-menu function, or change the setting.
/ : Move the cursor left / right to the previous / next sub-menu items.
4 Key Lock
Press to enable the DVR key lock function. To unlock the DVR, key in your password, and press .
Page 61

REMOTE OPERATION
~57~
NO. Function Description
5 Enter
Press to confirm the setting or enter your selection.
6 Digital Zoom
Press to zoom in / out the selected channel image.
7 Search
Press to enter the DVR full search menu.
You can check all the logs here, and select one of them to payback.
8
Playback control
buttons
(Stop) / (Play) / (Rewind) / (Forward) / (Pause) / (Slow Playback)
Rewind / Forward
Press once to get 4X fast rewind / forward, twice to get 8X, three times to get 16X, and four times to get 32X the
highest.
Slow Playback
Press once to get 4X slow playback and twice to get 8X slow playback.
9
Single Channel
Selection
Press the channel No. (CH1 ~ CH16) to see the live view of the selected channel.
You can also press or to go to the previous / next channel of the selected channel.
10 Display Mode
Press the display mode you want to see. There are 3 modes for your choice:
Press / / to show 4-cut / 9-cut / 16-cut display.
11 Snapshot
Press to take a snapshot for the current view, and open another browser window to display the captured
image.
12
Quad Sequence /
Full Sequence
Quad Sequence
Press to display the 4 quad display modes one by one.
The 1st view is CH1, CH2, CH5 & CH6,
the 2nd view is CH3, CH4, CH7 & CH8,
the 3rd view is CH9, CH10, CH13 & CH14, and
the 4th view is CH11, CH12, CH15 & CH16.
When the 4th view is displayed, it will start from the 1st view again.
To exit from this display mode, press any other channel display button.
Full Sequence
Press to display each channel one by one, starting from CH1. When CH16 is displayed, it will start from CH1
again.
To exit from this display mode, press any other channel display button.
13
Web
Transmission
MPEG4 / JPEG / QuickTime
QuickTime is Apple Inc.’s multimedia software. You need to have QuickTime installed in you operation system
first. When “QuickTime” is selected, you will be promoted to enter the user name and password to access the
server of the DVR.
14 Change Quality
BEST / HIGH / NORMAL / BASIC
Press to change the image quality.
15
Change
Resolution
4 CIF / CIF
Press to change the image resolution (4CIF: 720*480 / CIF: 352*240)
16
Audio Channel
Selection
To hear the audio for a channel that supports audio recording in the live or playback mode, click 1, 2, 3 or 4 to hear
the audio from the audio channel 1, 2, 3 or 4.
For the audio channel(s) of each model, please see “11). / ” in the section “2.1 Front Panel” at page 3.
means the audio channel is not connected to the camera supporting audio.
Page 62

REMOTE OPERATION
~58~
8.3 QuickTime Player
You can also use the QuickTime player to remotely log into the DVR and check the live view only.
Note: QuickTime is Apple’s multimedia software. You need to have QuickTime installed in you operation system
first, and you can access the DVR to see the live view.
If you have installed QuickTime, please skip Step 1.
Step 1: Go to Apple’s official website to download QuickTime. The website address is as follows:
http://www.apple.com/quicktime/win.html
a). Click “DDoowwnnllooaadd” to go into the download page, and select to download the free player.
b). Leave your Email address, and press “FFrreeee DDoowwnnllooaadd NNooww” to download the latest QuickTime player.
c). When the download is completed, execute the “QQuuiicckkTTiimmeeIInnssttaalllleerr..eexxee” file, and follow the on-screen
instructions to finish the installation procedure.
Step 2: Open your QuickTime player. Select “File” → “Open URL”, and key in the URL address.
The URL format is “rtsp://ipaddress/live/mpeg4” (For example, “rtsp://59.124.231.75/live/mpeg4”).
Click “OK” to continue.
Step 3: A pop-up window will appear and prompt you to enter the authentication information. Key in the user name
and password for accessing your DVR. The user name and password are the same as the ones you use
to log into the AP.
If the information is correct, press “OK” to go on. If not, press “Cancel” to quit the accessing.
Step 4: When the login is successful, you will see a similar screen as the following.
Page 63

APPENDIX 1 PIN CONFIGURATION
~59~
APPENDIX 1 PIN CONFIGURATION
For 16CH DVR
Siren:
When the DVR is triggered by alarm or motion, the COM
connects with NO and the siren with strobe starts wailing and
flashing.
Magnetic Contact:
When the magnetic contact is opened, the
alarm will be triggered and the recording is on.
PIN FUNCTION DESCRIPTION
1
GND GROUND
2~9
ALARM INPUT
Connect ALARM INPUT (PIN 2 -- 9) and GND (PIN 1) connector with wires. Once an
alarm is triggered, the DVR will start recording and the buzzer will be on.
PIN 2 is Alarm 8. Once the alarm is triggered, the CH8 of the DVR will start alarm-triggered recording.
PIN 3 is Alarm 6. Once the alarm is triggered, the CH6 of the DVR will start alarm-triggered recording.
PIN 4 is Alarm 4. Once the alarm is triggered, the CH4 of the DVR will start alarm-triggered recording.
PIN 5 is Alarm 2. Once the alarm is triggered, the CH2 of the DVR will start alarm-triggered recording.
PIN 6 is Alarm 16. Once the alarm is triggered, the CH16 of the DVR will start alarm-triggered recording.
PIN 7 is Alarm 14. Once the alarm is triggered, the CH14 of the DVR will start alarm-triggered recording.
PIN 8 is Alarm 12. Once the alarm is triggered, the CH12 of the DVR will start alarm-triggered recording.
PIN 9 is Alarm 10 Once the alarm is triggered, the CH10 of the DVR will start alarm-triggered recording.
10
PIN OFF NA
11
PIN OFF NA
12
PIN OFF NA
13
EXTERNAL ALARM NO
Under the normal operation, COM disconnects with NO. But when any alarm is
triggered, COM connects with NO.
Attention: The voltage restriction is under DC24V 1A.
14
PIN OFF NA
15~22
ALARM INPUT
Connect ALARM INPUT (PIN 15 – 22) and GND (PIN 1) connector with wires. Once an
alarm is triggered, the DVR will start recording and the buzzer will be on.
PIN 15 is Alarm 7. Once the alarm is triggered, the CH7 of the DVR will start alarm-triggered recording.
PIN 16 is Alarm 5. Once the alarm is triggered, the CH5 of the DVR will start alarm-triggered recording.
PIN 17 is Alarm 3. Once the alarm is triggered, the CH3 of the DVR will start alarm-triggered recording.
PIN 18 is Alarm 1. Once the alarm is triggered, the CH1 of the DVR will start alarm-triggered recording.
PIN 19 is Alarm 15. Once the alarm is triggered, the CH15 of the DVR will start alarm-triggered recording.
PIN 20 is Alarm 13. Once the alarm is triggered, the CH13 of the DVR will start alarm-triggered recording.
PIN 21 is Alarm 11. Once the alarm is triggered, the CH11 of the DVR will start alarm-triggered recording.
PIN 22 is Alarm 9. Once the alarm is triggered, the CH9 of the DVR will start alarm-triggered recording.
23
PIN OFF NA
24
PIN OFF NA
25
EXTERNAL ALARM COM
Under the normal operation, COM disconnects with NO. But when any alarm is
triggered, COM connects with NO.
Attention: The voltage restriction is under DC24V 1A.
Page 64

APPENDIX 1 PIN CONFIGURATION
~60~
For 8CH DVR
Siren:
When the DVR is triggered by alarm or motion, the COM
connects with NO and the siren with strobe starts wailing and
flashing.
Magnetic Contact: When the magnetic cont
act is opened, the
alarm will be triggered and the recording is on.
PIN FUNCTION DESCRIPTION
1
GND GROUND
2~5
ALARM INPUT
Connect ALARM INPUT (PIN 2 – 5) and GND (PIN 1) connector with wires. Once an
alarm is triggered, the DVR will start recording and the buzzer will be on.
PIN 2 is Alarm 8. Once the alarm is triggered, the CH8 of the DVR will start alarm-triggered recording.
PIN 3 is Alarm 6. Once the alarm is triggered, the CH6 of the DVR will start alarm-triggered recording.
PIN 4 is Alarm 4. Once the alarm is triggered, the CH4 of the DVR will start alarm-triggered recording.
PIN 5 is Alarm 2. Once the alarm is triggered, the CH2 of the DVR will start alarm-triggered recording.
6 ~ 12
PIN OFF NA
13
EXTERNAL ALARM NO.
Under the normal operation, COM disconnects with NO. But when any alarm is
triggered, COM connects with NO.
Attention: The voltage restriction is under DC24V 1A.
14
PIN OFF NA
15~18
ALARM INPUT
Connect ALARM INPUT (PIN 15 – 18) and GND (PIN 1) connector with wires. Once an
alarm is triggered, the DVR will start recording and the buzzer will be on.
PIN 15 is Alarm 7. Once the alarm is triggered, the CH7 of the DVR will start alarm-triggered recording.
PIN 16 is Alarm 5. Once the alarm is triggered, the CH5 of the DVR will start alarm-triggered recording.
PIN 17 is Alarm 3. Once the alarm is triggered, the CH3 of the DVR will start alarm-triggered recording.
PIN 18 is Alarm 1. Once the alarm is triggered, the CH1 of the DVR will start alarm-triggered recording.
19~24
PIN OFF NA
25
EXTERNAL ALARM COM
Under the normal operation, COM disconnects with NO. But when any alarm is
triggered, COM connects with NO.
Attention: The voltage restriction is under DC24V 1A.
Page 65

APPENDIX 2 COMPATIBLE USB FLASH DRIVE BRAND
~61~
APPENDIX 2 COMPATIBLE USB FLASH DRIVE BRAND
Please upgrade the firmware of the DVR to the latest version to ensure the accuracy of the following table. If the USB
flash drive is not supported by the DVR, the "USB ERROR" message will be shown on the screen.
Note: Please use your PC to format the USB flash drive as "FAT32".
MANUFACTURER MODEL CAPACITY
256MB
JetFlash 110
512MB
JetFlash V30
1GB
JetFlash 150
1GB
JetFlash V20
1GB
Transcend
JFV10
4GB
256MB
512MB
Kingston
DataTraveler DTI KUSBDTI/256FE
2GB
256MB
PQI
Cool Drive (U339)
512MB
256MB
HANDY STENO HF202
512MB
USB2.0 Flash Drive HS120
1GB
USB2.0 Flash Drive AH320
1GB
Apacer
AH221
2GB
USB2.0 Flash Disk-PD1
1GB
USB2.0 Flash Disk-RB15
1GB
USB2.0 Flash Disk-PD4
1GB
Adata
PD10
2GB
128MB
256MB
512MB
1GB
Sandisk
Cruzer Micro
4GB
Page 66

APPENDIX 3 COMPATIBLE HDD BRAND
~62~
APPENDIX 3 COMPATIBLE HDD BRAND
Please upgrade the firmware of the DVR to the latest version to ensure the accuracy of the following table.
MANUFACTURER MODEL CAPACITY ROTATION
Deskstar 7K250, HDS722516VLAT20 160GB 7200 rpm
HDS722516VLAT80 160GB 7200 rpm
HDS722516DLAT80 160GB 7200 rpm
Deskstar 7K250, HDS722525VLAT80 250GB 7200 rpm
HITACHI
Deskstar 511DHT0021 500GB 7200 rpm
DiamondMax Plus 9, Model#6Y160L0 160GB 7200 rpm
DiamondMax 10 6L160R0 160GB 7200 rpm
DiamondMax 10 6L200R0 200GB 7200 rpm
DiamondMax 10 6L200PO 200GB 7200 rpm
MaxLine Plus , Model#7Y250P0 250GB 7200 rpm
DiamondMax 10 6L250R0-3 250GB 7200 rpm
Maxtor
DiamondMax 10 HDMA6L300RO-3 300GB 7200 rpm
Barracuda 7200.7 Plus, ST3160023A 160GB 7200 rpm
Barracuda 7200.8 ST3200826A 200GB 7200 rpm
Barracuda 7200.8 ST3250826A 250GB 7200 rpm
Barracuda 7200.8 ST3300831A/P 300GB 7200 rpm
Barracuda 7200.8 ST3400832A/P 400GB 7200 rpm
7200.9 ST3200827A/P 200GB 7200 rpm
7200.10 ST3250620A/P 250GB 7200 rpm
Seagate
7200.10 ST3320620A/P 320GB 7200 rpm
Caviar SE WD1600JB 160GB 7200 rpm
Caviar WD2000BB-00DWA0 200GB 7200 rpm
Caviar SE WD2500JB 250GB 7200 rpm
Western Digital
Cavir RE WD2500SB-01KBC0 250GB 7200 rpm
Page 67

APPENDIX 5 TROUBLESHOOTING
~63~
APPENDIX 4 TROUBLESHOOTING
Please refer to the table below for easy troubleshooting. The table describes some typical problems and also their
solutions. Please check them before calling your DVR dealer.
FAQ (Frequently ask question)
Questions Solutions
Check power cord connection.
No power
Confirm that there is power supplied from the outlet.
DVR is not working when pressing any button
You might be under “Key Lock” mode. Press any key and enter the password to exit
this mode.
Replace with another HDD for testing.
Replace with another HDD cable for testing.
HDD detection failed
Make sure HDD “Master”, “Slave” mode is correctly set.
Replace with another USB flash drive for testing.
Can’t detect your USB flash drive
Format the USB flash drive as FAT32 format and try again.
Confirm the camera is power supplied.
Check the setting of the camera lens.
Check the monitor’s video cable and connection.
No live video
Check the camera’s video cable and connection.
Check if the HDD is installed and connected properly.
No recorded video
Check the “MANUAL RECORD ENABLE” is set to “ON” , and the record function in
the “CAMERA” menu is set to “ON” too.
Timer recording is not working
Check if “TIMER RECORD ENABLE” option is set to “ON” and the timer schedule
has
been arranged.
Check if “EVENT RECORD ENABLE” option is set to “ON”.
Check the detection function “DET” is set to “ON”.
Motion detection recording is not working
Check the detection area “AREA” has been setup.
Can’t play the recorded data on my DVR
There must be at least 8192 images of recorded data for playback to work properly. If
not, your DVR will stop the playback.
For example, if the IPS is set to 30, the recording time should be at least 273 seconds
(8192 images / 30 IPS) for the playback to work properly.
Can’t backup the video with audio
Make sure the audio cameras are connected to the DVR channels which support
the
audio function (CH1, CH2, CH3 and CH4).
Check the DVR firmware version.
Can’t view the DVR images over the network
with IE web browser
Please choose to allow the web browser ActiveX or applet in the pop-out message.
You need to be a supervisor to operate this function. For details, please see “Account”
at page 40.
Check if the network connection information is correct (IP Address / Port / User Name
/ Password).
Failed to backup the recorded files of the DVR
from remote PC side.
(For details, please see “Network Backup” at
page 33.)
Specify the hard disk (HDD Number) and channel number (Channel) within which
have the recorded data you need.
Check the USB flash drive is formatted to FAT32.
Failed to upgrade the firmware / OSD file
Check the firmware / OSD file is correct.
Check whether if the batteries are installed or not.
Aim at the IR receiving zone and try again.
Can’t use the IR remote control
Check the lock button on the DVR front panel is switched to the right position.
Time and date settings return to default values
If the time and date settings return to their default values after the DVR is rebooted,
please charge the DVR for at least 24-48 straight hours. Please contact your local
retailer if the situation still occurs.
A new log is added in the system log other than
the hourly logs.
A new log will be added in the system log when t
he HDD data is overwritten
or the recording starts after DVR reboots.
Page 68

INDEX
~64~
APPENDIX 5 DEFAULT VALUE
Default Value
Items Default Value
DVR Side:
ADMIN Password 0000
Channel Title Display ON
Event Status Display ON
Image Size CIF
Image Quality BEST
Image Per Second (IPS) 120 (NTSC) / 100 (PAL)
Record Timer OFF
Detection Timer OFF
Date Format Y/M/D
Daylight Saving OFF
Camera – BRIG (Brightness) 128
Camera – CONT (Contrast) 098
Camera – SATU (Saturation) 128
Camera – HUE 128
Camera – COV (Covert Screen) OFF
Camera – REC ON
Detection OFF
Detection - LS 07
Detection - SS 03
Detection - TS 02
Detection - RE 10
Detection - Alarm OFF
Alert Buzzer ON
Alert Buzzer Duration 5 seconds
Network - IP Address 192.168.1.10
Port 80
De-interlace ON
Quad Dwell Duration 3 seconds
Full Screen Dwell Duration 3 seconds
Manual/ Event/ Timer Record ON
Event Record IPS 120 (NTSC) / 100 (PAL)
Timer Record IPS 120 (NTSC) / 100 (PAL)
Pre-alarm Record ON
Serial Type RS485
Baud Rate 2400
Host ID 0
Auto Keylock (SEC) 30
Language English (Multi-lingual OSD selectable)
AP Side:
User Name admin
Password admin
Port 80
IP Address 192.168.1.10
 Loading...