

UniStrong Russell Series User Manual

Handheld GPS Navigator
Russell Series
User Manual

Revision: R00
(12/2010)
Trademarks
All brand and product names are trademarks or registered trademarks of their respective companies.
Disclaimer
Specifications and documents are subject to change without notice.
Notes
Not all models are available in all regions.
Depending upon the specific model purchased, the colour and look of your device and accessories may not exactly
match the graphics shown in this document.
The screenshots and other presentations shown in this document are for reference only. They may differ from the
actual screens and presentations generated by the actual product.

3
Table of Contents
1 Getting started..........................................................................................4
1.1 Getting to know your device...........................................................................4
1.2 Opening the battery door...............................................................................5
1.3 Installing the batteries....................................................................................5
1.4 Using a memory card.....................................................................................6
2 Getting to know the basics......................................................................7
2.1 Turning on and off..........................................................................................7
2.2 Navigating on the screen...............................................................................7
3 Bluetooth connectivity.............................................................................8
4 Navigation.................................................................................................9
4.1 About GPS.....................................................................................................9
4.2 Precautions and notices.................................................................................9
4.3 Starting the GPS Position..............................................................................9
5 Reference................................................................................................10
5.1 Troubleshooting...........................................................................................10
5.2 Caring for your device..................................................................................10
6 Regulatory information..........................................................................12
6.1 Regulations statements................................................................................12
Federal Communications Commission (FCC) statement.............................12
European notice...........................................................................................12
6.2 Safety precautions.......................................................................................13
About charging.............................................................................................13
About the charger.........................................................................................13
About the battery..........................................................................................14
4
1
Getting started
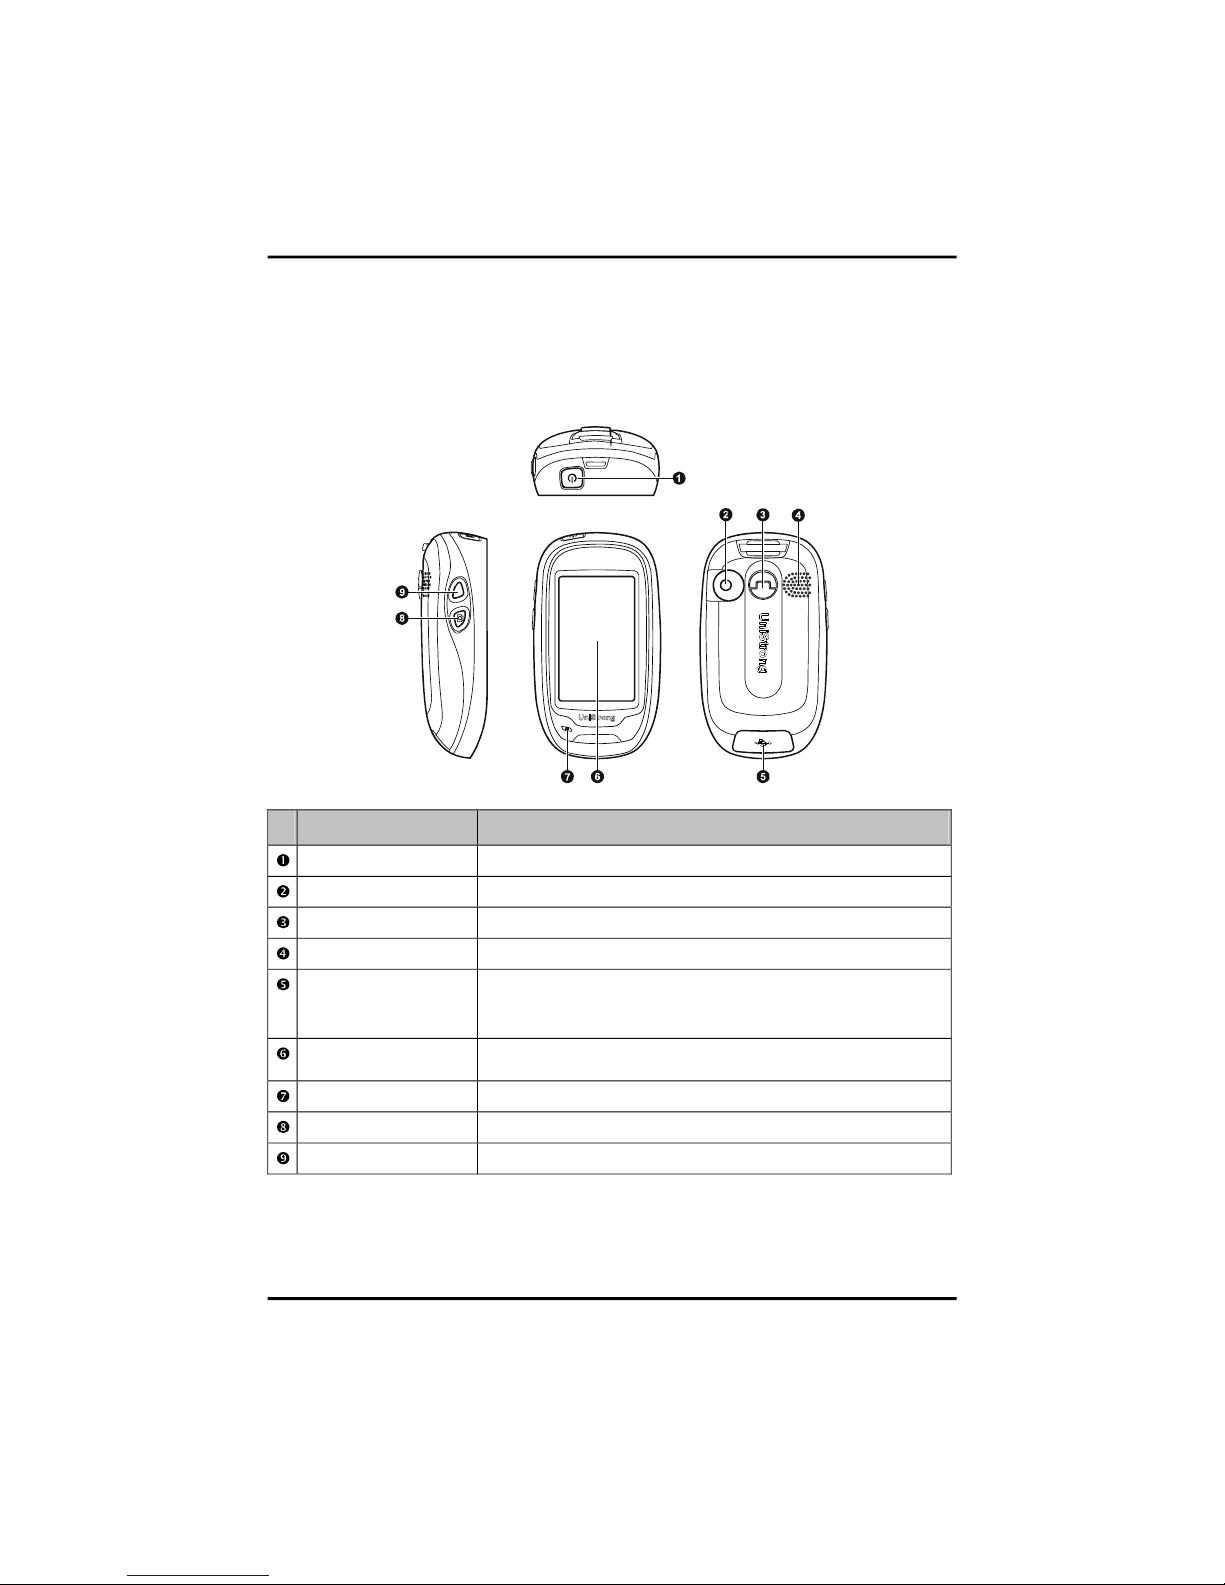
1.1 Getting to know your device
Name Description
Power button
Turns your device on and off.
Camera lens
Takes aim at the subjects for pictures.
Battery door lock
Loosens and secures the battery door.
Speaker
Sends out sounds.
Mini-USB connector
Connects to the USB cable.
Note: Please make sure to close the protection cover firmly when not using the
connector to prevent water or dirt from entering the connector.
Touch screen
Displays the output of your device. Tap the screen with your fingertip to select menu
commands or enter information.
Microphone
Receives sound and voice.
Camera button
Takes pictures.
Function button
You can customise the function of this button.
5
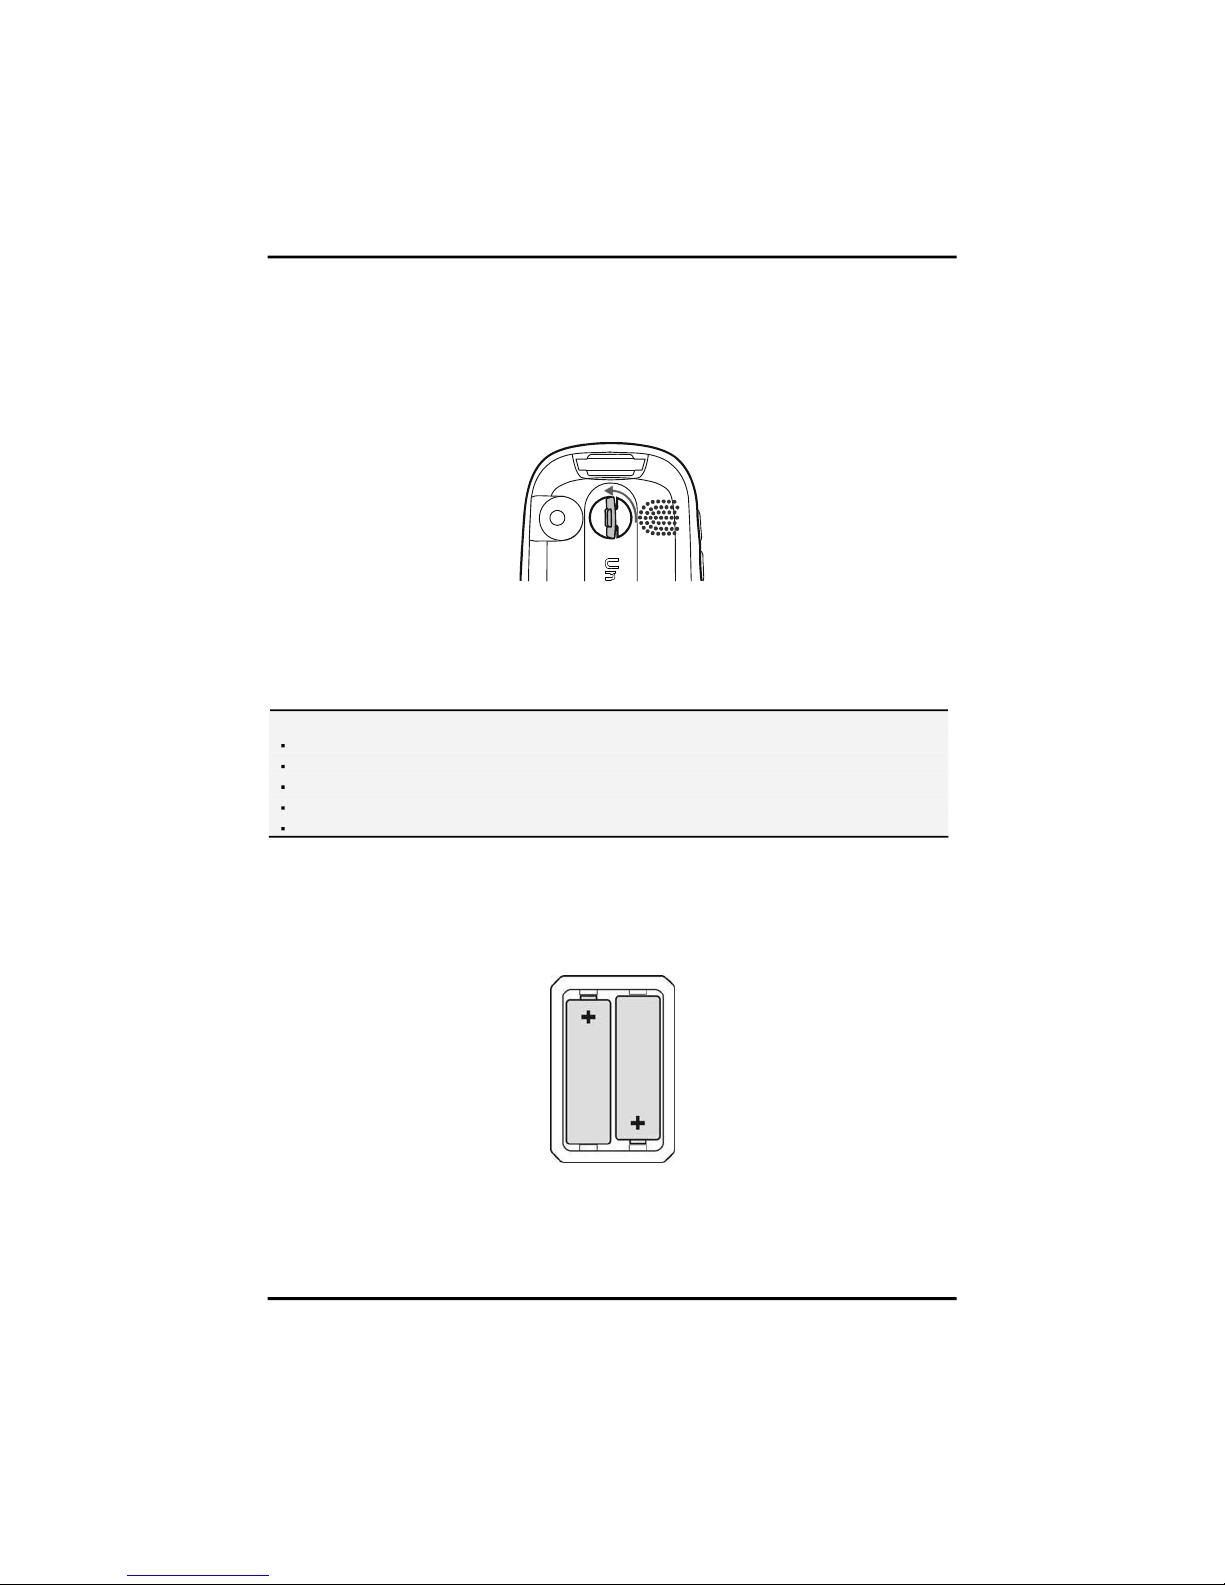
1.2 Opening the battery door
1. Raise the arm, and turn the battery door lock 90 degrees counter clockwise.
2. Lift the top of the battery door until the pivot point at the bottom releases, allowing the cover to become free
from the device.
When reinstalling the battery door, make sure to first insert the hinge point at the base of the cover and then close
the top of the cover. When the cover is connected closely to the device, turn the battery door lock 90 degrees
clockwise to secure it.
1.3 Installing the batteries
CAUTION:
Do not heat, open, puncture, mutilate, or dispose of batteries in fire.
Use only the correct type of battery.
When not using the battery for a long period (more than one month), remove the batteries to prevent damage from battery corrosion.
In case the battery leaks, clean the liquid and install a new battery.
Check the regulations of your local government for proper battery disposal.
1. Open the battery door (See the previous “Opening the battery door“ for information.)
2. Place two “AA” batteries in the battery compartment. A diagram in the interior of the battery compartment
shows the orientation of the batteries.
3. Replace and secure the battery door. (See the previous “Opening the battery door“ for information.)
 Loading...