

Unisteer 8051460 User Manual

IDIDIT COLUMN ELECTRA-STEER KIT
8051460
Full refund will NOT be granted to any kits that are damaged,
scratched, or altered in any fashion.
BEFORE YOU START PLEASE READ!
Designing steering systems requires an understanding of steering function and
design. If you are inexperienced it is recommended that you seek professional
help before beginning a steering project.
The Unit is intended for normal highway use in vehicles not exceeding 2800 lbs (1200 kg).
The column MUST be firmly anchored. All Torque required to steer the vehicle will be transferred
through the column mounts.
The unit CANNOT be mounted near a heat source, exposed to excessive moisture/water, or
submerged under water.
All Steering Shafts, Joints, U-Joints, and Connectors must be designed to withstand the full load of
the steering system to which the electric motor is being installed.
The Wiring, Module, and Motor must not be tampered with. Any modification to the Module or Motor
will void any existing or implied warranties, if so offered.
FAILURE TO ADHERE TO THE ABOVE WARNINGS MAY RESULT IN SERIOUS INJURY OR
DEATH. Maval Manufacturing and Unisteer Performance IS NOT RESPONSIBLE FOR
IMPROPERLY INSTALLED ELECTRIC STEERING SYSTEMS.
Page 1 655970
Installation Instructions for Electric Steering Column:
Cut Here
NOTICE: YOU MUST SECURE YOUR STEERING COLUMN AT FIREWALL AND DASHBOARD
DROP. INJURY MAY RESULT FROM IMPROPER INSTALLATION
1. After removing your stock steering column assembly, you can install and mock up the location of your
new column. To do this you must mount the upper part of the column with a steering drop of your
choice {not included} mounted securely to the dash assembly.
2. You must also mount the lower part of the column tube securely at the firewall using a mount plate
and clamp or similar part.
3. Once the mock up is complete and you’re happy with the position of the column you can look to see
where your final length on the column tube and shaft need to be.
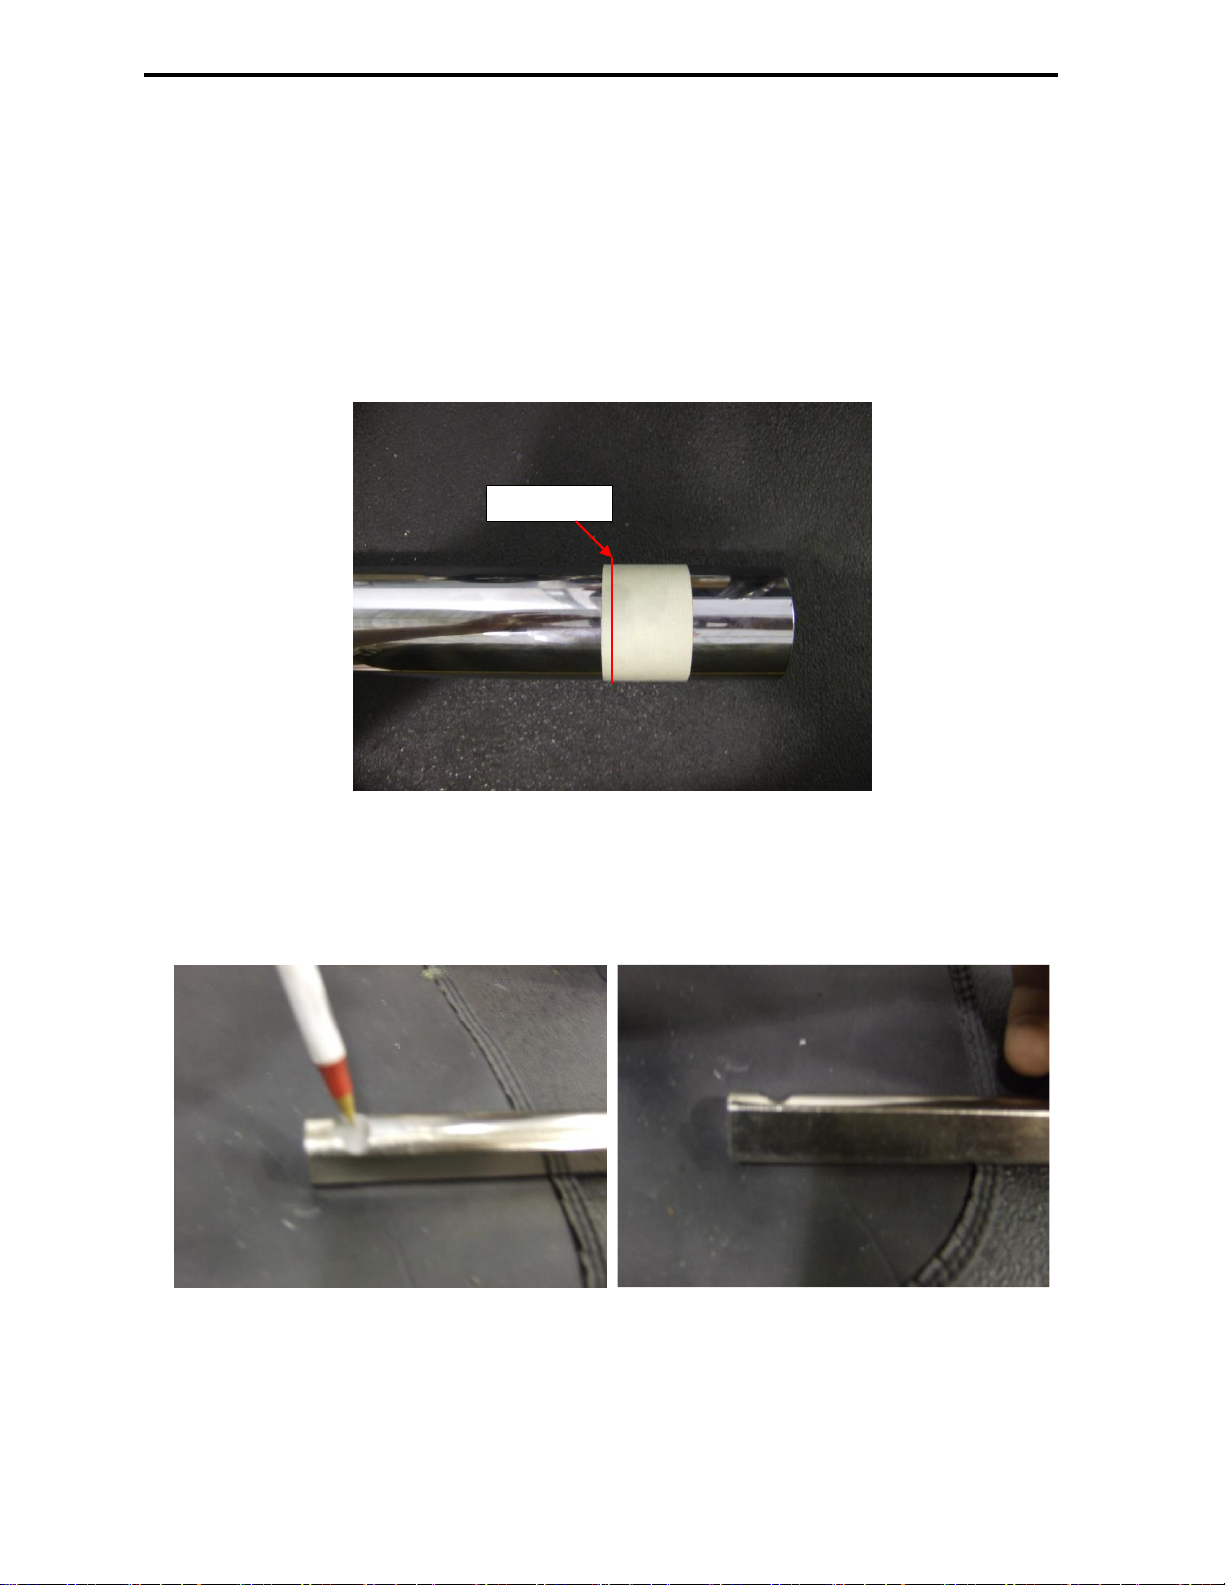
4. After you know where you need to cut the shaft and tube. Place a piece of masking tape over the
column tube to protect it and with a pipe cutter or similar tool cut the tube where you marked it.
5. Once the tube is cut, you can now cut the final length on the shaft. NOTE: Make sure to leave enough
of the shaft hanging out of the tube to capture a u-joint. Keep in mind the tube gets a plastic bearing
installed in it to hold the shaft in place.
6. Once you have the shaft cut to length you will need to grind a notch in it for the u-joint bolt to go
through. To do this, slip the u-joint over the shaft and make it flush with the inside of the joint. With a
marker make a dot on the shaft where the bolt hole on the u-joint goes through.
Page 2 655970
 Loading...