

Unisteer 8001550 User Manual
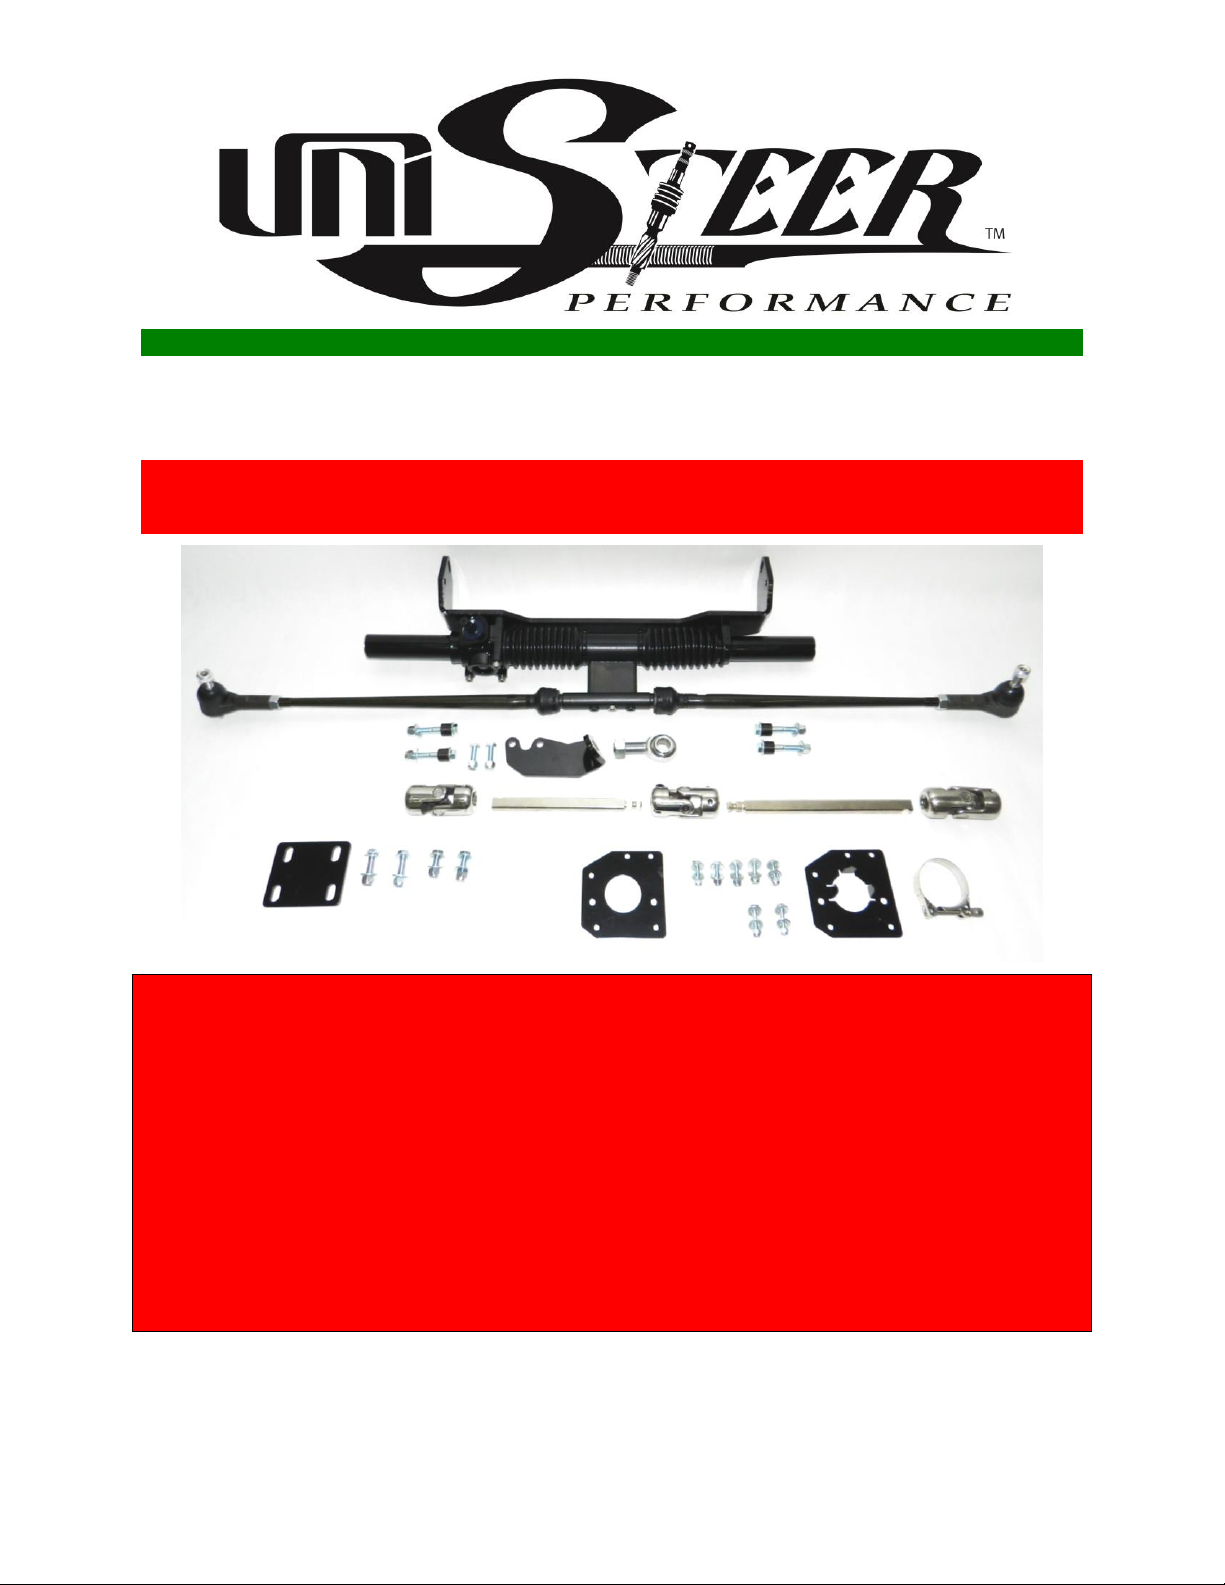
’58-’62 Corvette Manual Rack & Pinion Kit Instructions
# 8001550
Full refund will NOT be granted to any kits that are damaged,
scratched, or altered in any fashion.
*AN IDIDIT COLUMN IS NEEDED FOR INSTALLATION. COLUMNS ARE
AVAILABLE THROUGH UNISTEER PERFORMANCE. 800-338-9080
*ALTHOUGH THIS KIT IS FAIRLY SIMPLE TO INSTALL, SOME MODIFICATIONS
MAYBE NECESSARY.
*BEFORE STARTING INSTALLATION, PLEASE BE AWARE OF THE
MODIFICATIONS THAT ARE NEEDED TO INSTALL.
*ALSO BE AWARE THAT THERE ARE APPLICATION/PROVISIONS NEEDED IN
ORDER TO INSTALL. PLEASE READ ALL INSTRUCTIONS FIRST.
*DUE TO VARIABLES OUTSIDE OUR CONTROL THESE KITS MAY NOT FIT ALL
APPLICATIONS. ALSO, PLEASE VERIFY KIT WILL FIT YOUR APPLICATION
BEFORE ALTERING VEHICLE.
Page 1 656470
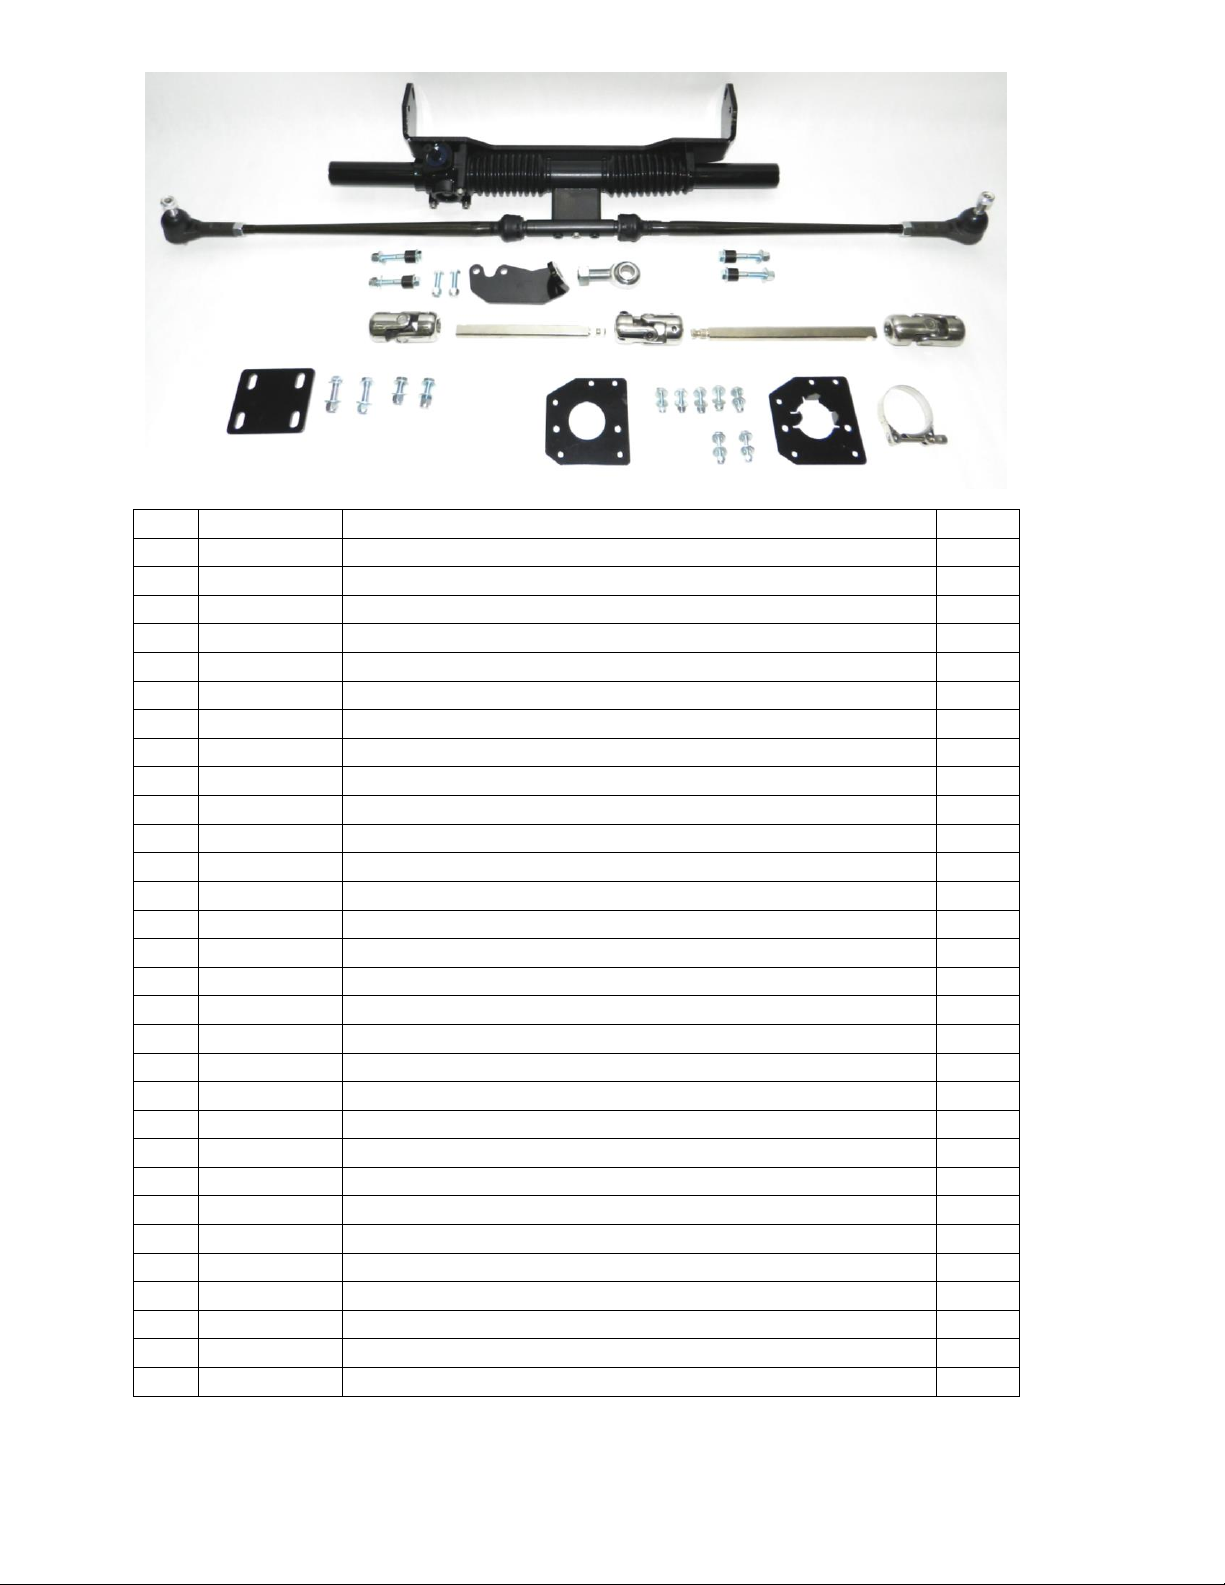
#
Part #
Description
Qty
1
8001600
58-62 Vette Manual Rack & Bracket w/Tie Rod Ends
1 2 120490
3/8”-16 Lock Nut
4 2 200850
Zinc 5/16” Flat Washer
8 2 207210
0.75” OD Rack Stand Off
4 2 231730
3/8”-16 x 2.5” Hex Bolt
4 3 232610
3/8”-16 x 1.25” Bolt
2 3 120490
3/8”-16 Lock Nut
2 4 8026670
58-62 Manual Shaft Support Bracket
1 5 8050770
Chrome Shaft Support Bearing w/Nut
1 6 8050230
9/16”-26 x 3/4DD U-Joint
1 7 548110
8.275” DD Shaft w/one 9/16”-30 Spline
1
8
8050440
9/16”-30 x 9/16”-30 U-Joint
1
9
547630
10” DD Shaft w/one 9/16”-30 Spline
1
10
8050880
¾”-36 Ididit x ¾” DD U-Joint
1
11
8026380
58-62 Vette Core Support Plate
1
12
231490
3/8”-16 x 1.5” Hex Bolt
2
12
200850
Zinc 5/16” Flat Washer
4
12
120490
3/8”-16 Lock Nut
2
13
230810
3/8”-16 x 1” Bolt
2
13
200850
Zinc 5/16” Flat Washer
4
13
120490
3/8”-16 Lock Nut
2
14
8026440
Black Outer Column Bracket
1
15
232350
Zinc ¼”-20 x 1” Hex Bolt
5
15
120660
¼”-20 Lock Nut
5
15
201000
Zinc ¼” Flat Washer
10
16
231360
¼”-20 x 1.25” Hex Bolt
2
16
120660
¼”-20 Lock Nut
5
16
201000
Zinc ¼” Flat Washer
10
17
8026450
Black Inner Column Bracket
1
18
130350
55-59mm Column Clamp
1
1 2 2 3 4 5 6 7 8 9 10
11
12
13
14
15
16
17
18
Page 2 656470
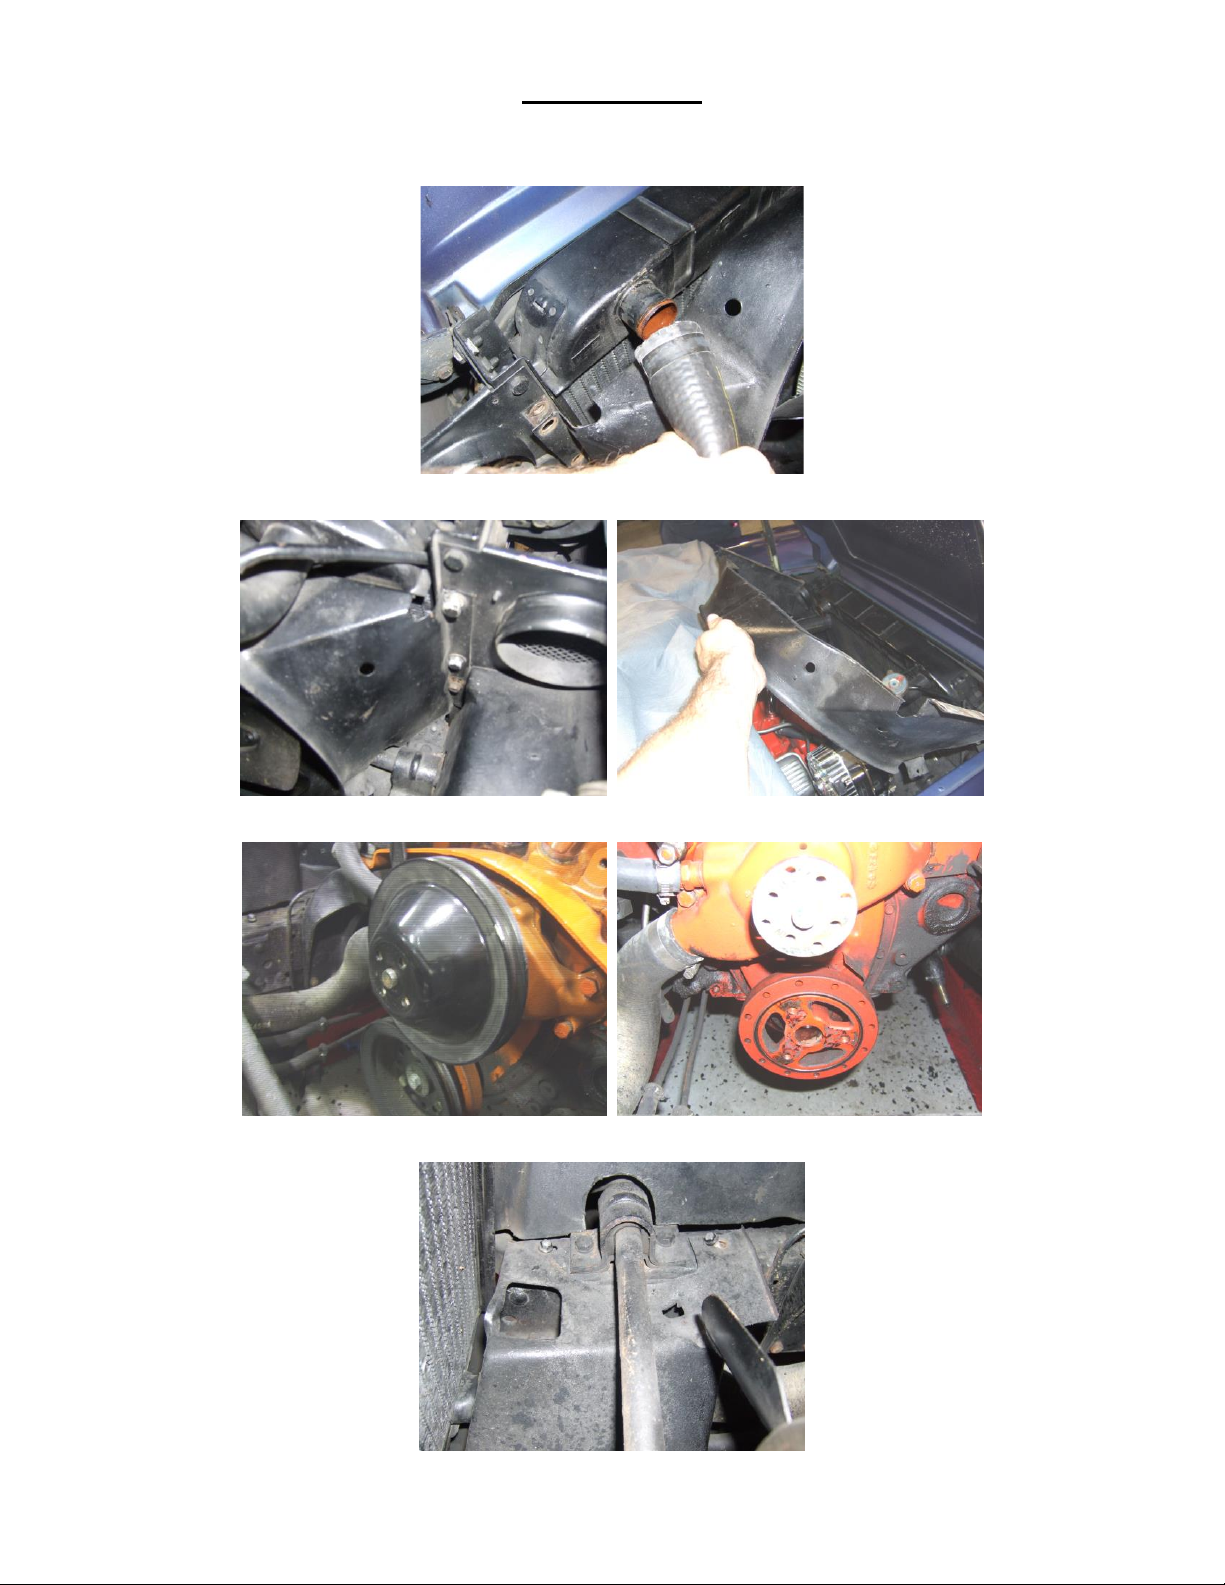
Disassembly:
Note: Entire project is more accessible with the hood removed from the vehicle.
1. Drain coolant from radiator. Disconnect upper coolant line from both the radiator and the engine.
2. Remove the upper and side fan shrouds.
3. Remove the fan and pulleys from front of engine.
4. Remove the lower fan shroud.
Page 3 656470
 Loading...